Set up post-event surveys and add the survey link to your emails
Last updated: August 14, 2026
What This Does
Post-event surveys let you collect feedback after your event ends. You publish a survey, attach its link to Thank you for coming or to any custom email, and attendees answer straight from their inbox without logging in.
This article covers the full organiser setup, the five states the post-publish banner can show, and what attendees see once the email goes out.
Note: One survey link is issued per event. It resolves at click time, so the same link works in every email you attach it to.
Before You Begin
Access to the event dashboard with permission to edit Surveys and Communication.
An email to carry the survey link — Thank you for coming under Communication > Standard, or any custom email under Communication > Custom.
A survey with its questions already added.
Steps
Which emails can carry the survey link
Thank you for coming, under Communication > Standard.
Any custom email under Communication > Custom.
Warning: The link appears in the Special Links picker only for emails addressed to attendees, and only once a survey is published. It is not available in speaker or sponsor emails, or in other standard emails such as reminders, registration confirmations, or We missed you at the event.
1. Create and publish the survey
Open your event and go to Surveys.
Select Create survey and add your questions.
Select Publish on the survey row, then confirm in the Publish survey dialog.
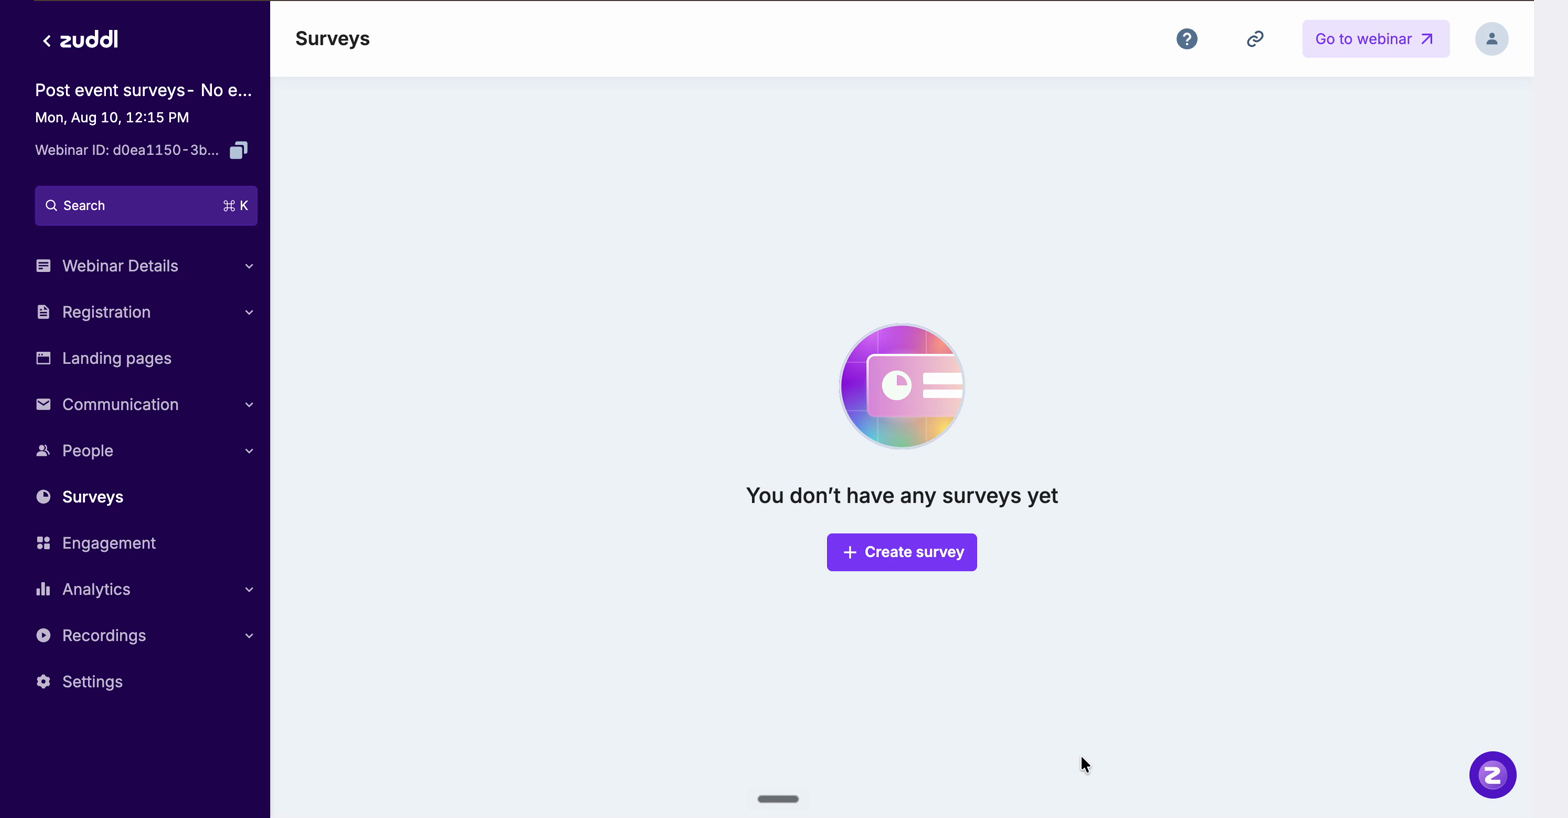
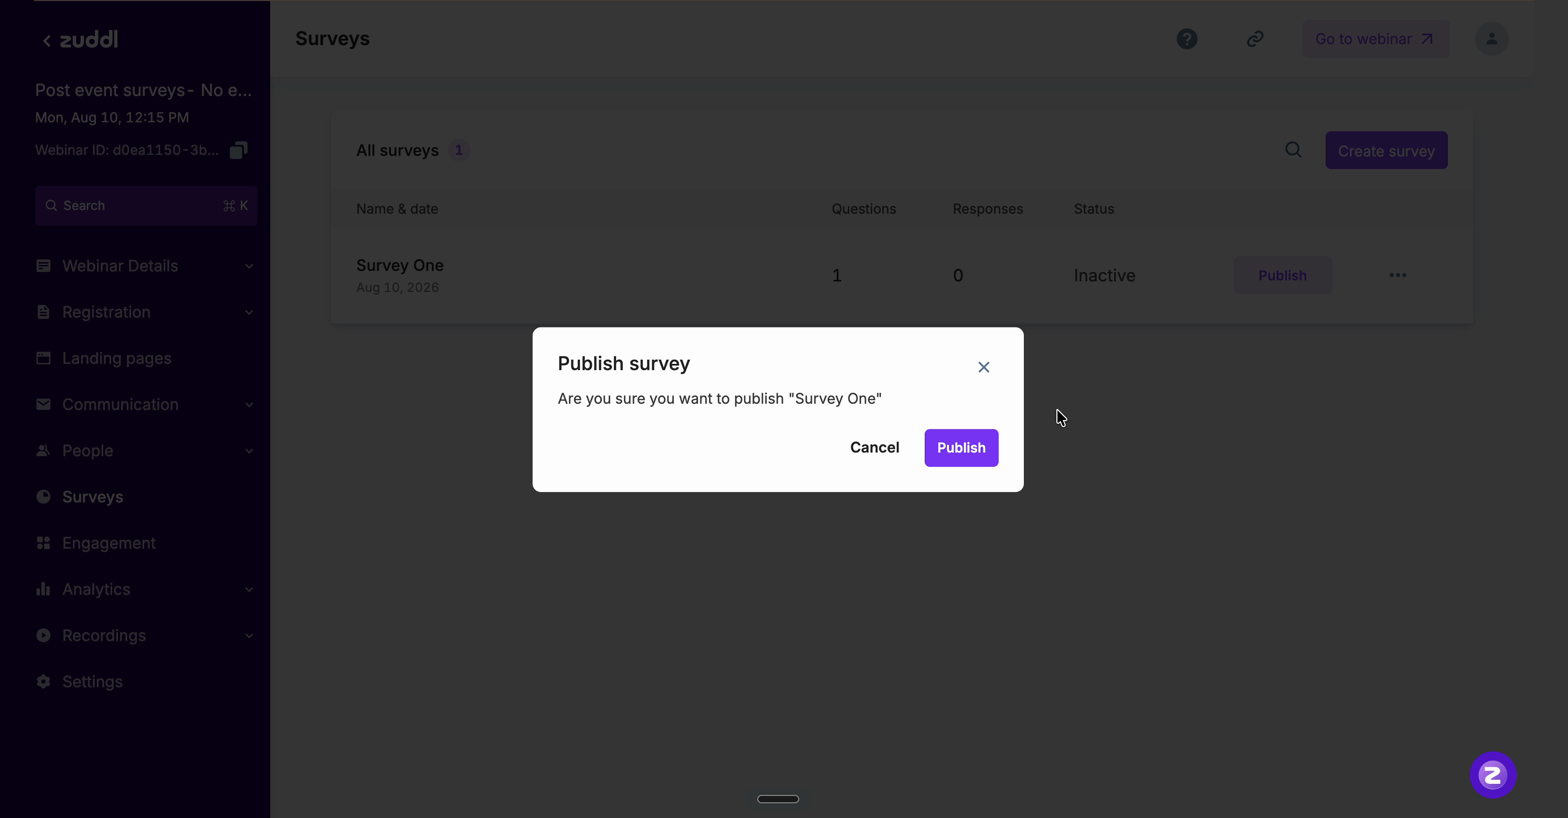
Warning: The survey link only becomes available once a survey is published. While every survey is a draft, the link does not appear in the Special Links picker.
2. Use the banner that appears after publishing
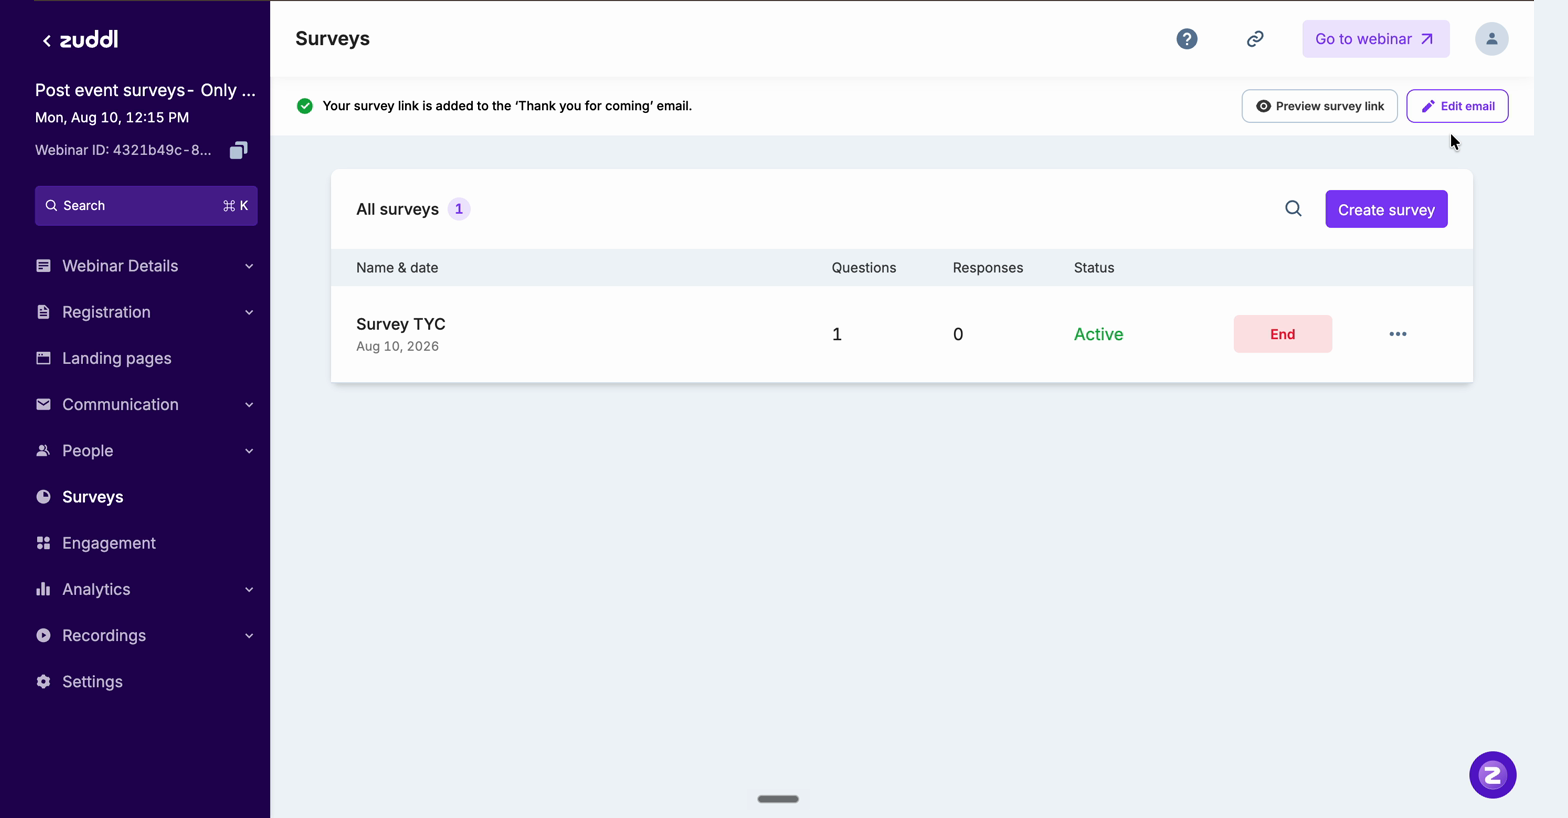
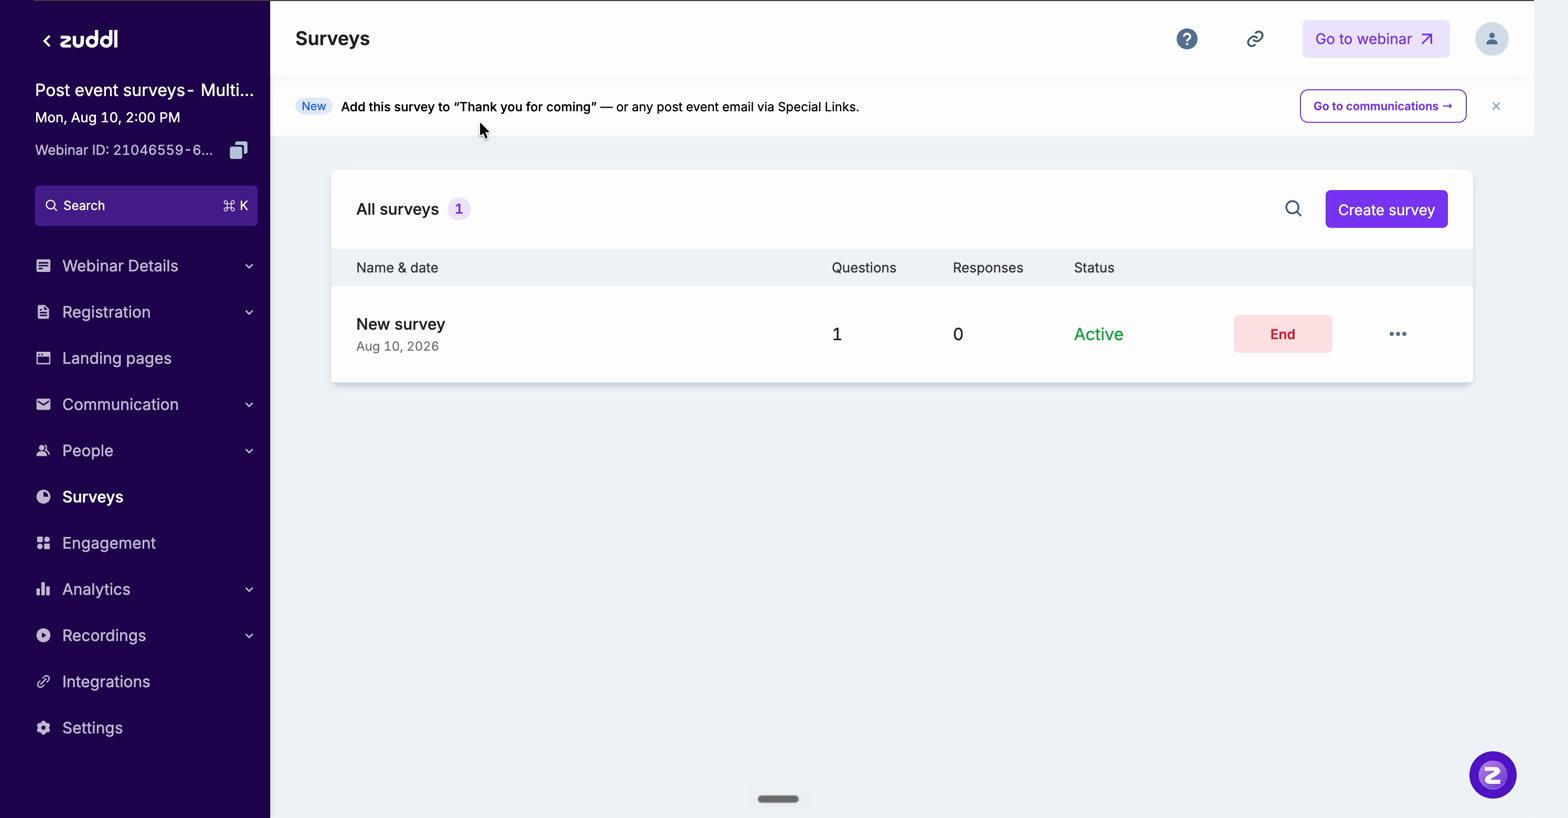
A banner appears at the top of the Surveys page as soon as you publish. Its message, its button, and where that button takes you all change according to which post-event emails are active on the event. There are five states.
1. Thank you for coming is on, nothing else. The banner offers + Add to email. This one does not navigate anywhere — the link is written into that email straight away.
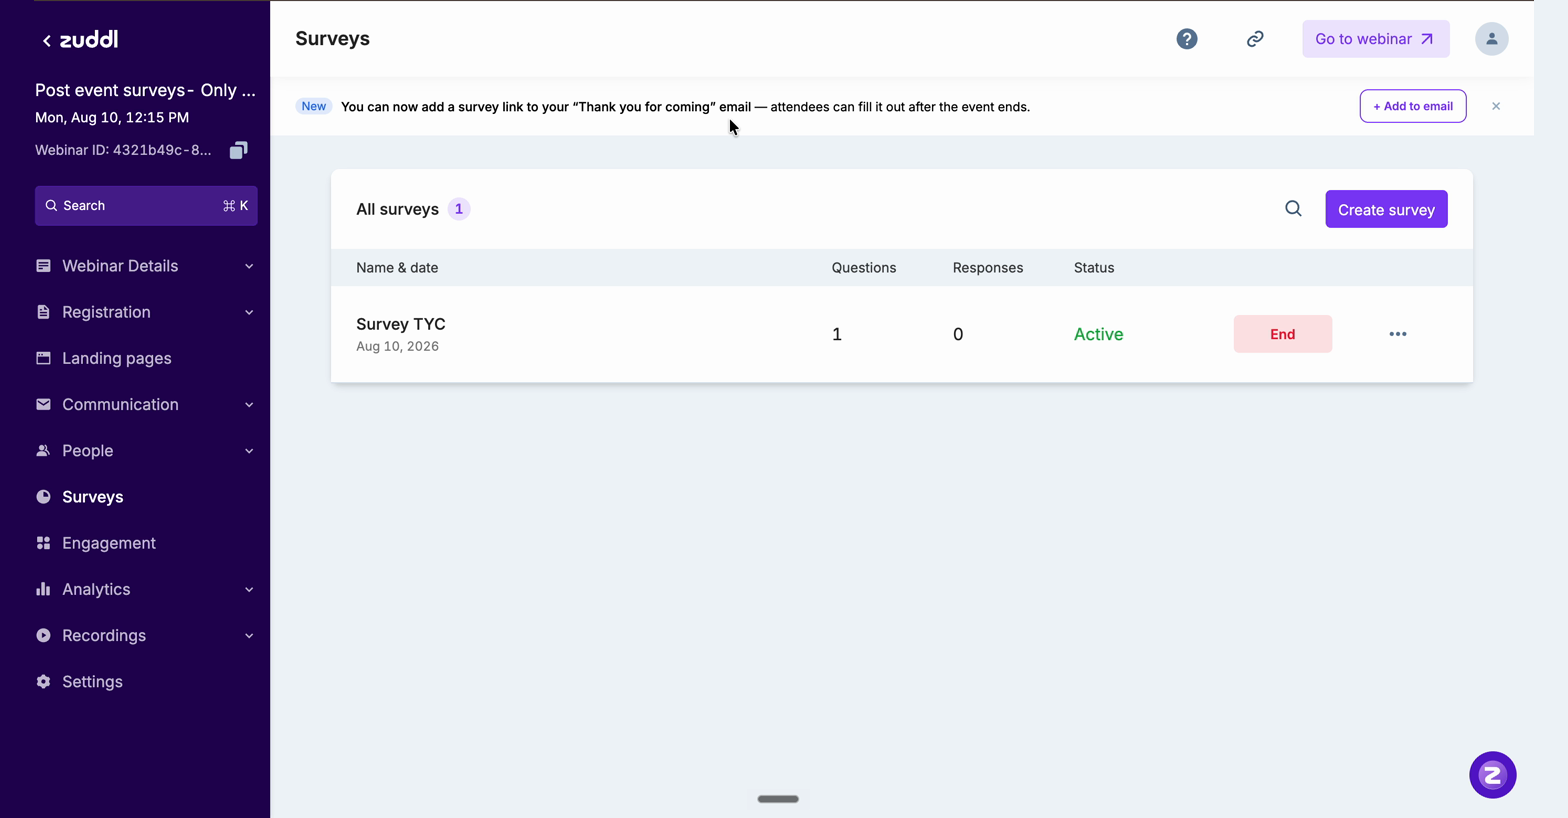
The banner is replaced by a confirmation reading Your survey link is added to the ‘Thank you for coming’ email, with Preview survey link and Edit email beside it. Edit email opens that email in the editor.
2. Nothing is on. The banner suggests enabling Thank you for coming. Its Go to communications button lands on Communication > Standard, where you enable that email and attach the link from its row.
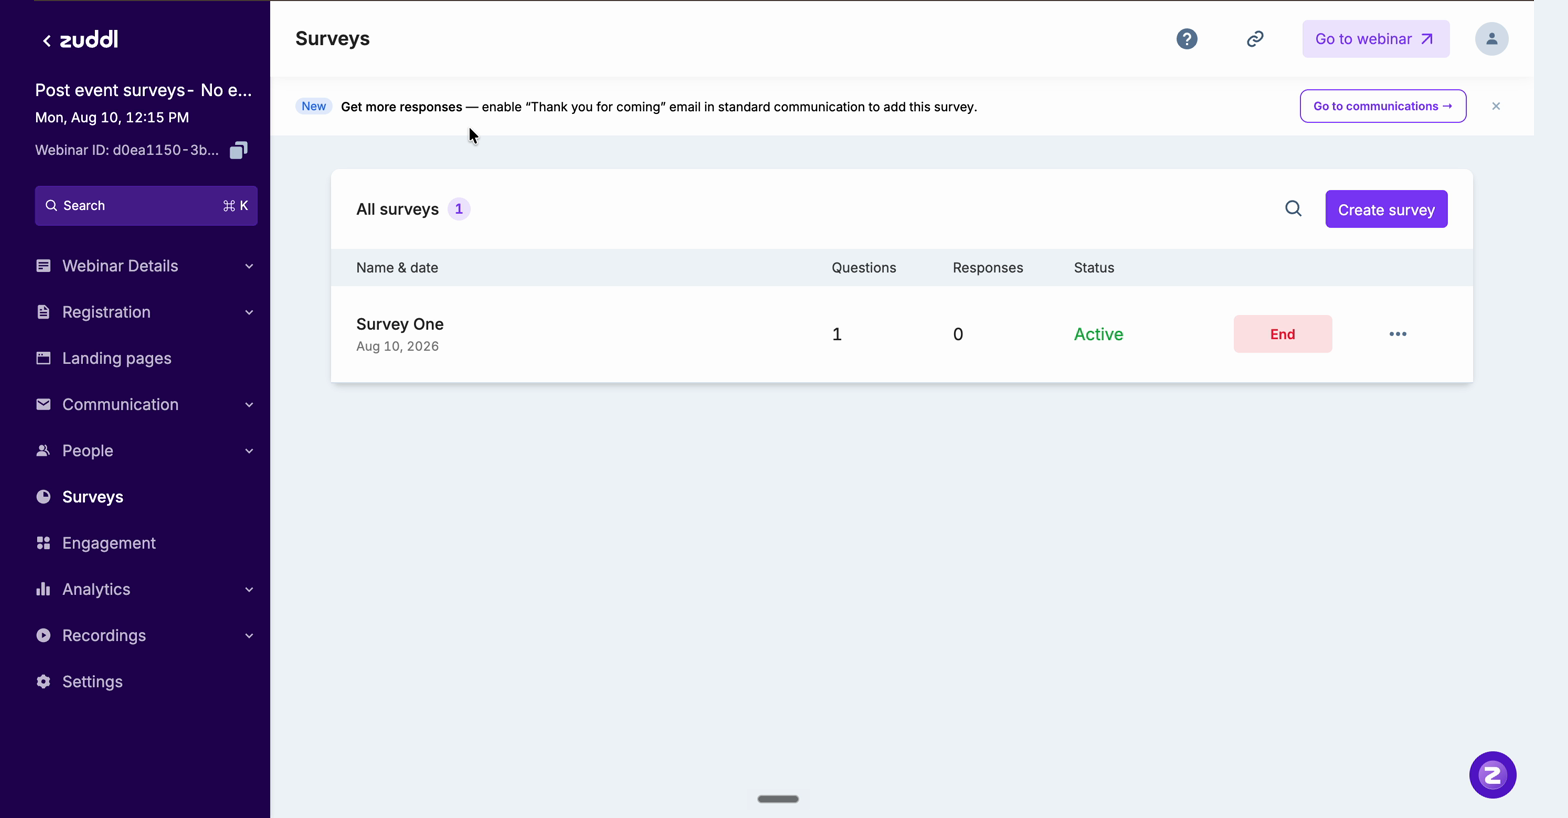
3. One custom email is on. The banner names that email. Go to communications lands on Communication > Custom, opened on the email it named.
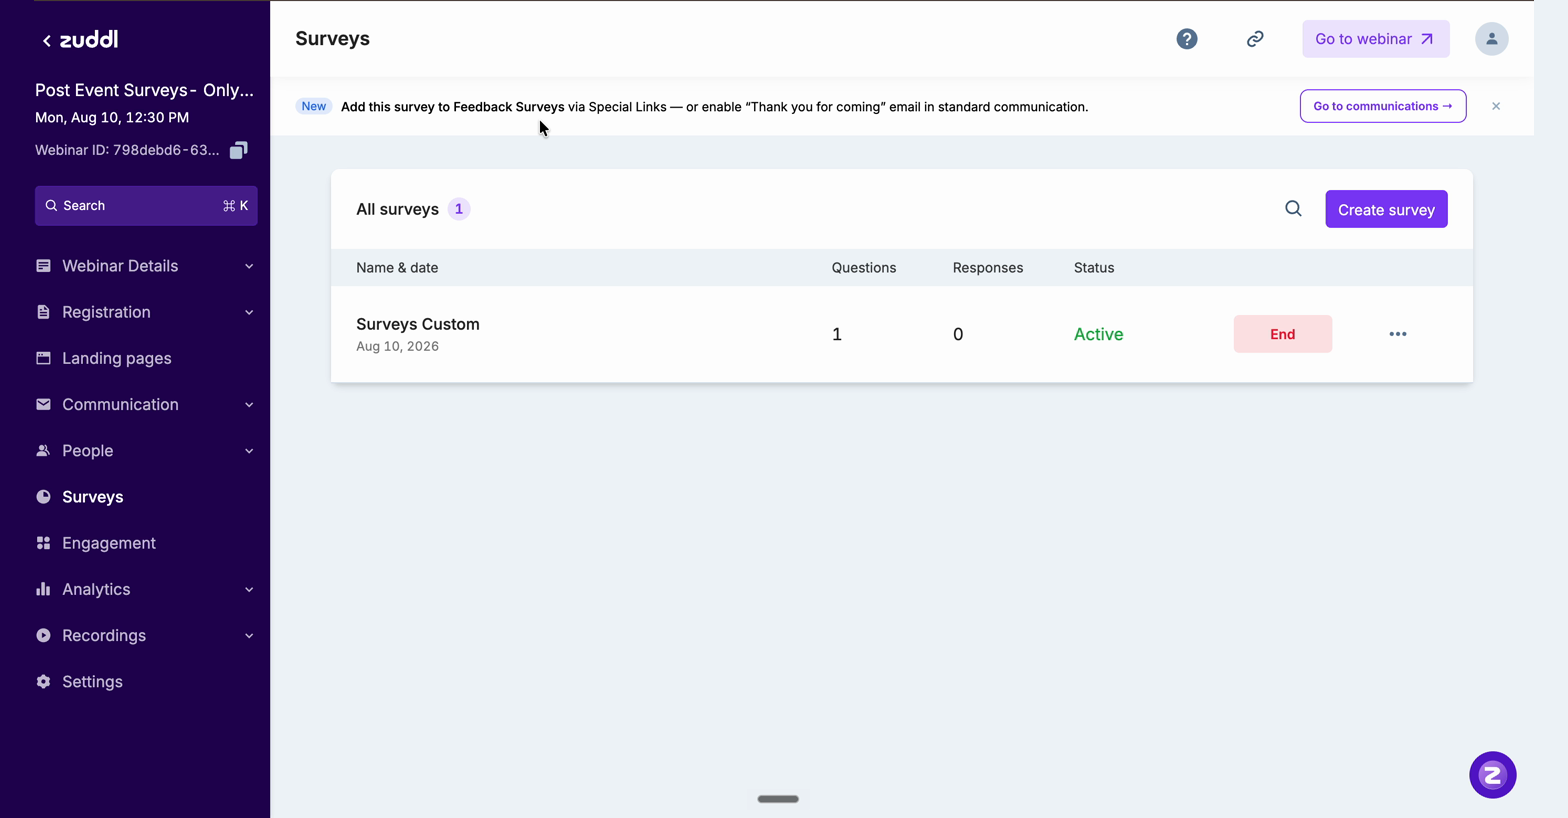
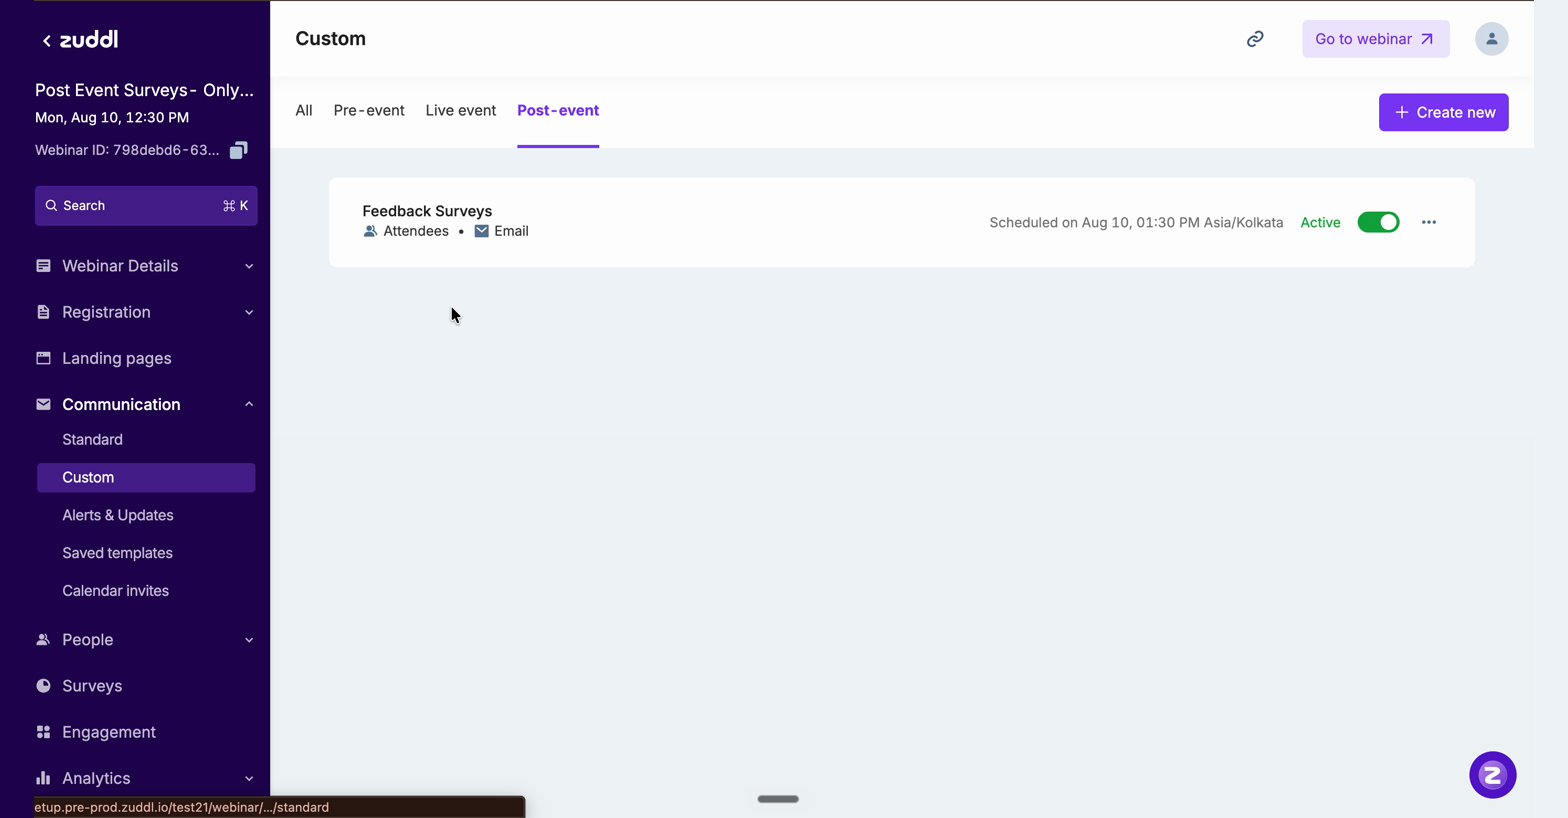
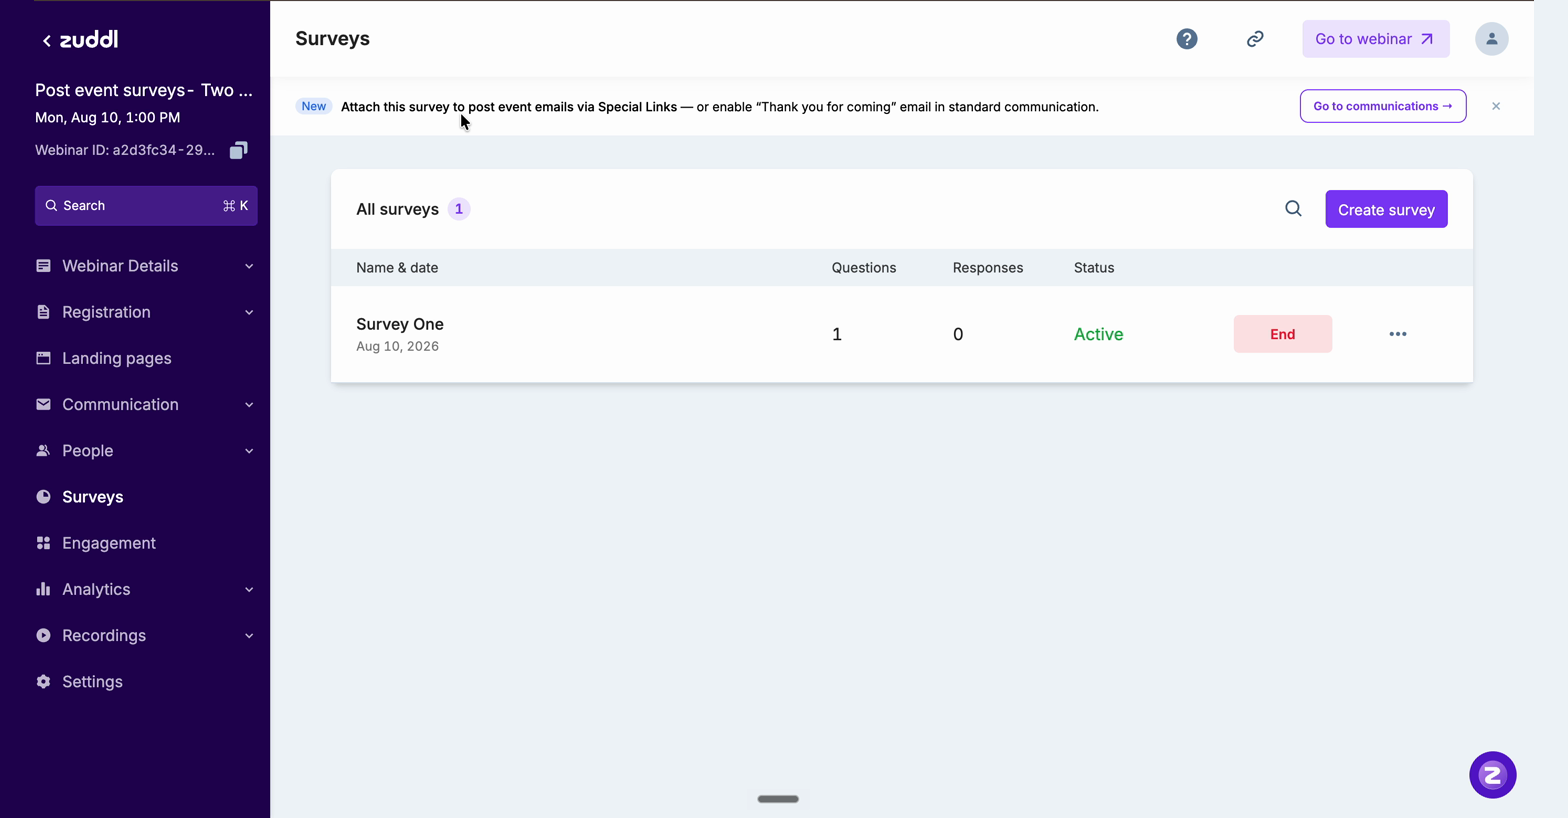
4. Several custom emails are on. The banner refers to them collectively. Go to communications lands on the same Communication > Custom list, where you choose which one to attach the link to.
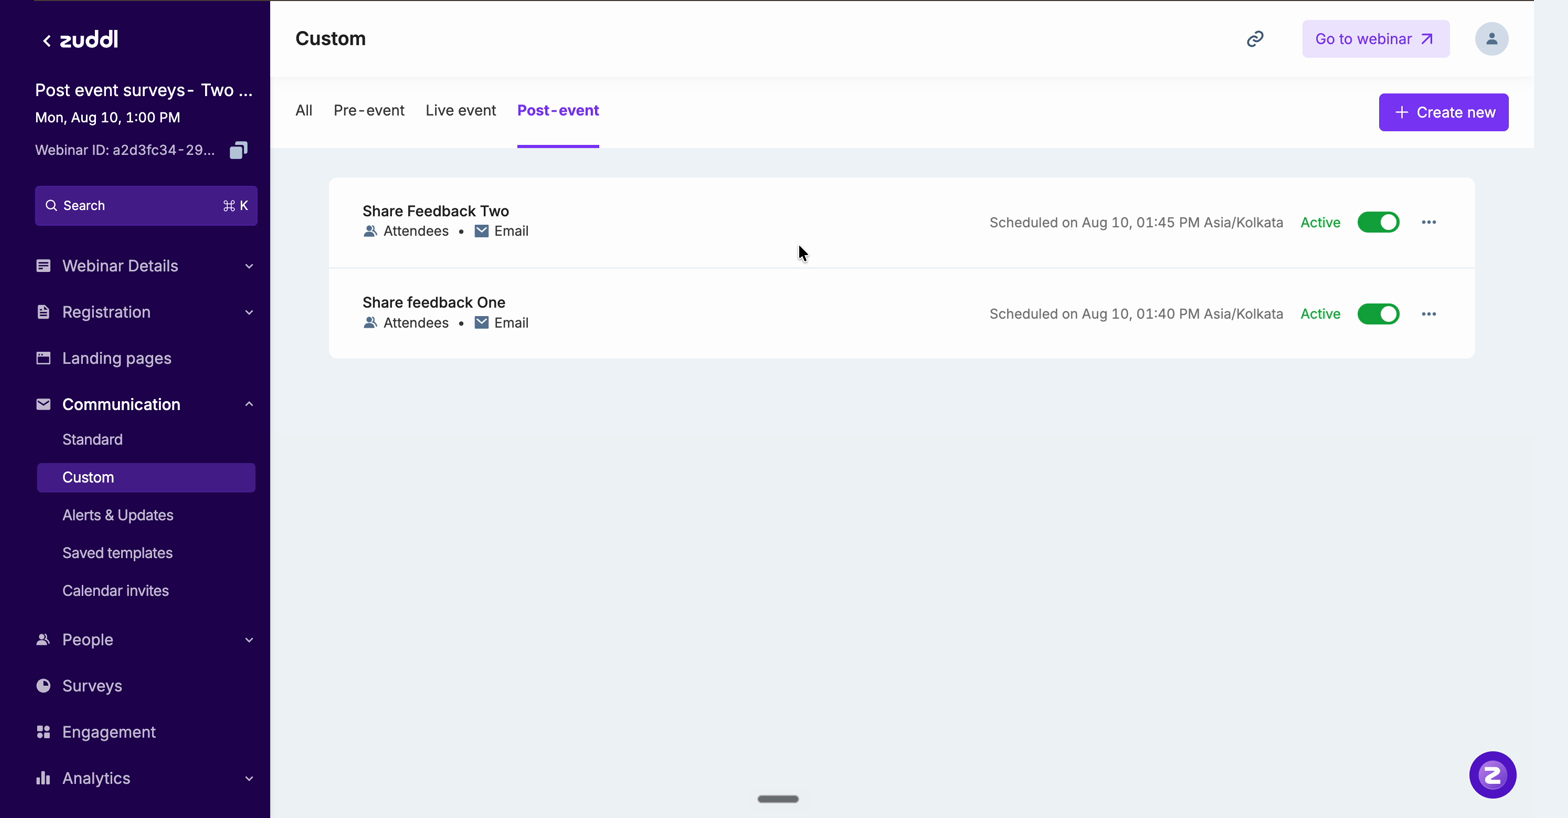
5. Thank you for coming and custom emails are both on. The banner offers both routes. Go to communications lands on Communication > Standard so you can take the one-click path, and Special Links remains available in any other email.
3. Attach the link from Communication
You can attach the link directly at any time, without using the banner.
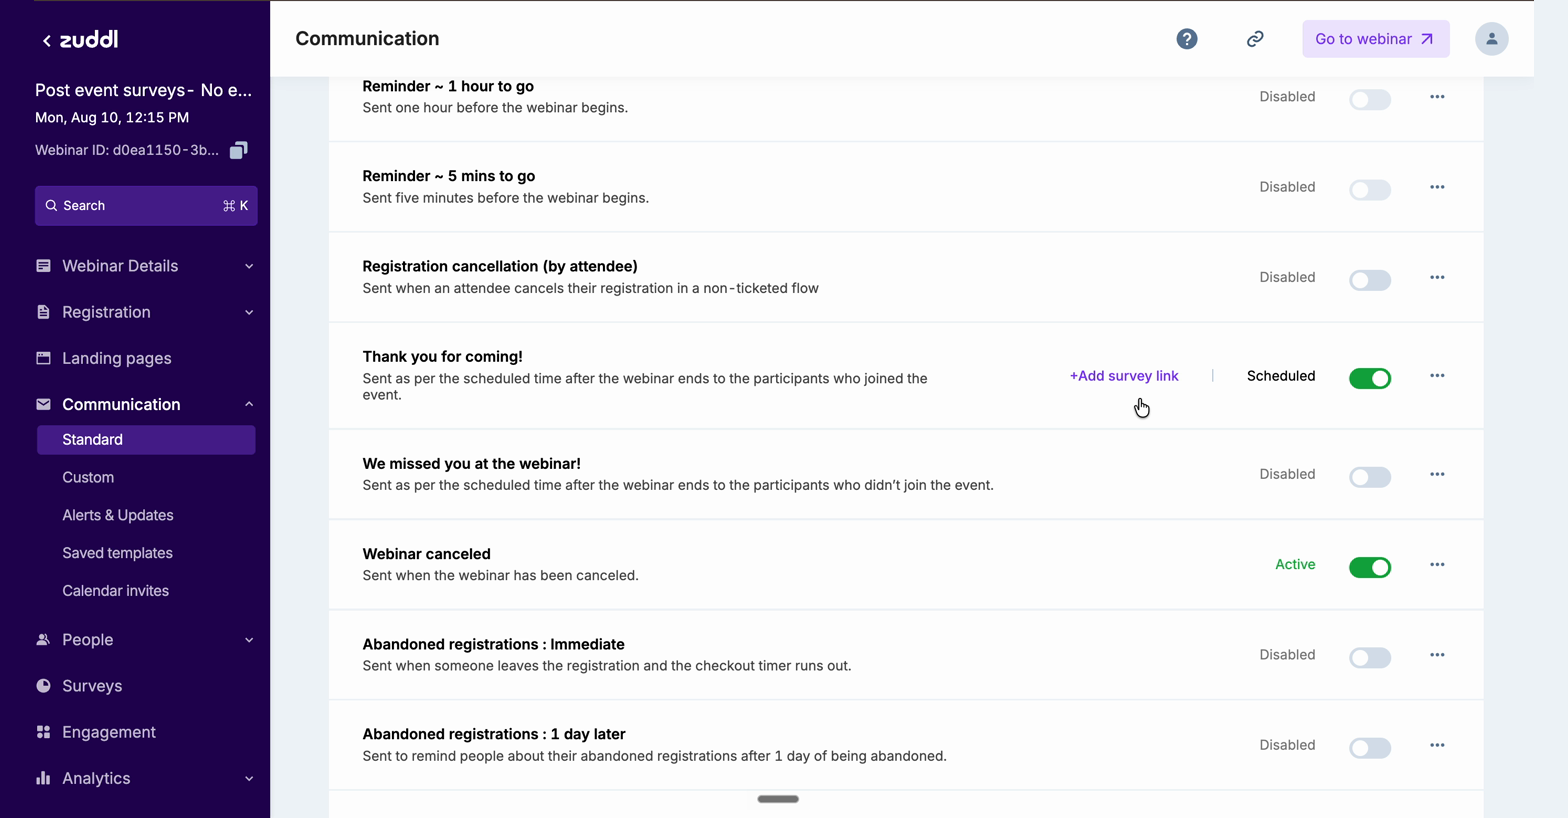
Go to Communication > Standard.
Enable Thank you for coming using its toggle.
Select +Add survey link on that row.
4. Place the link inside a custom email
Use the Special Links picker to place the link in a custom email, or anywhere you want it in a specific position.
Go to Communication > Custom and open the email you want to edit.
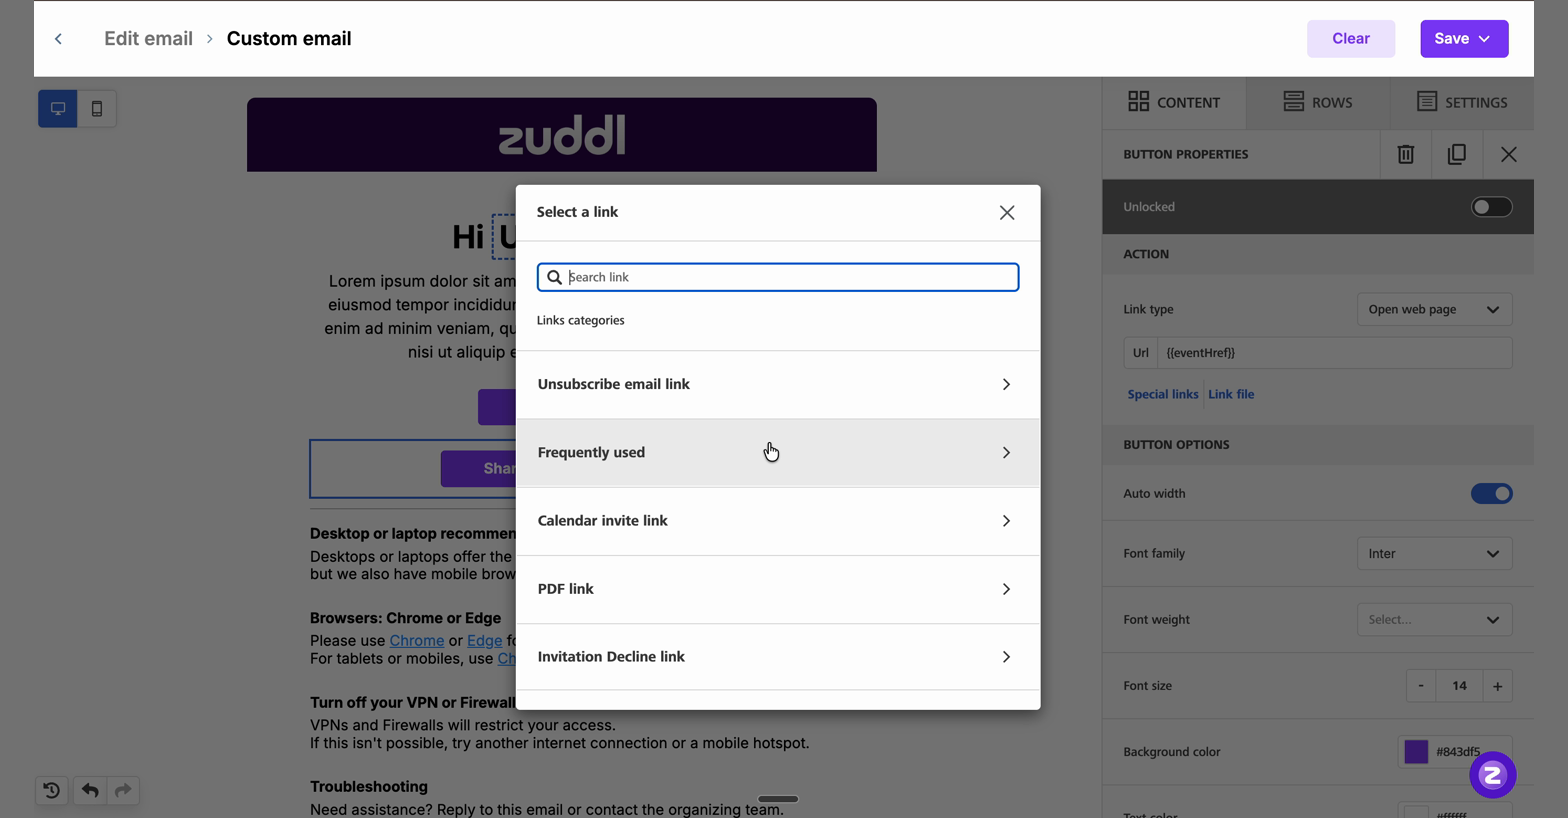
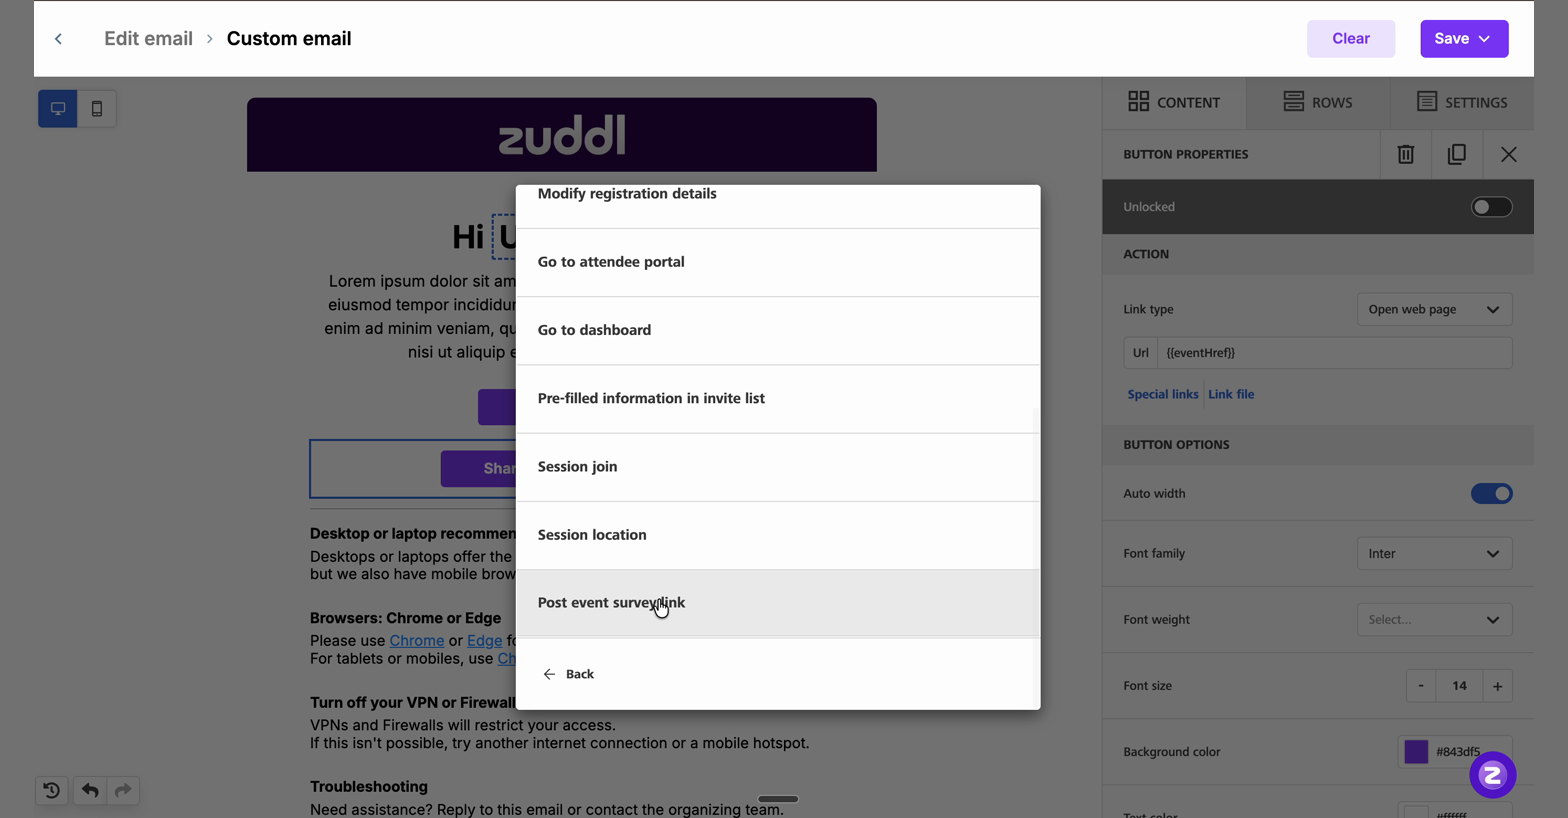
Select the element that should carry the link, then open Special links.
The picker opens on Links categories. Open Frequently used — the survey link sits inside that category, not on the first screen.
Choose Post event survey link.
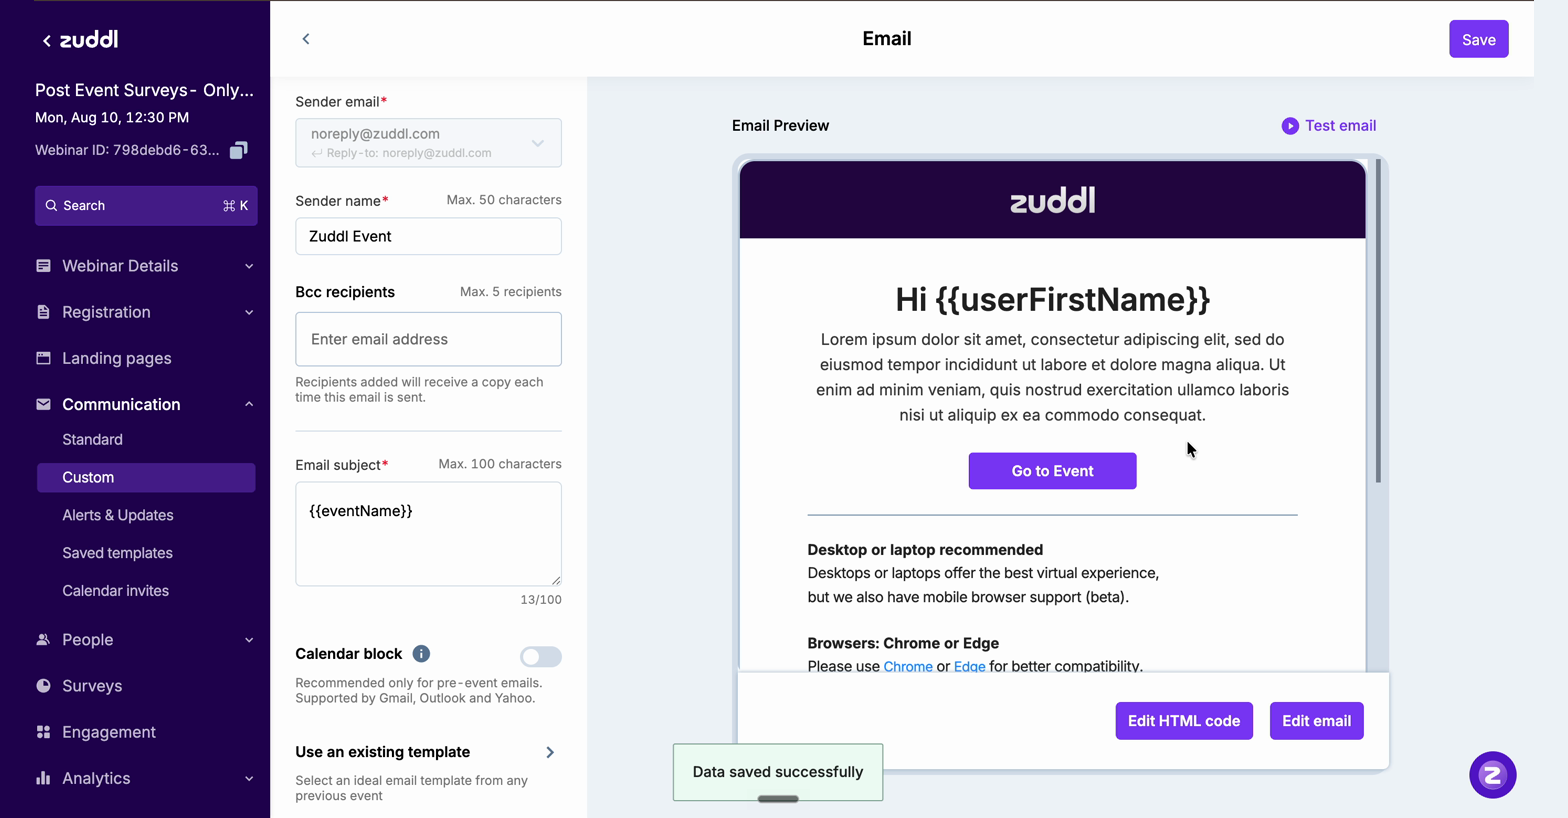
Save the email. A Data saved successfully confirmation appears at the bottom of the screen.
What Happens Next
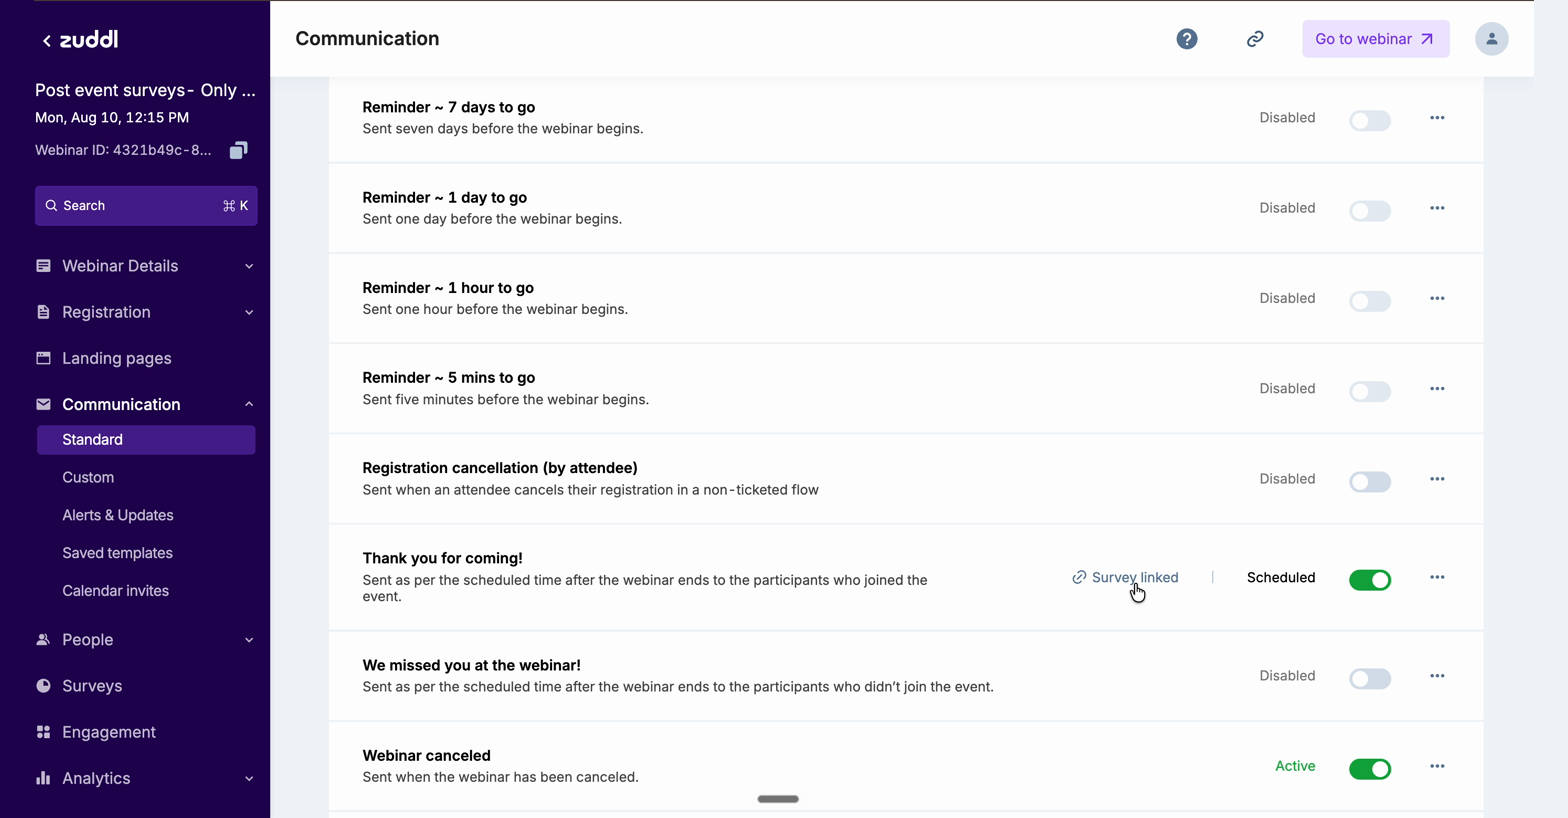
• The email row shows a Survey linked tag in Communication.
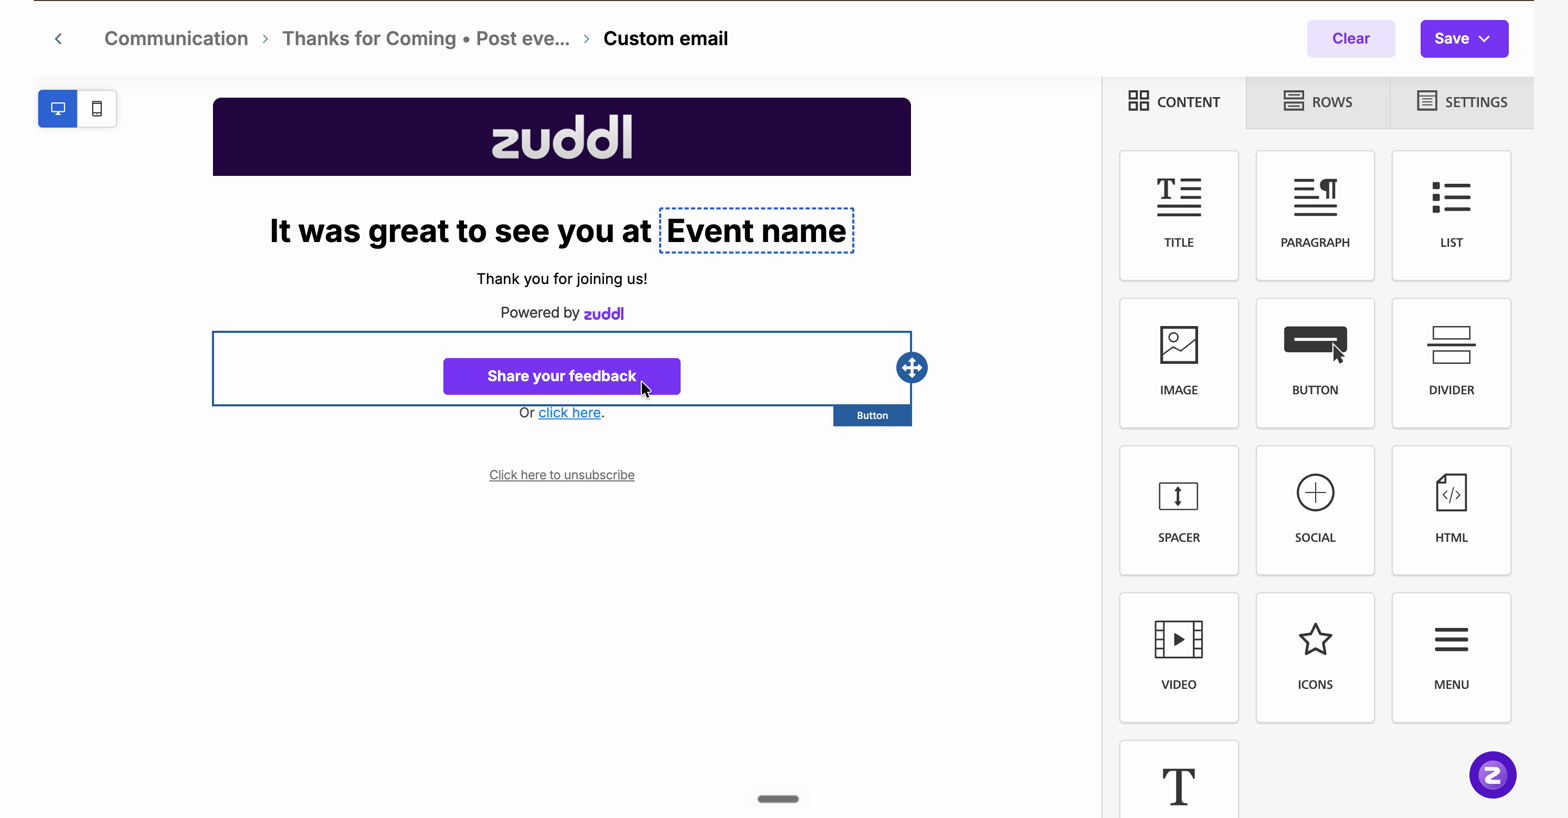
• Recipients get a Share your feedback button at the end of the email body, with an Or click here text link below it. Both point to the same survey, and you can move, restyle, or delete either block like any other block in the editor.
• Use Preview survey link on the Surveys page to check the page recipients will land on before you send. Draft surveys appear there for you under a Preview Mode banner and are never shown to attendees.
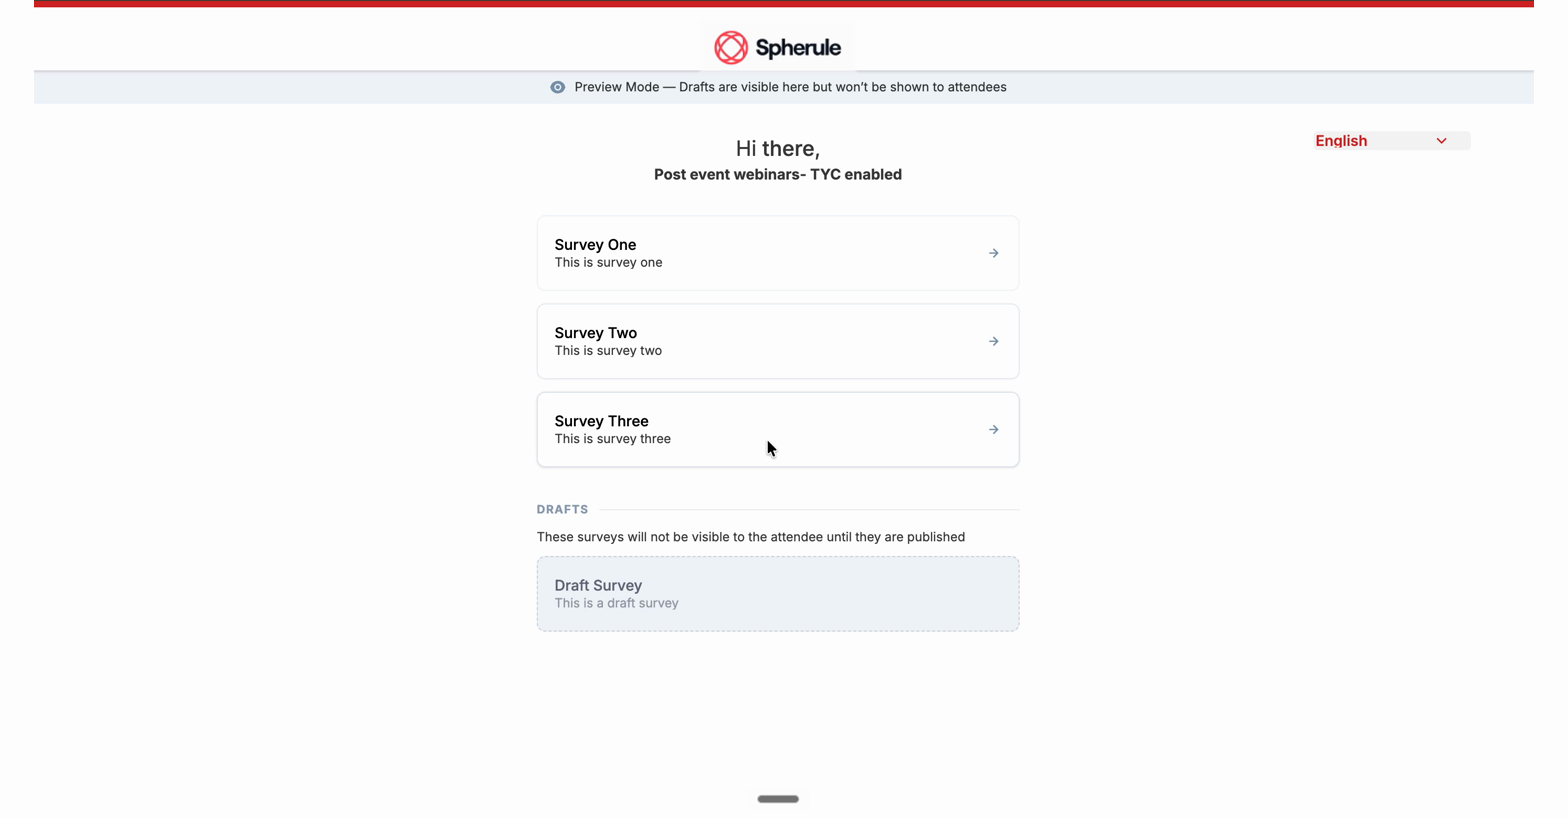
What Attendees See
1. The survey list. Selecting the link in the email opens the list. Attendees are identified by the link itself, so there is no login or one-time password step.
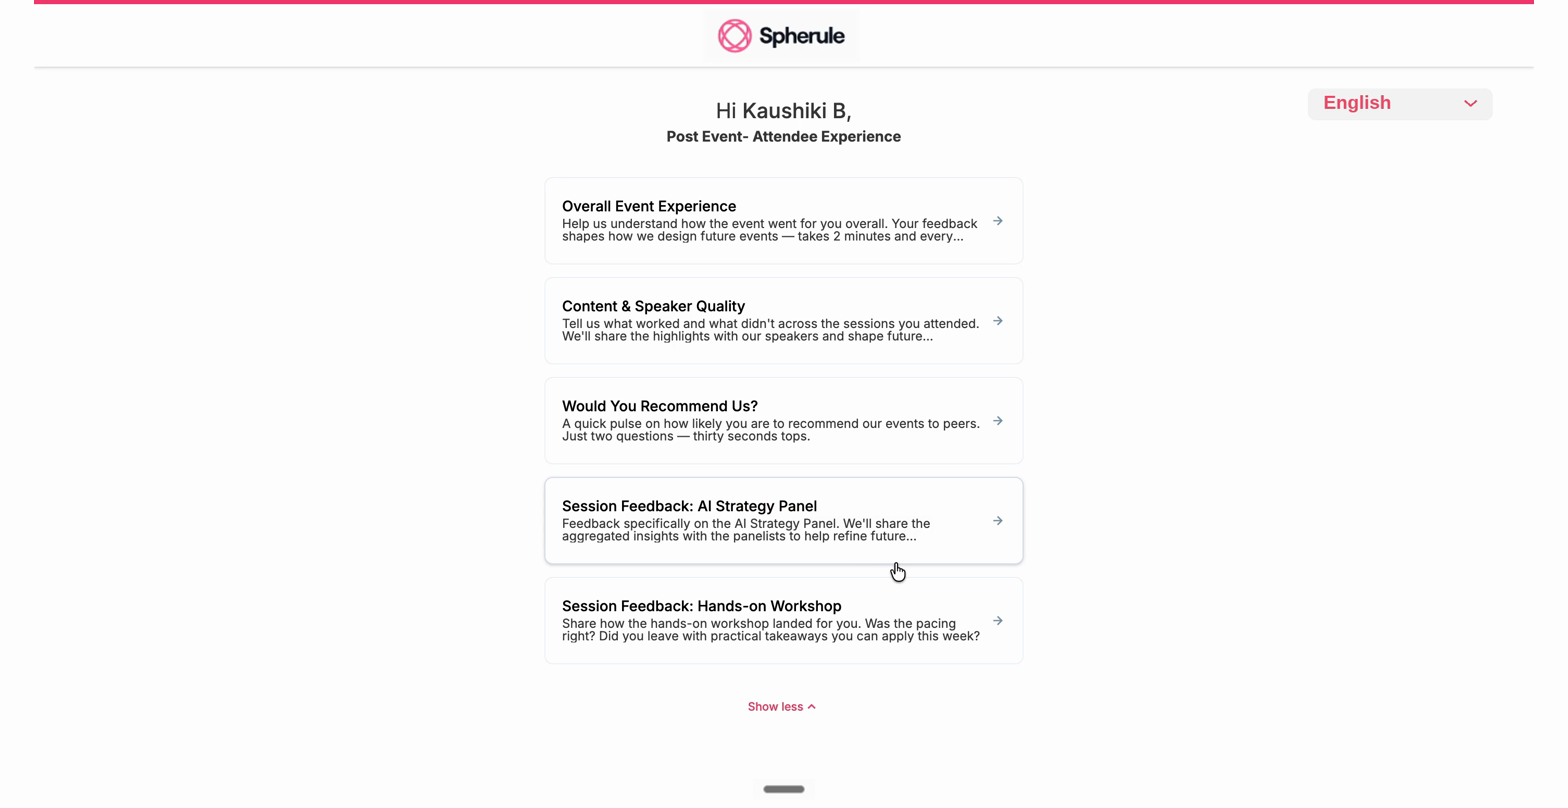
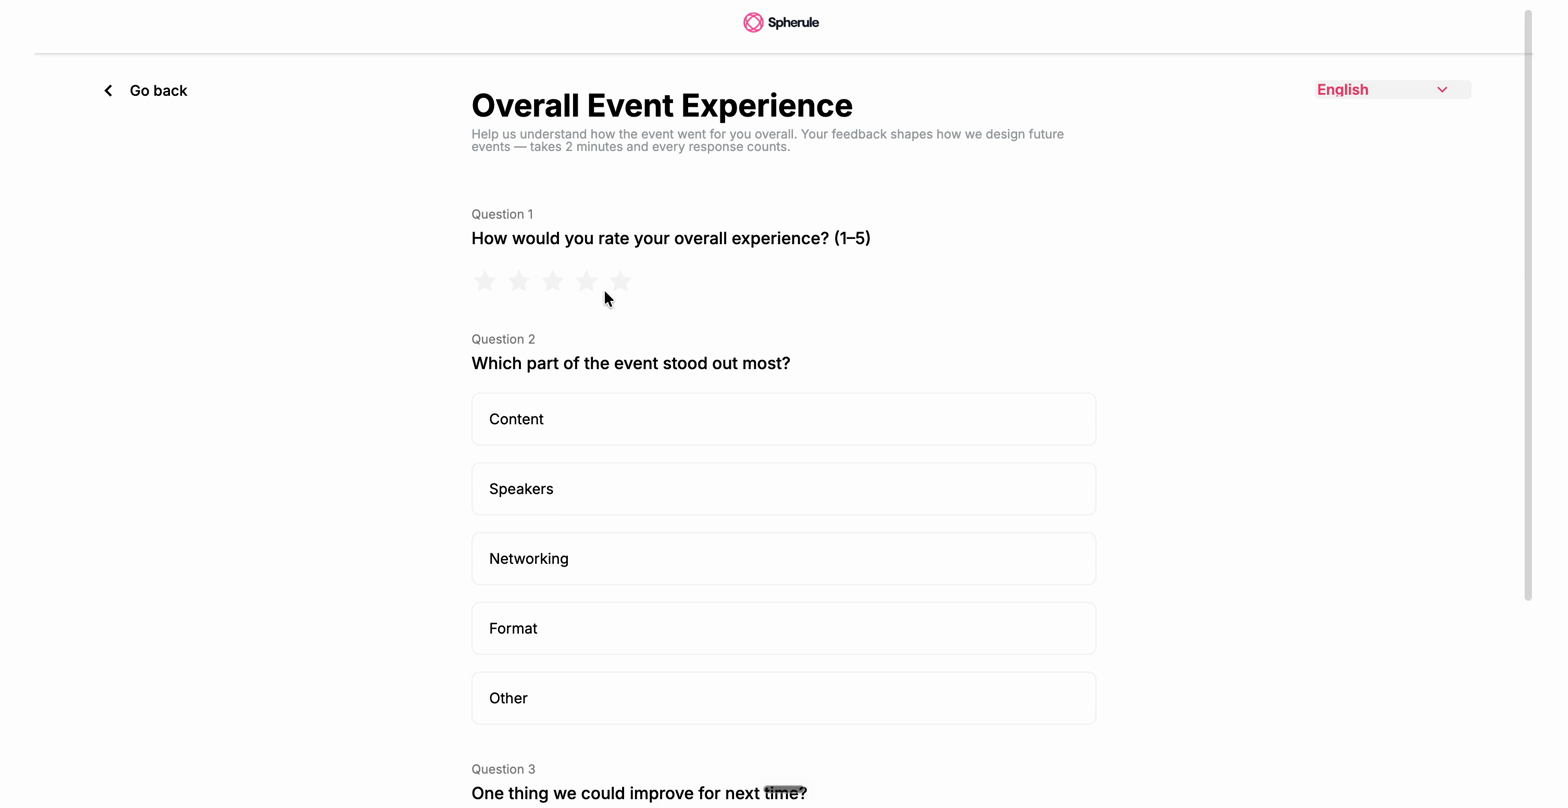
2. Answering the questions. Opening a card shows every question on a single page, with Go back at the top left.
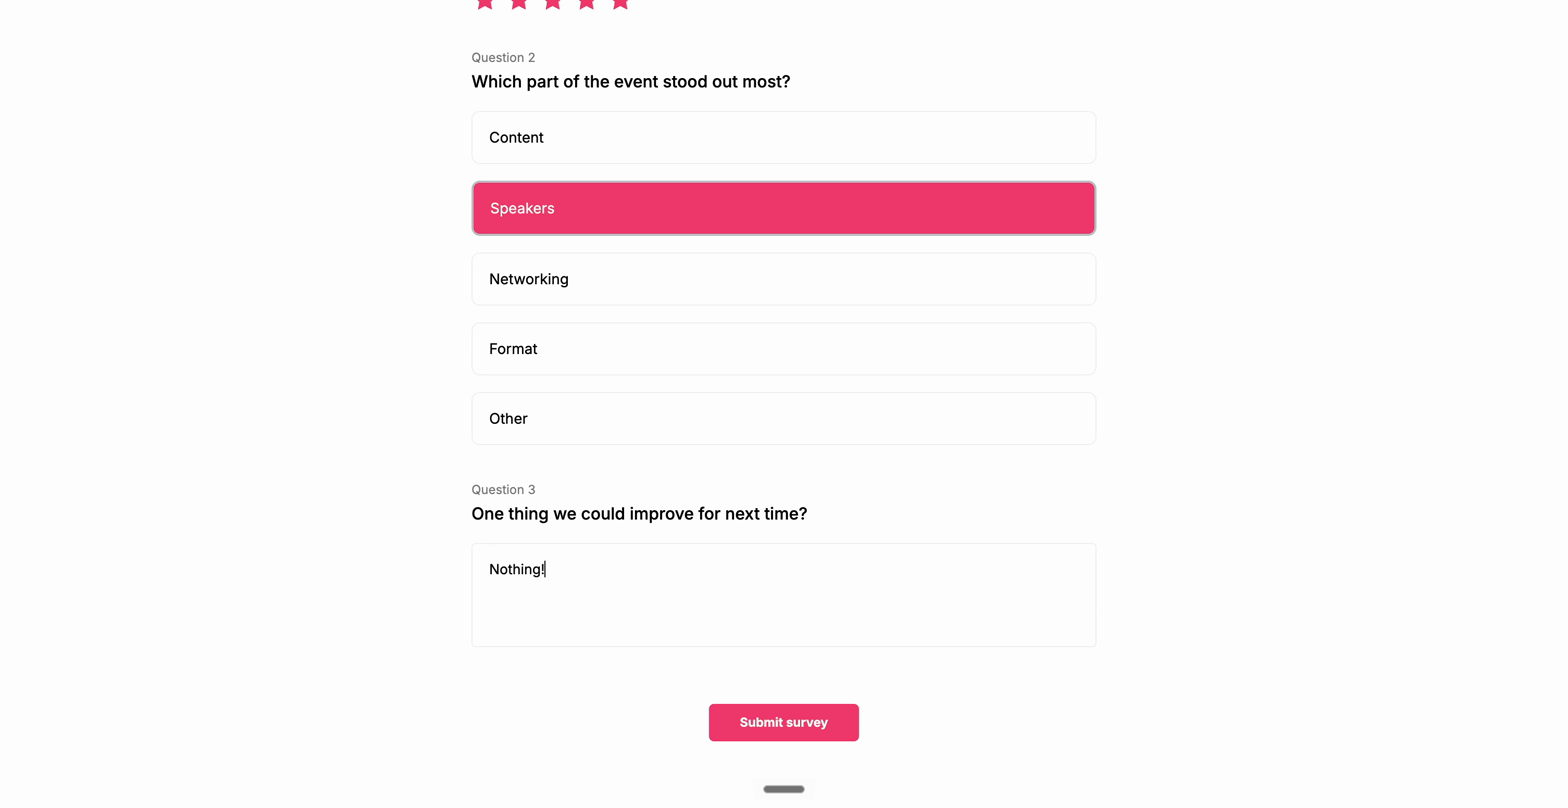
3. Submitting. Submit survey sits at the bottom of the page, below the last question.
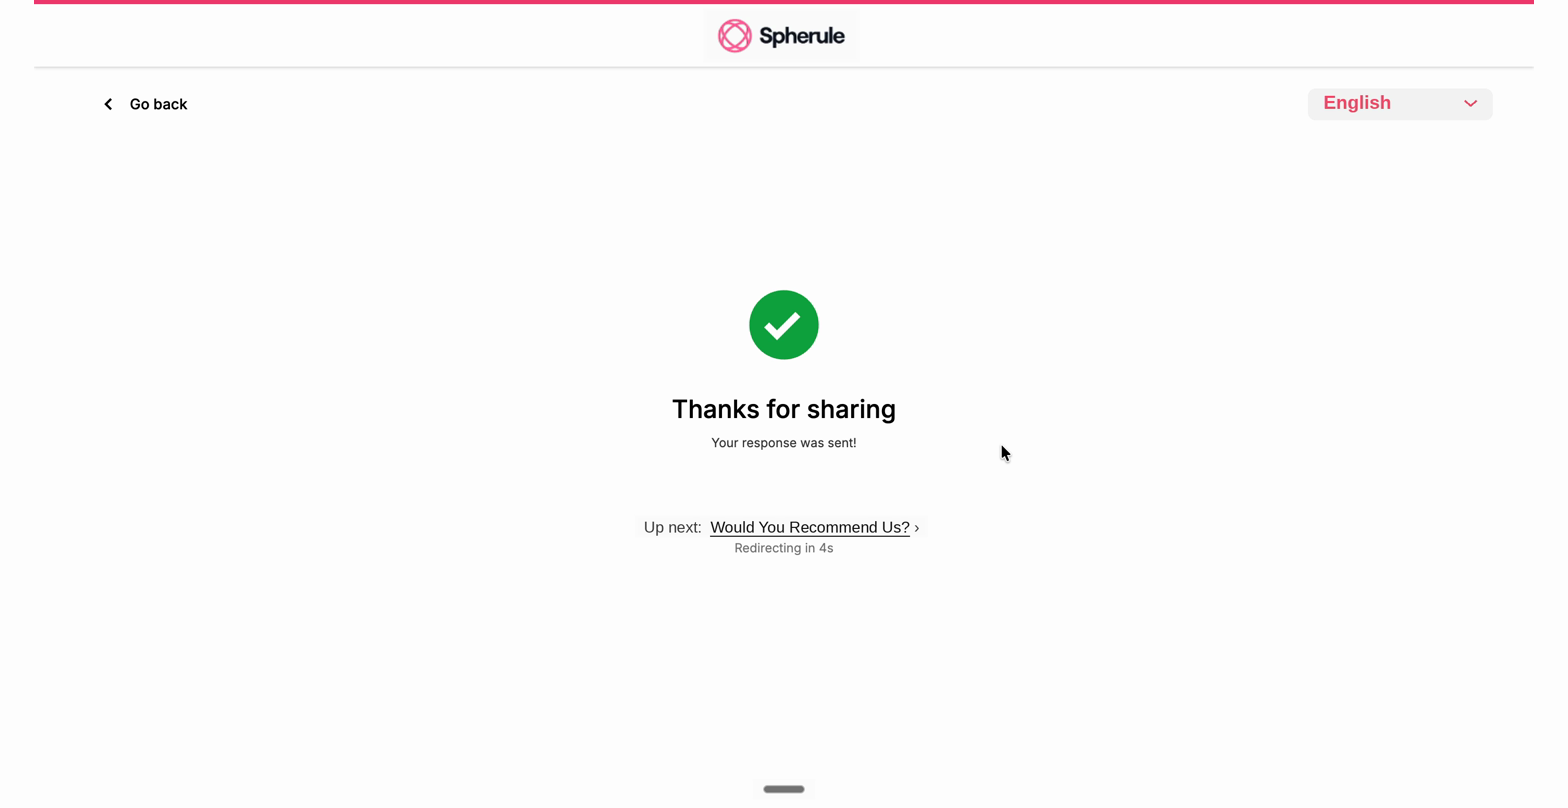
4. The end screen. Attendees land on the end screen configured during survey setup. When another survey is still outstanding, an Up next link and a countdown appear, and they are routed on automatically when it reaches zero.
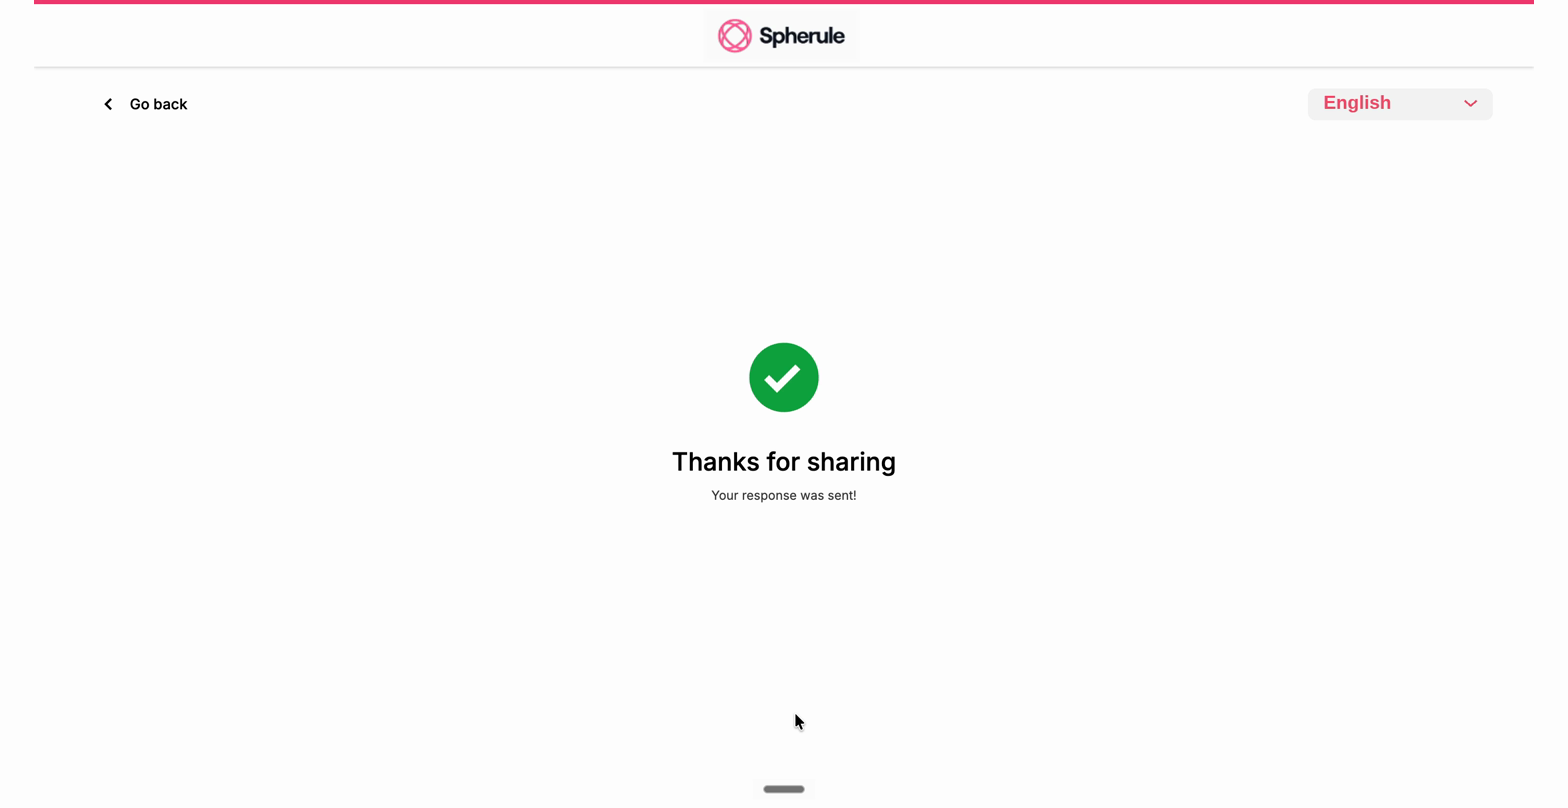
5. After the last survey. The same end screen appears, without the Up next link or countdown.
Who Receives Which Survey
The survey link itself works the same on every event format. What changes is which surveys an attendee sees once they open it.
Event surveys go to everyone who opens the link, on any format. There is no attendance condition.
Session surveys are matched to each attendee, and the rule follows the format of the session rather than the event. A hybrid event can hold sessions of any format, so more than one rule can apply on the same event.
Virtual session — shown only to attendees recorded as having joined that event virtually.
In-person session — shown to attendees of that session. If you switch on Send it to the people who have checked in to the sessions and check-in is enabled for the session, it narrows to attendees who checked in to that session.
Hybrid session — shown to attendees who satisfy either of the above.
Note: The Send it to the people who have checked in to the sessions option is under Engagement > Surveys, and appears only on in-person and hybrid events. Virtual events and webinars do not show it, because there is no check-in to match against.
Only published surveys are ever eligible. Drafts are excluded for attendees on every format.
Notes
The survey link signs recipients in automatically using their attendee magic link, so Attendee magic link must be enabled on the event for the link to work. Turn it on under Registration > Authentication. If it is off, attendees who select the link in the email are not signed in and cannot open the survey.
If Post event survey link is missing from the Special Links picker, no survey has been published on the event yet. Publish one and reopen the picker.
If the banner does not appear after publishing, refresh the Surveys page. It reflects the emails that are active at that moment.
Enabling Thank you for coming after attaching the link elsewhere does not move or duplicate the link.
Only surveys relevant to each attendee appear in their list. The first three show by default, with a Show more option when there are more.