How to Set up Credits and Certification for a Hybrid Event in Zuddl
Last updated: August 1, 2025
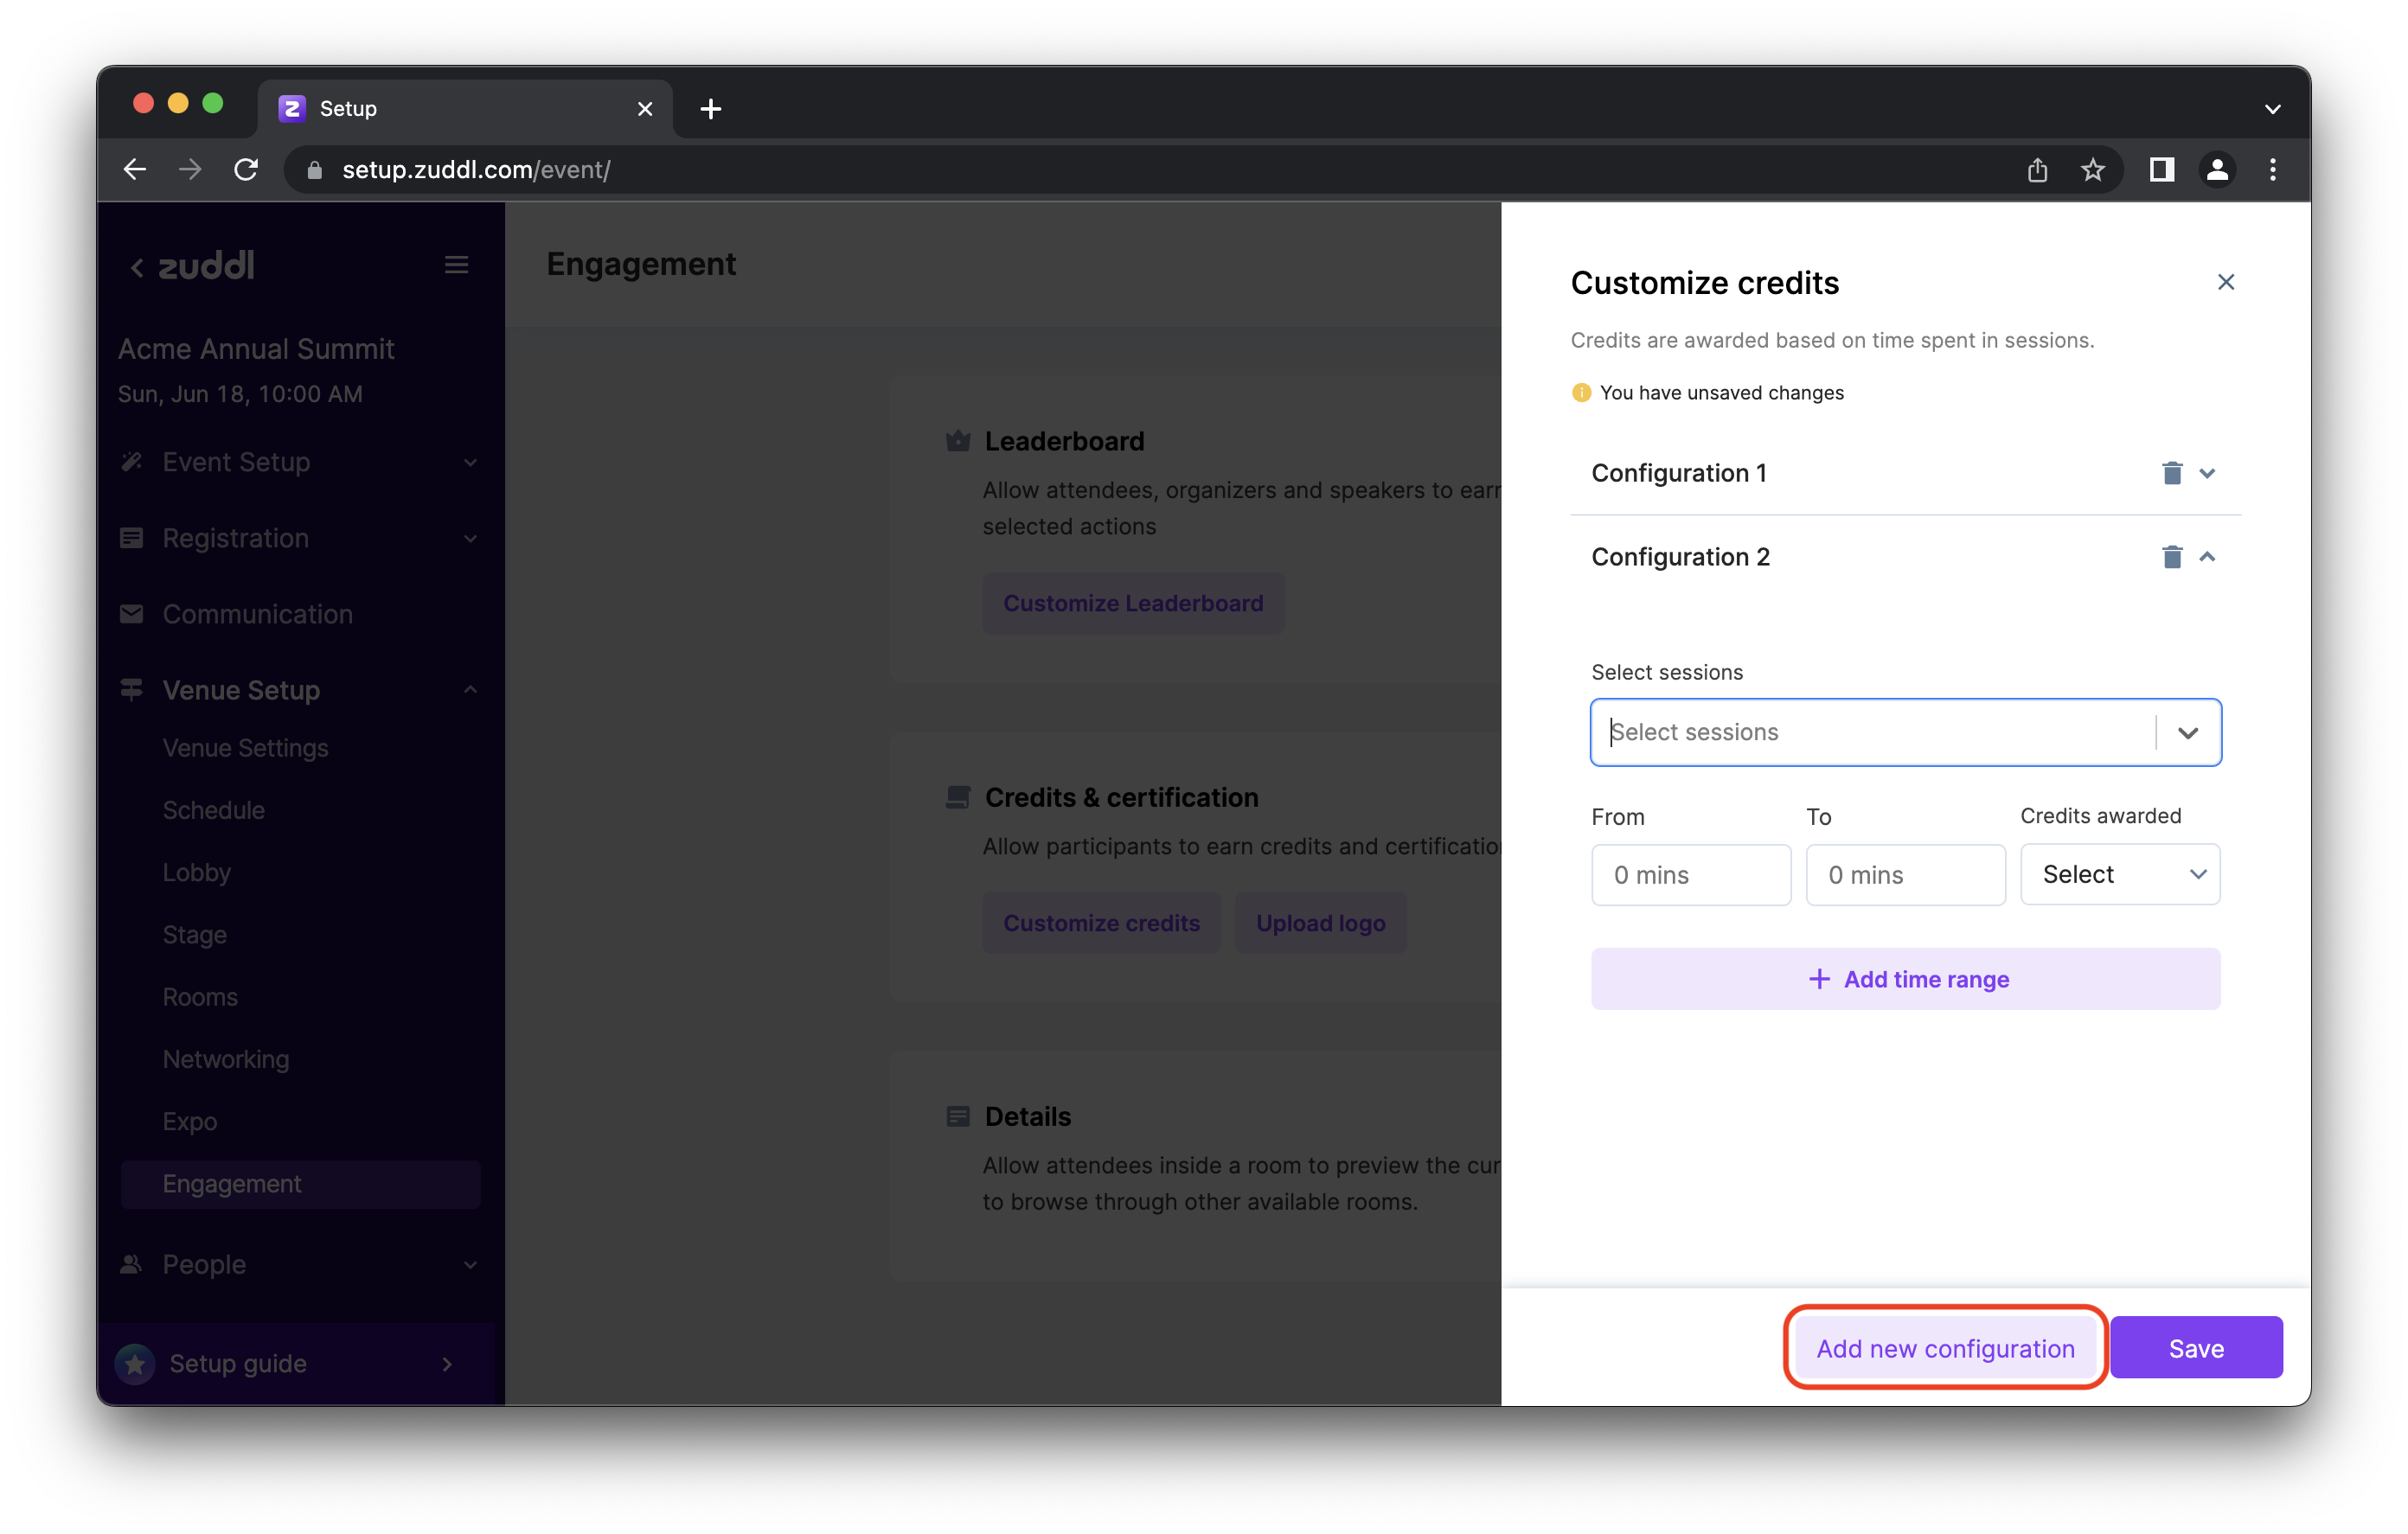
Customize how credits are awarded
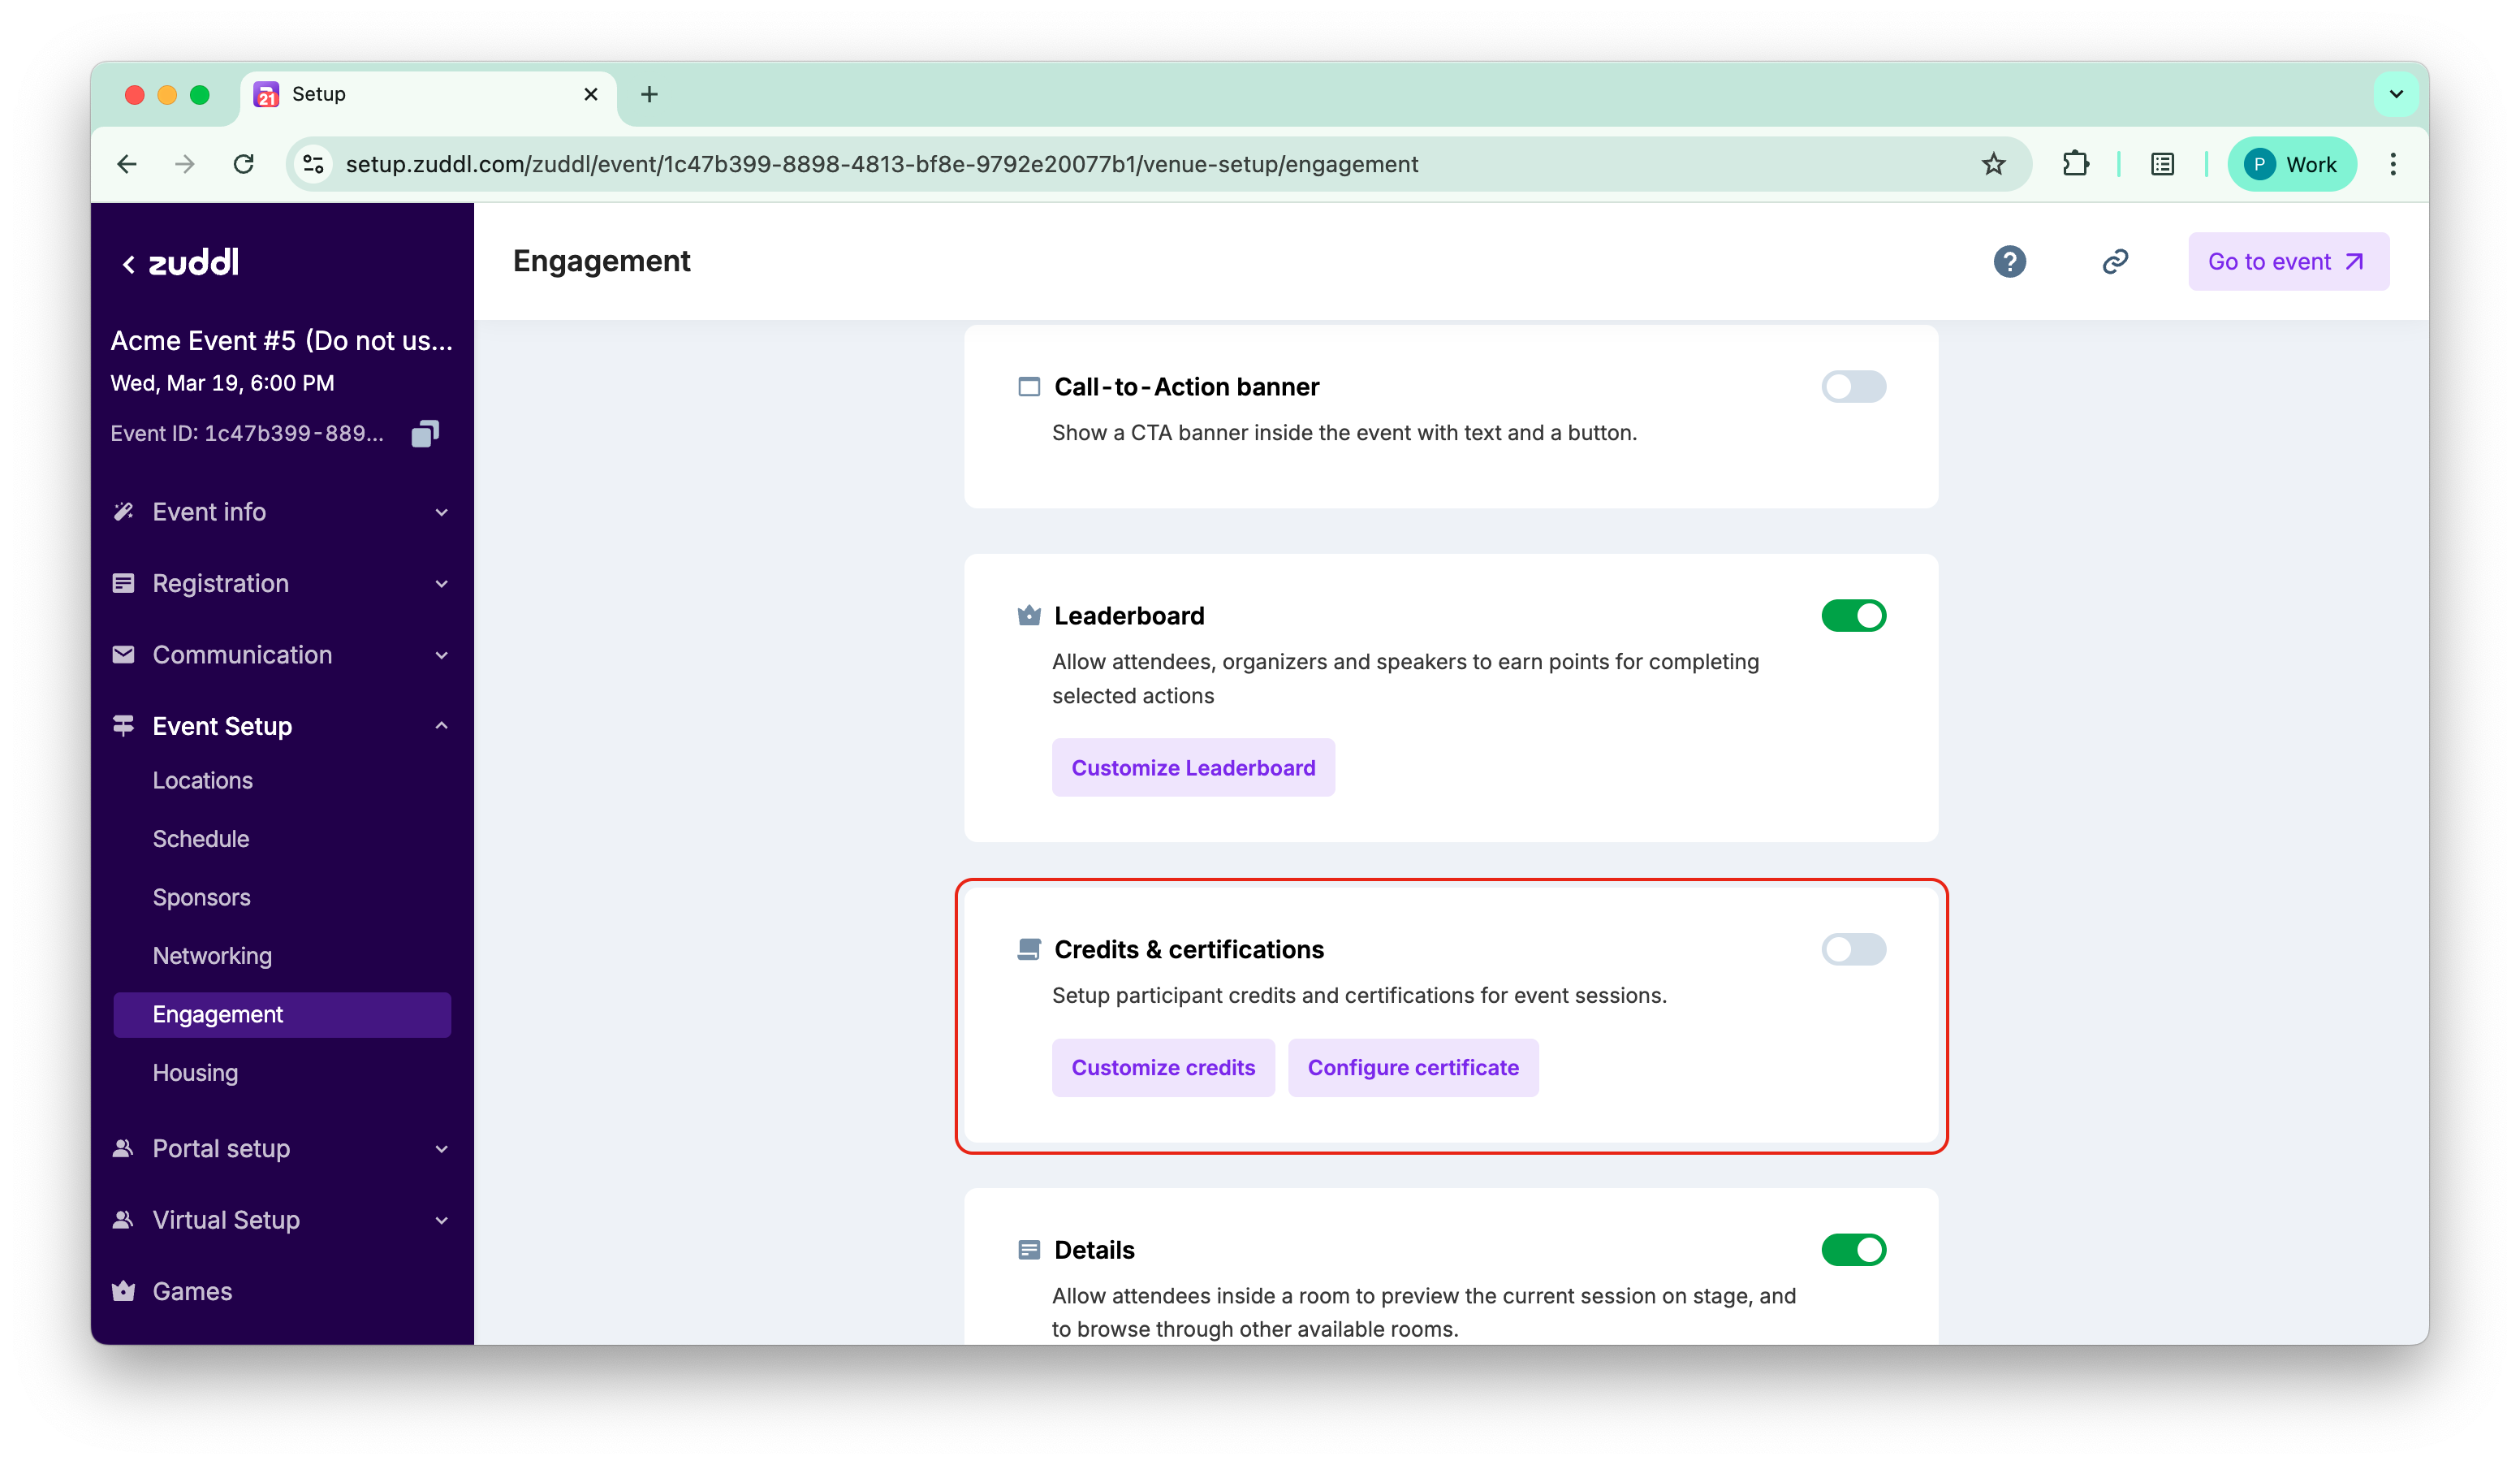
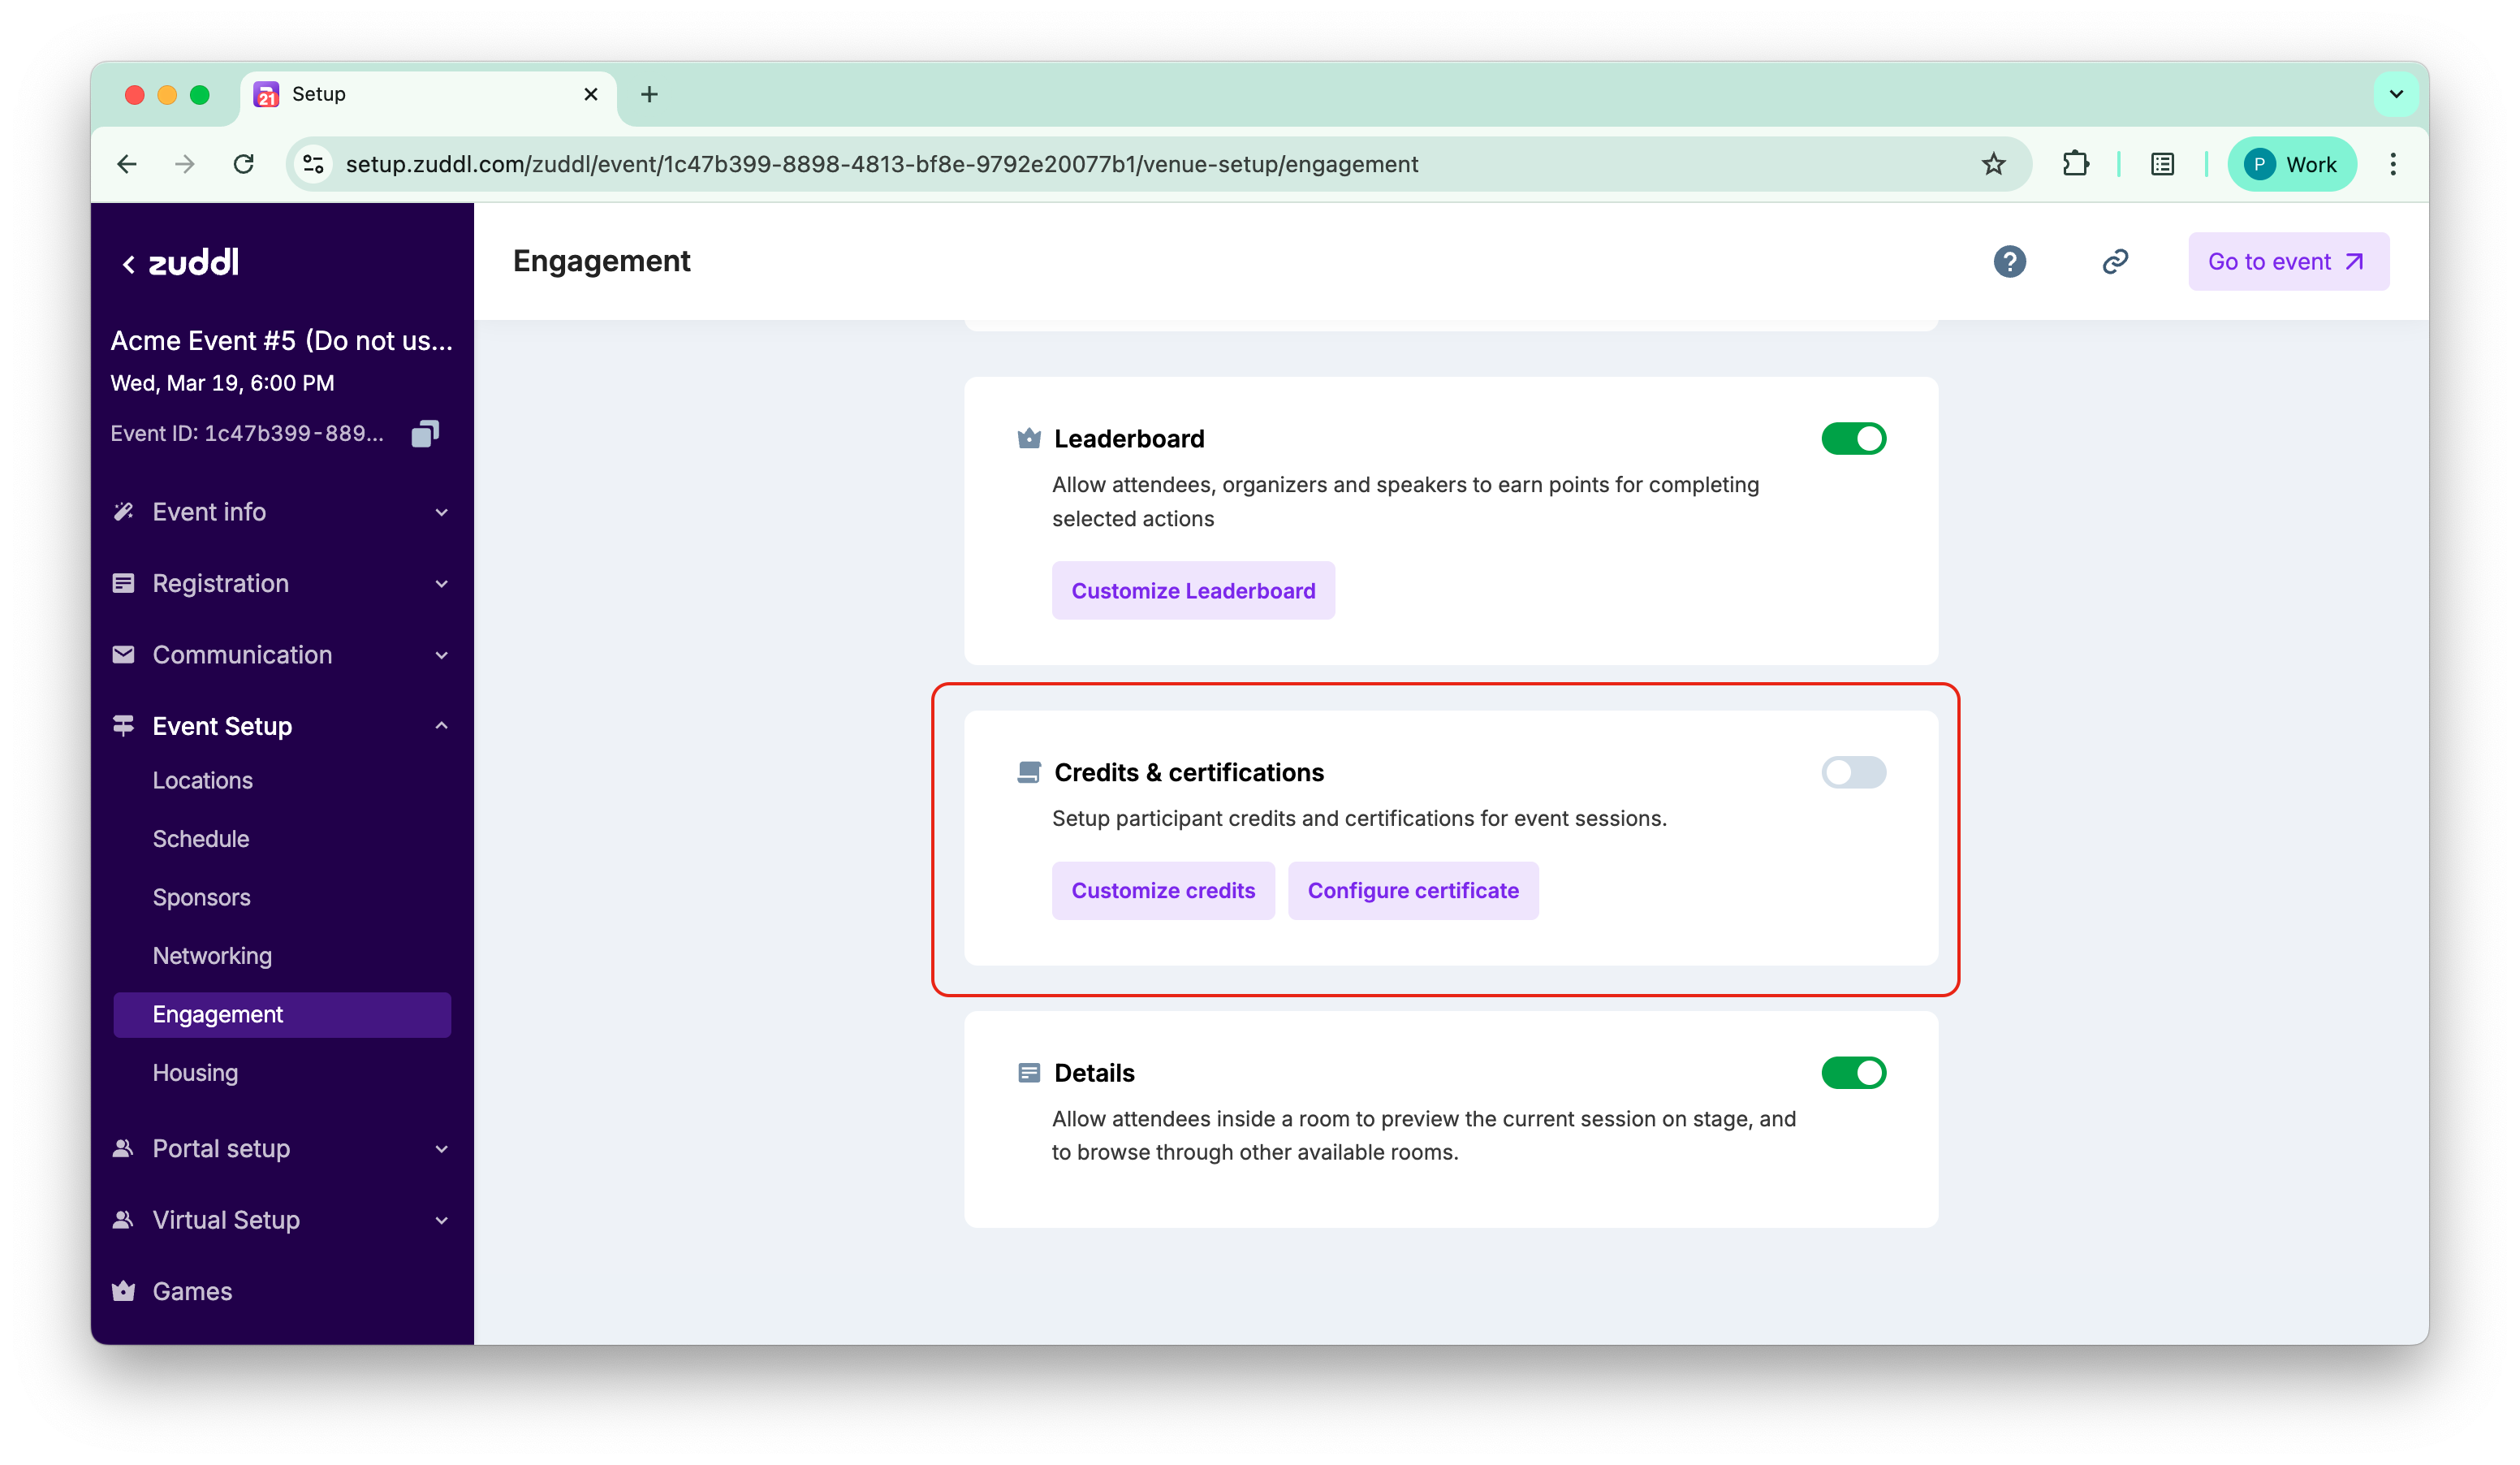
- Go to Venue Setup > Engagement and toggle on Credits & certification.
- In the select criteria field, choose the following options:
- Watch time
- Polls
- Watch time and polls
Customize credits for Watch time
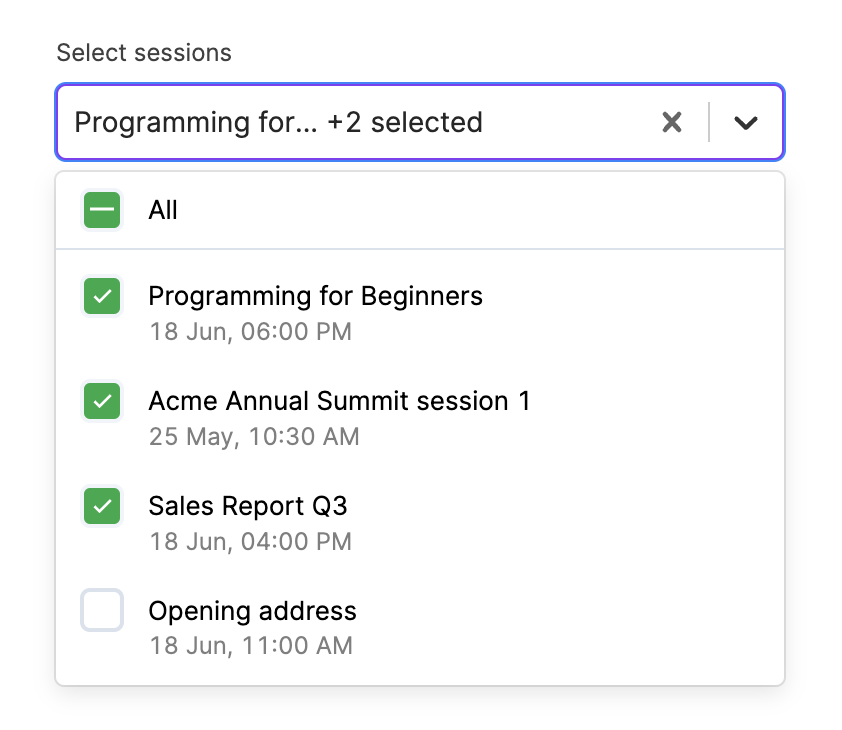
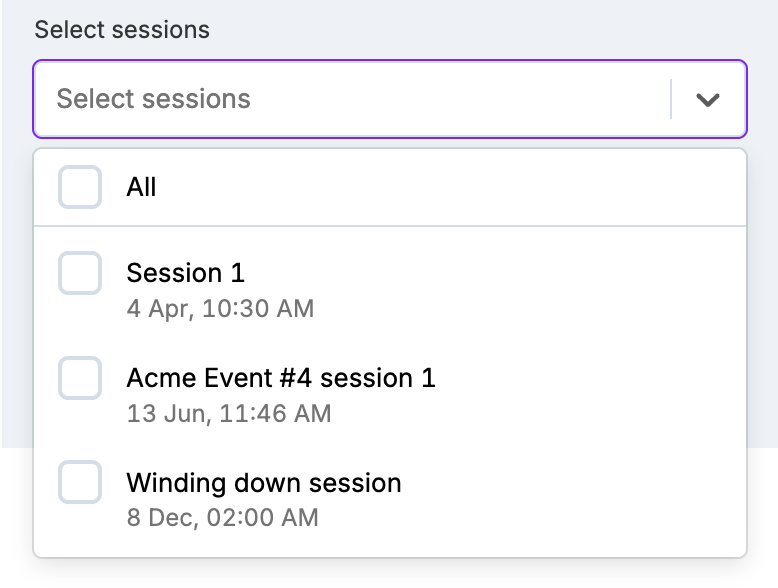
- Select Watch time from the dropdown options. Under Select sessions, select all the sessions for which this credits configuration is to be applied.

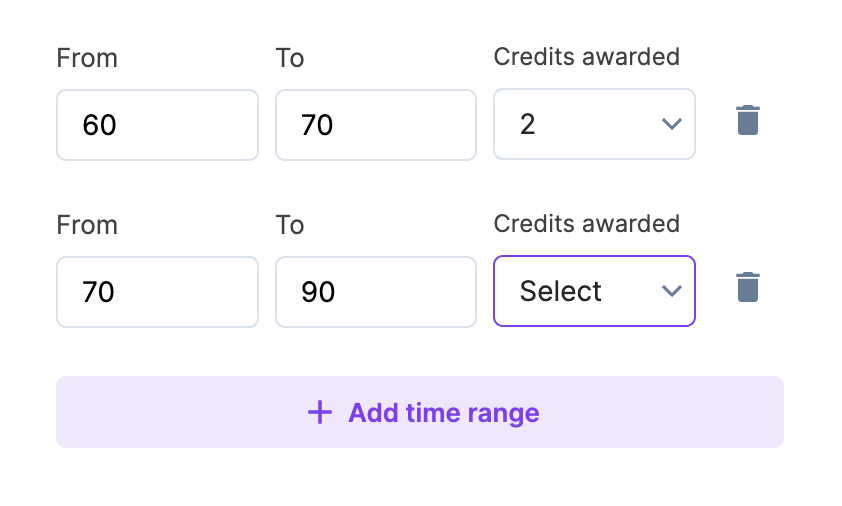
6. Click Add new configuration to add further customization for awarding credits.
Customize credits for polls
- Select Polls from the dropdown options.
- Under Select sessions, select all the sessions for which you want to offer credits.
- Enter the minimum Number of polls to qualify and Credits per session.
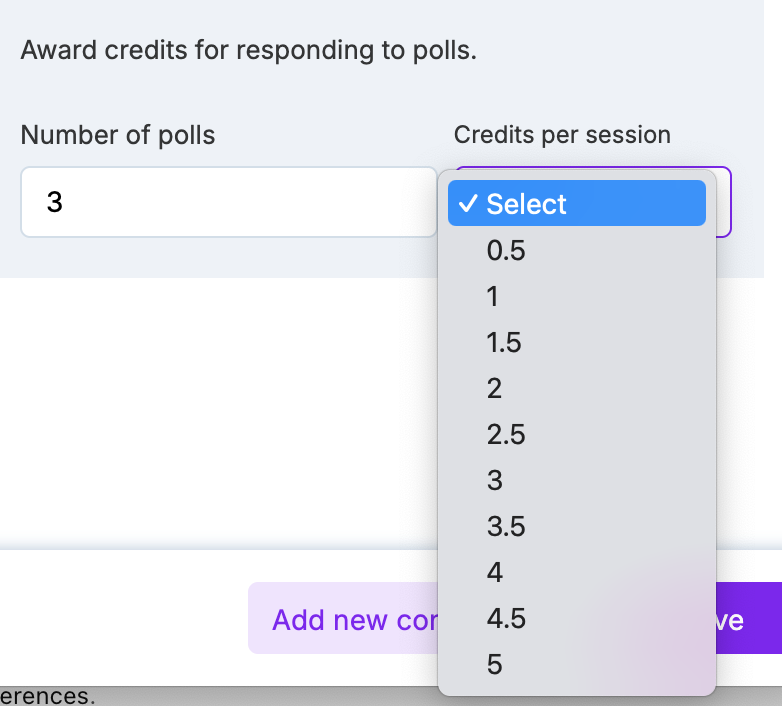
- Click Save.
Customize credits for watch time and polls
In this criteria, all the fields for watch time and polls are shown. Click Save to finish setting up credits.
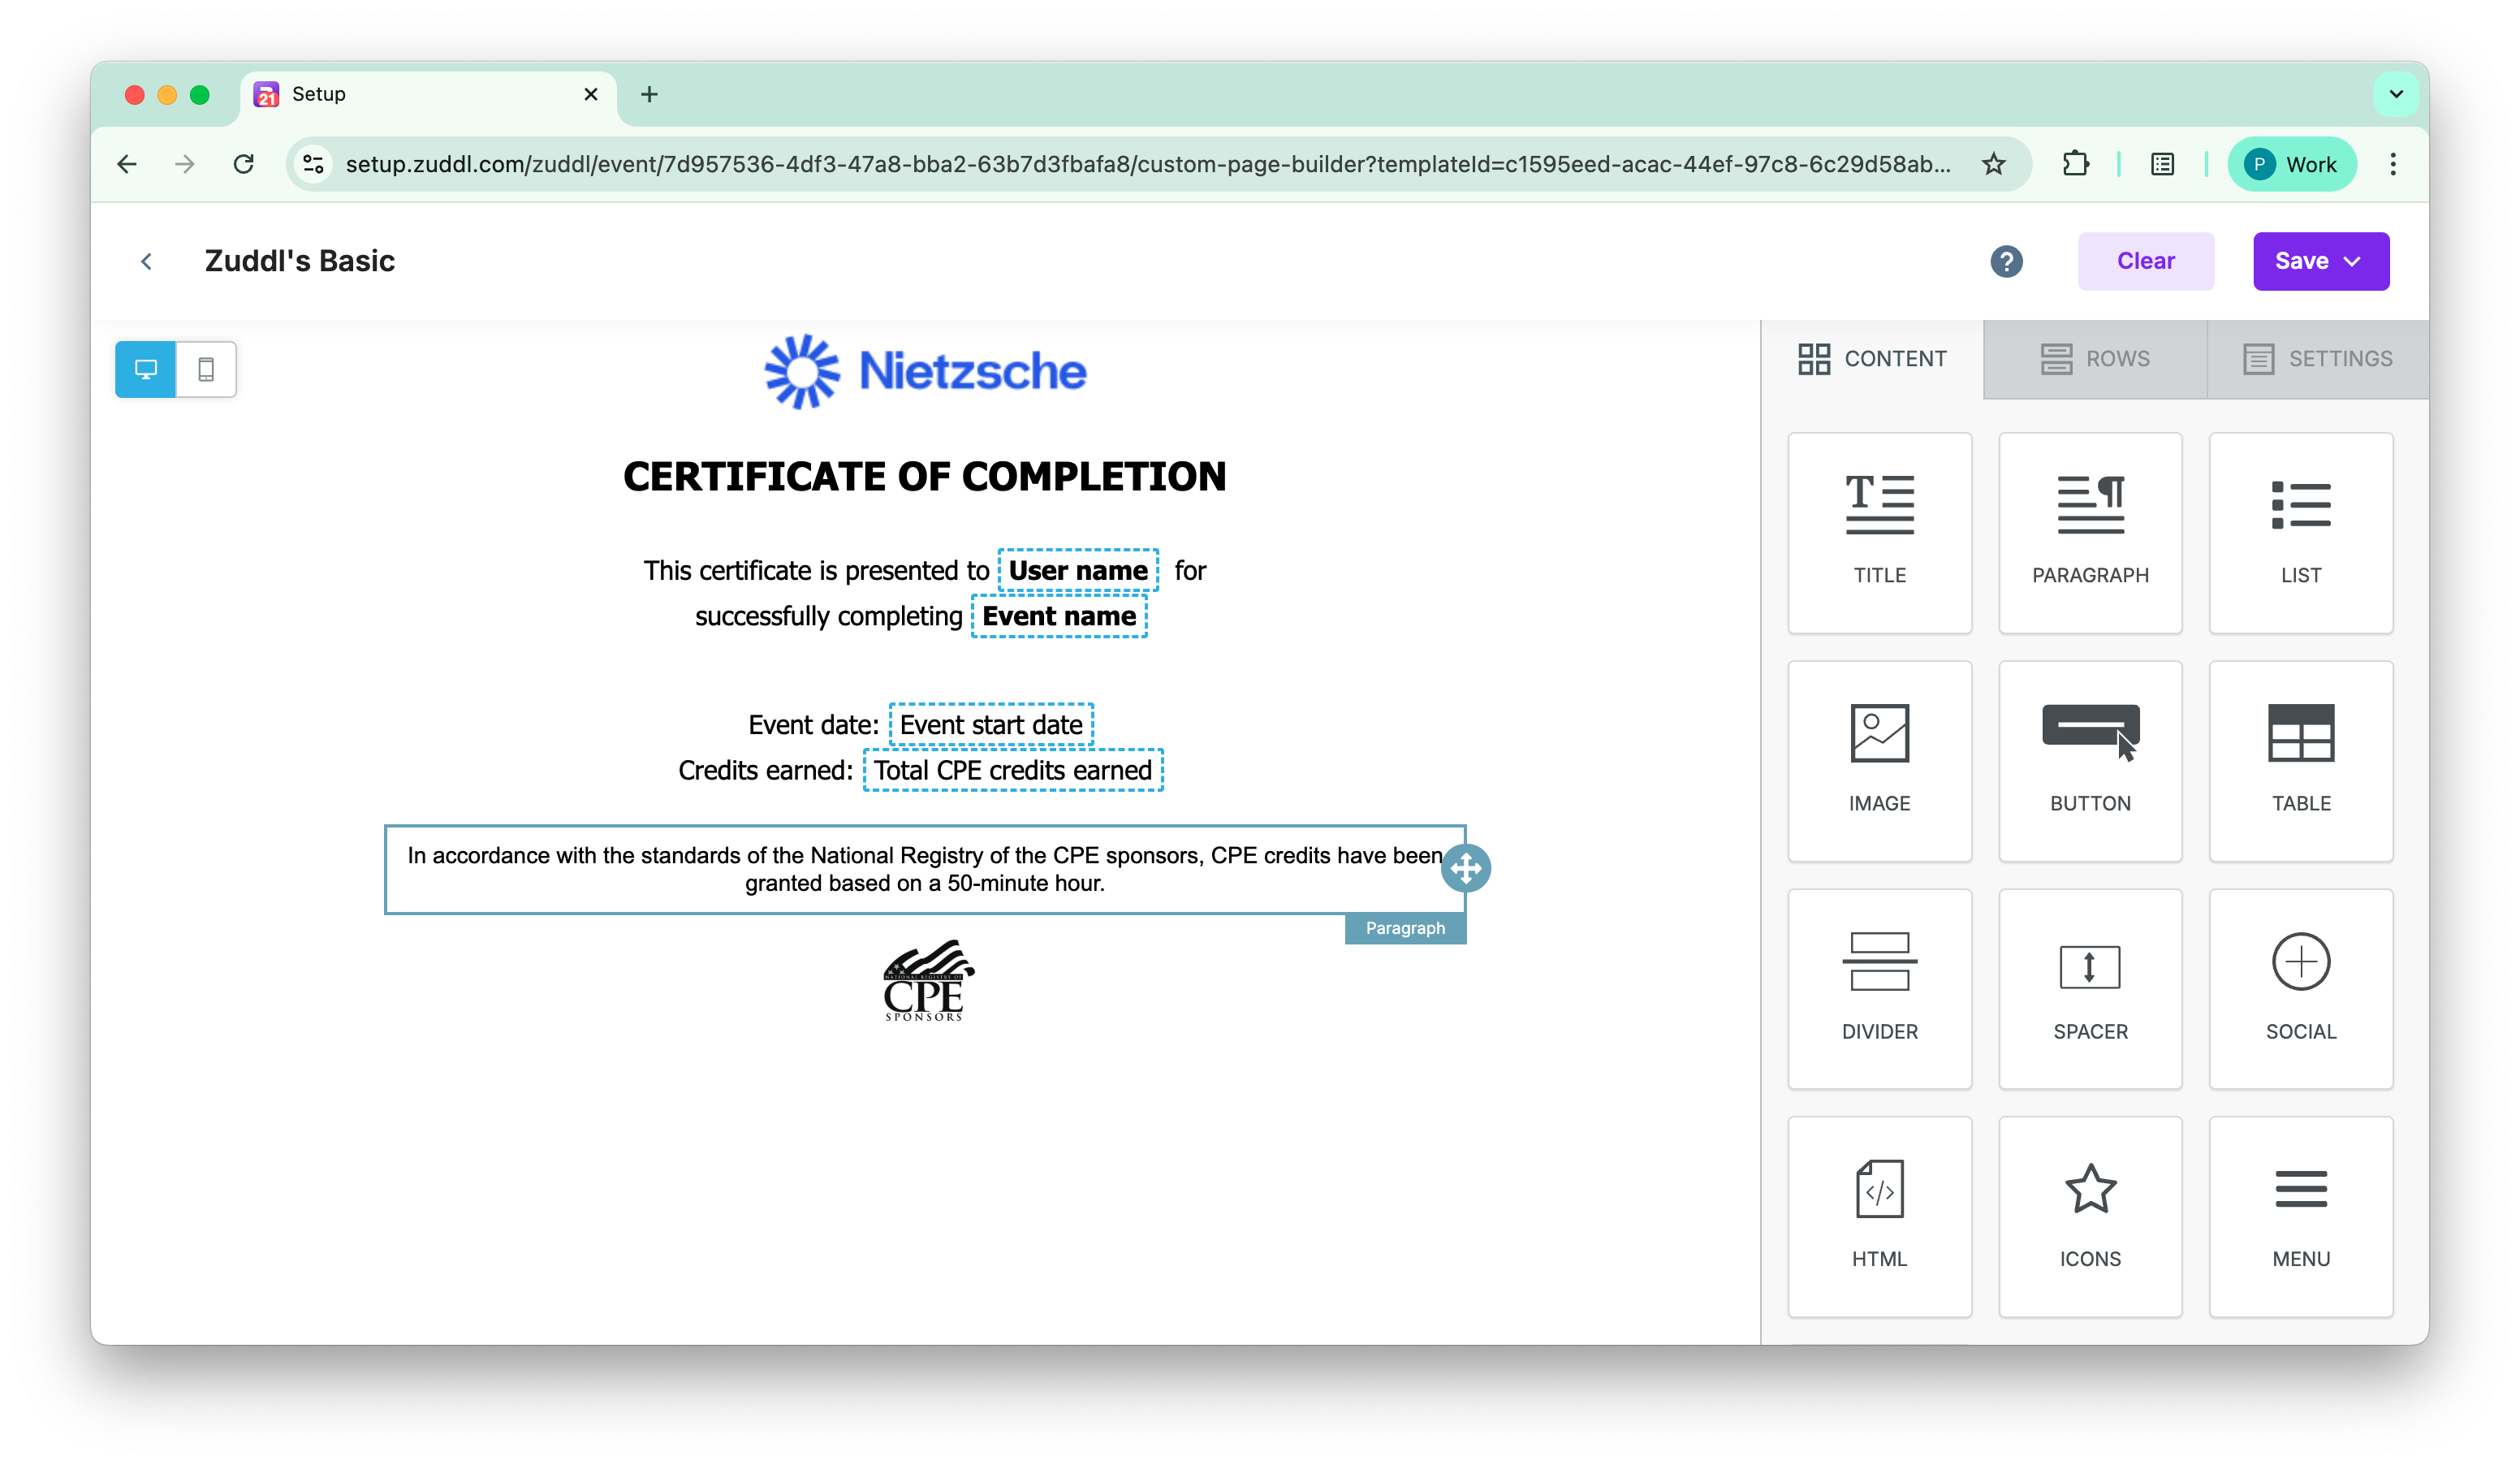
Customize the Certificate
- Click the Configure certificate to custom design the certificate such as adding company logo, sponsor logo and much more.
You can also click the Configure certificate button on the Credits & certification card in Engagement to do this.
You can design a certificate using templates in the following ways:
Blank template: Start fresh with no predefined components
Zuddl Basic: Show only the basic details
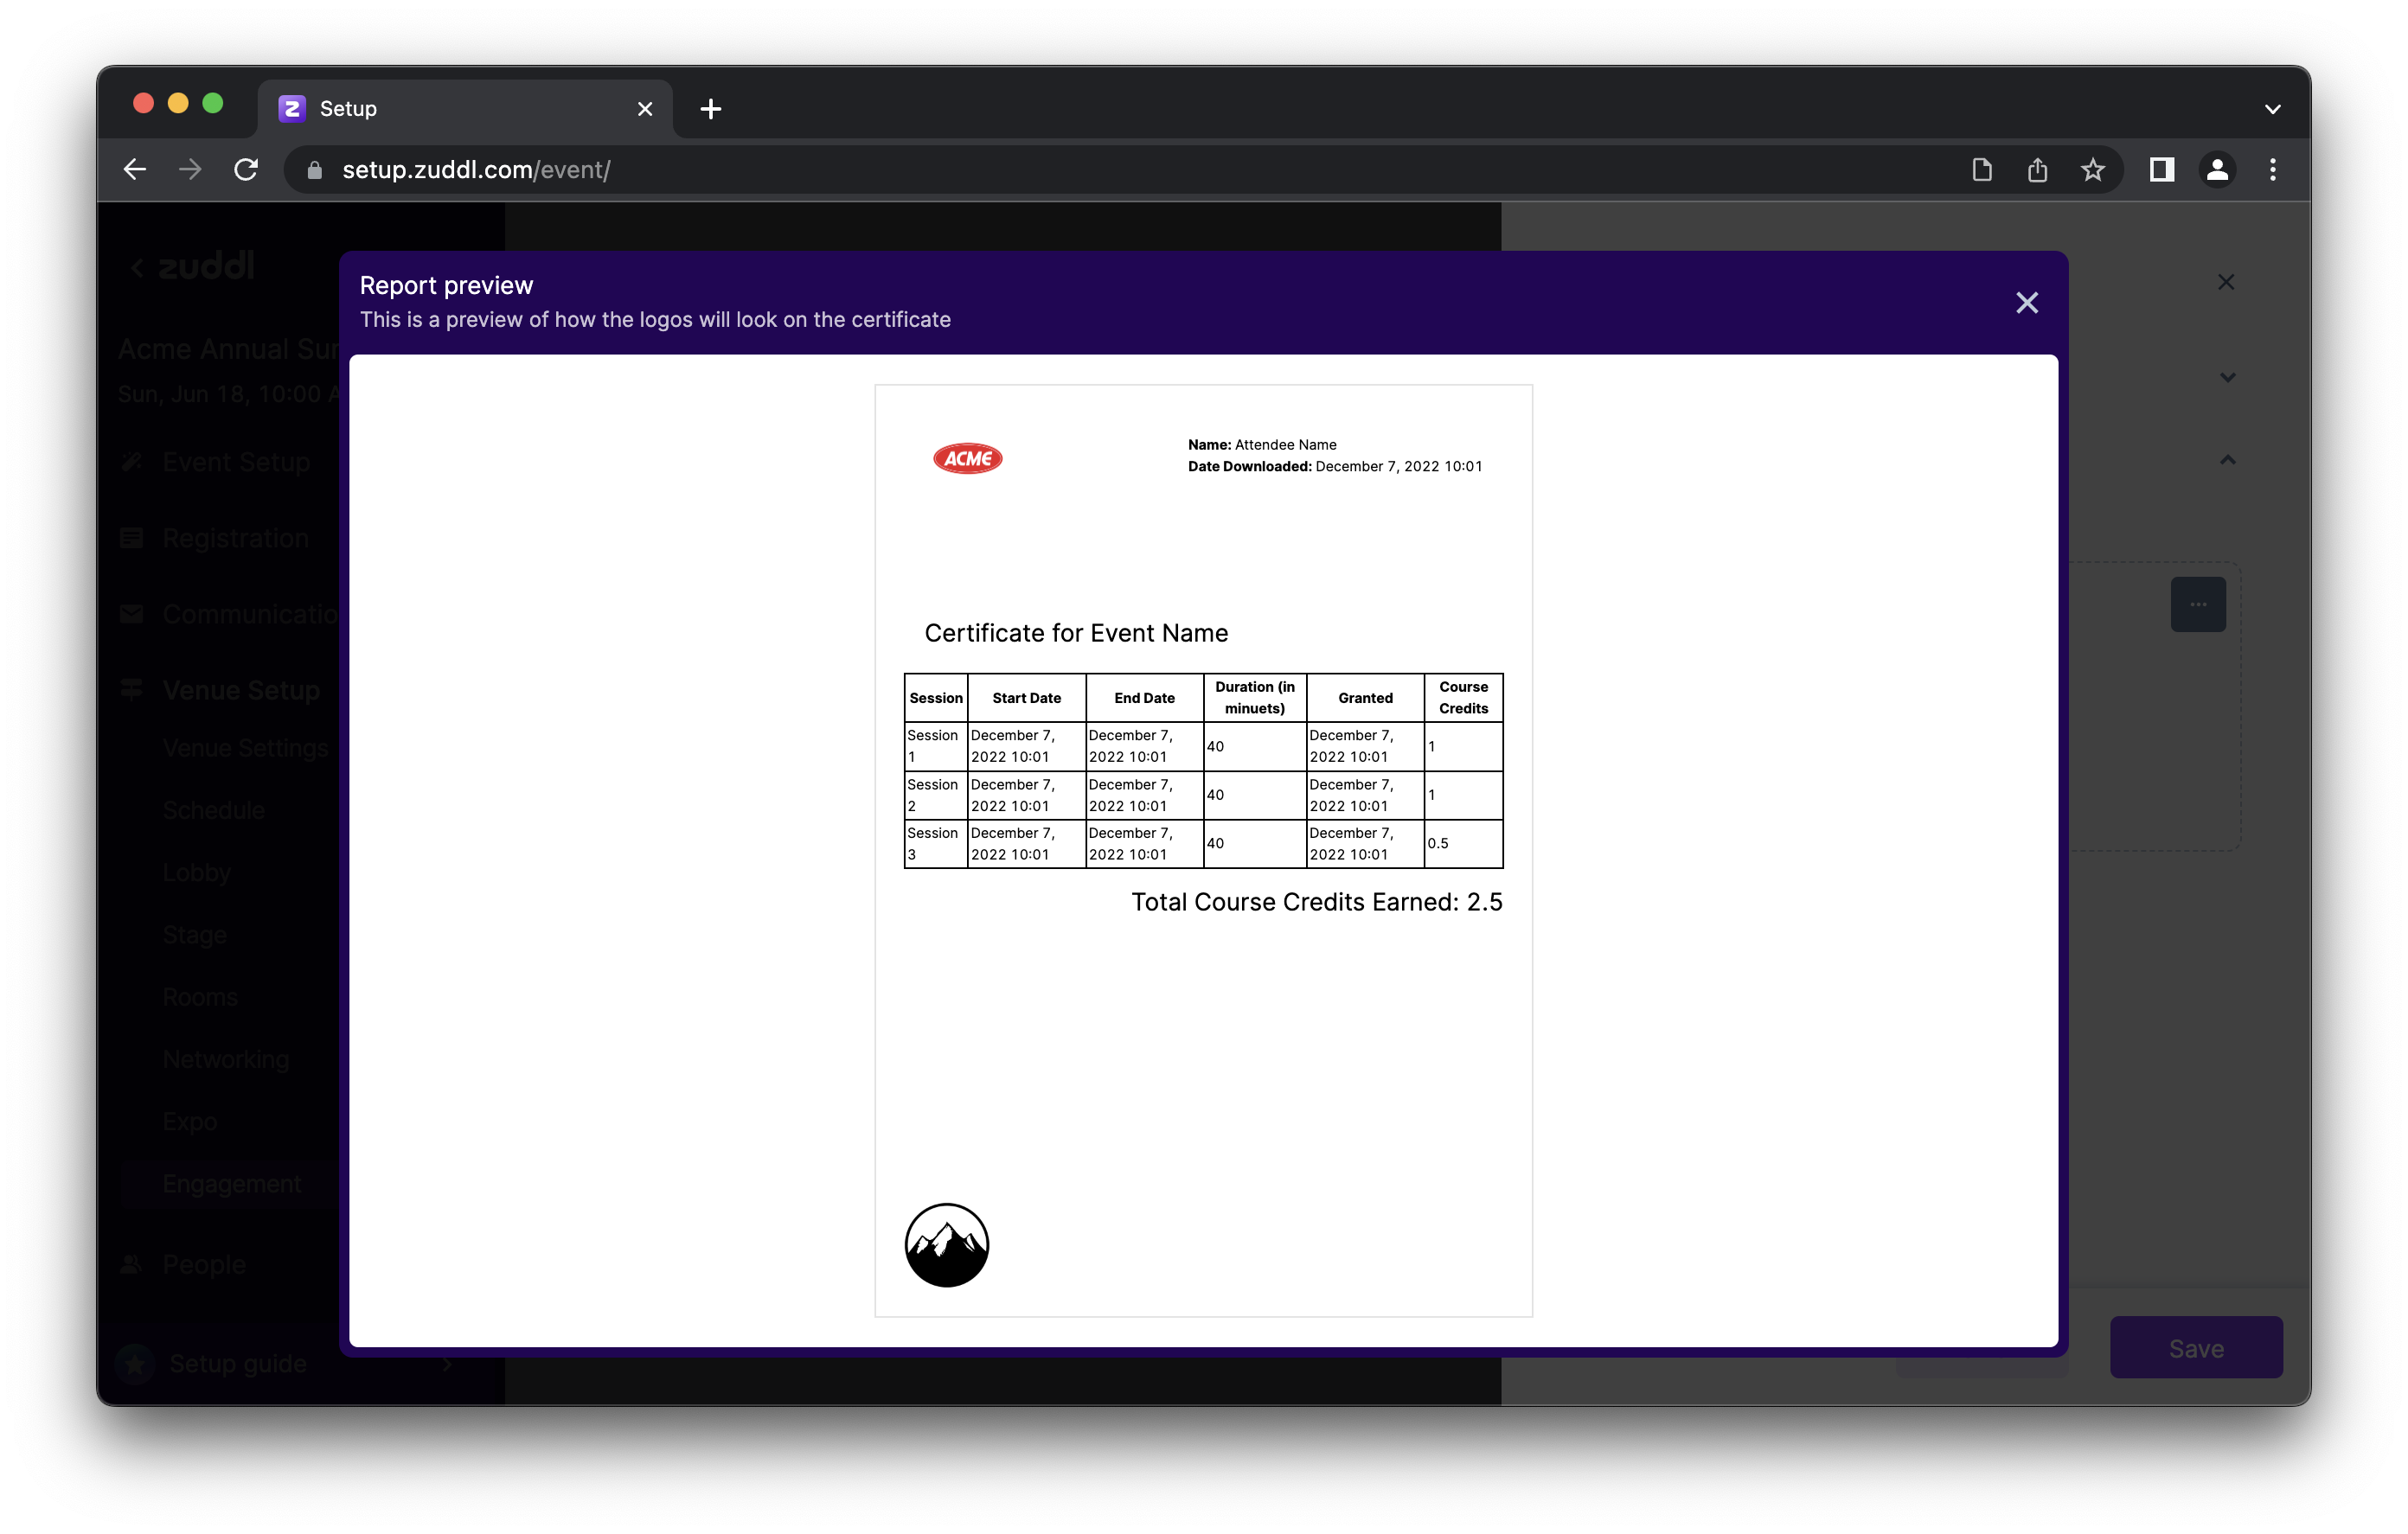
Zuddl Advance: We show session-wise credits in tabular form
Click on any template or blank template, to start editing the template using the template editor.
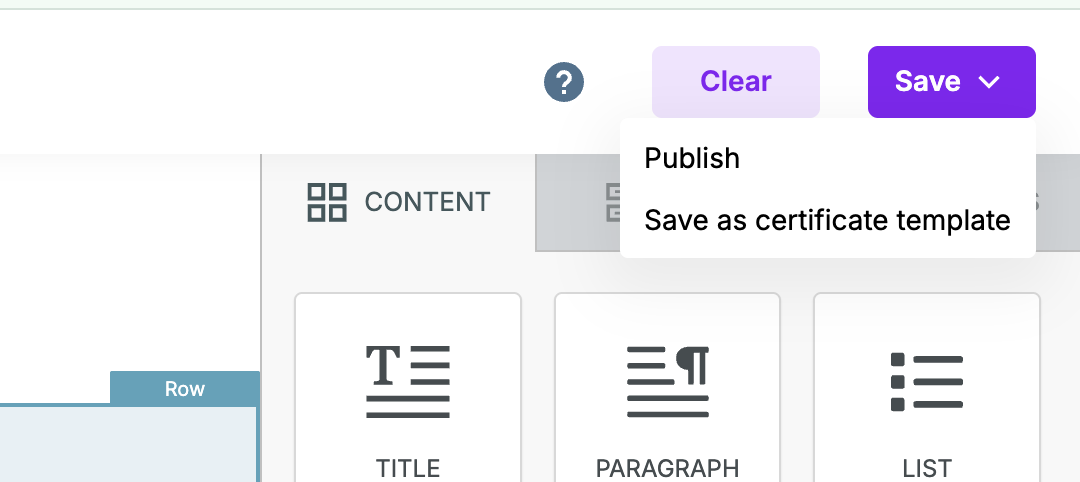
Click on the Save button
Publish: Save the local changes and publishe it for the event. This appears under the Published section on the template selection screen.
Save as certificate template: You can rename save a template at the org-level to be shown at every event.
Your published certificate appears under the published section which you can preview.