Set up Simulive (pre-recorded video sessions) for hybrid events
Last updated: August 15, 2026
What This Does
Simulive lets you schedule a pre-recorded video to play automatically on a Stage session. The video starts by itself at the time you set, so no organizer needs to be present to start the session. Chat, polls, Q&A, and surveys stay live throughout, so attendees experience it as a live session.
Use Simulive when a speaker cannot attend live, when you want to run the same session across multiple time zones without repeating it, or when you want a polished pre-recorded keynote that still supports live audience interaction.
Note: Simulive is set up per session, not per event. You can mix Simulive sessions and live sessions in the same event and on the same stage.
Before You Begin
- You need organizer access to the event in Zuddl (Event Setup permissions).
- The event format must be virtual or hybrid, and the session format must be virtual or hybrid. Simulive is available on both event formats and both session formats. It is not available on in-person events, or on in-person sessions, which have no video playback surface.
- The virtual venue must be a Stage. Simulive is not available for Room or Lobby sessions. In a hybrid event this is the session's virtual venue, set separately from any physical location.
- Your video must be an MP4 file, up to 12 GB. Recommended resolution is 1920x1080px (16:9).
- One video per session. Each Simulive session plays a single pre-recorded video. To run several videos in sequence, either combine them into one file before uploading, or create a separate session for each video.
- Your video must not exceed the Max length shown above the upload area in the Simulive section. See Error states and validation.
- Upload well ahead of the event. Large videos take time to process, and Zuddl blocks the setup if processing will not finish before the session starts.
Steps
- In the left navigation, go to Event Setup > Schedule.
- Click Add session to create a new session, or click an existing session to edit it.
- Fill in the session basics: Session name, About the session, Select day, and Start & end time.
- Set Select session type to Hybrid or Virtual. Then under Select a virtual venue choose Stage, and pick the stage.
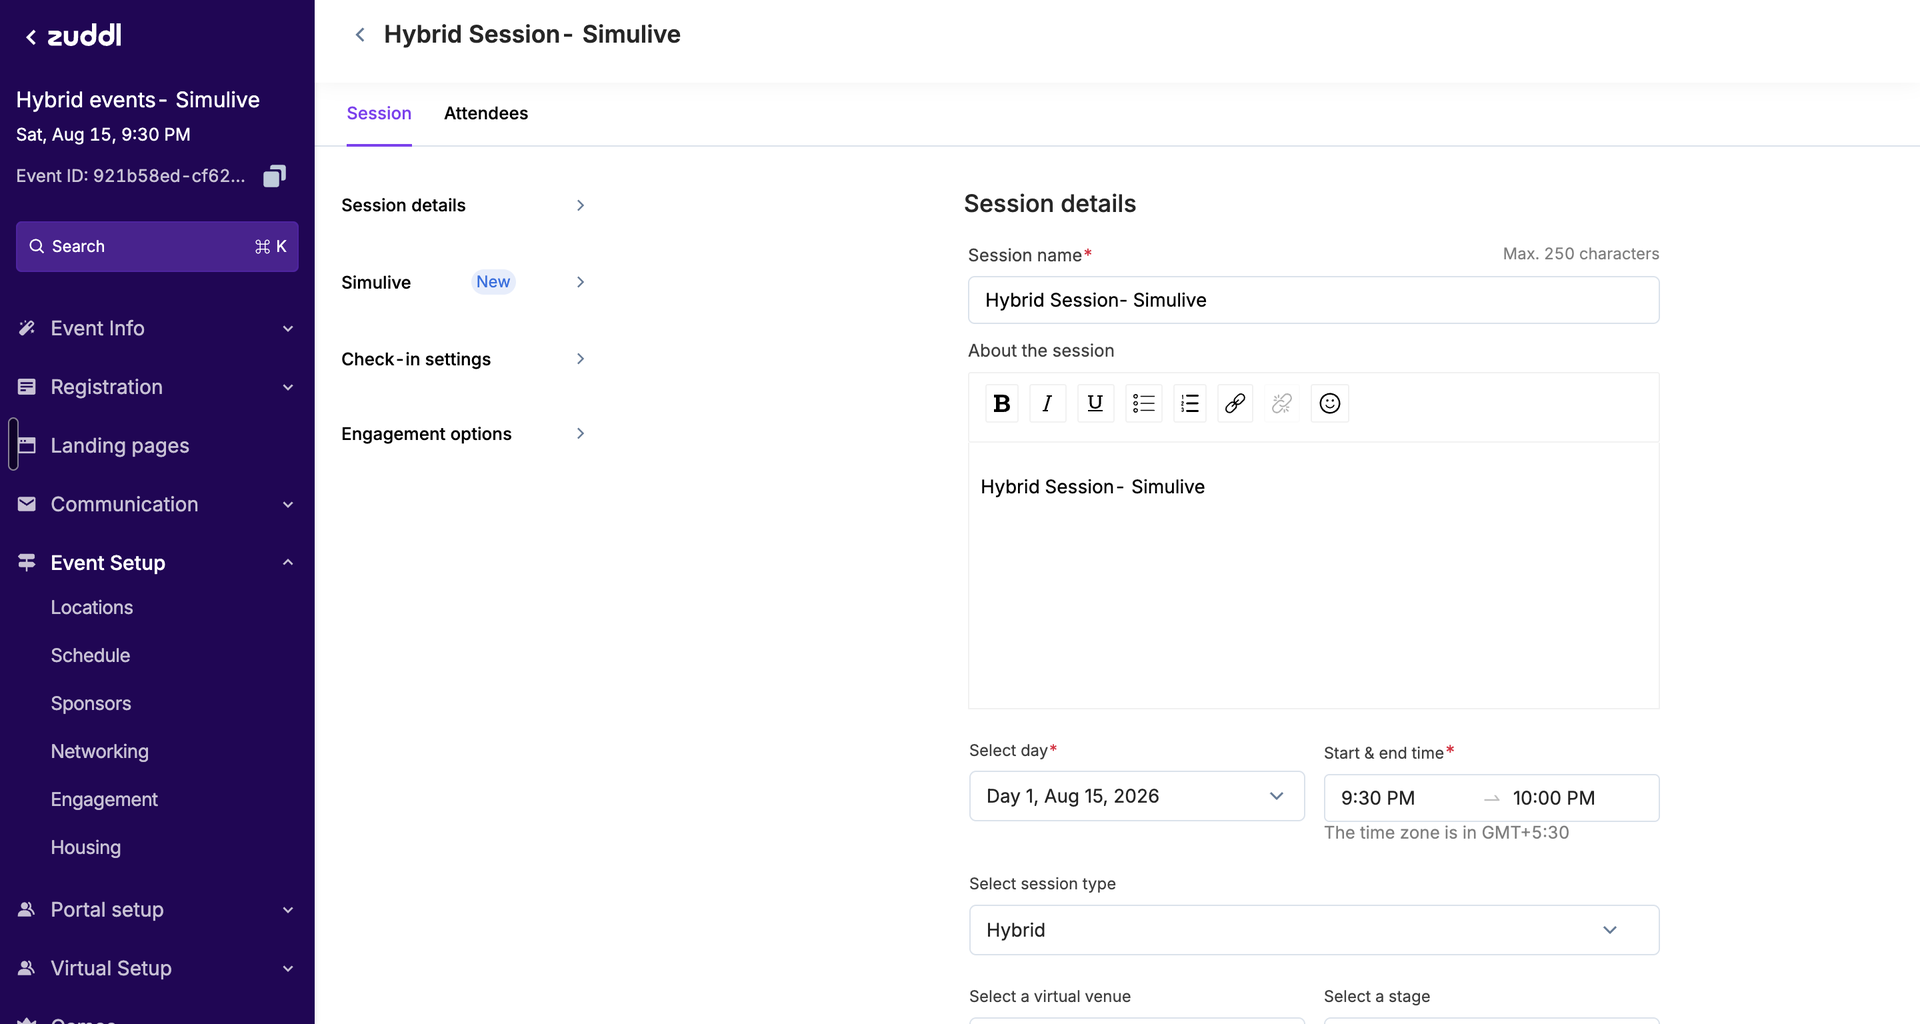
- Scroll to the Simulive section, or click Simulive in the left-hand section list.
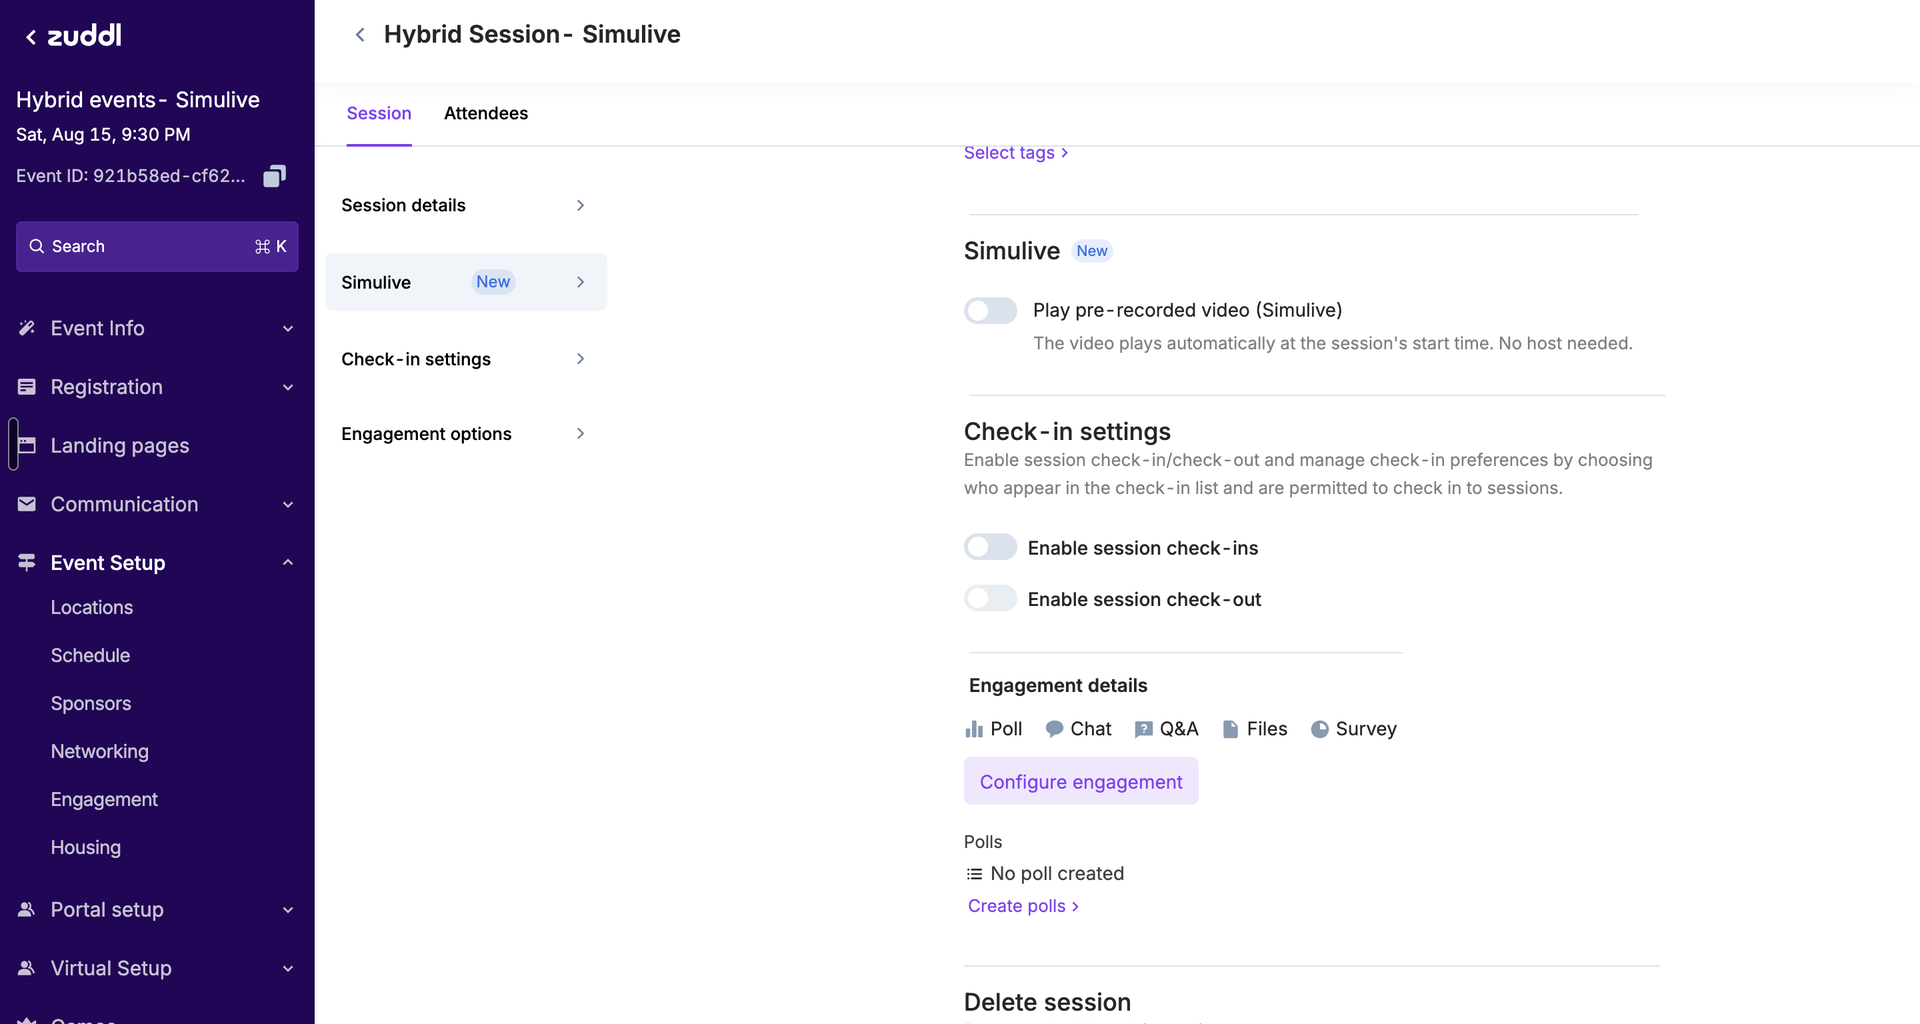
- Turn on Play pre-recorded video (Simulive). The playback and upload fields appear.
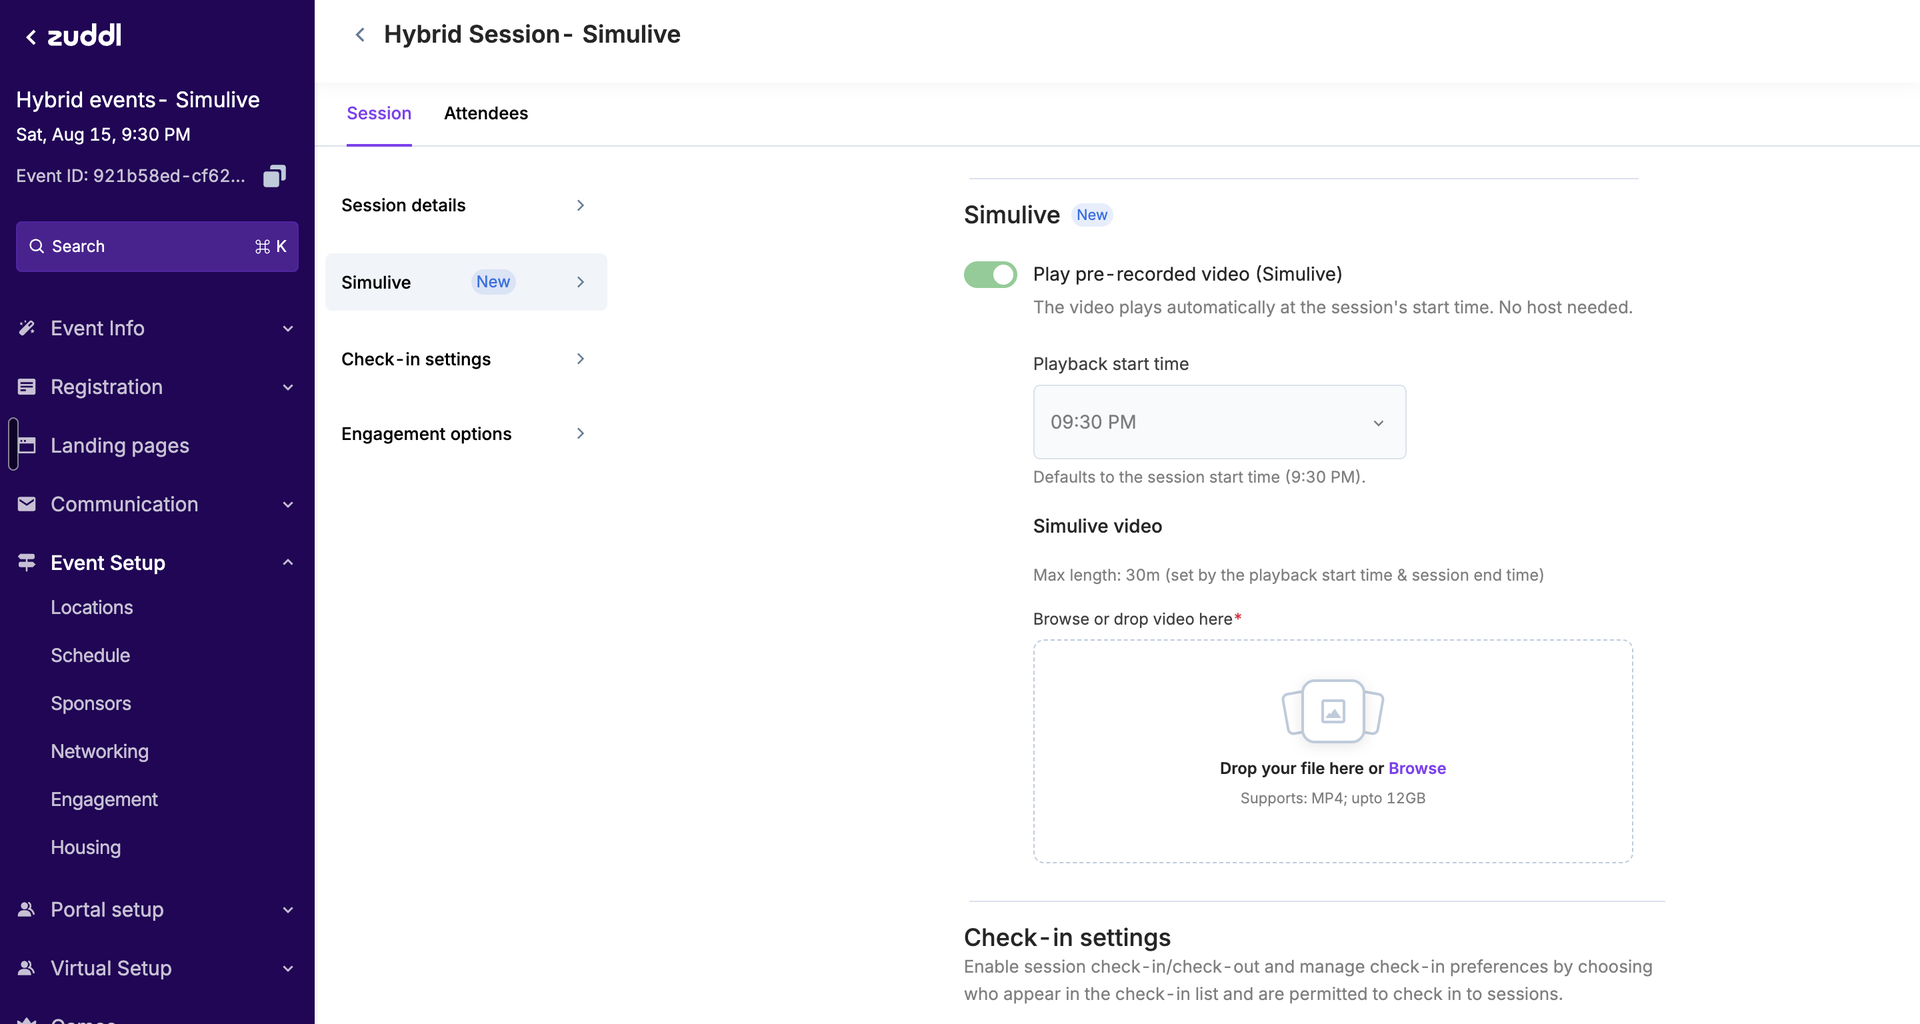
- Set the Playback start time. This defaults to the session's start time, which means the video begins as soon as the session begins. Change it only if you want a short welcome or holding period on the stage before the video starts.
- Upload your video. Click Browse and select your MP4. Check the Max length value shown above the upload area first, so your video fits.
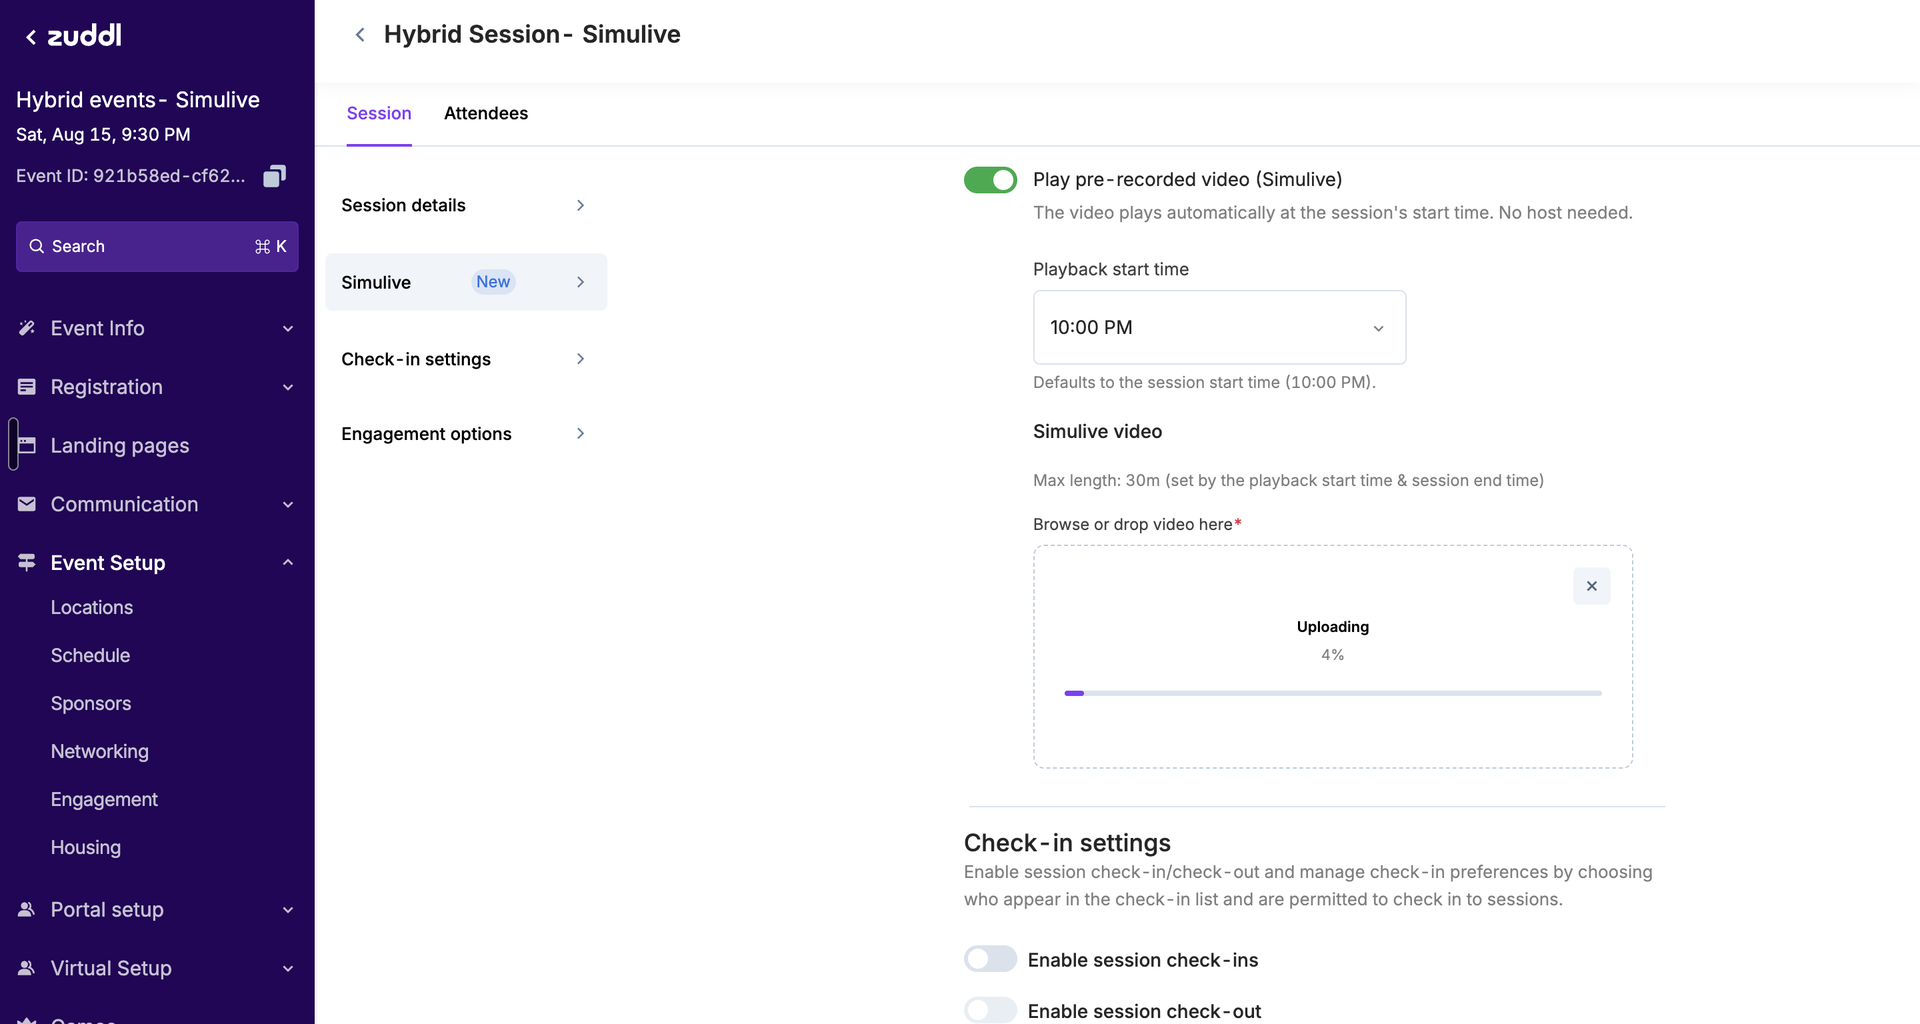
- Wait for the upload and processing to finish. When it completes, the video appears as a card with its file name, duration, and file size.
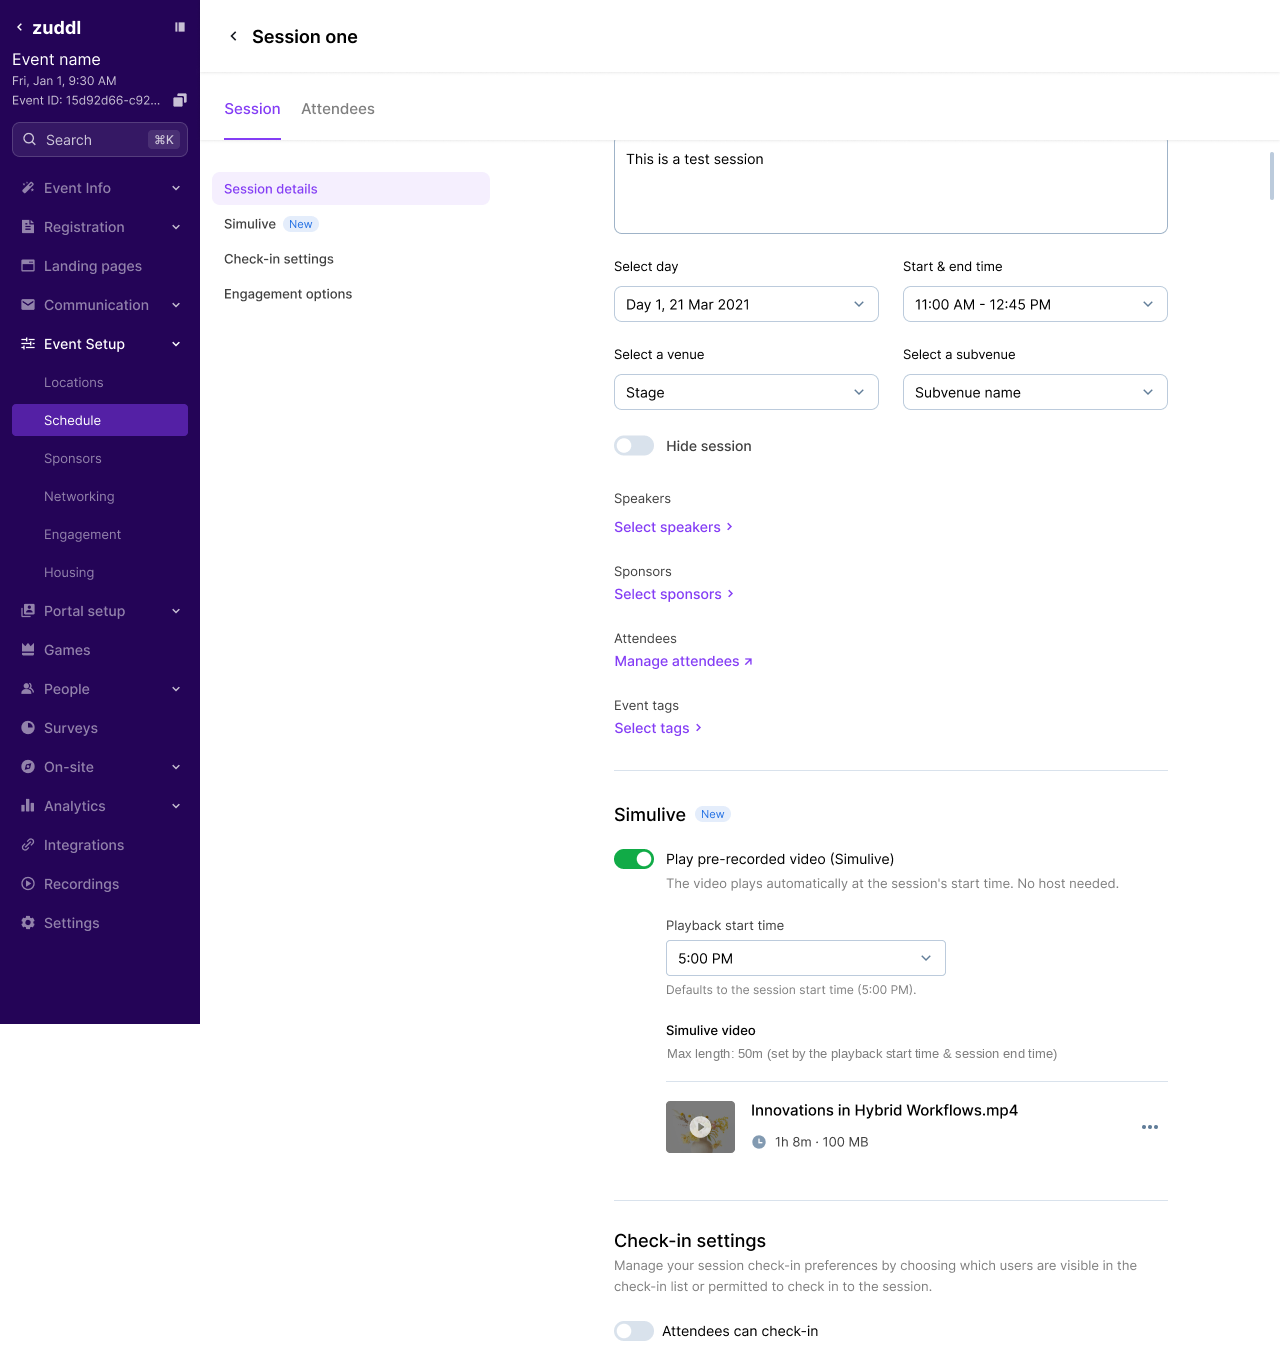
- Your changes are saved automatically. The session now shows a Simulive badge on the Schedule.
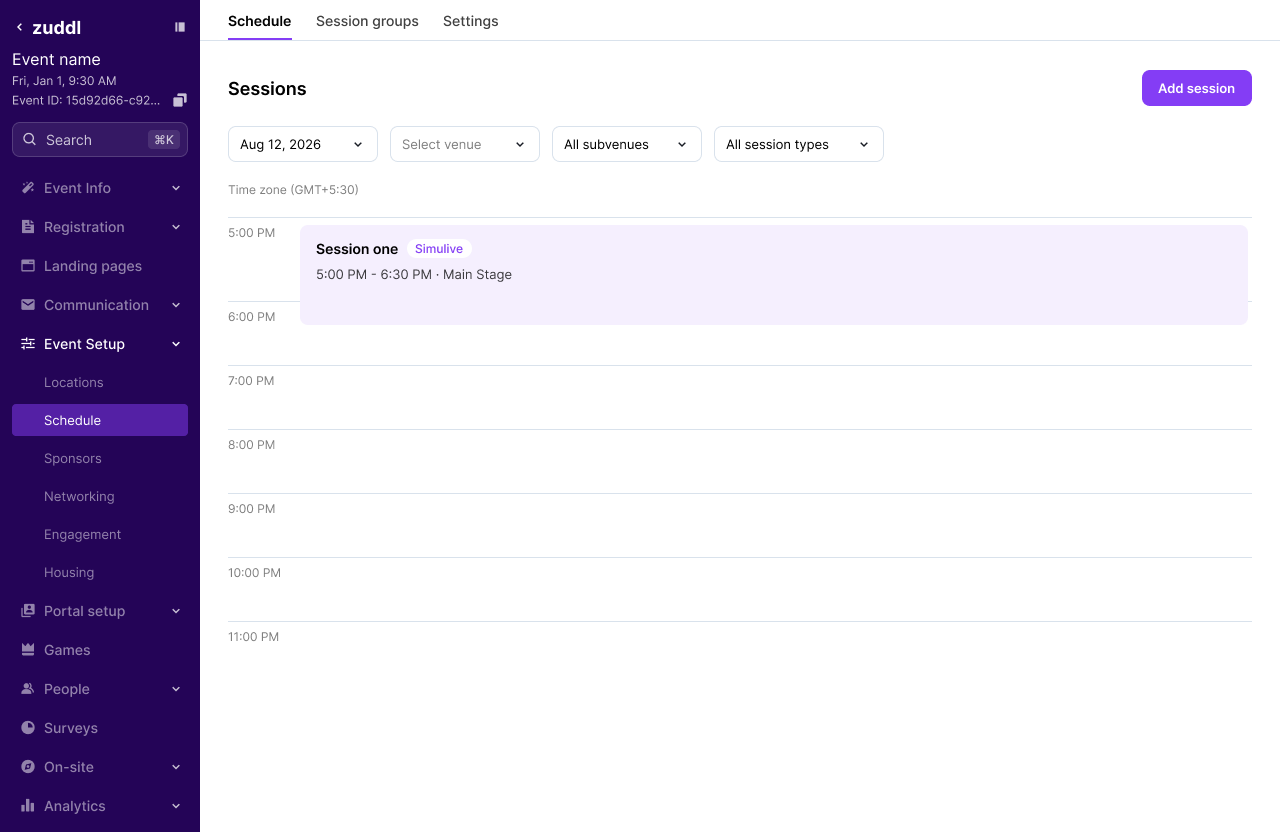
Note: Your Simulive changes are saved automatically — there is no separate save step for the video. You can keep editing the setup right up until the session starts automatically, after which the settings become read-only.
What Happens Next
Before the session starts
Nothing else is required from you. If you open Studio for the session, you see a banner counting down to the automatic start: "Session will automatically start in Xm: Xs". You can still edit branding up to the auto-start moment.
When playback begins
At the playback start time, a short countdown appears on the stage and the video begins. Playback is triggered by a background job, so the video starts within a few seconds of the scheduled time rather than exactly on the second.
In Studio, the header shows Recording on with a running timer, and an End simulive button is available.
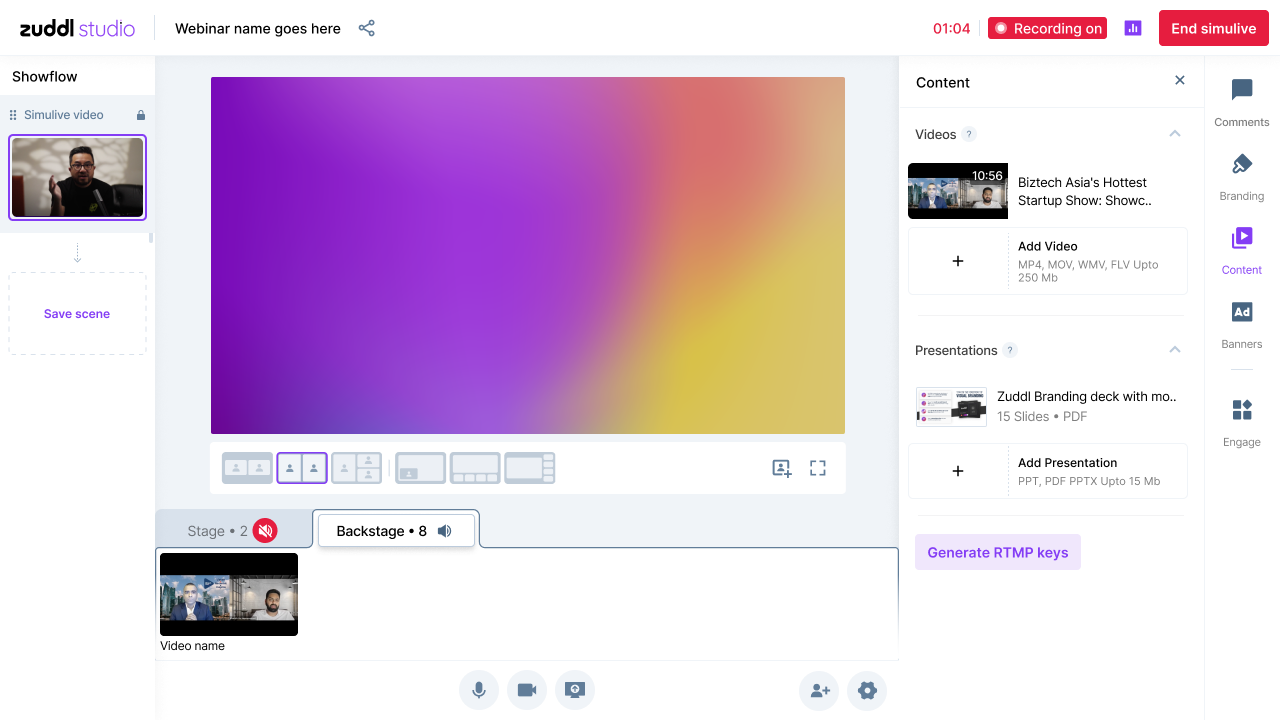
Chat, polls, Q&A, and surveys remain fully live and moderatable throughout playback. You or your team can respond to attendees exactly as you would in a live session.
What attendees see
- No countdown timer — the session content simply begins at the scheduled time.
- There is no scrub bar and no fast-forward — attendees cannot skip ahead of the live position.
- Attendees who join late enter at the current live position, exactly as they would in a live session.
- All engagement tools (chat, polls, Q&A, surveys) are available throughout.
- Attendees stay on the same stage between sessions — they are never redirected.
Note: The countdown banners described below are shown in Studio, to organizers only. Attendees do not see them.
Organizer banners between continuous sessions
When one Simulive session runs straight into another on the same stage, Studio shows a countdown so you know the handover is coming and is being handled automatically. This banner appears only when the next session is also a Simulive session.
- While the current session is still running: Studio shows "Next session will automatically start in Xs", counting down to the current session's scheduled end time (which is the next session's start time).
- In the handover window: once the scheduled end time passes and the next video has not started yet, the banner changes to "Next session will automatically start in a few moments" until playback begins.
Note: These banners appear only when the next session is also a Simulive session. If the next session on the stage is a normal live session, no banner is shown — a live session starts only when an organizer starts it, so there is nothing to count down to.
The banners also require the sessions to be continuous on the same stage: the video runs through to the session end time and the next session starts immediately after. If there is a gap between sessions, no banner is shown.
Handover timing between continuous sessions
Each Simulive session carries a small amount of technical overhead at its edges: a short countdown before the video plays, and a few seconds to close out the recording at the end. In practice this adds roughly 8 to 13 seconds per session.
Two things follow from this, and both are expected behavior:
- The recording is slightly longer than the source video. A 7m 57s video typically produces a recording of around 8m 08s.
- The overhead accumulates across a chain of continuous sessions. If you schedule ten back-to-back Simulive sessions, the tenth will begin roughly 100 to 120 seconds after its scheduled start time. Organizers see the "starting in a few moments" banner during each handover.
Tip: If exact start times matter for a long run of sessions, schedule a small buffer between them rather than making them strictly continuous. That absorbs the per-session overhead instead of letting it accumulate.
Starting the next session manually
In Studio you can start an upcoming session yourself instead of waiting for its scheduled time. Clicking next on the upcoming session ends the current Simulive session and starts the next one — it overrides the running Simulive playback, and any remaining video is skipped.
Ending the session
The session ends automatically shortly after the video finishes. To end it early, click End simulive in Studio and confirm.
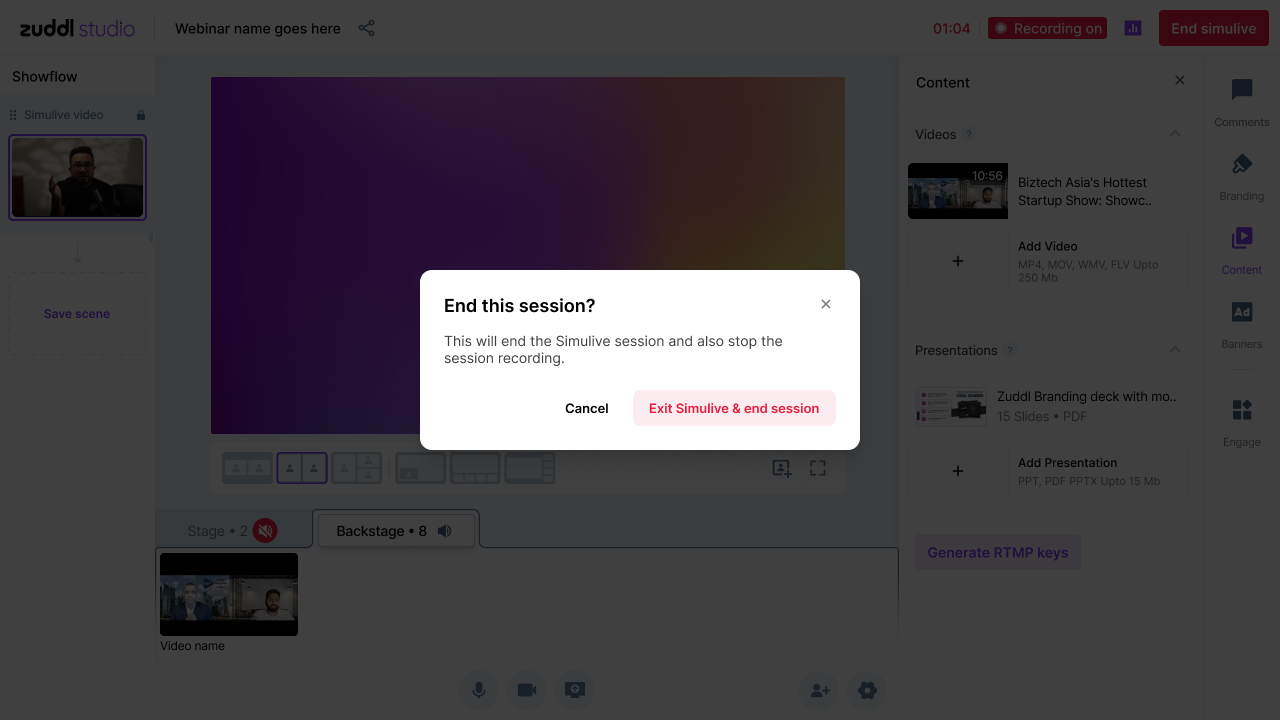
Recordings
Your uploaded Simulive video automatically becomes the session's on-demand recording. There is no separate toggle to enable this, and no extra step after the event.
Error states and validation
Maximum video length
Zuddl shows the longest video this session can take as a Max length value directly above the upload area, described in-product as "set by the playback start time & session end time". In other words, the limit is the time remaining between when playback starts and when the session ends — not the full session length. It updates whenever you change the session times or the playback start time.
If your video is longer than that limit, the upload is rejected and Simulive cannot be set up. To resolve it, either upload a shorter video, extend the session's end time, or move the playback start time earlier.
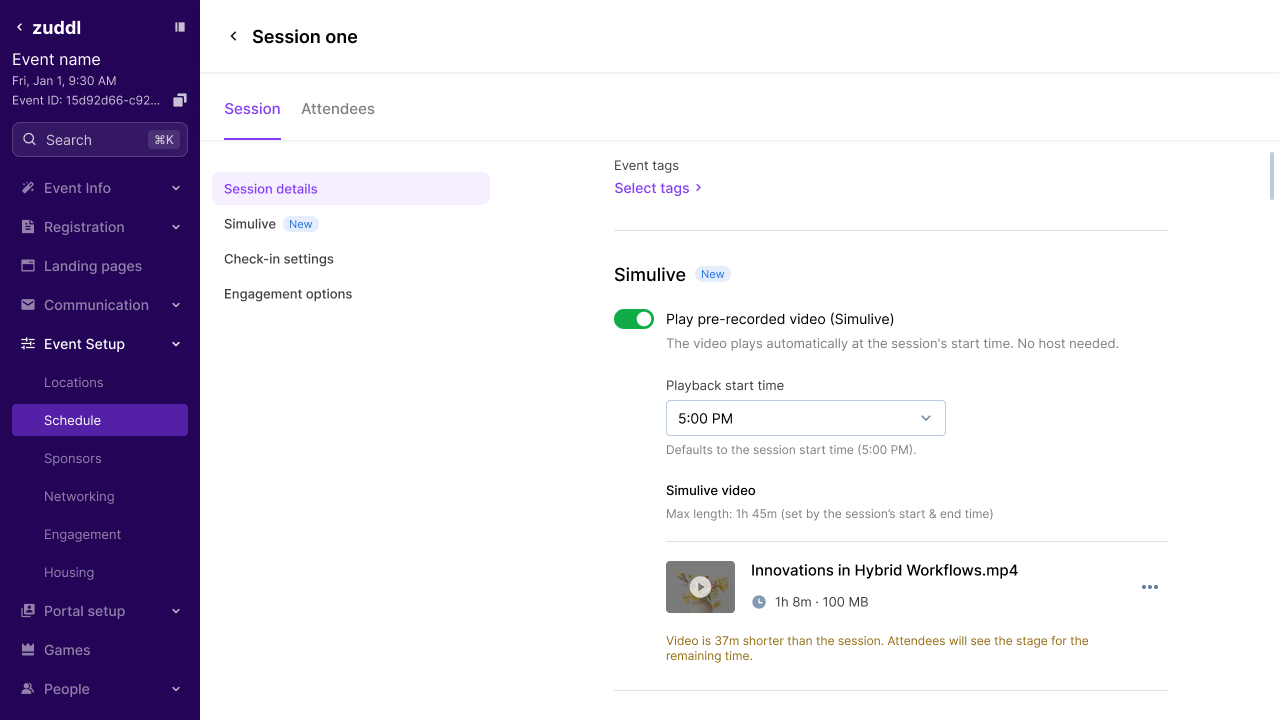
Video shorter than the session
This is allowed and shows an inline note telling you how much time is left over. The session ends shortly after the video finishes, and the remaining time is treated as a normal gap before the next session.
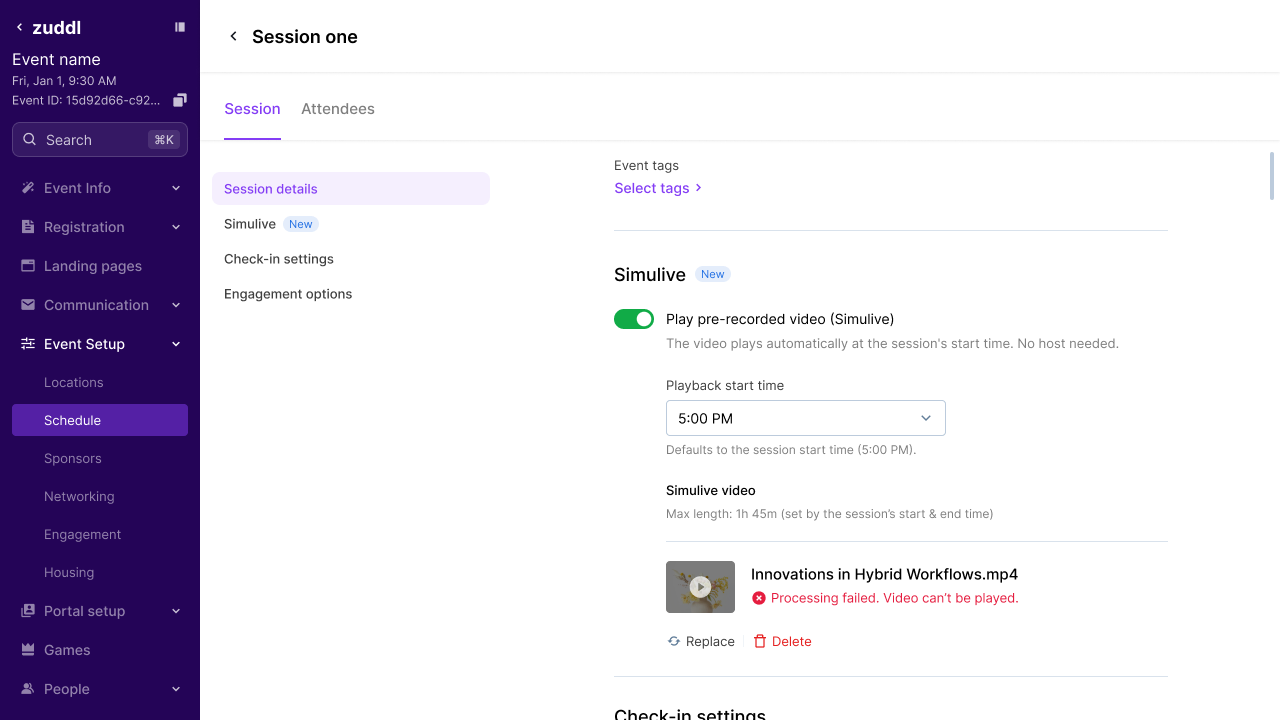
Video processing failed
If the file cannot be processed, the video card shows an error with Replace and Delete options. Re-export the file as a standard MP4 (H.264) and upload it again.
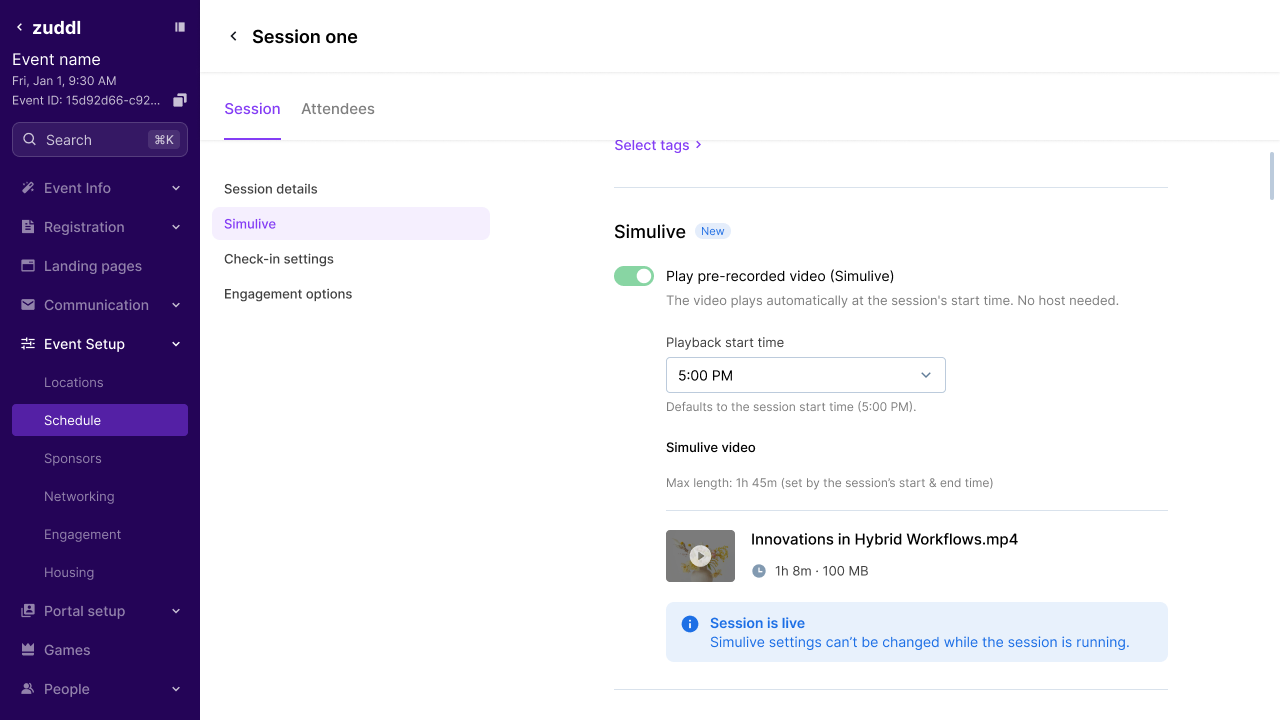
Settings locked while the session is live
While a session is running, the Simulive section becomes read-only and shows a "Session is live" message. Make all changes before the session starts.
Advanced Setup
Changing the venue of a Simulive session
Simulive is tied to the Stage venue, and what happens depends on where you move the session:
- Moving to a different Stage (for example, Main Stage to Track 2 Stage) is allowed. Simulive stays enabled and your uploaded video is kept.
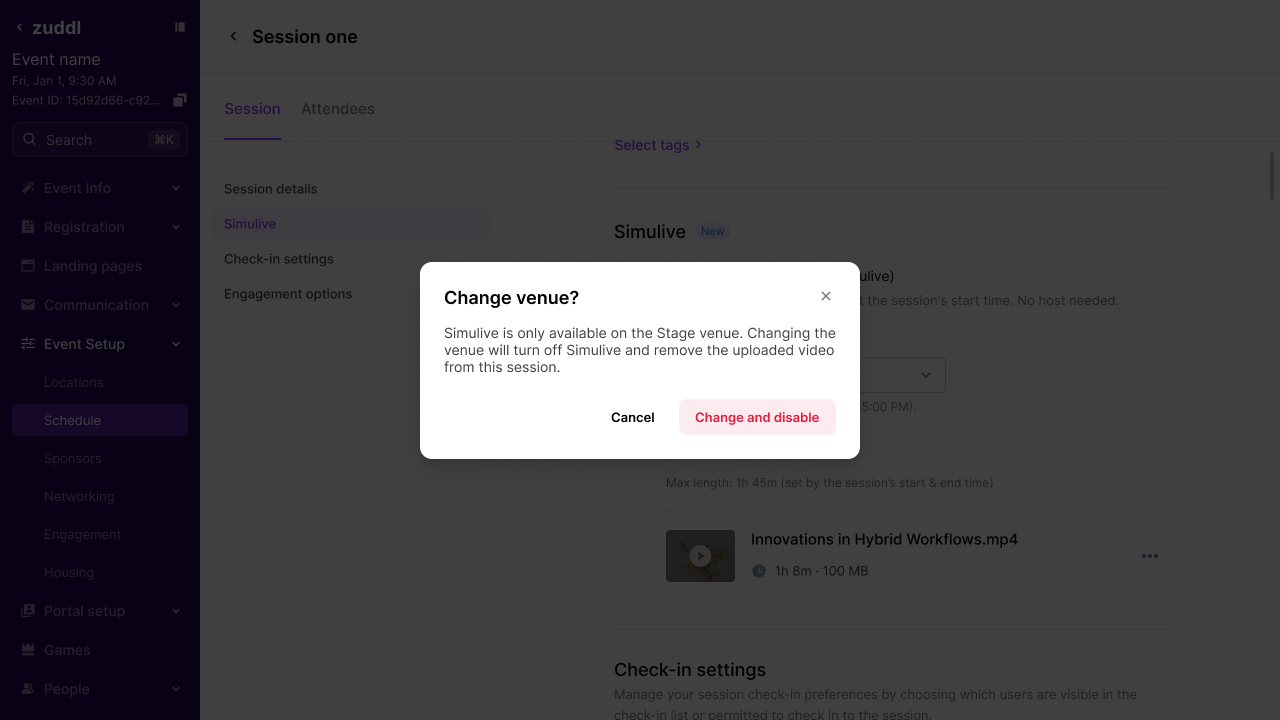
- Moving to a non-Stage venue (Room or Lobby) is allowed, but Simulive cannot follow the session there. Zuddl asks you to confirm first, and proceeding disables Simulive and removes the uploaded video. You will need to turn Simulive back on and re-upload if you move the session back to a Stage.
Duplicating an event that uses Simulive
Simulive content is not duplicated by default — you have to opt in during duplication.
- Start the duplication and open the Event configurations tab in the Duplicate event panel.
- Turn on the option to duplicate Simulive content. It is off by default.
- Complete the duplication. Your pre-recorded videos are copied across to the matching sessions in the new event.
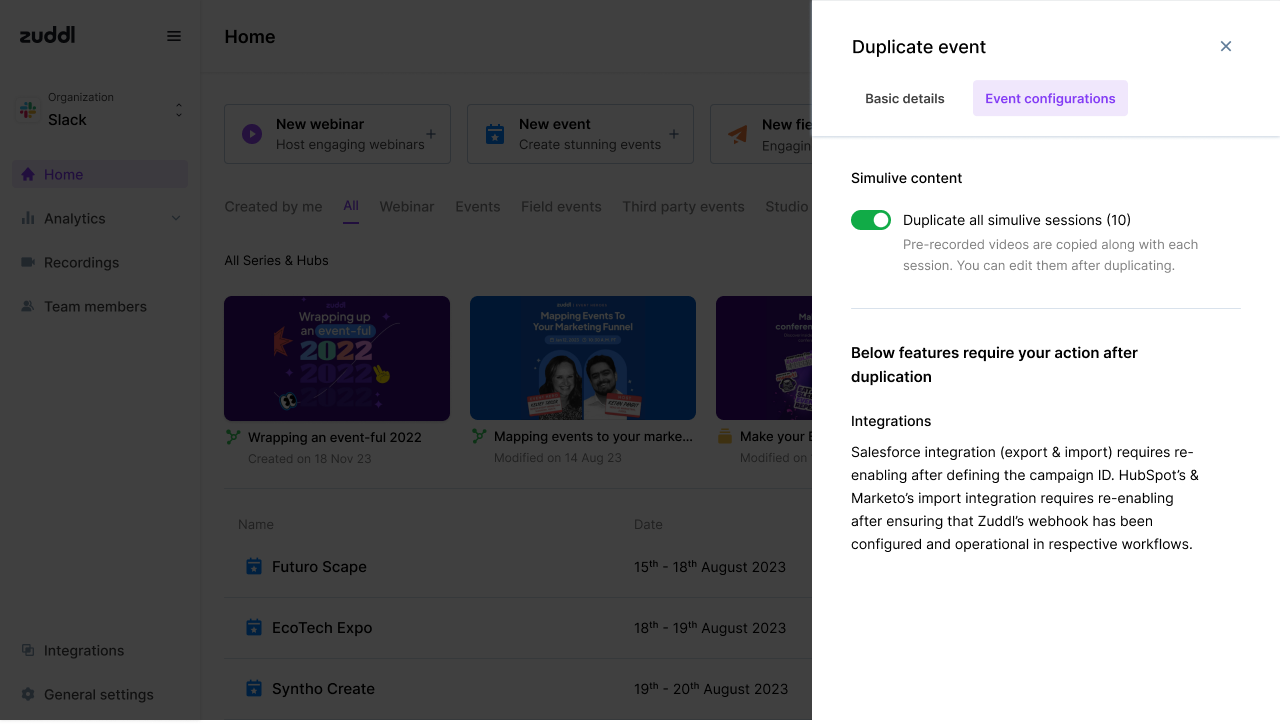
Warning: The per-session Play pre-recorded video (Simulive) toggle does not carry over. Open each affected session in the new event and turn it back on.
Playback start times are recalculated against the new event date, preserving the same offset from the event start. Review them after duplication, especially if the new event runs in a different time zone.
Replacing or removing a video
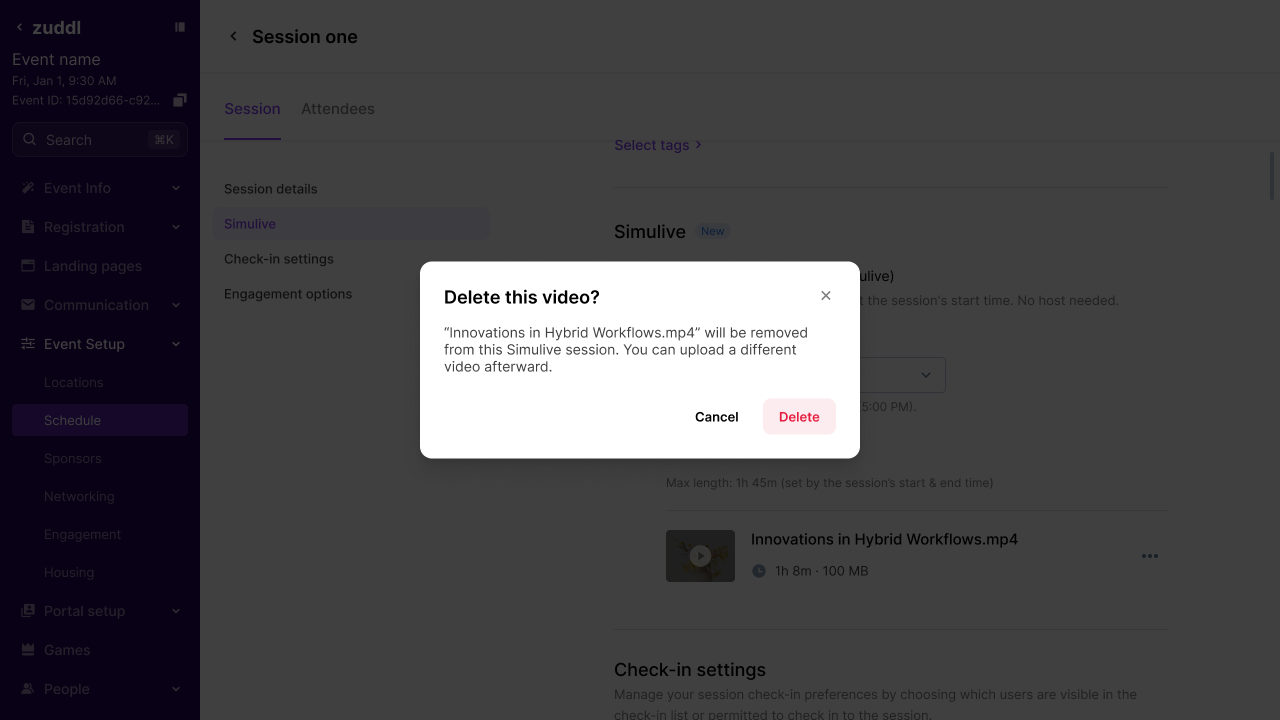
Open the session, go to the Simulive section, and use the ... menu on the video card to replace or delete the file. Deleting asks you to confirm, and you can upload a different video afterwards. The change is saved automatically.
Turning Simulive off
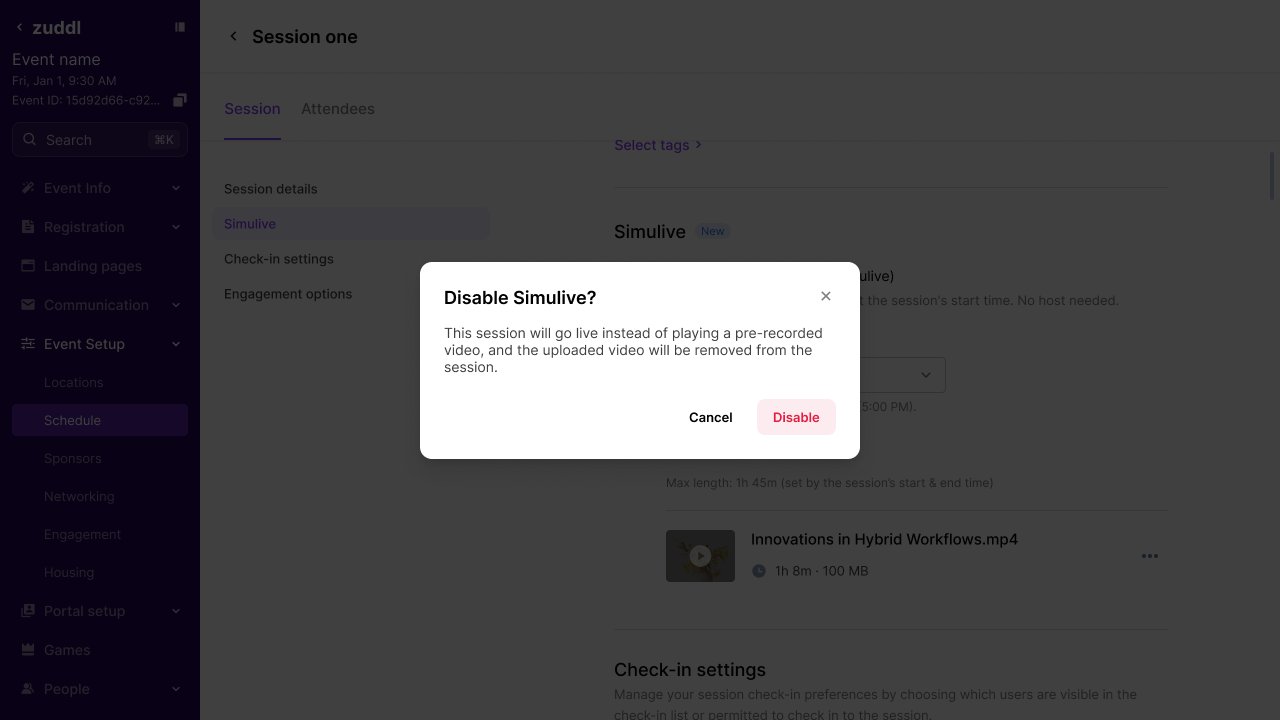
Switching the Play pre-recorded video (Simulive) toggle off asks you to confirm. The session reverts to a normal live session and the uploaded video is removed.
Notes
- Attendees cannot skip ahead. There is no scrub bar or fast-forward, by design, so everyone watches the same moment at the same time.
- Attendees who disconnect during a handover land in whichever session is currently live on that stage when they reconnect.
- Changing an event's format after sessions are created does not change the format or venue of existing sessions. A session created as virtual or hybrid on a Stage keeps its Simulive setup, so review your schedule if you change the event format.