How to Create Multiple Registration Flows for a Field Event in Zuddl
Last updated: August 1, 2025
To customize the registration process for your event participants, you can create and publish multiple registration flows.
Follow these steps to create and use multiple flows:
-
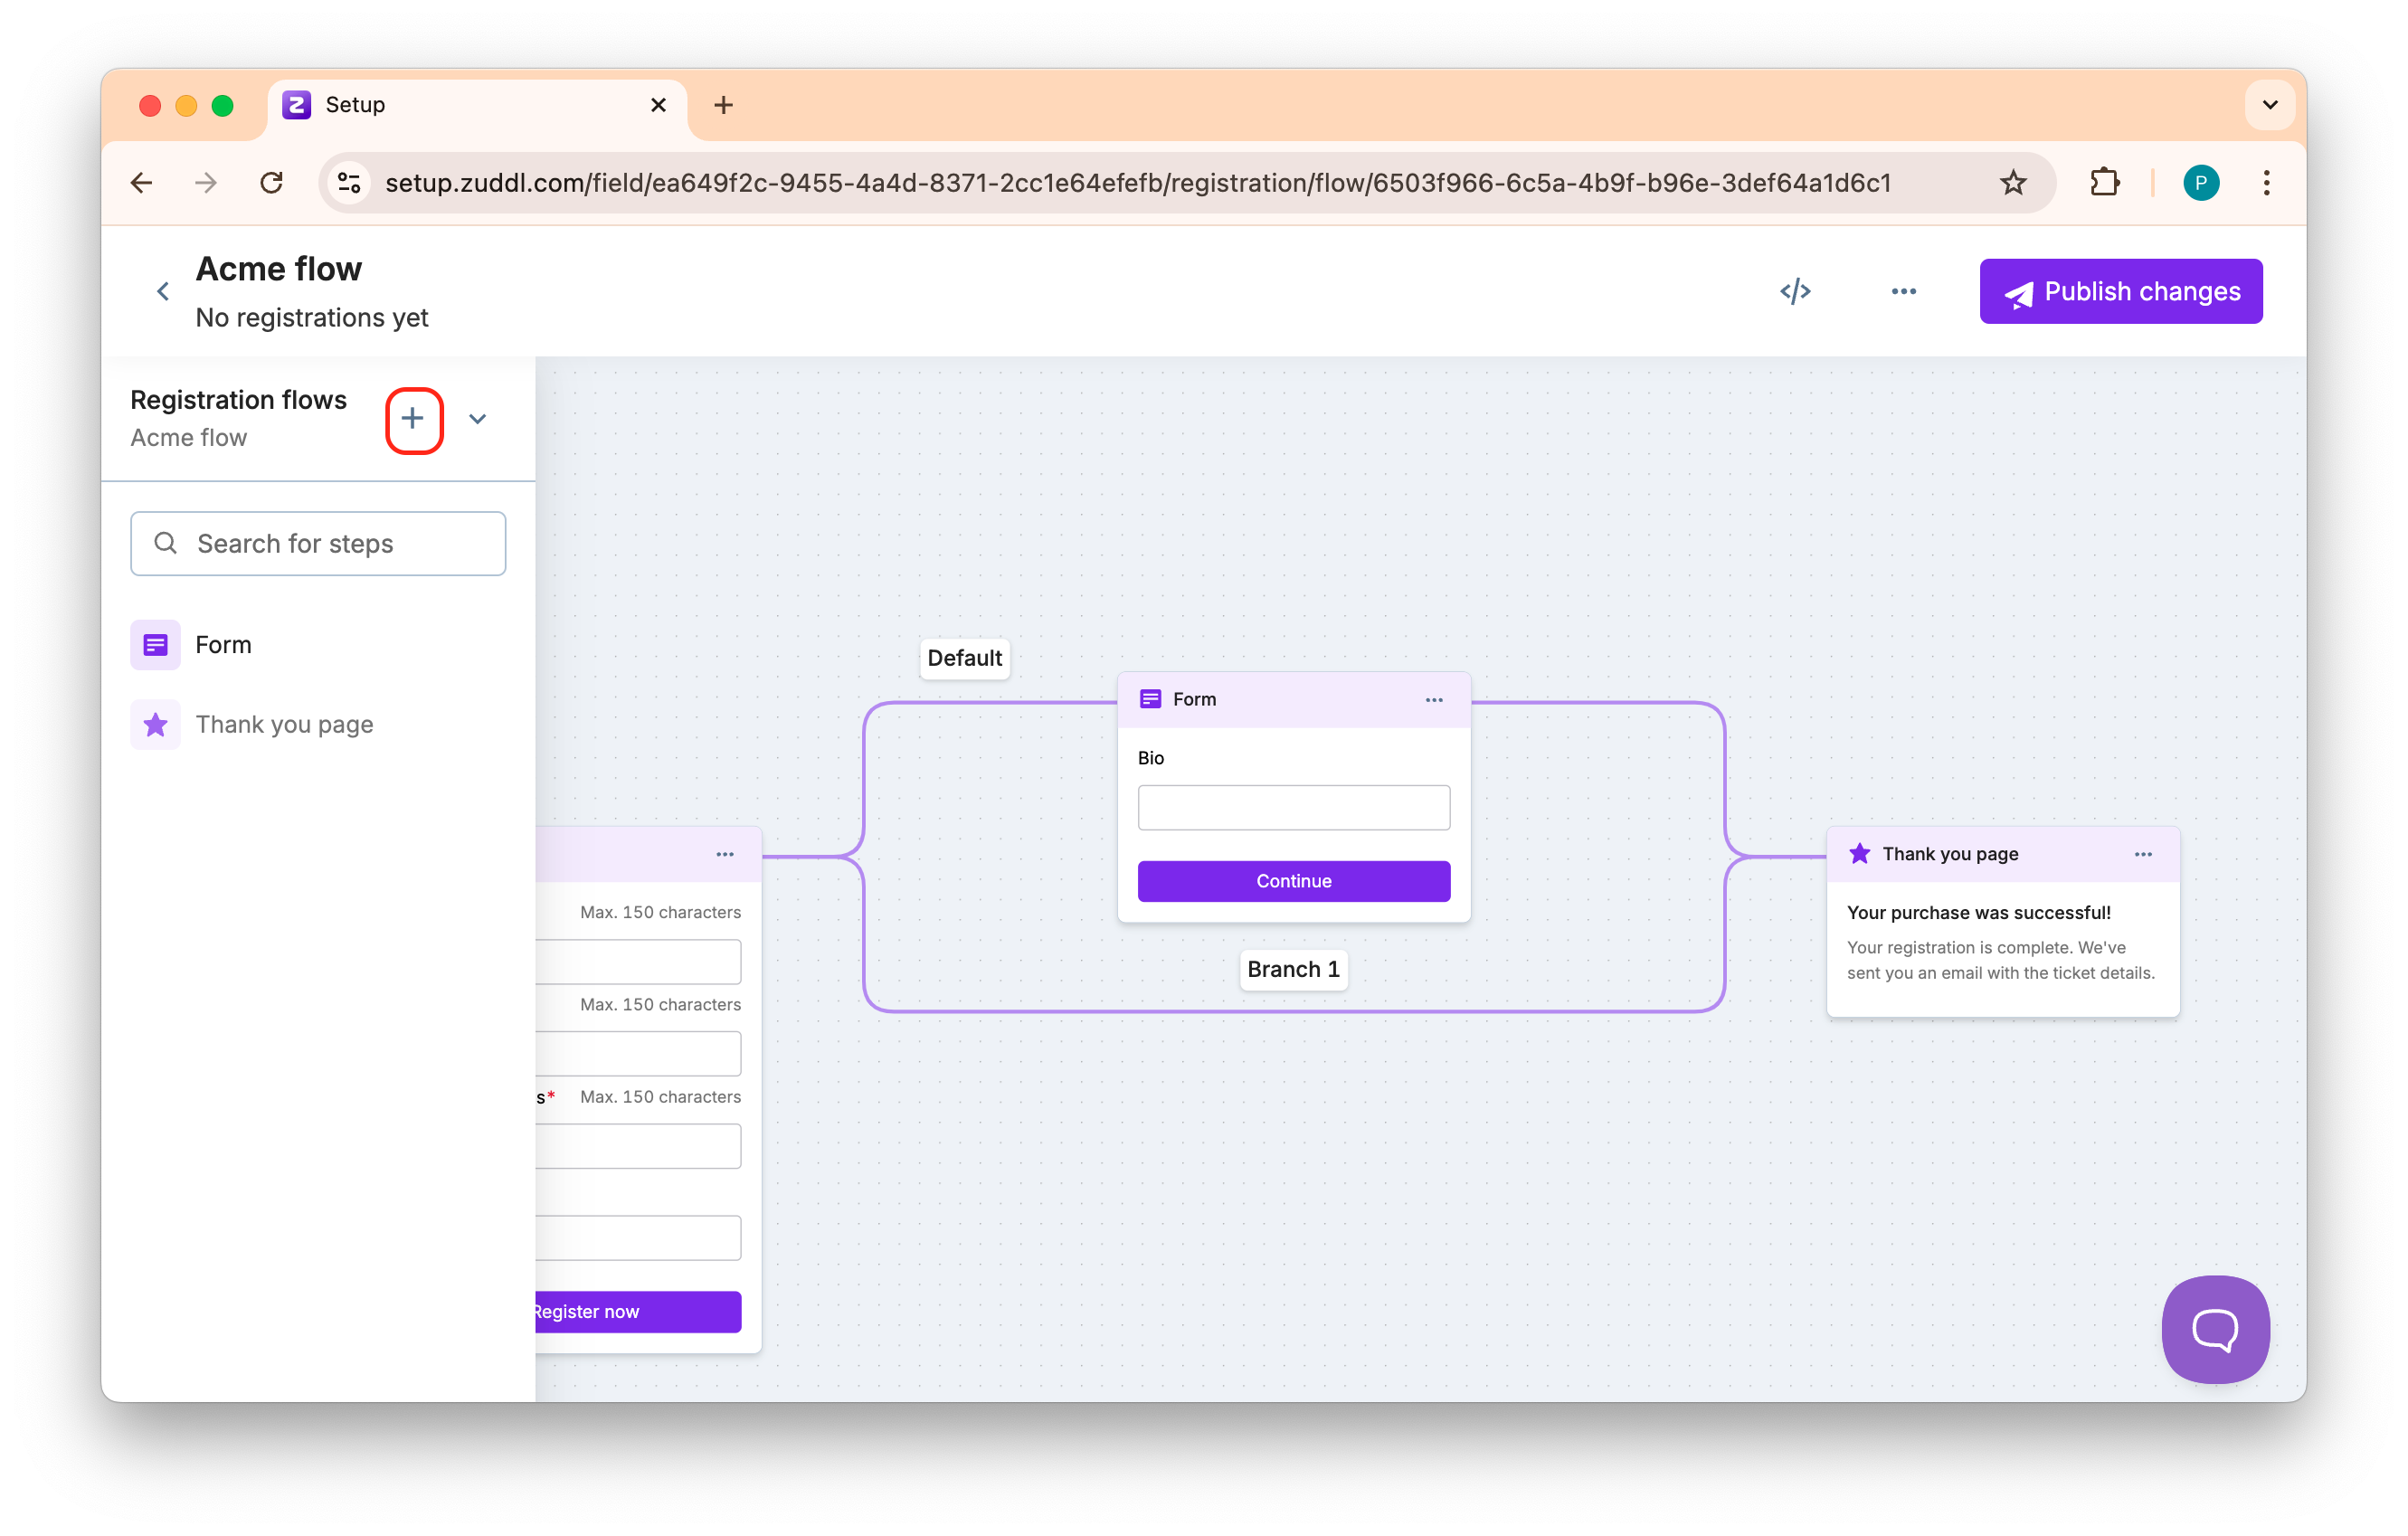
In the flex event setup, go to Registration > Registration Flows. The page opens with the default flow.

In the panel on the left, click the ‘+’ button to create a new registration flow.
-
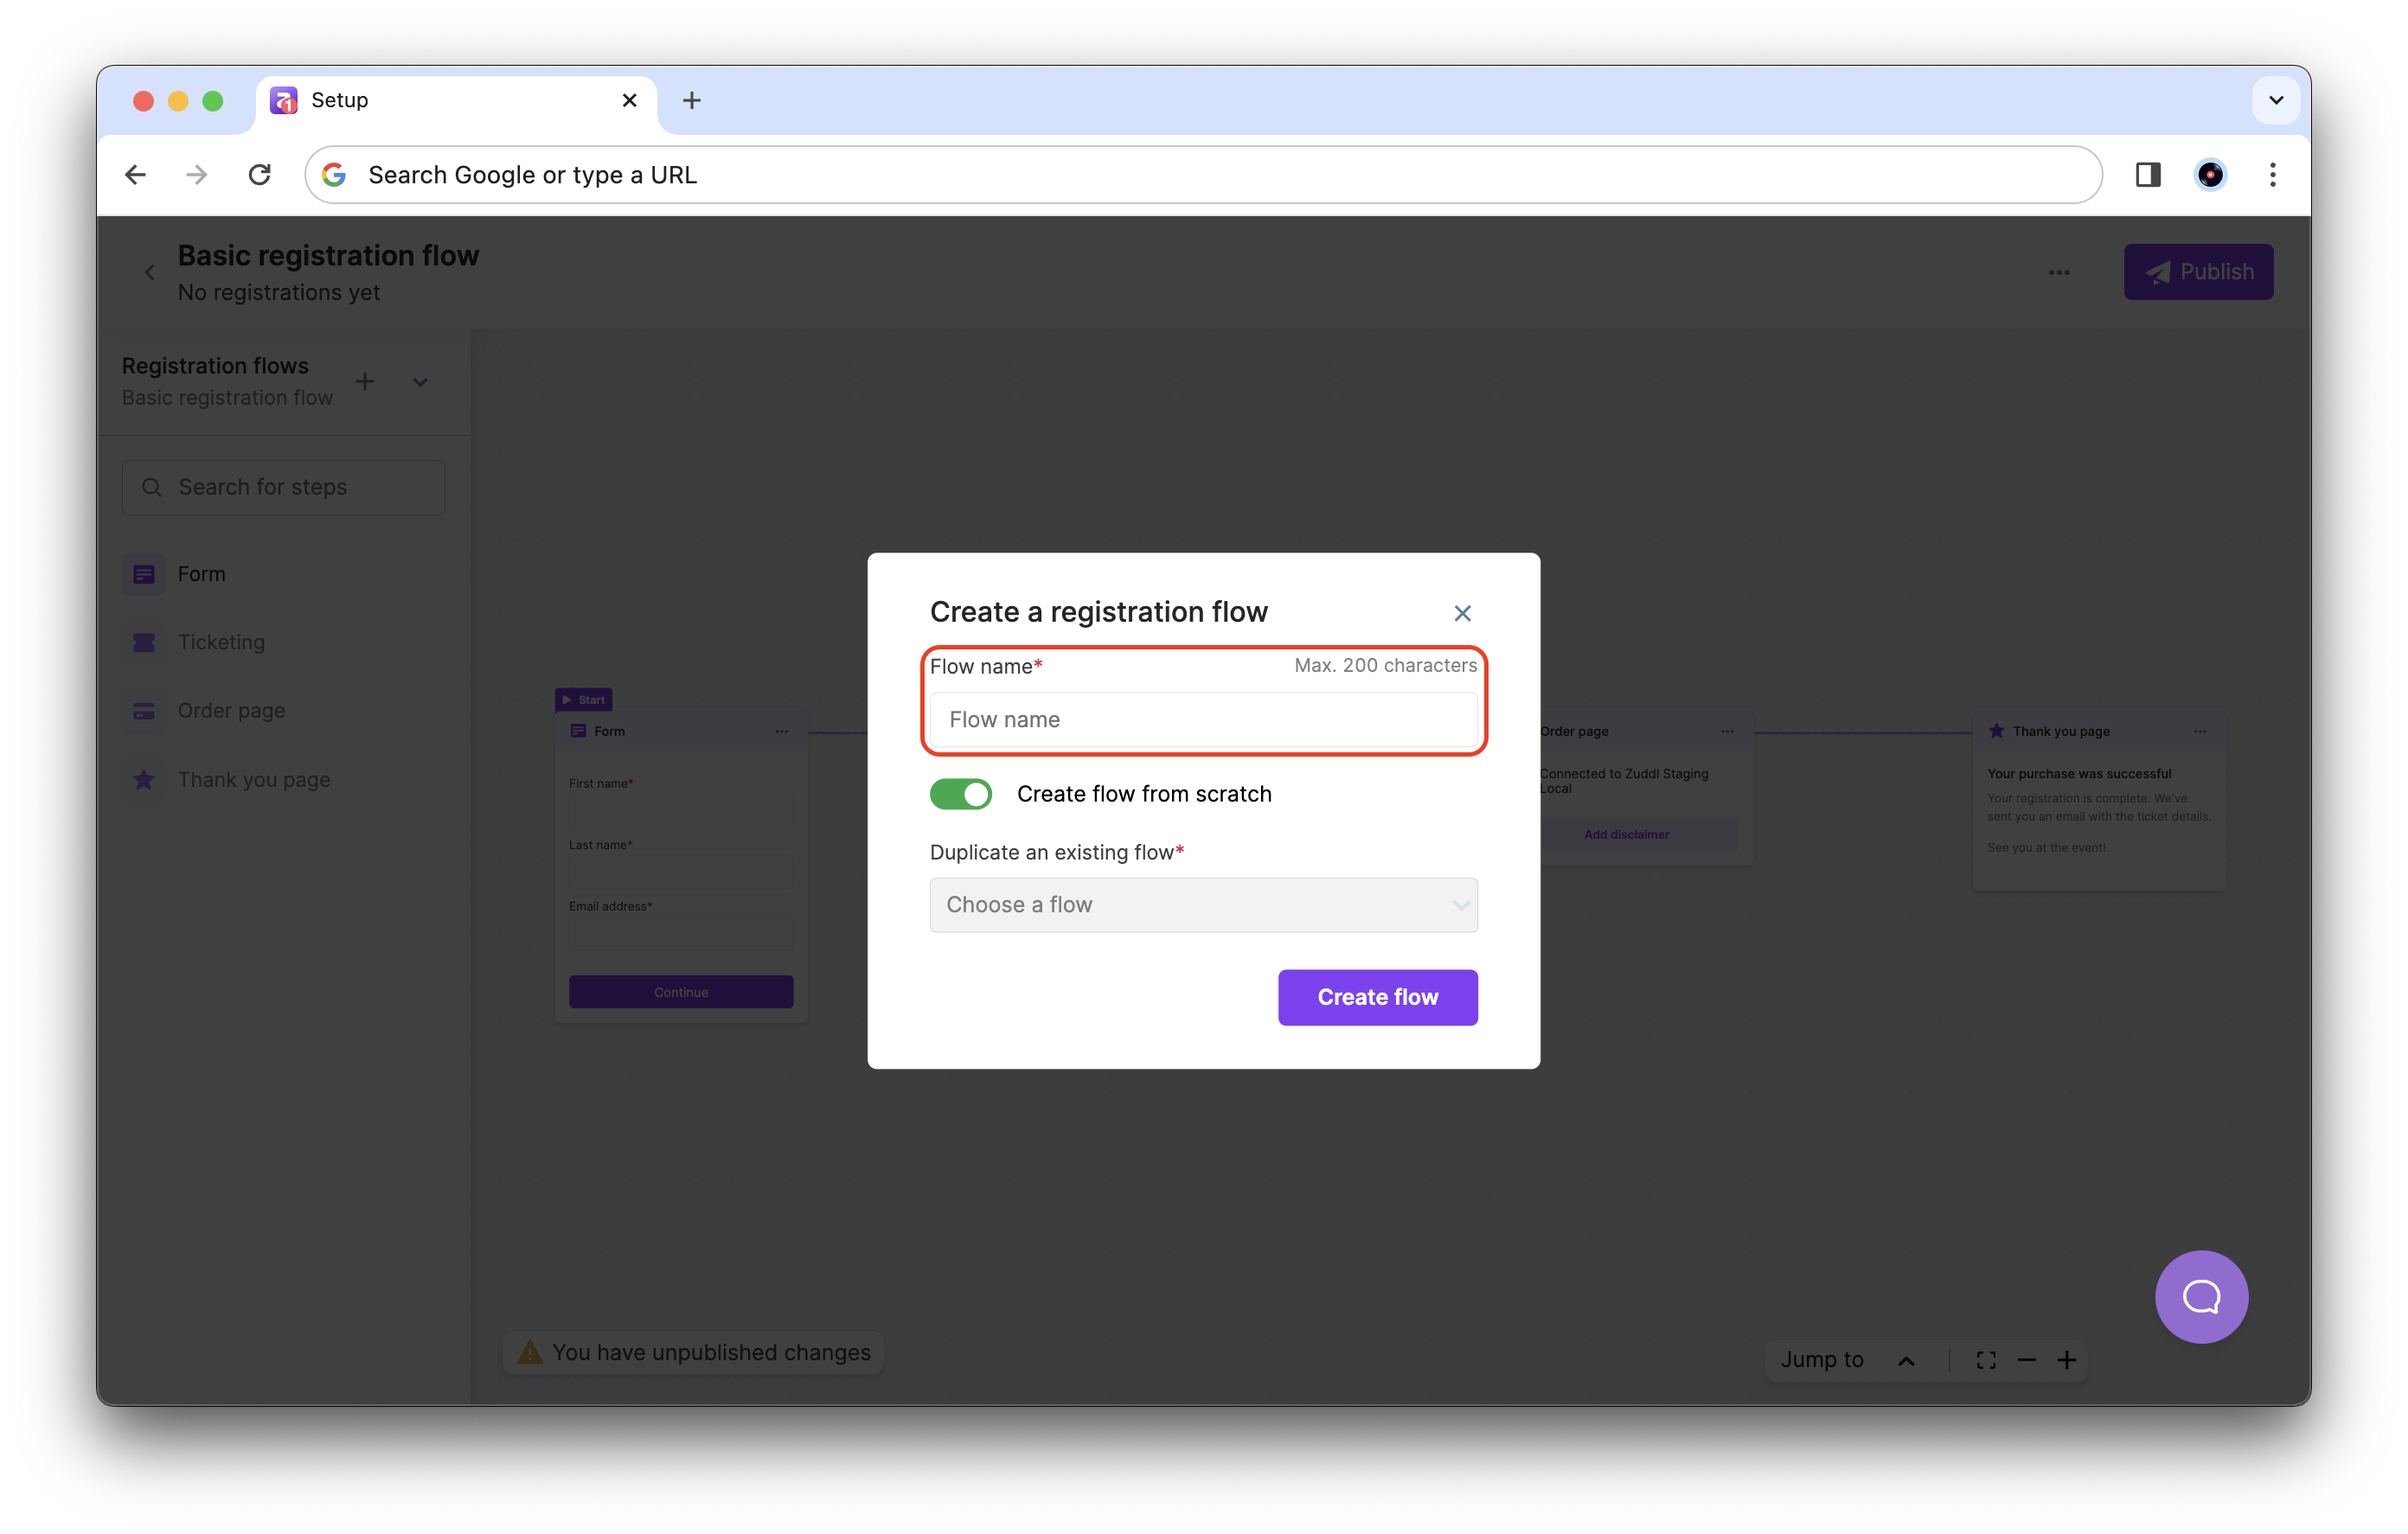
In the popup, enter a Flow name.
-
By default, this process creates an entirely new flow. To duplicate an existing flow, turn off the ‘Create flow from scratch’ toggle and choose a flow to duplicate from the drop-down list.

-
Click Create flow to finish the process. The new flow is now available to edit.
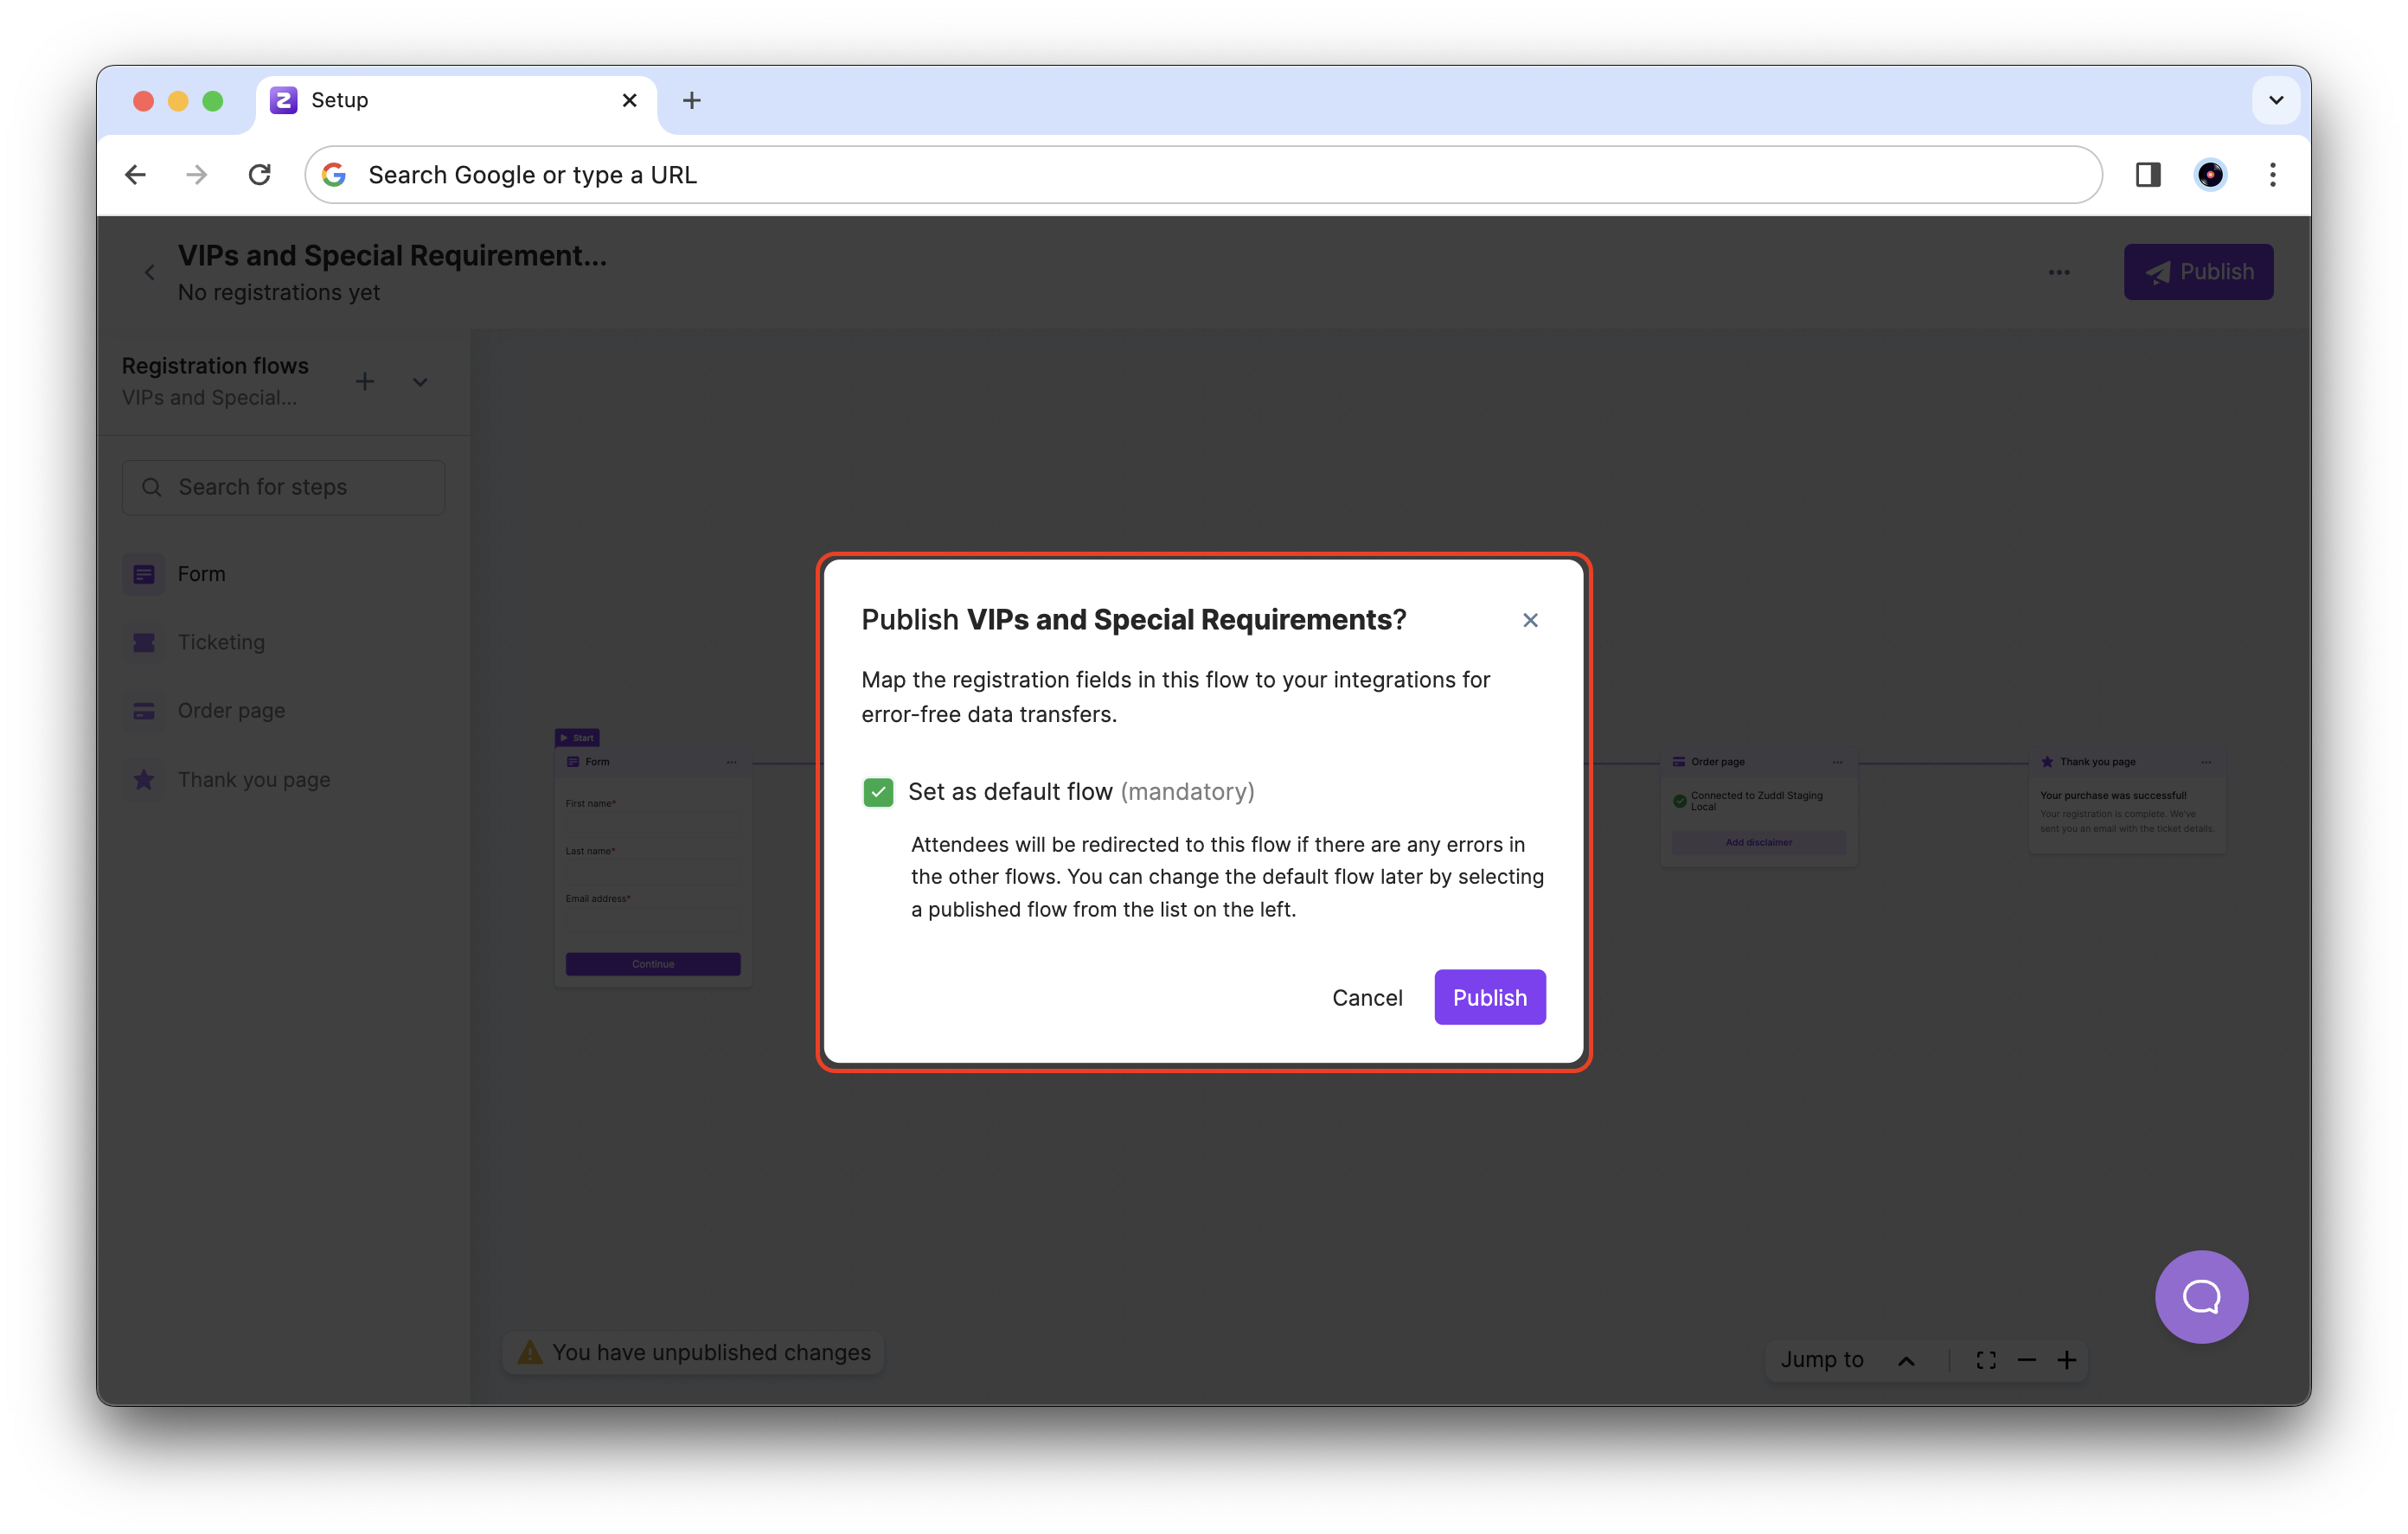
To publish your flow and make it available for registrants, click the Publish button.

If you duplicate an event with published flows, the flows will be saved as drafts in the new event.
-
- If more than one flow is published, you are prompted to set a default flow. If users experience errors using any published flow (if the flow is deleted or unpublished), they are redirected to the default flow.
- Select the checkbox for Set as default and click the Publish button to publish this flow. You can change the default flow from the list of flows.
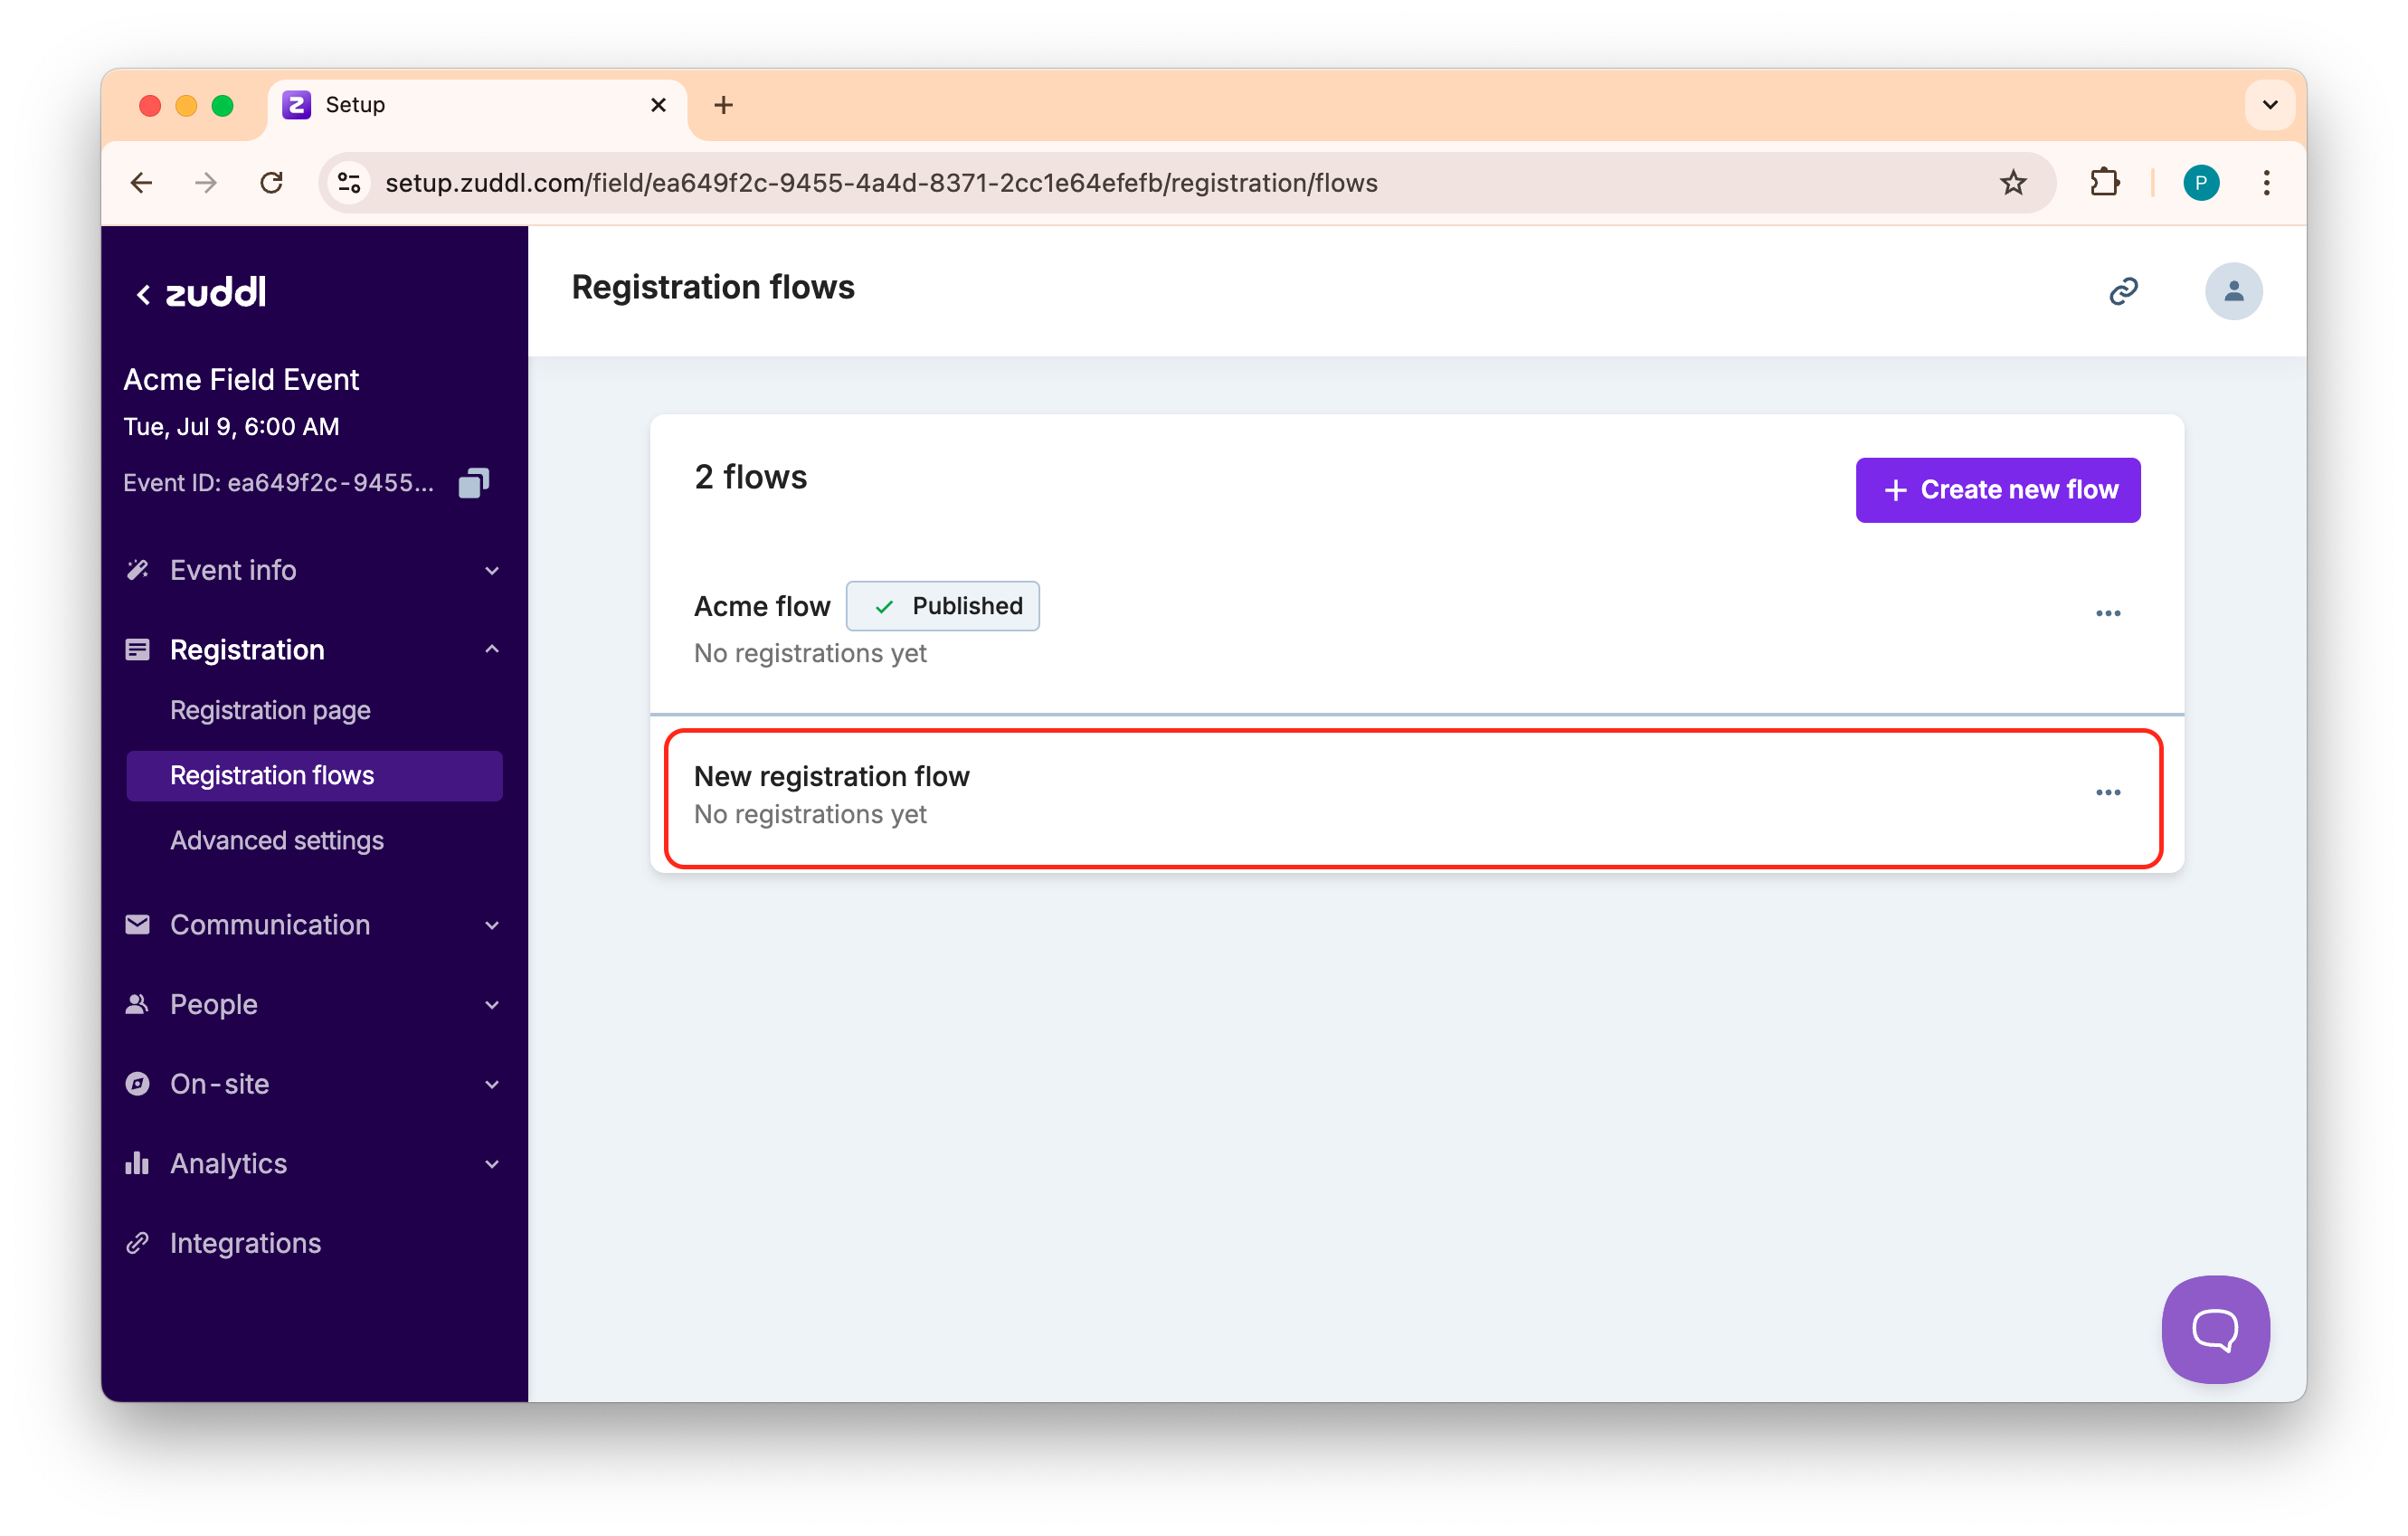
- In the list of flows, click the more options button (3 dots icon) to view the options for each flow:
Using flows inside registration pages
You can see multiple flows for registration pages using the unique embeddable code of each flow.
Follow these steps to embed flows in your pages:
-
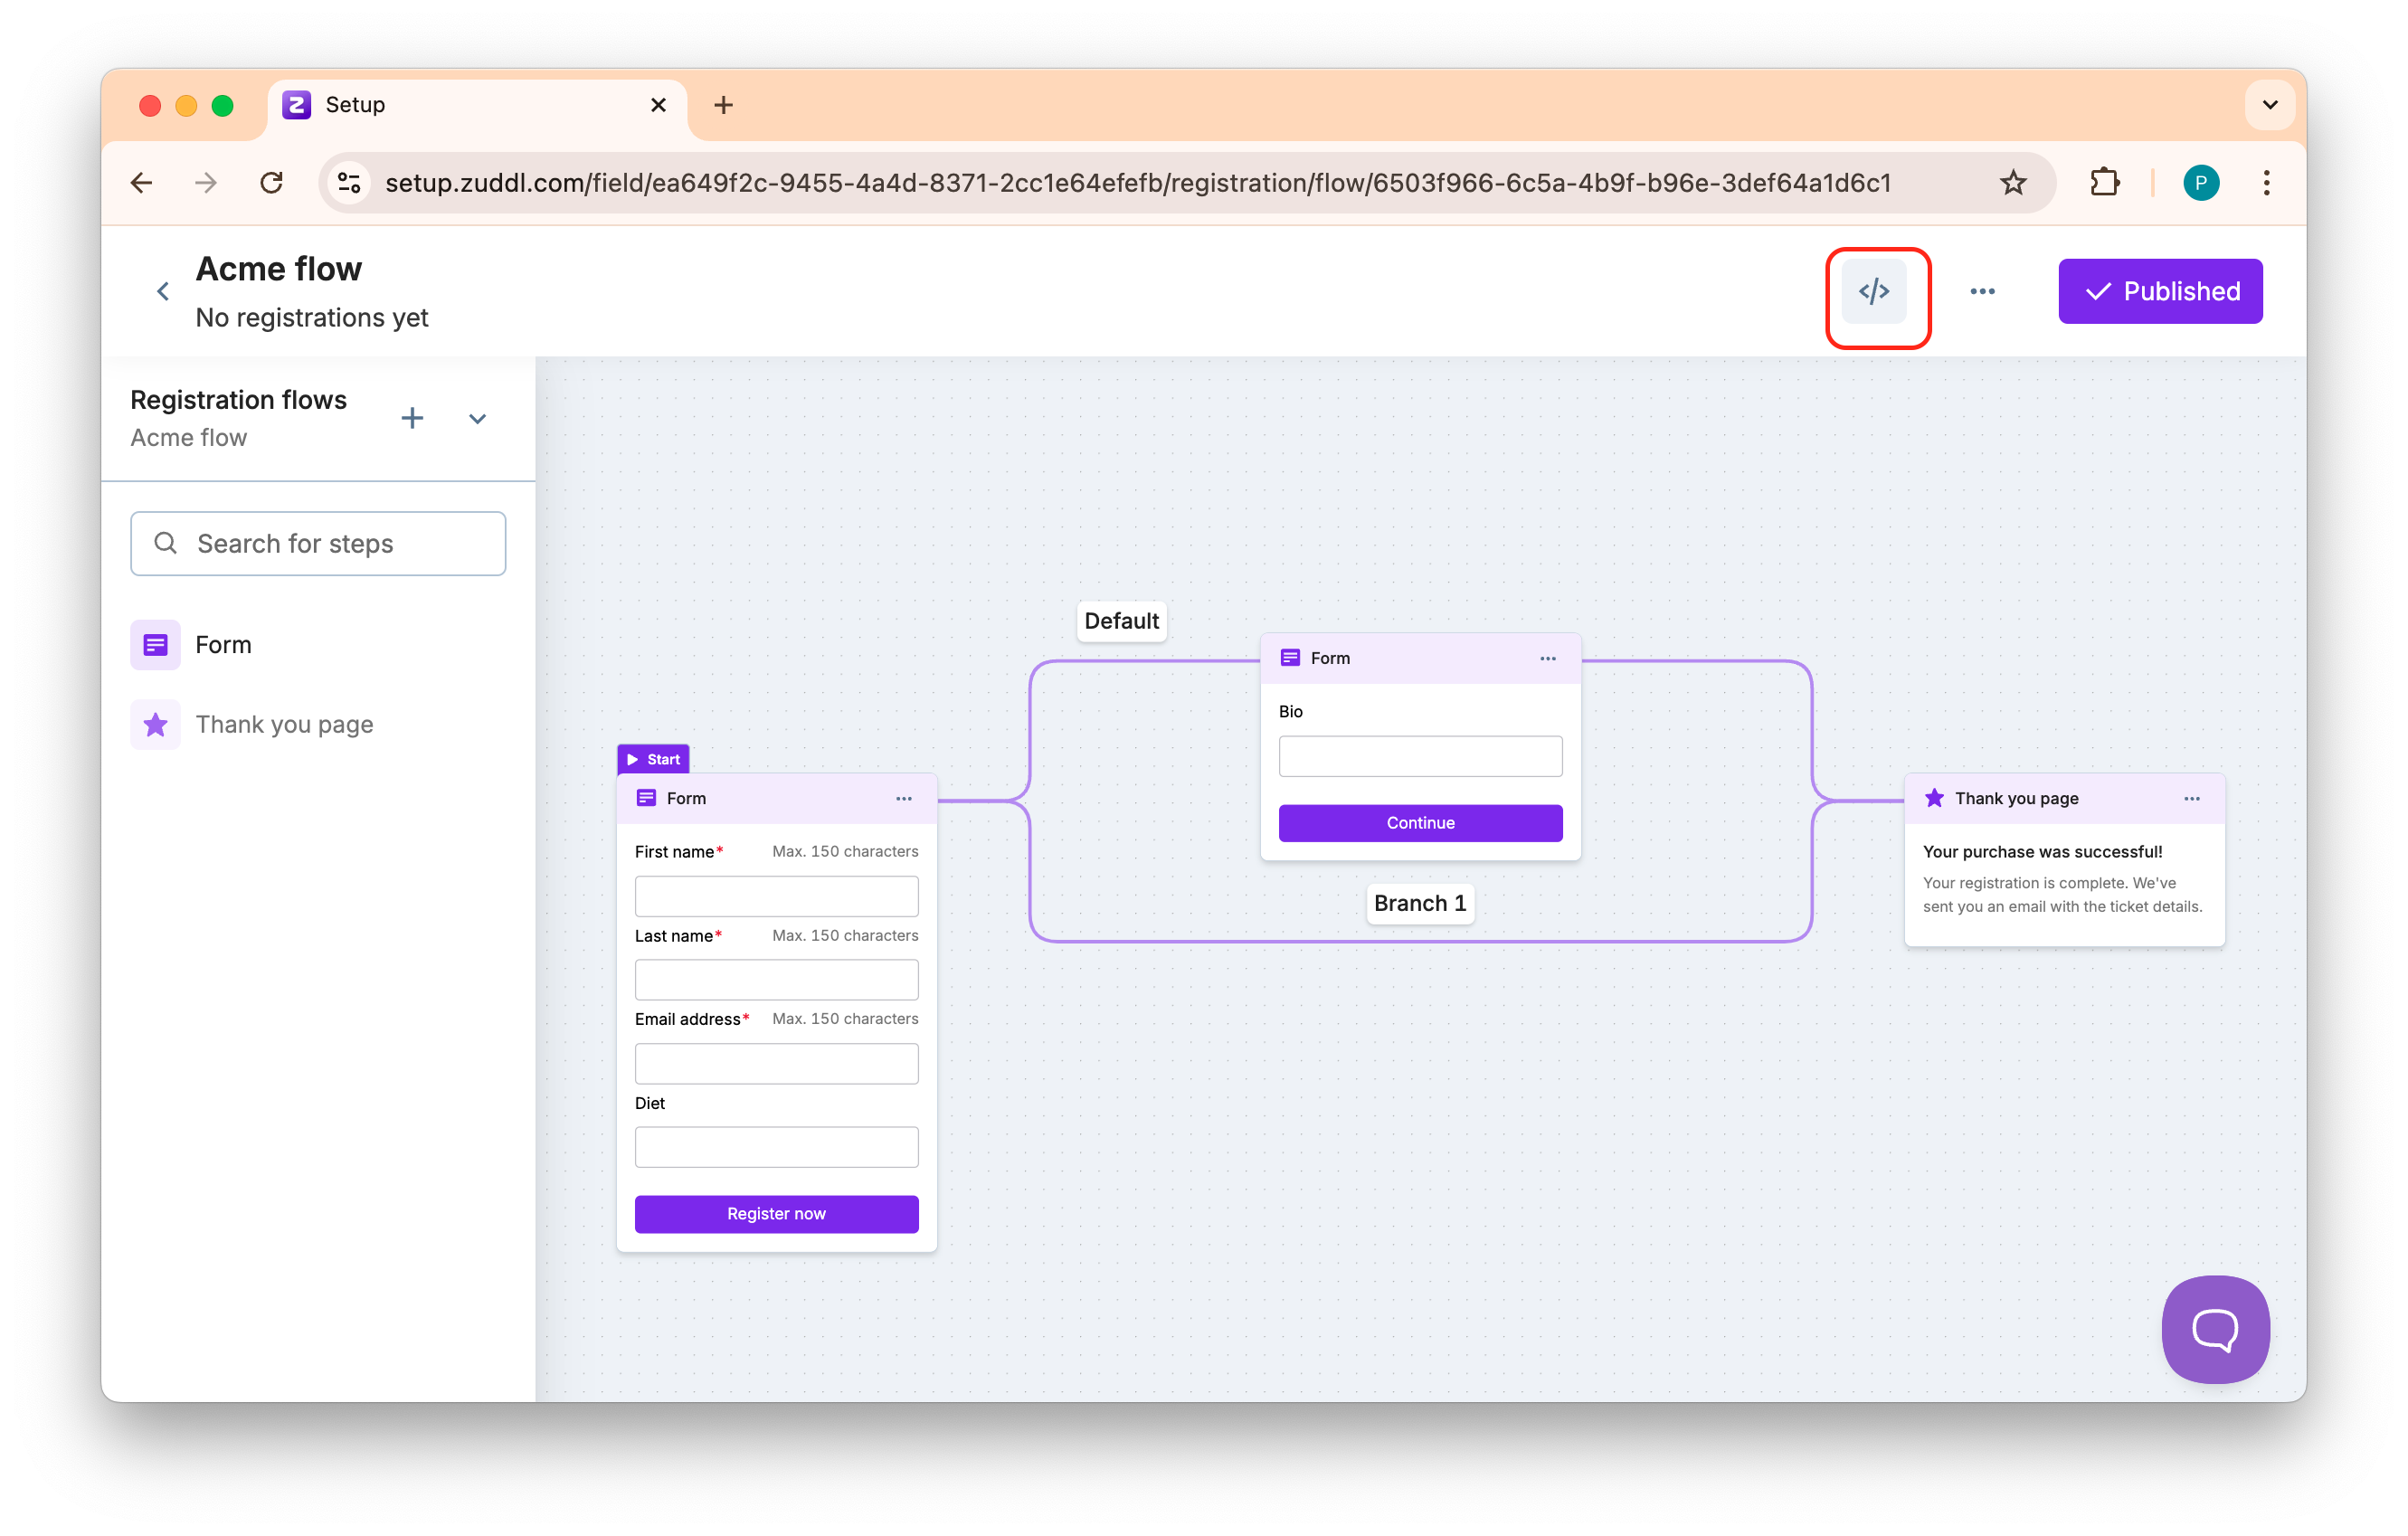
In the flex event setup, go to Registration > Registration Flows. Here, you can see the available flows. Click on the desired flow.
-
In the flow setup, click the button to find the embeddable code. Each flow has a unique code.
-
Click the Copy code button to copy the embeddable code for this flow.

-
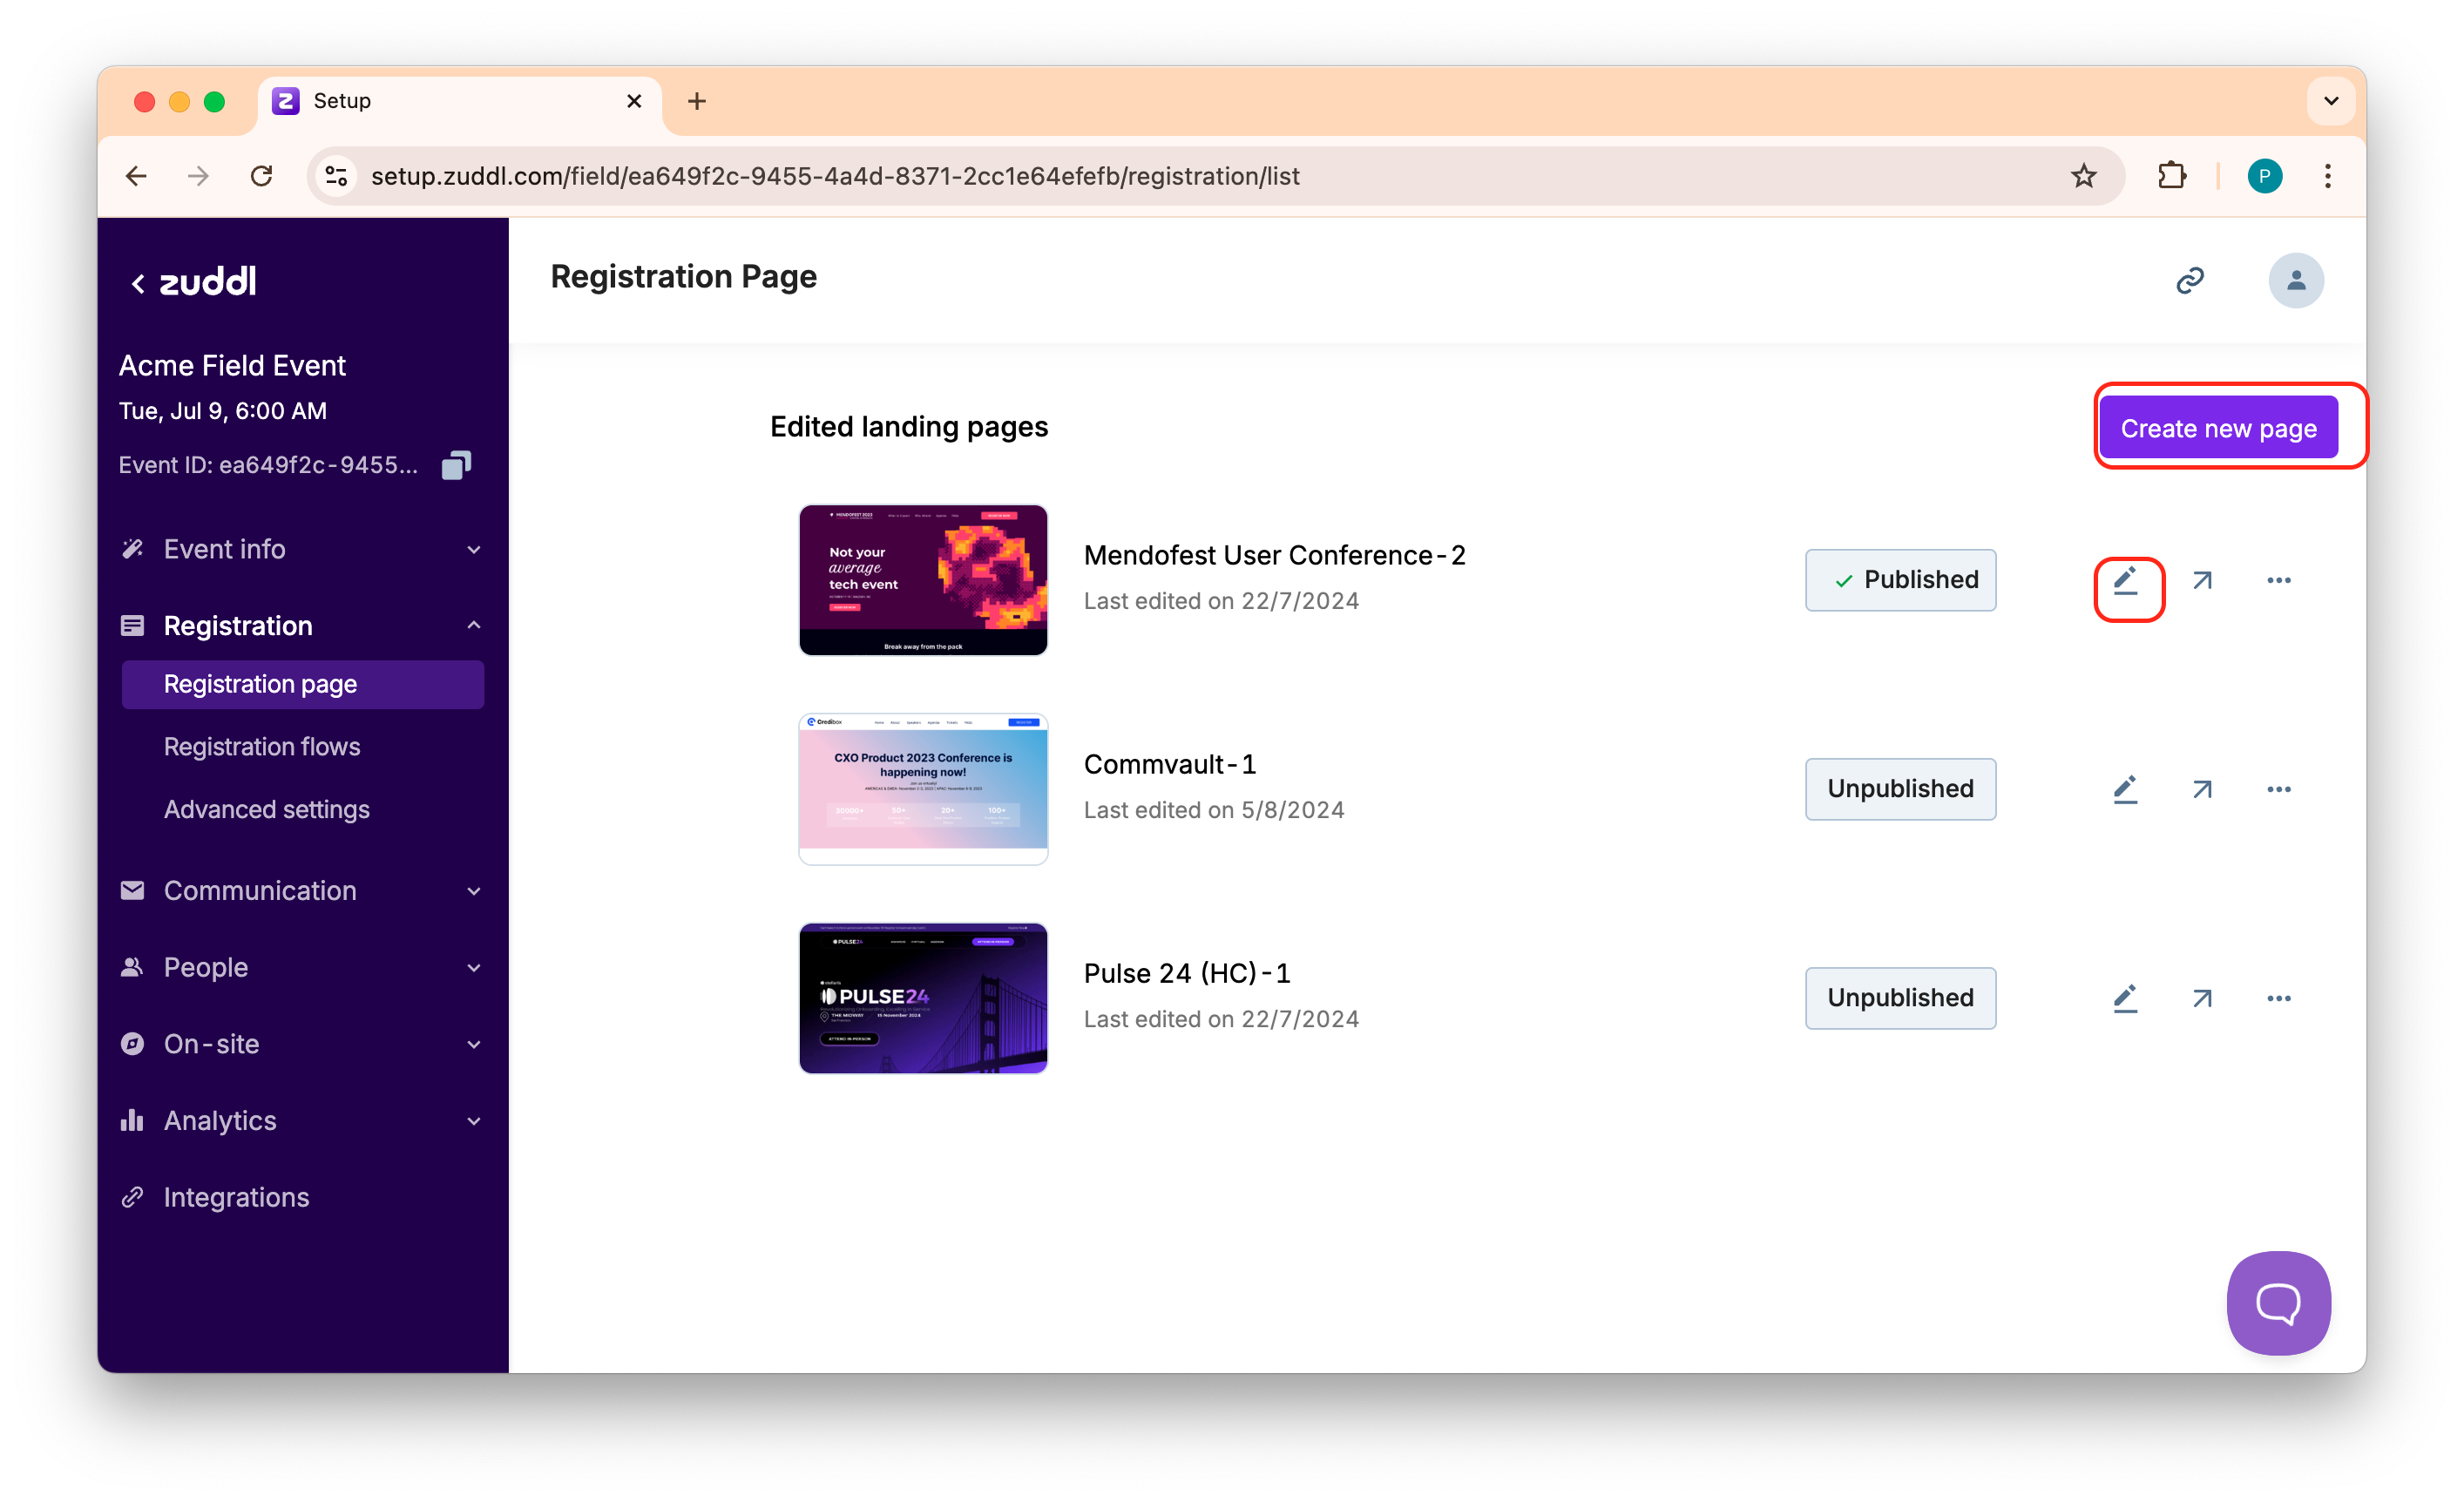
To use this code, go to Registration > Registration page. Create a new page from the list of templates, or edit a saved page.


-
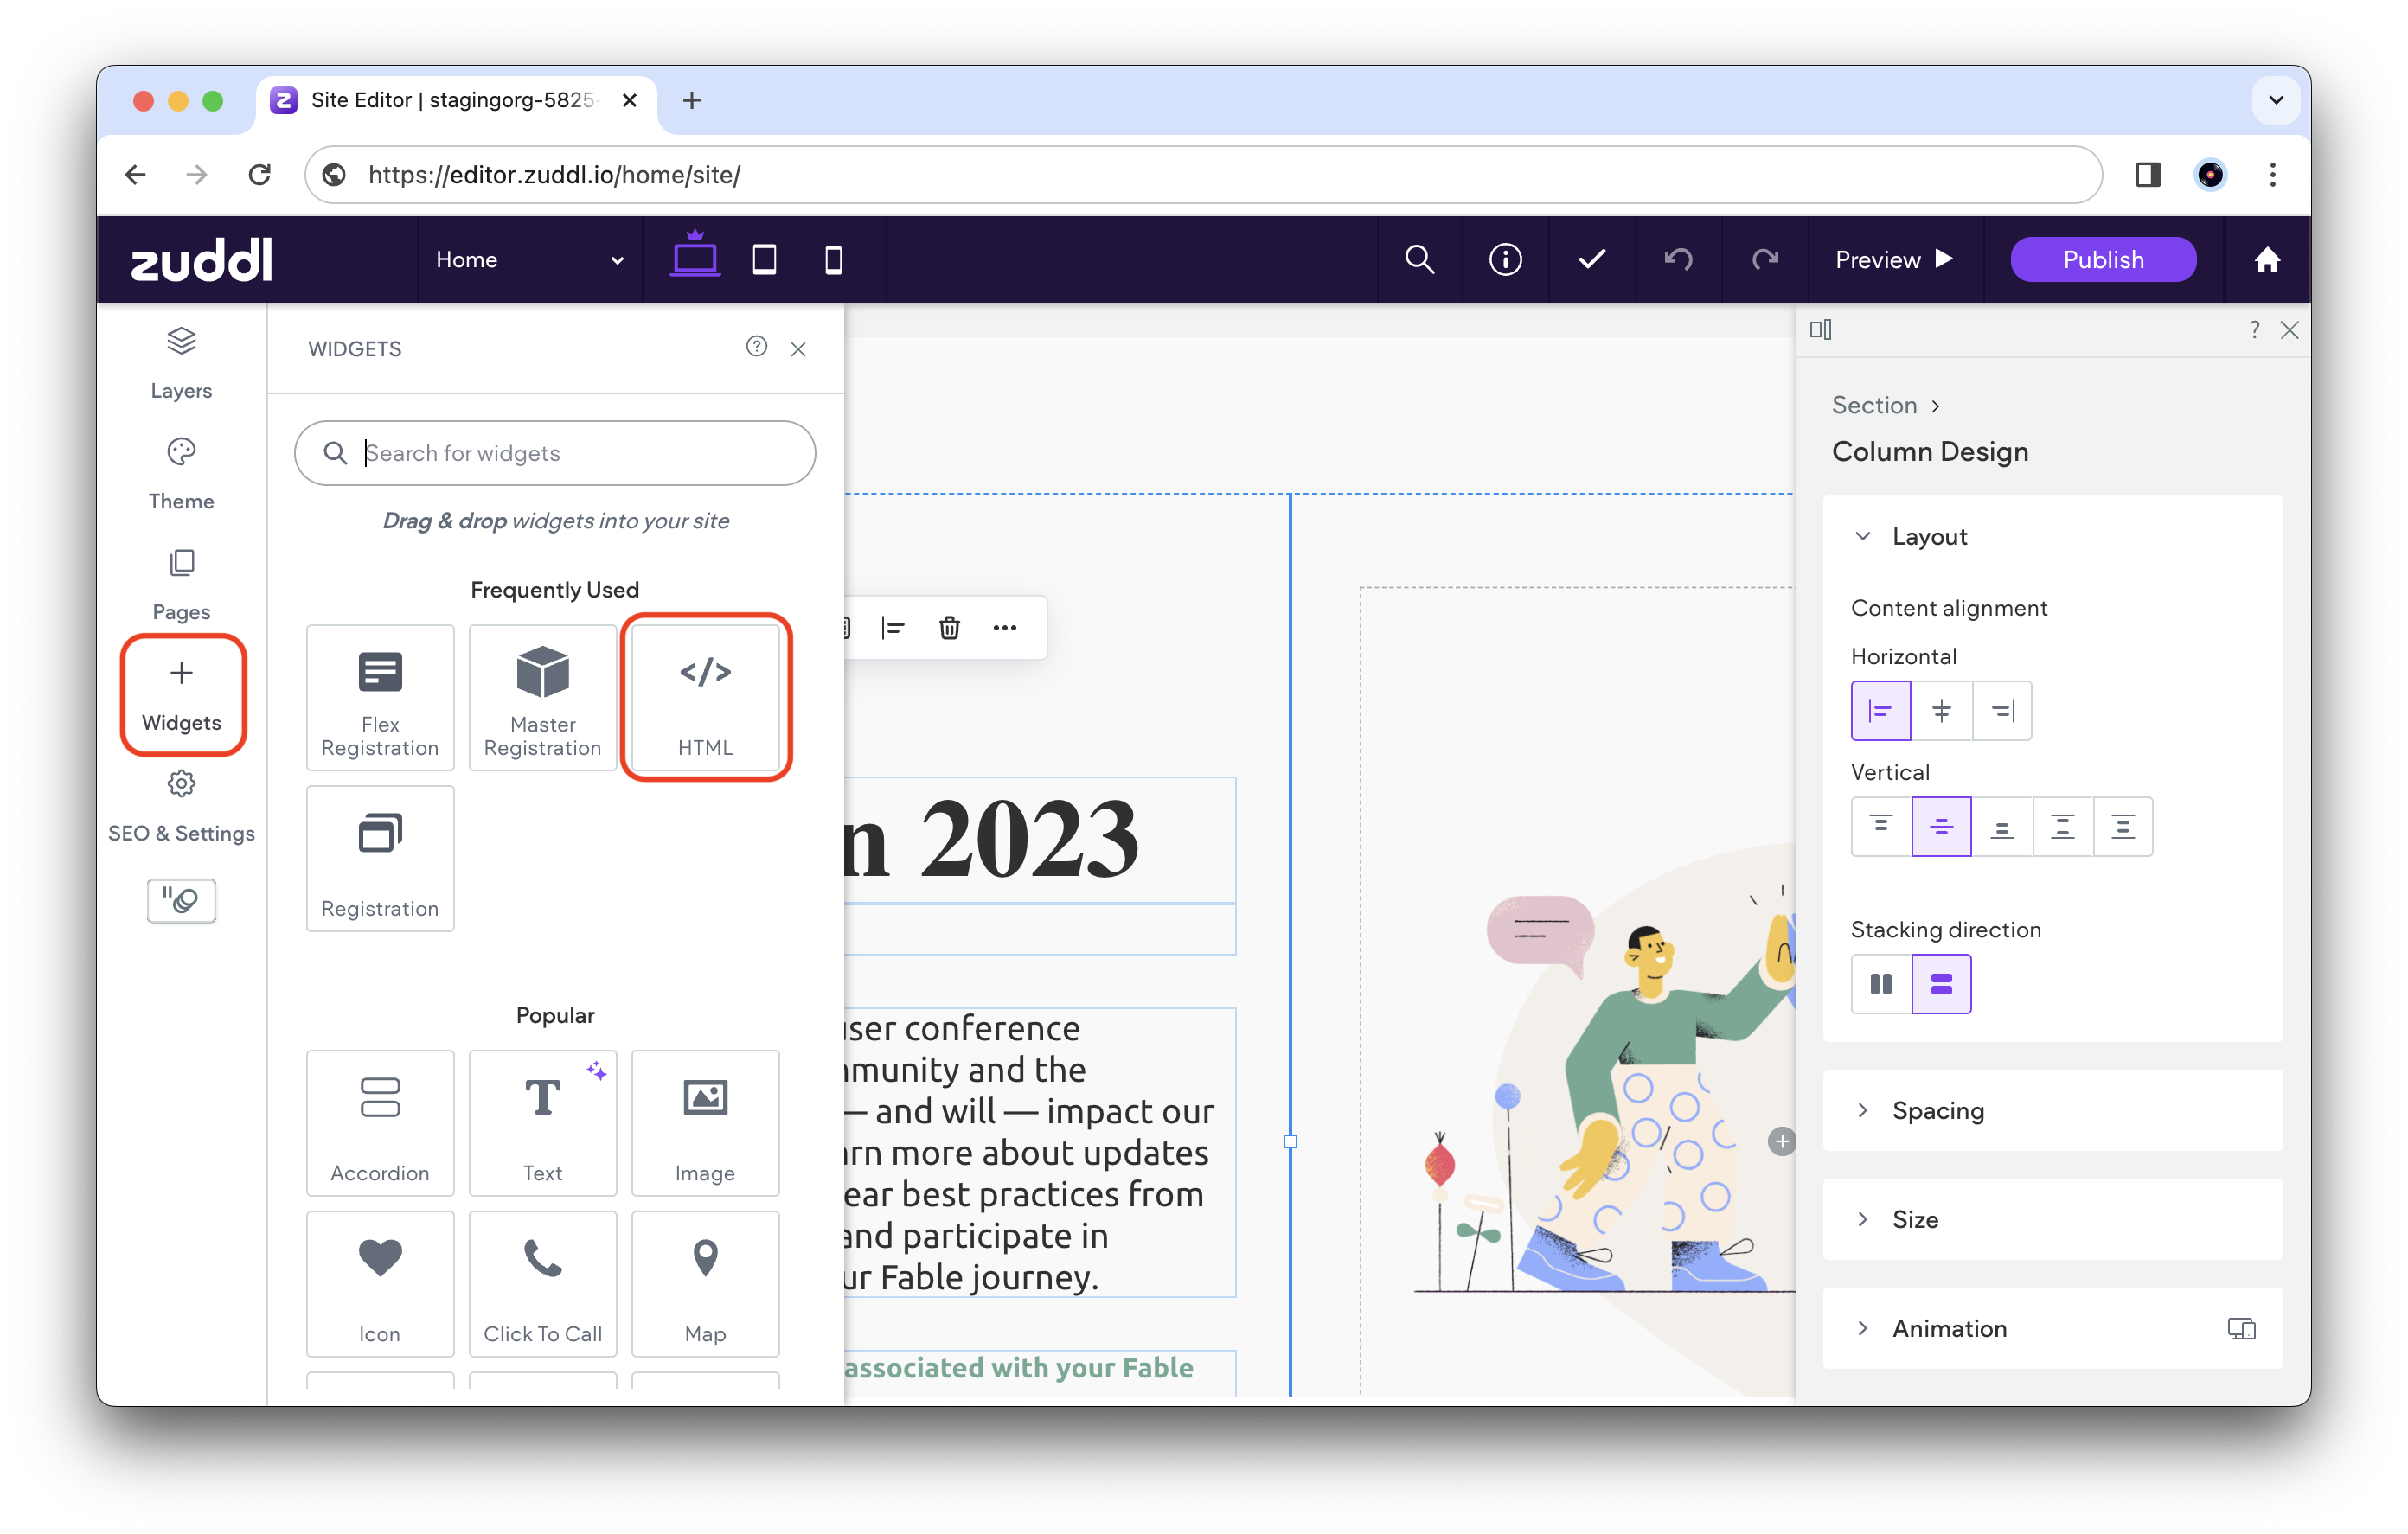
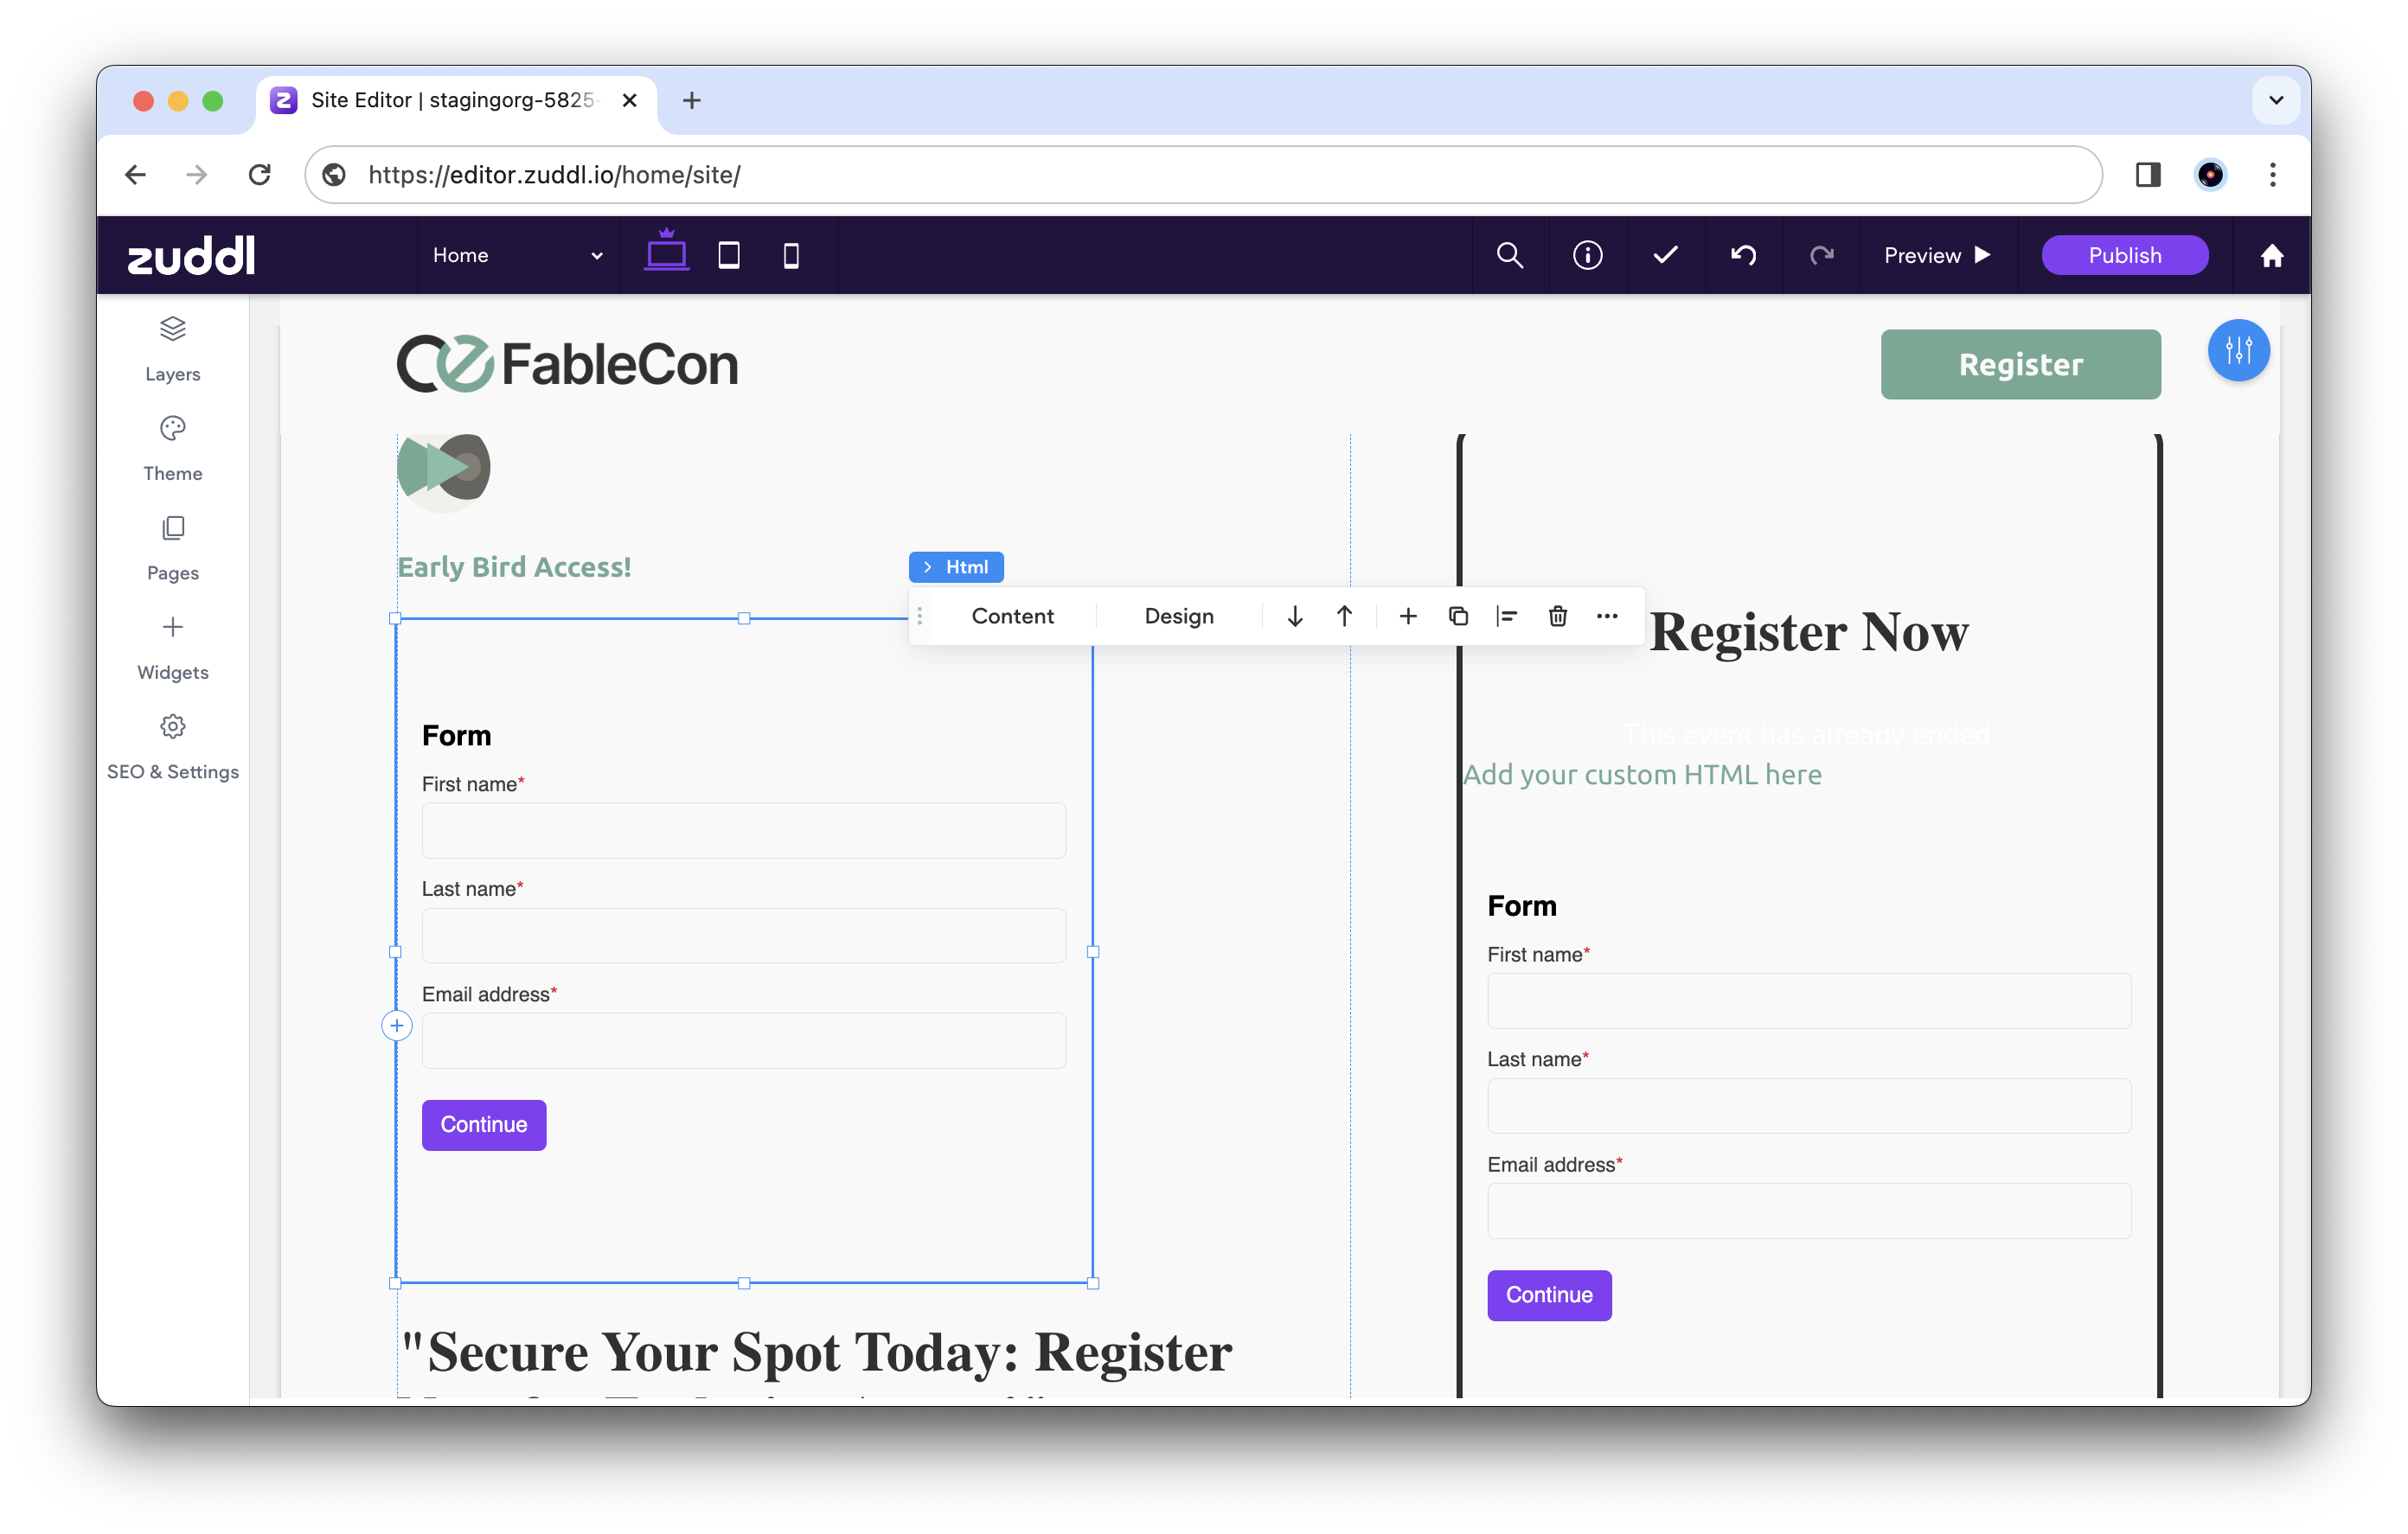
On the left panel of the page editor, click Widgets and choose the HTML widget from the list.
-
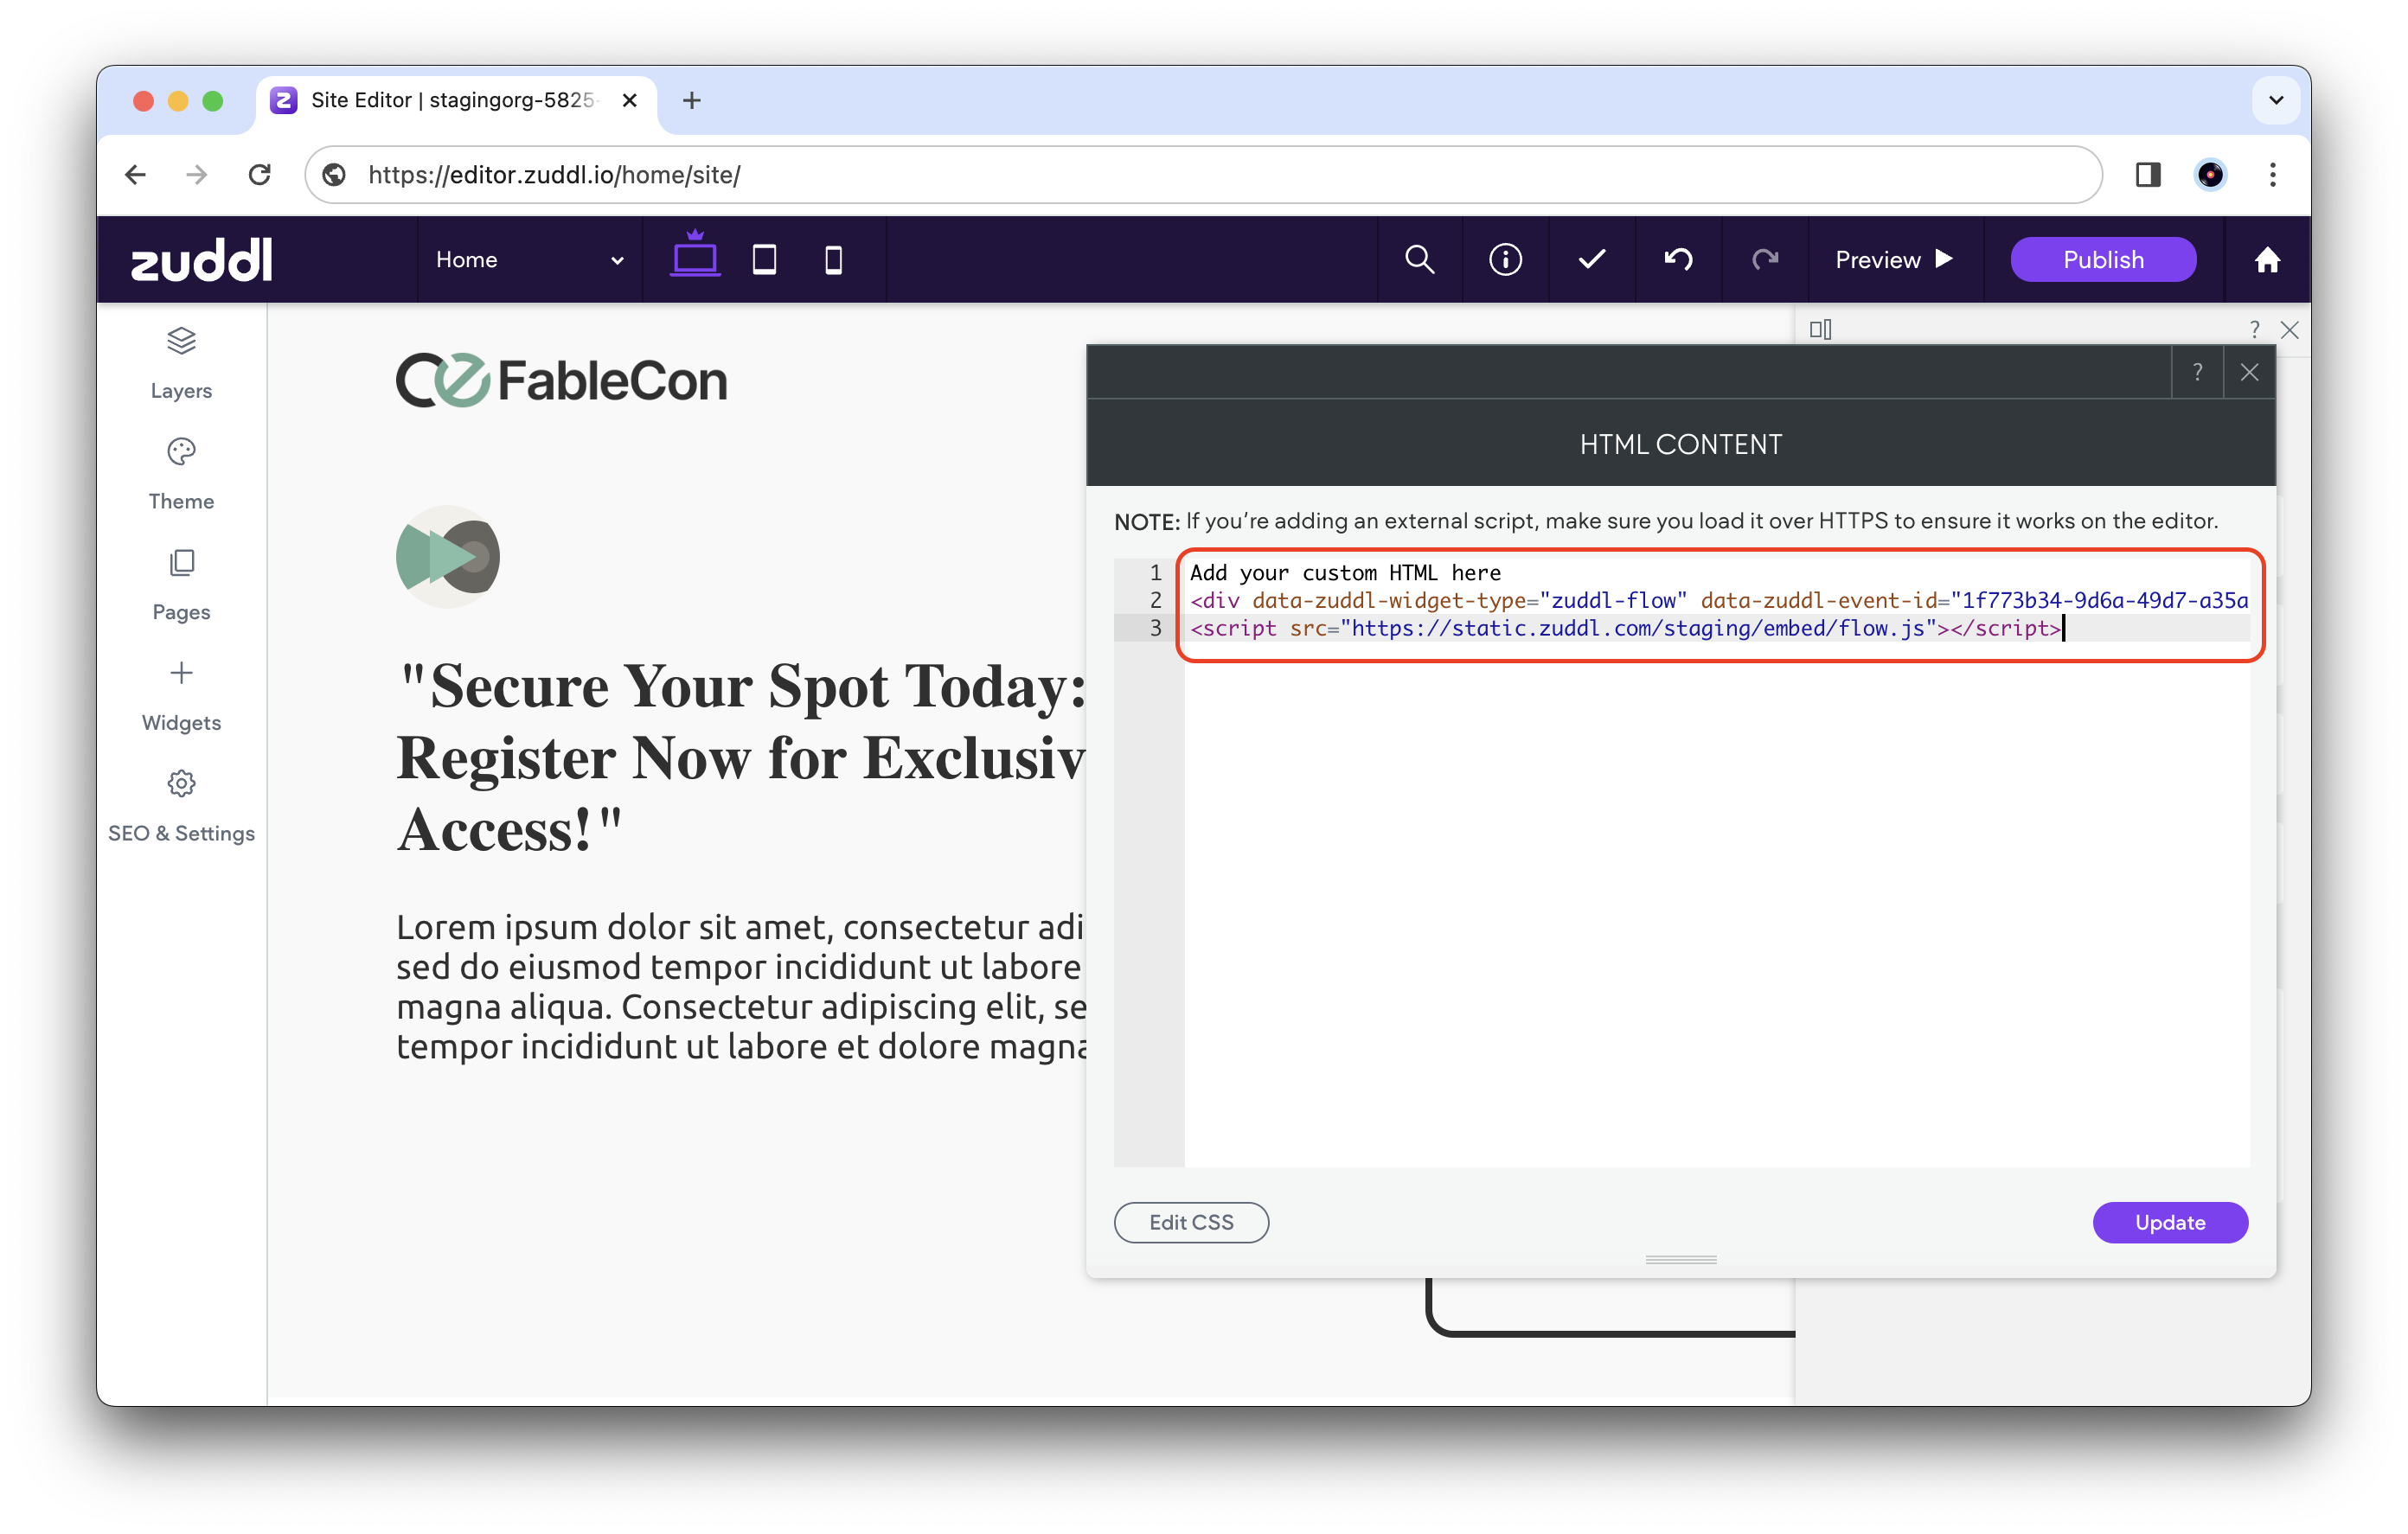
Paste the copied embeddable code in the HTML CONTENT window and click Update. The flow is now embedded on the registration page.
-
To embed another flow on the page, repeat the same process and add another HTML widget as desired with the embeddable code of the second flow.
- Rename: Allows you to rename the flow.
- Make default flow: Sets this flow as the default.
- Copy flow link: Copies a link to this flow that you can share with users. This option is available when at least one Zuddl registration page is published using this flow.
- Delete: Deletes this flow.
