Attendee List (Potential Leads) for Third-Party Events
Last updated: July 7, 2026
The Attendee List lets you pre-load the expected attendees of a third-party (non-Zuddl) event into your Zuddl Leads dashboard before the event begins. Booth reps then use this list inside the Zuddl Lead Capture app: when they scan a badge, the app automatically matches the scan against your uploaded list and surfaces the matching attendee — so reps capture complete, accurate lead details, even offline.
Think of it as giving your team a "known guest list" to check scanned leads against, instead of relying only on what a badge or business card shows.
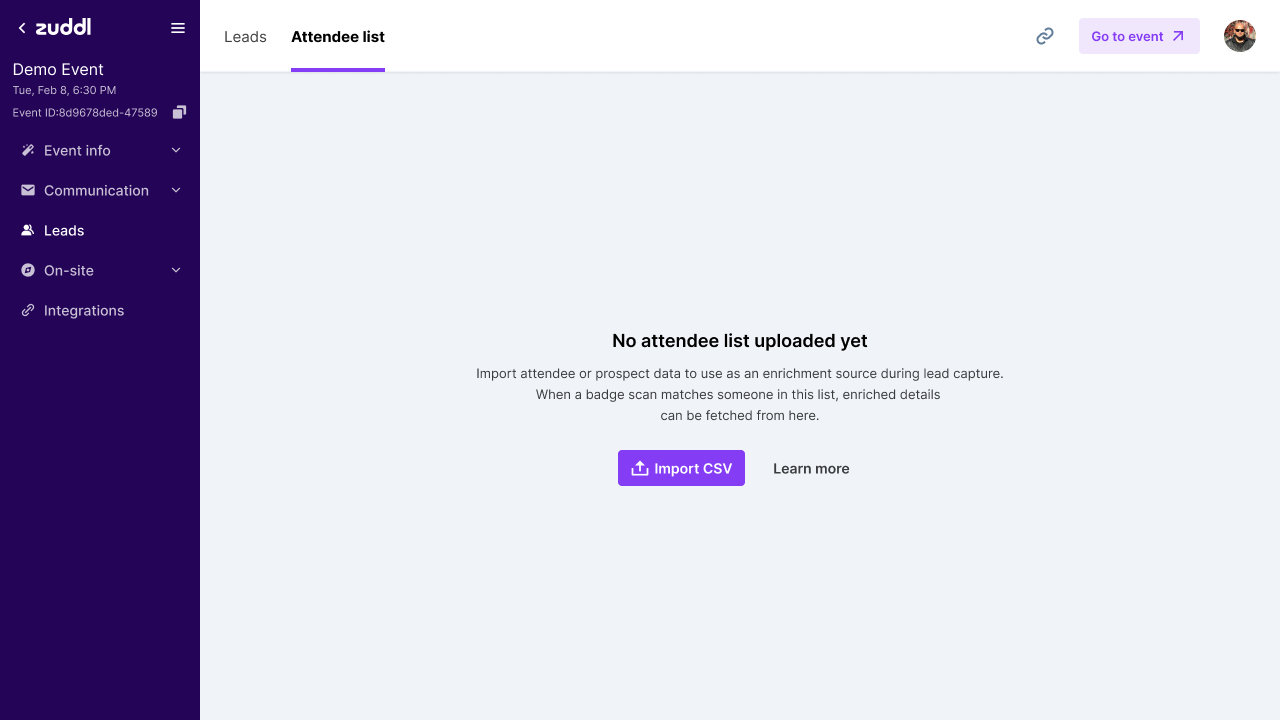
Where to find it: Event → Leads → Attendee list tab.
Part 1 — Upload your attendee list (Web, before the event)
Before any data is uploaded, the Attendee list tab is empty and prompts you to import your data.
To upload your list:
Open your event and go to Leads in the left sidebar.
Select the Attendee list tab (next to the Leads tab).
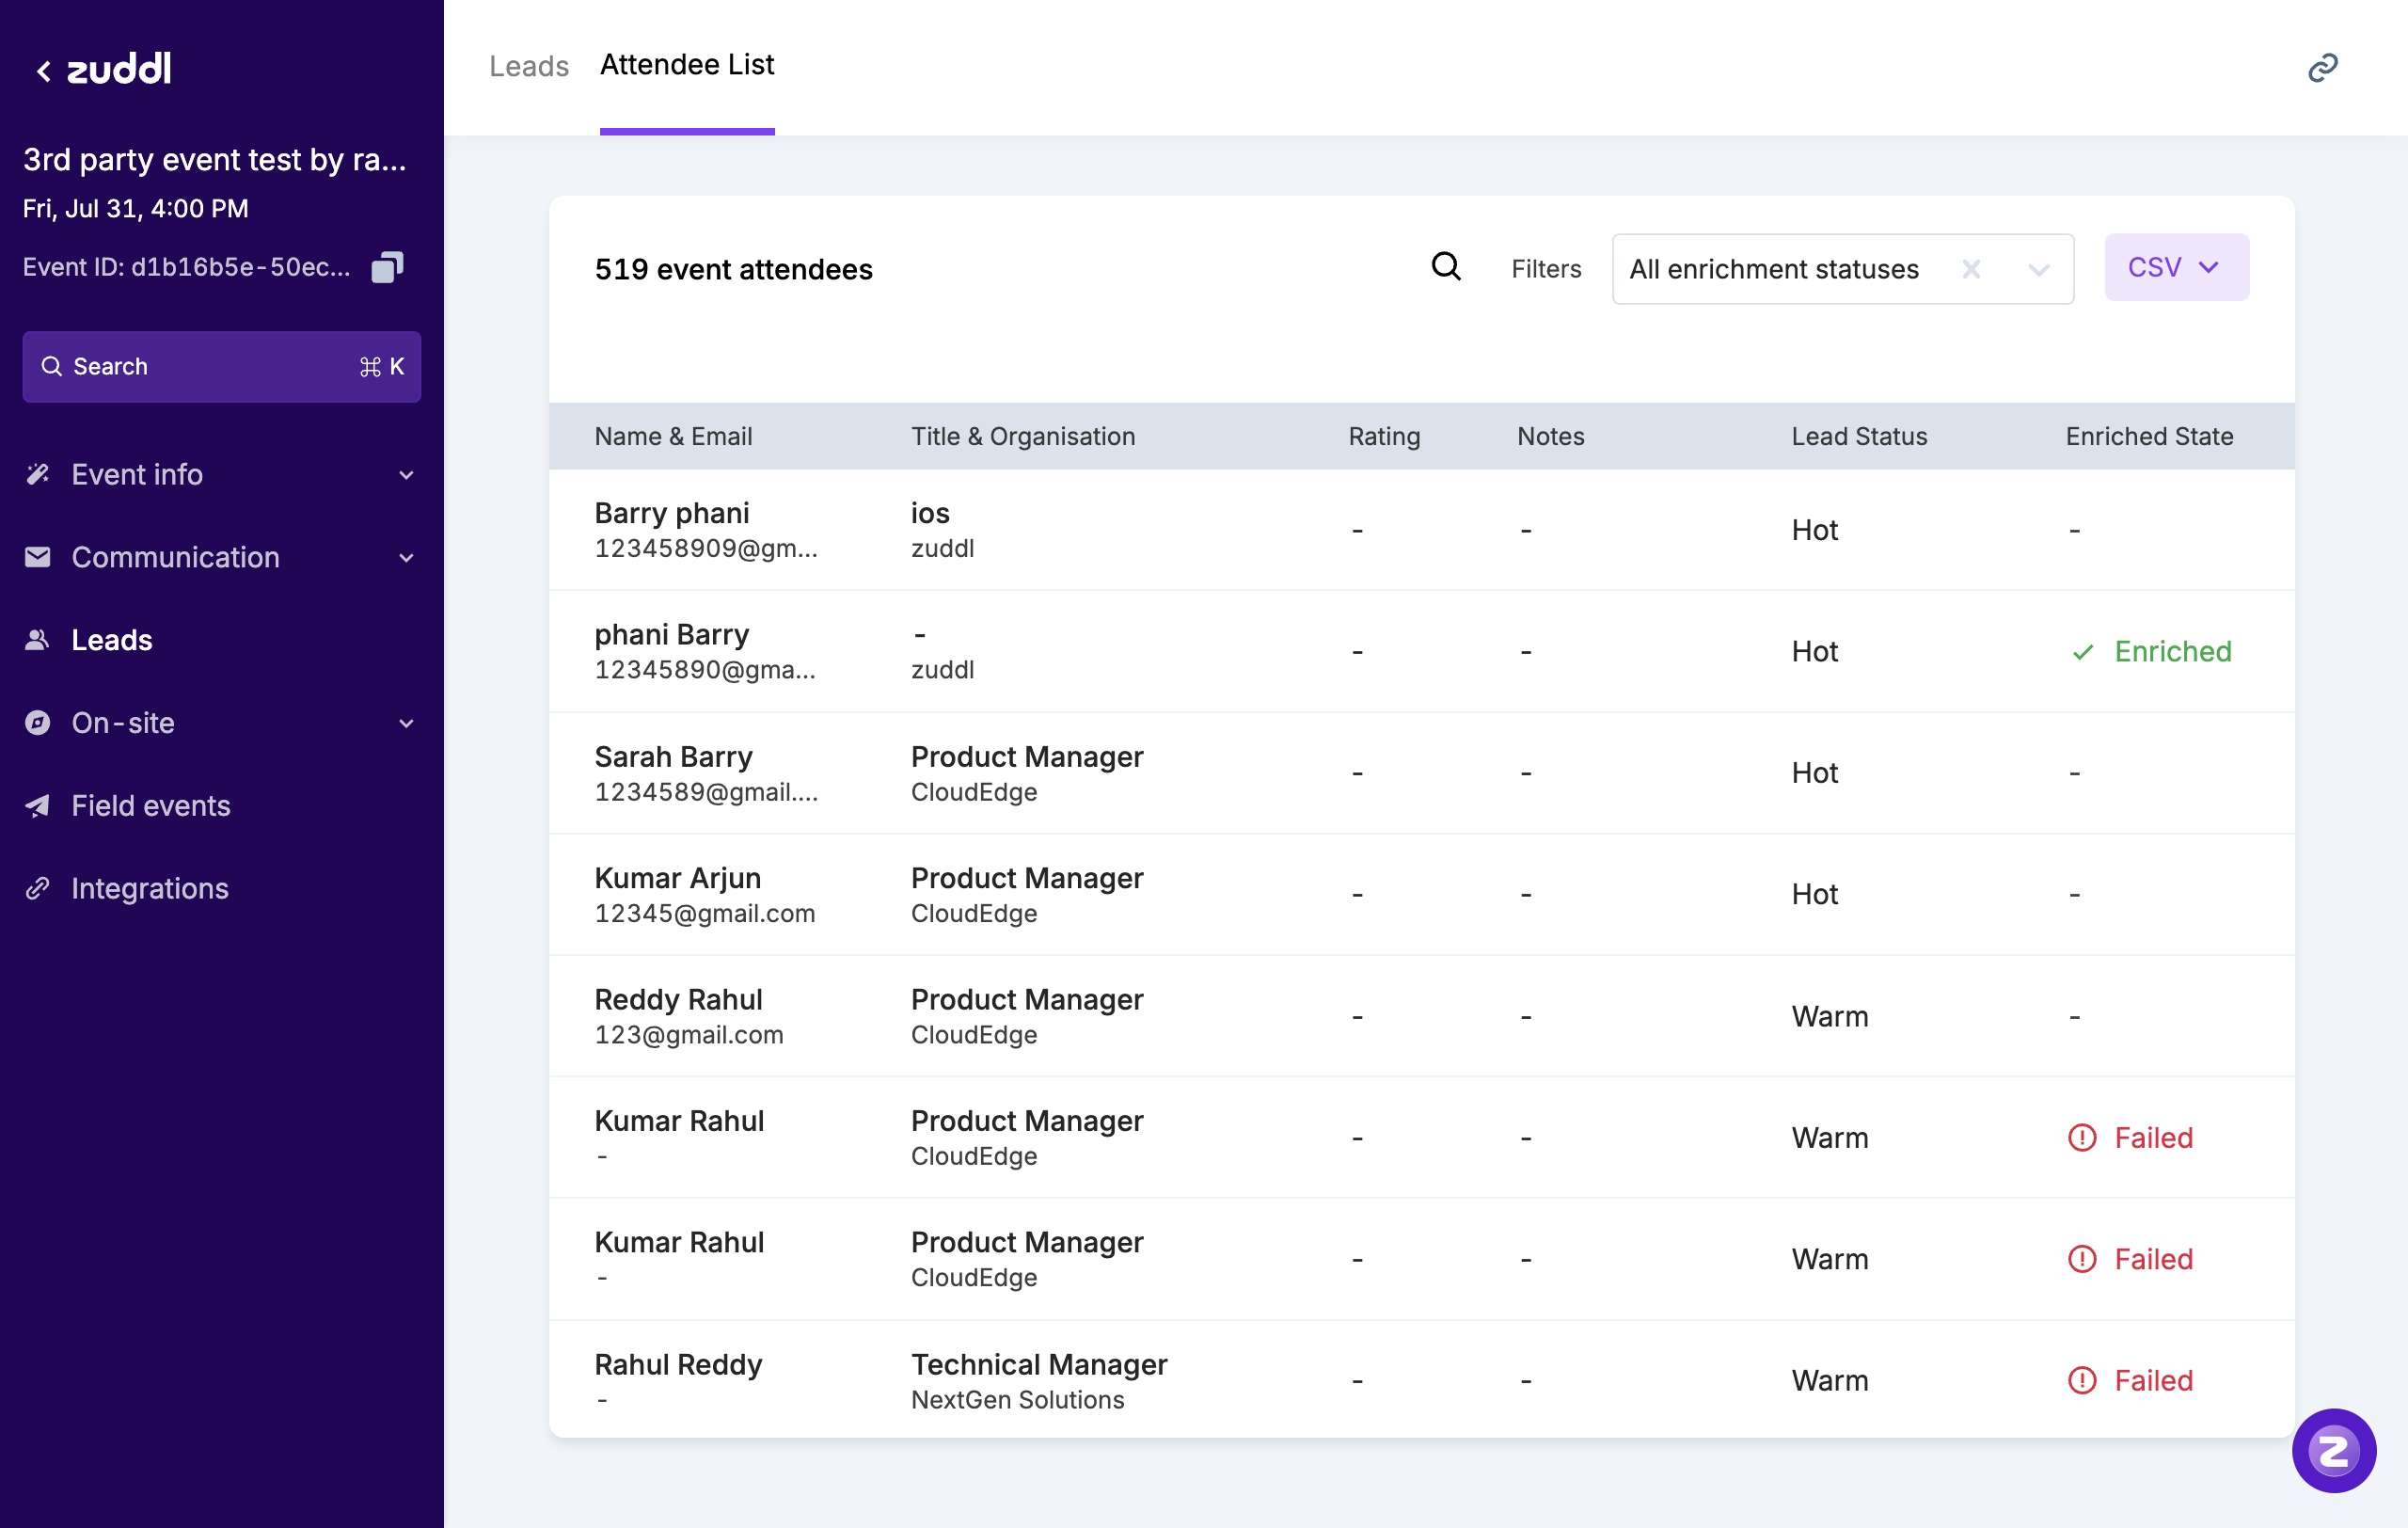
Click the CSV dropdown (top-right) and choose Import.
In the Import CSV dialog, Browse to your file or drop your
.csvdirectly into the upload area, then click Import.
Once imported, your attendees populate the table with their enrichment and capture status.
CSV format requirements
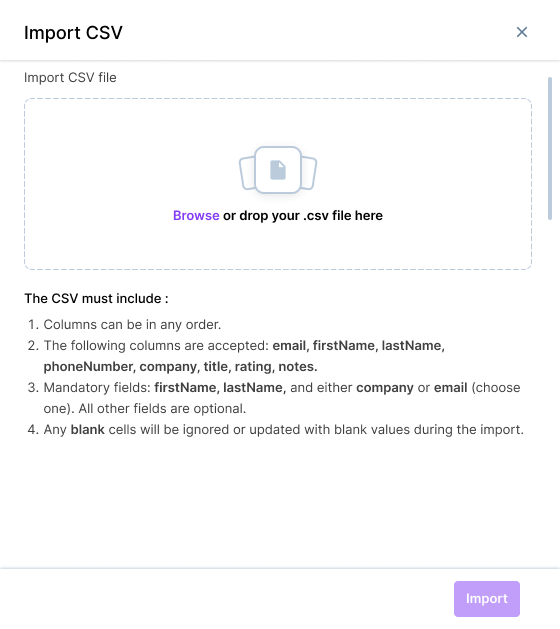
Columns can be in any order.
Accepted columns:
email,firstName,lastName,phoneNumber,company,title,rating,notes.Mandatory fields:
firstName,lastName, and eithercompanyoremail(at least one of the two).All other fields are optional.
Blank cells are ignored, or will overwrite existing values with blanks during a re-import.
Duplicate rows (same email) are removed automatically.
Part 2 — Capture leads against the list (Lead Capture app, at the event)
The uploaded Attendee List syncs to the Zuddl Lead Capture app and is cached on the device, so matching works even without a stable connection.
In the app, tap Scan badge and scan the attendee's badge / QR.
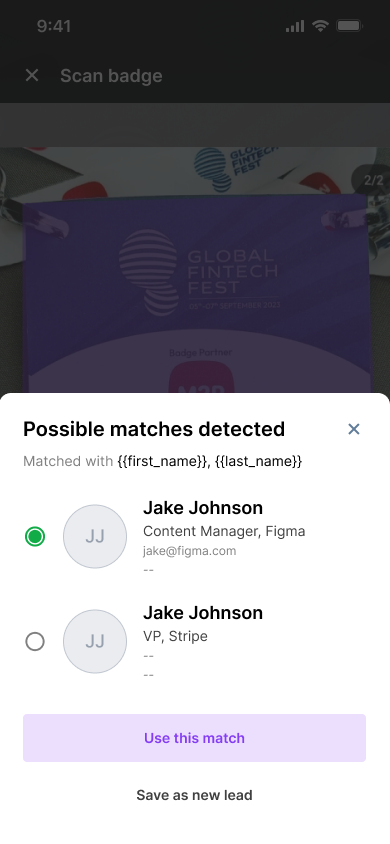
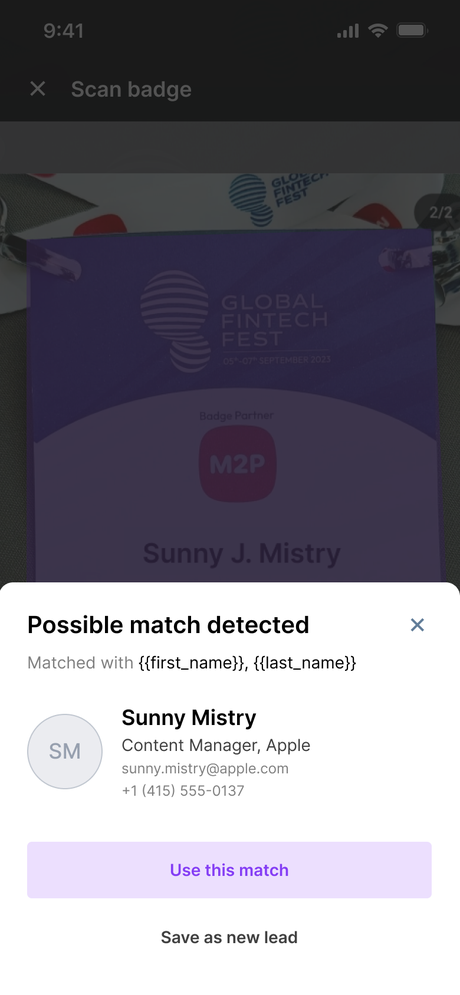
If the scan matches your uploaded list, the app shows a "Possible matches detected" tray, indicating it matched with the scanned name.
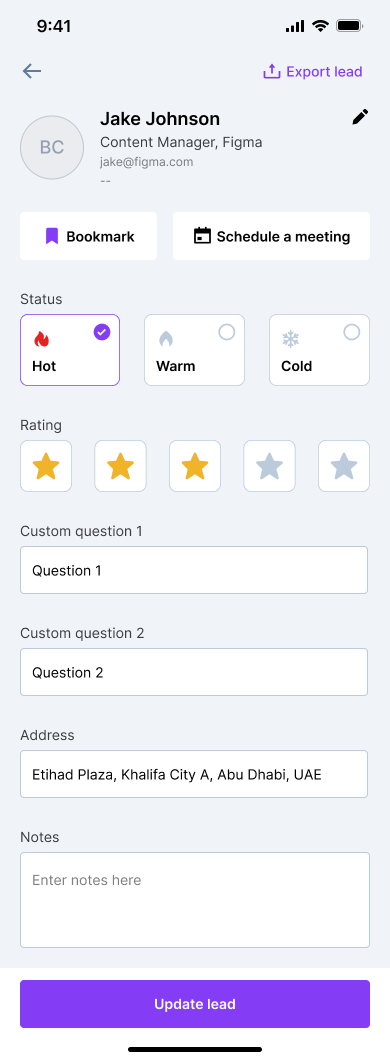
On the lead detail screen, enrich the lead as usual — set Status (Hot / Warm / Cold), add a Rating, answer Custom questions, add Notes, Bookmark, or Schedule a meeting — then tap Update lead.
If the scan doesn’t match — Save as new lead
Sometimes a scanned attendee isn’t on your uploaded list, or the surfaced suggestion isn’t the right person. In that case the rep can capture them as a brand-new lead instead of forcing a match.
On the Possible match detected tray, tap Save as new lead (below Use this match) instead of accepting the suggested match.
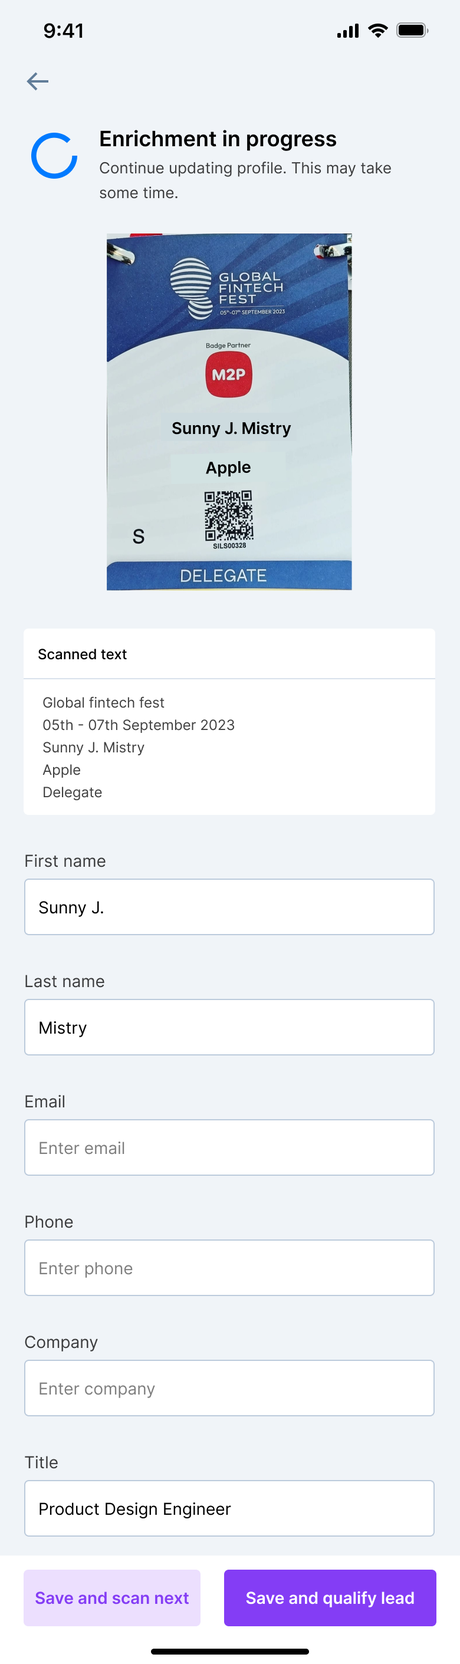
The app opens the lead detail with Enrichment in progress and pre-fills what it read from the badge (scanned text, name, company, title). Complete any missing fields such as email or phone.
Tap Save and qualify lead to set status, rating and notes, or Save and scan next to keep scanning.
Tip: Use Save as new lead whenever the person isn’t on your attendee list or the match looks wrong — the lead is still enriched and saved to your Leads.
Because the rep starts from accurate, pre-loaded data, leads captured this way are more complete than badge-only scans.