How to use the Zuddl Lead Capture App for an In-person Event in Zuddl
Last updated: September 4, 2025
The "Lead Capture by Zuddl" app is designed exclusively for exhibitors/booth owners to help collect, track, qualify, and share potential customers - attendees and speakers they meet at an event hosted on Zuddl.
With the lead capture app, your booth owners can add booth visitors as leads and qualify them based on their engagement, enabling you to convert a prospect into a customer of your business.
Target audience:
There are two main types of audiences for the lead capture app: internal audiences—booth owners/ organizers, and external audiences—app users.
Prerequisite
You need to be added as booth owner for an event by the organizer.
Steps
To use the lead capture app,
Install the app on your phone from the App Store if you use a Mac OS or Play Store for Android users.
After you've installed the app, you can log in to your account. To log in, enter your email address and click the Get verification code button to receive a 6-digit code in your inbox.

Enter the code in the respective field to log in.

Alternatively, if your Zuddl account password is handy, you can also log in with a password. Simply enter your email address and password to log in.
After logging in, you can view your ongoing event under the Live tab. After the event ends, you can still view the leads under the Completed tab. Similarly, you can see all your past and upcoming events under Completed or Upcoming.

Click on an event from the list to view the booth for which you are the booth owner.
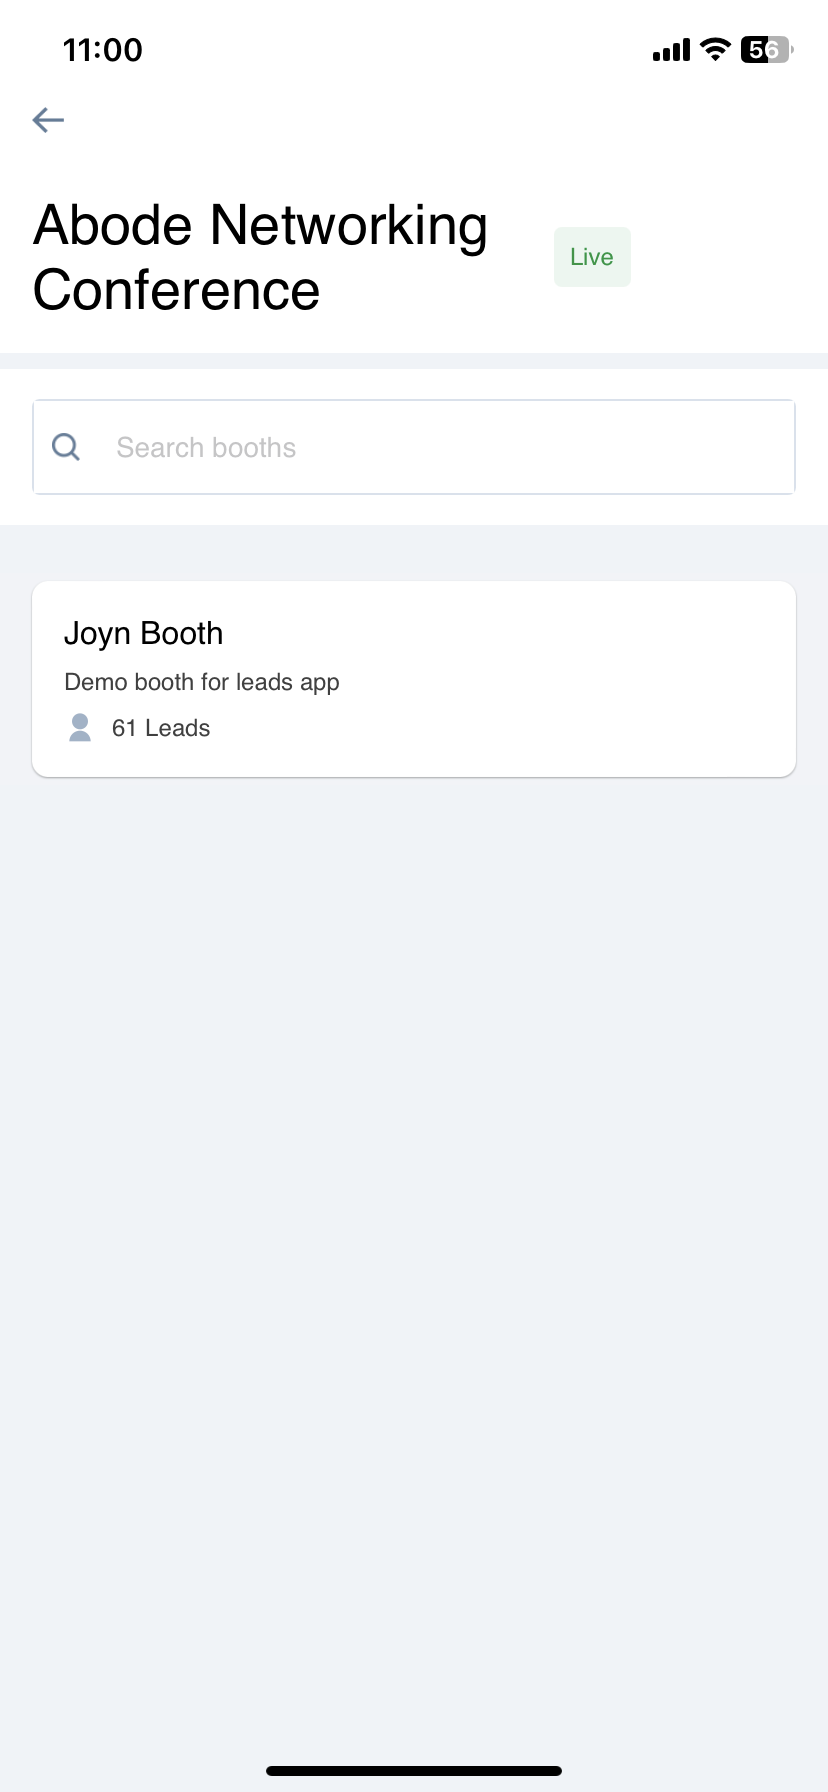
In this list, you can view the booth name and number of leads.
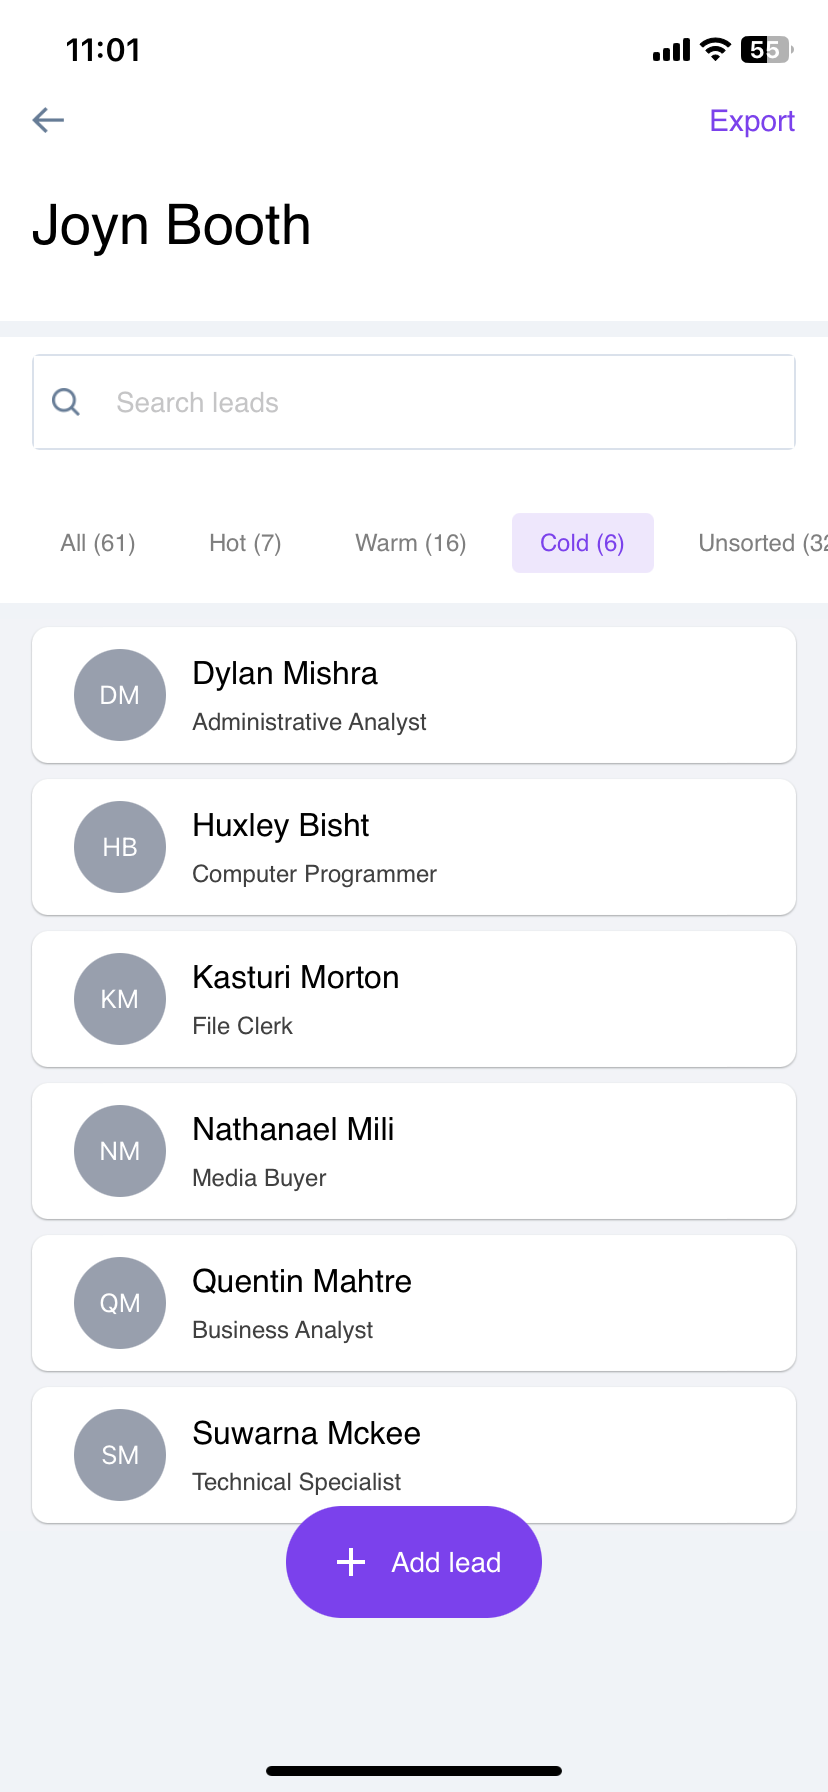
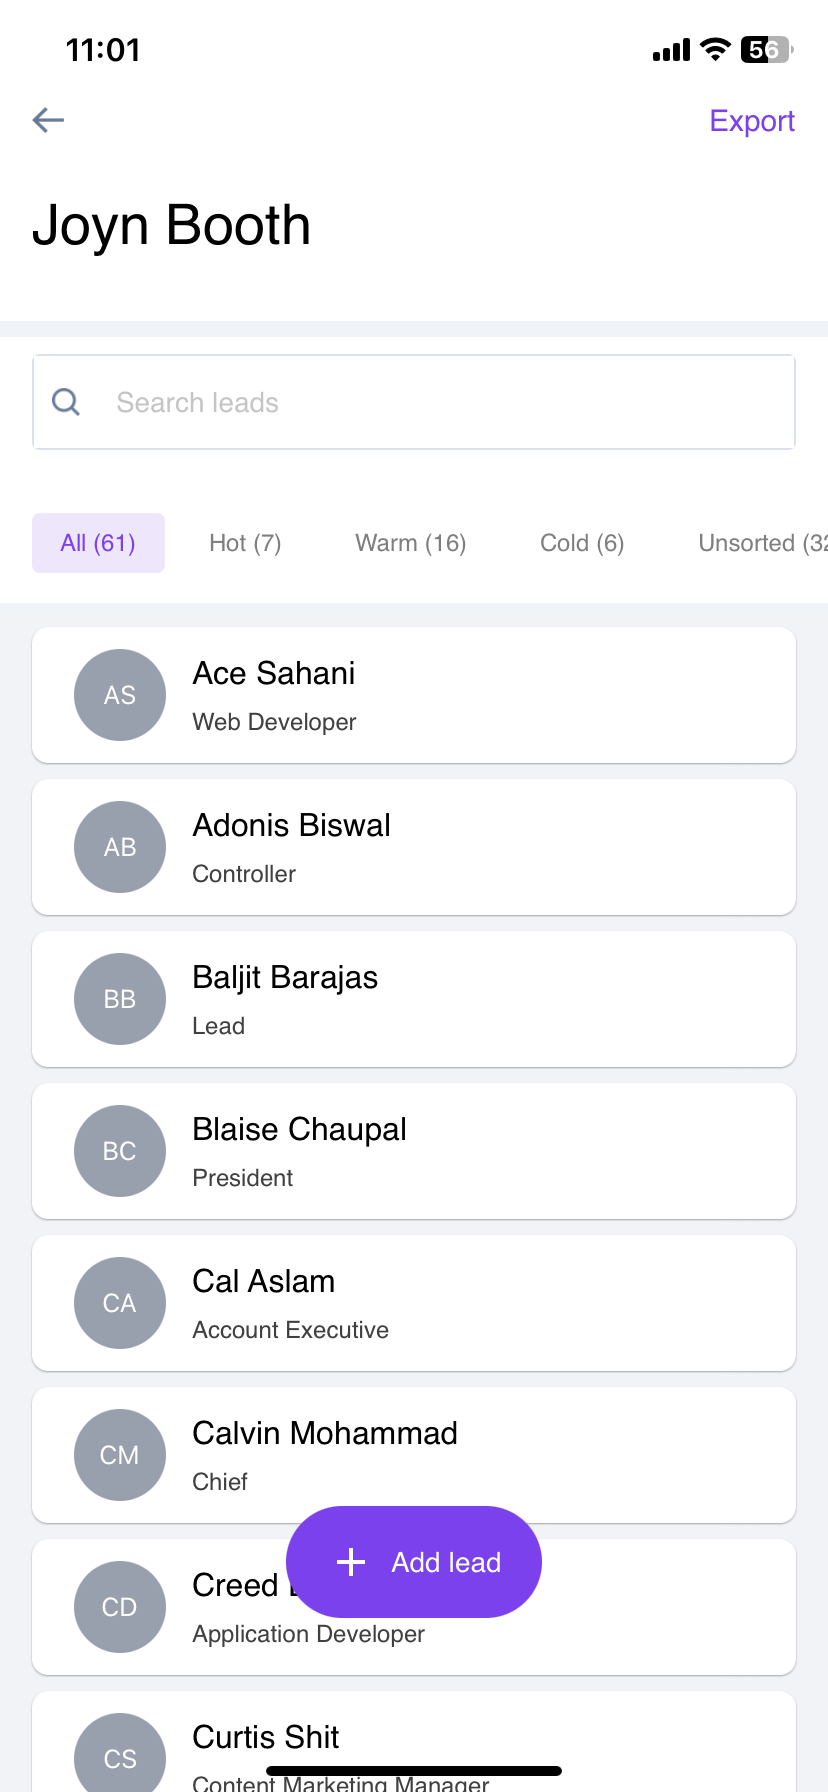
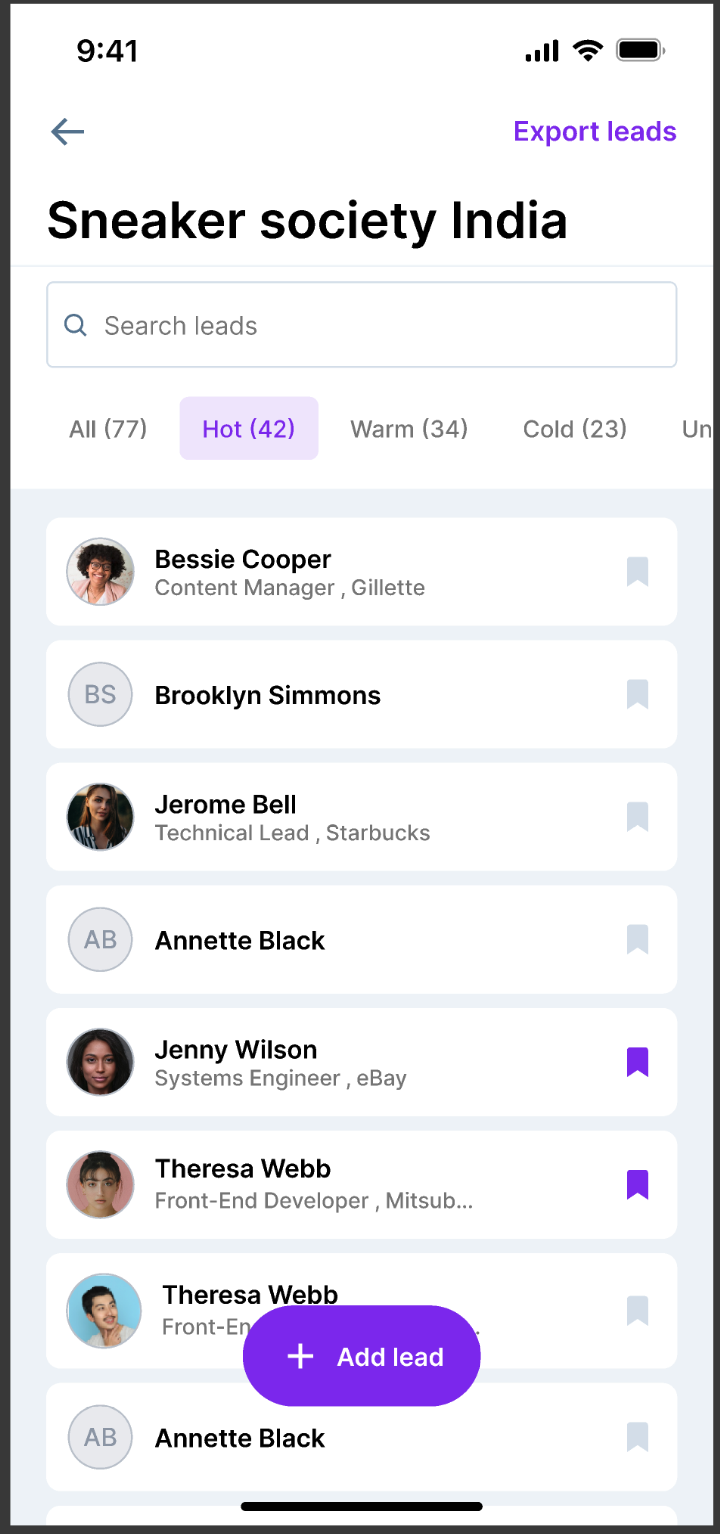
Inside the booth, you can view the total number of leads categorized into Hot, Warm, Cold, and Unsorted.
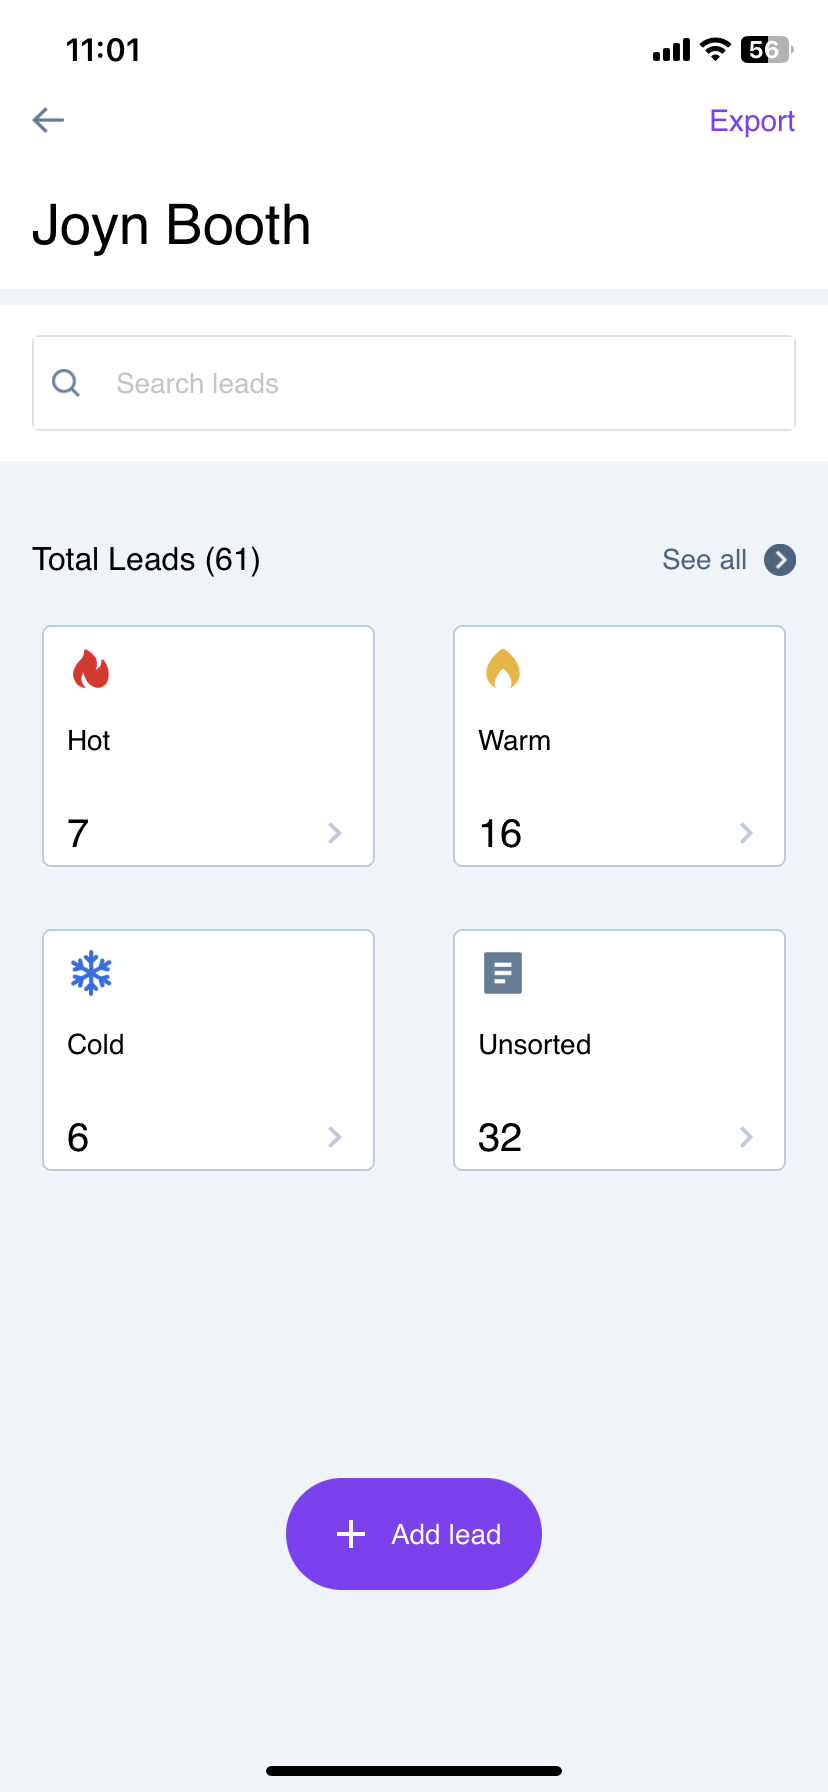
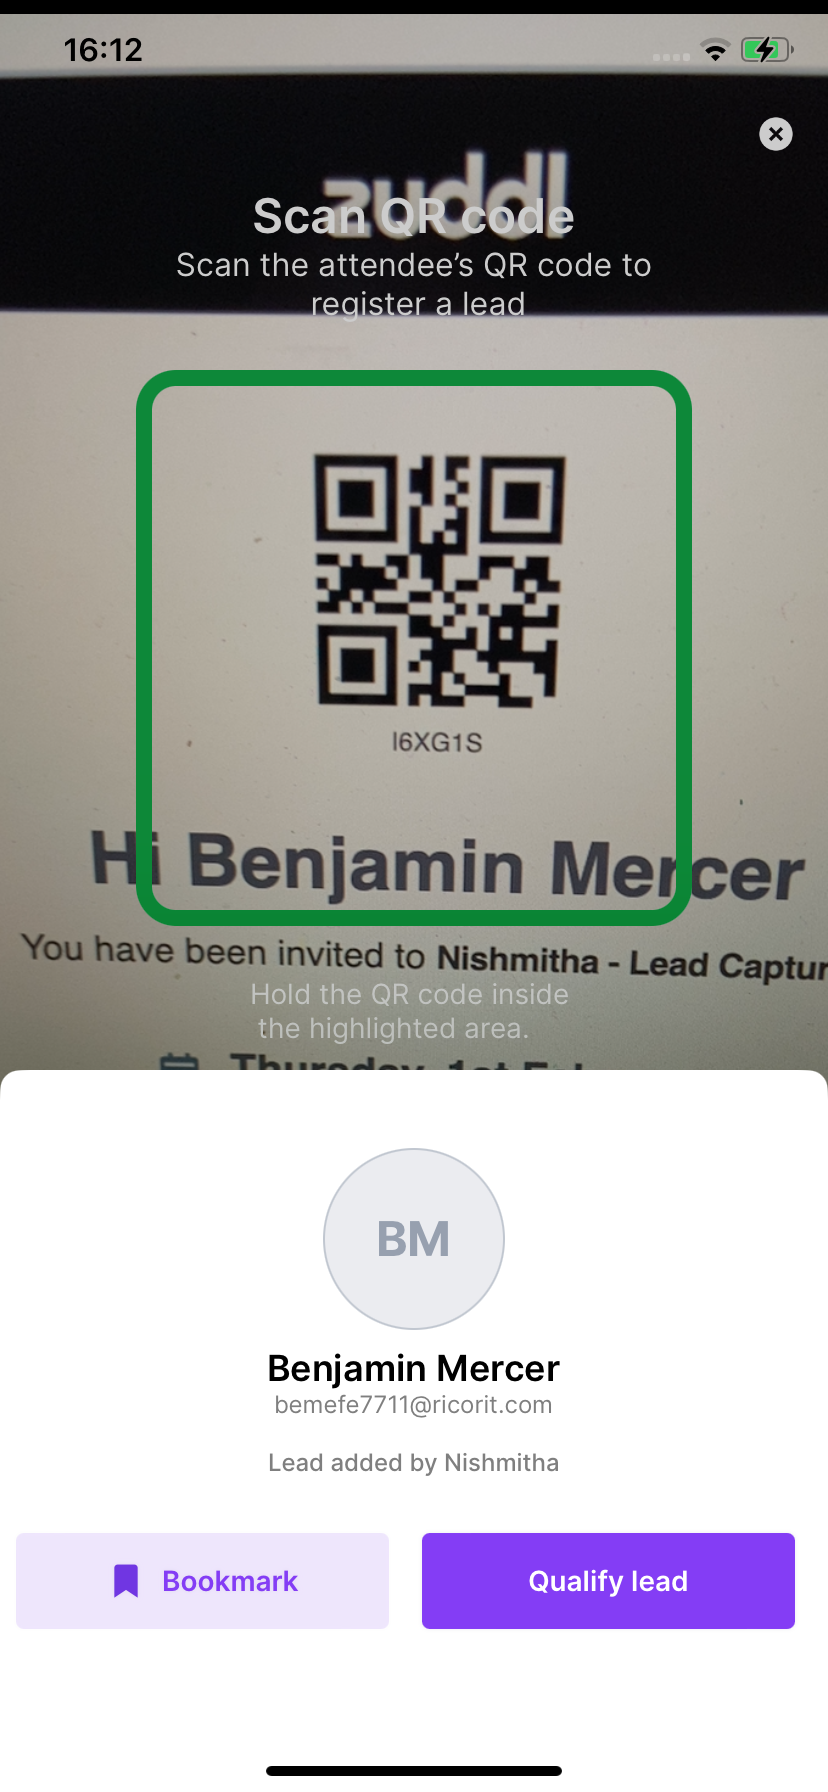
Click Add lead to create a new lead.
Next, you need to enter attendee details to register a lead. Register a lead by scanning attendees' QR codes on their badges. Position the QR code inside the highlighted box section to scan, and the app captures the attendee details.
You can also add speakers as leads in the same way as attendees by scanning their QR code or searching for their names.
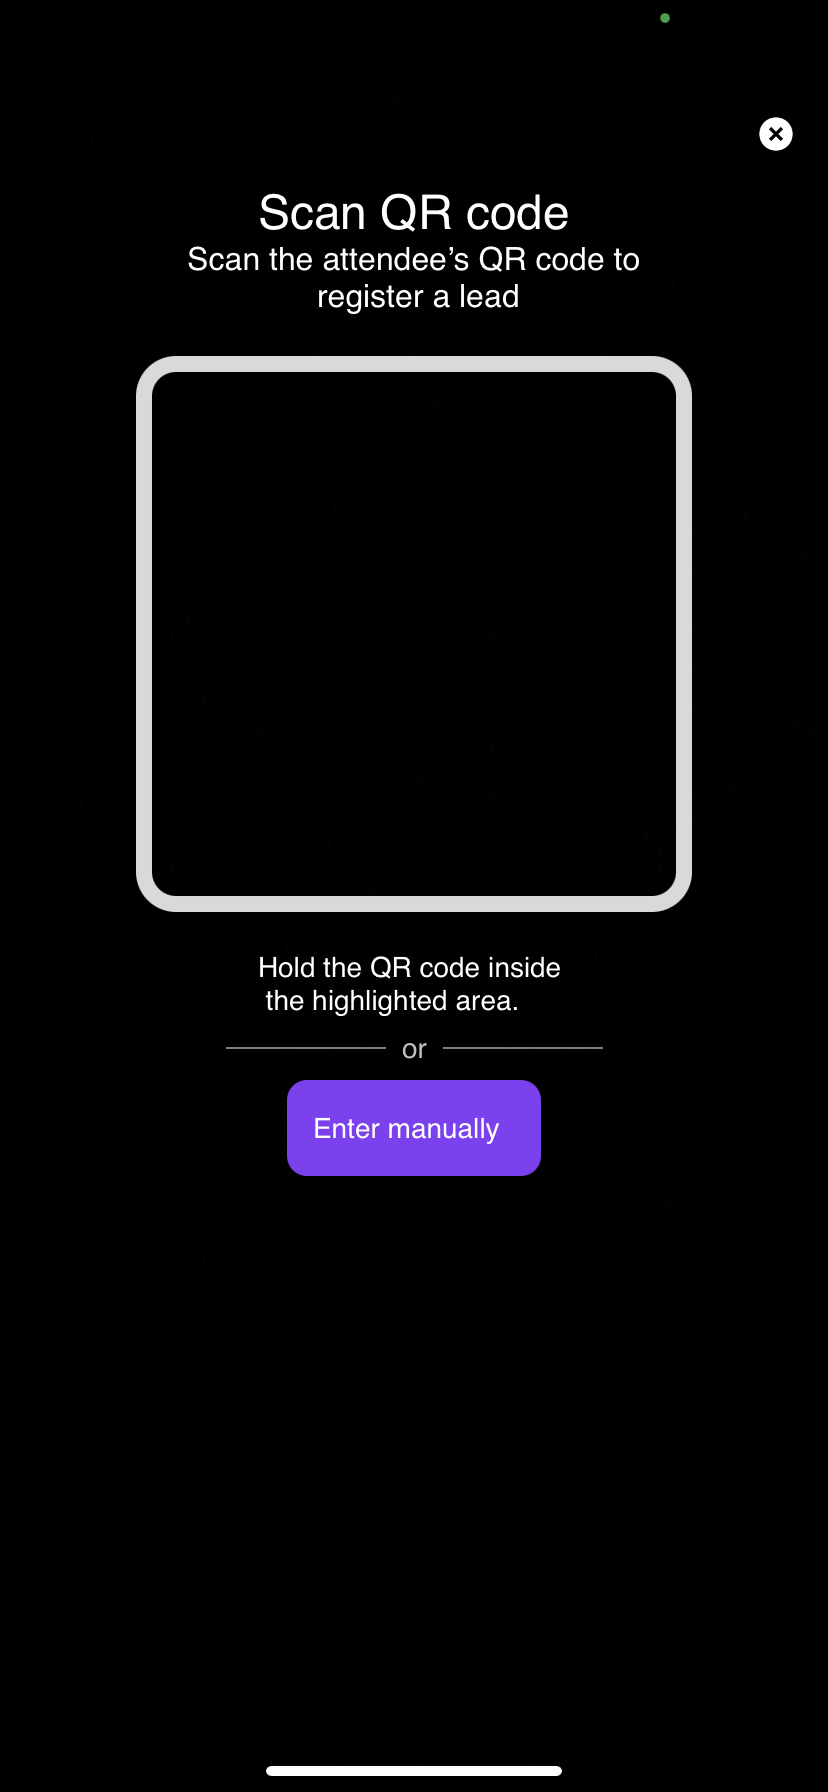
Alternatively, you can also click Enter manually to input the attendee or speaker's email address manually.

Enter Lead Details Manuall.PNG
Click the Add lead button. This will fetch the attendees' details from the Zuddl backend and directly add them as leads.

The newly added lead appears in the lead list as shown below:
Manage Lead data
After you've captured all the leads, you can perform specific actions based on your business needs.
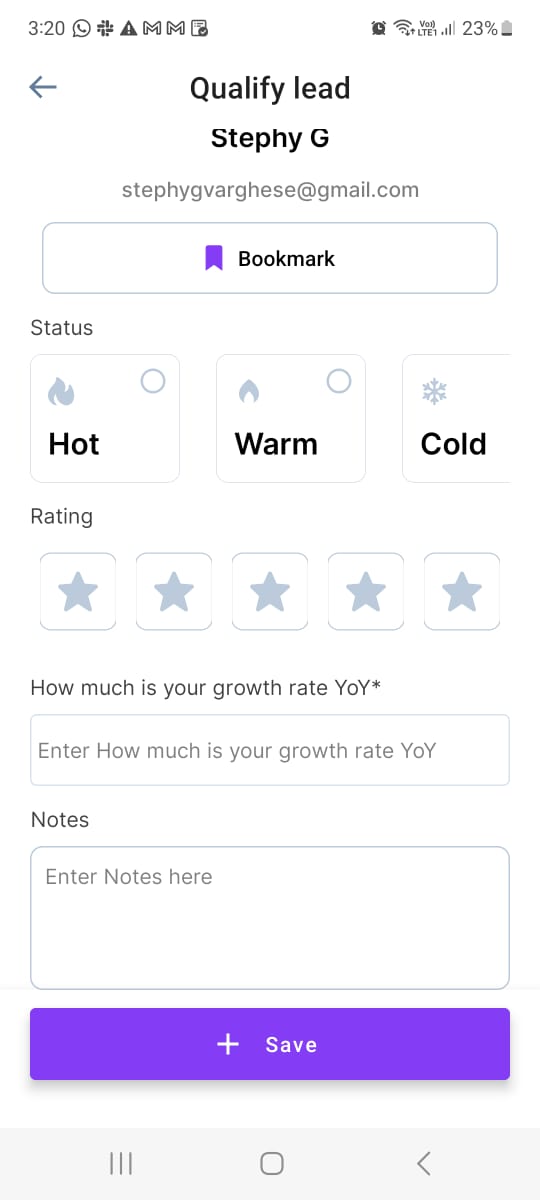
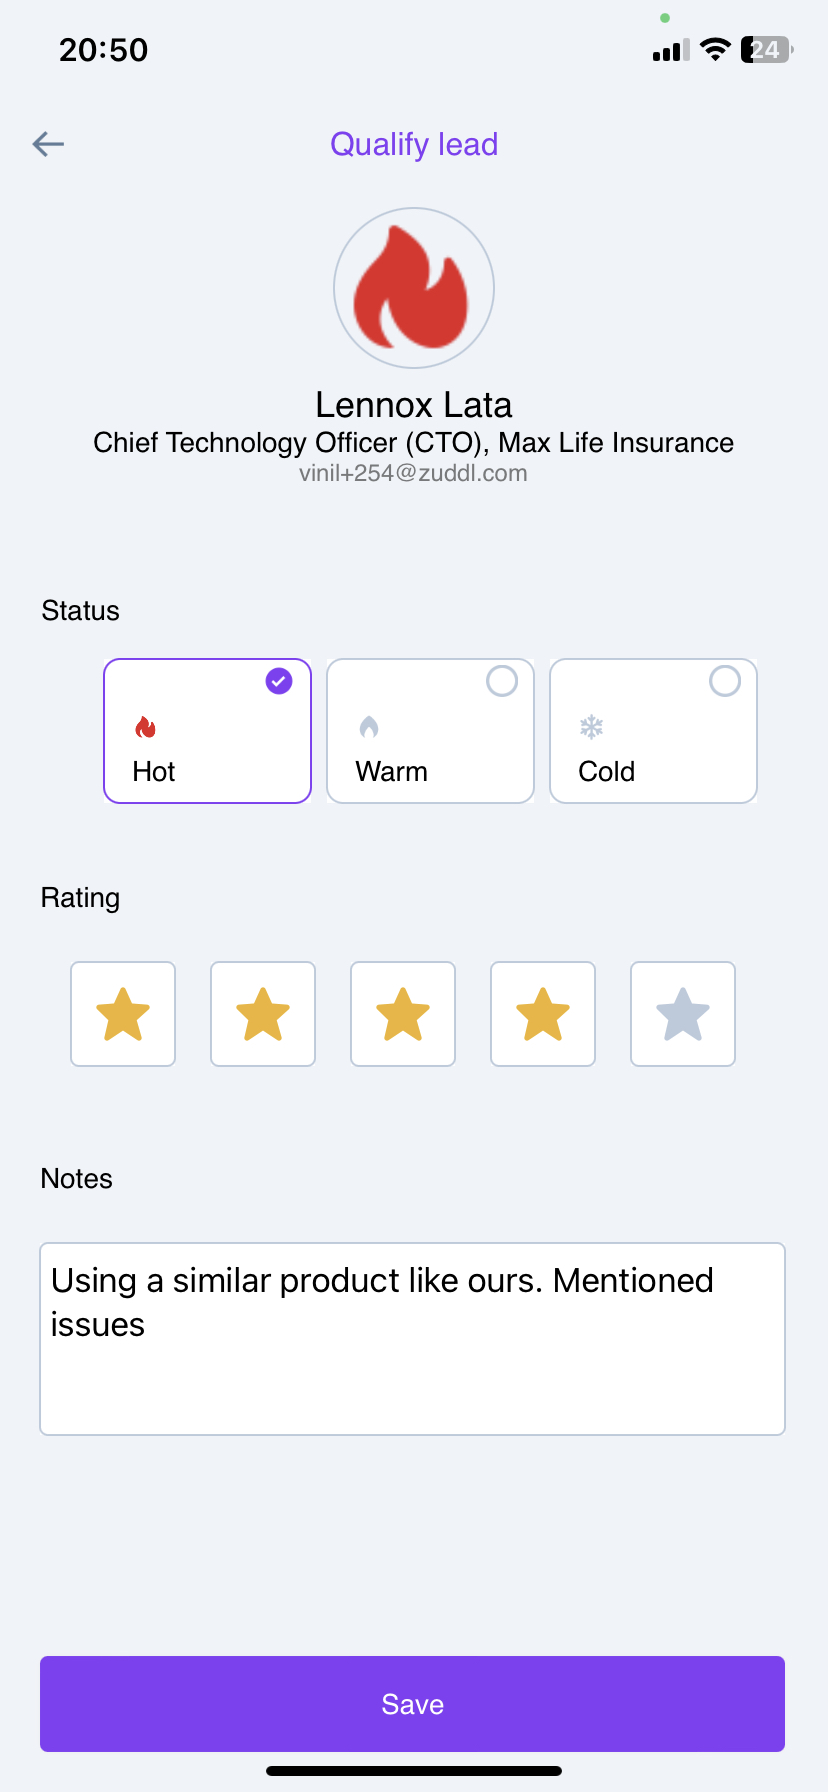
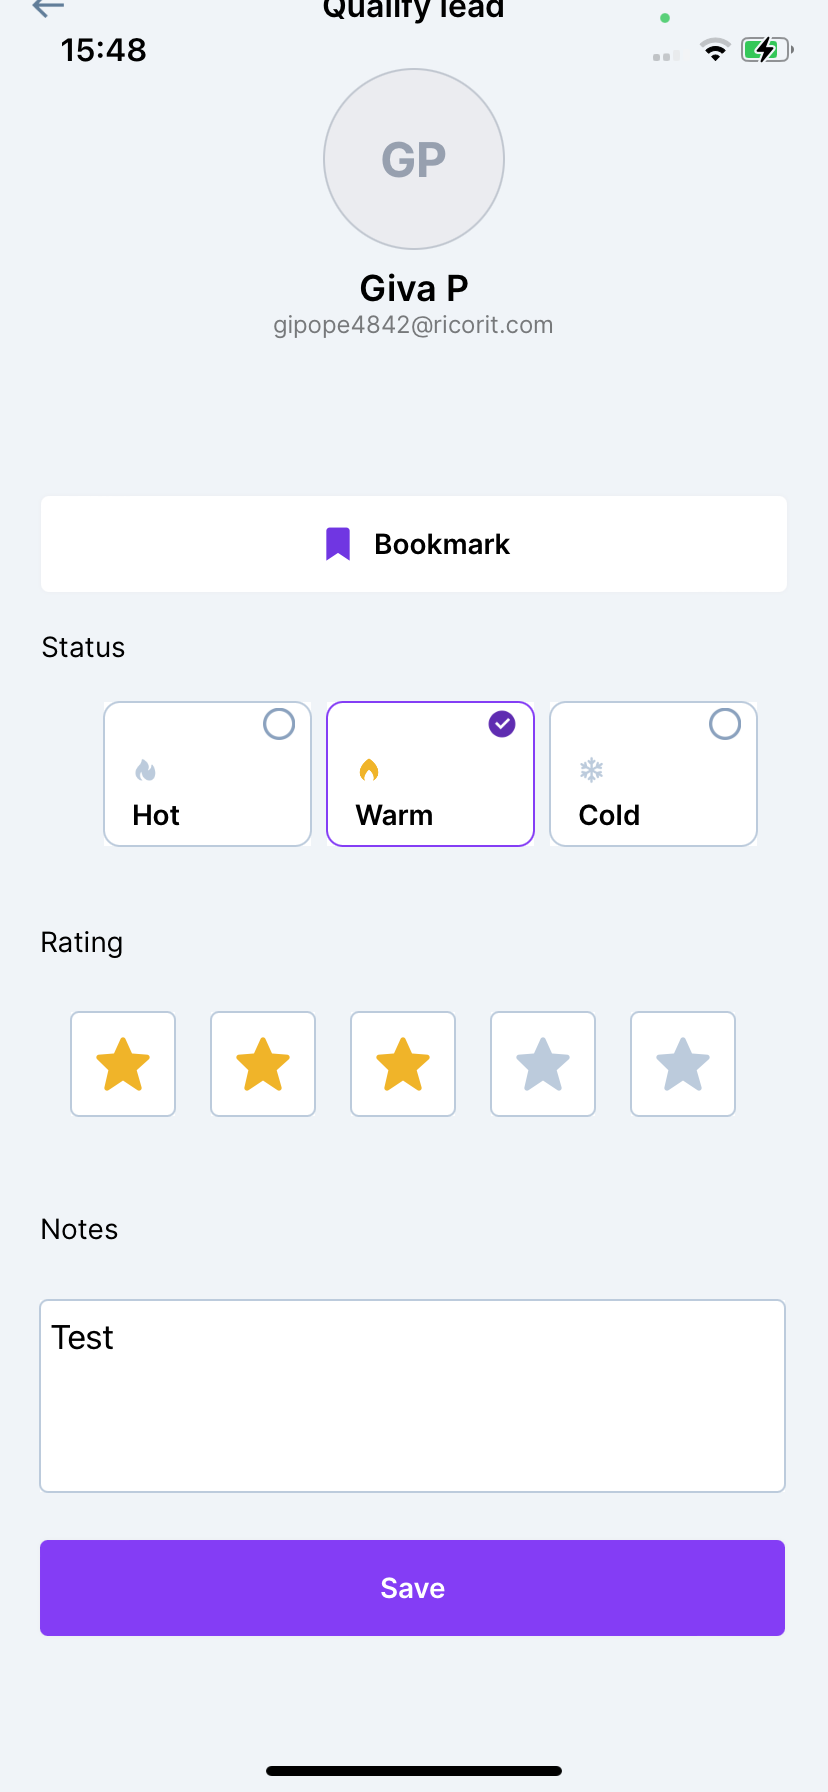
Update a Lead
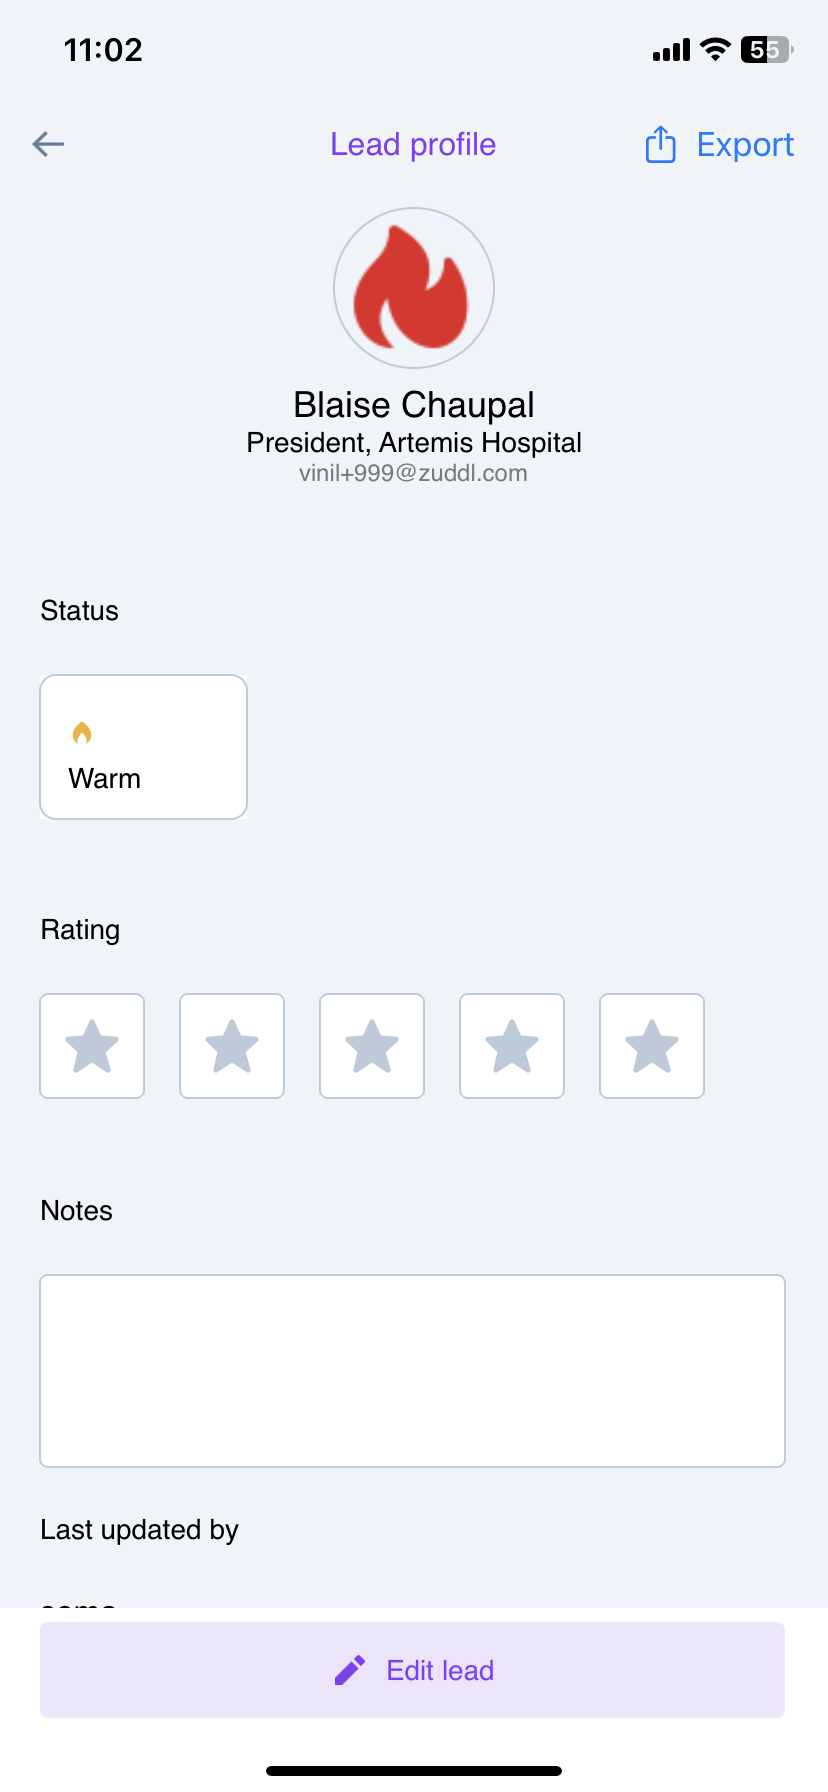
You can view the lead profile, edit the lead Status, and add details such as Ratings or Notes.
Export a Lead
Exporting the list of leads into a suitable format is essential for your business to take further action for the leads.
To export leads from All/selected categories, click the Export link at the top-right corner for a category and select the attendees you want to export.
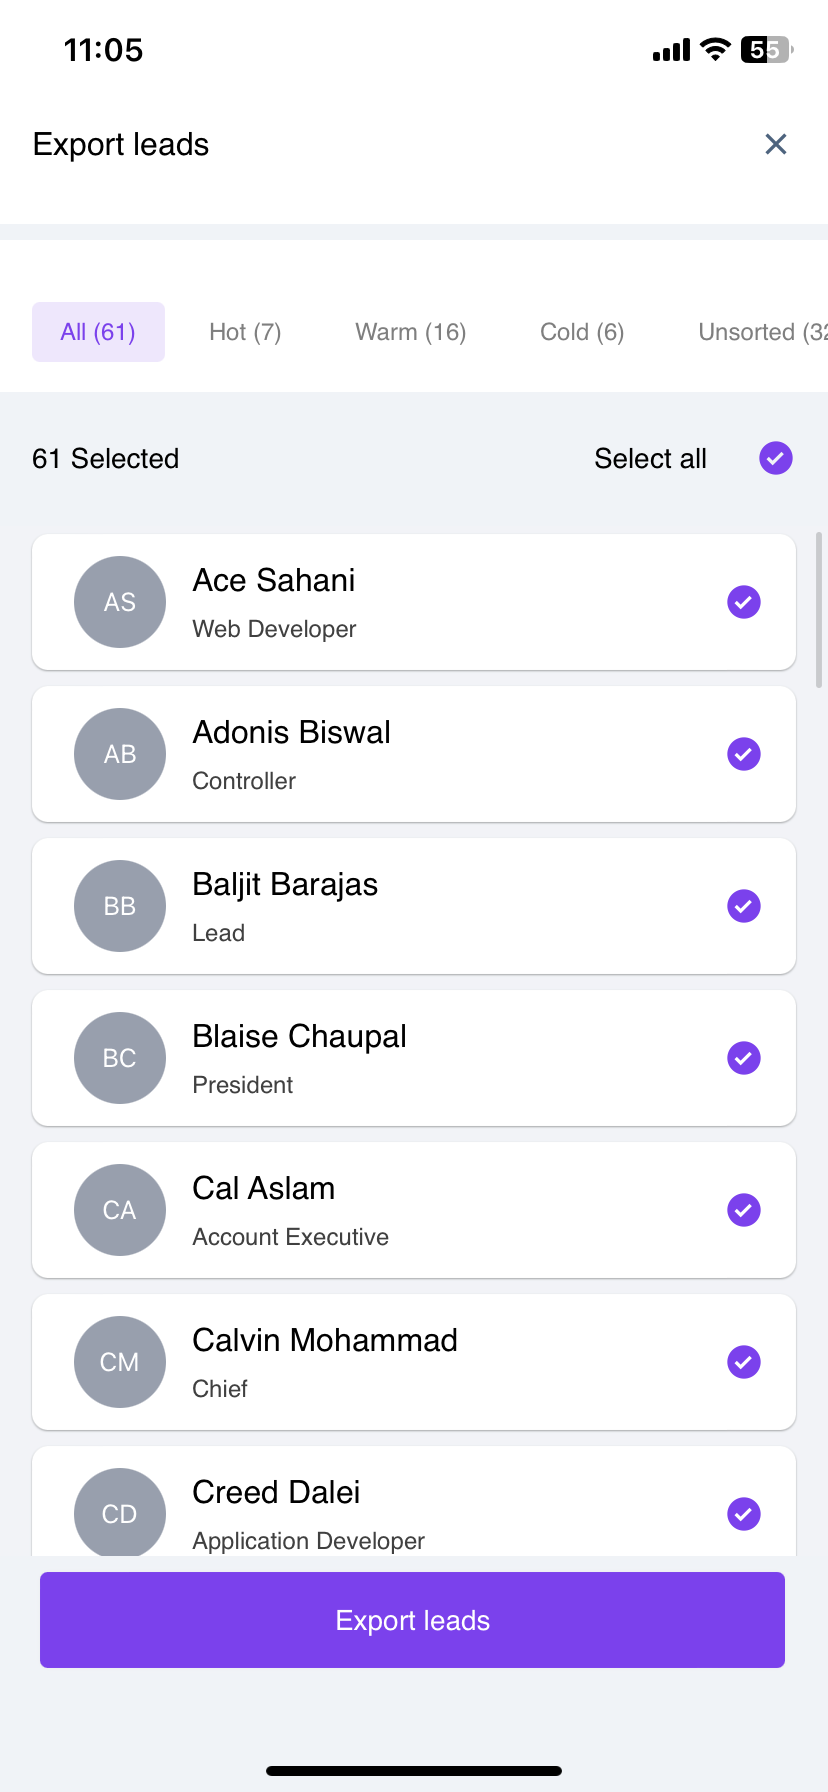
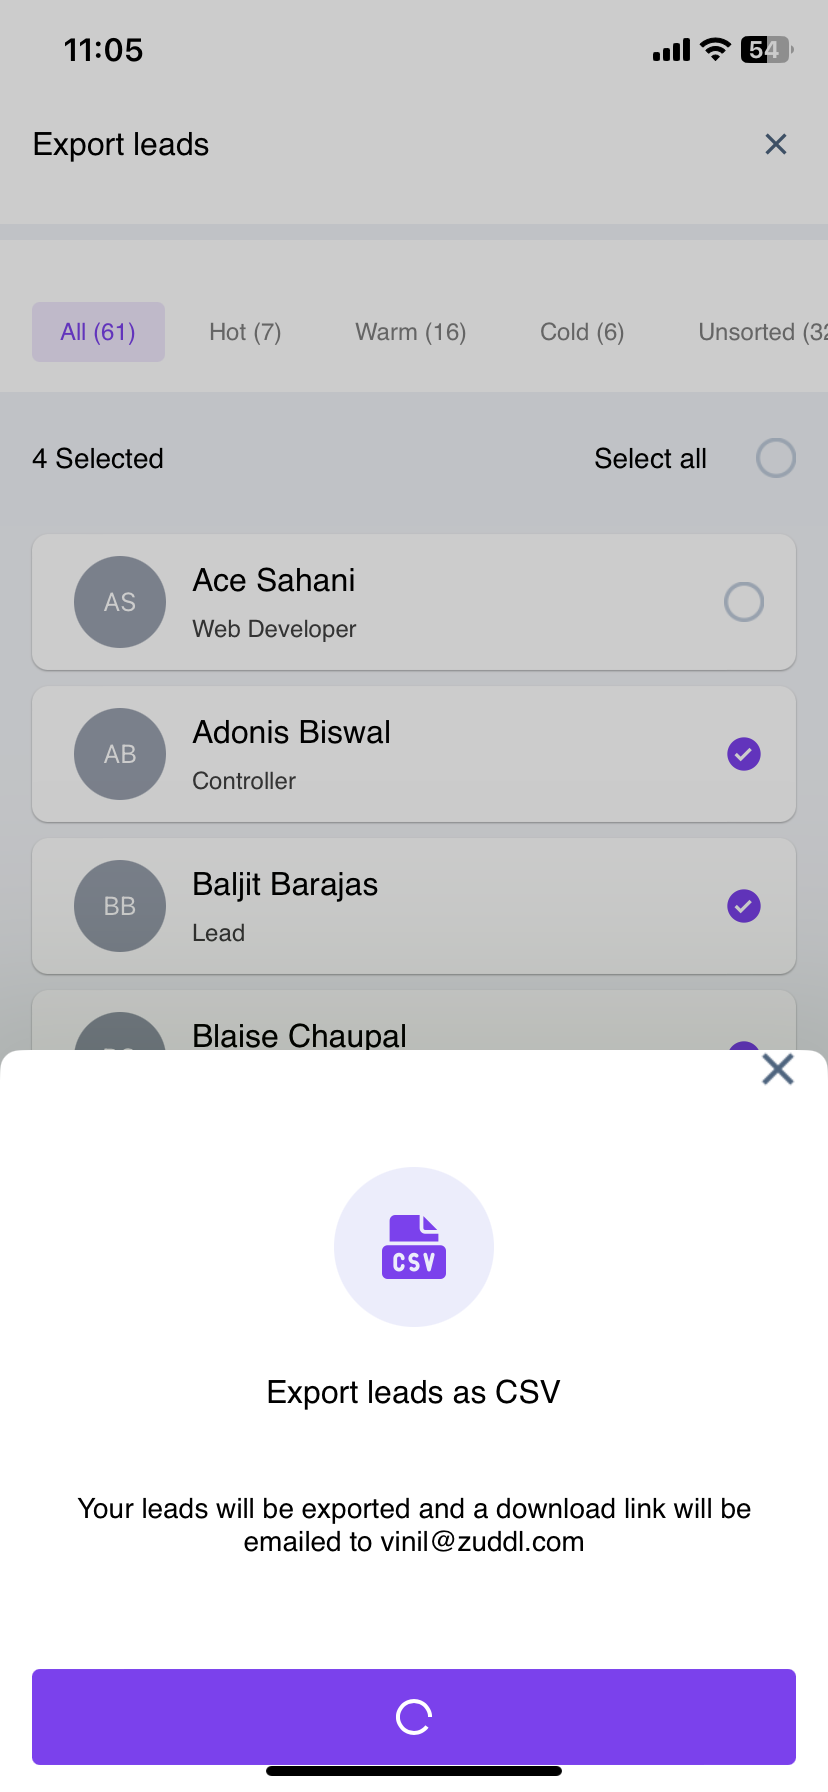
Click Export leads. This exports the leads into a CSV file and sends it to your email address.
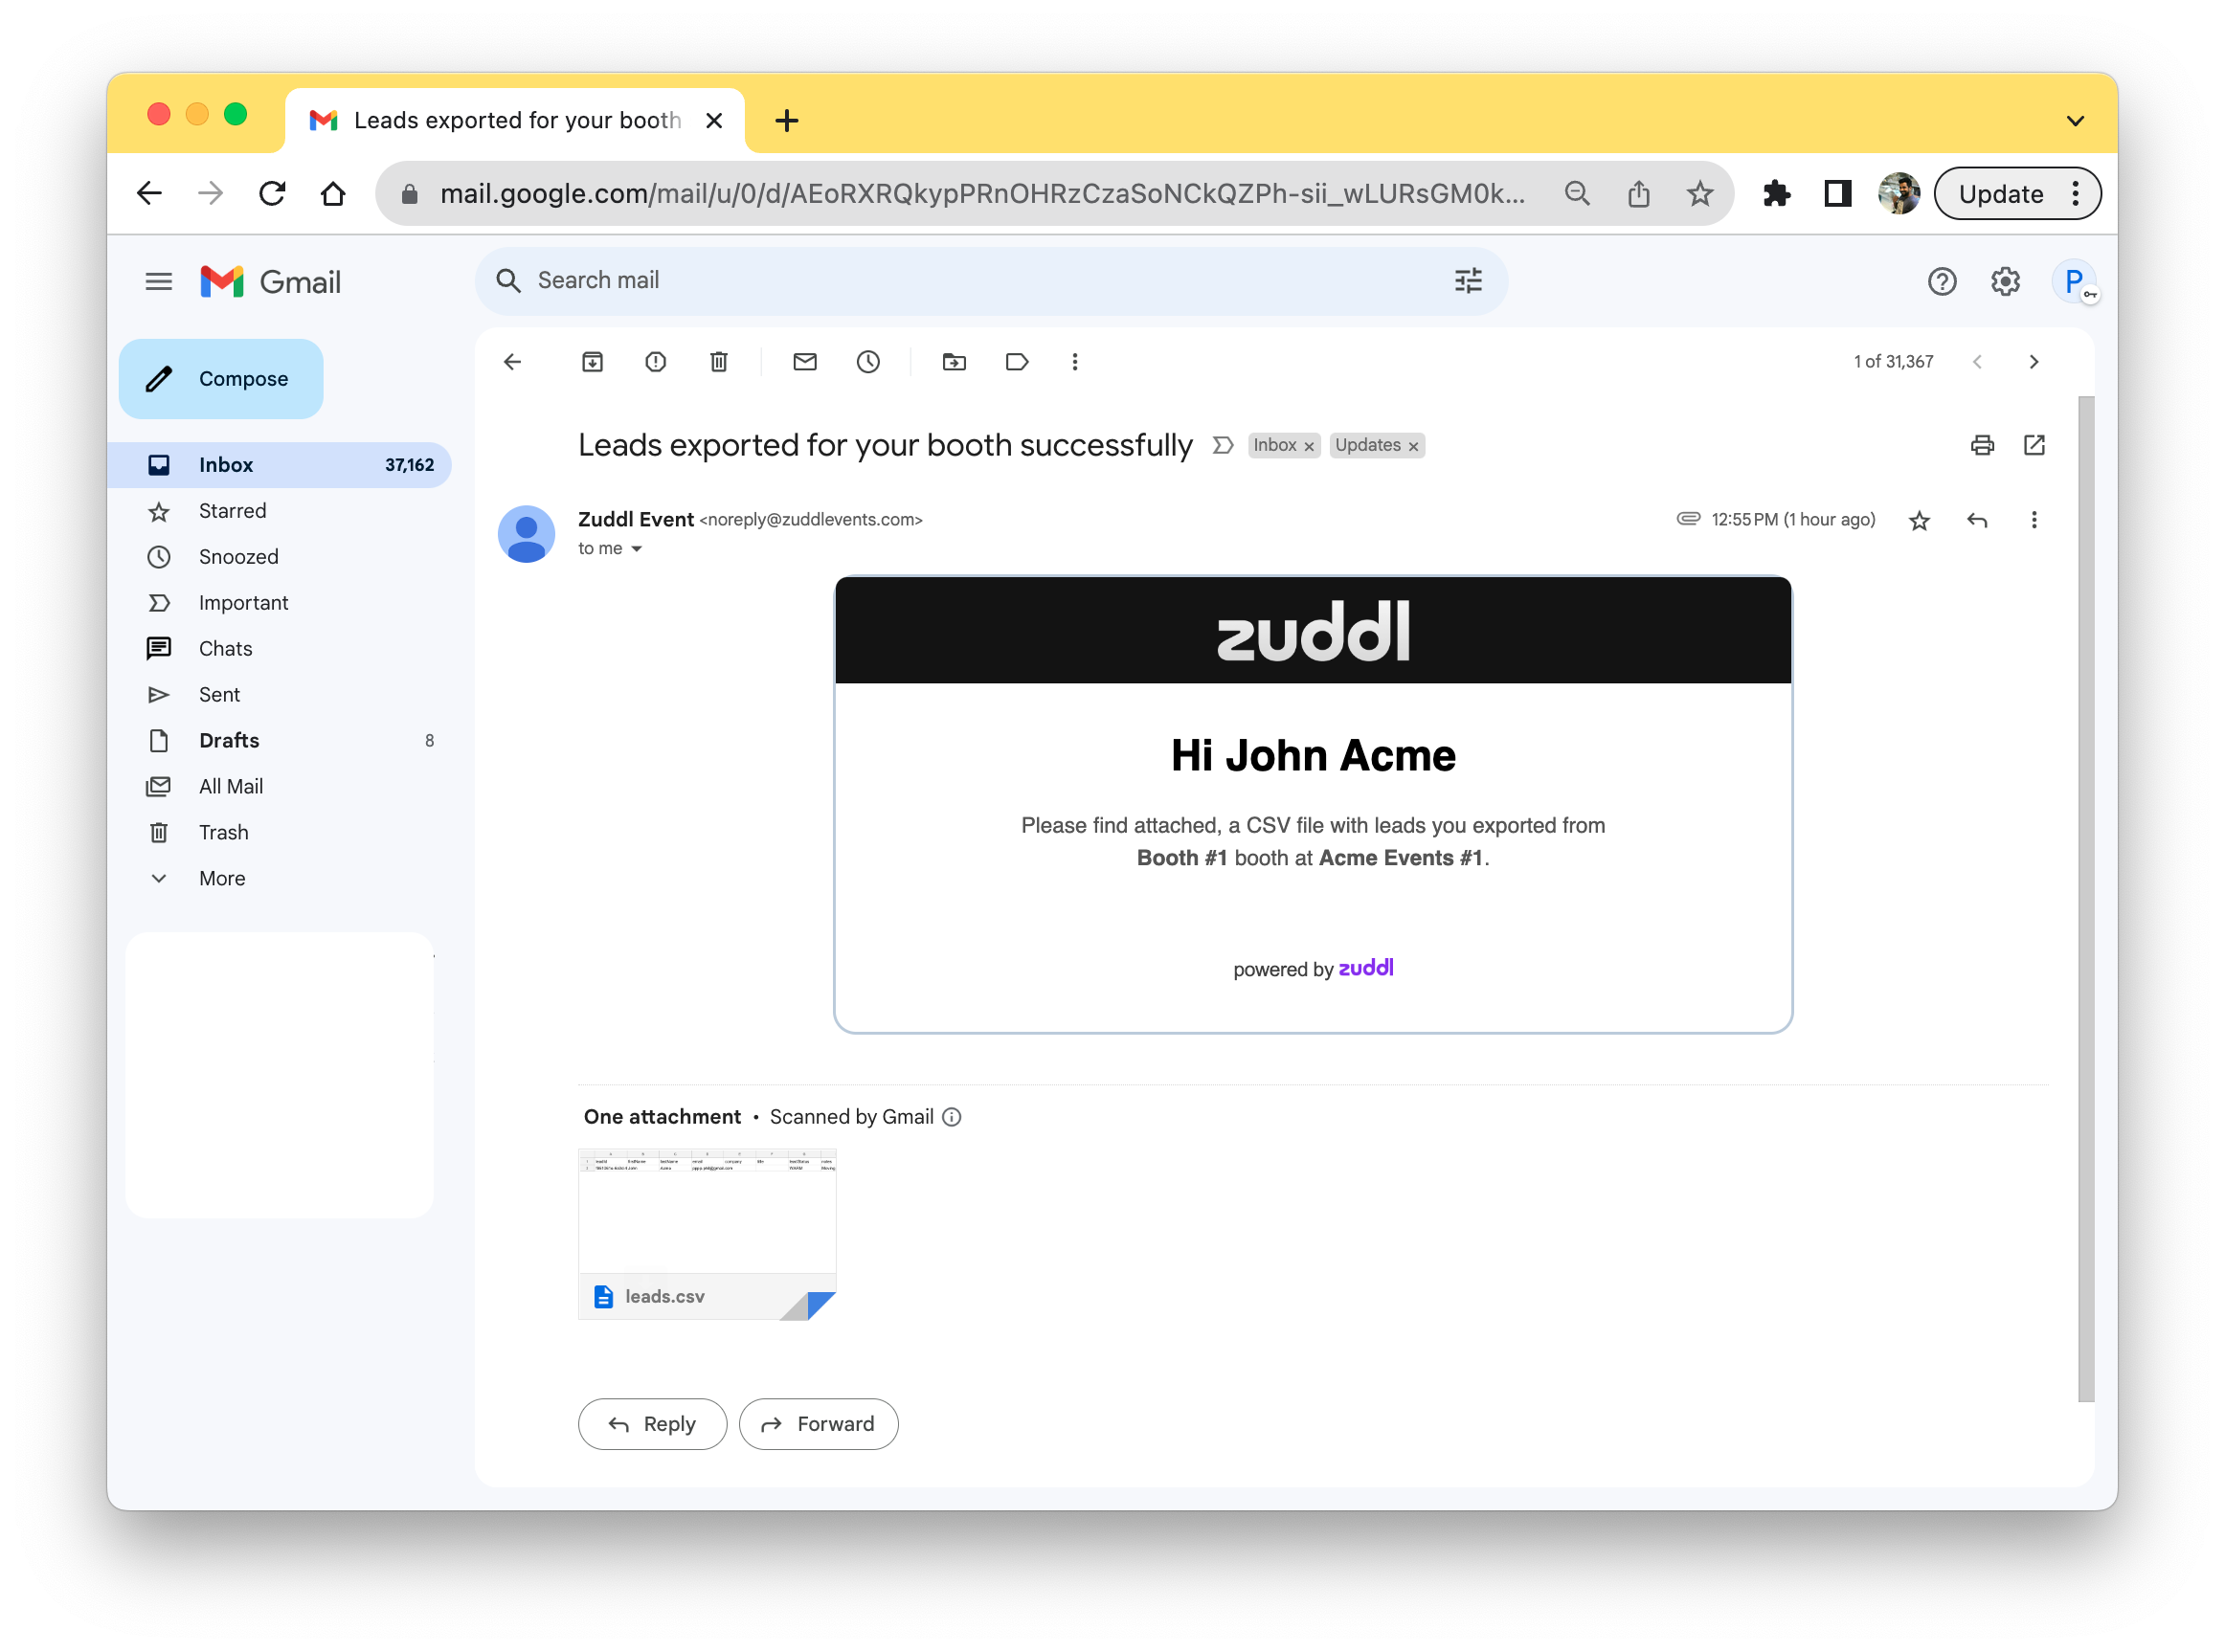
The leads are sent as an email attachment, as shown below:
If you've integrated your Zuddl account with any natively supported integrations with activity capture support, the leads captured using this app are not considered as attended booth activity.
Export a single lead
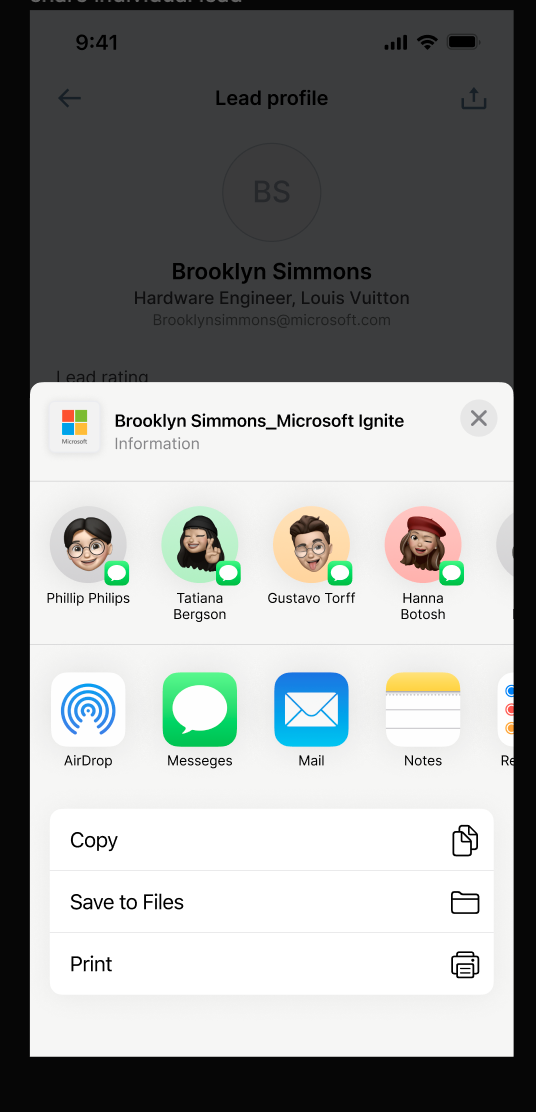
You can also export a single lead and share it with your team members via WhatsApp or other messaging apps. To export a single lead,
Go to the lead profile and click on the Export button.
This shows the different mediums through which you can share the lead. For instance, the screenshot below shows how a lead is shared via SMS.
Bookmarking
Bookmarking in the Zuddl app works just like bookmarking in other applications. Bookmarking helps booth owners save attendees before taking further action on them. Once bookmarked, the attendee is auto-allocated as a lead.
In addition to scanning the QR code, booth owners can bookmark by searching for attendees by their email address.
Organizers can also search for attendees by their name to bookmark.
To bookmark,
Enter the attendee or speaker's email to add as a lead. This shows their details in a pop-up window.
On the pop-up, select the Bookmark button. This adds the attendees to the list of bookmarked attendees. The attendee details screen shows the attendee as Lead added bookmarks.

You can click the Lead added to bookmarks button again to remove it from the bookmarks.
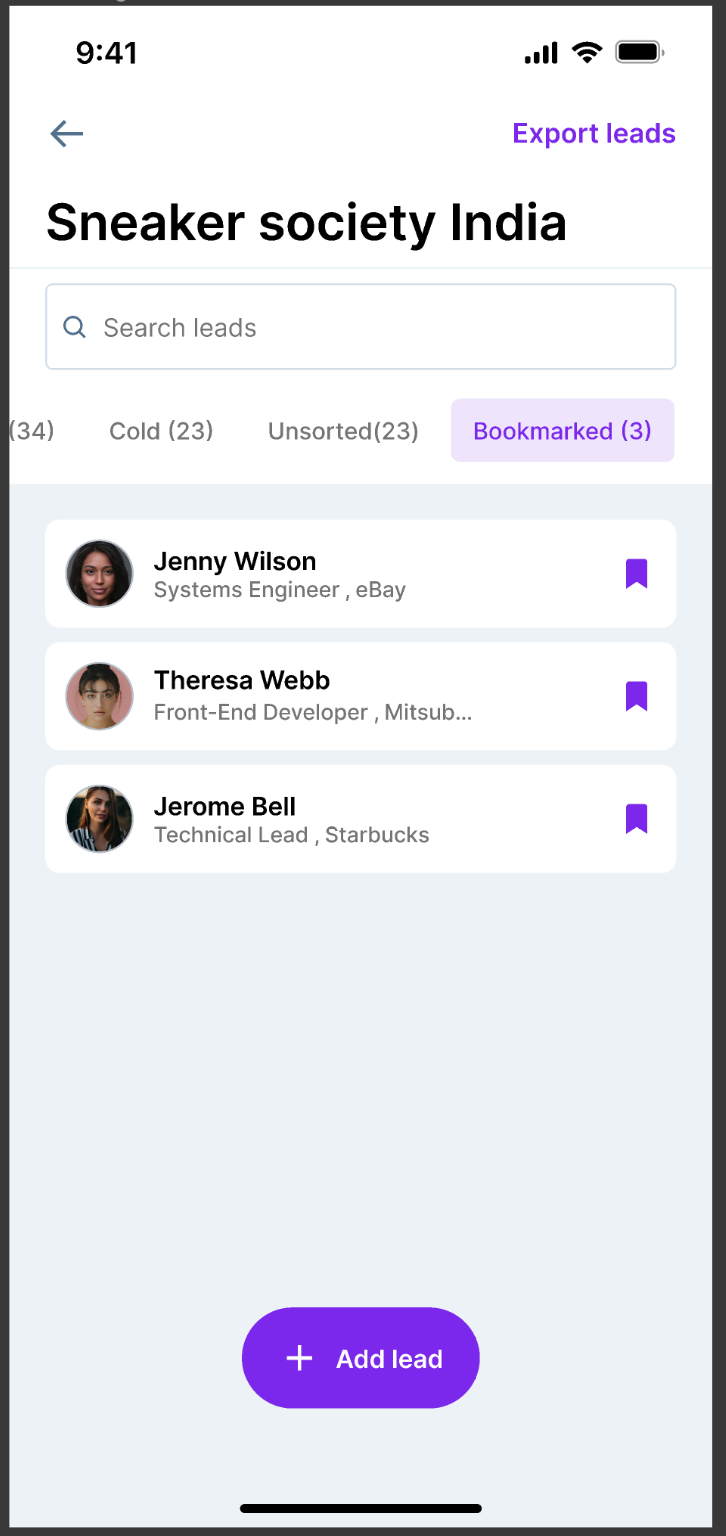
To bookmark an attendee after you've added them as a lead, click the bookmark icon beside each lead name in the leads list.
This adds the lead under the Bookmarked tab, as shown below:
Also, you can go to the lead details page and click the Bookmark button.
Lead capture for App users
You can add people outside your team as app users for the lead capture app so that they can capture leads through the app. Organizers and moderators can see the full list of attendees of that event under the Attendee tab, as shown below. For sponsor booths, app users cannot access the attendee list; they can only see the lead they've captured. Showing an attendee list is useful for field events (smaller-sized events) where the app user would need access to a complete attendee list to take action.

The below table shows list access for different booth types and roles.
RoleBooth typeAccess | ||
Organizer, Moderator | Organizer booth (or default booth) and all booth types | Can view full event attendee list |
App user or booth owners | Sponsor booth | Only leads list |
App user or booth owners (exclusive access given by organizer) | Organizer booth | Can view full event attendee list |
You can create app users from your event dashboard. To create
Go to your Zuddl dashboard.
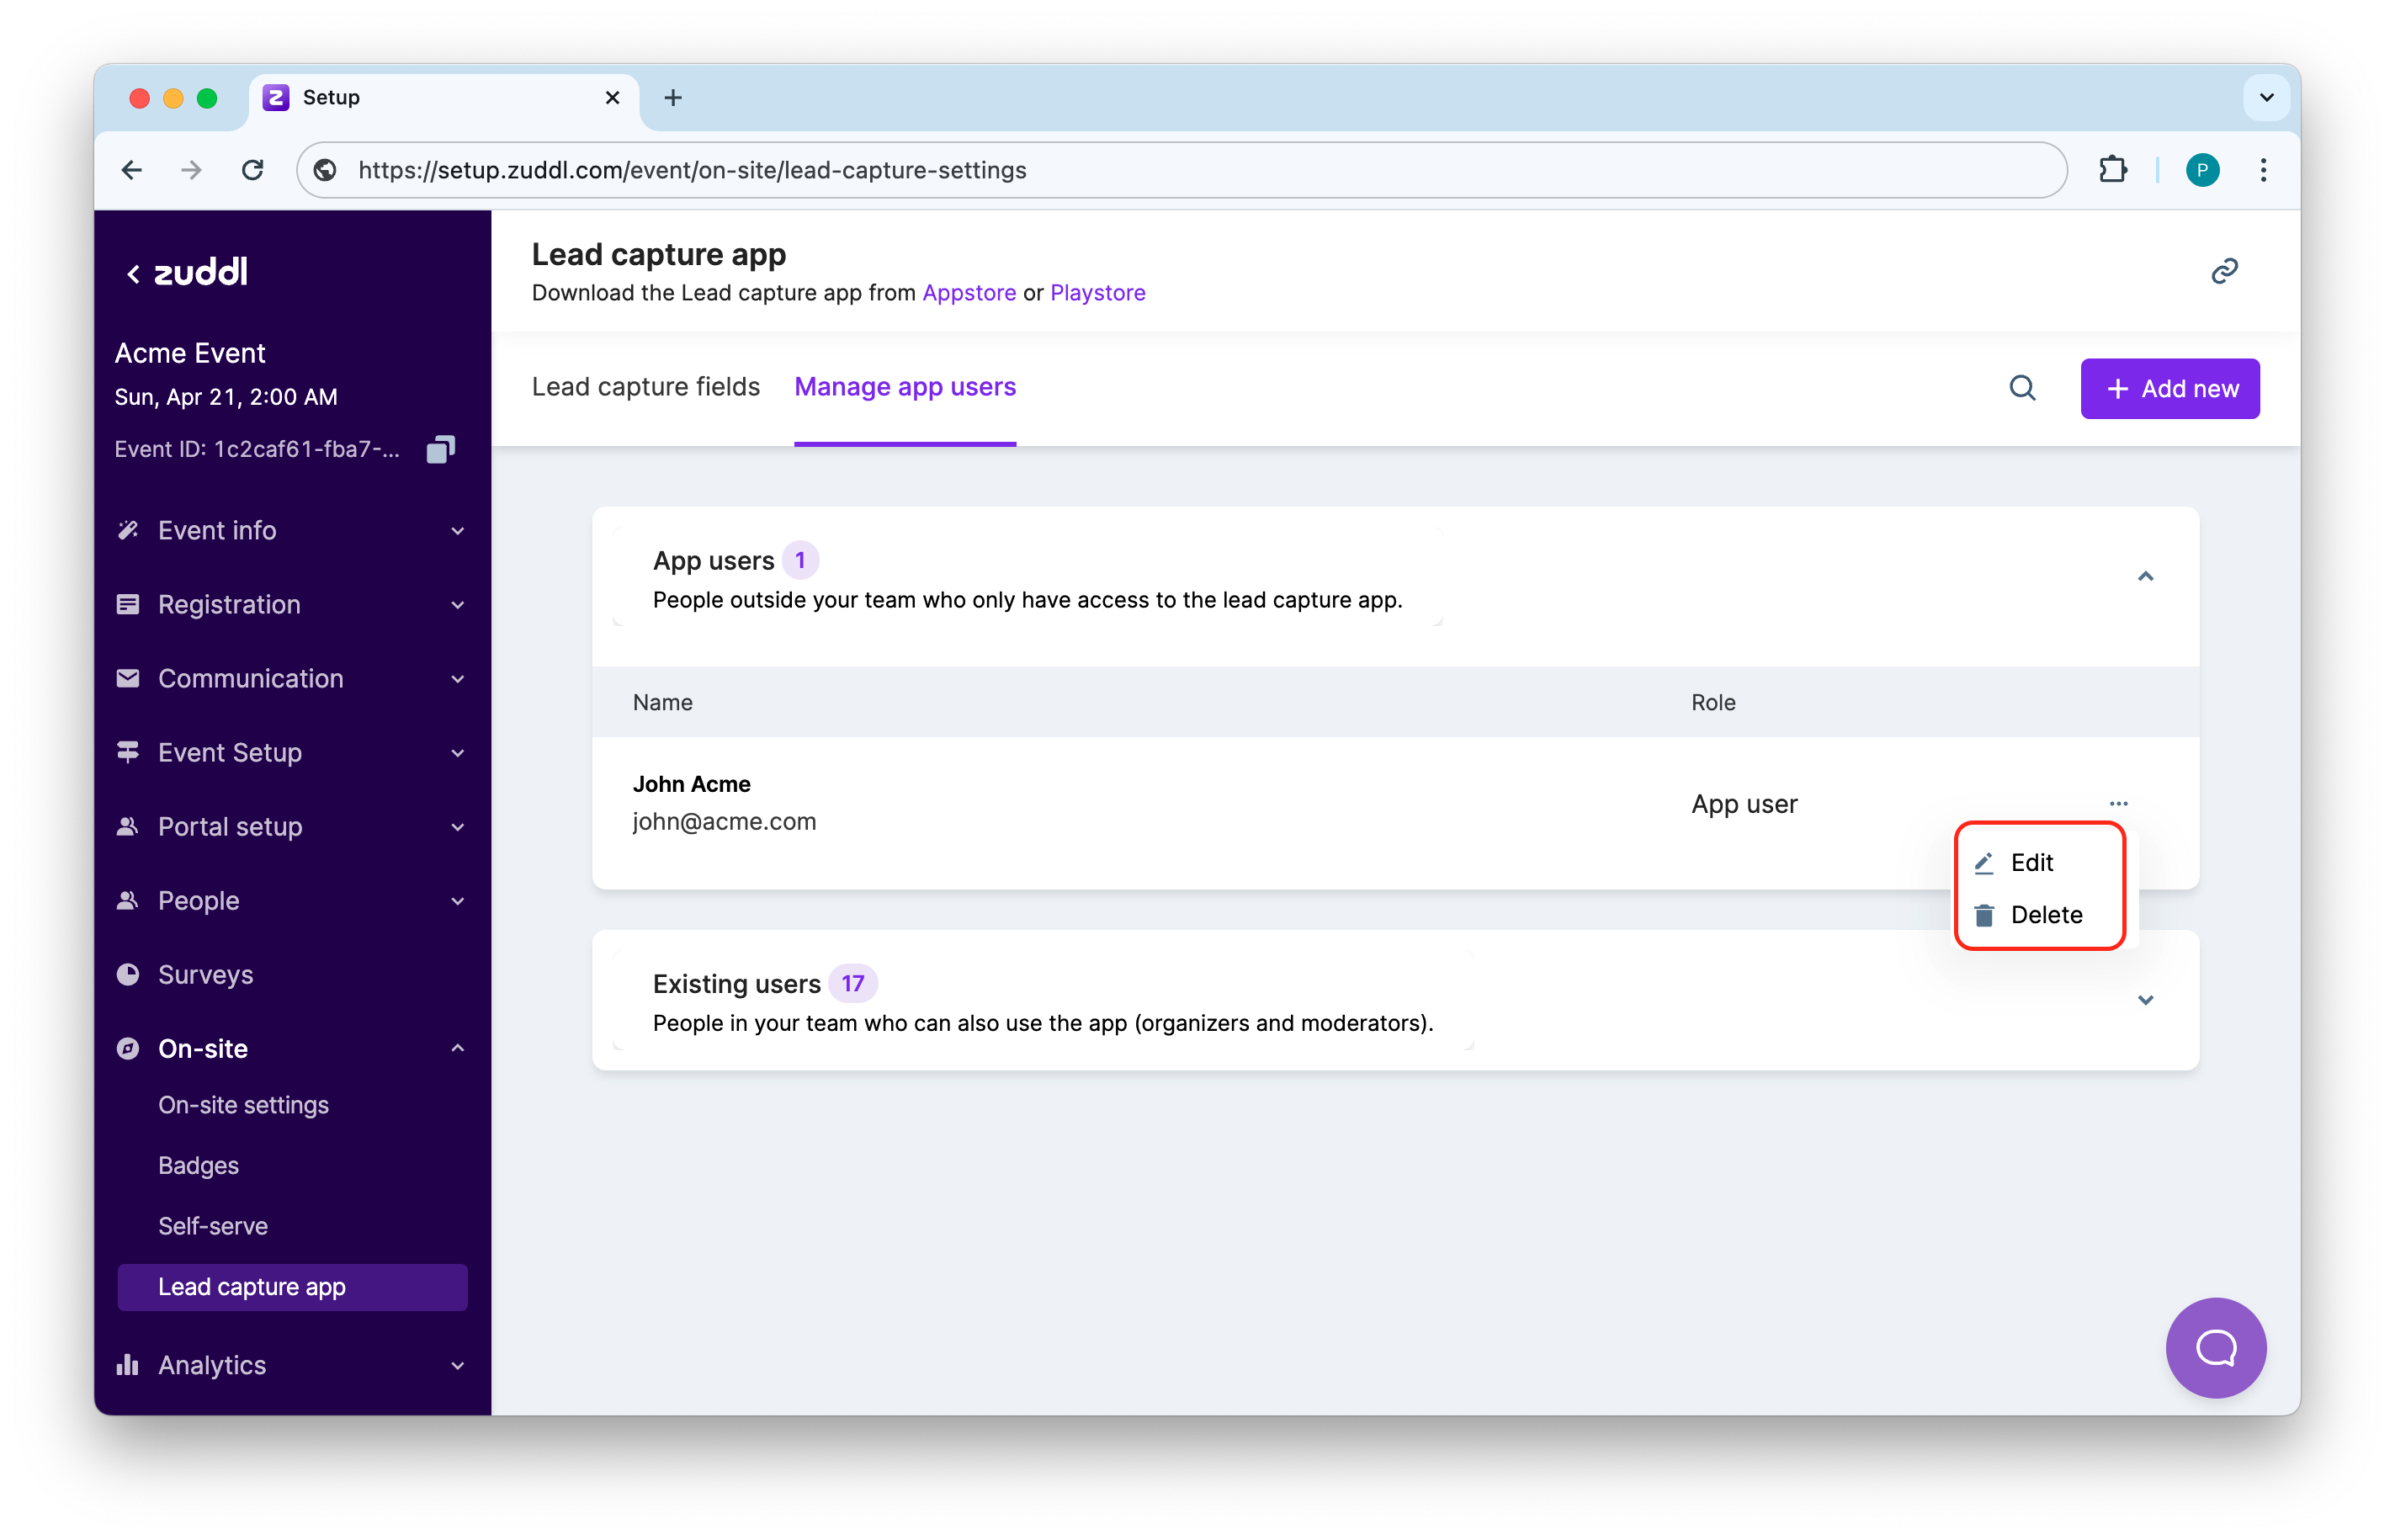
Navigate to Onsite > Lead capture app and select the Manage app users tab.
Click +Add new to add a new app user.
By default, all booth owners are added app users.

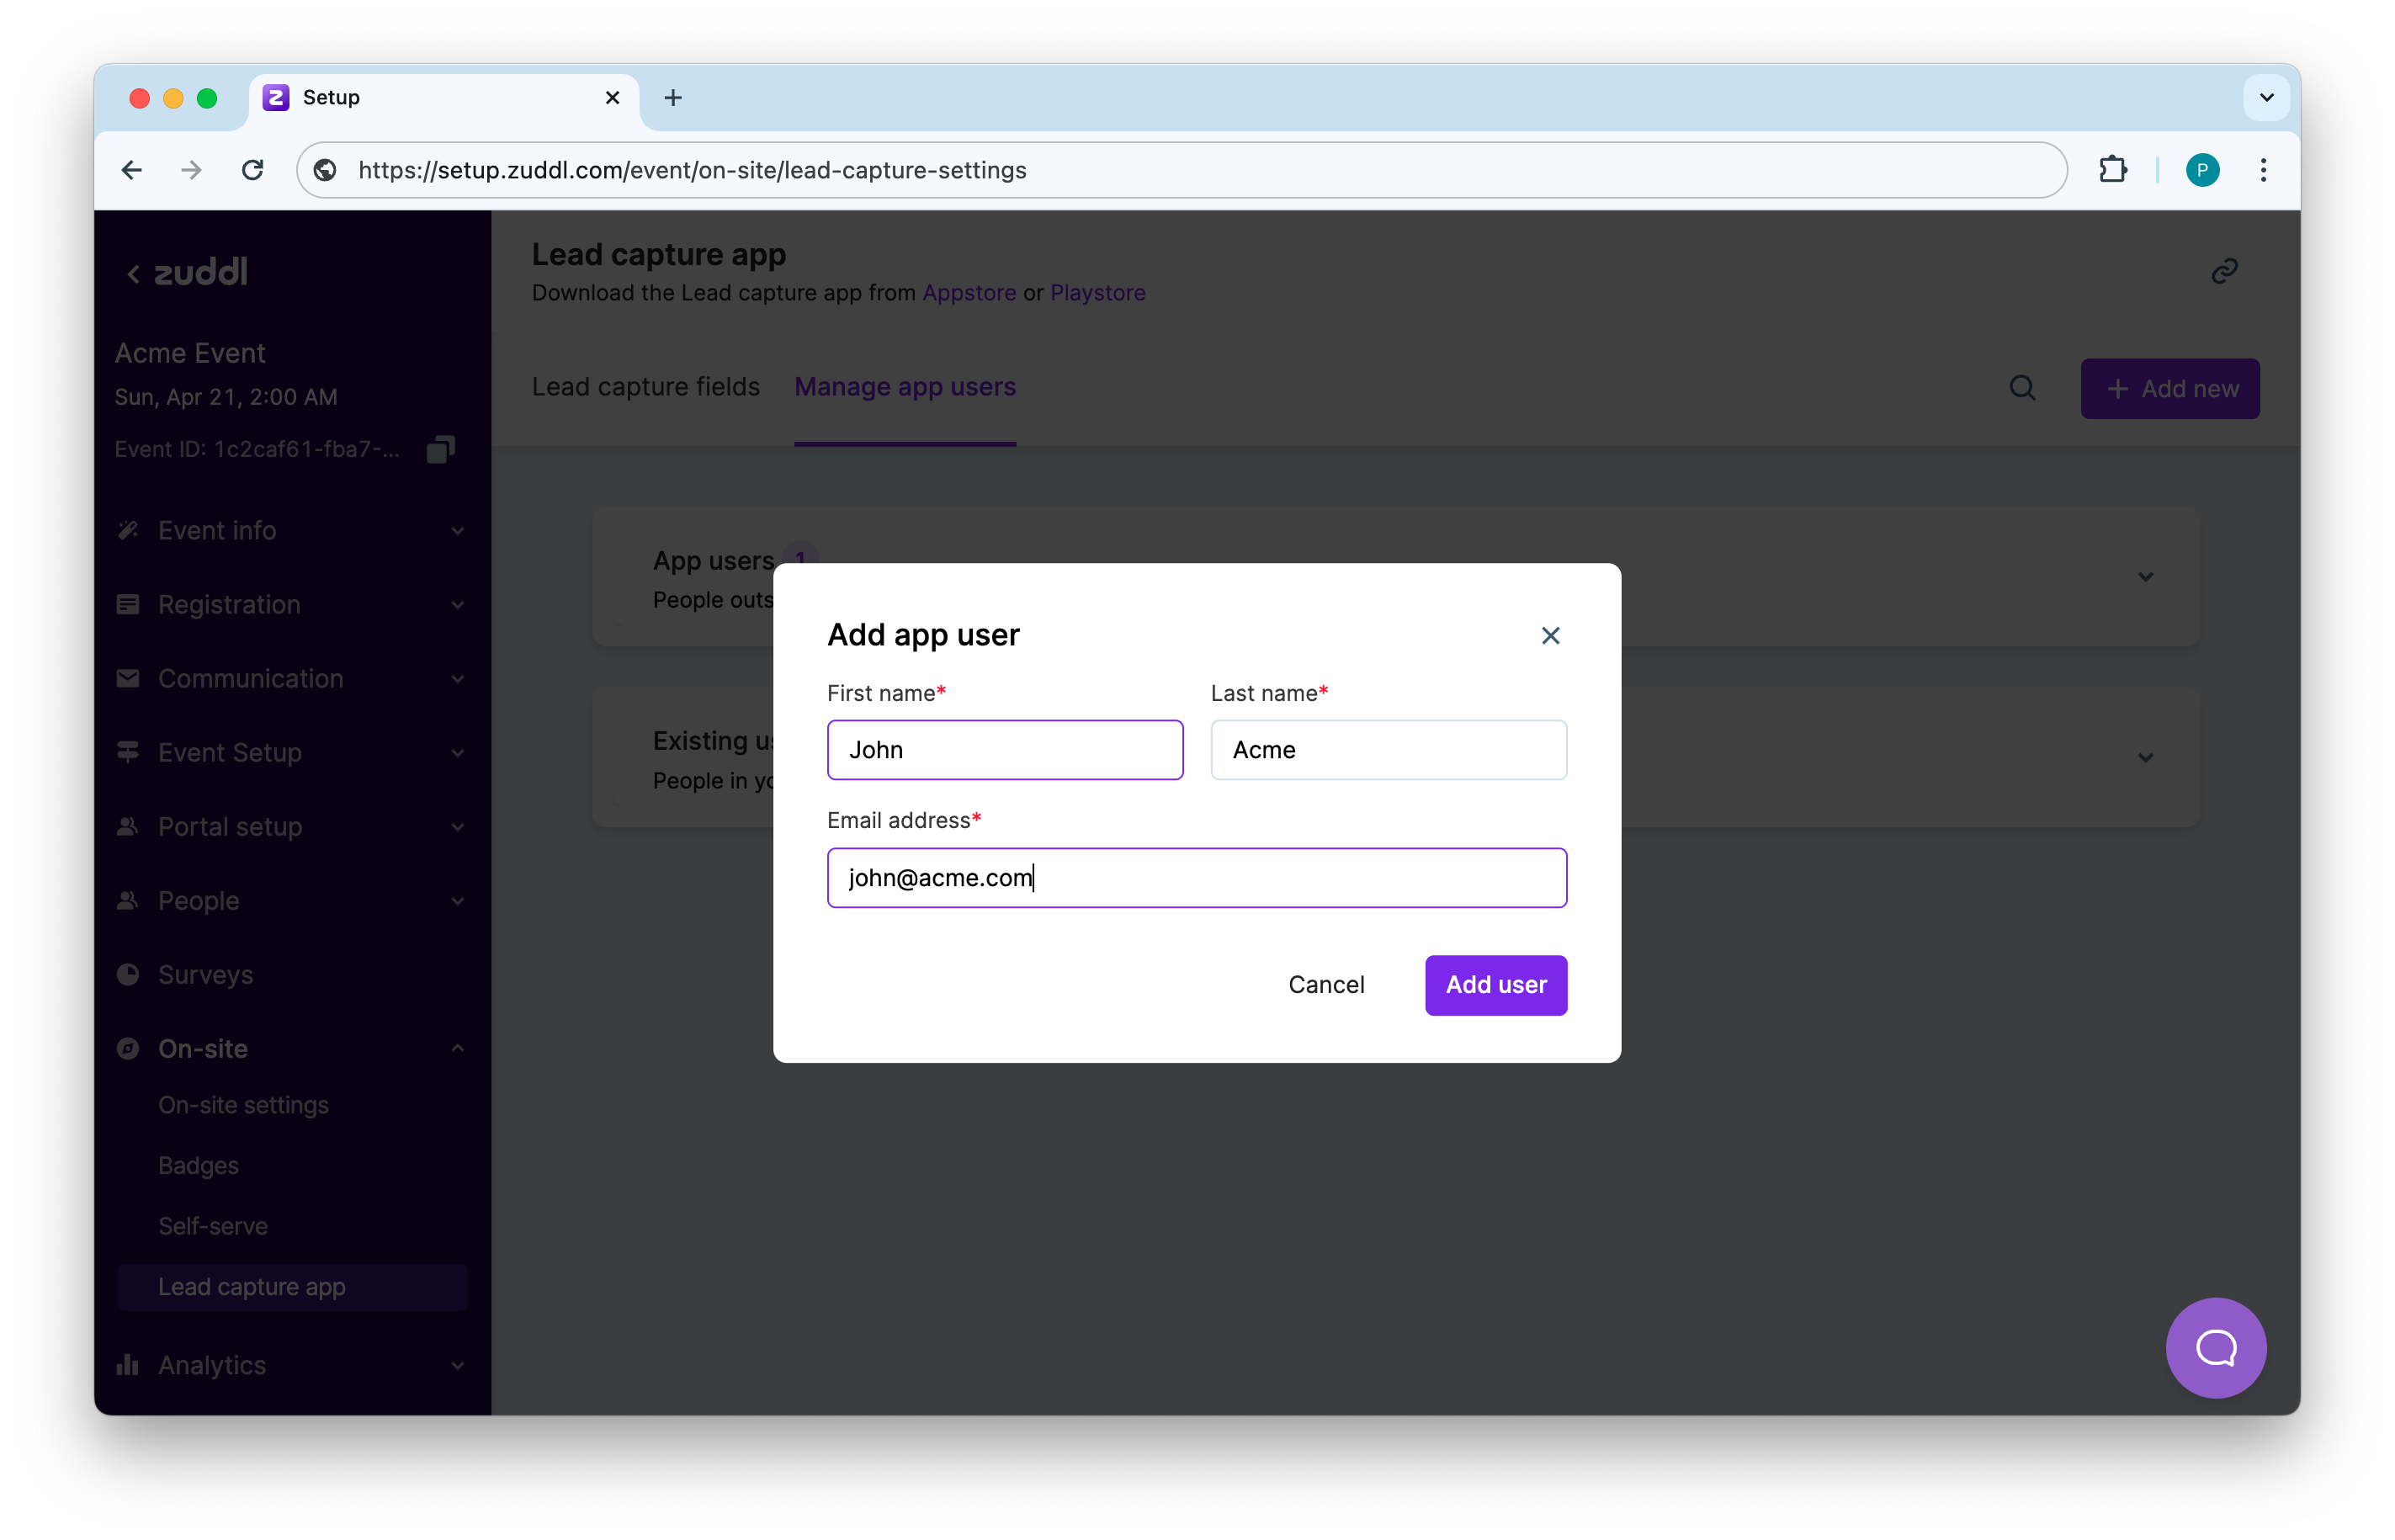
On the add new app user form, enter the following:
First name: The first name of the user
Last name: The last name of the user
Email address: The user's email address by which the user can log in to the lead capture app.
You can also edit or delete app users.
Lead capture fields
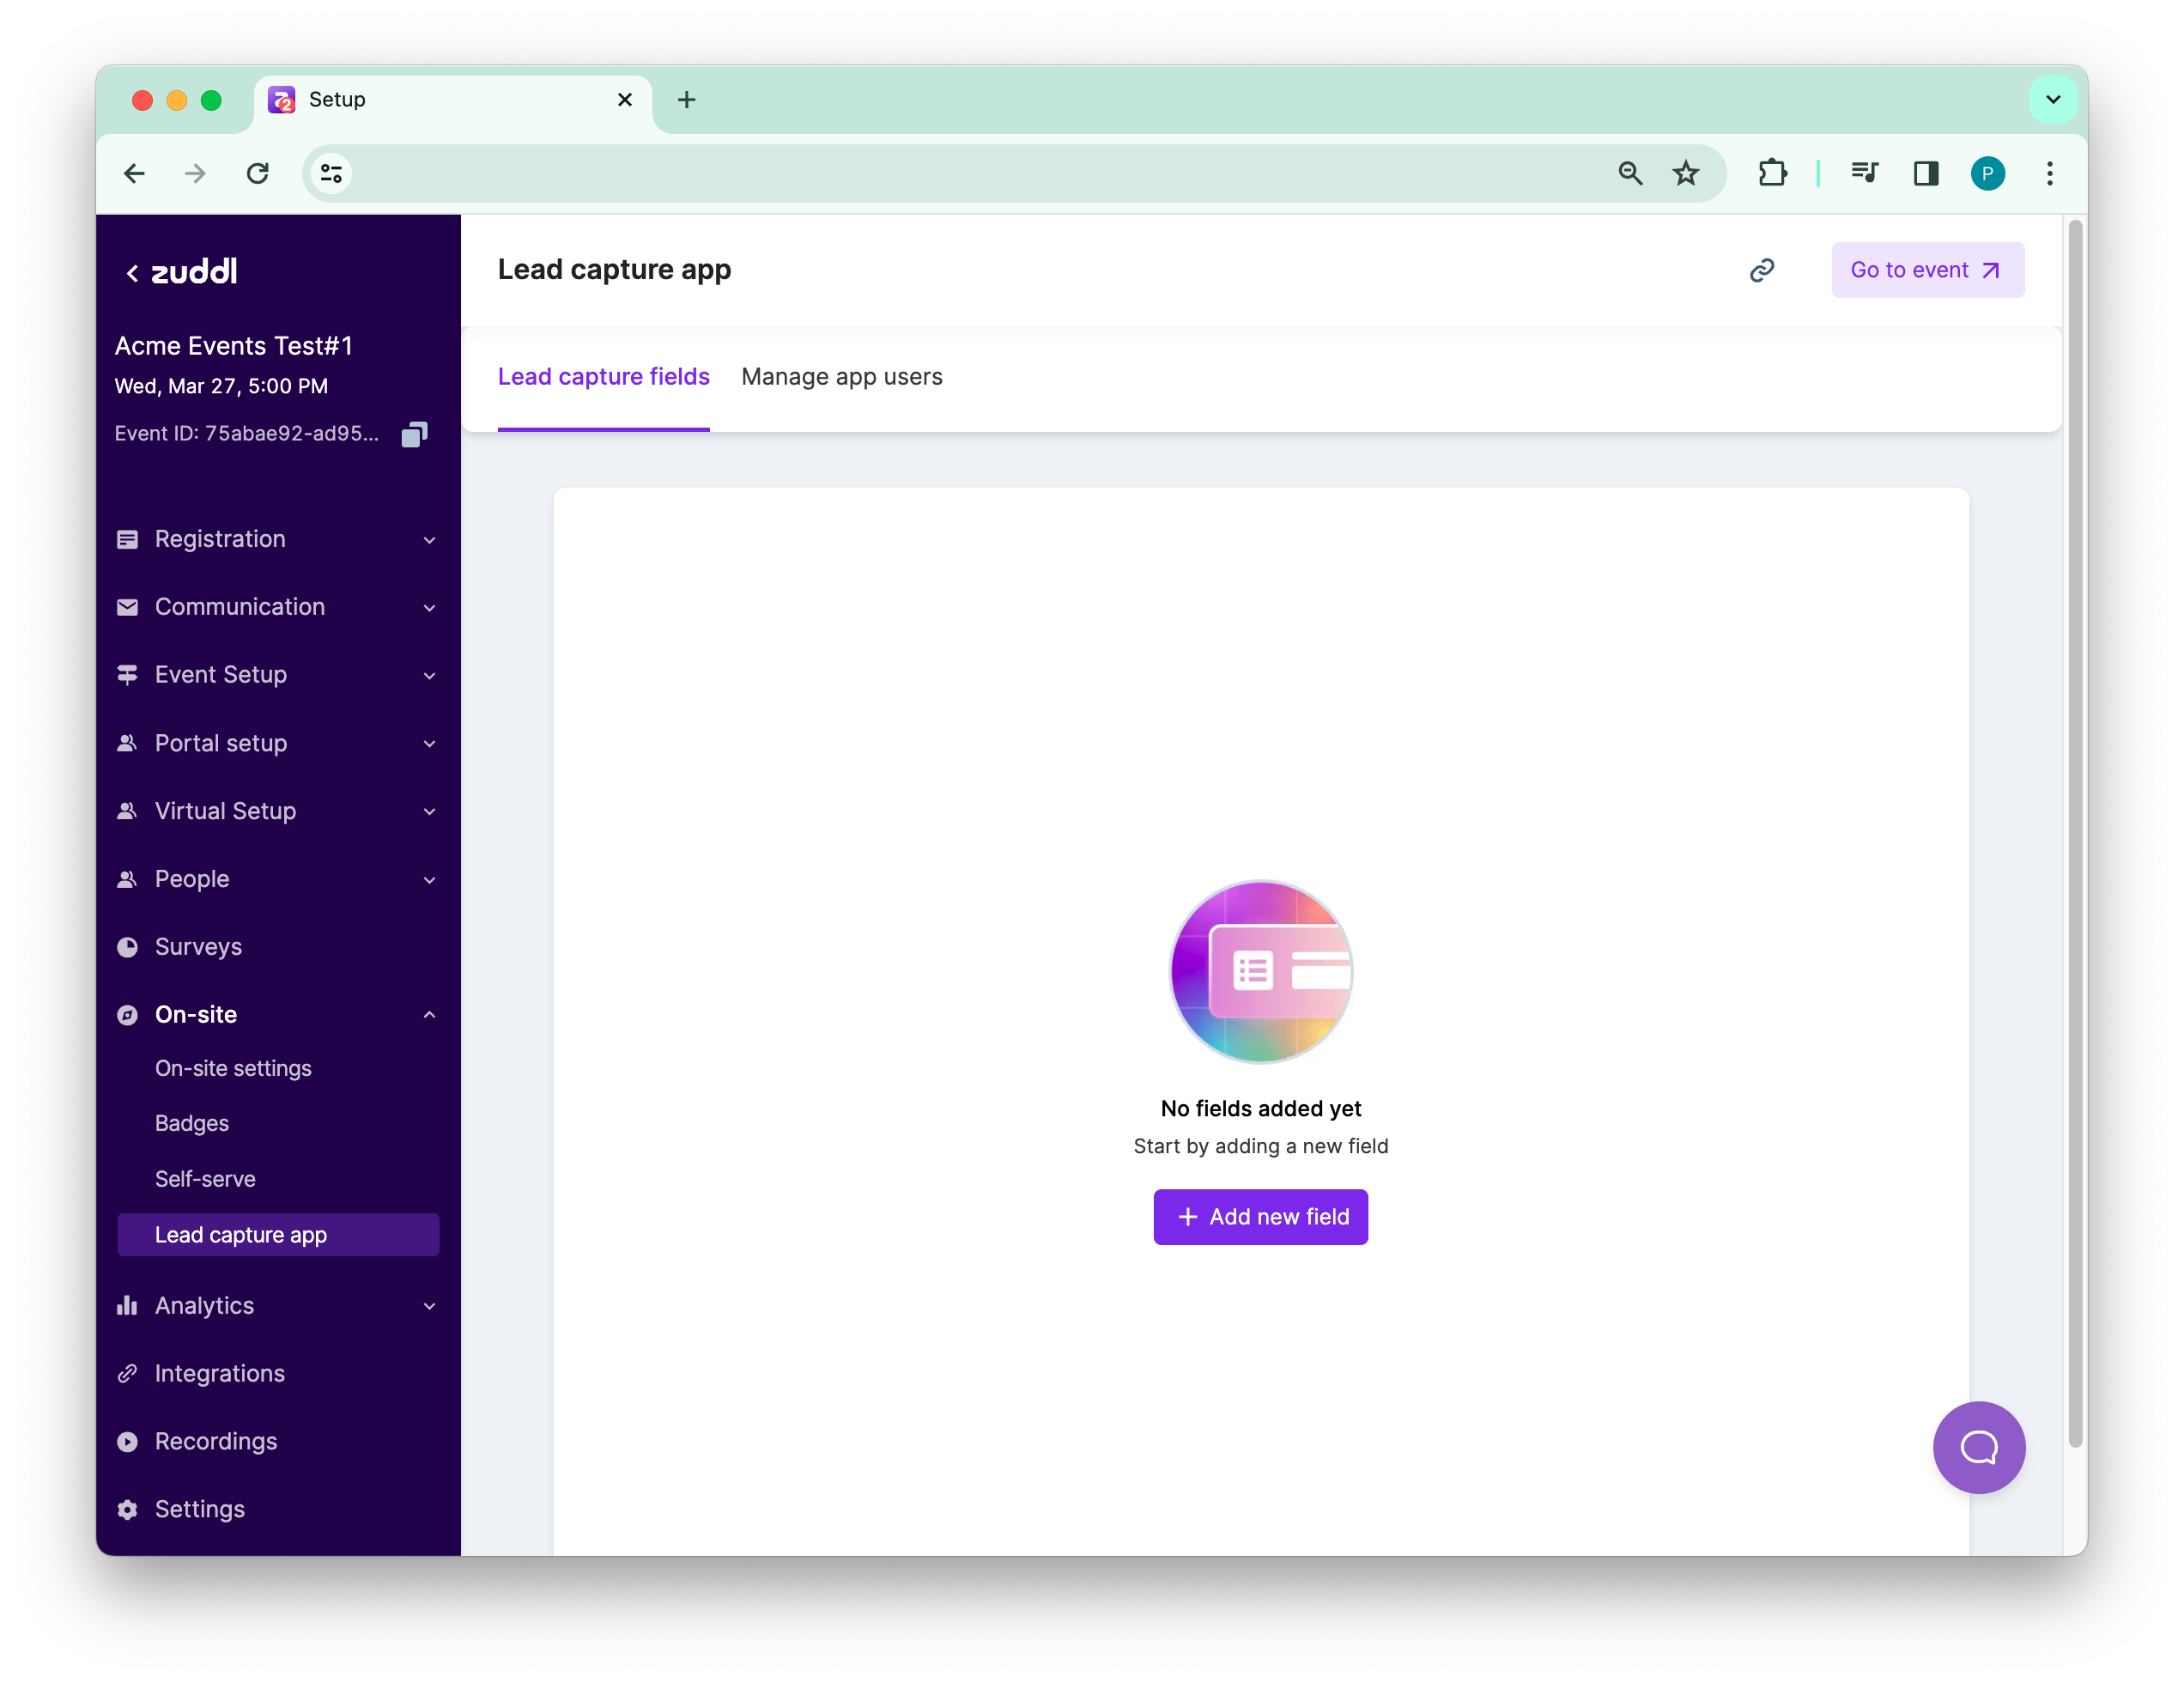
You can add additional fields for app users to enter while adding leads. To add lead capture fields:
Navigate to Onsite > Lead capture app and select the Lead capture fields tab.
Click +Add new to add a new field.
Select a Field type from the dropdown list:
Short answer
Dropdown
Multi-select
Rating
Radio
Disclaimer
Under the Type your question field, enter the lead questions.
Optional. Select the Mandatory checkbox to make the field mandatory to be filled.
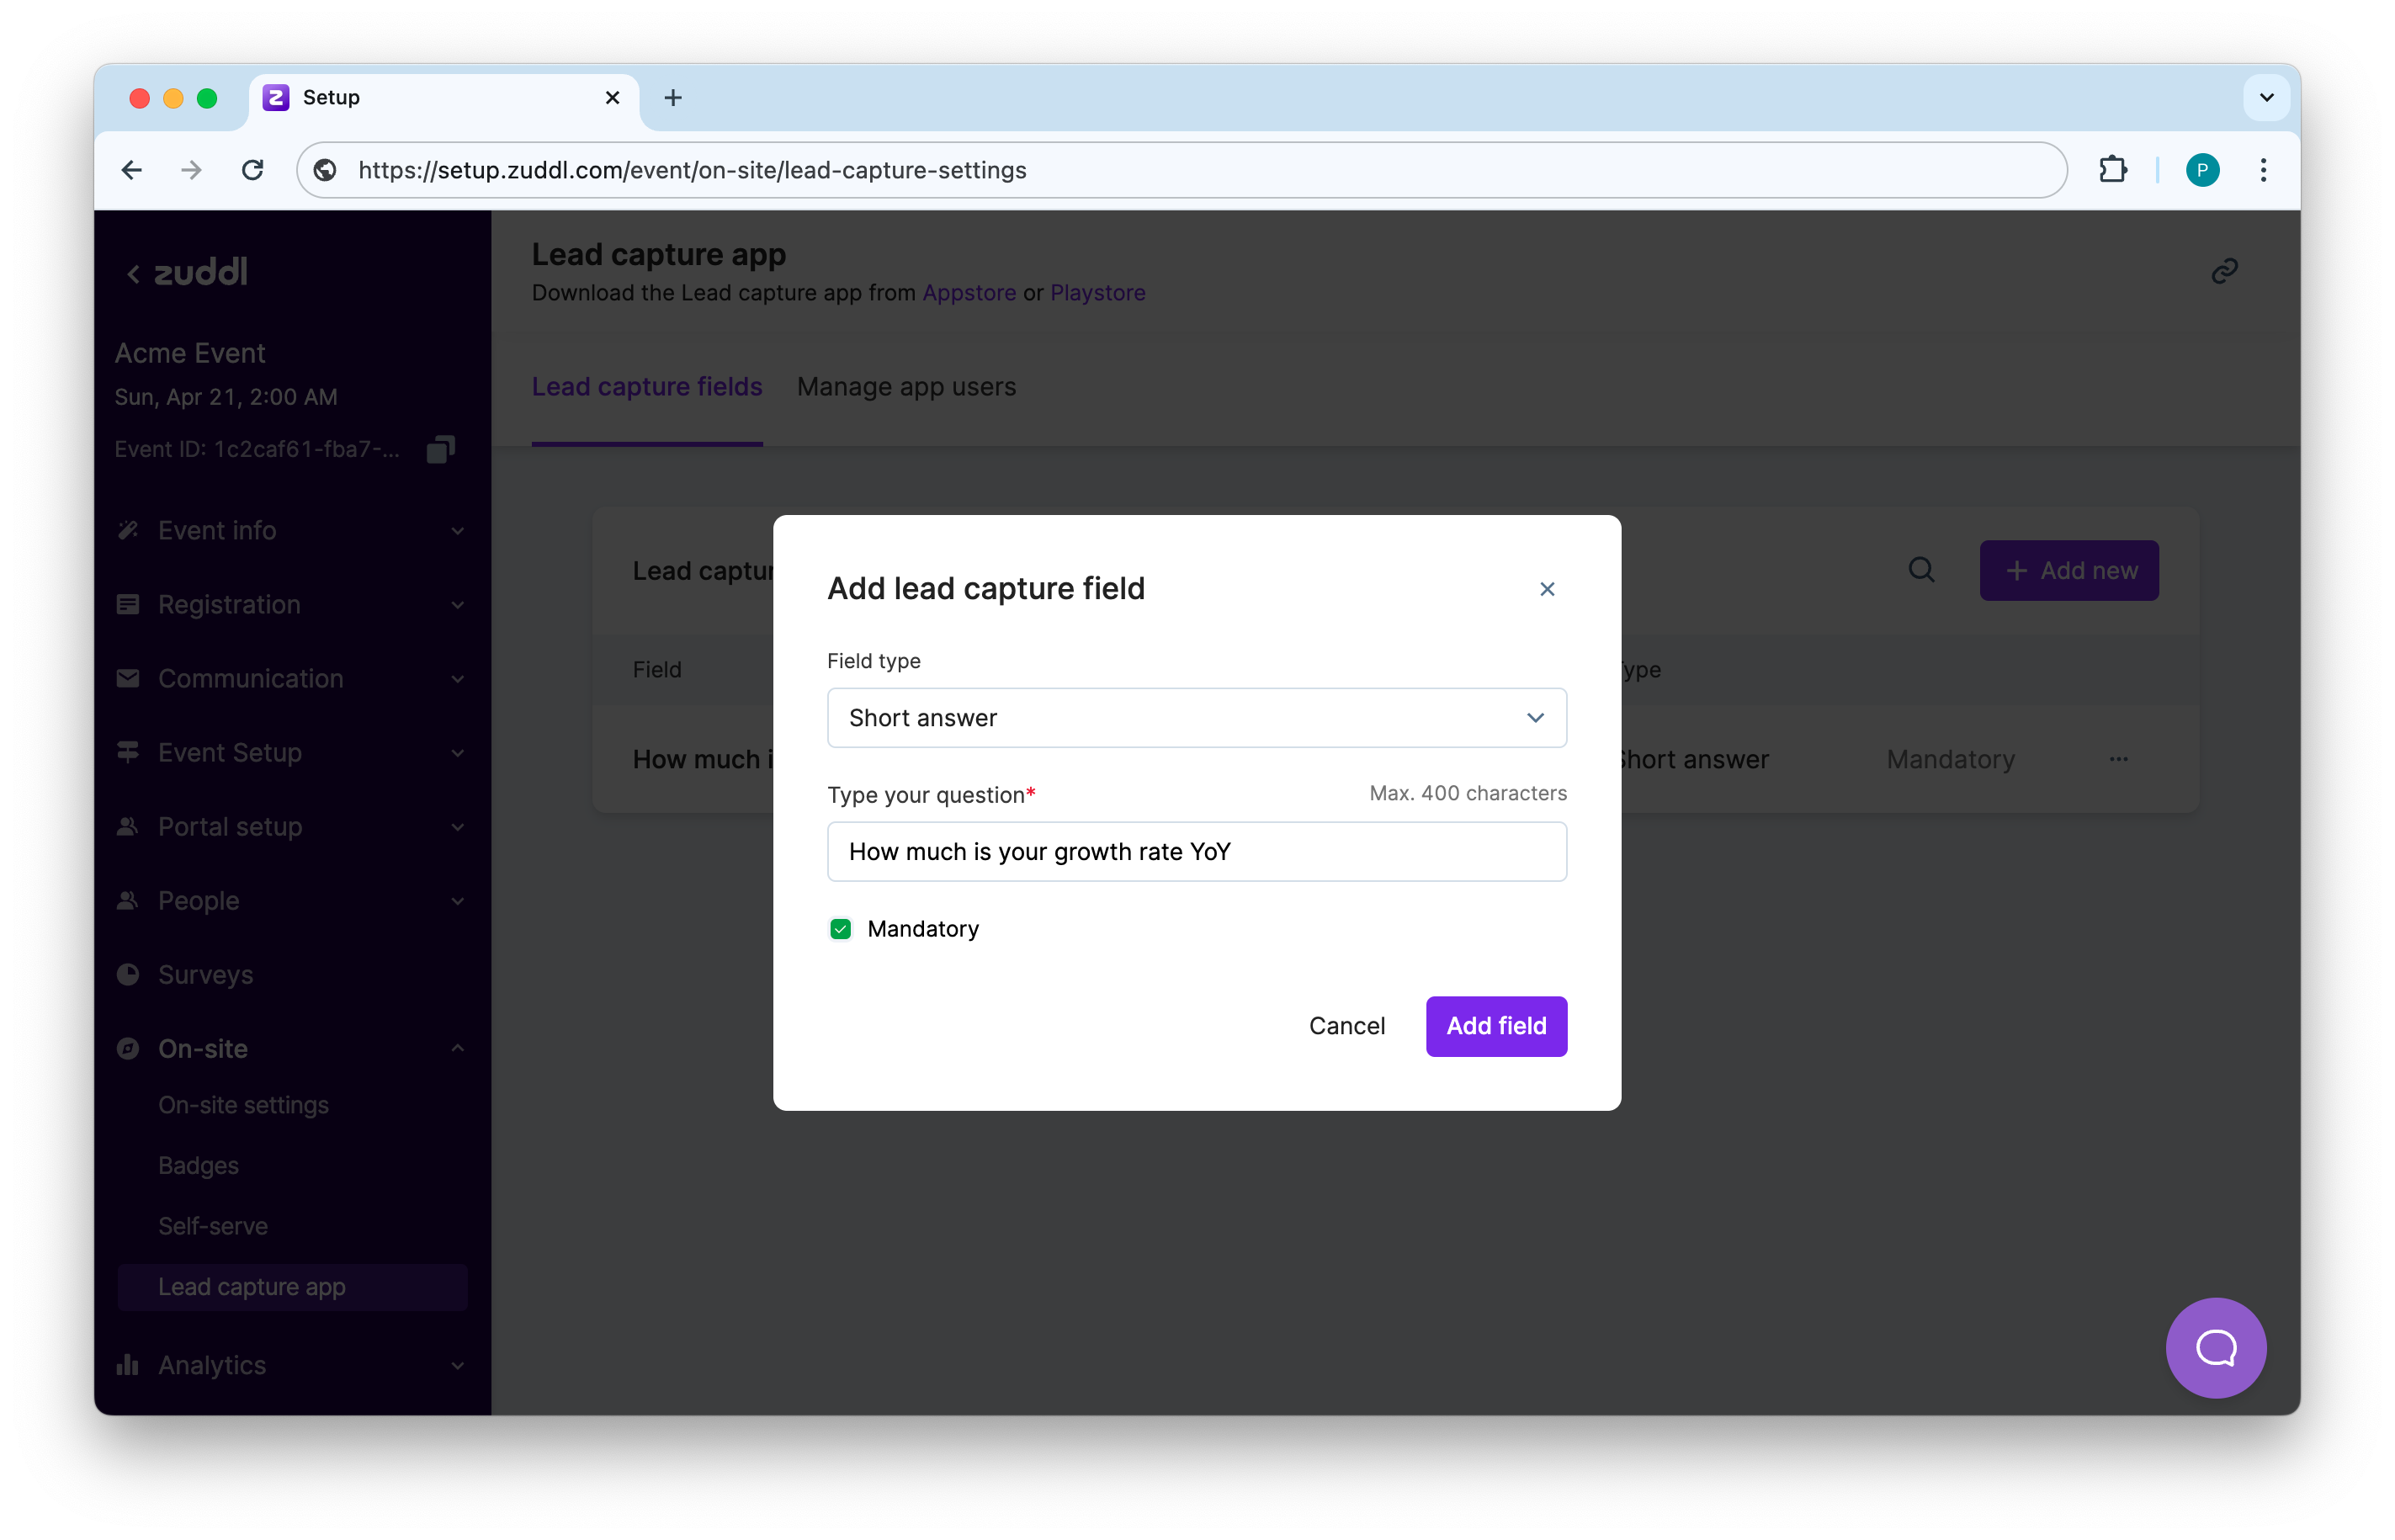
Click the Add field to add the field to the list. The added fields appear when the app user adds a lead via QR code scanning or manually entering an email address. The app user can fill in the details as required.

You can also Edit and Delete a lead capture field before it is actually used by an app user.On the app, the lead capture field looks like this: