How to Build an Email for an In-person Event in Zuddl
Last updated: September 3, 2025
You can choose a tool to overhaul the email entirely and custom-design it according to your requirements. To use the email builder option:
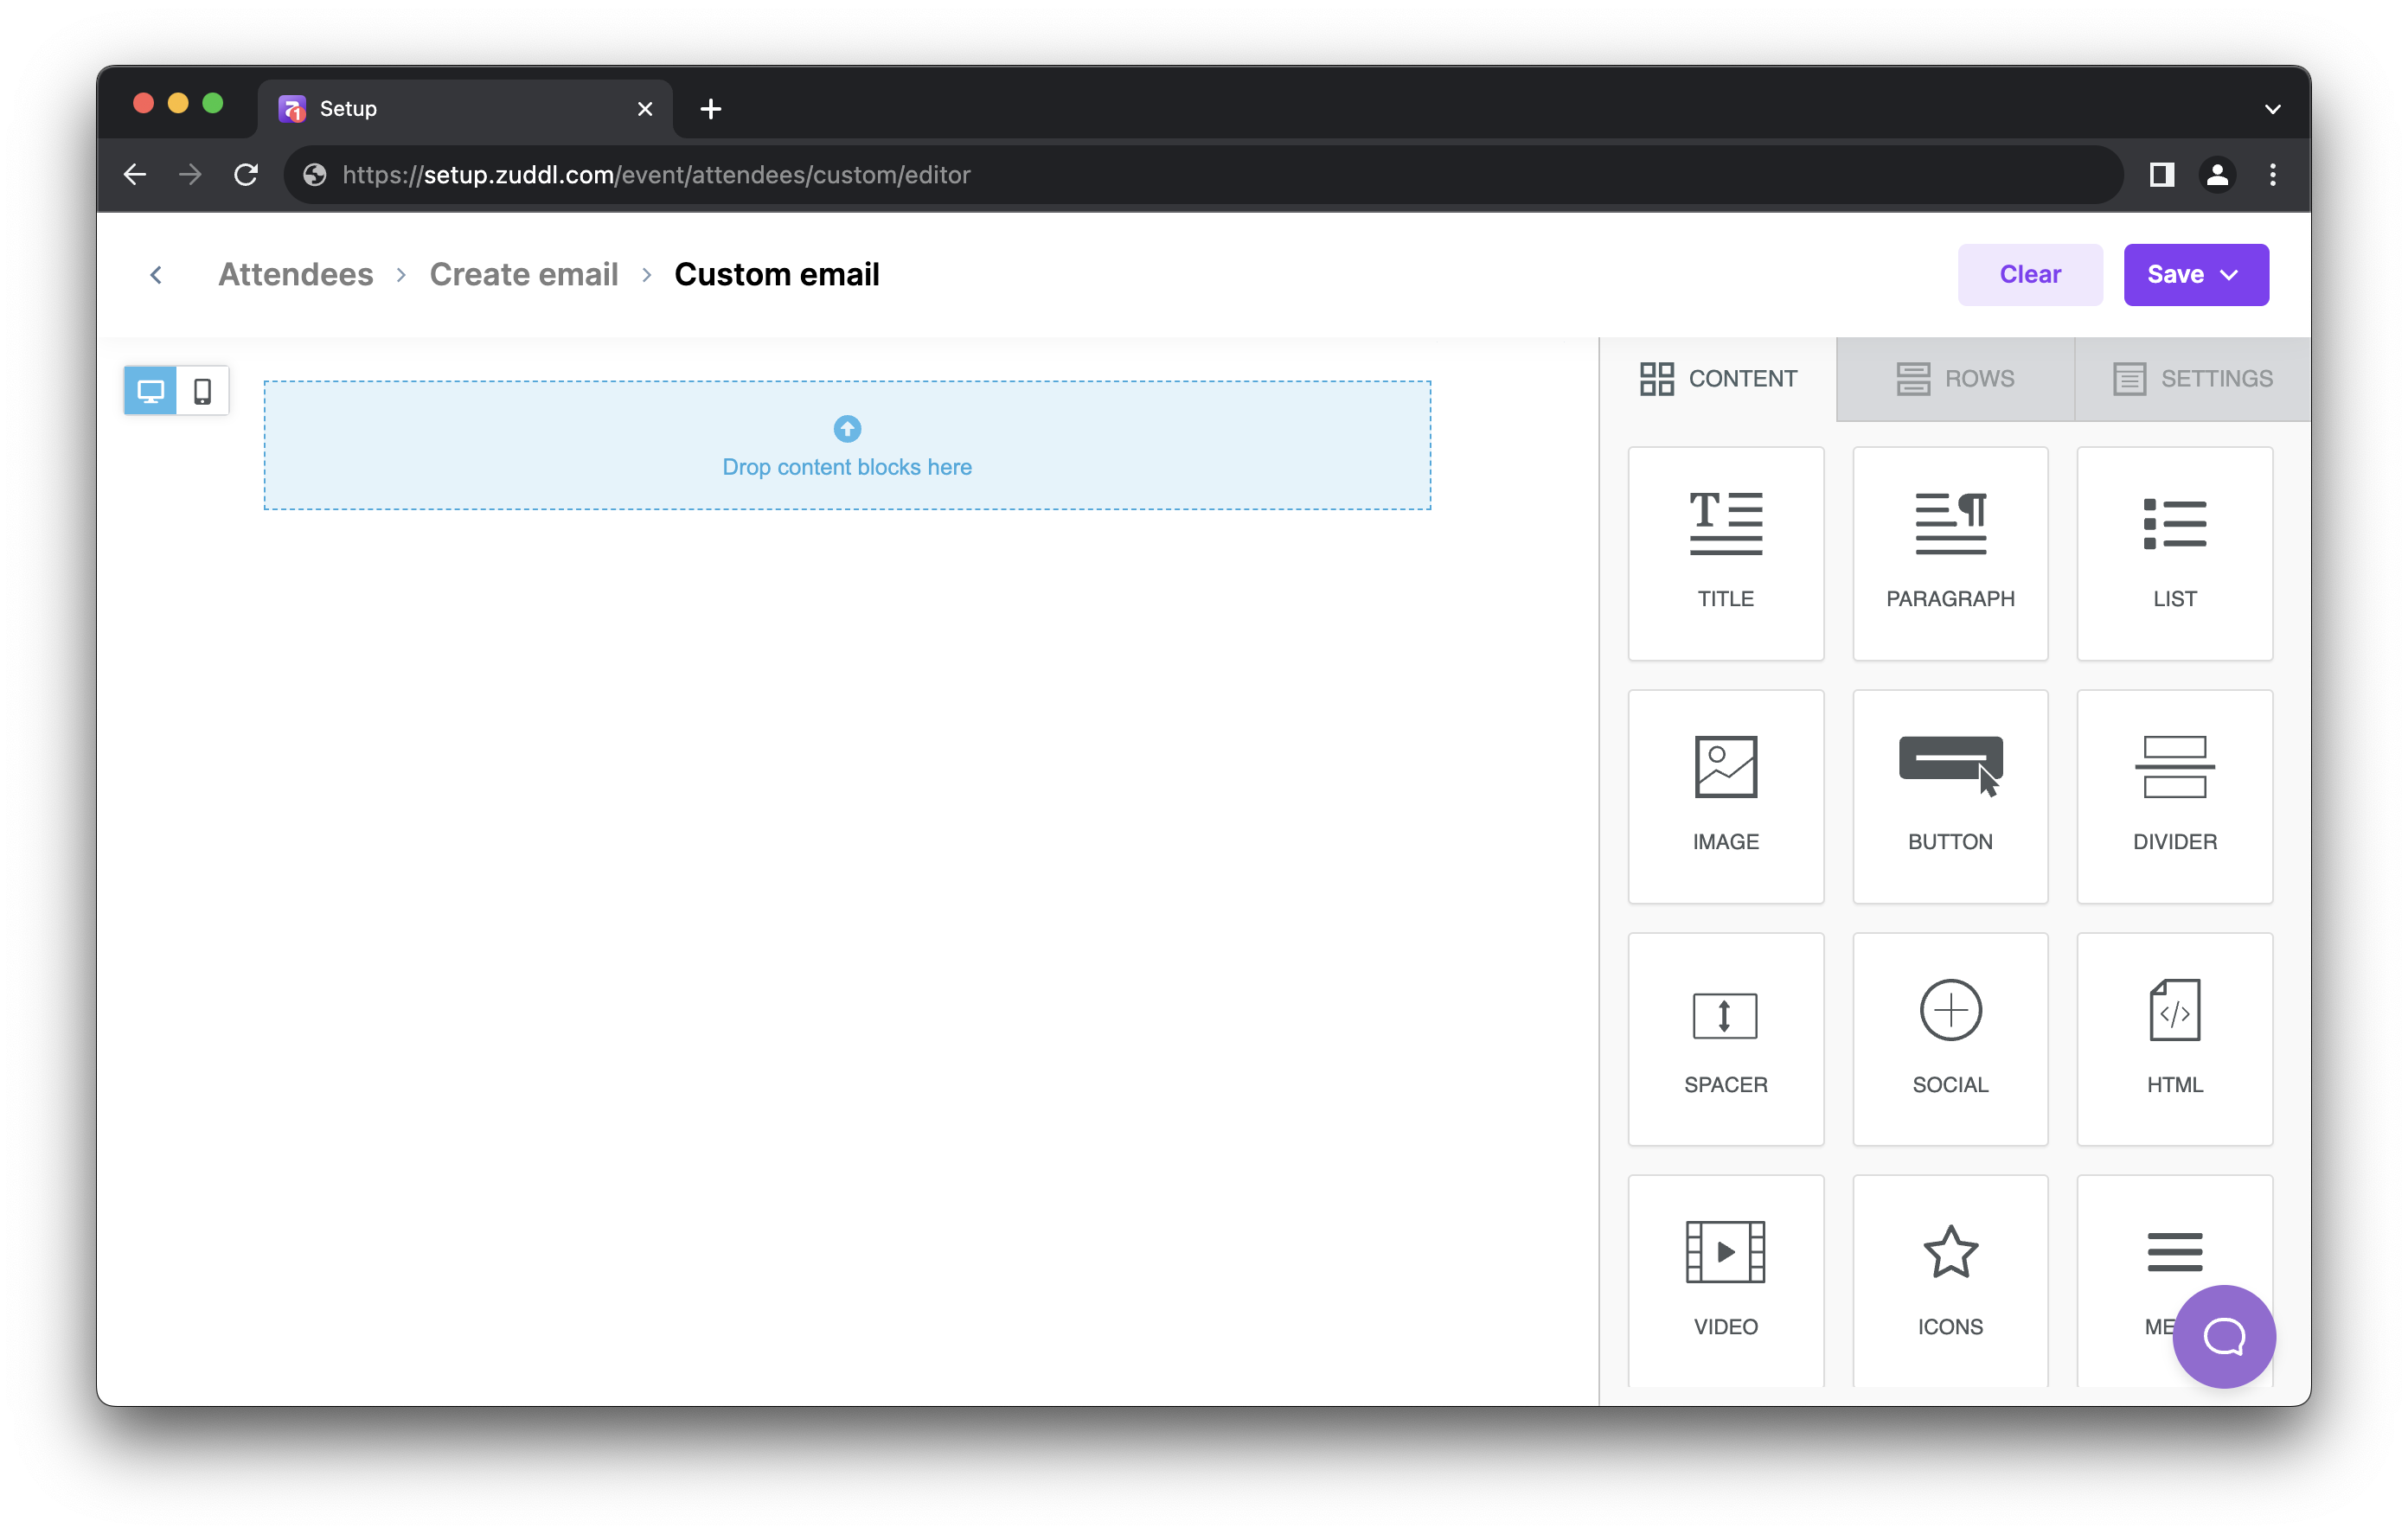
Click on Edit email. This opens the editor page.
You can use widgets from the left navigation option, such as Title, Image, Buttons, and more, to customize the design of the email entirely.
Once you create the email, click the Save button. Alternatively, you can click Save and exit to save it for a one-time use or click Save as a template to keep it as a template that can be reused later in other events, webinars, or field events.
You can also access the saved custom template from the People menu.
You can click Revert to the Original to reset your changes to the original template or click Edit email to go back to editing.
Important Note
Changing the event date or time resets the email toggles to default.
For example, if your Registration confirmation email was toggled on, it gets turned off when the event dates are modified. You will be notified of this change via a popup.
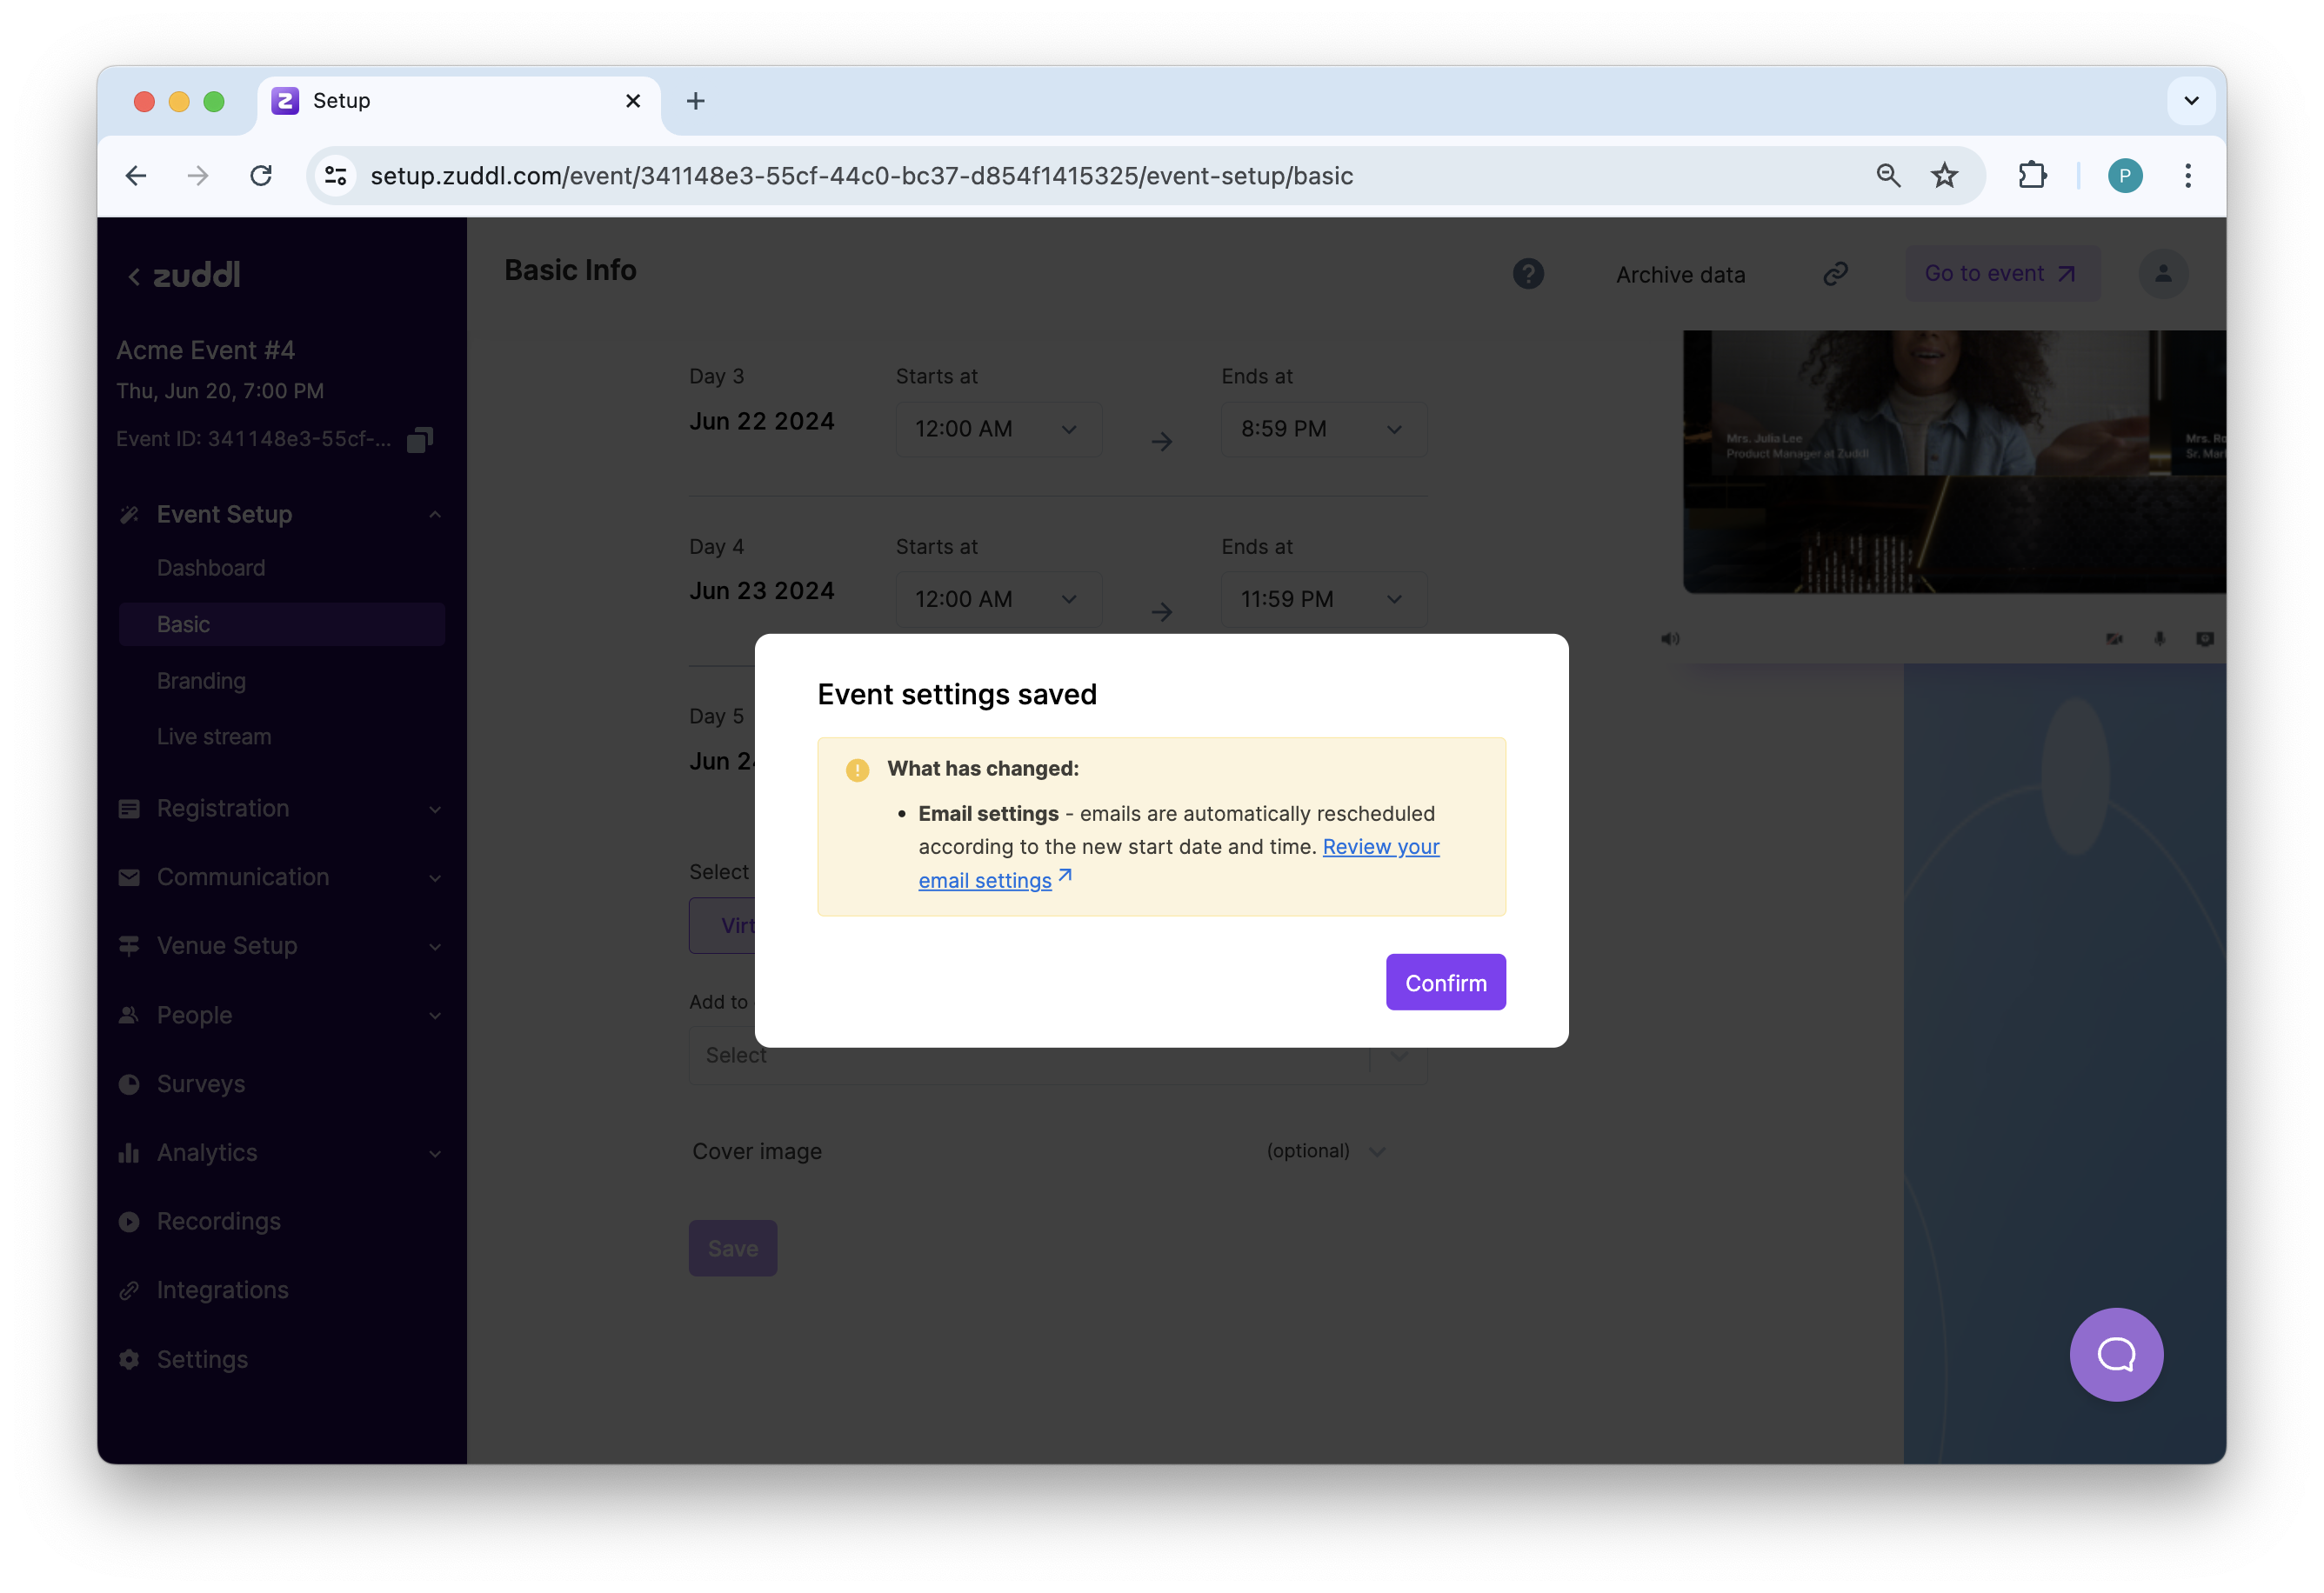
This resetting is done to prevent any accidental misfires during trial runs. Conversely, changing the event date or time in the email does not change the event date or timing.
How to customize email
There are primarily two types of variables you can work with when customizing your email:
Merge tags
Special links
How to use merge Tags
Merge tags are dynamic variables that you can easily insert in your emails for which Zuddl fetches the value from the backend. For example, you can add the ‘User name’ merge tag to your email template, and Zuddl will automatically bring the names of all the attendees to whom this email is sent. So each attendee would receive personalized emails.
To use merge tags:
Select any text variable enclosed in the blue dotted box.
Click on the Merge tags option on the rich-text toolbar.
Note: A blue dotted box represents a merge tag in a template.
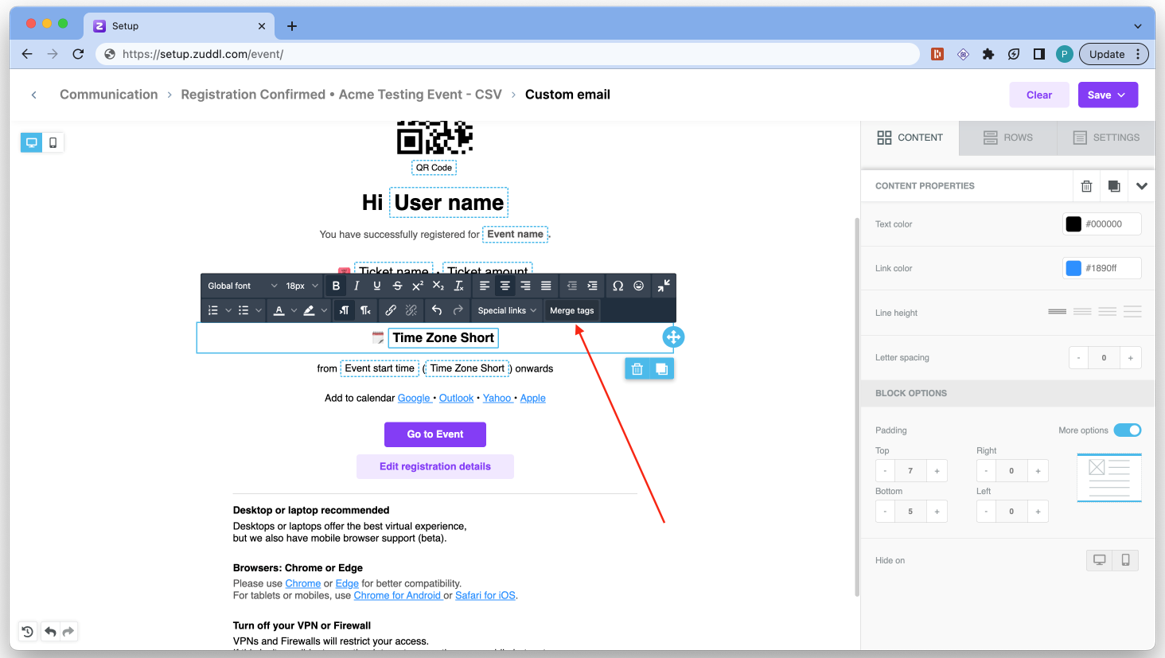
Select the desired merge tag from the list.

This will add the merge tags at your cursor position.
The merge tags, “QR code image” and “Event logo,” shouldn’t be used with text as they would render the image URL rather than the image. These are added to the list to reference the codes used in the image component.
You can also add more merge tags by following the same steps. However, ensure that your cursor is in the right place. The types of special links are shown in the below table:
Merge tags nameDescriptionHTML tagUsed forAudienceDisplay conditions | |||||
User name | The full name of the attendee/speaker | {{userName}} | All event | Attendees & speakers | N/A |
First name | The first name of the user | {{firstName}} | All event | Attendees & speakers | N/A |
Last name | The last name of the user | {{lastName}} | All event | Attendees & speakers | N/A |
Event name | The name of the event | {{eventName}} | All event | Attendees & speakers | N/A |
Event start date | The set start date of the event | {{eventStartDate}} | All event | Attendees & speakers | N/A |
Event start time | The set start time of the event | {{eventStartTime}} | All event | Attendees & speakers | N/A |
Event start date time | Even start date and time (shown together) | {{eventStartDateTime}} | All event | Attendees & speakers | N/A |
Event end date time | Even end date and time (shown together) | {{eventEndDateTime}} | All event | Attendees & speakers | N/A |
Timezone | The event timezone | {{timeZone}} | All event | Attendees & speakers | N/A |
Timezone short | The event timezone in short form | {{timeZoneShort}} | All event | Attendees & speakers | N/A |
QR code | QR code for check-in. Requires a display condition. | {{qrCode}} | Hybrid and In-person | Attendees & speakers | QR code |
QR code Image | QR code image. Requires a display condition. | {{qrCodeImgSrc}} | Hybrid and In-person | Attendees & speakers | QR code |
Event logo | Event logo (if added). Requires a display condition. | {{eventLogo}} | All event | Attendees & speakers | Event link |
Event type | Type of event: Virtual, In-person, or Hybrid. Requires a display condition. | {{eventType}} | All event | Attendees & speakers | NA |
Ticket name | Name of the ticket for the attendee. Requires a display condition. | {{ticketName}} | Ticketed event | Only attendees. Must have a ticket | Ticket type (Ticketed event) |
Ticket amount | Total ticket amount. Requires a display condition. | {{ticketAmount}} | Ticketed event | Only attendees. Must have a ticket | Ticket type (Ticketed event) Edit registration link (Ticketed event) |
Transaction ID | Transaction ID of the purchase. Requires a display condition. | {{transactionId}} | Ticketed event | Only attendees. Must have a ticket with a transaction | Transaction id (Ticketed event) |
Add-on summary | If any add-ons have been added to a ticket. The description/summary & details are shown in the email. Requires a display condition. | {{addOnSummary}} | Ticketed event | Only attendees. Must have a ticket with add-ons | Edit registration link (Ticketed event) |
Sponsor name | If booth owners/sponsors have been added, the same is displayed on the email. Requires a display condition. | ||||
Event venue | Renders the complete location as text in your email. Works if you have added an Event venue to event. | {{inPersonLocation}} | |||
Session picker summary | Shows the list of session names under the session picker field name. | {{sessionPickerSummary}} | Only attendees |
Adding merge tags manually
You can add merge tags for standard registration form fields directly onto an email template by using the format: {{registration.}}
Field type Field nameMerge tag format | ||
Standard field | Title | {{registration.designation}} |
Company | {{registration.company}} | |
Phone |
| |
Country | {{registration.country}} |
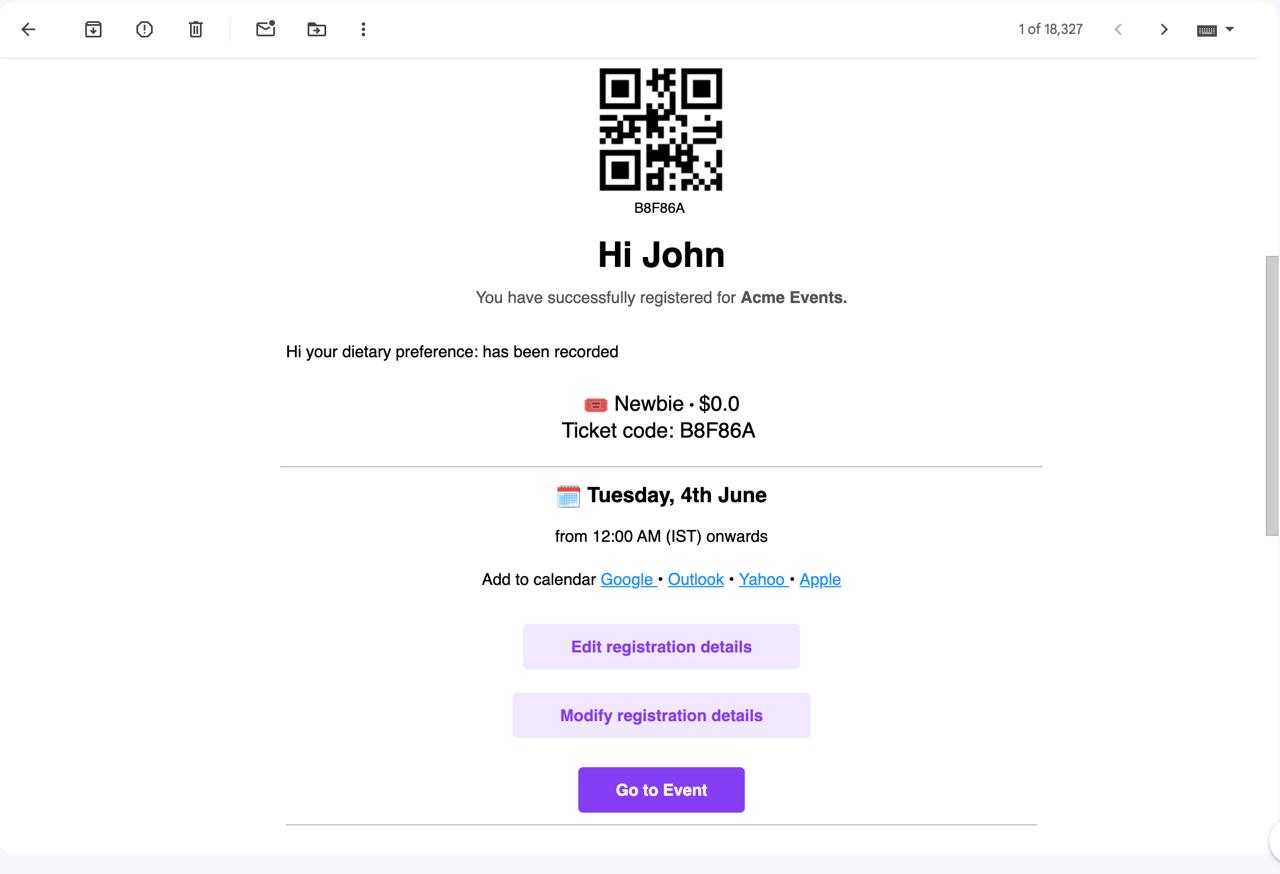
To use the custom fields that you've added in the registration form as merge tags, contact our support team at support@zuddl.com, they will provide the merge tag label which you can use while editing the emails. For example, to include a dietary preference custom field in your email, you can edit your email as shown below:
Email preview - Organizer | Actual attendee email |
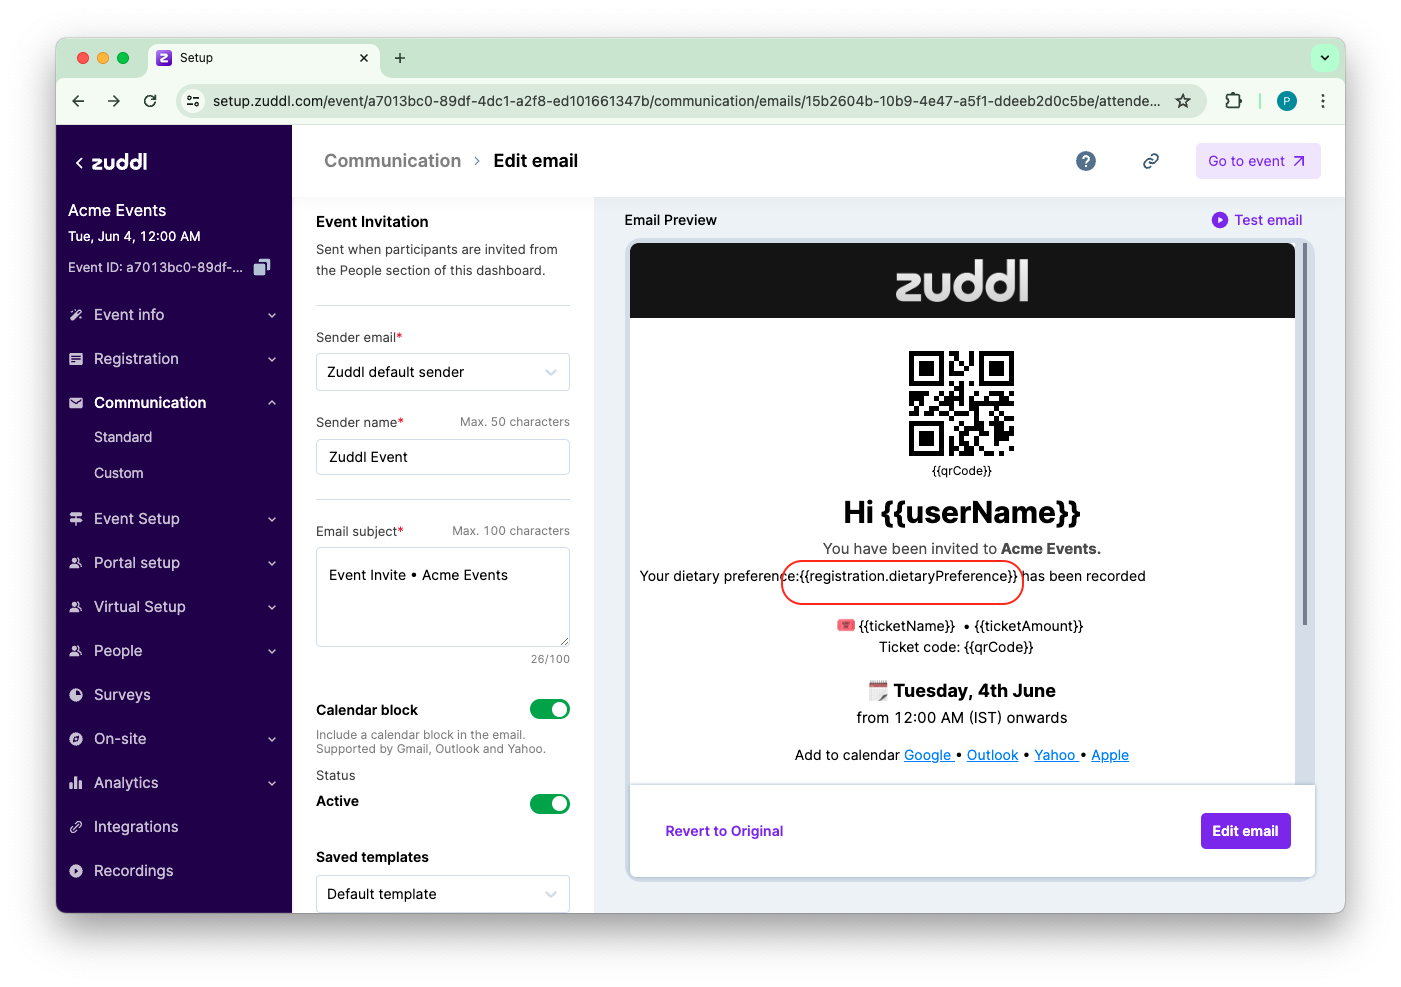 | 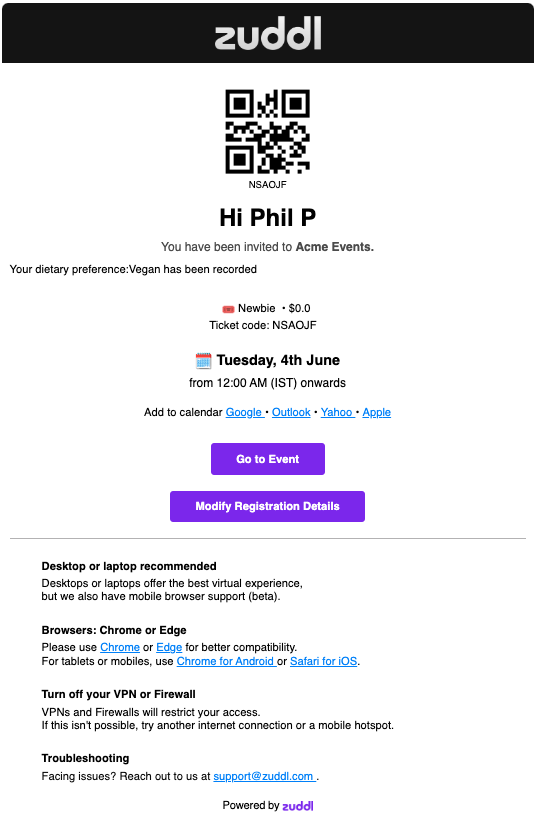 |
You can directly use these email merge tags in your communication emails in rows of paragraph elements. You can add/edit display conditions to only show fields based on specific conditions. If multi-select fields show values in comma-separated format.
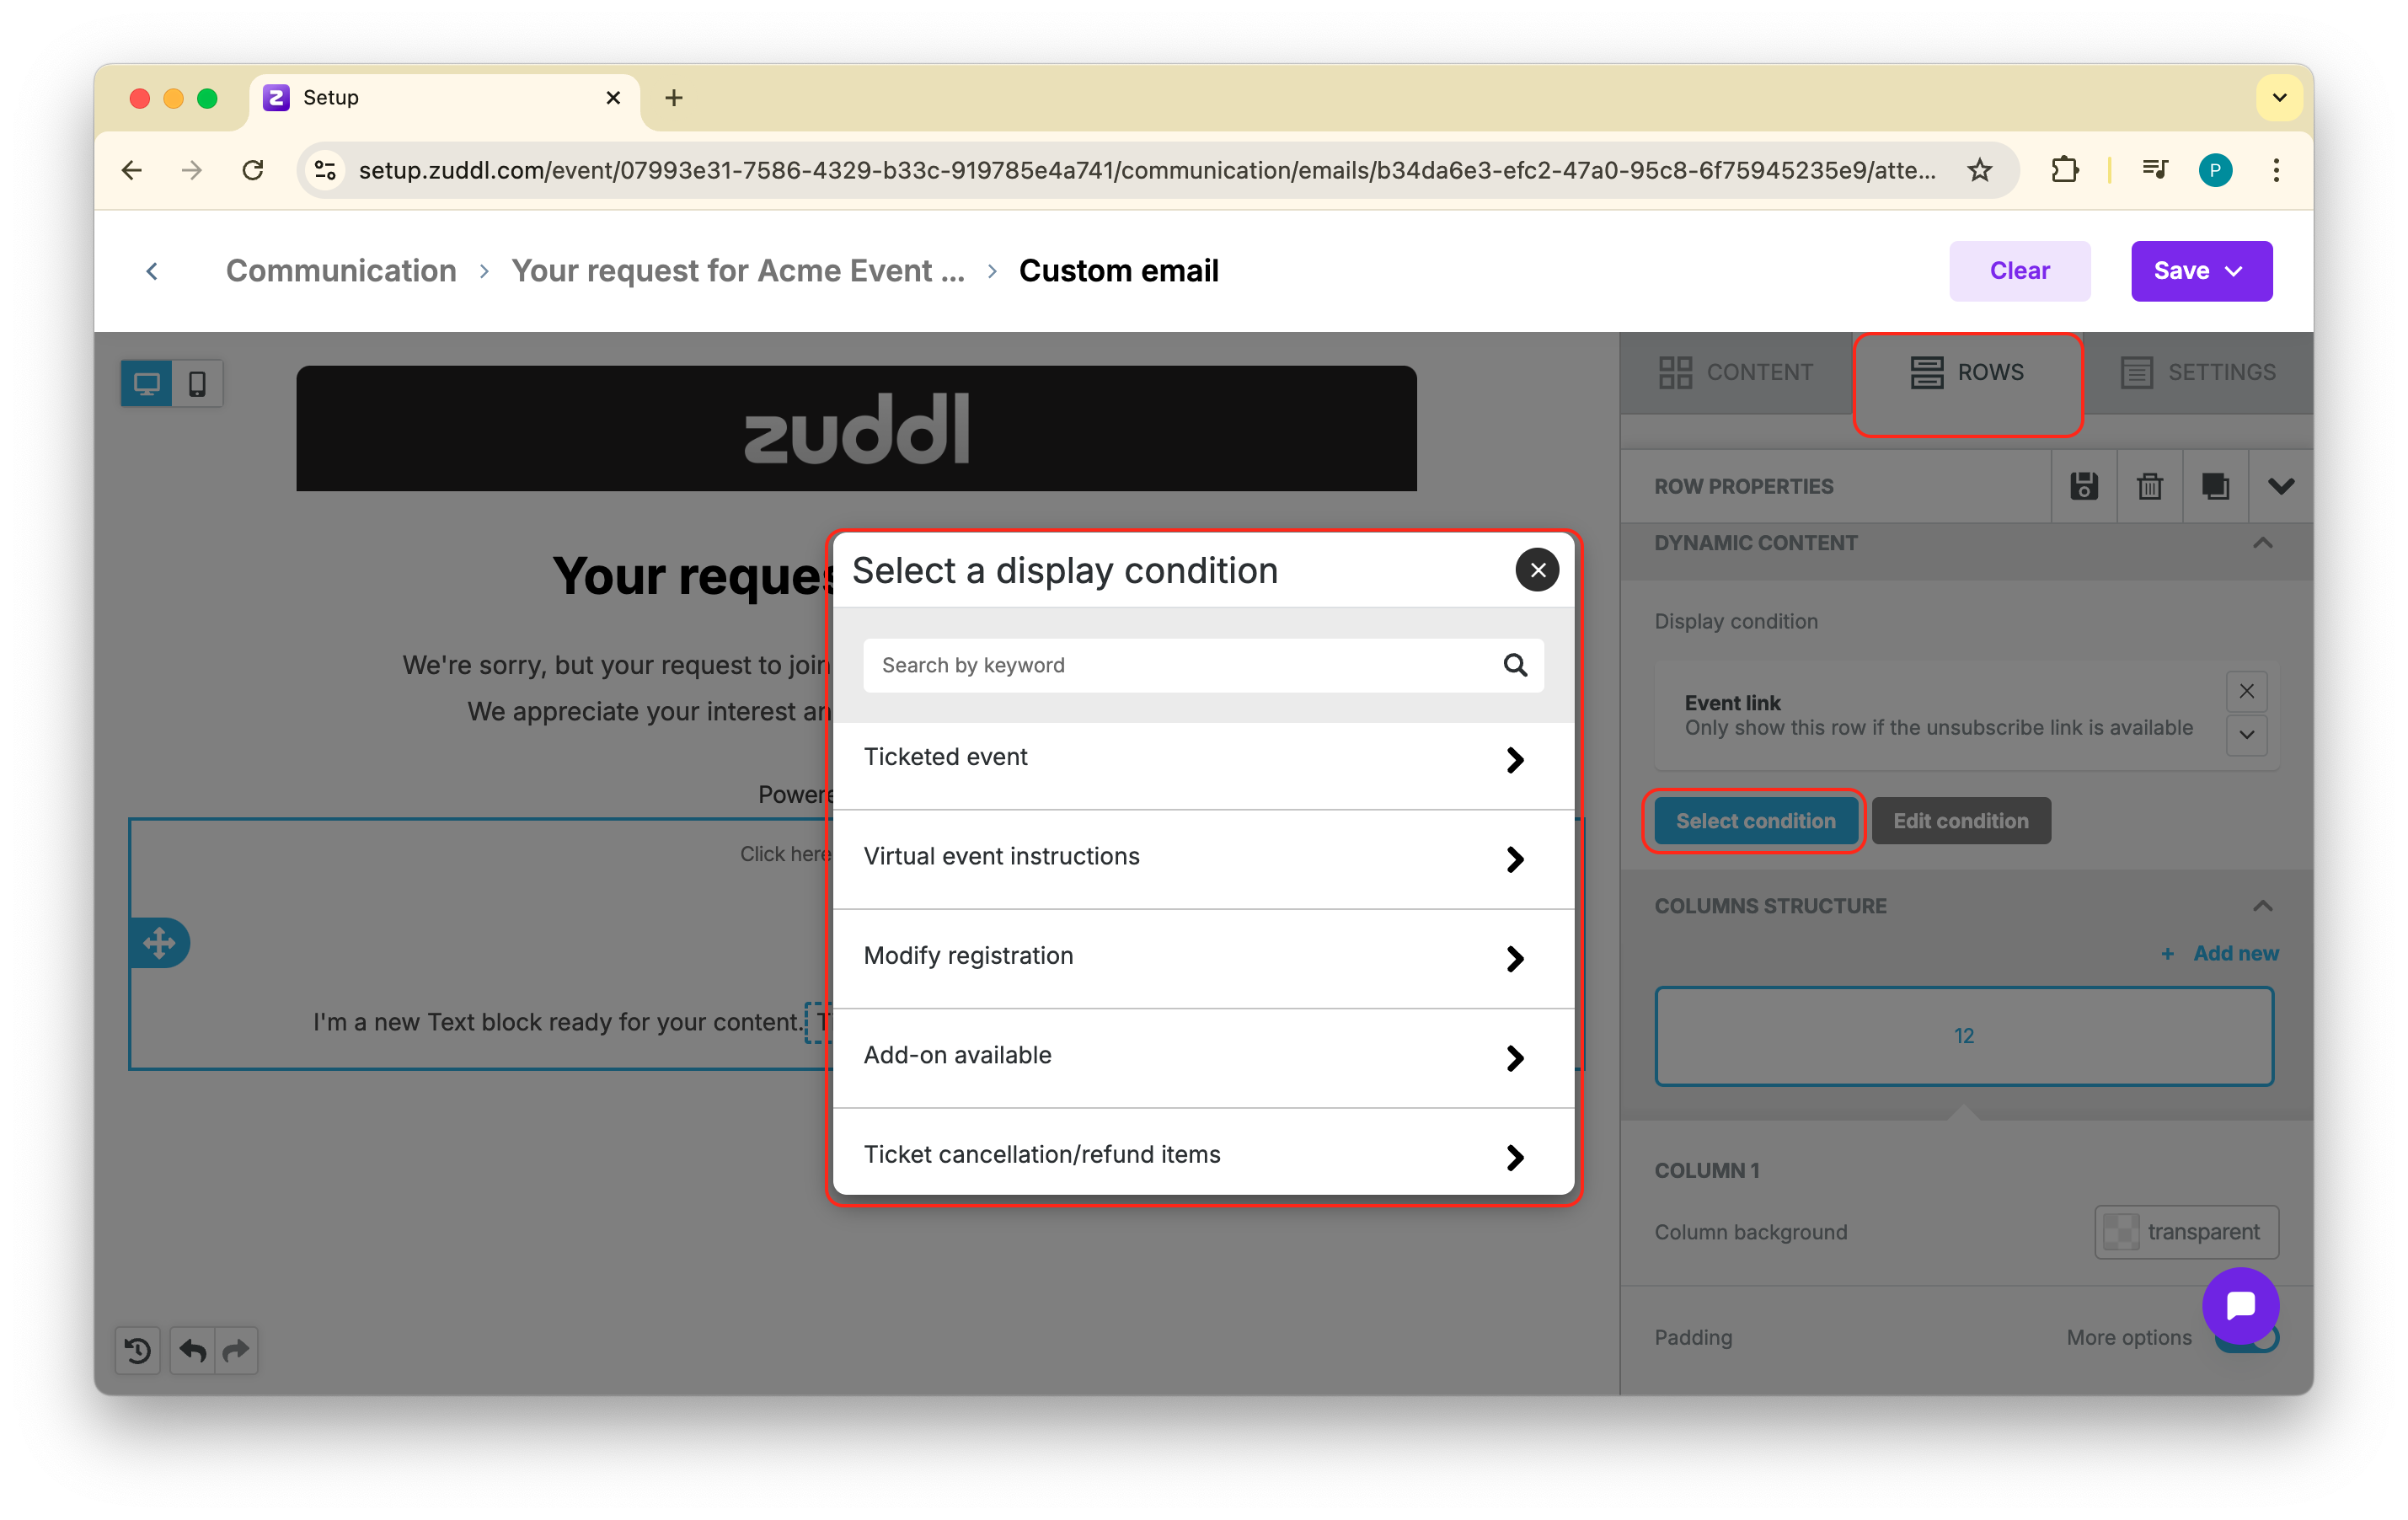
If the registrant has left a field blank, on the email the particular field will be appear empty
In case of multiple tickets
You need to add Ticket name and Ticket amount merge tags within within the row element display condition
Before: {{#tickets}}
After: {{/tickets}}
How to use special links
Special links are pre-defined links that can be easily added to your email template. The steps to add a special link to your email template are the same as adding a merge tag.
The types of special links are shown in the below table:
Special linkDescriptionUsed for | ||
Go to event | Use this to add an event hyperlink to your email. | All users |
Calendar invite link | Use this to add to calendar links for Apple, Outlook, Google, and Yahoo email. When a user clicks on any calendar invite link, it opens the Create Event page in the respective calendar. | All users |
Edit registration details | Allows attendees or purchaser to edit registration details. Used mainly for registration confirmation email | Attendees |
Modify registration details | Allows purchaser to edit registration details. Used mainly for registration confirmation email | Attendees |
Unsubscribe email link | Mandatory link. An option for users to unsubscribe from Zuddl emails. You cannot save an email without this link. | All users |
Pre-filled information in invite list | When an invitee clicks on the special link, they are taken to the event registration form where the invitee details (First name, Last name, and Email address) are pre-filled. | |
Venue location | Renders a hyperlink to the map. Works if you have added an Event venue to event. | |
PDF link | Adds a downloadable PDF link in the email body for Registration confirmation, Event Invite, Attendee registration trigger email, and Ticket confirmation. This link shows three types of PDF links: registration confirmation, Invoice, and Receipt |