How to Brand your Hybrid Event in Zuddl
Last updated: August 1, 2025
Zuddl lets you customize the branding for your event with different themes and color choices by adding graphic elements like background images and logos. You can also see your settings applied in the event preview for both desktop and mobile versions.

The branding setup is divided into three sections:
- Theme
- Navbar
- Virtual Background
Theme
Choose a color theme from the two options - Custom (selected by default) or Dark. These colors are applied across the live event on all venues and sub-sections.
Apply custom colors
To customize your theme by choosing colors:
- Choose a Primary color from the color picker or copy and paste the color hex code. This color is used for all primary actions and highlight sections.
- Choose a Secondary color. This color displays any text on top of the primary color. The secondary color is visible only for the Dark theme.
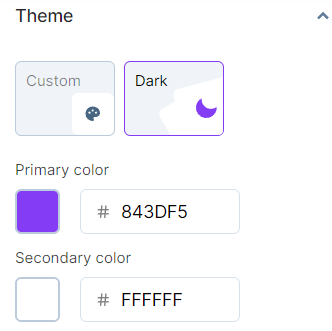
Our system automatically picks a Secondary color for a Custom theme that complements your chosen Primary color.
Add a background image.
A background image is applied in the event behind venue elements and panels. You can apply different background images for specific areas like rooms or booths, but the image uploaded here will be used as a default background in all other venues.
Click Edit Background button.
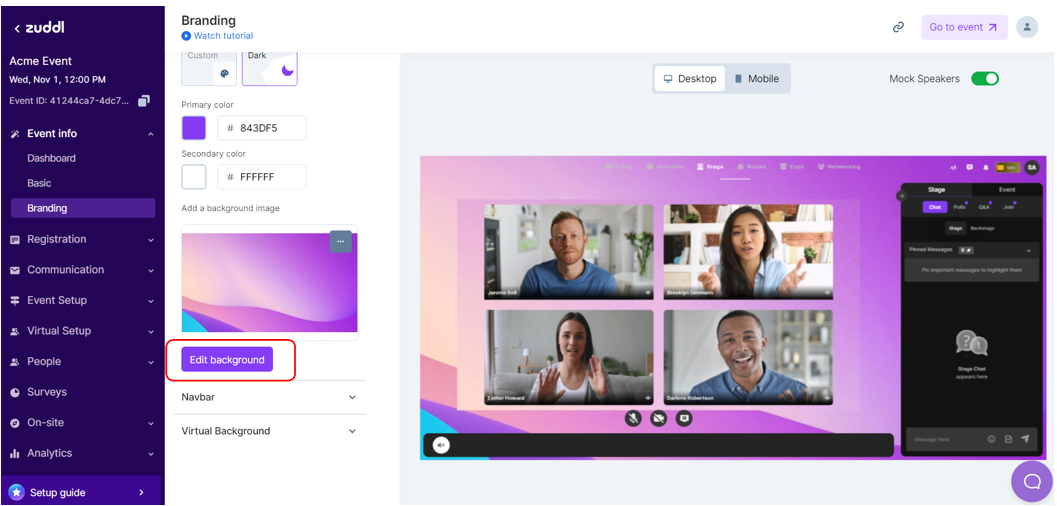
From the sidebar, choose an image from the available templates or Upload your own image with a recommended size of 1920x1080 pixels in a JPG, JPEG, PNG, or GIF file.

- Click Save to apply the background image.
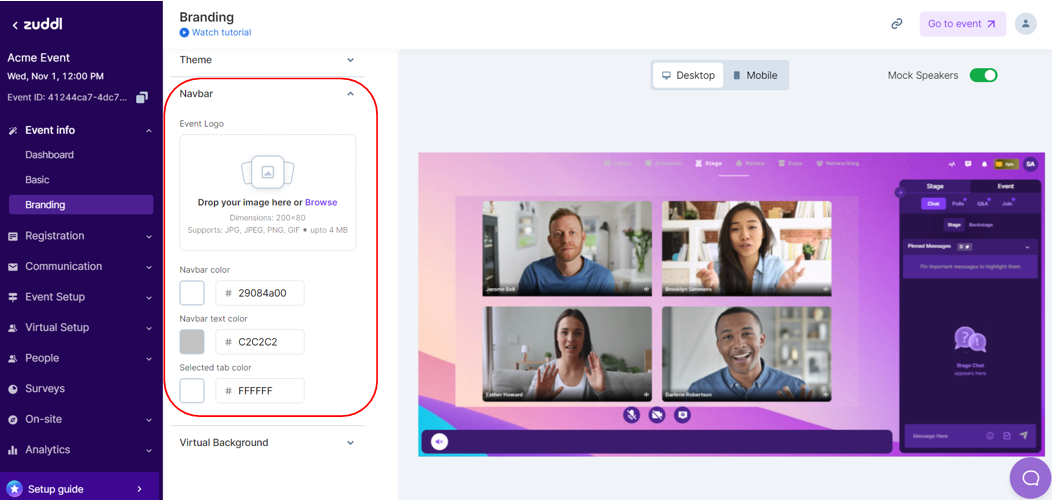
Navbar
The upper navigation bar (Navbar) for the event shows the different venues and can be customized for branding:
- Upload an Event Logo with a minimum size of 200x80 pixels in a JPG, JPEG, PNG, or GIF file up to 4 MB. The event logo is visible on the left of the Navbar. You can drag or drop an image or click on the Browse button to upload an image for the event logo.
- Select the colors for the Navbar:
- Choose a Navbar color. This is applied to the background of the Navbar.
- Choose a Navbar text color. The text labels on the Navbar will use this color.
- Choose a Selected tab color. This is used to highlight the currently selected venue tab.
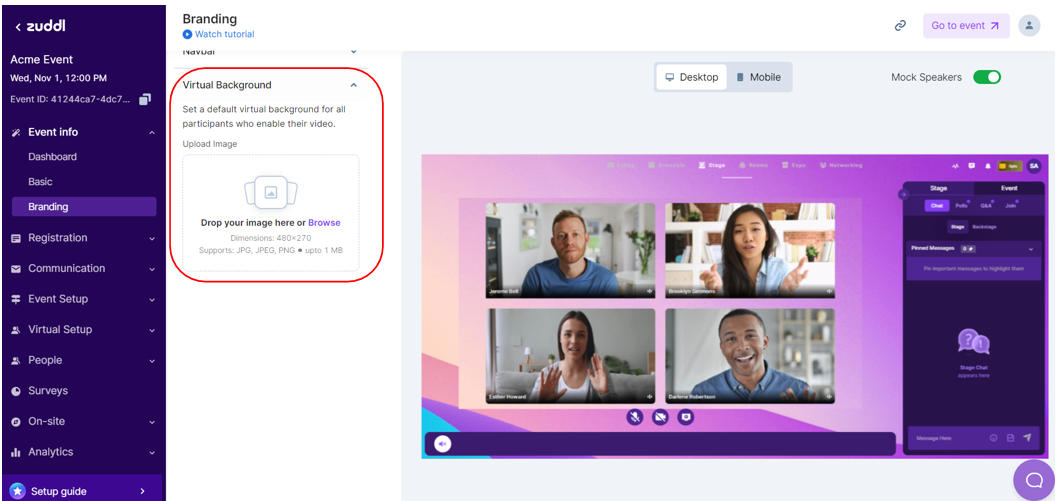
Virtual background
- You can upload a custom virtual background in the branding setup that your event participants can apply whenever they turn their camera on: in Rooms, in the Networking venue, when joining an expo booth, and more.
- You can drag or drop an image or click on the Browse button to upload an image for the virtual background. The recommended size is 480x270 pixels in a JPG, JPEG, or PNG file, up to 1MB.