How to Create a Custom Group for your In-person Event in Zuddl
Last updated: September 4, 2025
To create a custom group:
Login to the Zuddl dashboard and create an event. Learn more about creating an event.
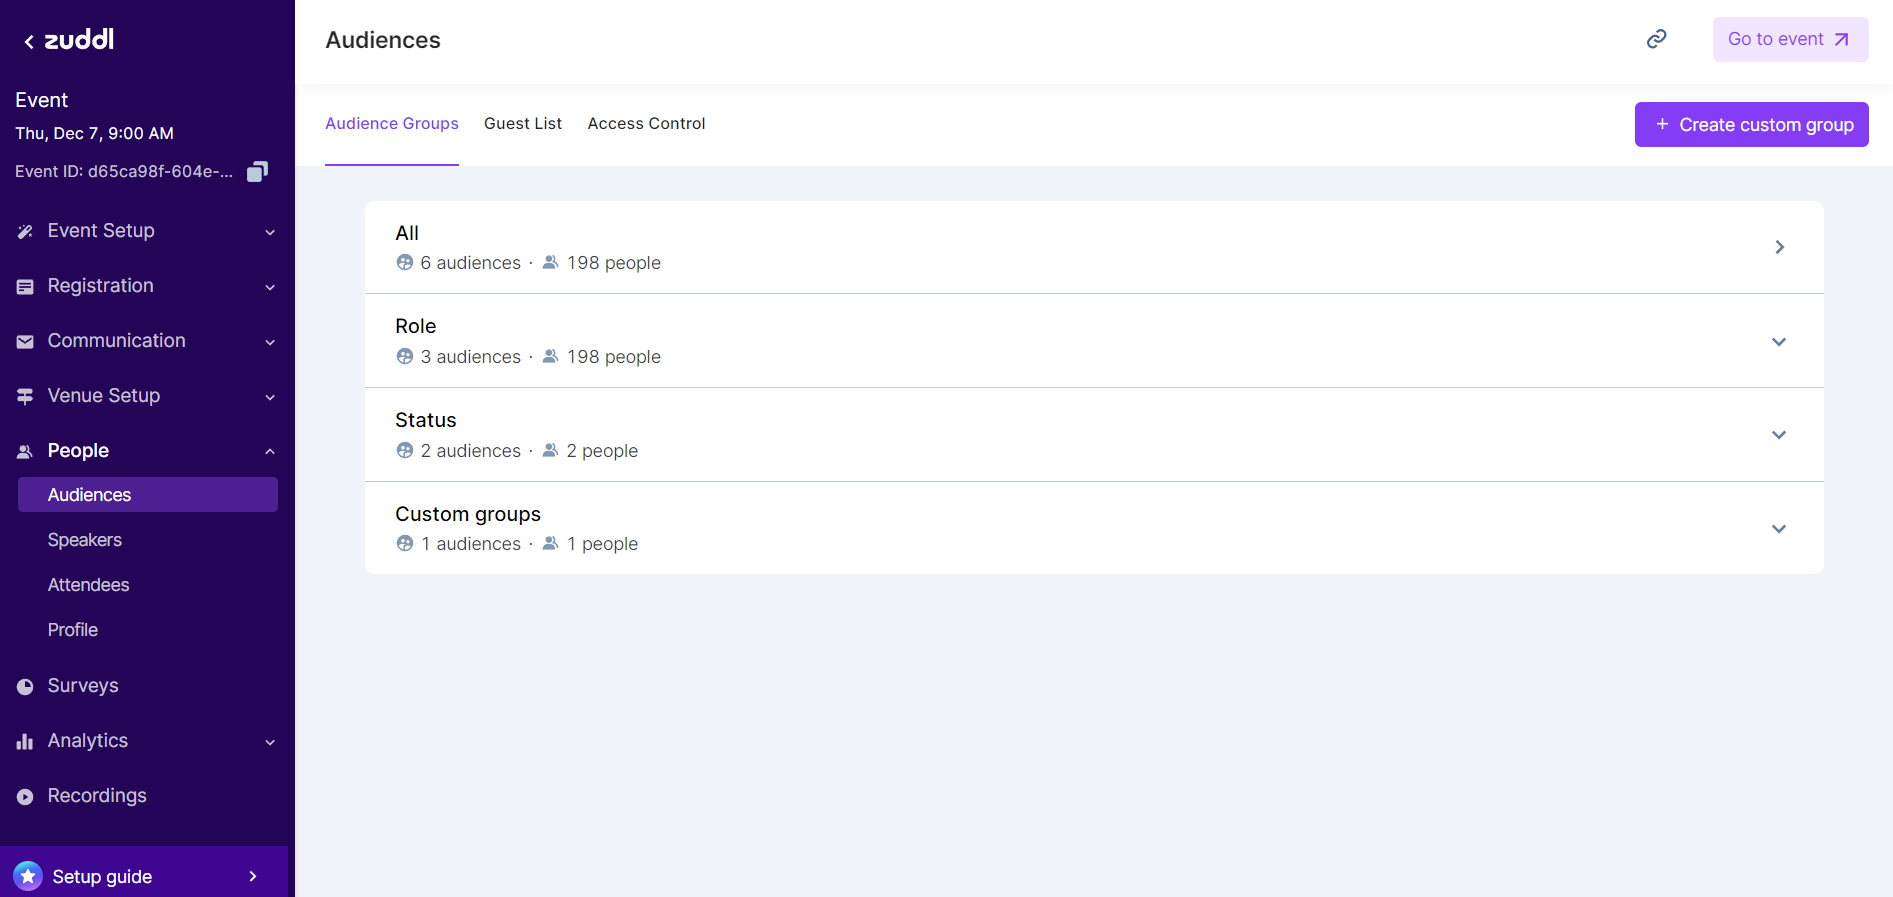
Go to People > Audience. Click on the + Create custom group button.
On the Create Custom Group form, fill in the necessary details:
Group Name: Enter a group name.
Active group: The attendees get automatically added to the active group if they match the filtering criteria. Also, the attendees who register after active custom group creation and still fit with the group filtering criteria get added to that group.
Static group: The attendees who match the filter criteria during group creation. A static group is not updated automatically even if attendees that match the filter criteria register later.
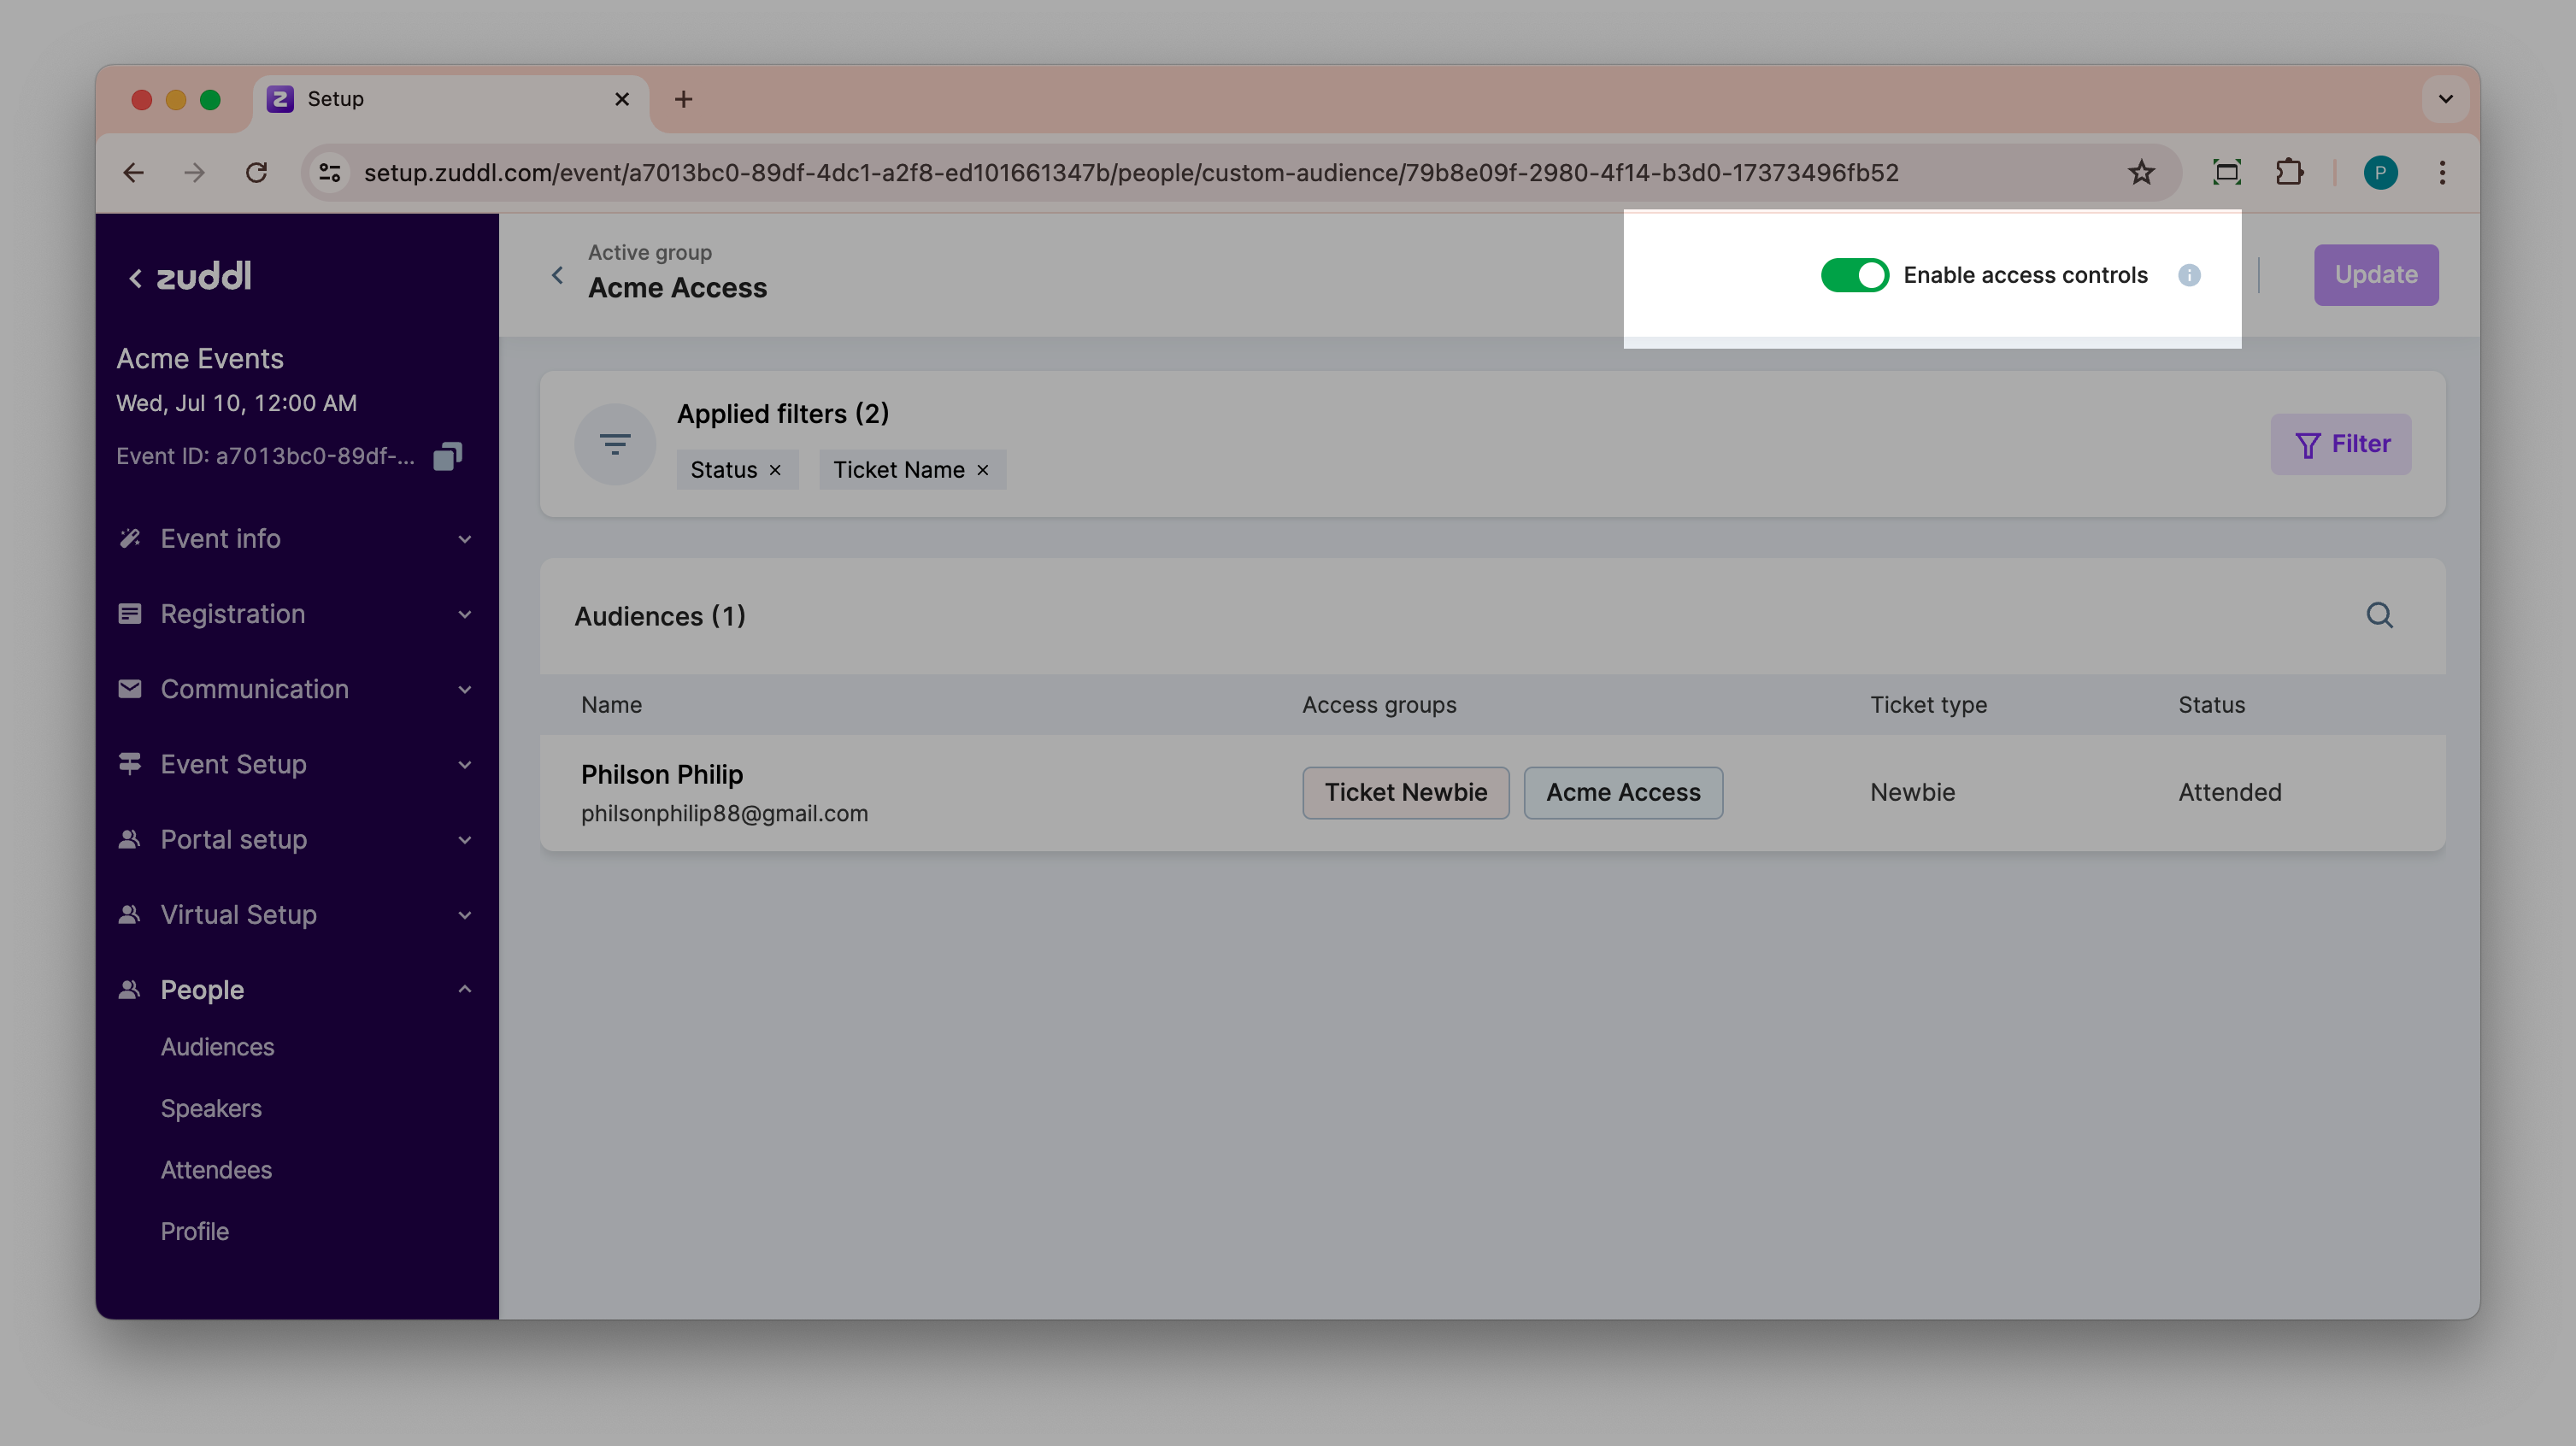
Enable access control: Toggle the enable access control to see the new custom groups on the access control page. You can enable/disable this feature anytime later during the process of custom group creation.
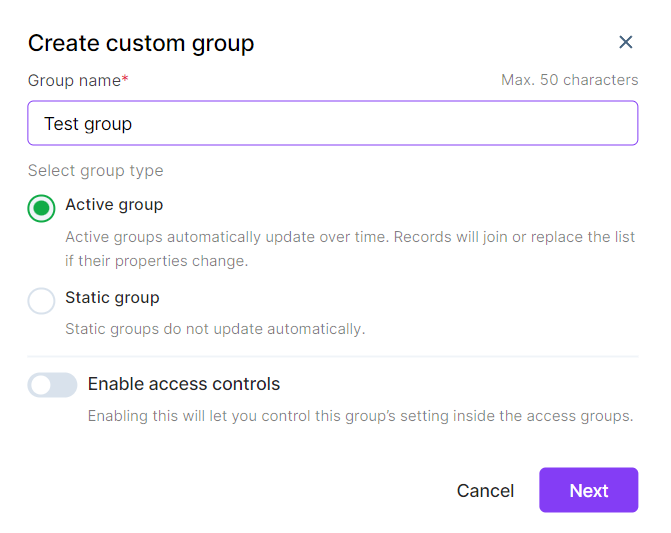
Click on the Next button to update the custom group list further using filters.
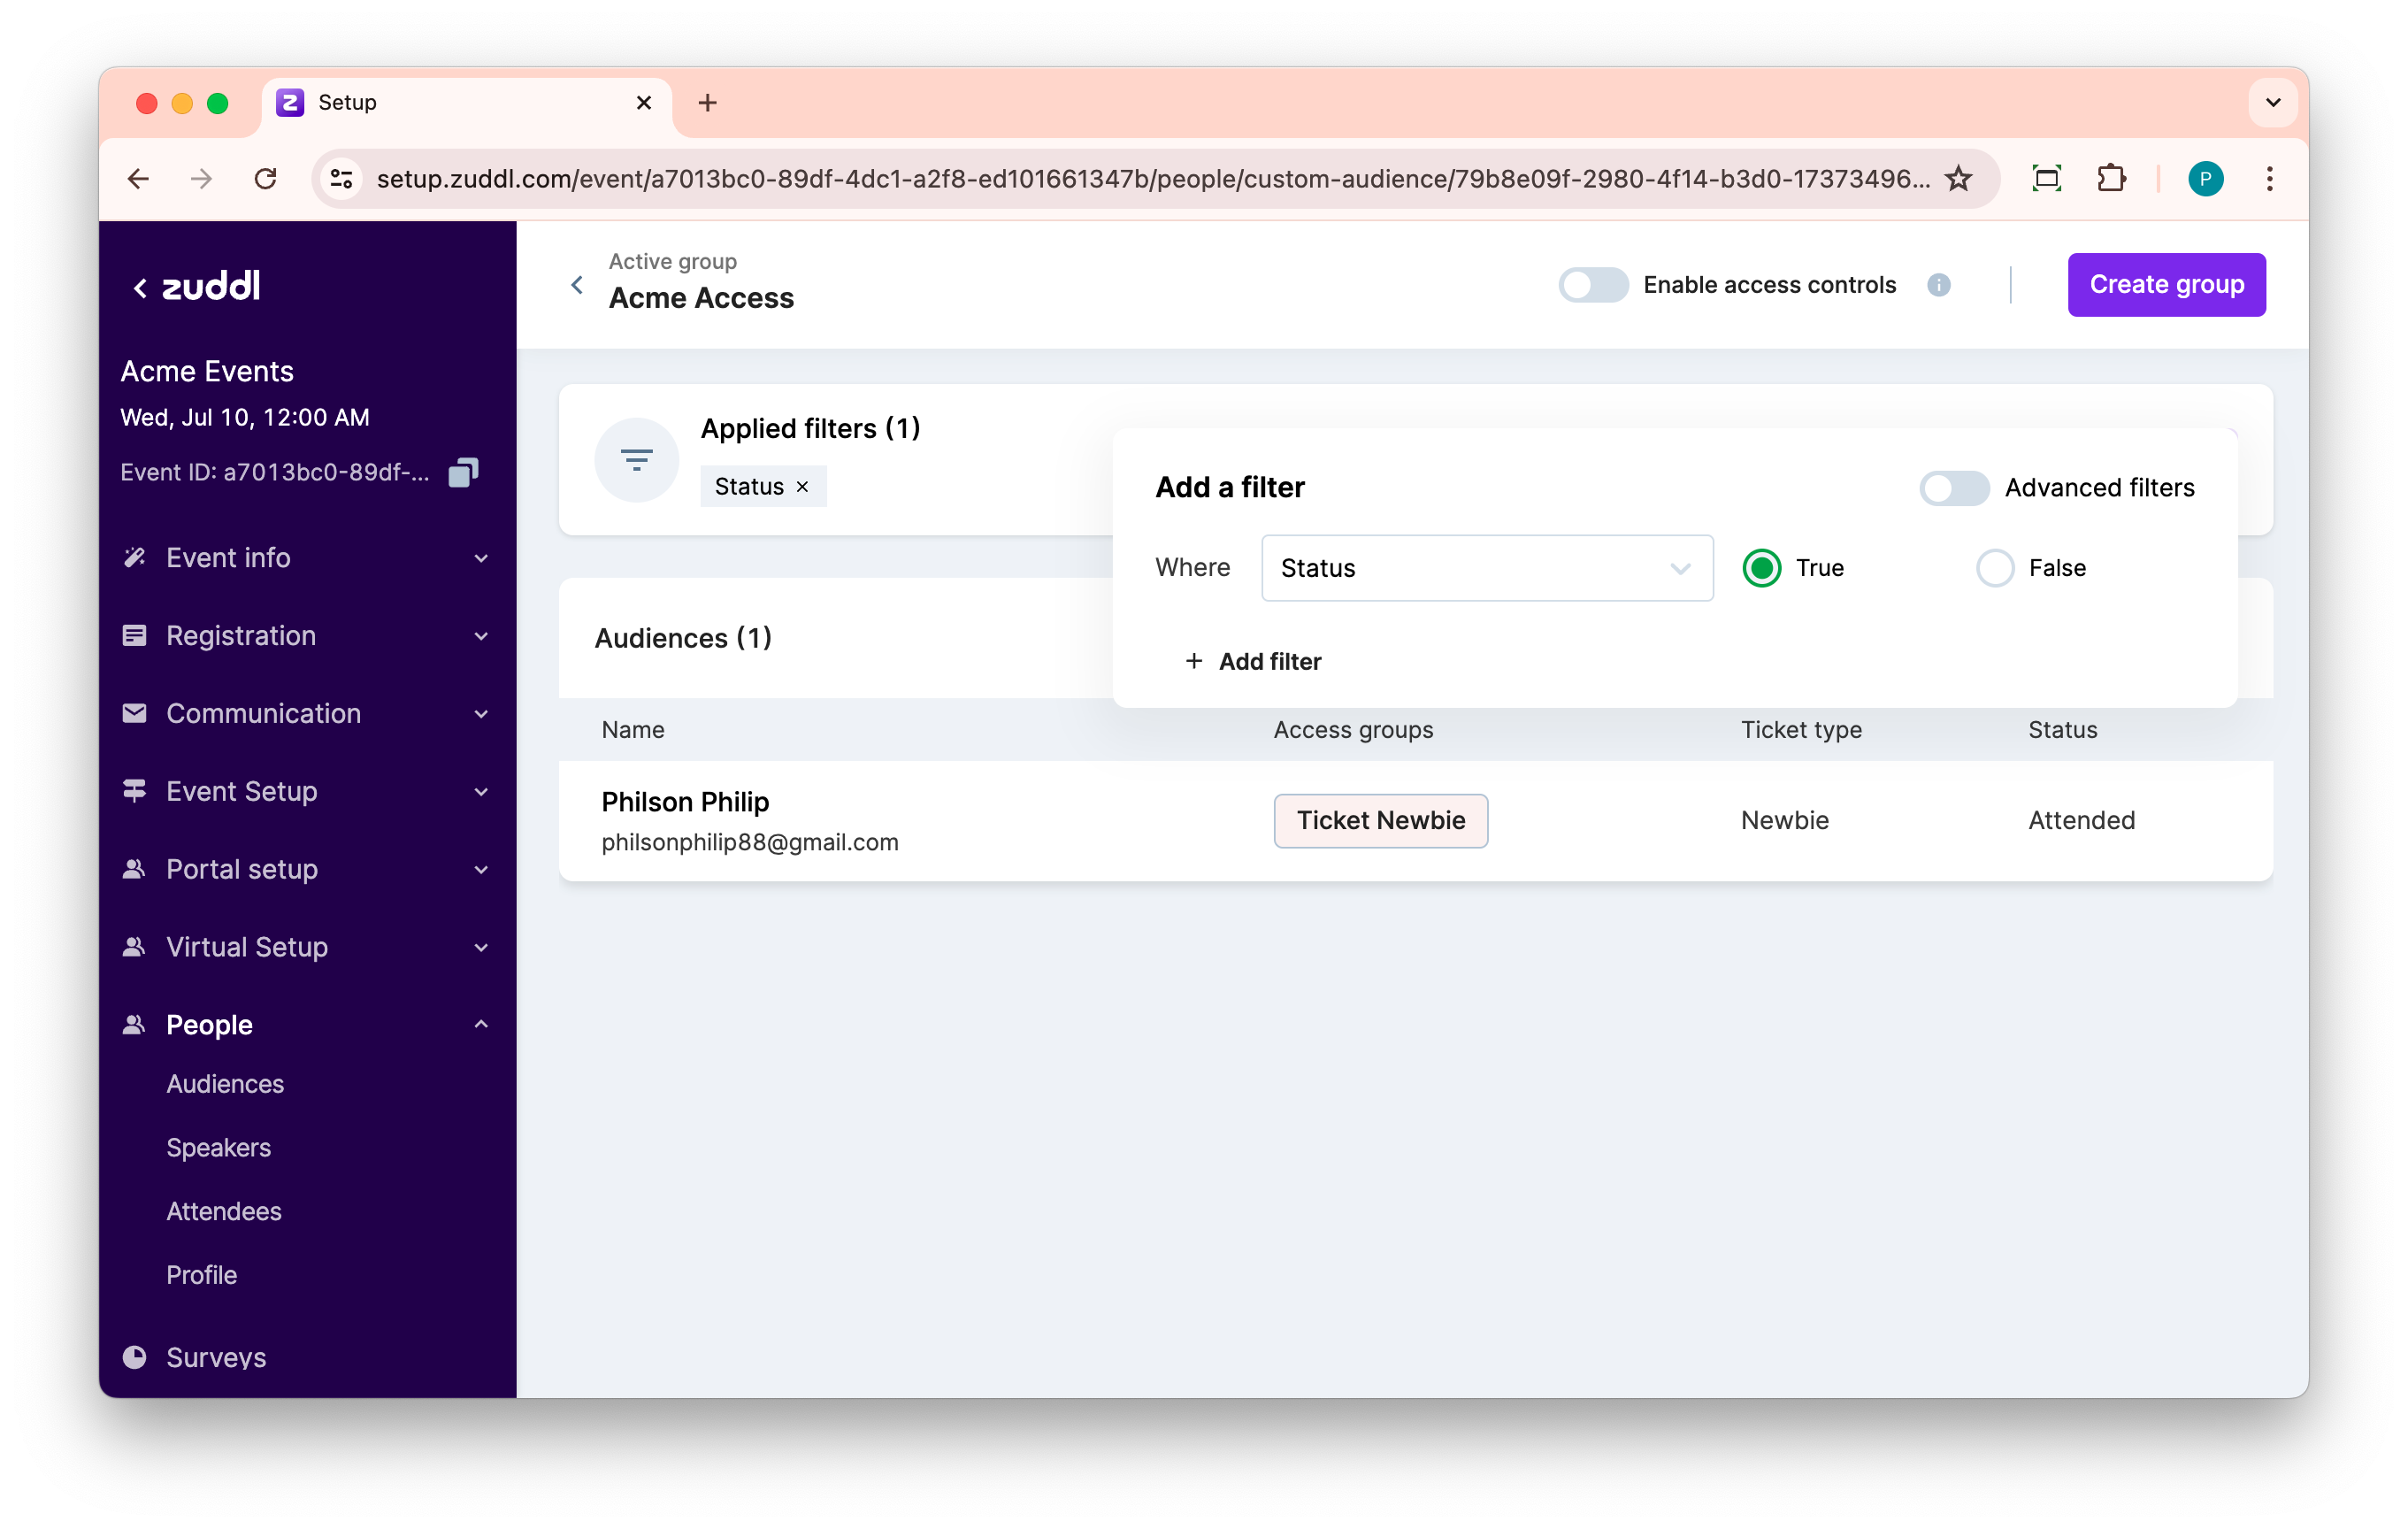
The attendees can be assigned to different groups, as shown in the All Audience section. To filter the attendees, click on the + Add filter button.

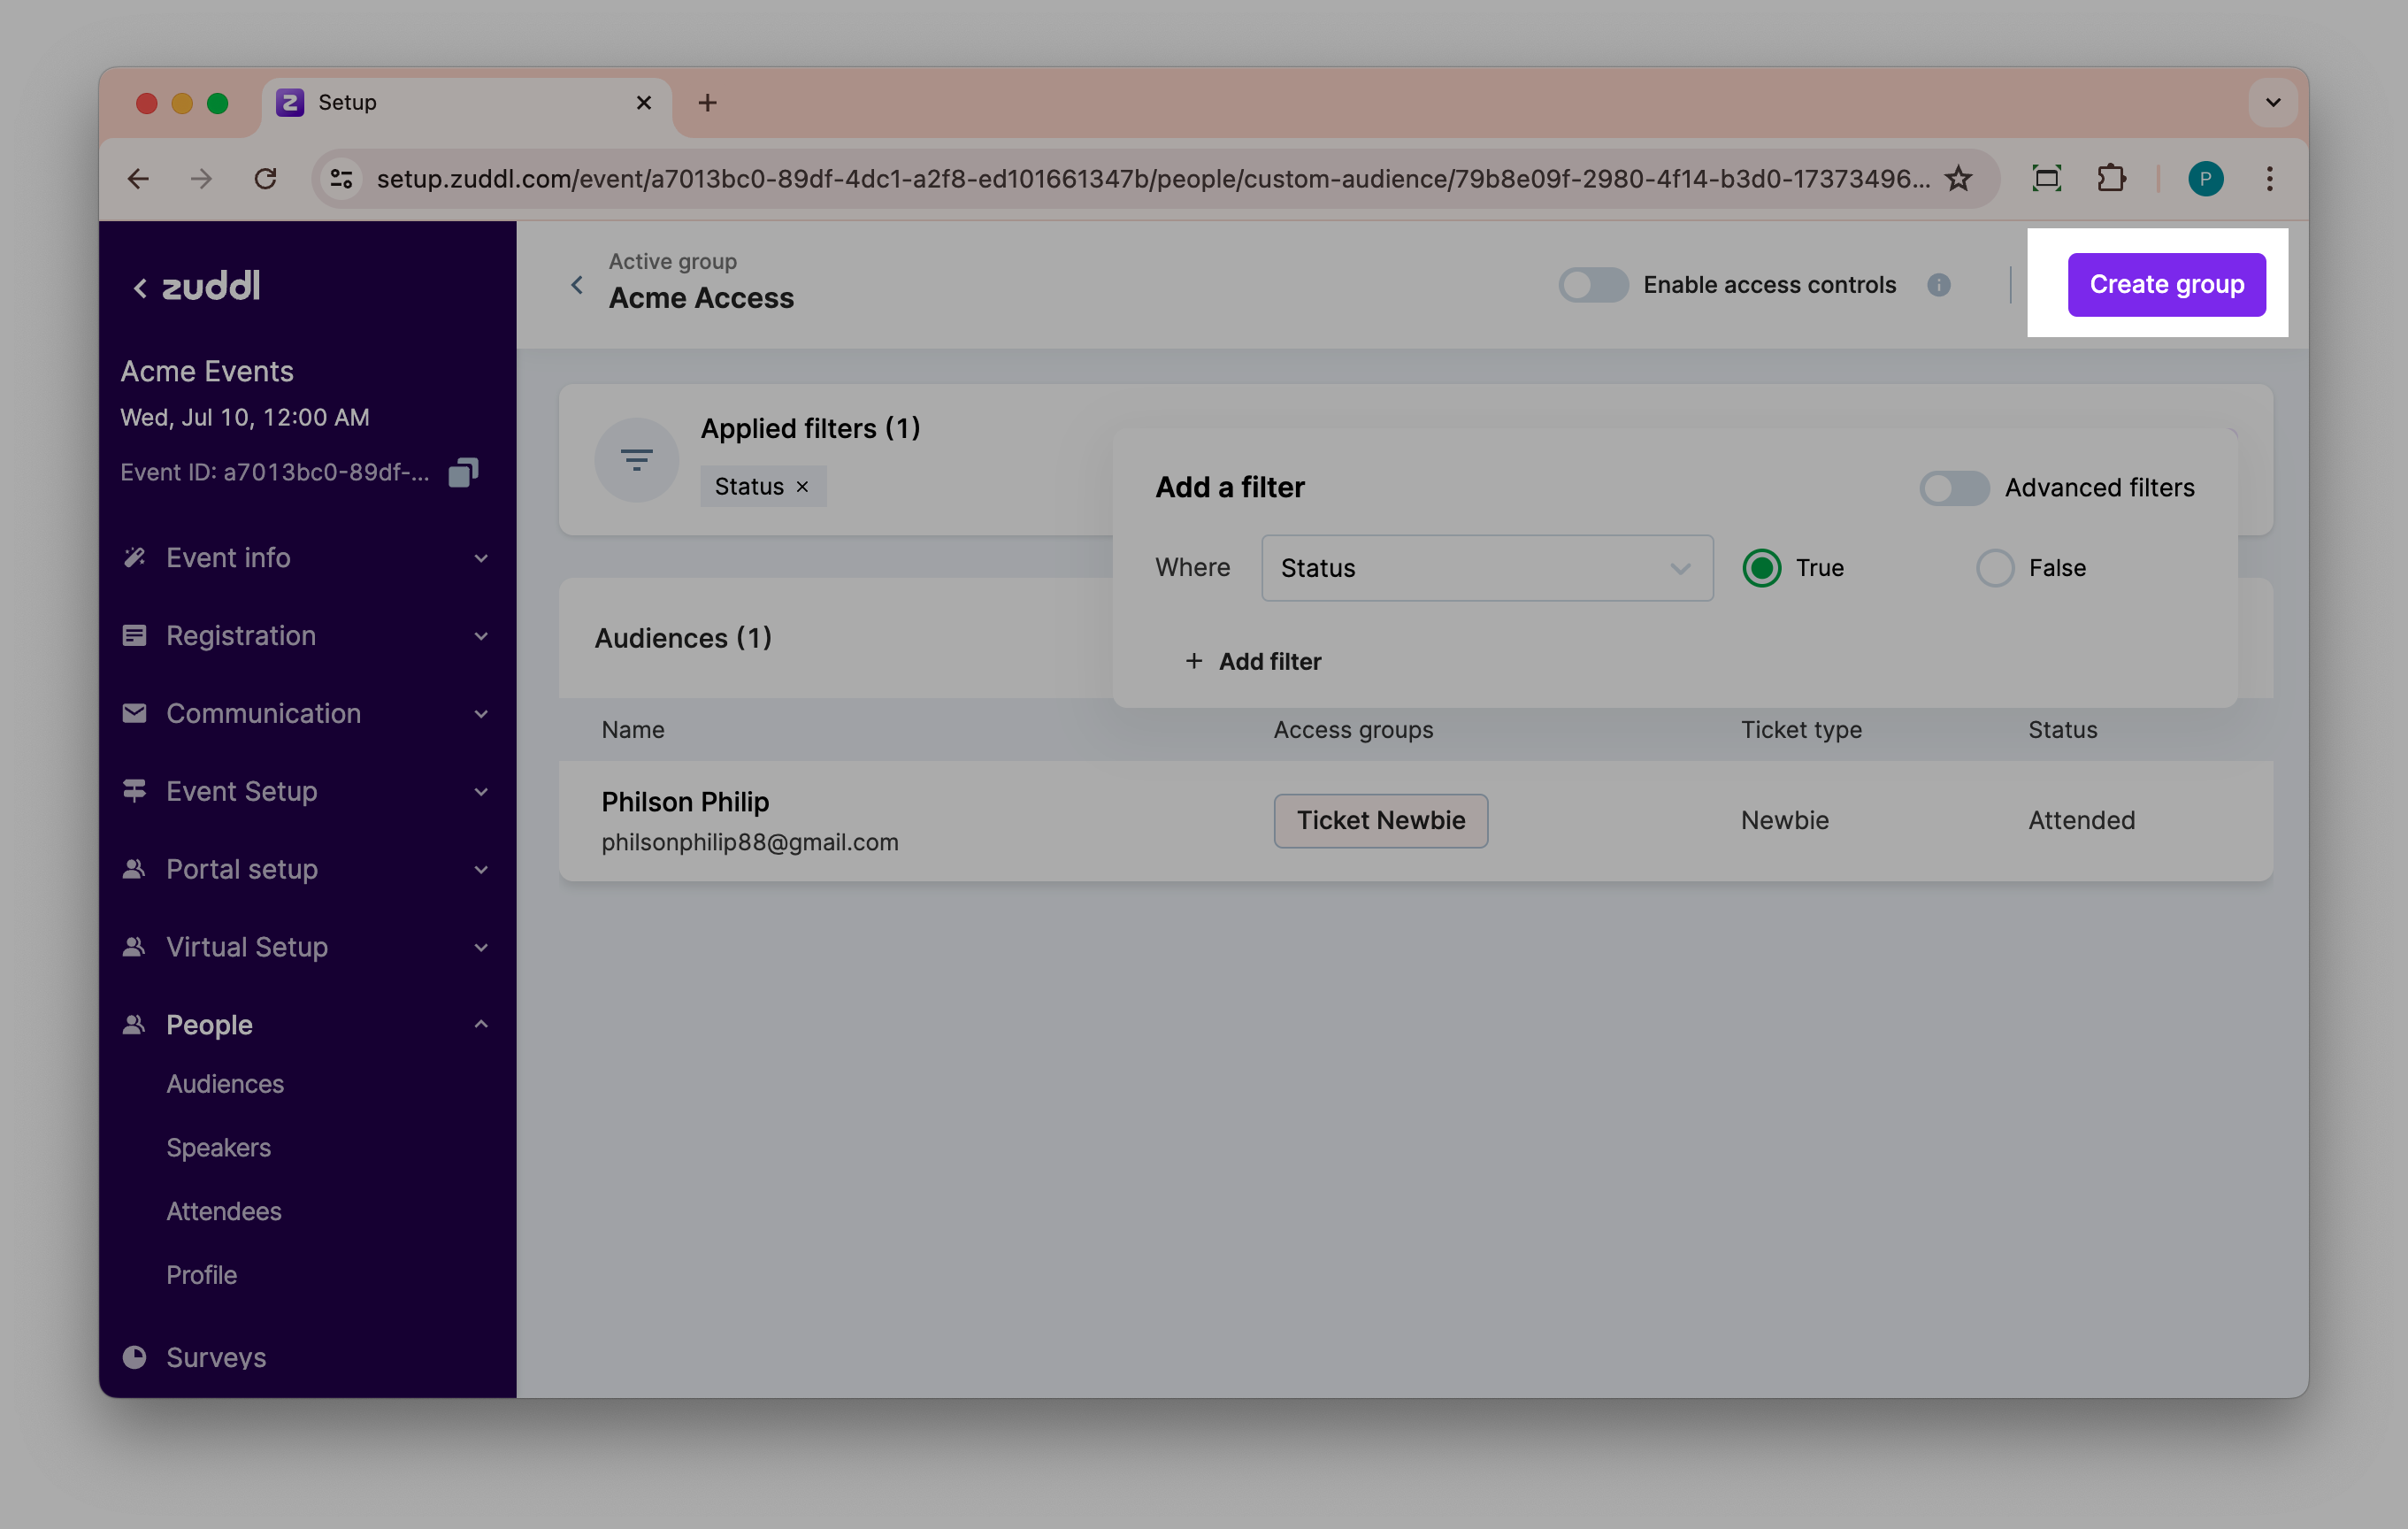
In the Where field, select any filter based on Tickets, Registration, and Event and Sessions for example, Status under the Registration category.0

You can also create filters based on hidden fields.
The Status filter opens up, allowing you to select True/False. Select True to filter the attendees who have attended the event and False to filter the attendees who did not.The list gets auto-populated based on your filter selections.
You can add click +Add filter to add more filters and apply AND logic between the filters.
For example, if you add an Email filter with the condition that the email should be a part of invite list, and a value. The result will be an AND operation of the Status and Email filter.

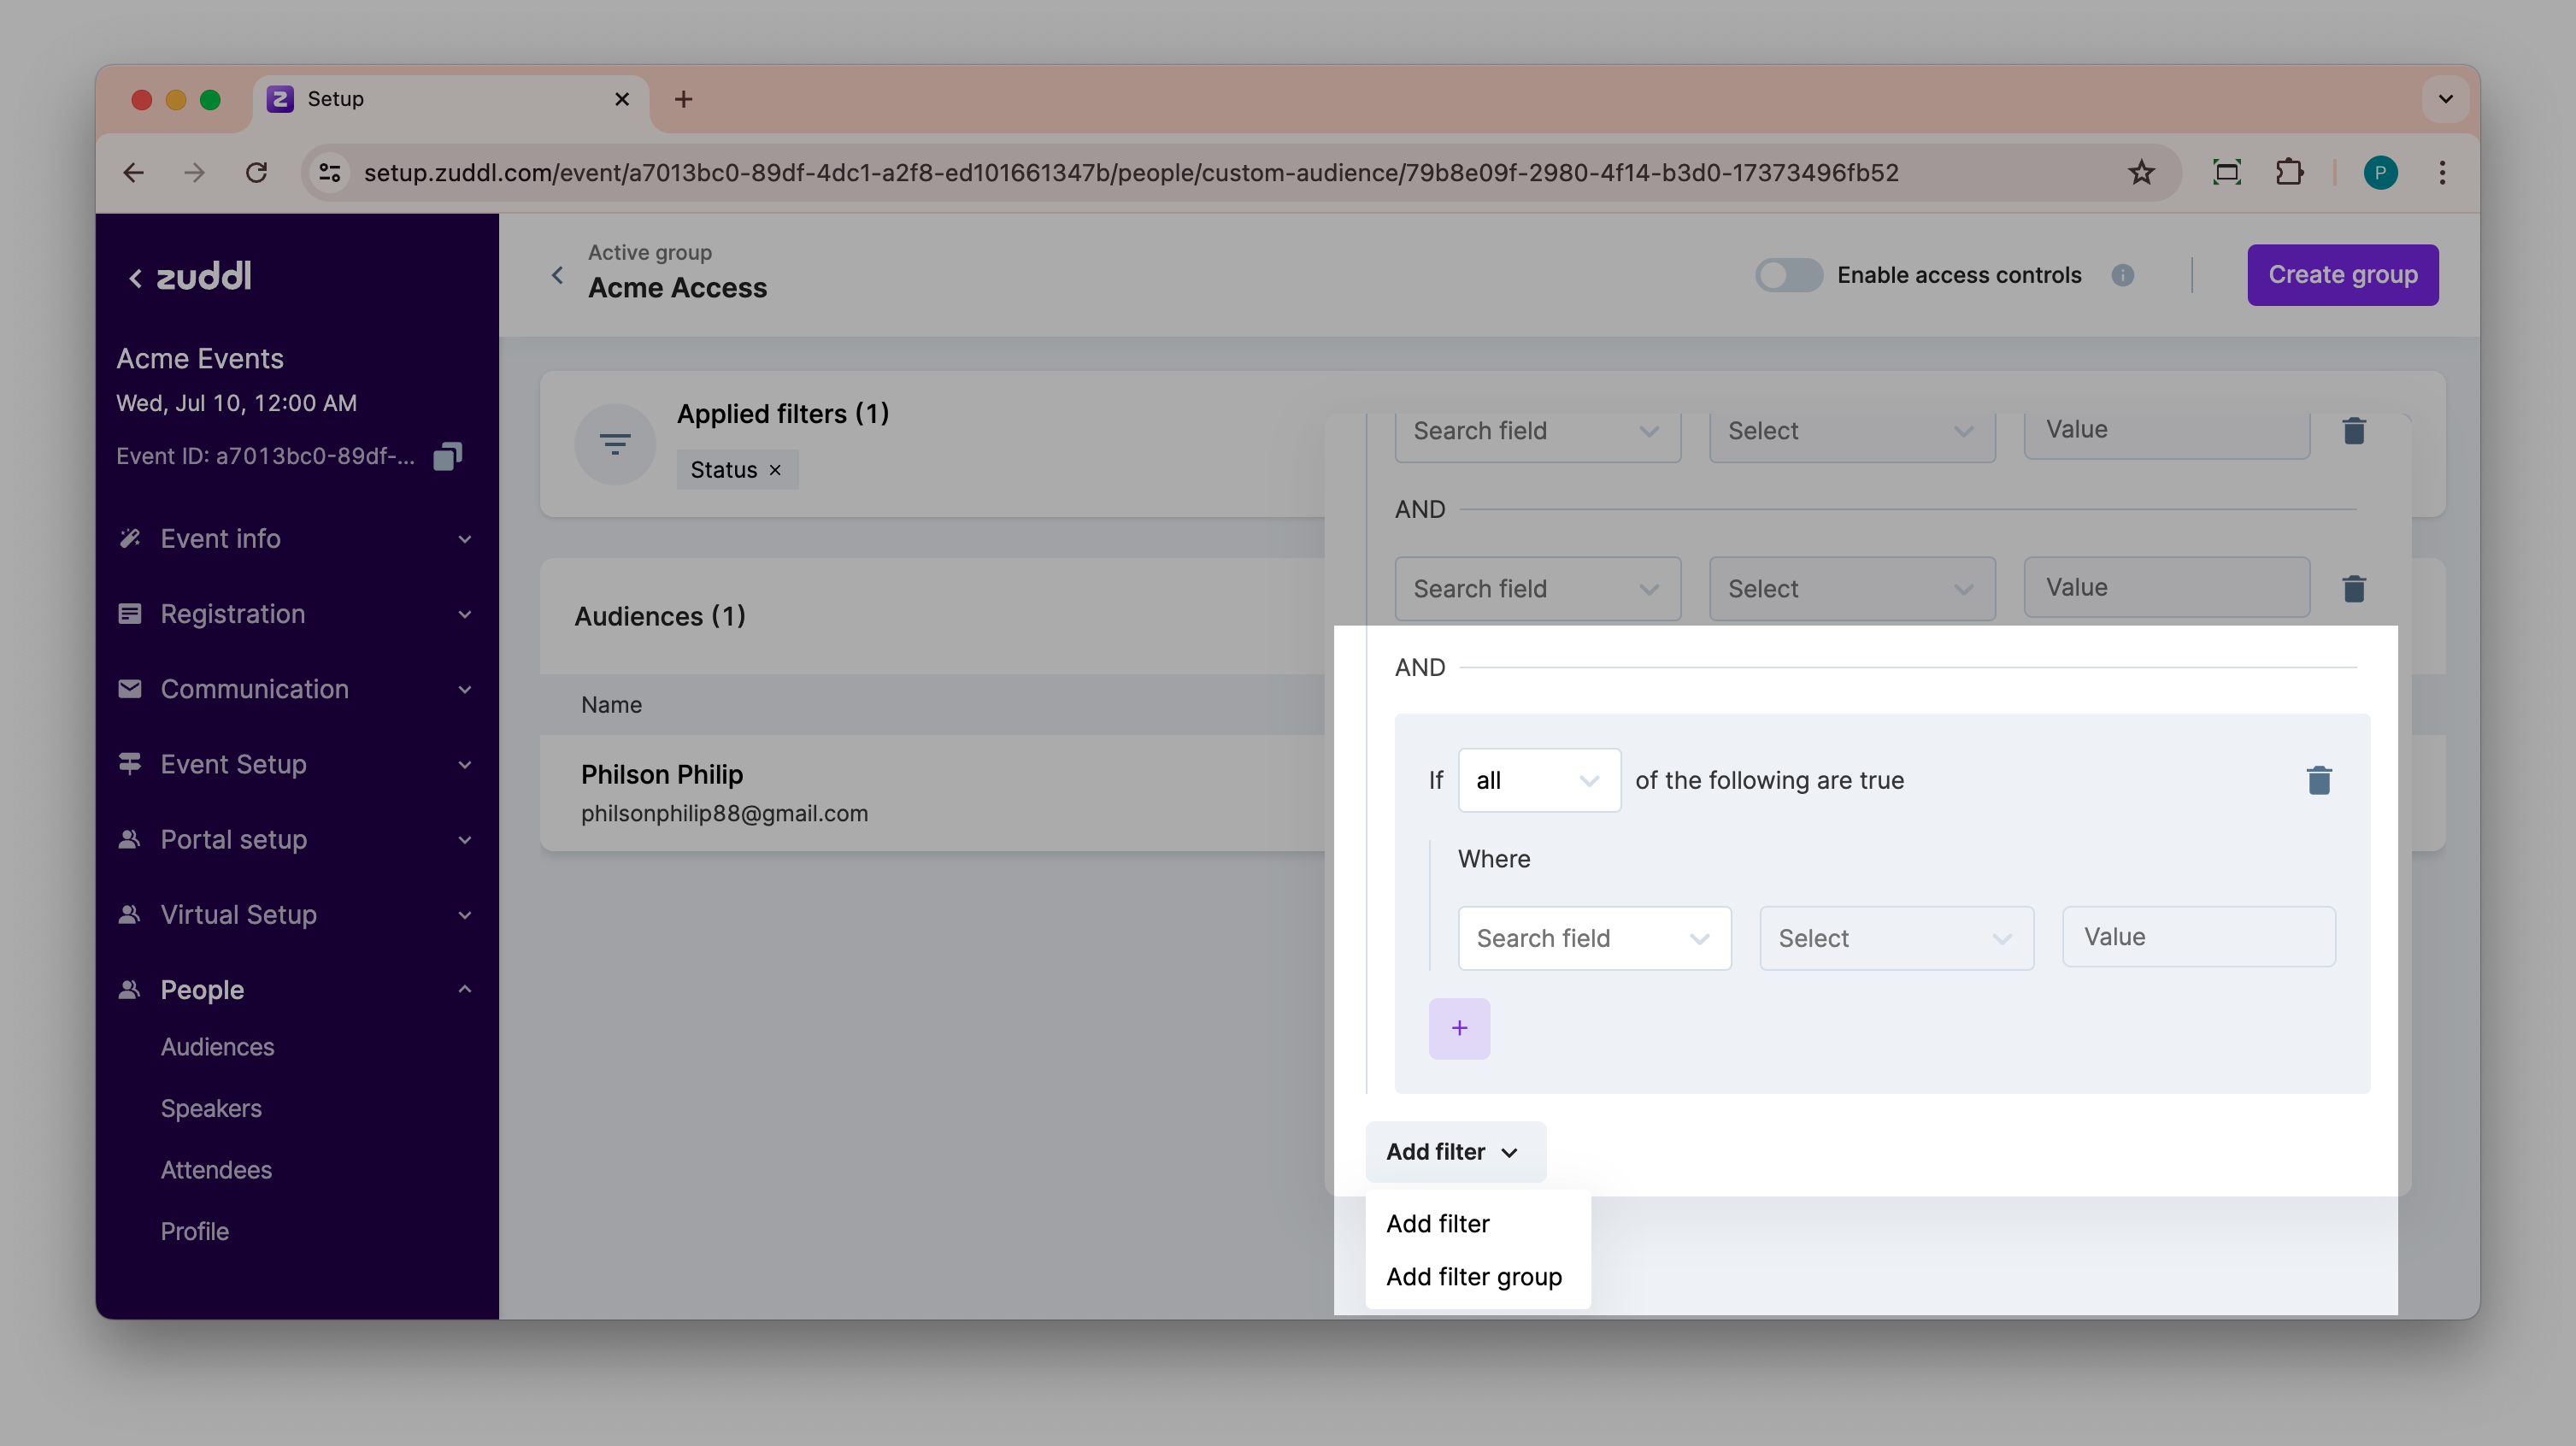
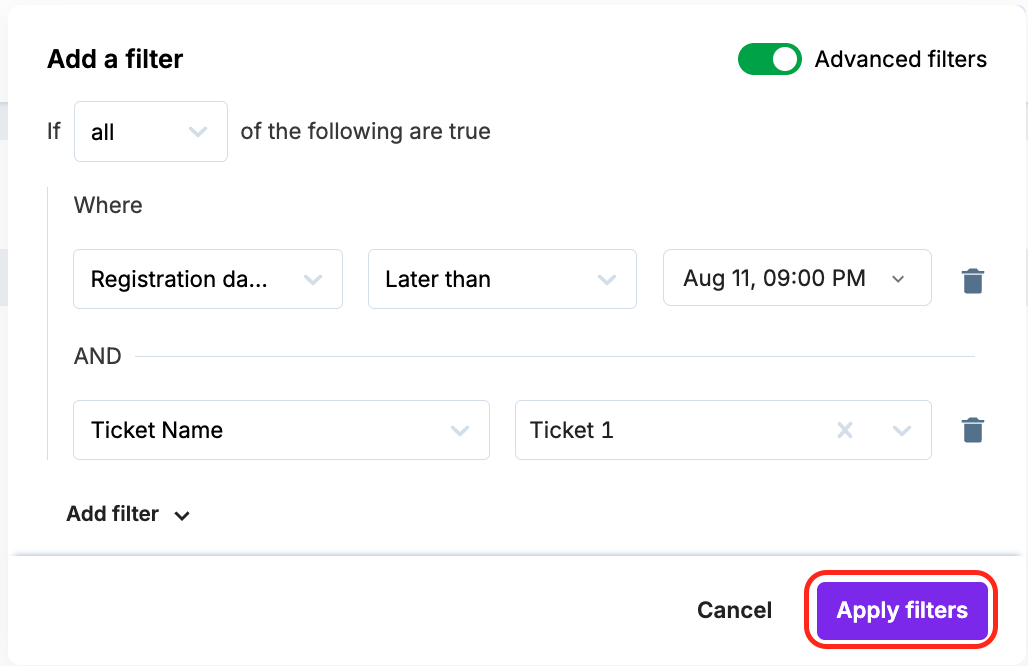
To apply a combination of filters with AND and OR operation, toggle on Advanced filters and select all or any for the governing statement.
If you select all, all added filters and filter groups will have AND operations
If you select any, all added filters and filter groups will have OR operations
You can click Add filter button, to add:
Filter: This adds a single filter with the same operator
Filter group: This adds a new filter group with a separate governing statement.
Click the Apply filters button
Click the Create group button in the top right corner to create a custom group.
A new Custom groups section in the Audience Groups tab shows the list of custom groups created.
Click on the Enable access control button to enable the access control for the custom group.
You can manage access permission on the custom groups from the Access Control tab.
A custom group name should not be similar to any default group name. Custom groups, once used, cannot be edited or deleted.
If multiple groups are mapped to an attendee, that attendee will inherit a combination of all groups. For example, if an attendee is assigned to groups X and Y, one has lobby access, and the other does not. The attendee would be able to access the lobby.
Rename or Delete
You can Rename or Delete a custom group from the group listing page.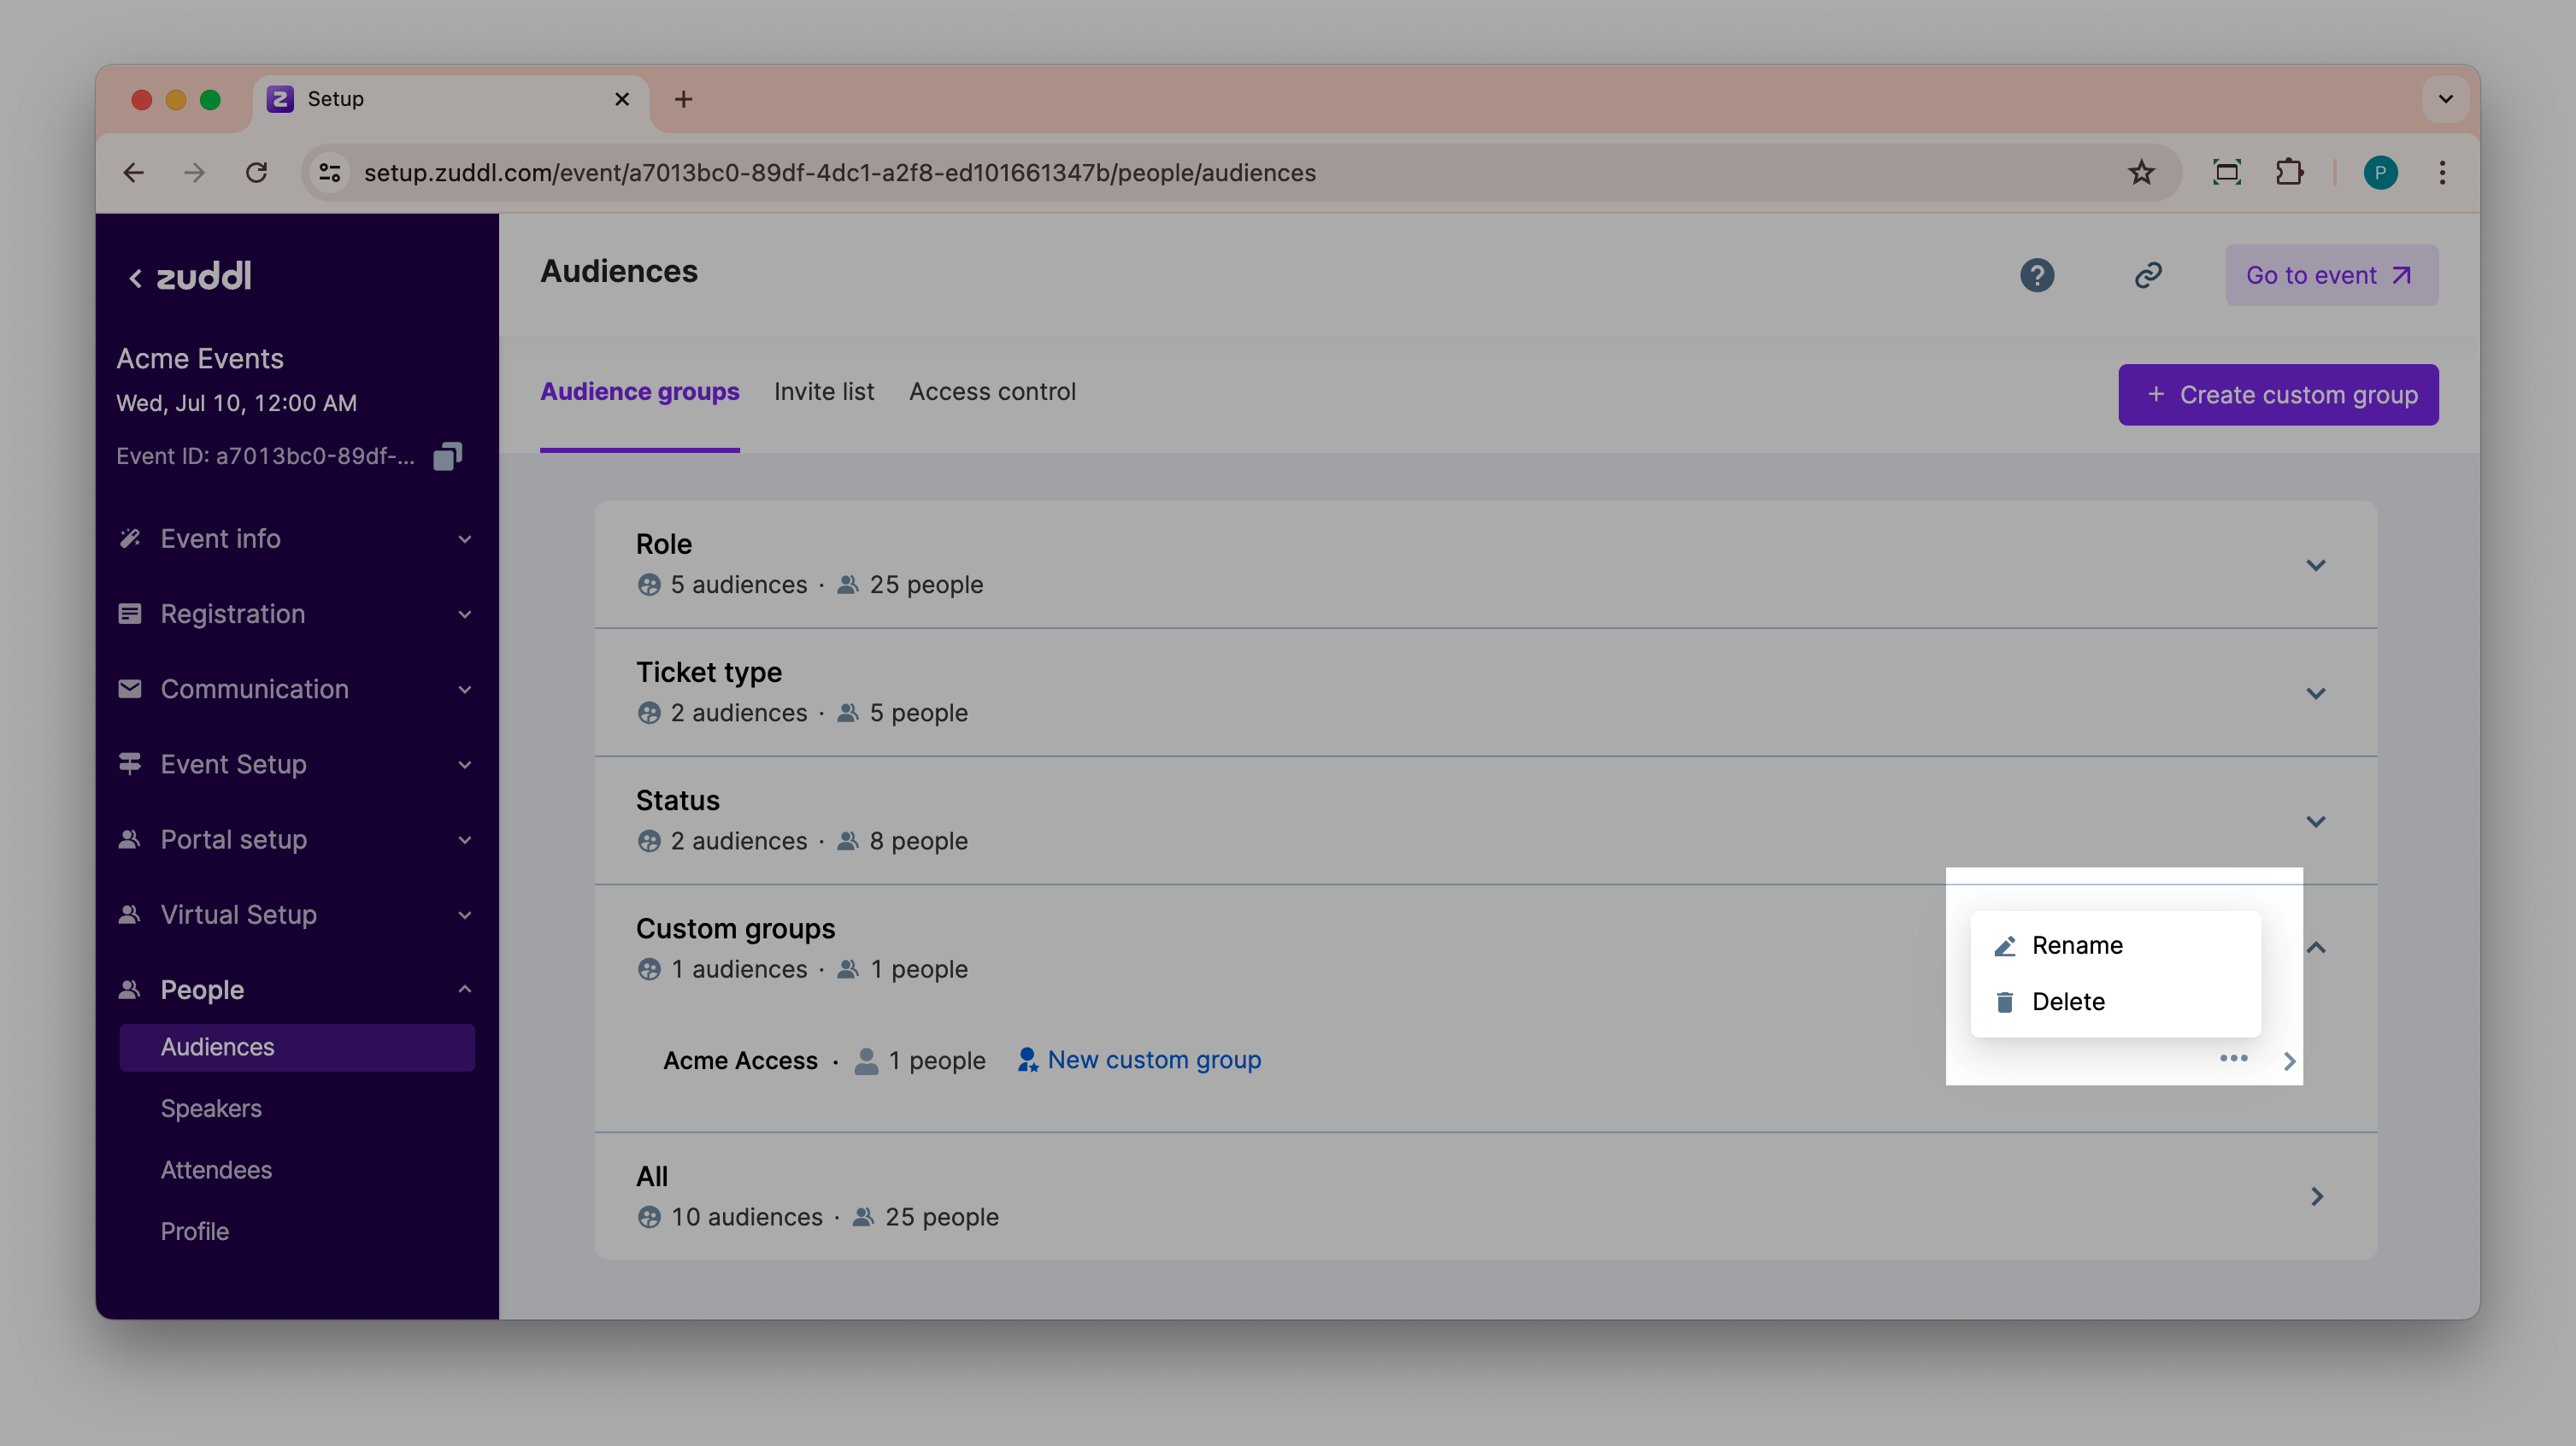
For active/static custom group, if any communication is currently being used, you can still edit the filters.