How to Set Up Badges for your In-person Event in Zuddl
Last updated: September 4, 2025
To make your event experience seamless, Zuddl now offers customizable badges for your participants for Hybrid and In-person events. You can have multiple templates for different audience groups and customize their appearance and contents as required.
There are four main stages to set up badges:
Customize your badge templates in the event setup.
Share your requirements with our team.
Ensure you have the printing equipment and materials on-site.
Use the Zuddl Onsite App to check in your participants and print badges.
For more detailed instructions on using the Onsite app, use this guide.
Creating a new badge template
Follow these steps to create a new badge template:
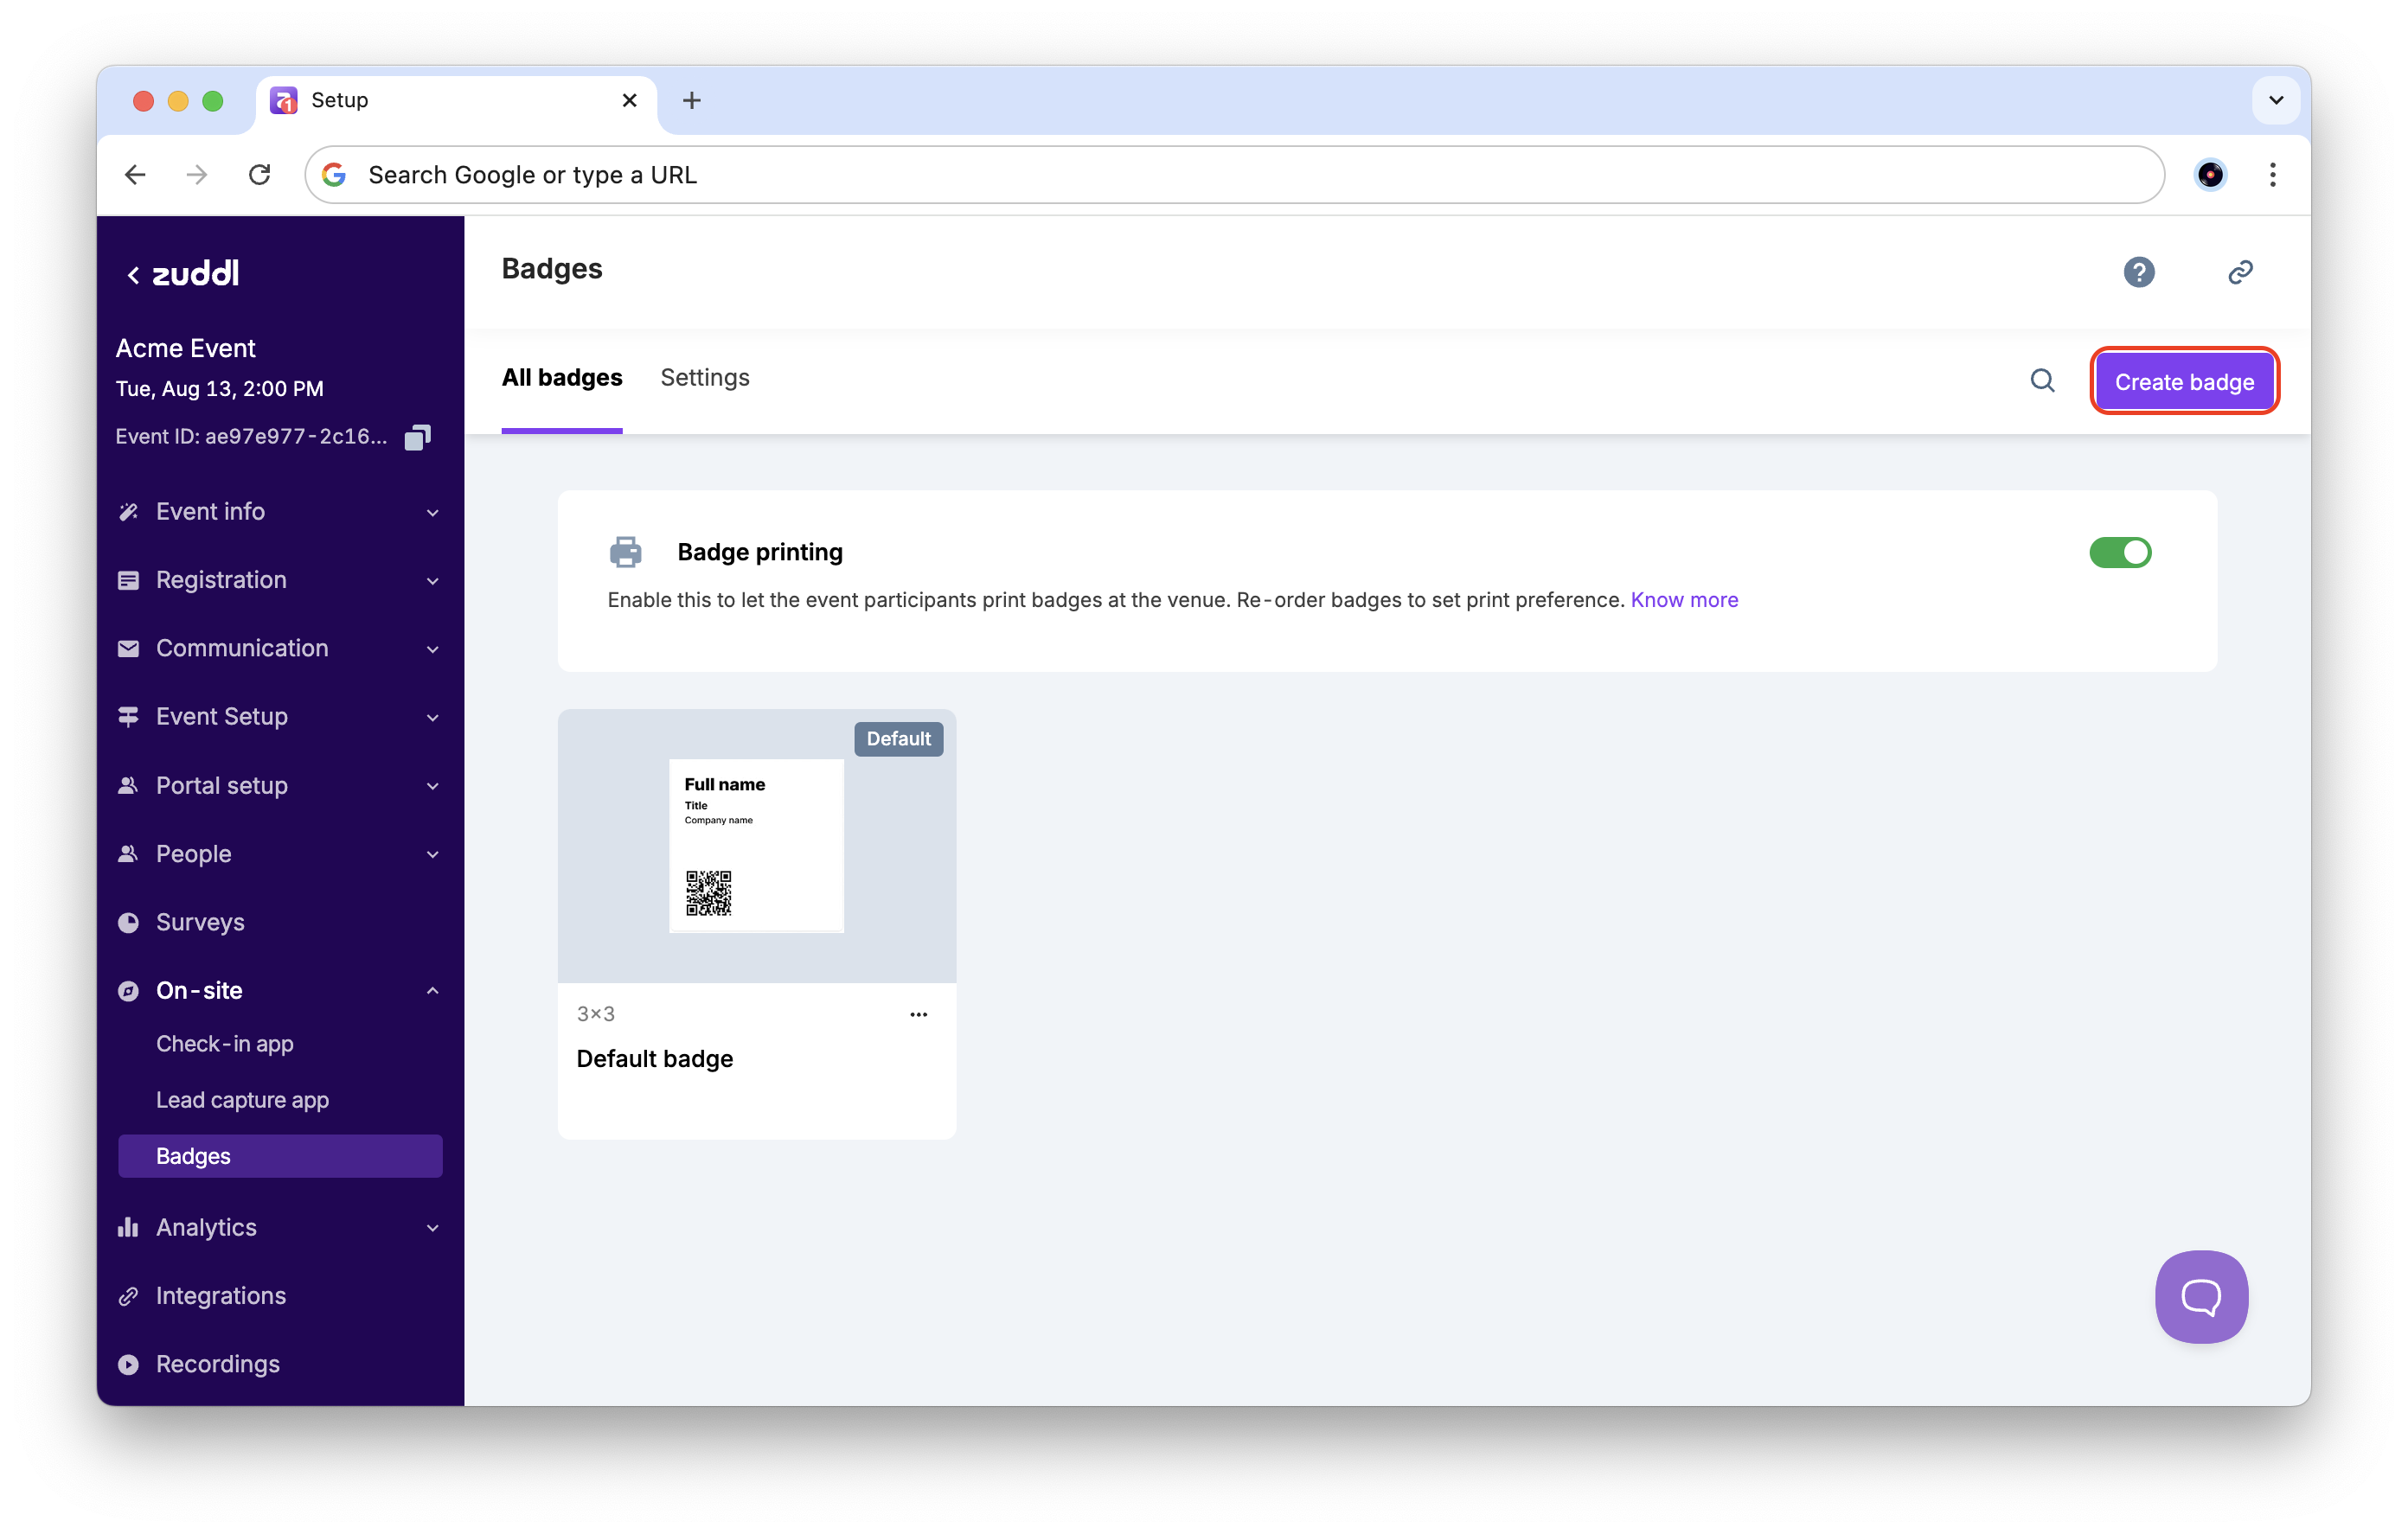
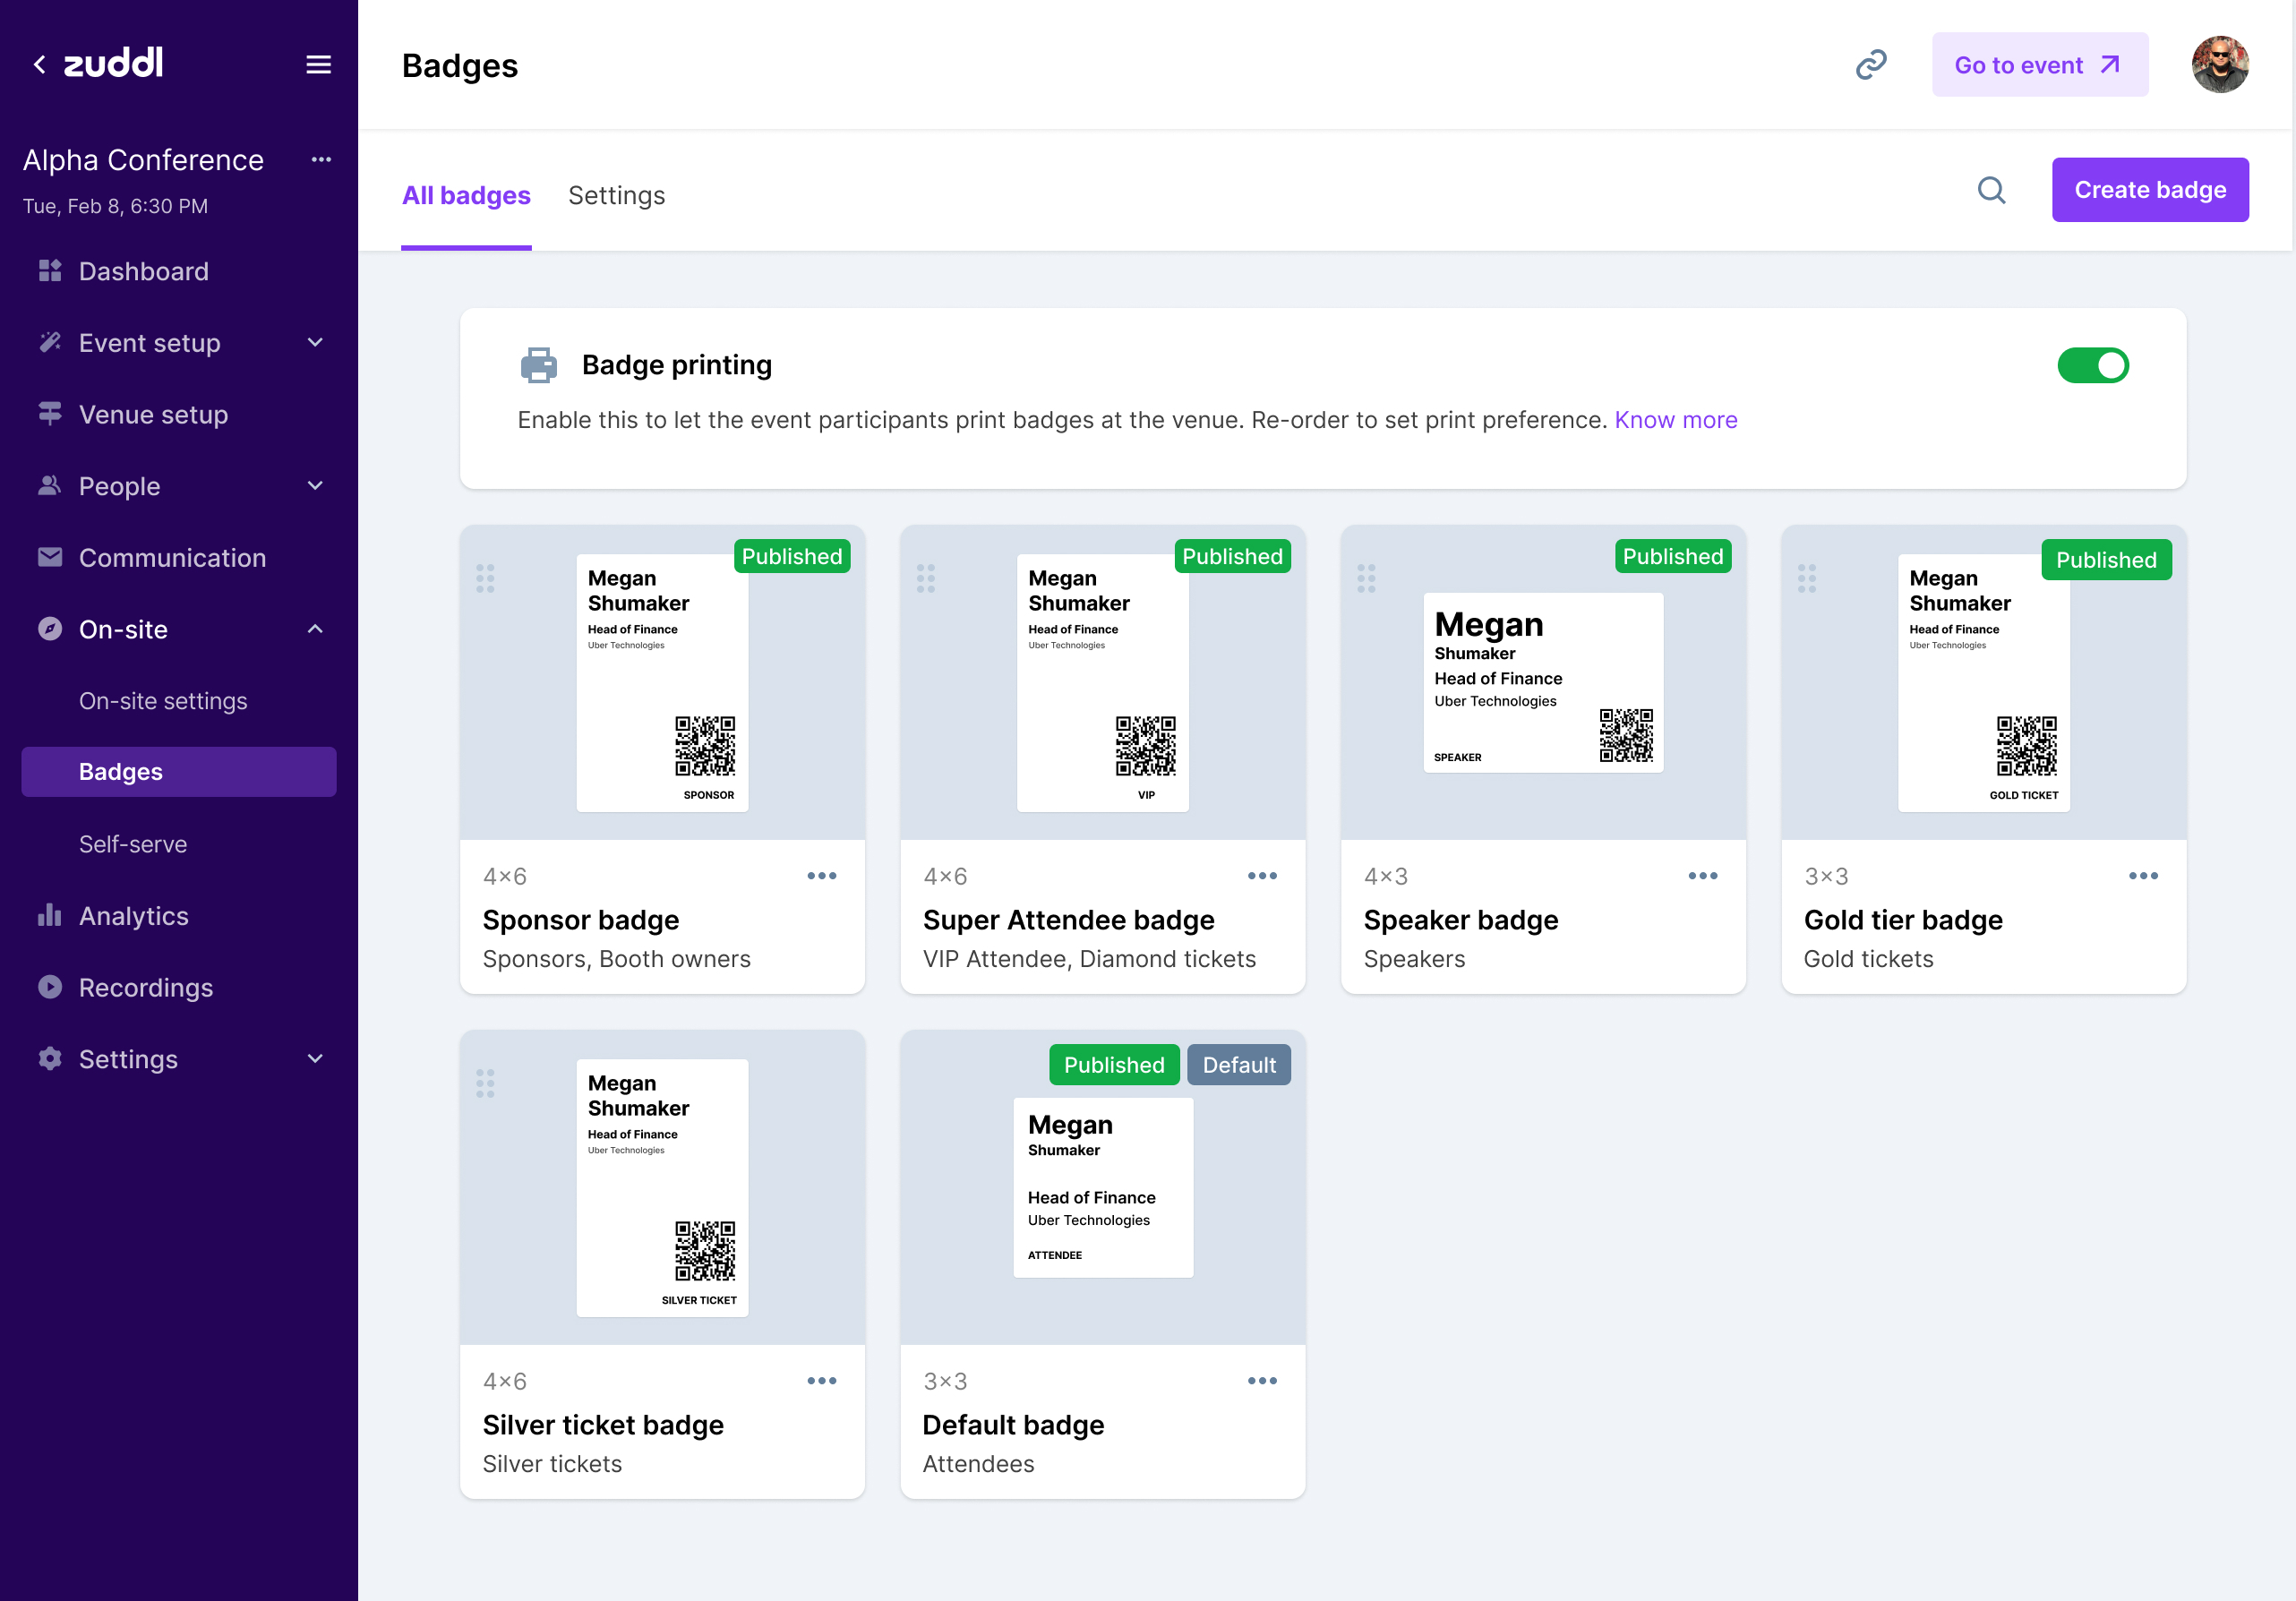
Go to Onsite > Badges > All badges tab. Click the Create badge button.
In the popup, customize the badge details:
Enter a Badge name (up to 30 characters).
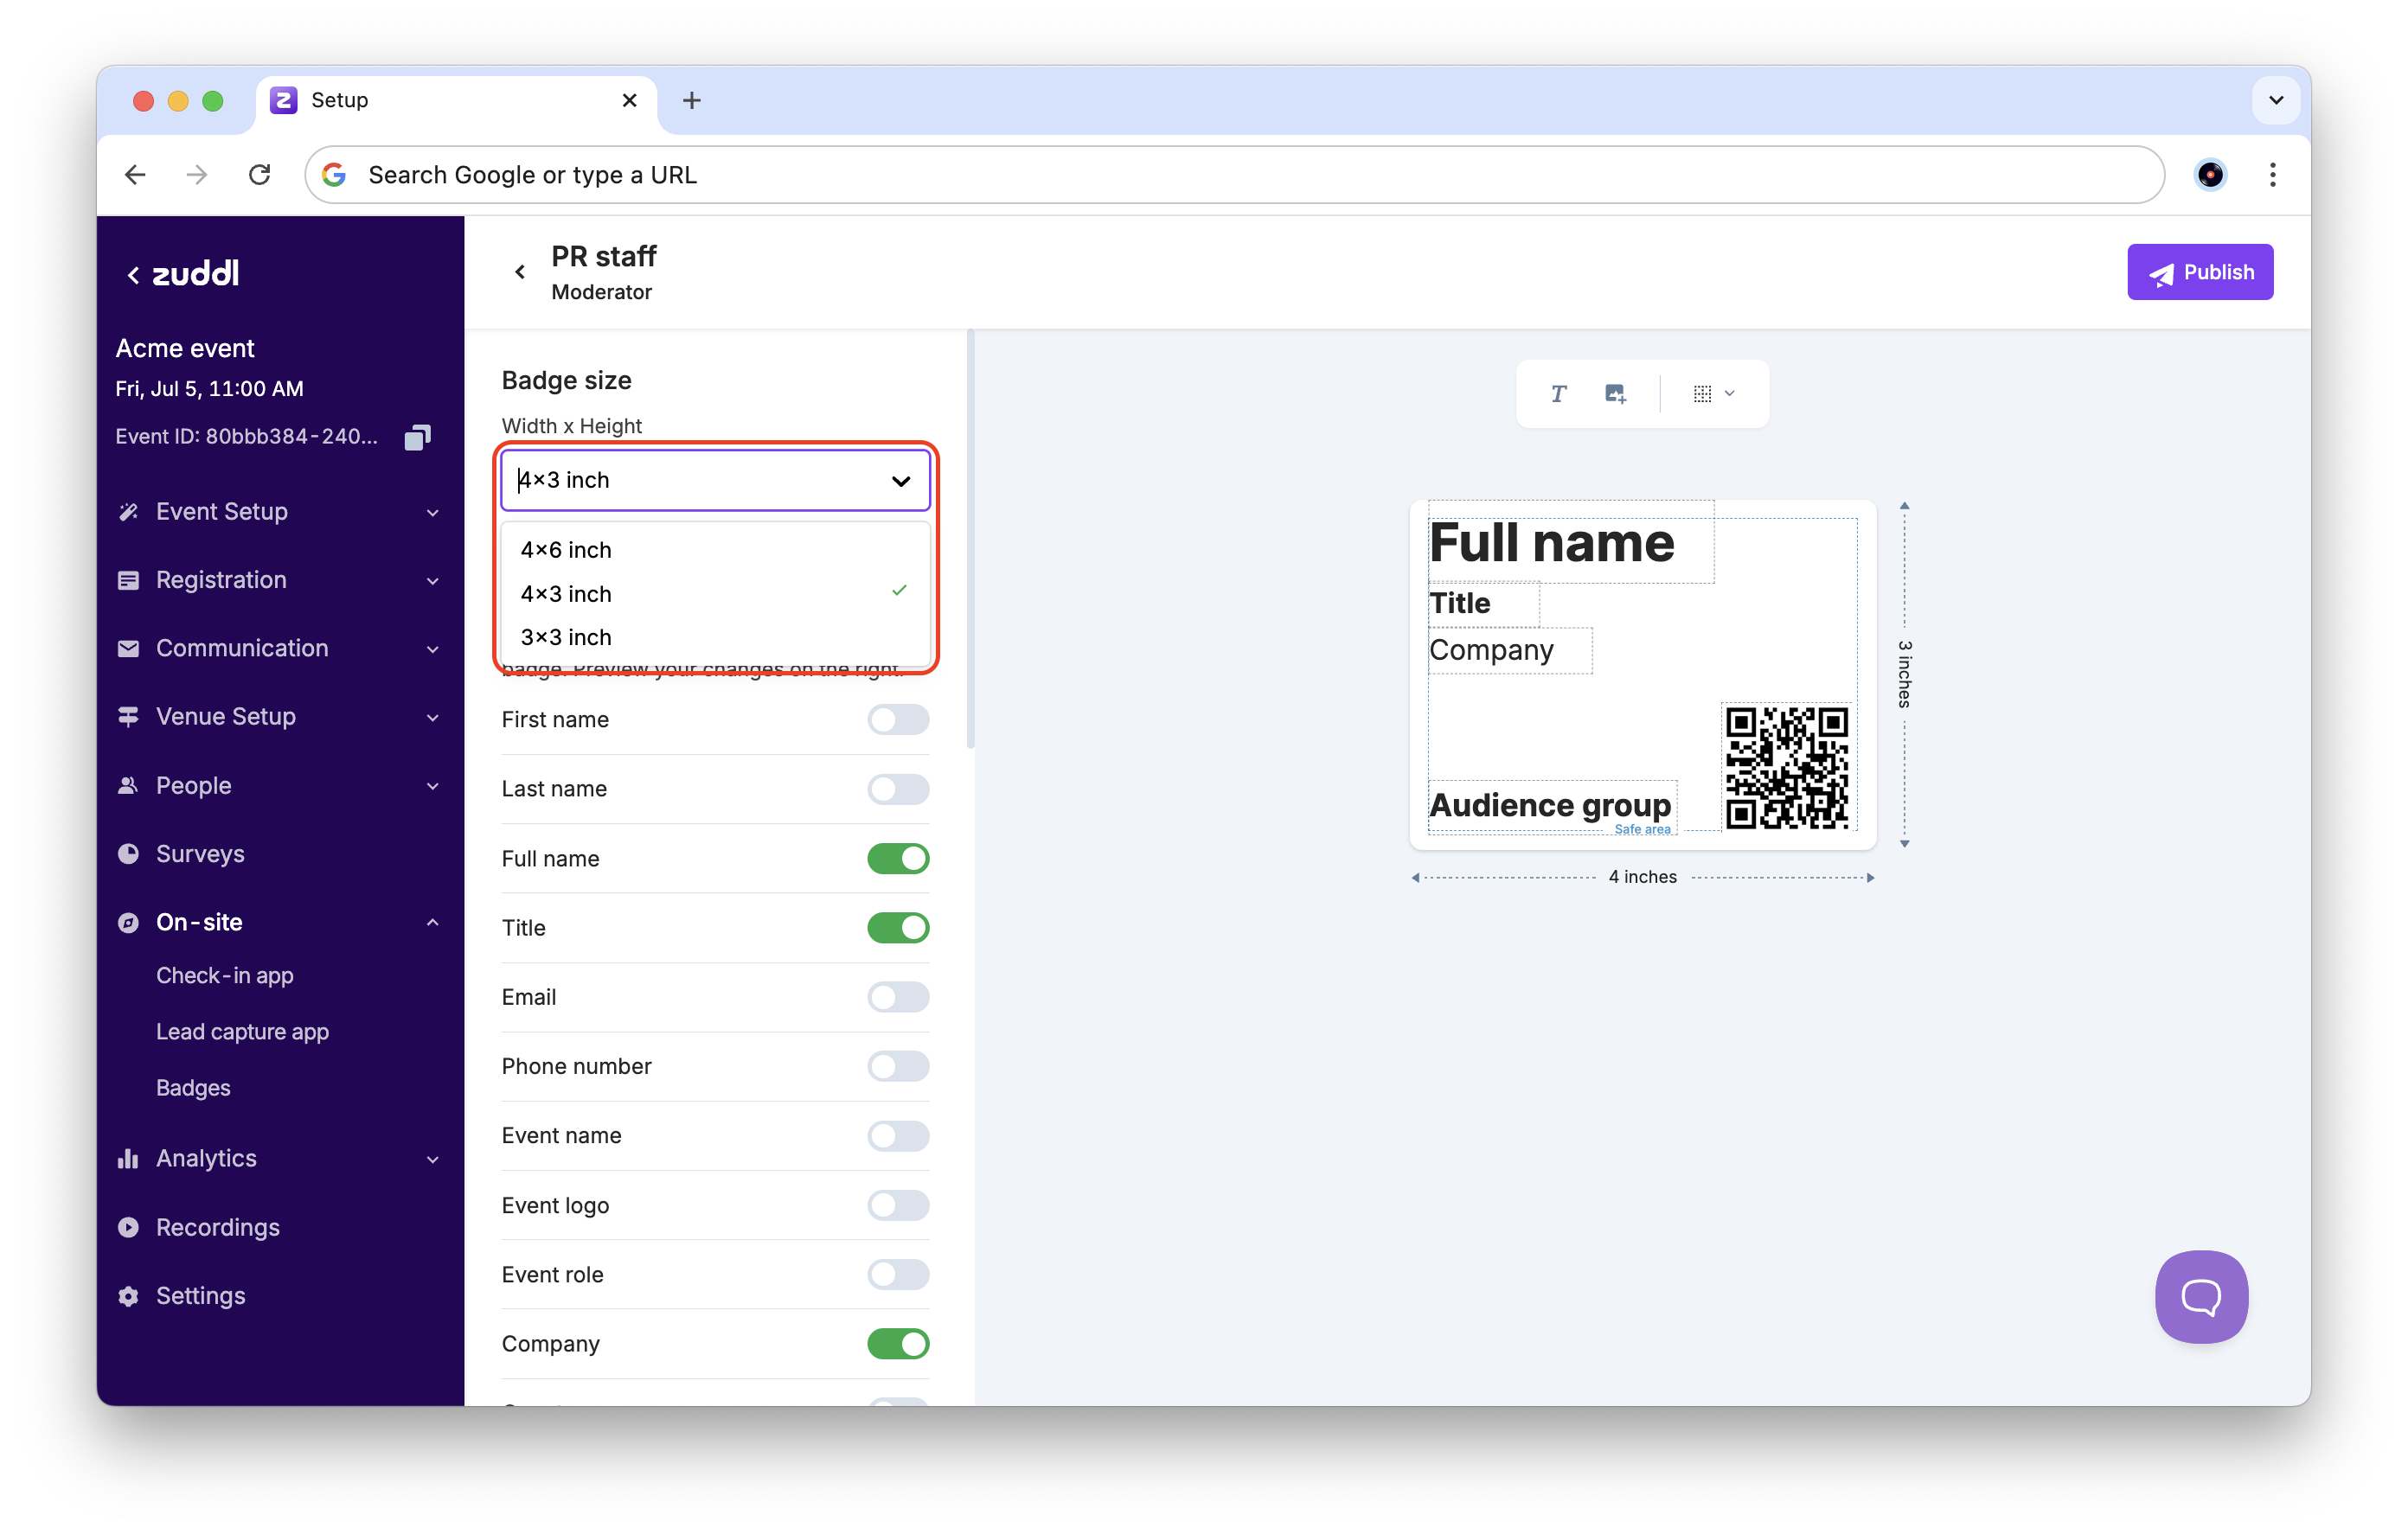
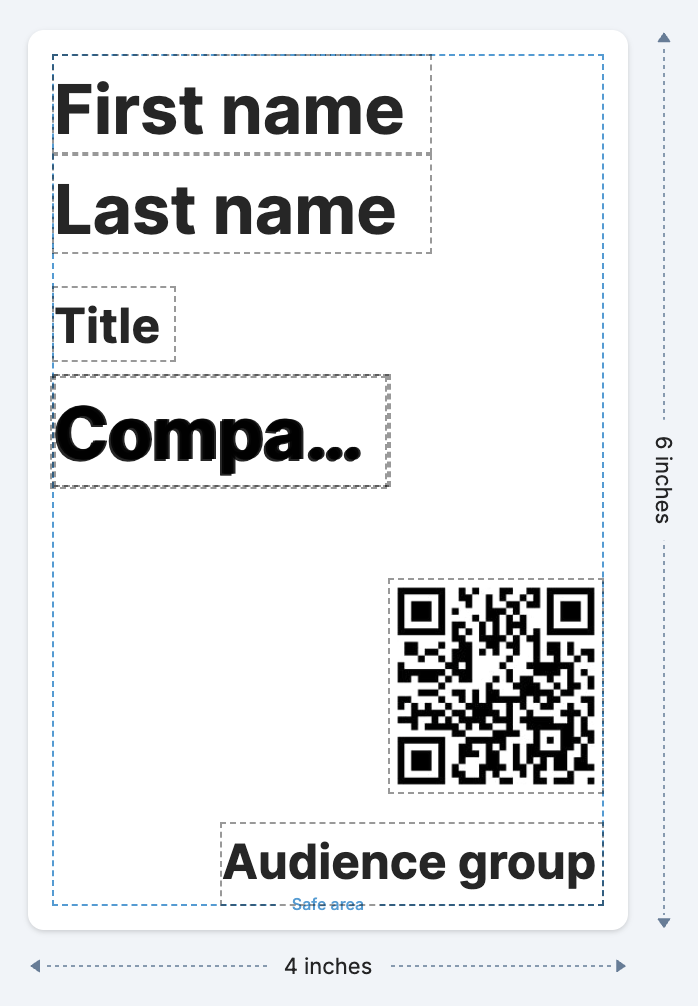
Select a badge size from the available options: 4x6, 4x3, or 3x3 (measured in inches). The default badge layout for each size is shown in the preview below.
Under Select audience group, choose the applicable audience groups for this badge.
Click Create badge.

Customizing the badge design
Once the badge is created, you can now start customizing its design. You can choose what badge elements to include, images to add, fonts, or even custom HTML designs.
Follow these steps to customize the badge design:
If you need to change the size of the badge, choose the desired option under Badge size.
It is recommended that you select a size before making other customizations, as changing the size later will rearrange all badge elements.
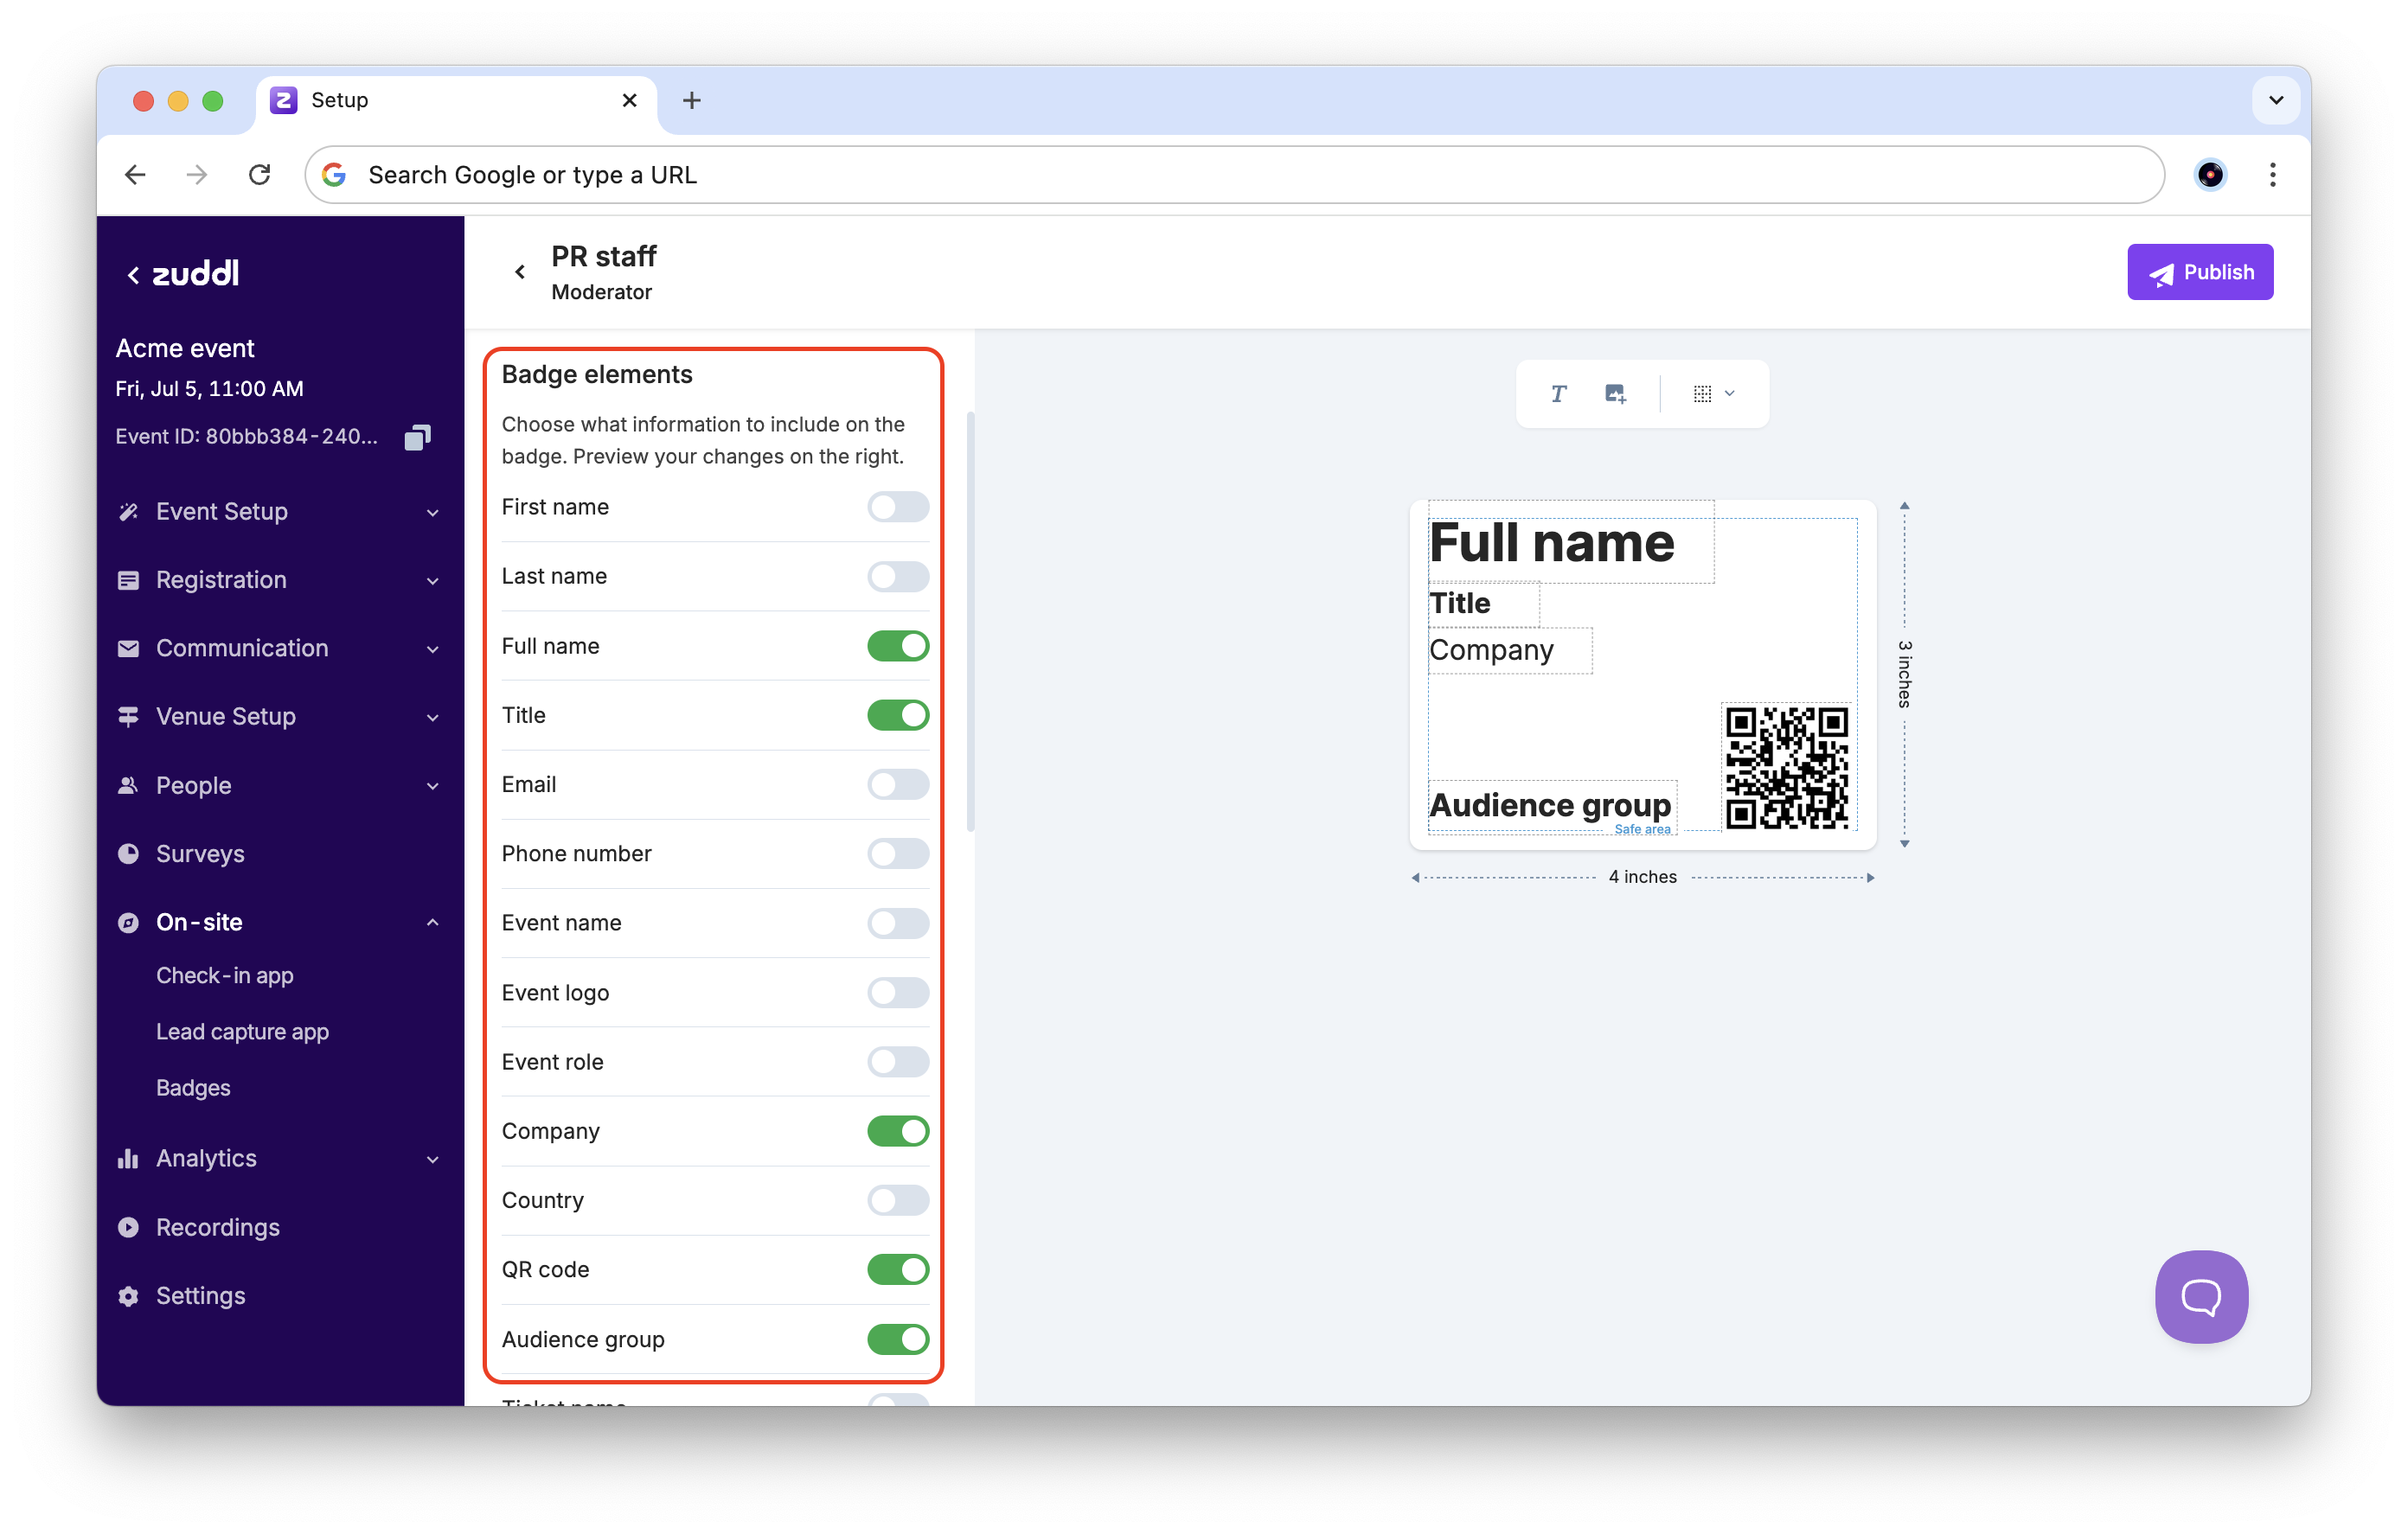
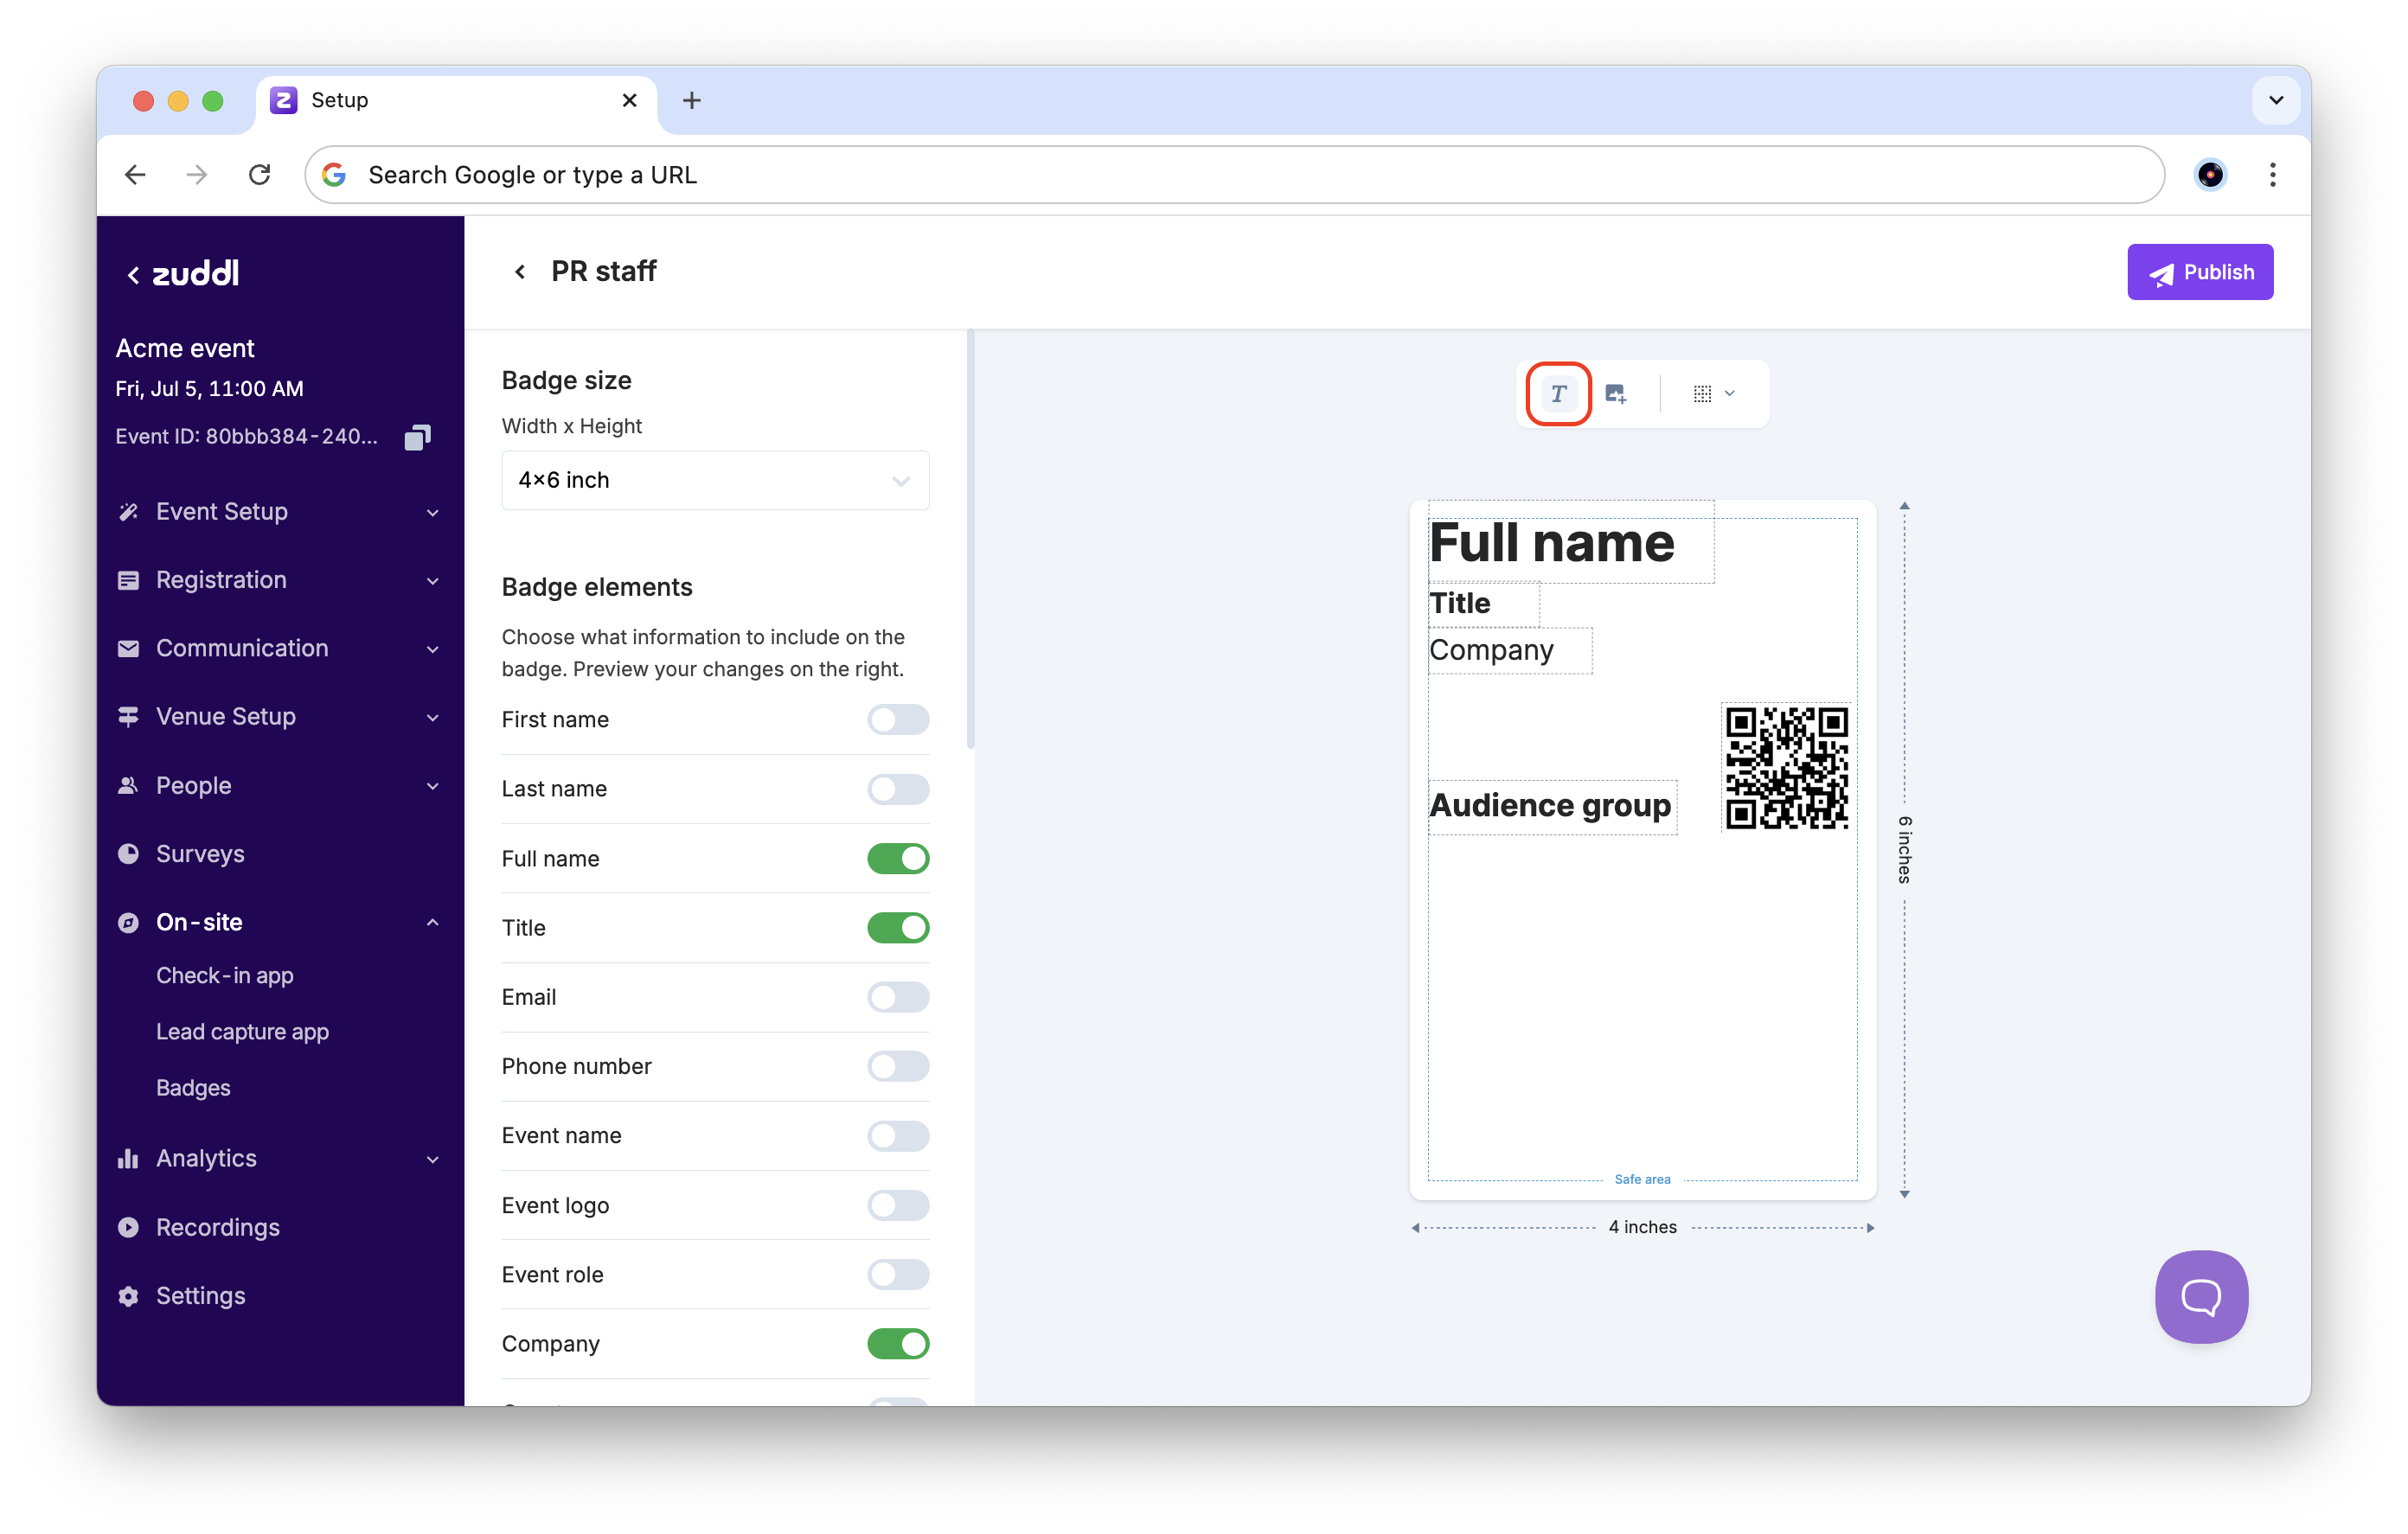
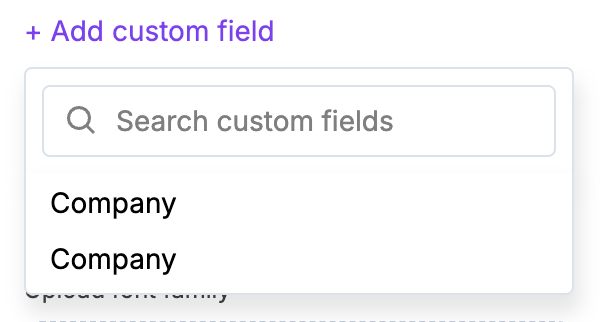
In the Badge elements section, choose what elements to include in the badge. Toggle off the elements you want to hide. To add a custom field, click + Add custom field and choose a field from the dropdown.
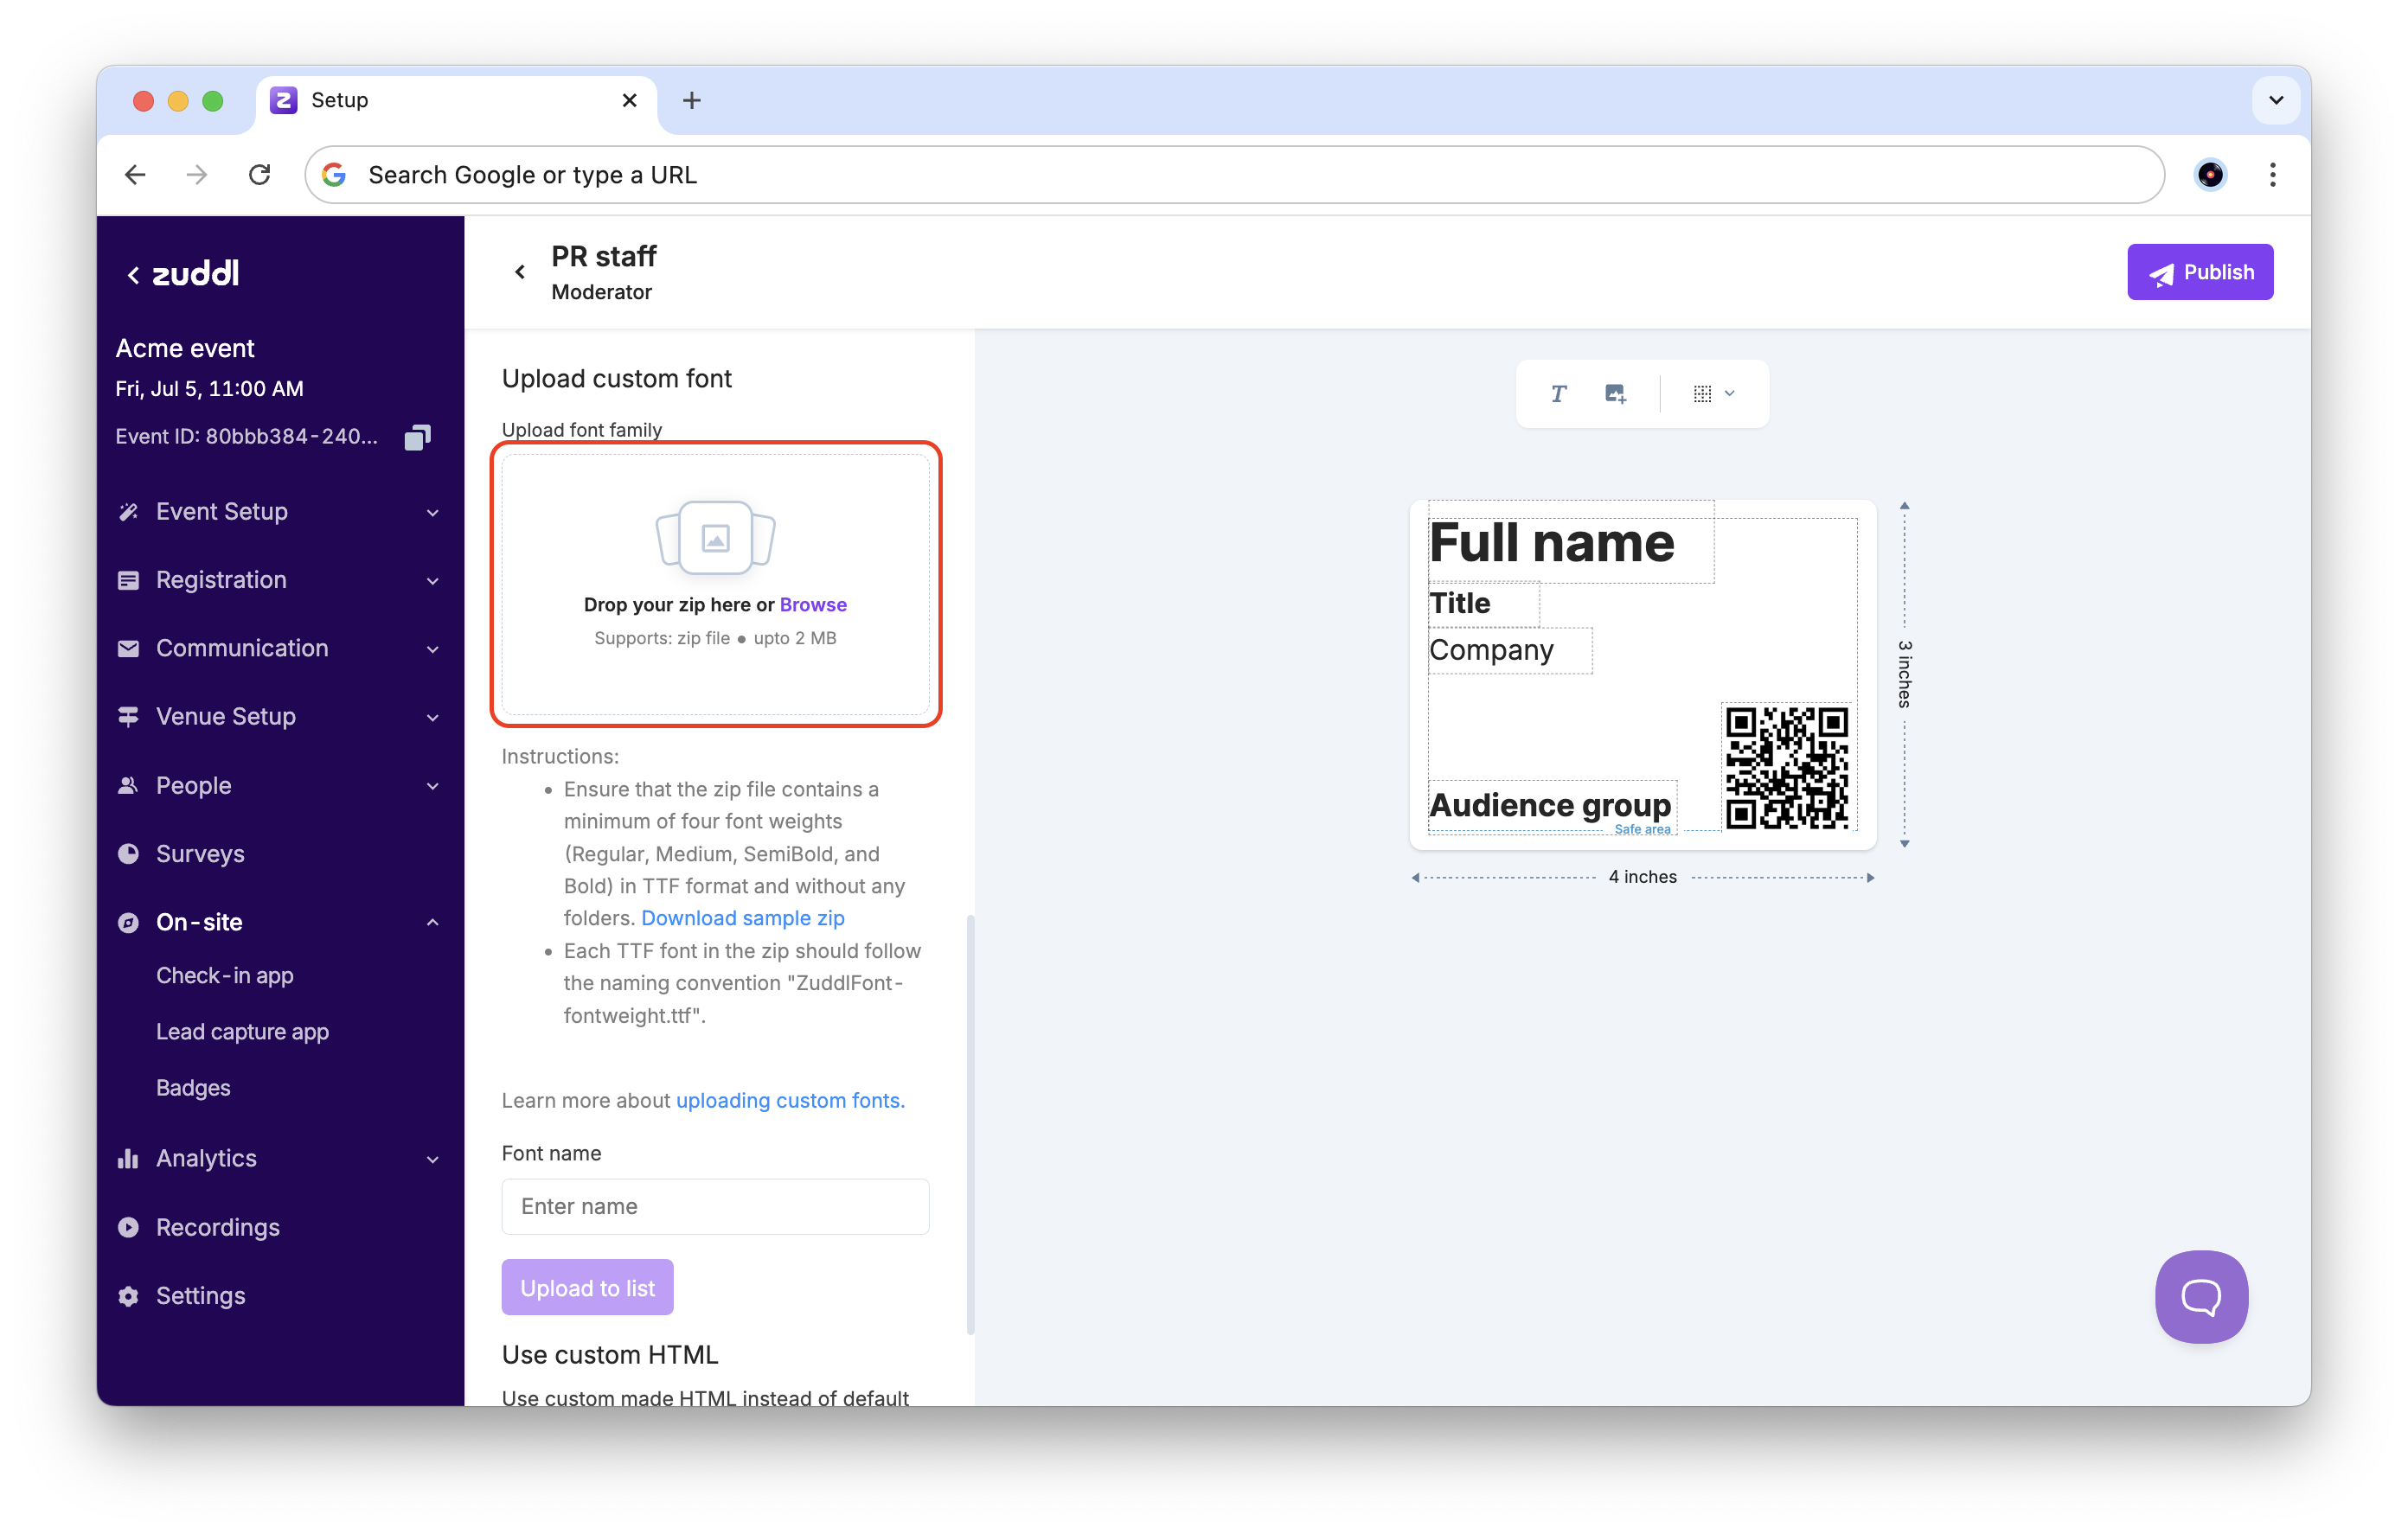
In the Upload custom font section, you can add custom fonts to use for the badge. Learn more about uploading custom fonts.
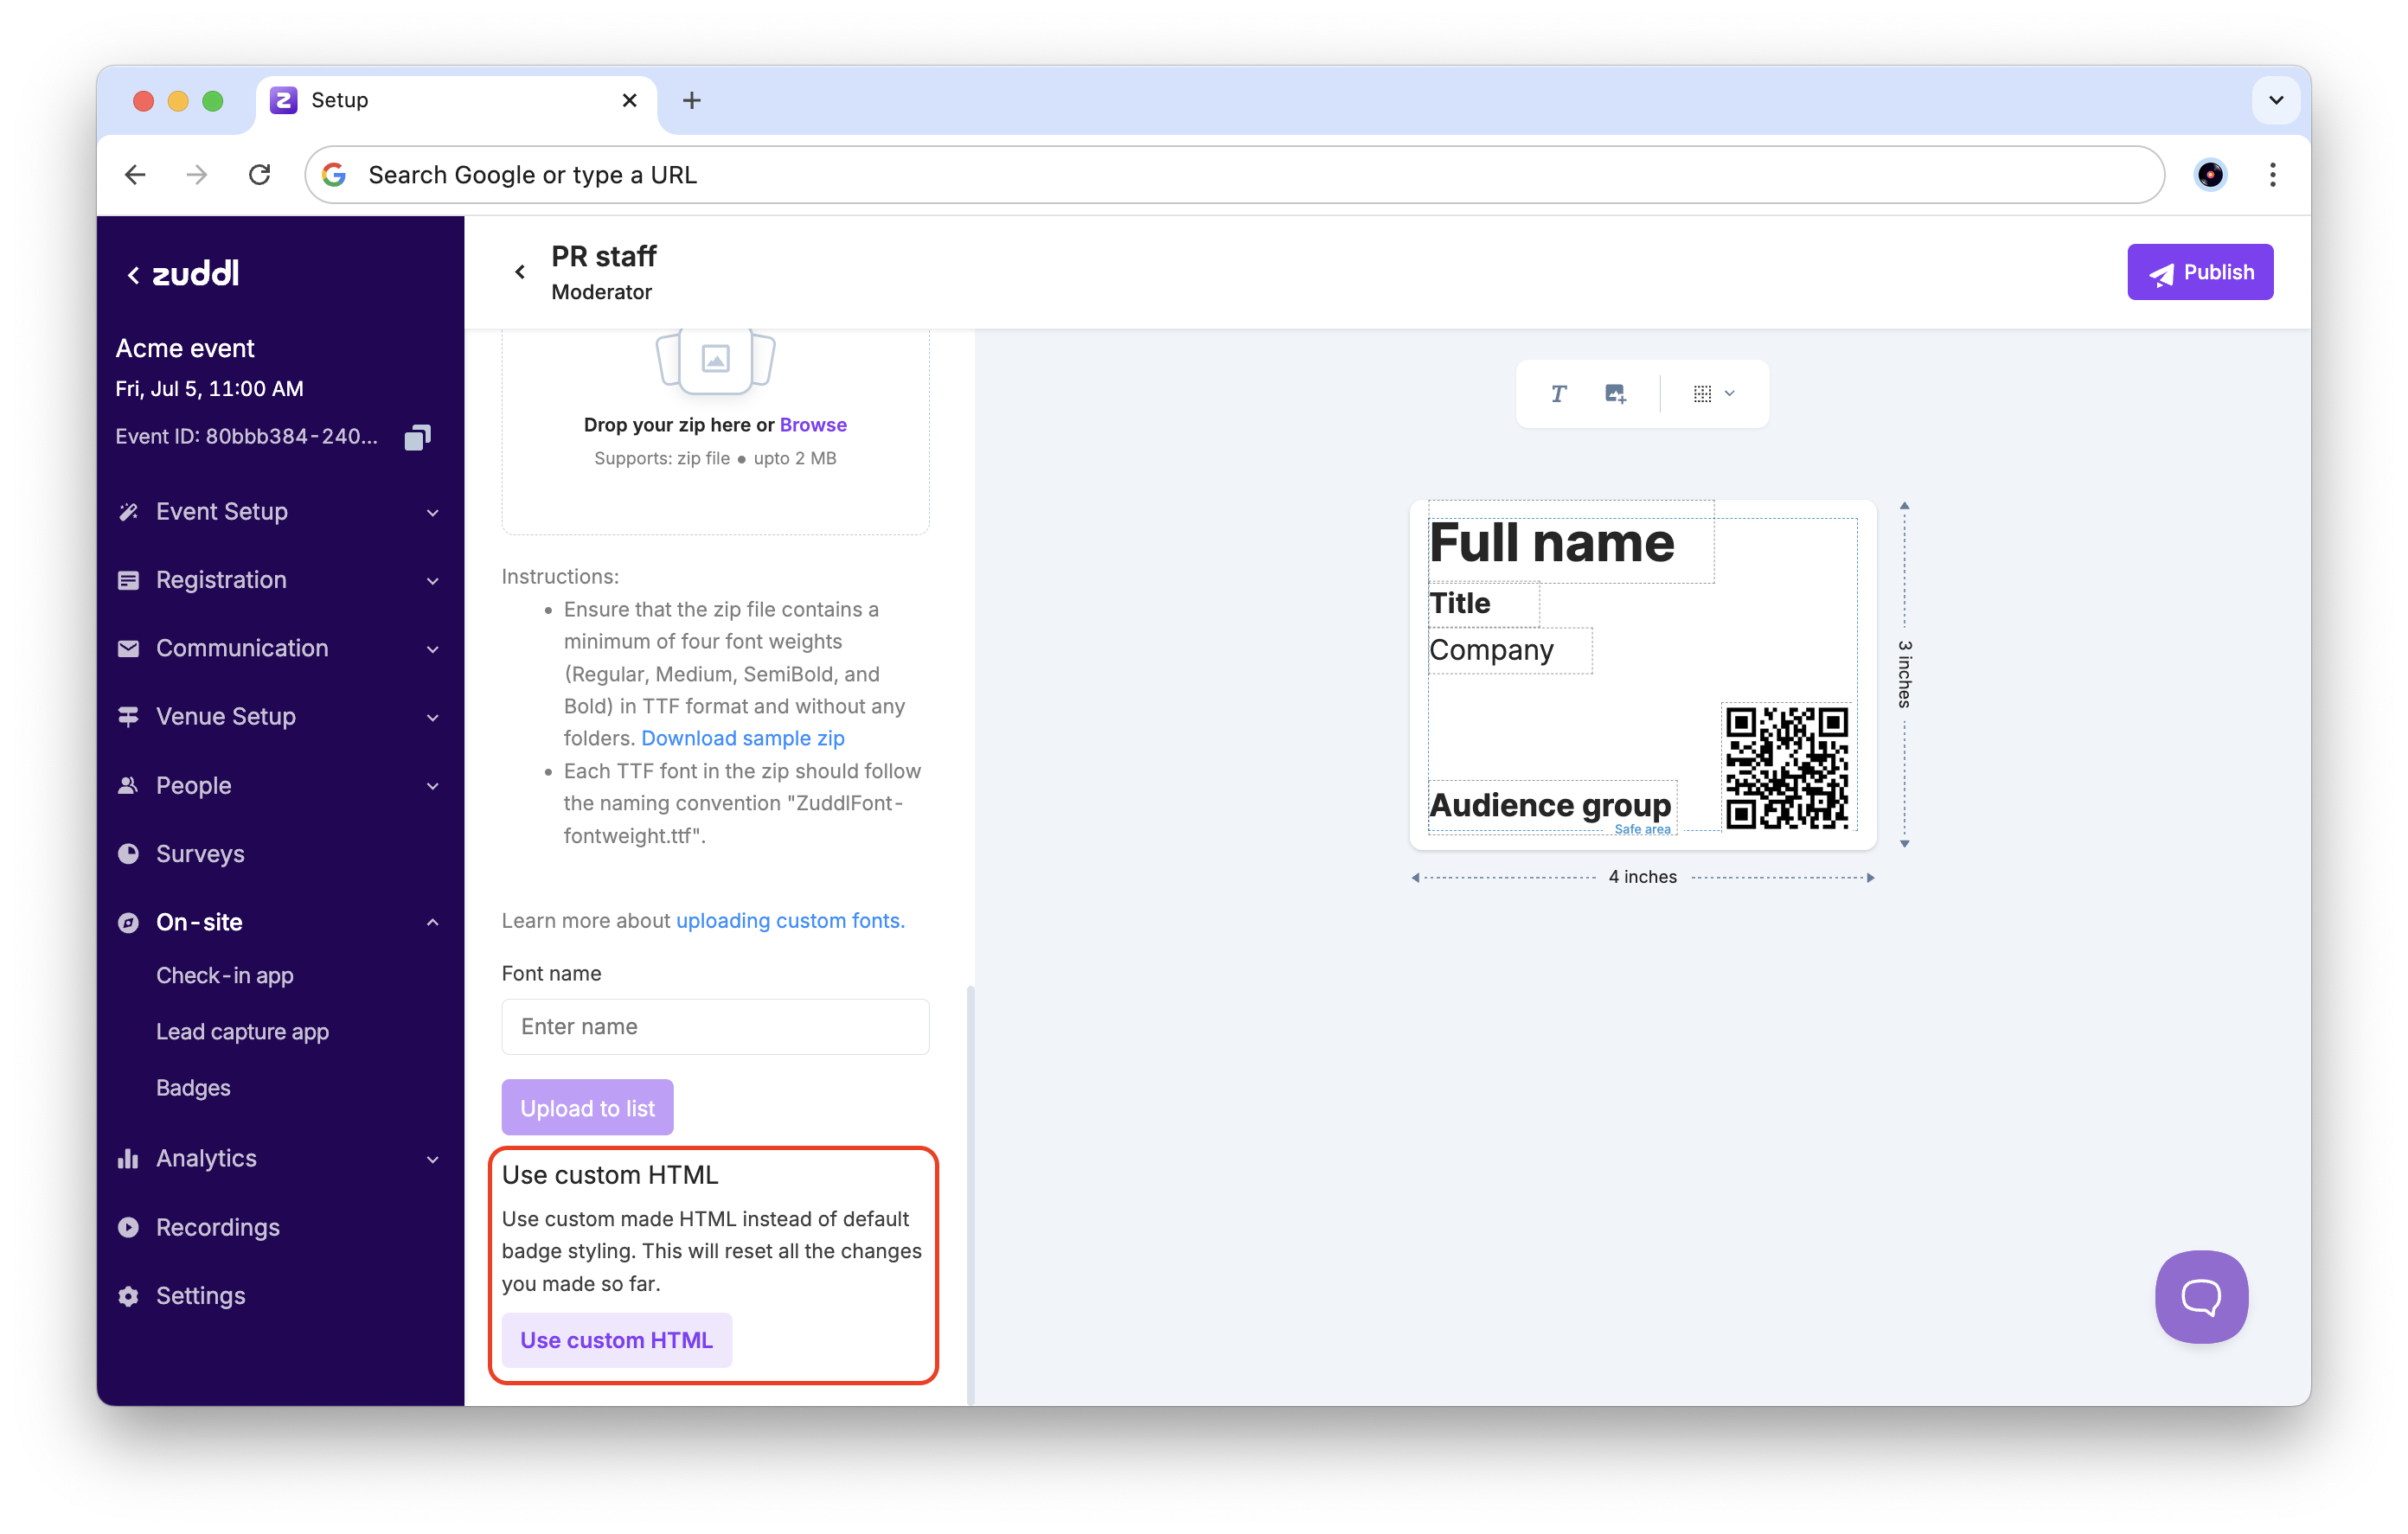
To use HTML styling to customize the badge, click the Upload custom HTML button.
Using custom HTML will reset all the changes made to the badge.
In the toolbar shown above the preview, click the text icon to add a text element. You can change the text contents or resize the borders by dragging them.
Click on the text element to open the edit toolbar.

Click Text options > Font to change the font for the text element. Use the Auto-fit text toggle to make the text automatically adjust size. Text will remain at the set font size if it fits the space, and will reduce in font size for longer character lengths. Set the Minimum font size to define the smallest size (for the longest character length).
Use the sizing controls to increase or decrease the font size.
Click the B icon to access the formatting options (Bold, Italic, Underline, and Strikethrough).
Click the alignment icon to access the text alignment options (Left, Center, and Right).
If elements are overlapping each other, click Rearrange to view the different options:
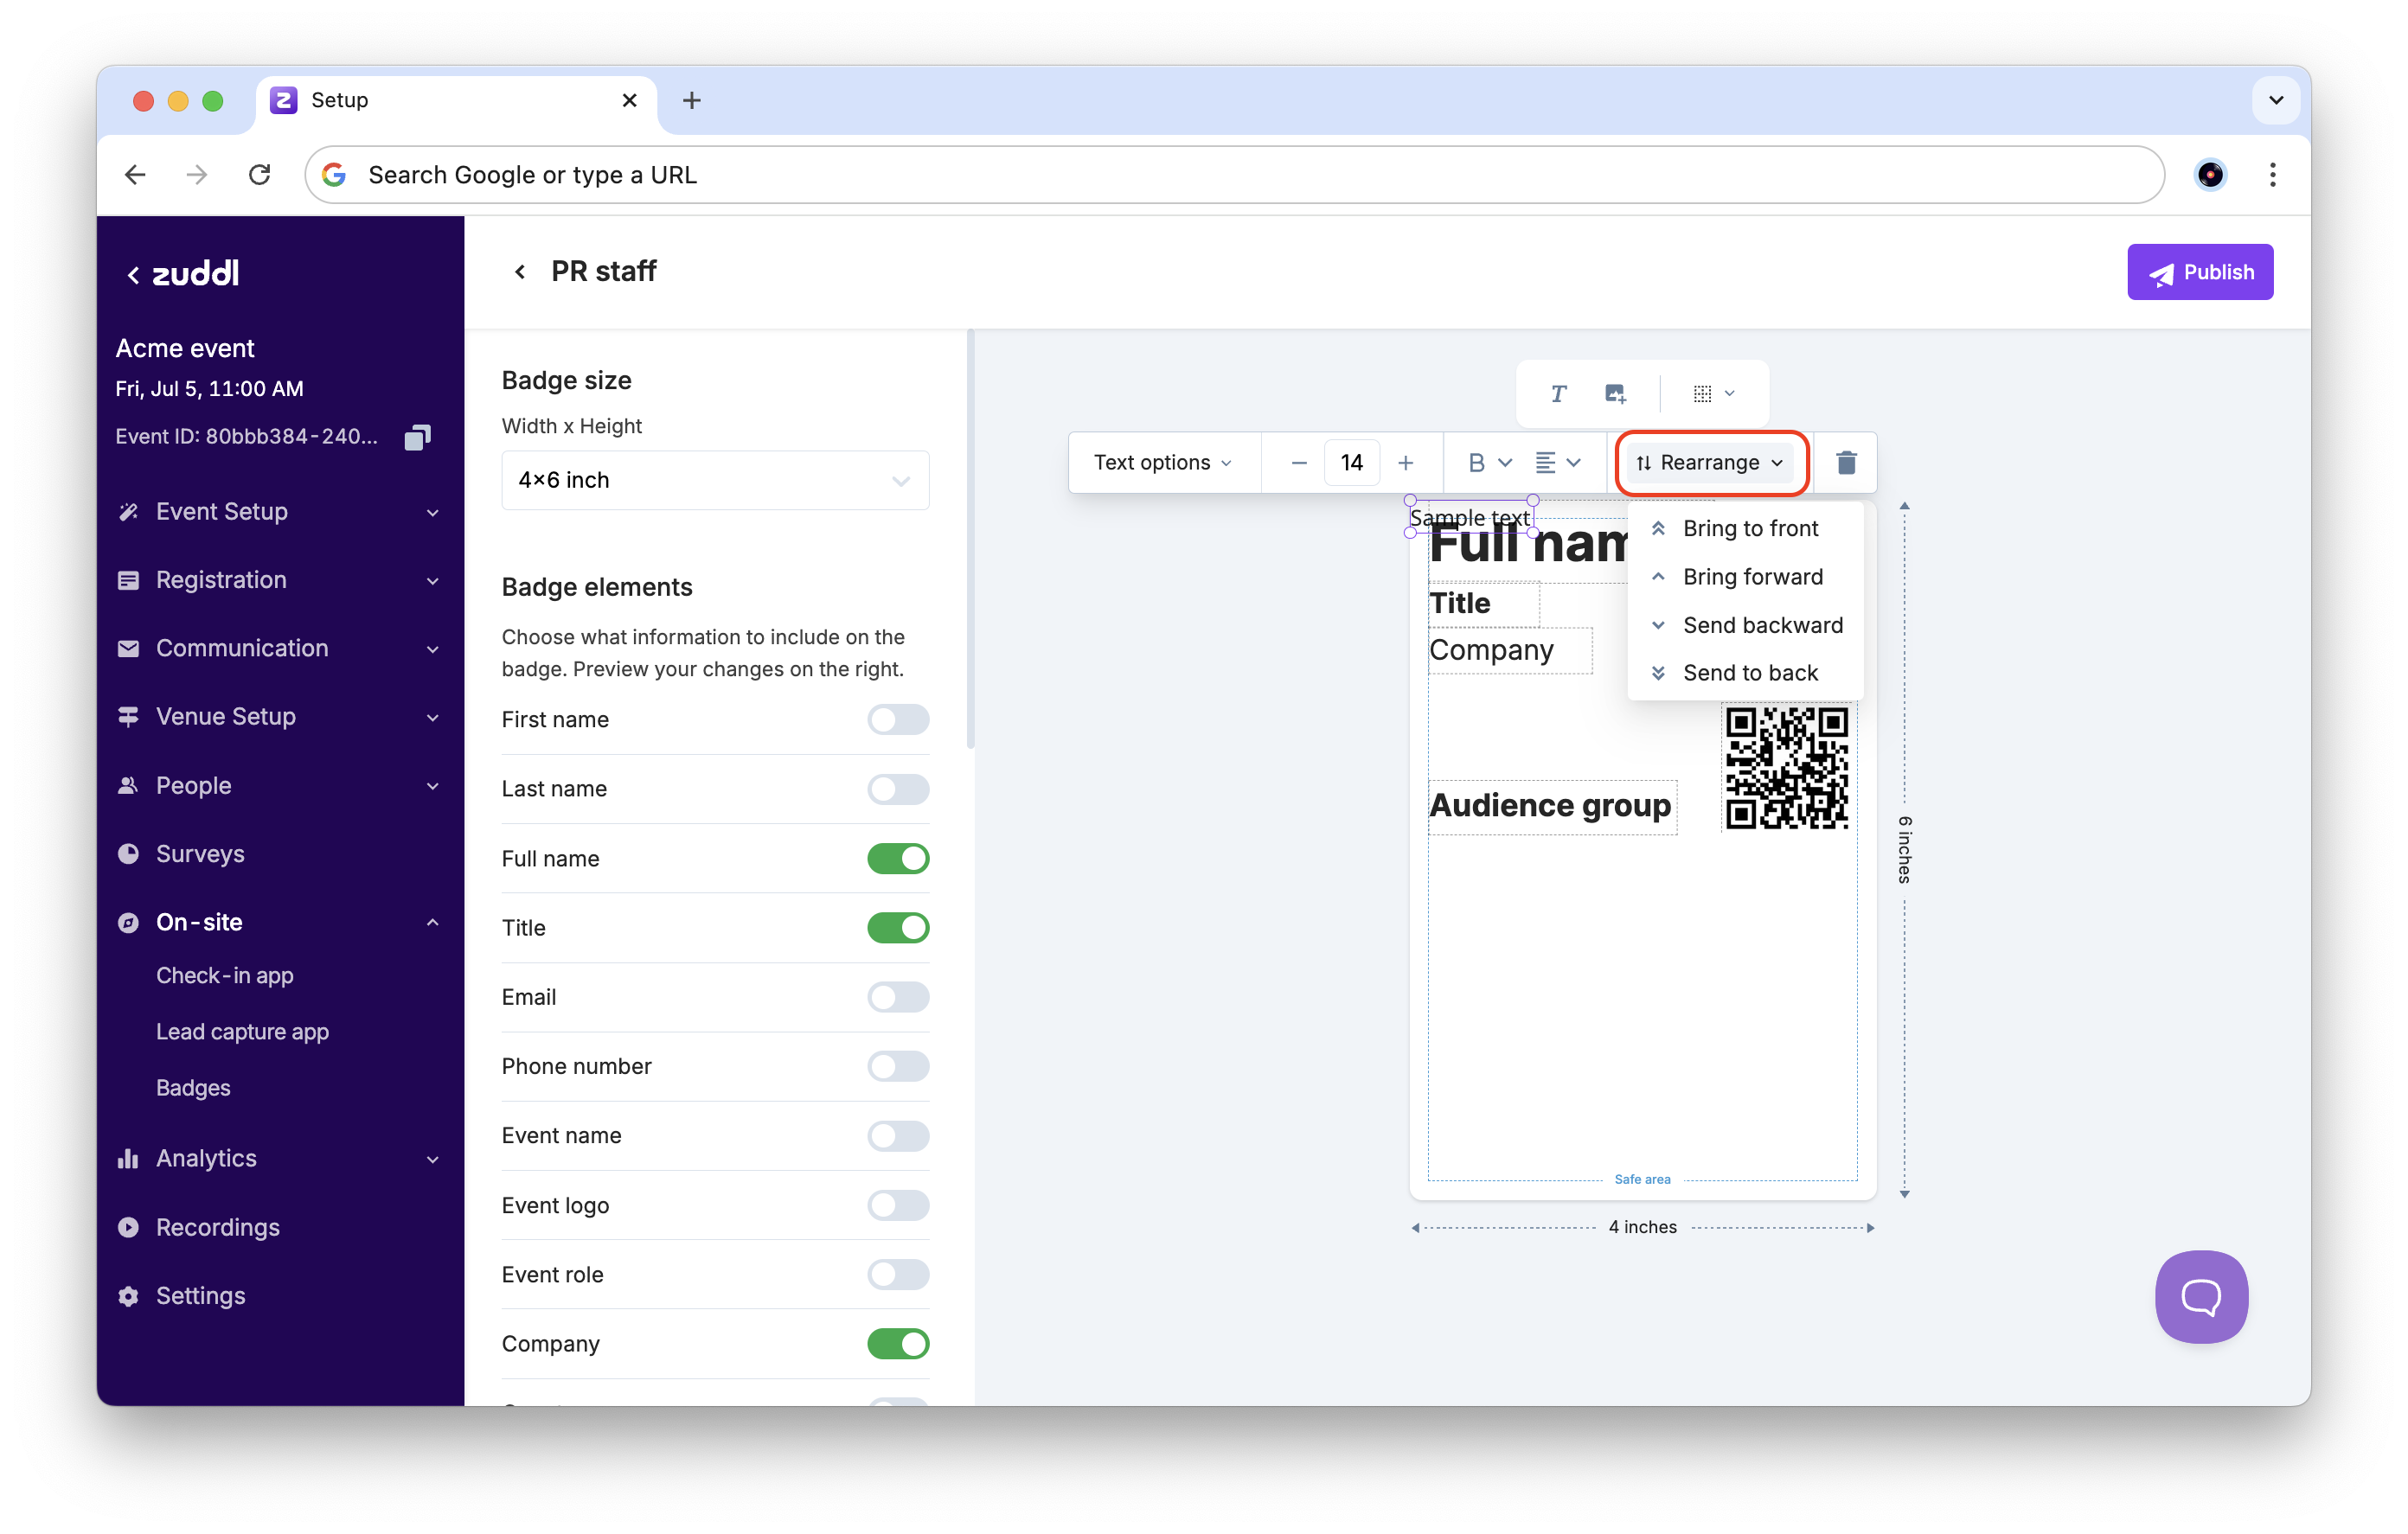
Bring to front: Moves this element to the front, over any other overlapping elements.
Bring forward: Moves this element forward by one element.
Send backward: Moves this element backward by one element.
Send to back: Moves this element to the back, behind any other elements that are overlapping.
In the toolbar shown above the preview, click the image icon to upload an image.
Images are currently printed in black and white on badges.

Click on the image to open the edit toolbar.
Use the orientation buttons to move the image on the badge to the left, center, or right.

If elements overlap, click Rearrange to view the different options.
Click the image icon to replace the image.
In the toolbar shown above the preview, click the grid icon to view grids if required. There are two options: 0.5x0.5 inch, and 1x1 inch. Grids are not printed on the badge and are only used for reference.
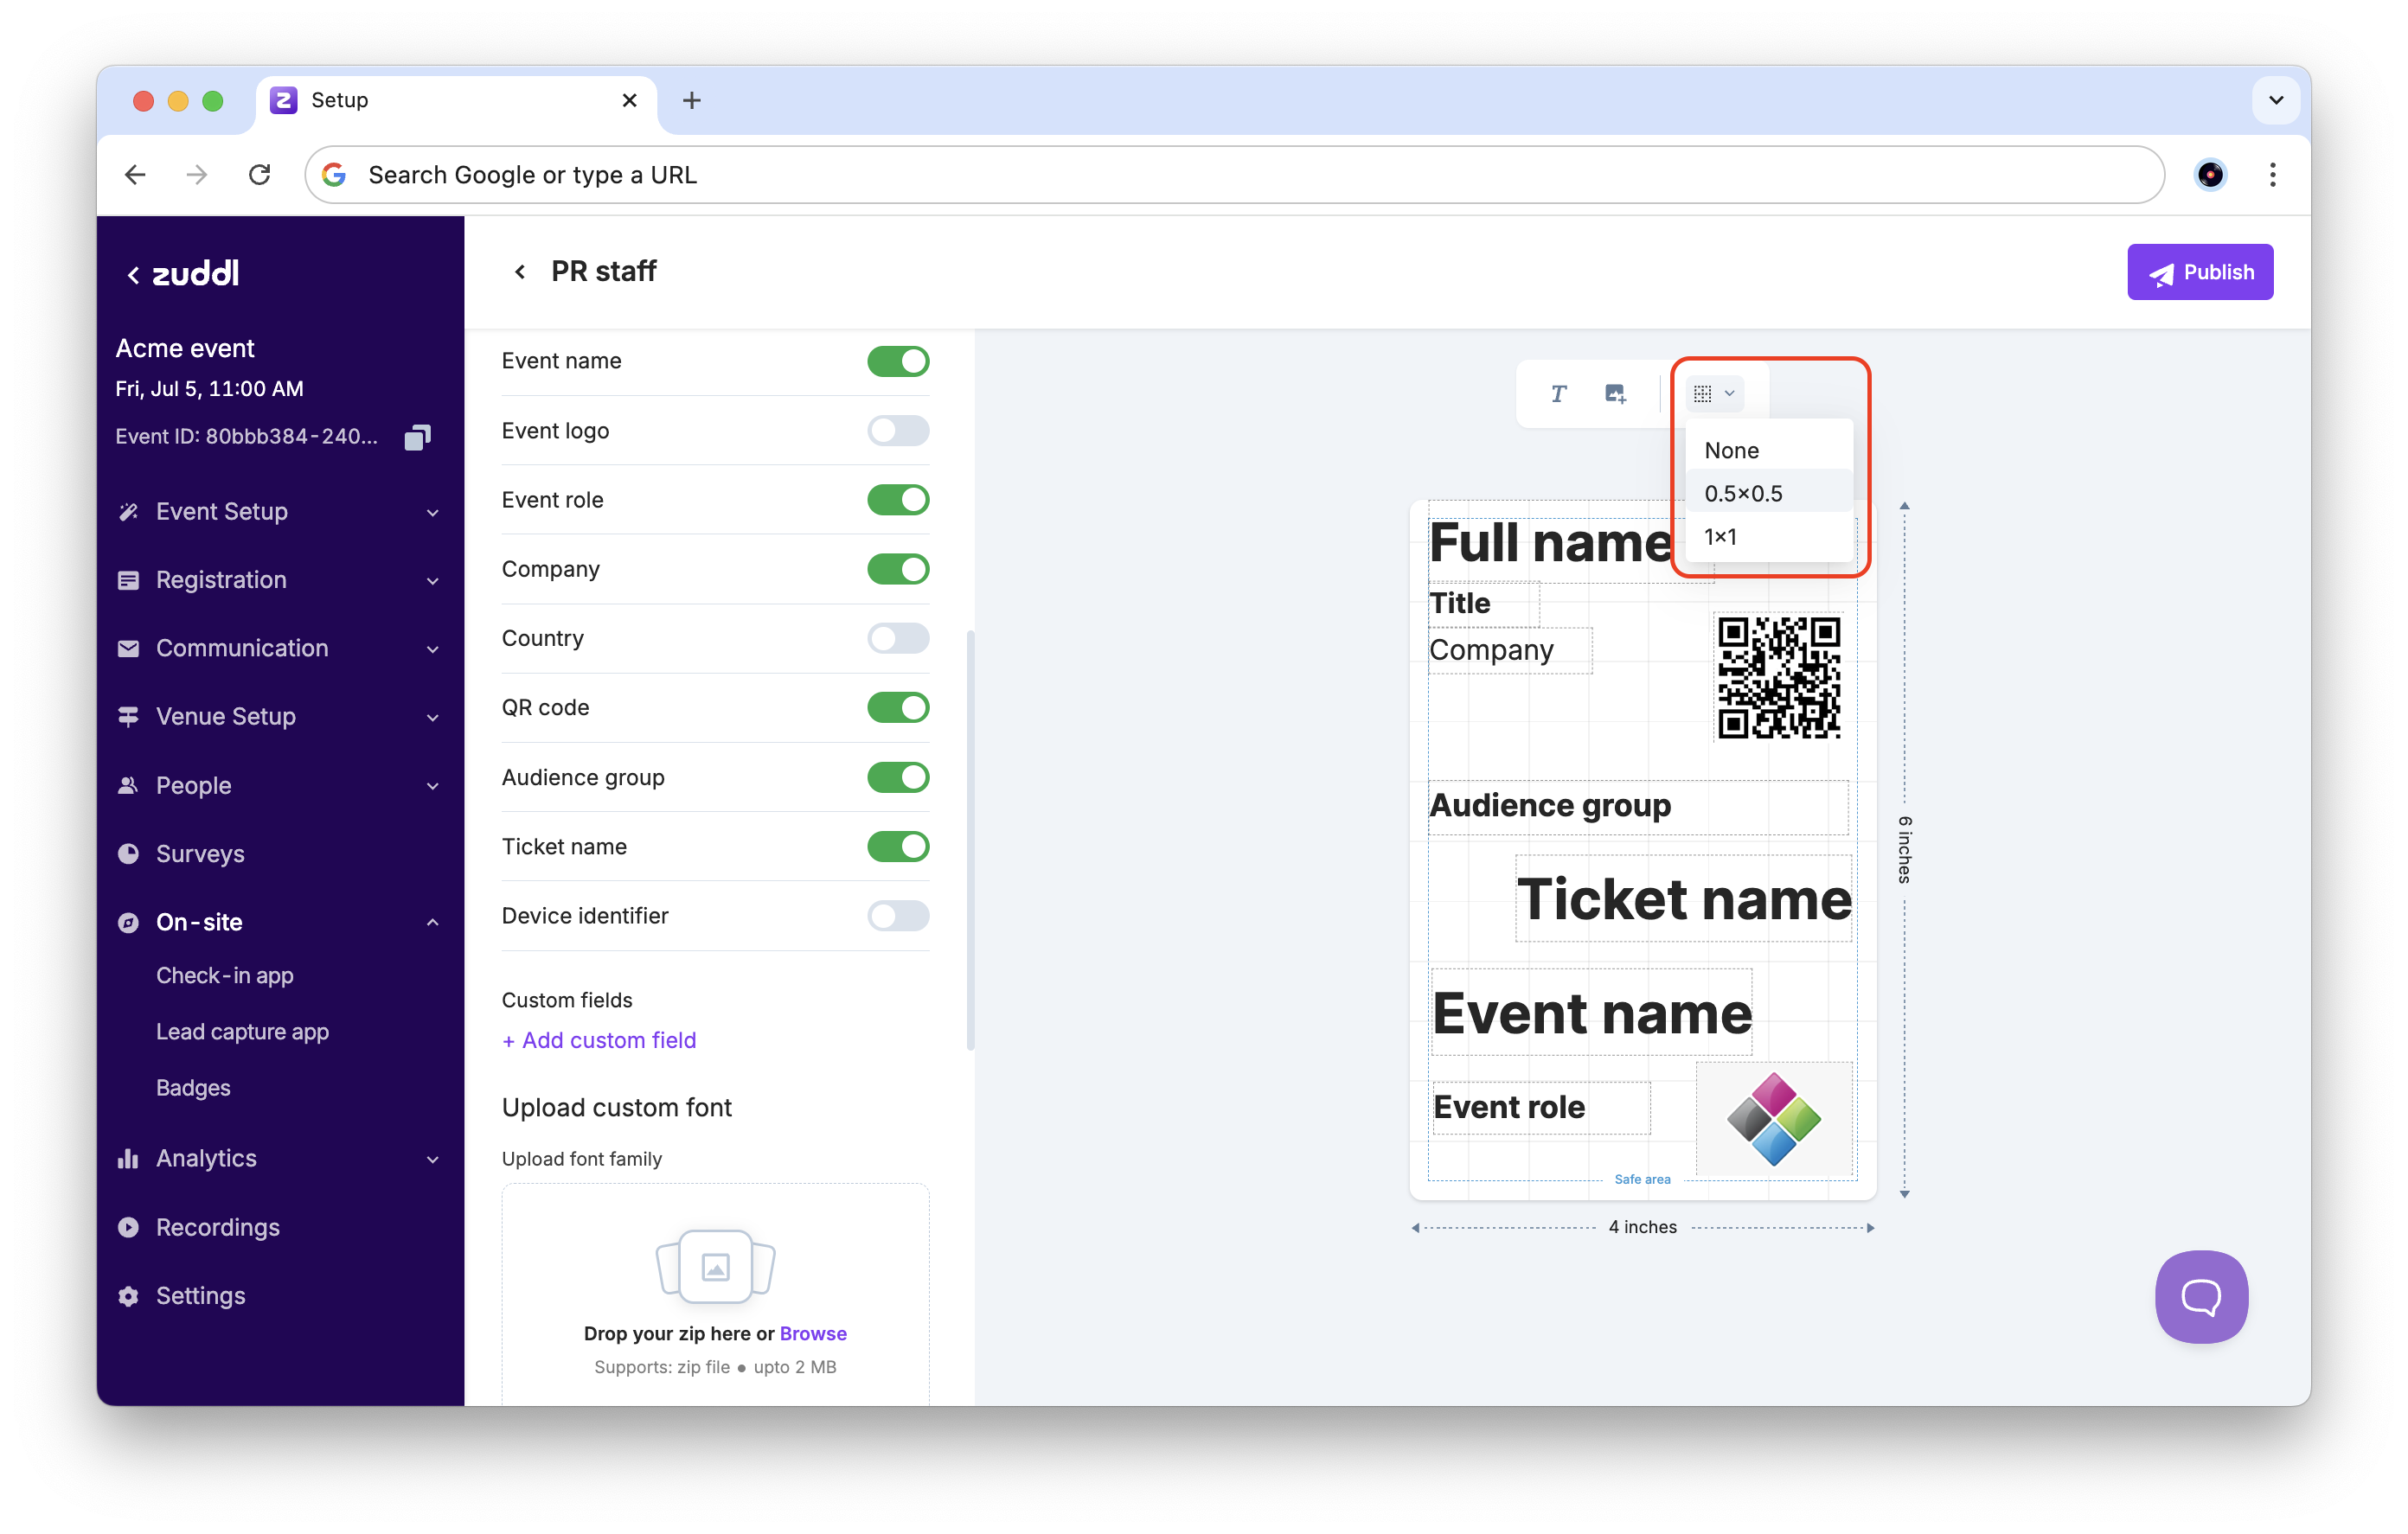
Ensure that your badge elements are within the Safe area marked on the preview. Any text or images outside this area are not printed on the badge.
Publishing the badge
Follow these steps to publish a badge:
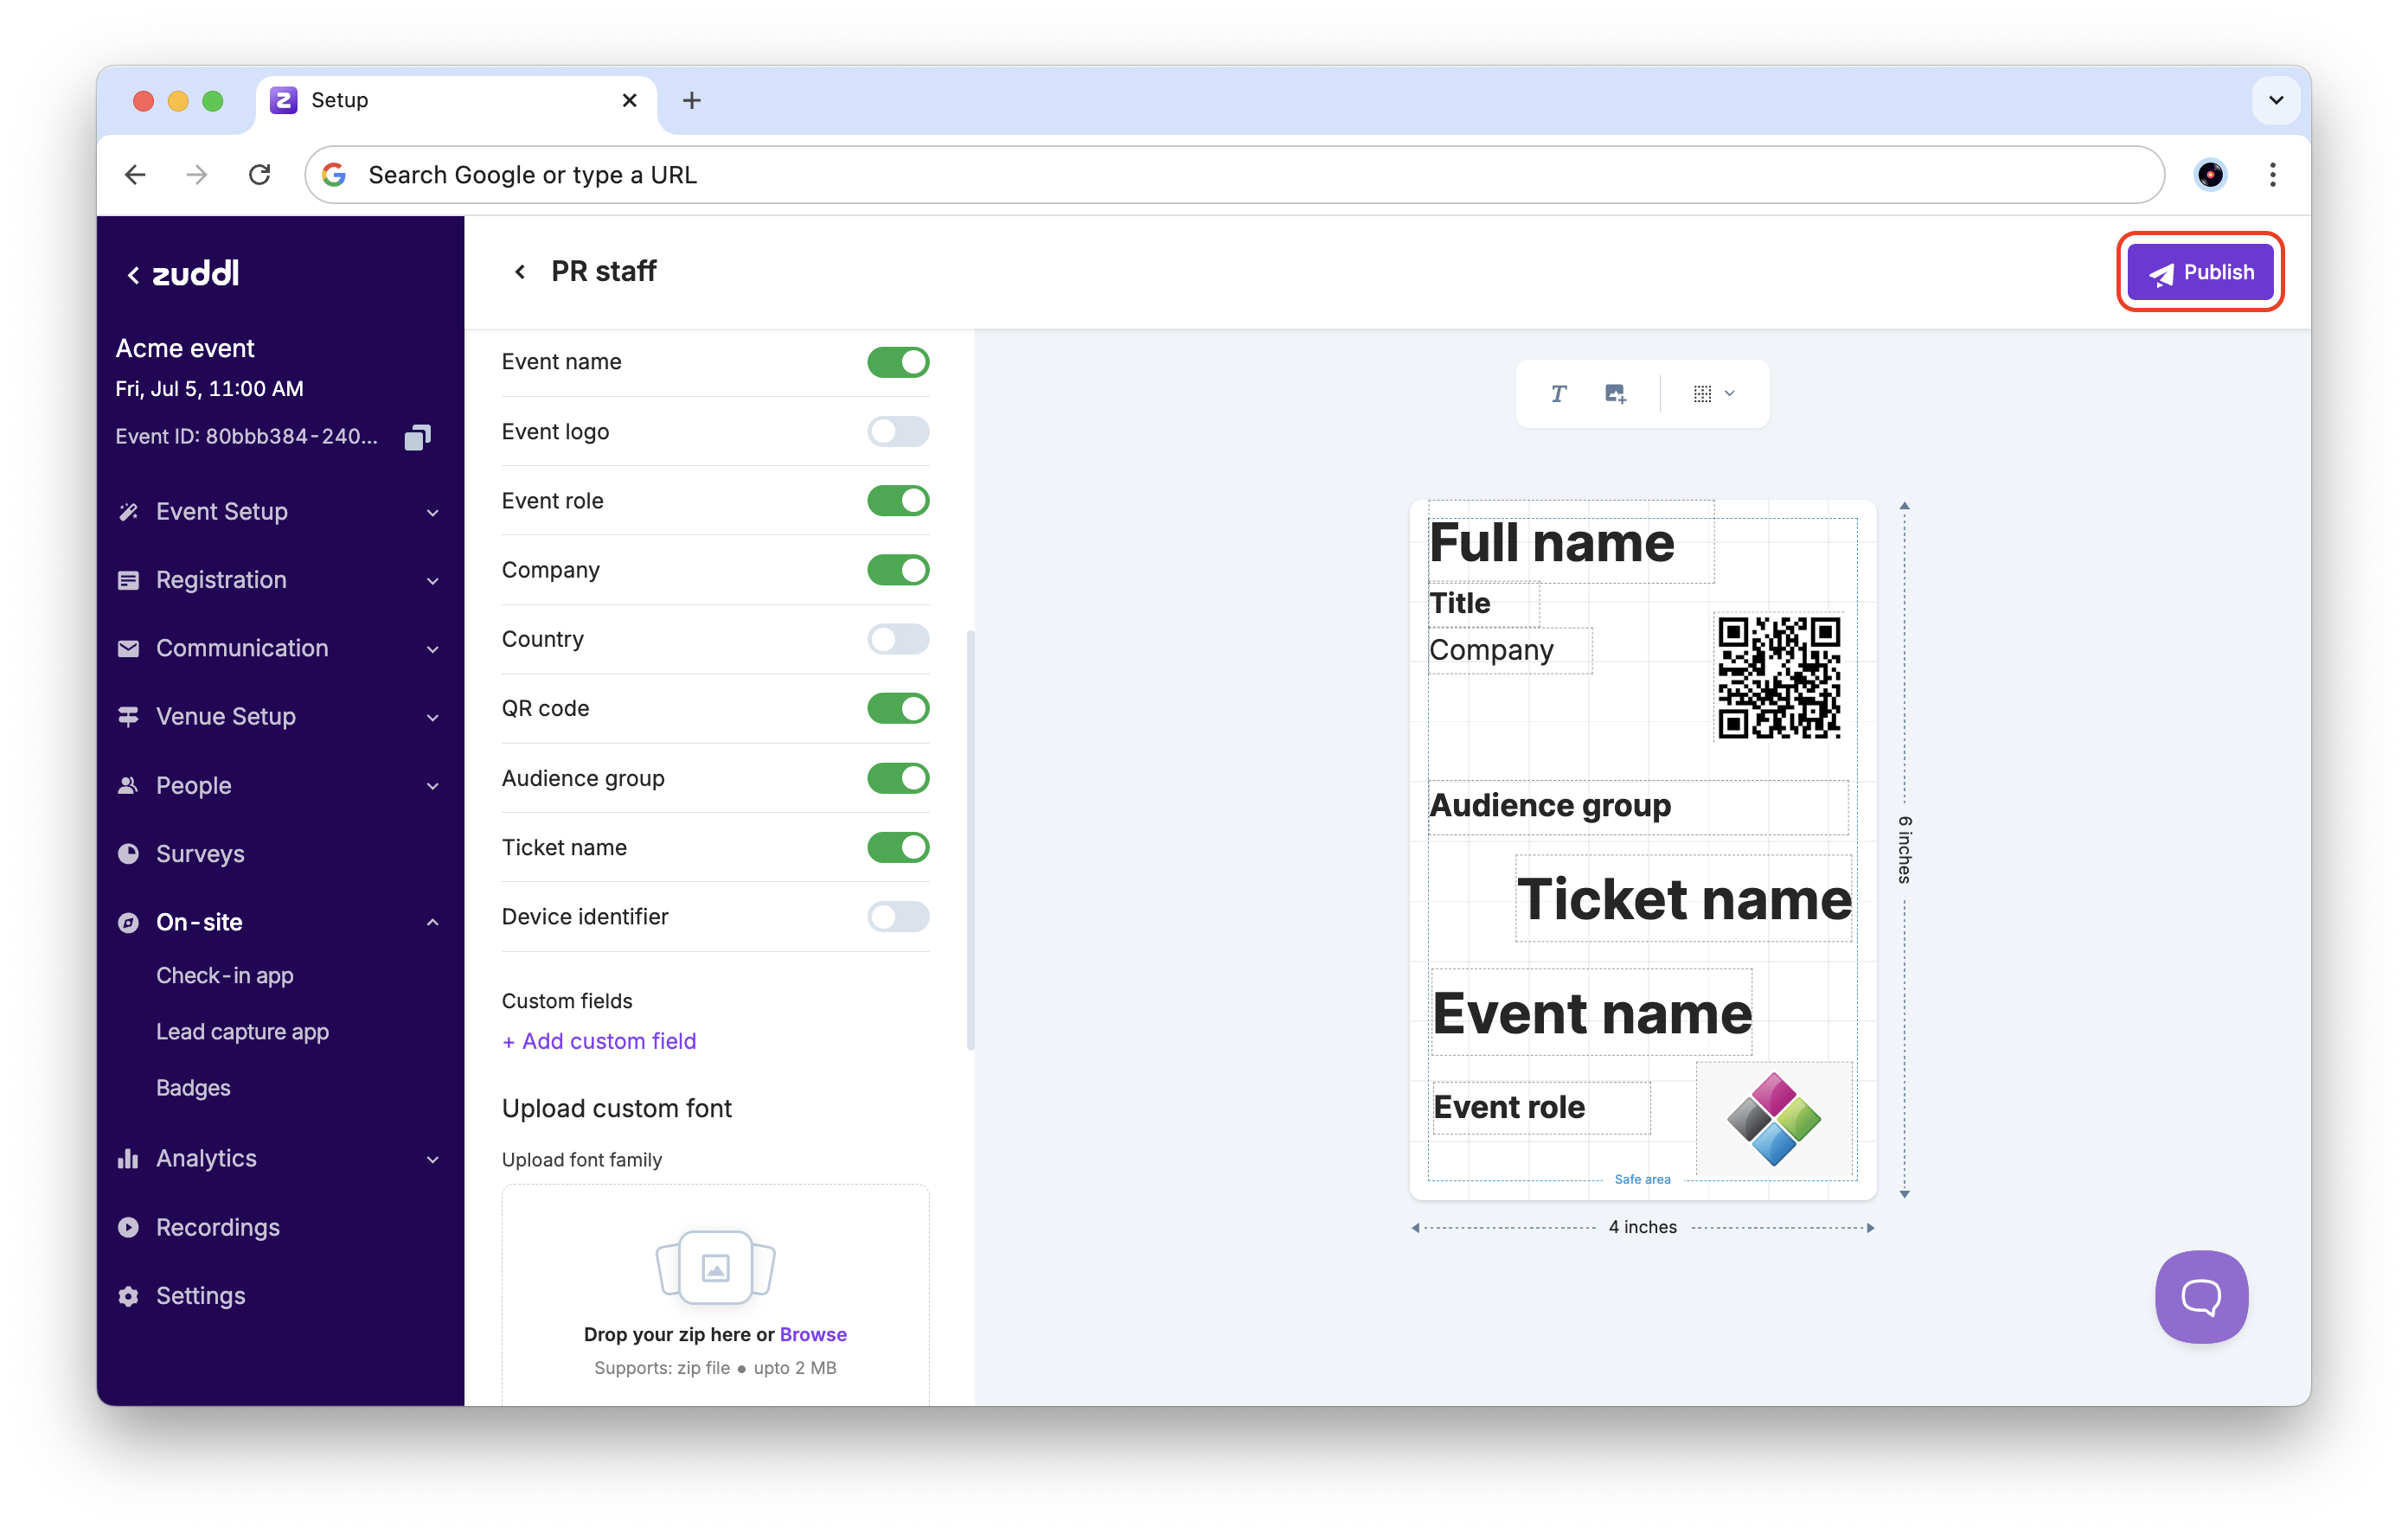
In the badge editor, click the Publish button. Once published, badges are available inside the app and can be printed for attendees.
When multiple badges are published, you can set one as the default. To set a different badge as default, open the options menu for that badge and click Make default.
Default badges are available for all audience groups, and cannot be deleted or unpublished without setting another badge as default.
If an audience group has no badges specifically assigned to them, those participants will get the default badge template printed instead.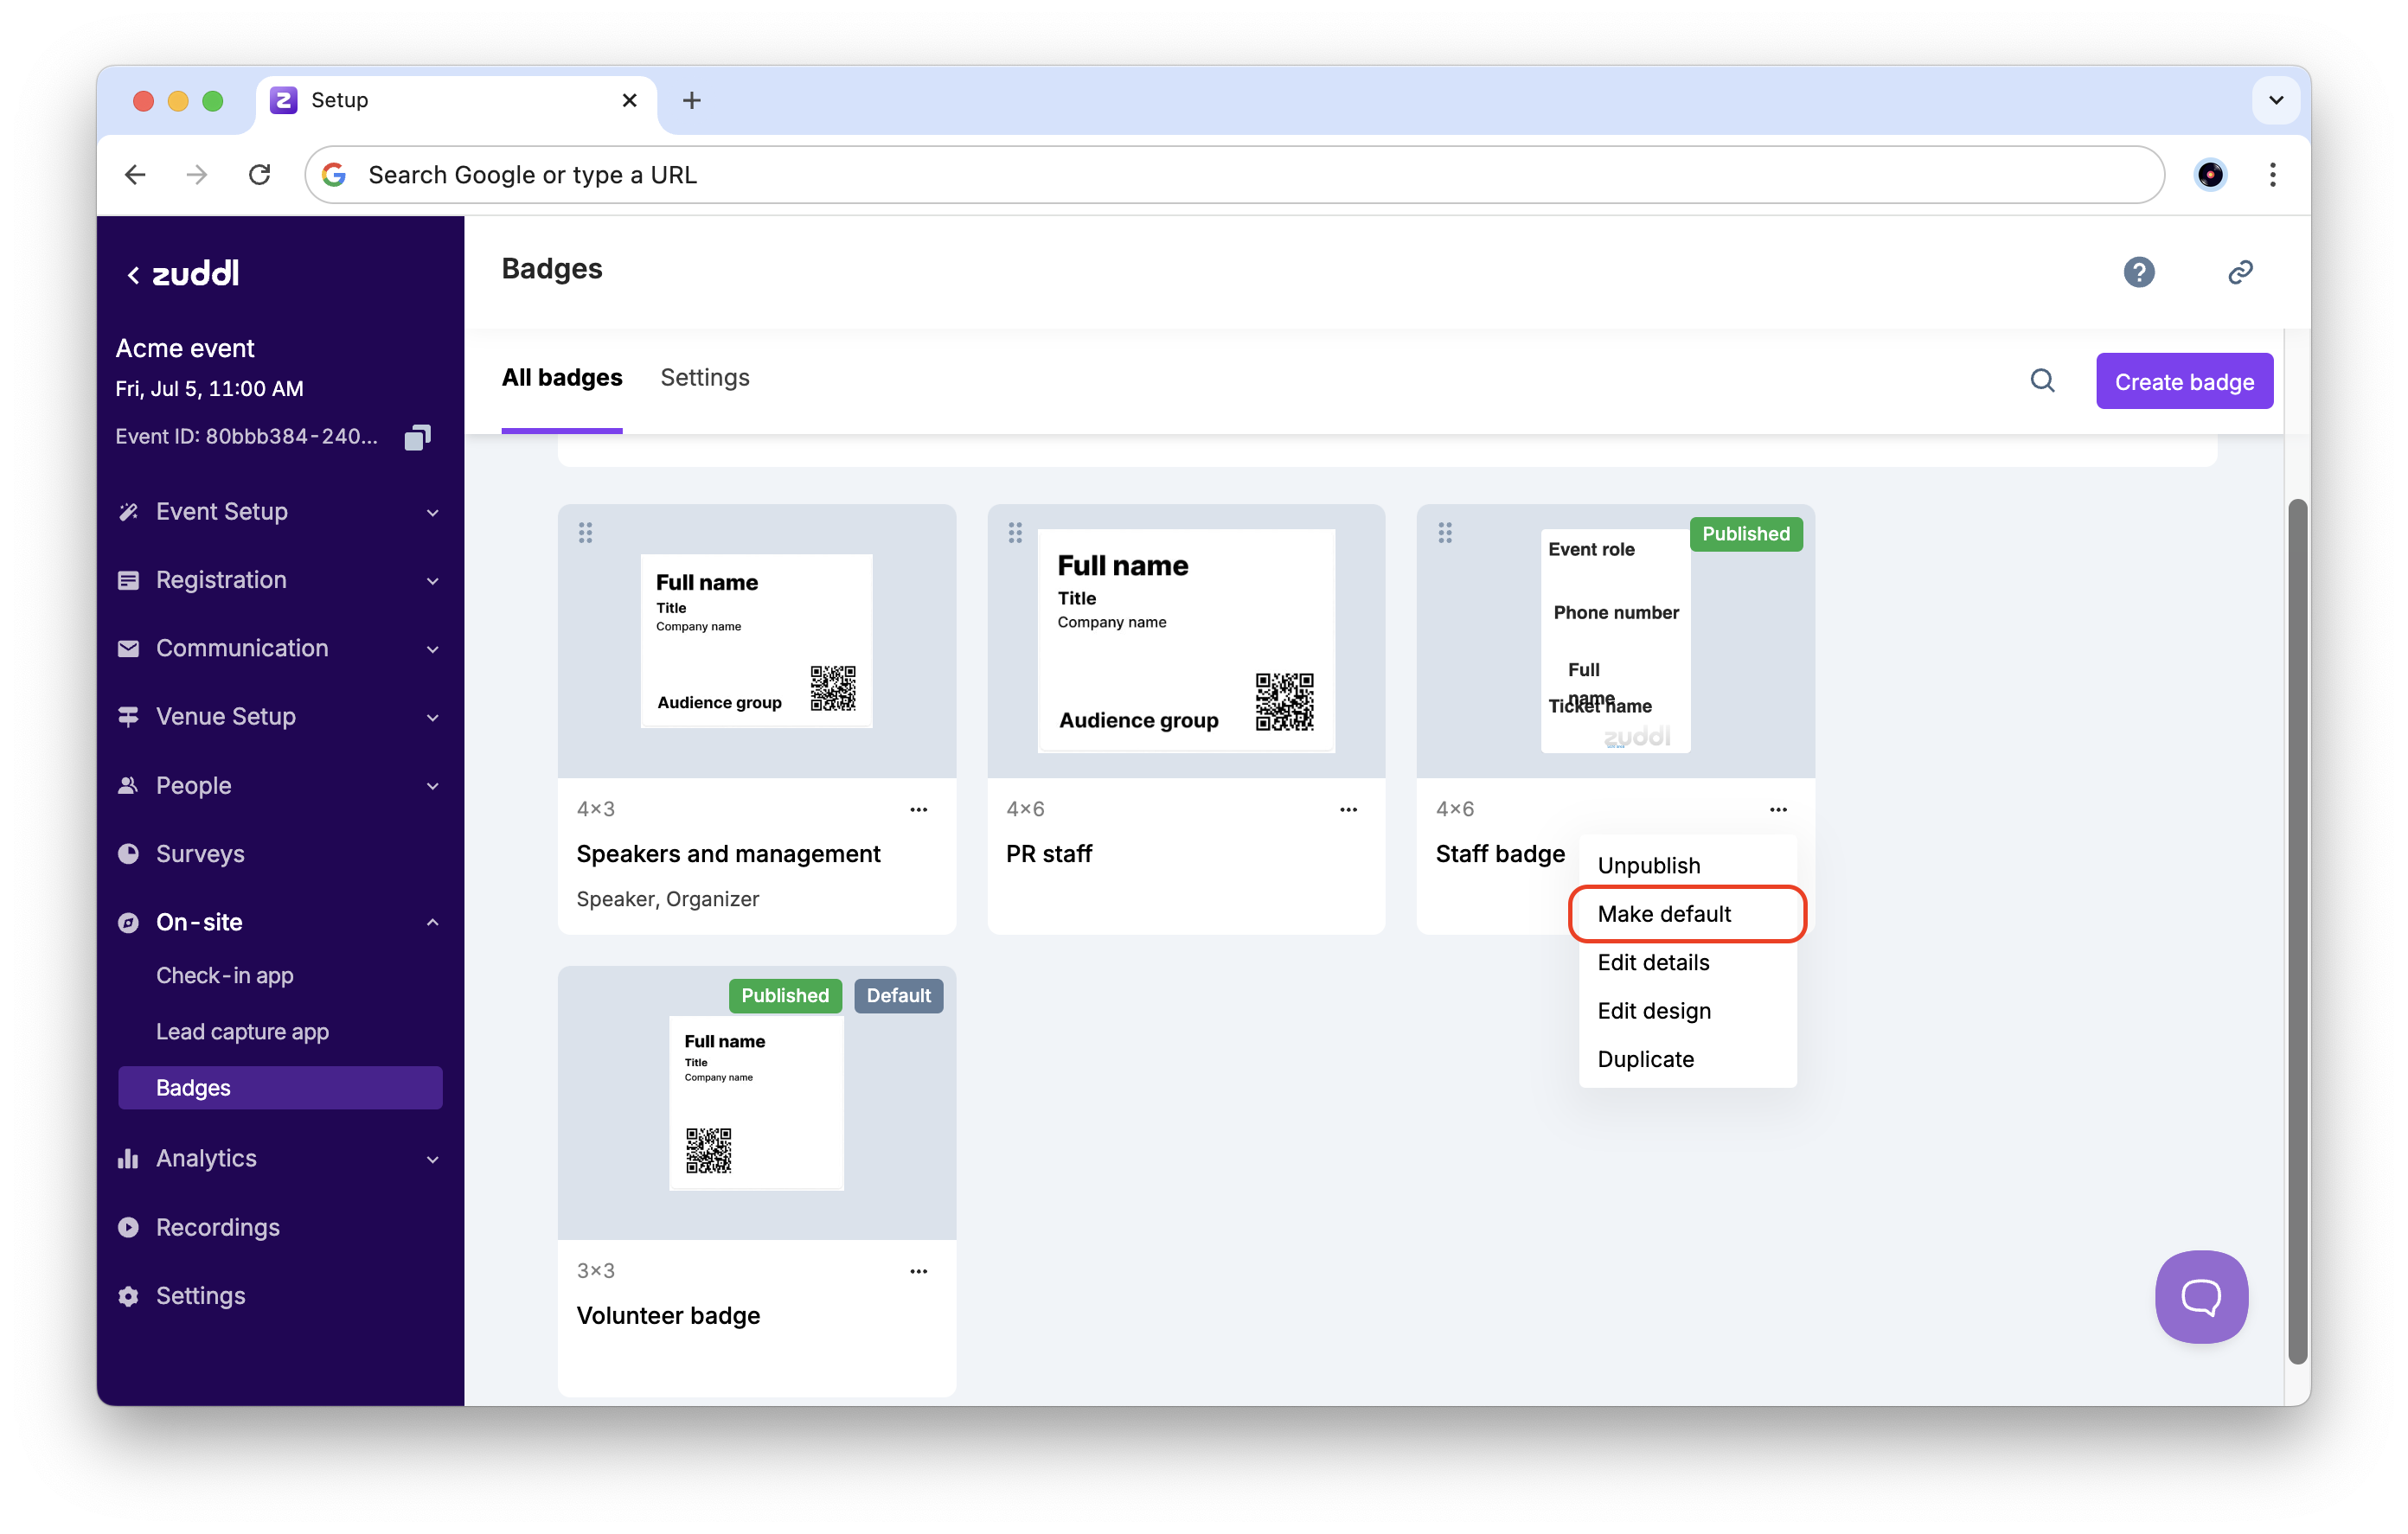
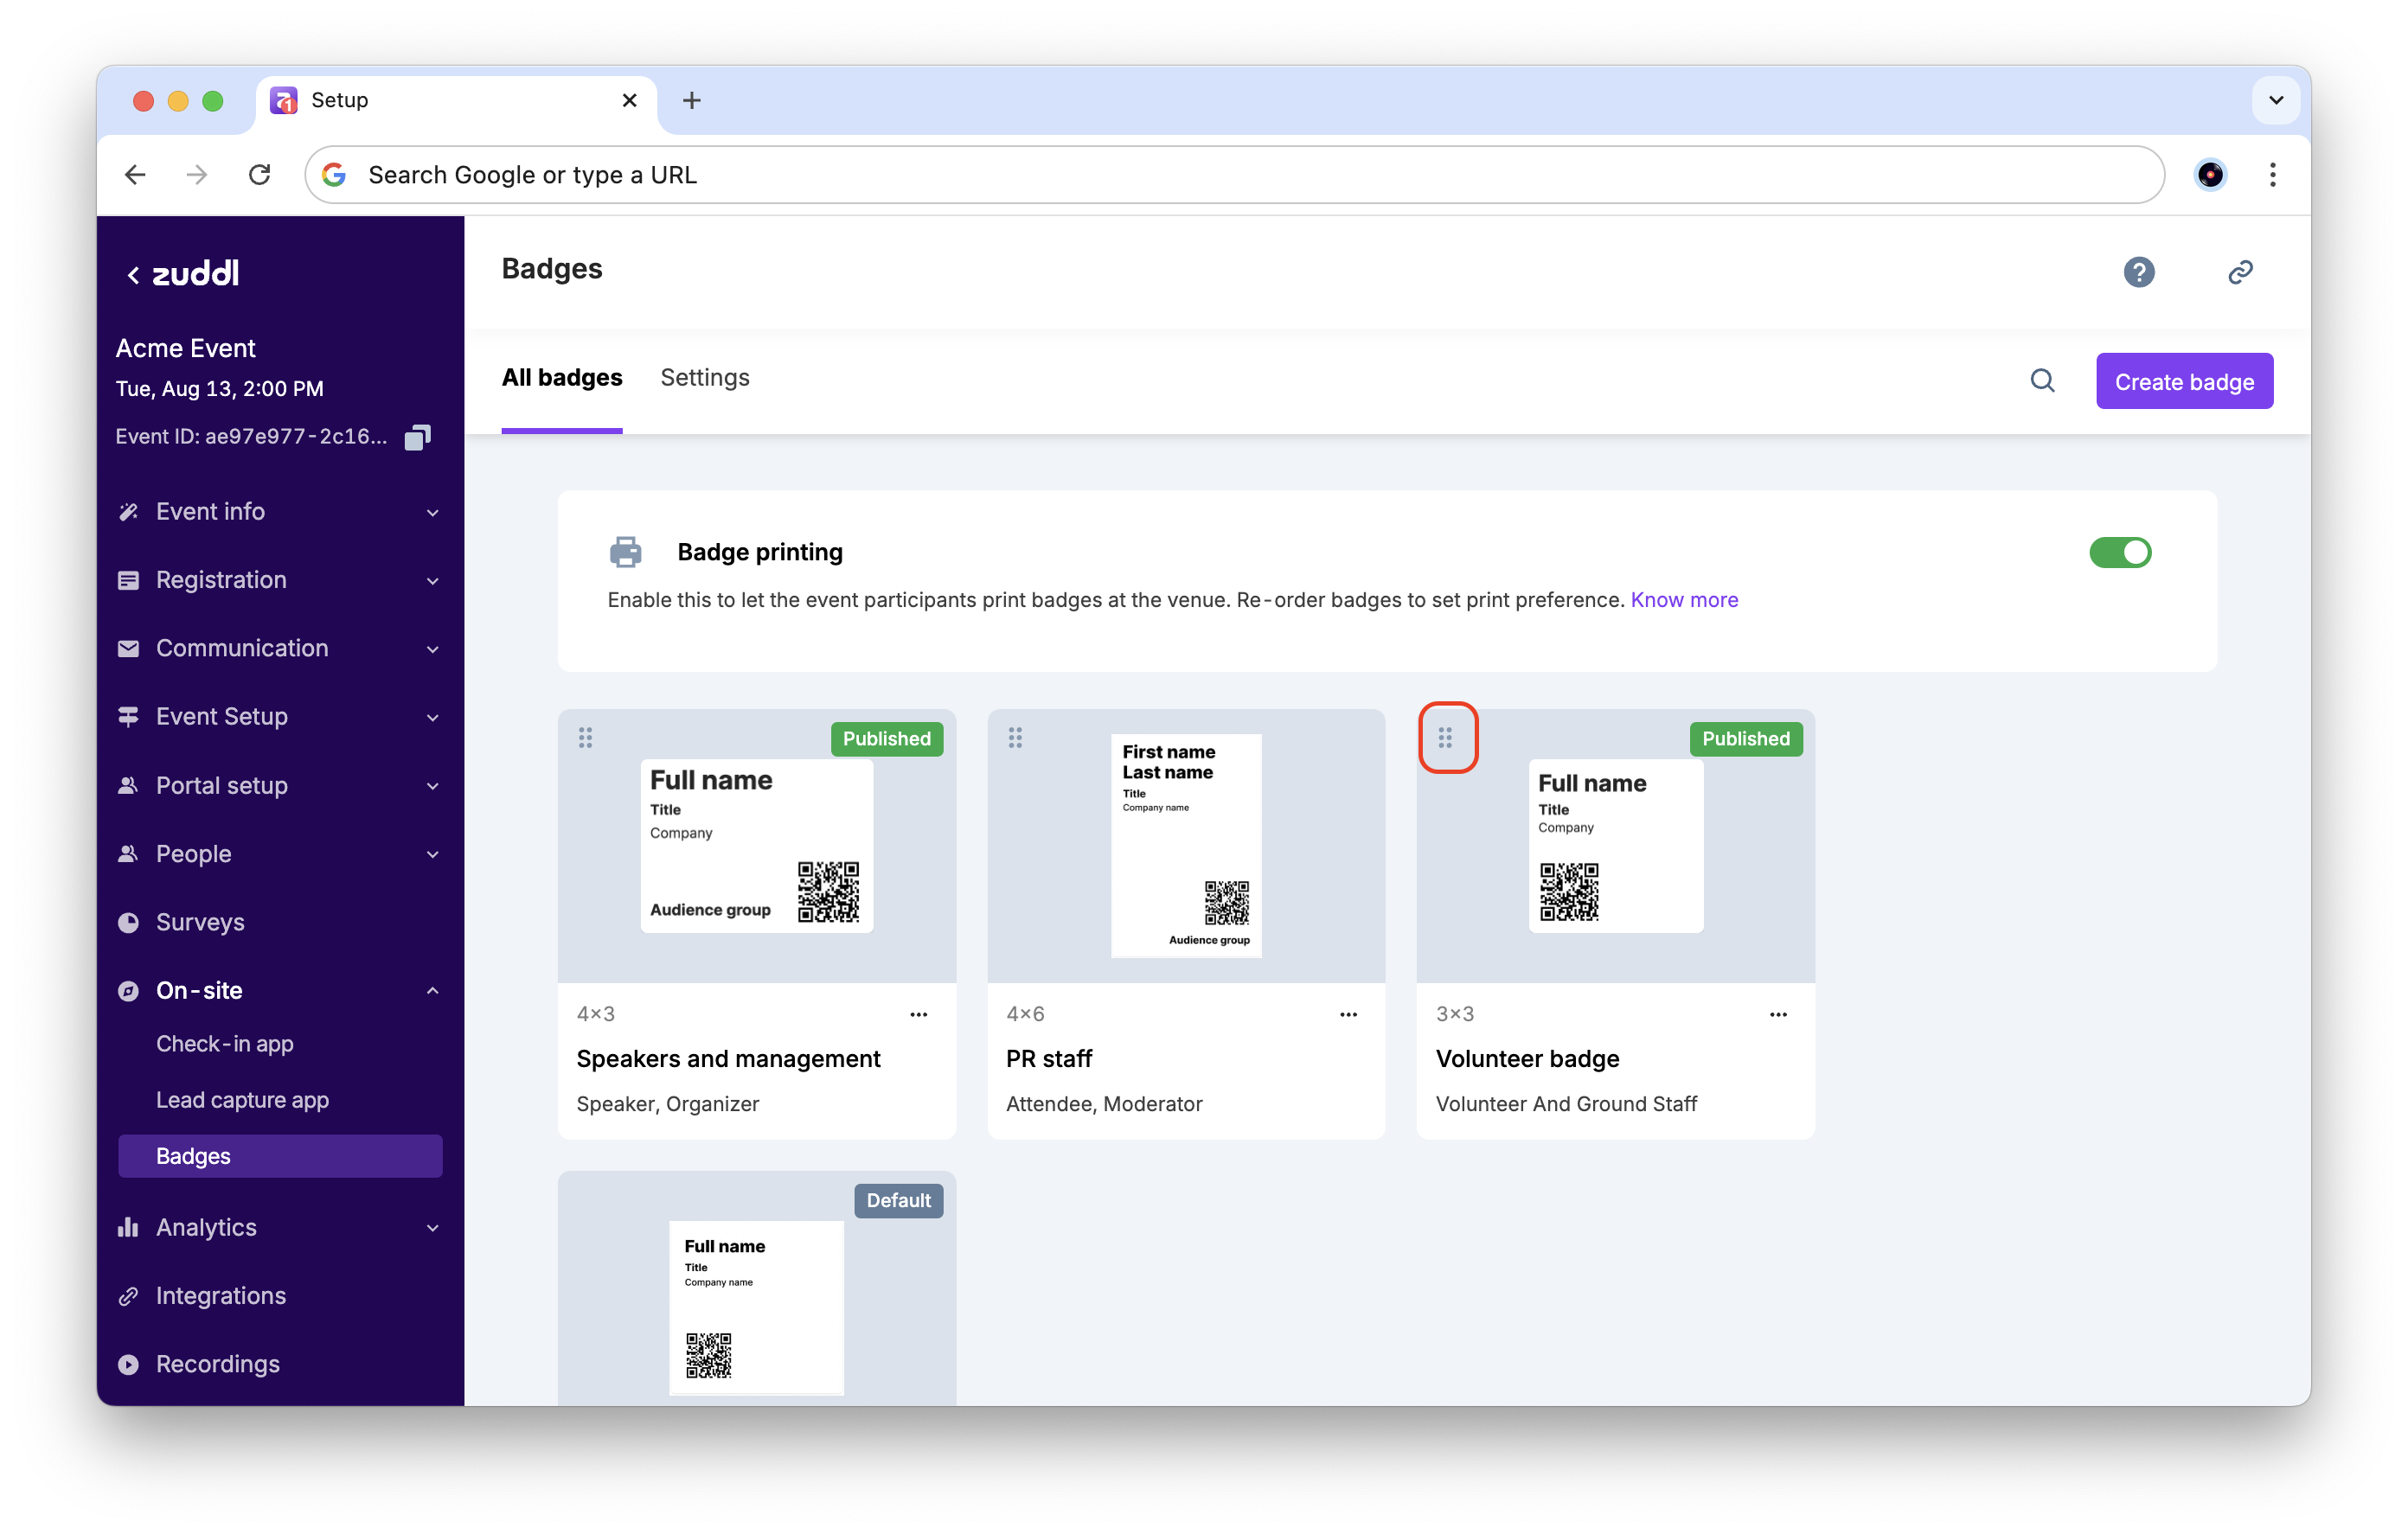
To reorder badges, click the reordering icon on the badge and drag it as desired.
The order of the badges determines which badge is printed. If a participant is a part of multiple audience groups and is eligible for multiple badges, the badge that is higher in the list will be the one printed.
Recommended approaches
To use the customization feature more effectively, here are some use cases and the suggested approaches to badge design:
Case 1 – Using a Single Badge Template for Multiple Audience Types
If you plan to use a single badge layout for all audience types (Attendees, Speakers, Sponsors, etc.):
Edit and publish the default badge template.
Assign it to all relevant audience groups.
Case 2 – Using Different Badge Templates for Different Audience Groups
If different audience groups require different badge designs:
Create separate badge templates for each group. For example badge 1 is assigned to sponsors and badge 2 is assigned to Attendees & Sponsors.
Use the priority order feature to define which badge takes precedence if someone belongs to multiple groups. So if badge 1 has a higher priority, sponsors will receive Badge 1.
Case 3 – Using the "Role" Field on Sponsor Badges
Currently, the Role field cannot be used on Sponsor badges, since doing so will apply the role of an attendee to the sponsor. Instead, here is the recommended approach:-
Add “Sponsor” as static text directly on the badge template.
Assign this badge only to Sponsors.
Adjust priority to ensure this badge is printed when a Sponsor belongs to other groups.
Case 4 – Designing a Badge with Fields from Different Registration Flows
Zuddl’s badge customization supports using fields that appear across different registration flows, even when standard fields (e.g., Title, or Company) are reused multiple times.
In scenarios where a standard field is (e.g., Title, or Company) are reused multiple times across registration flows, any occurrence after the first is treated as a custom field. All such fields are listed as custom fields in a dropdown and are accessible during badge design.
For example, if the field Company is used twice, first as a standard field, and again as a custom field.
In the badge setup, you may see multiple entries with same name ’Company’ all listed in a unified dropdown, giving access to the available data fields.
Recommended Approach:
Select and stack all relevant field variants in the same location on the badge template.
When the badge is generated, the correct field, based on the attendee’s registration submission, will automatically appear.
 |  |
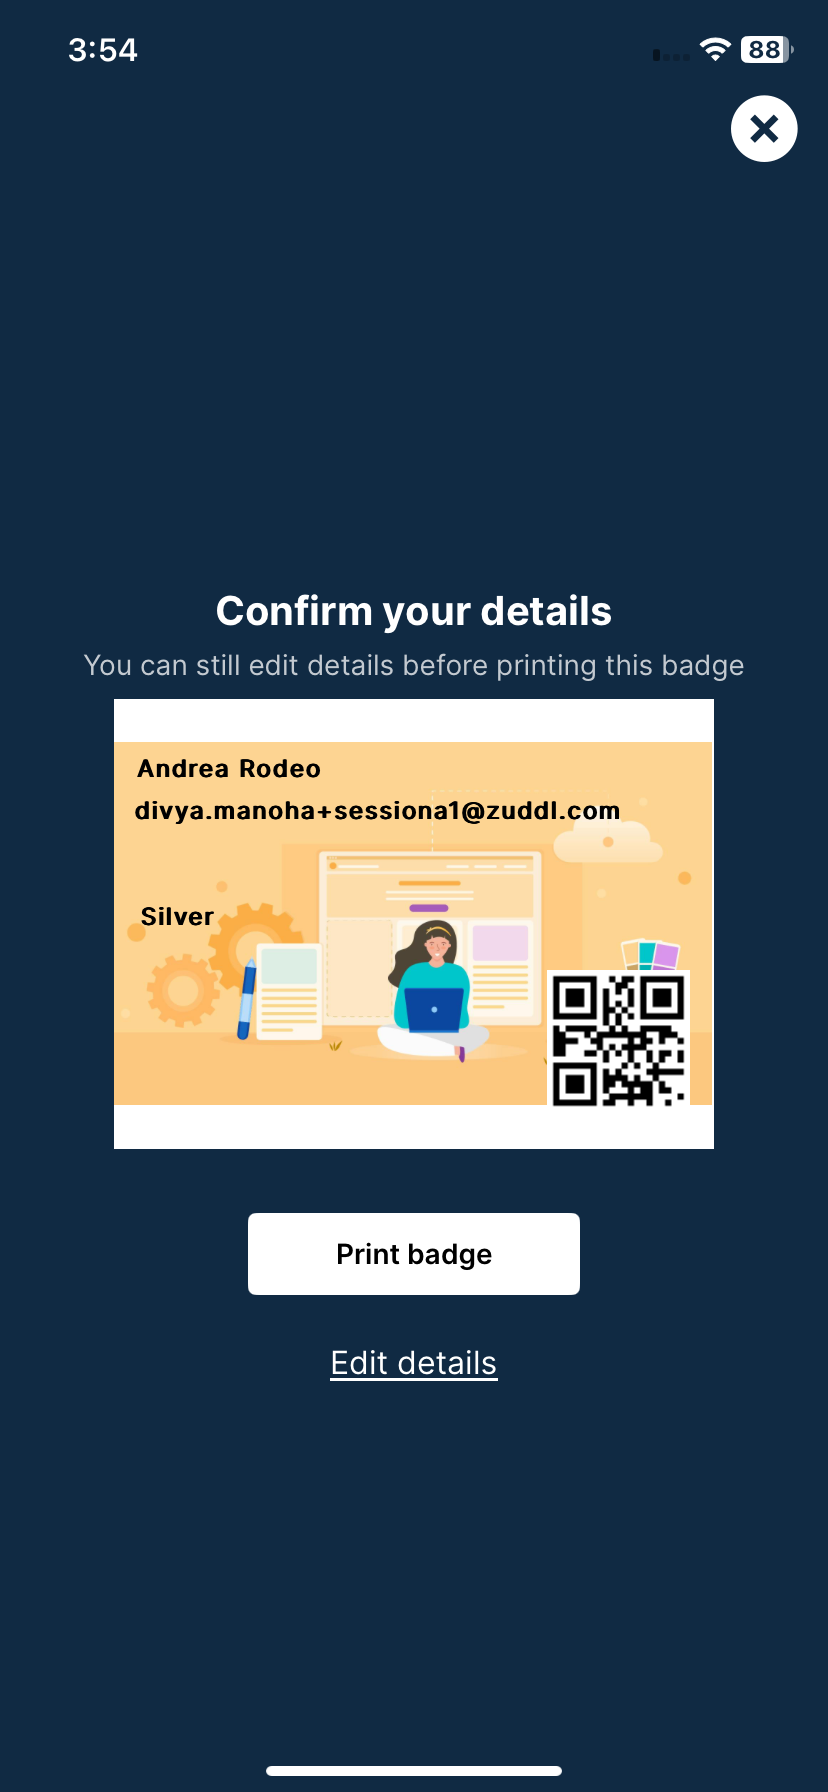
Badge printing in the App
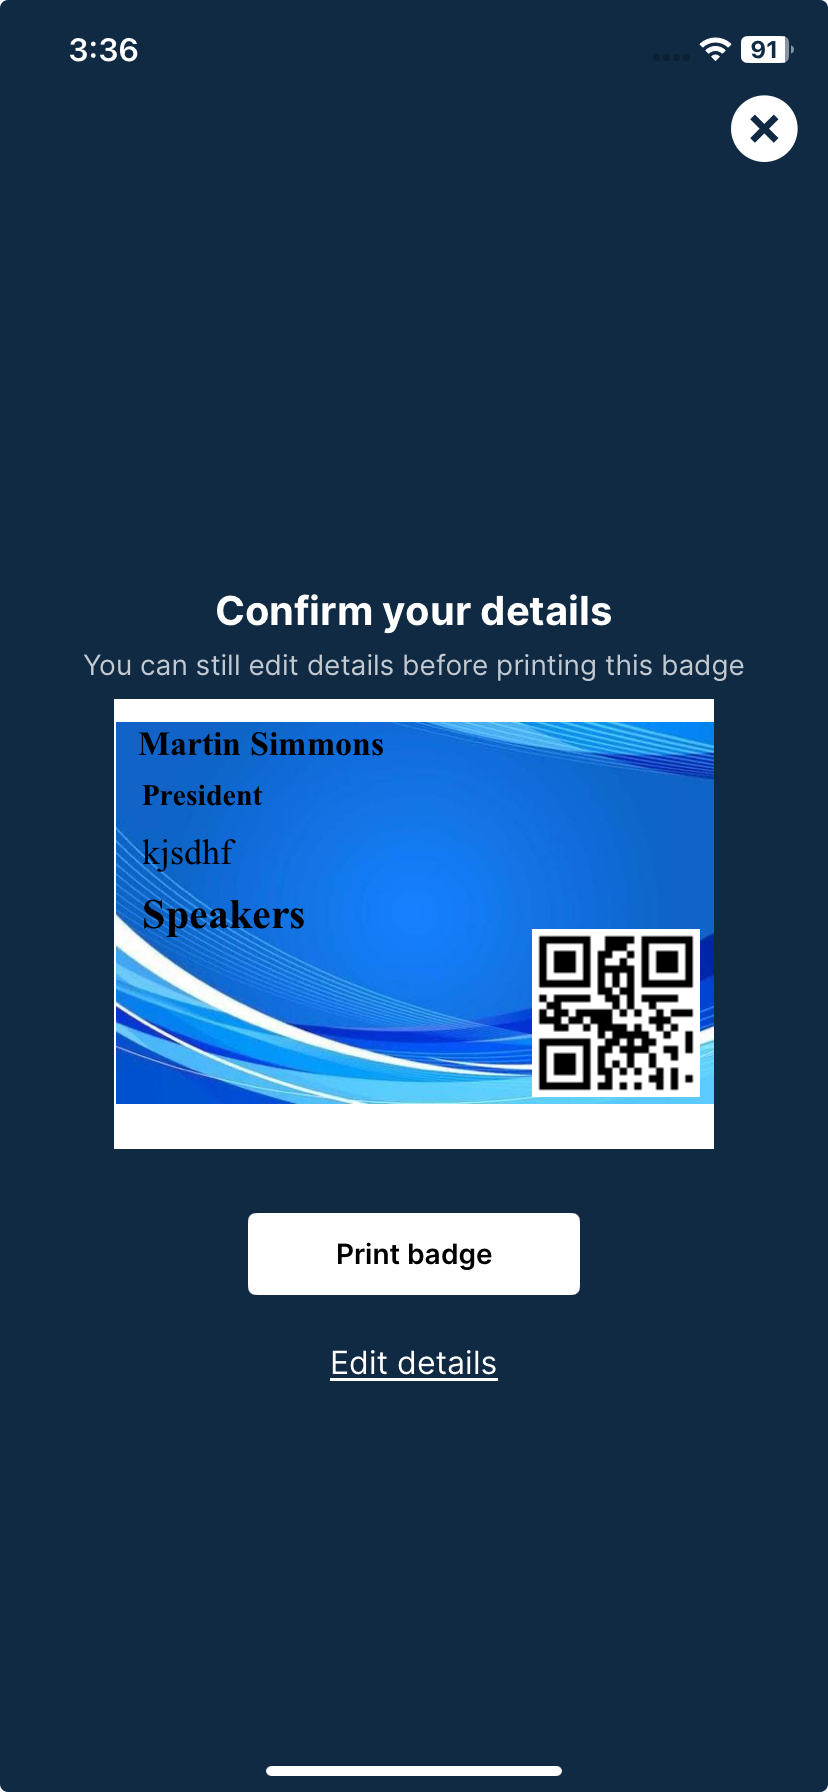
In the Zuddl Onsite App, you can print badges for event participants once you check them in. Badges are printed based on the badge settings in the event setup and the audience group assigned to a participant.
Let’s say you’ve created badges for audiences and ticket types with priority settings:
Printing a badge for a specific group: We've assigned a badge specifically for speakers. When a speaker is checked in, this badge will be printed for them.
No badge assigned: We have not assigned any badge specifically for this participant.
When they are checked in, the default badge is printed for them.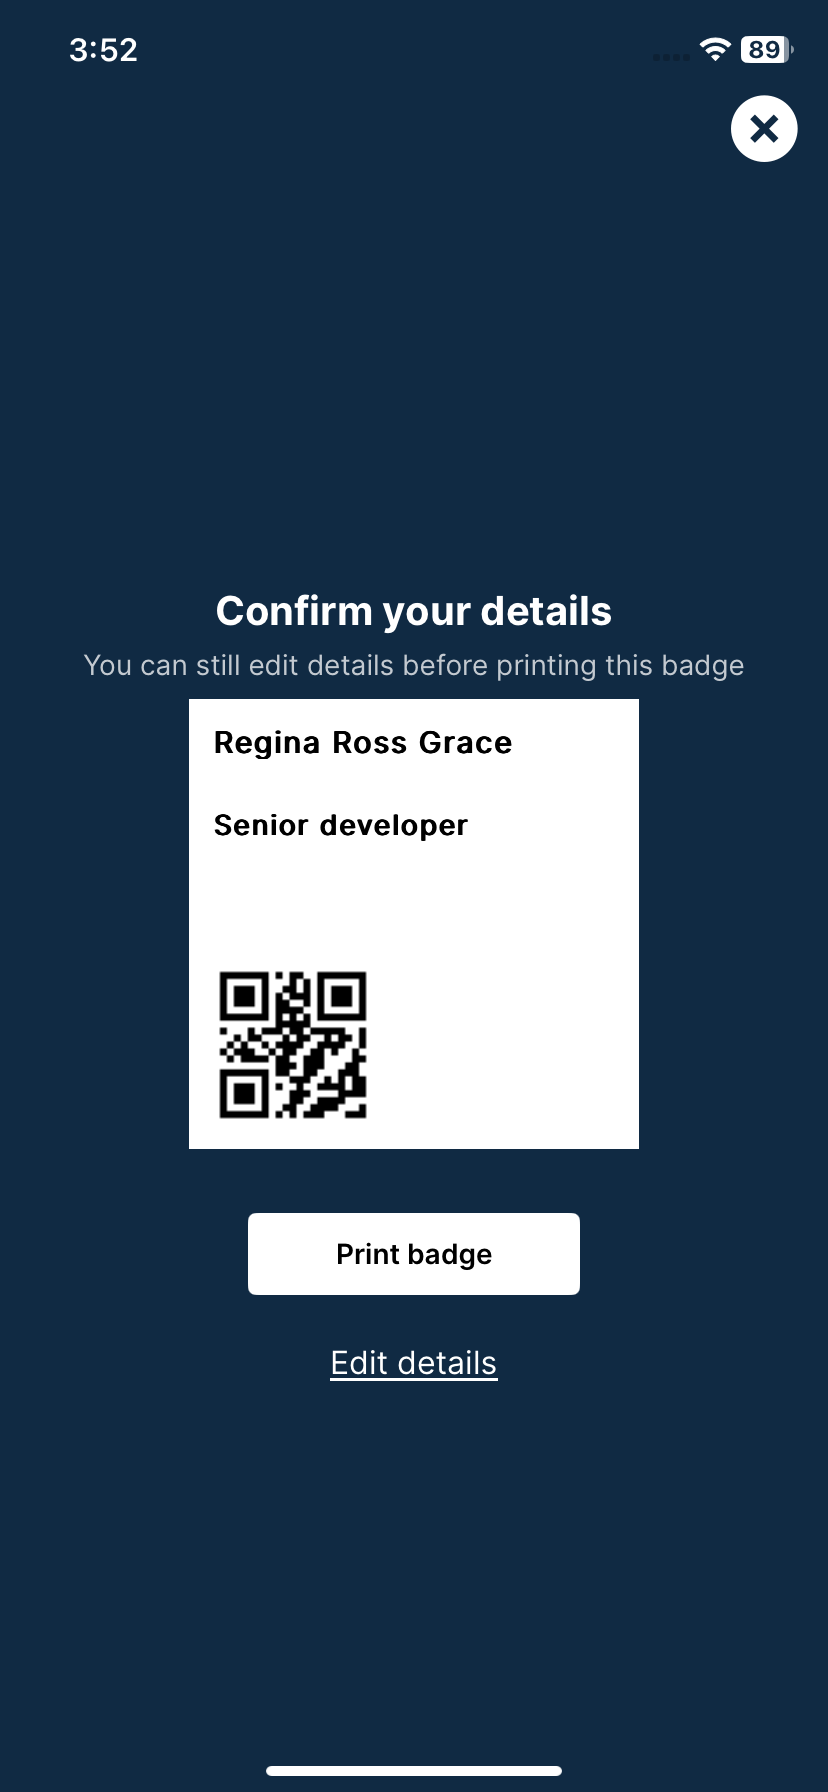
Participant is part of multiple groups: When a participant is in multiple audience groups, the badge with the highest priority will be printed for them.