How to Edit Recordings for a Hybrid Event in Zuddl
Last updated: August 1, 2025
After your event wraps up, Zuddl generates session recordings for you to review and work with. You can edit and trim these recordings using the built-in editing feature to create short, shareable highlight clips.
Learn about publishing full recordings here.
To edit your recordings:
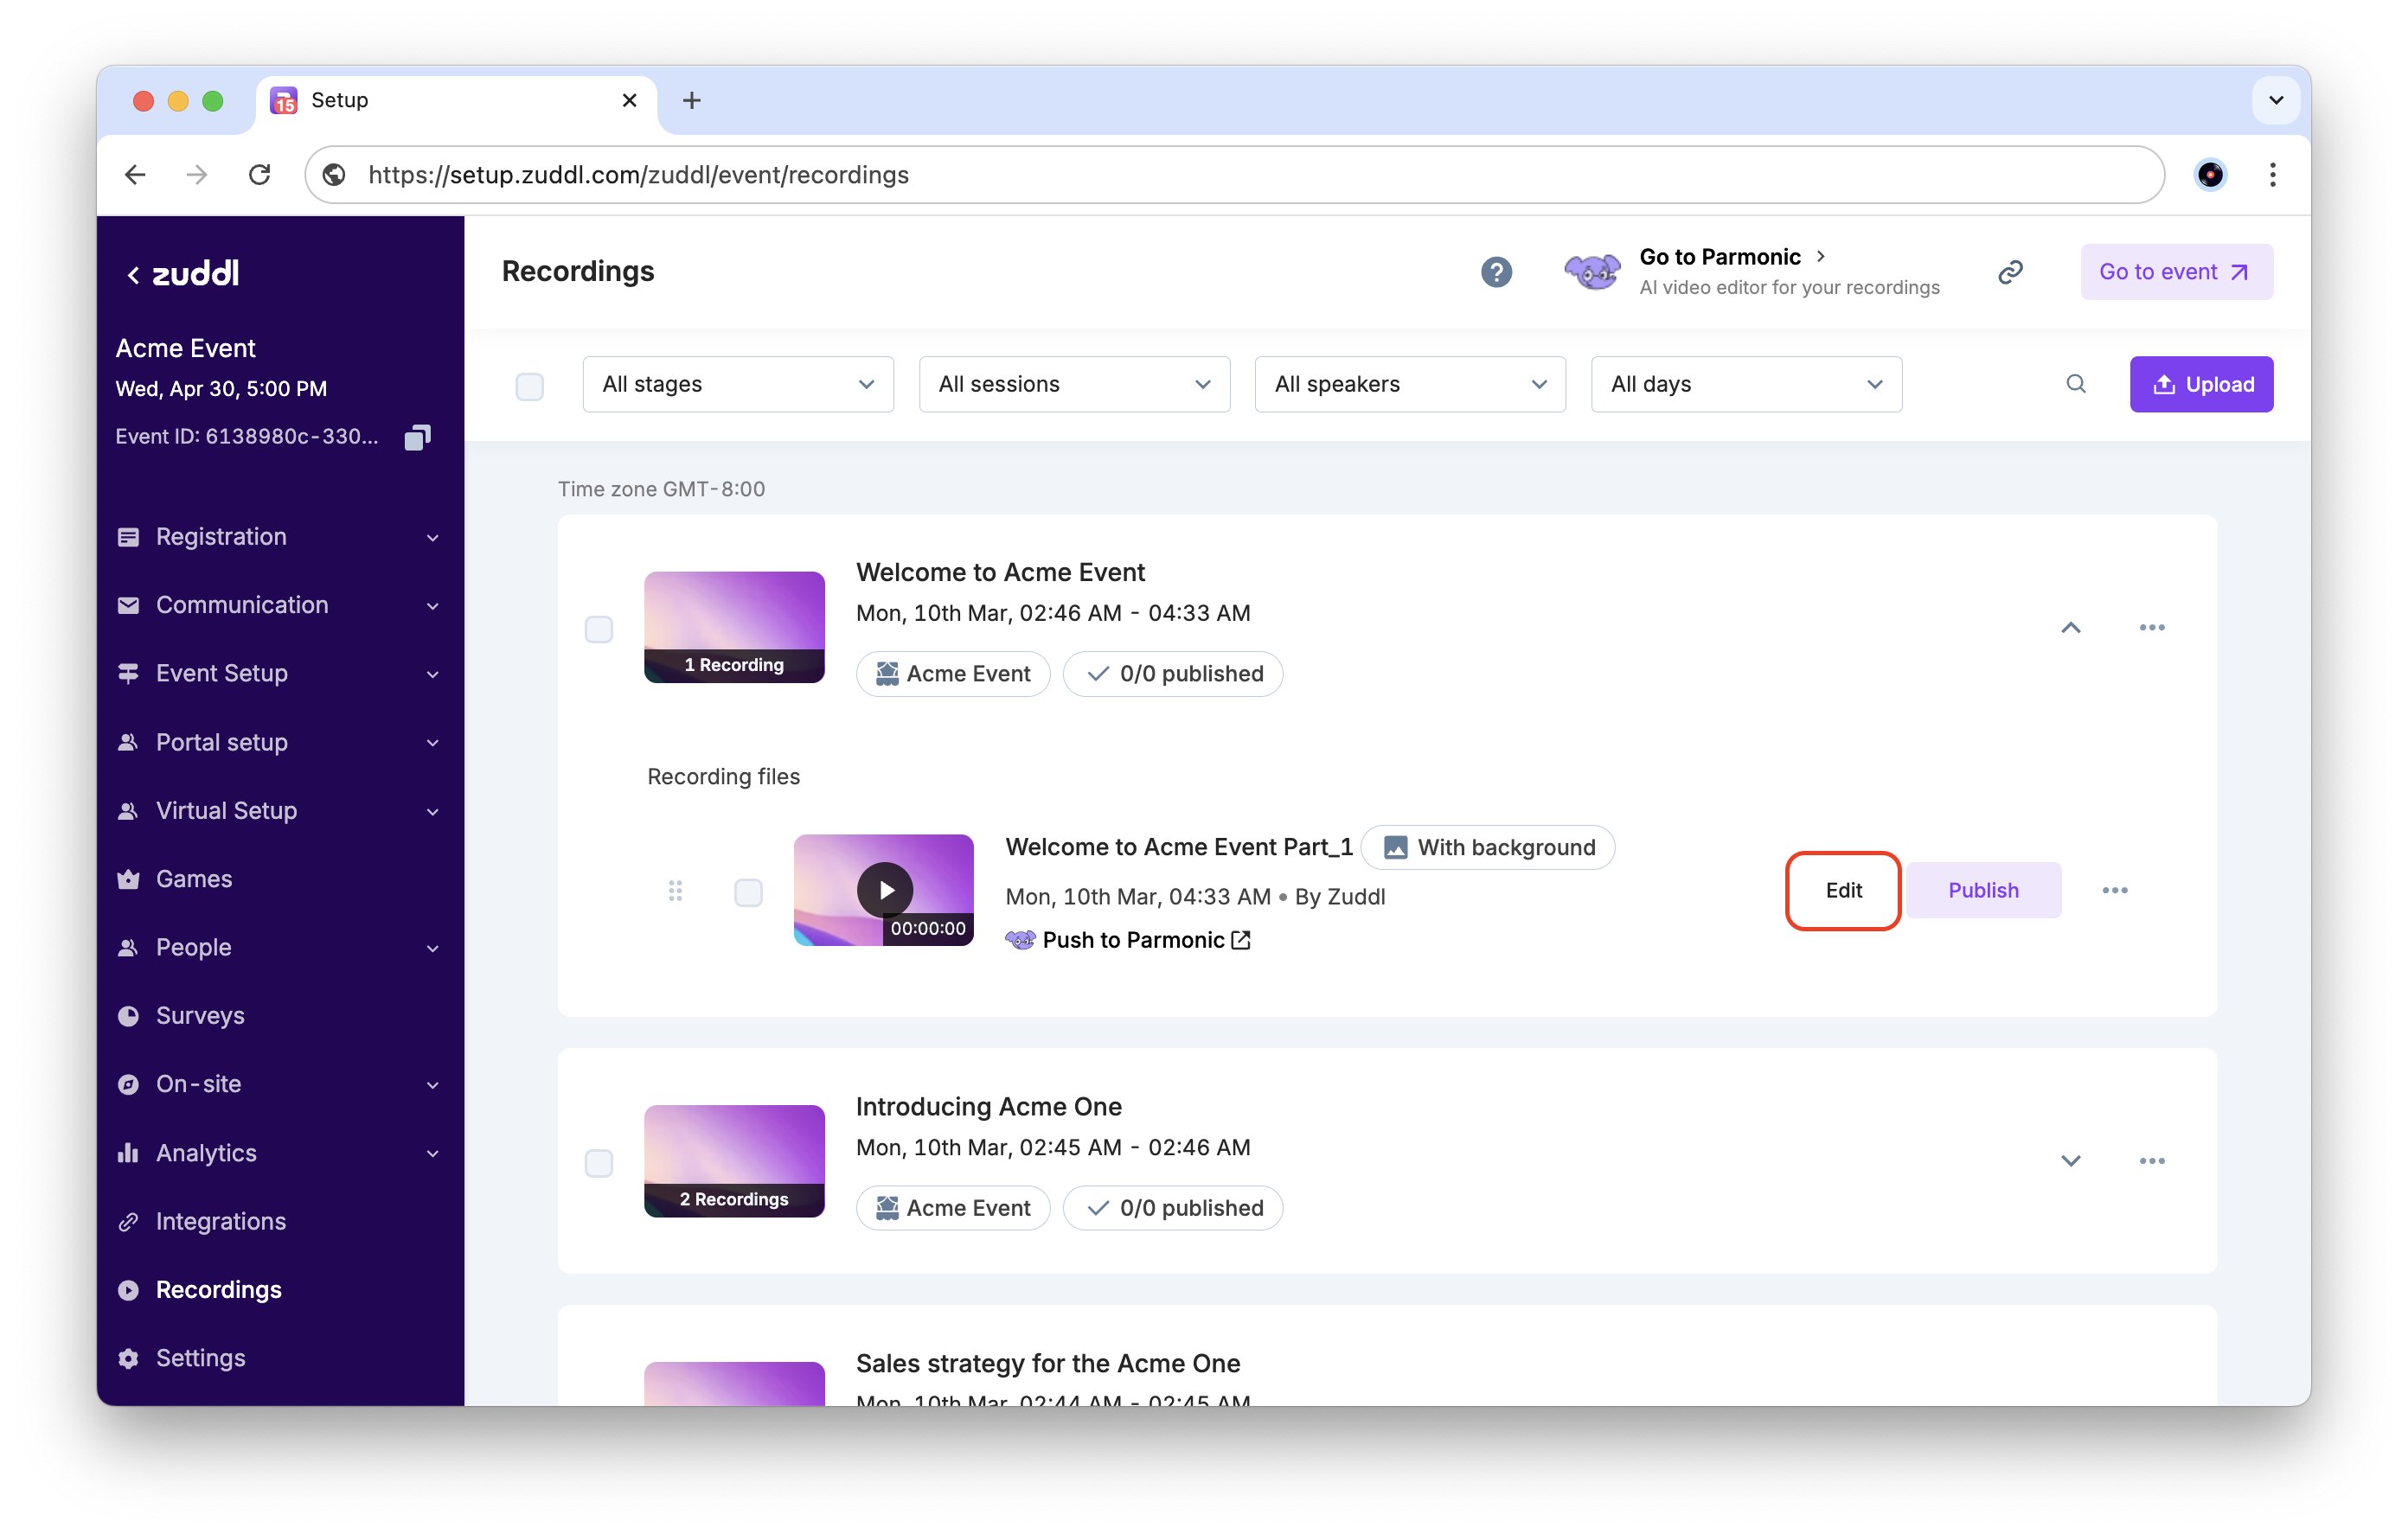
- In the event setup, go to Recordings. Click the expand button to view recordings for individual sessions. For the recording you want ot edit, click the Edit button.
- The editor takes some time to process the recording, about 60 seconds. Please wait while this happens.
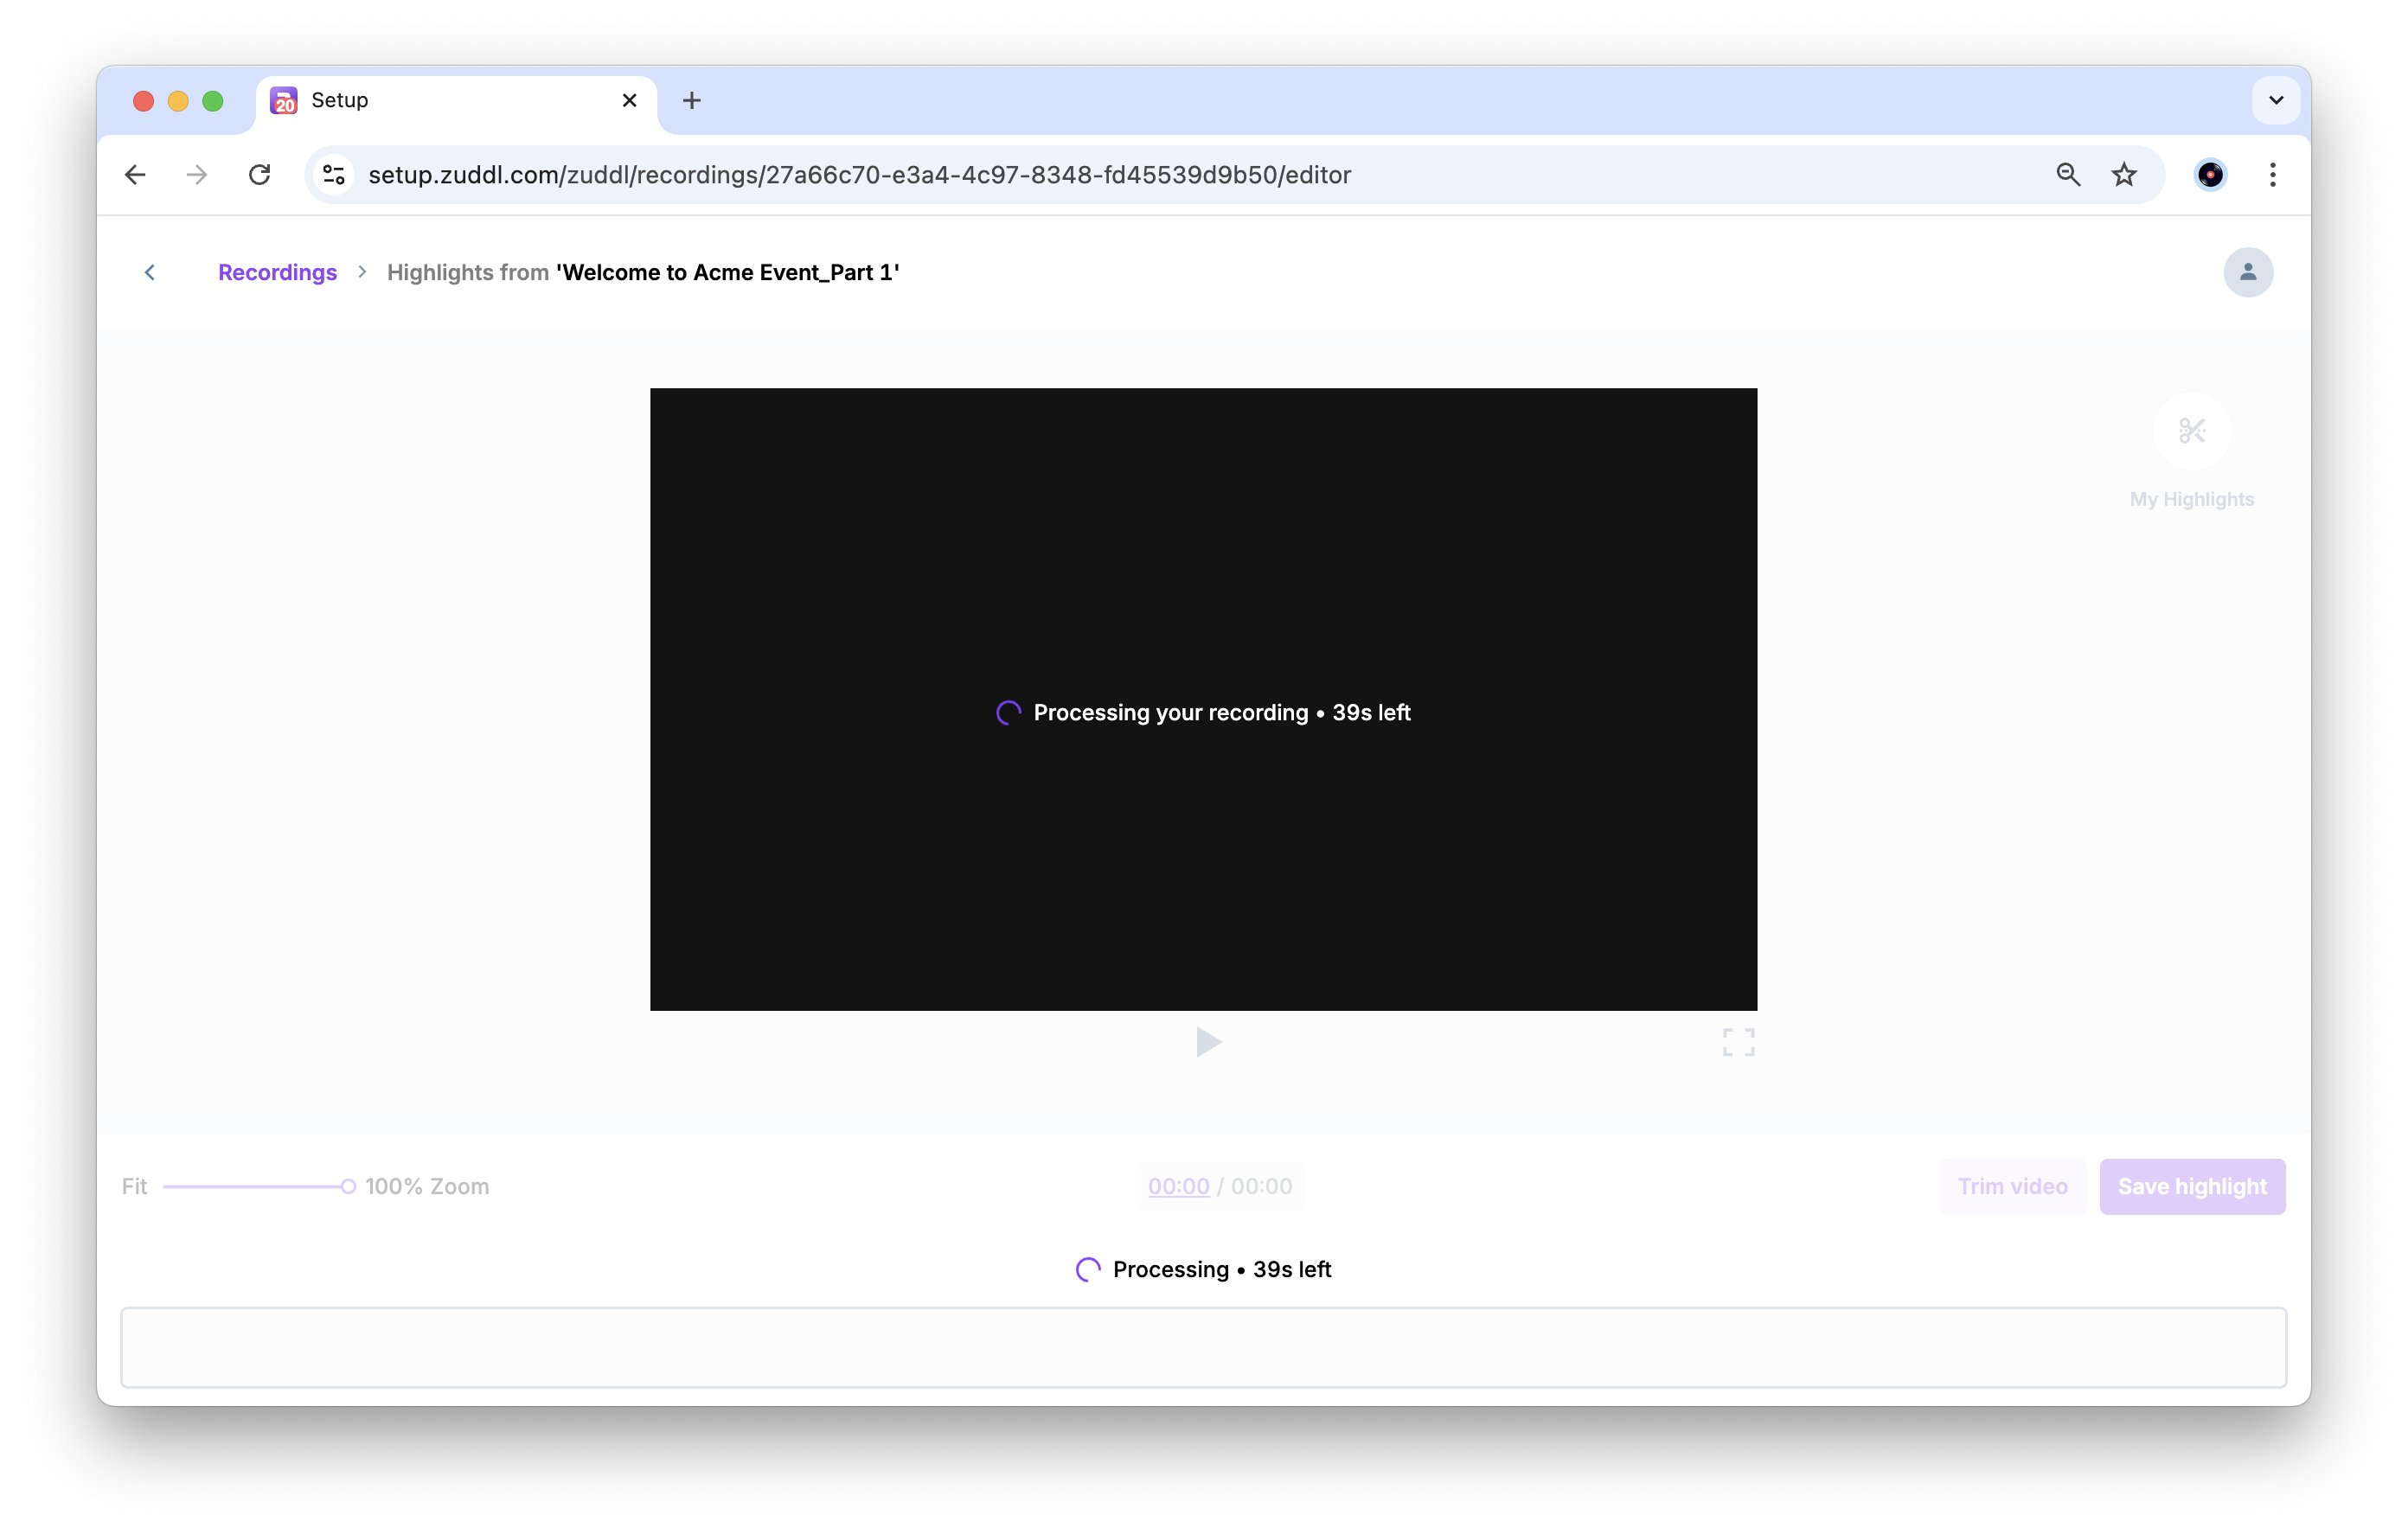
- When the recording is done processing, you can play it to review it. You can also use the timeline at the bottom to watch specific sections.
There are two major actions you can take for editing a recording: trimming and saving highlights.
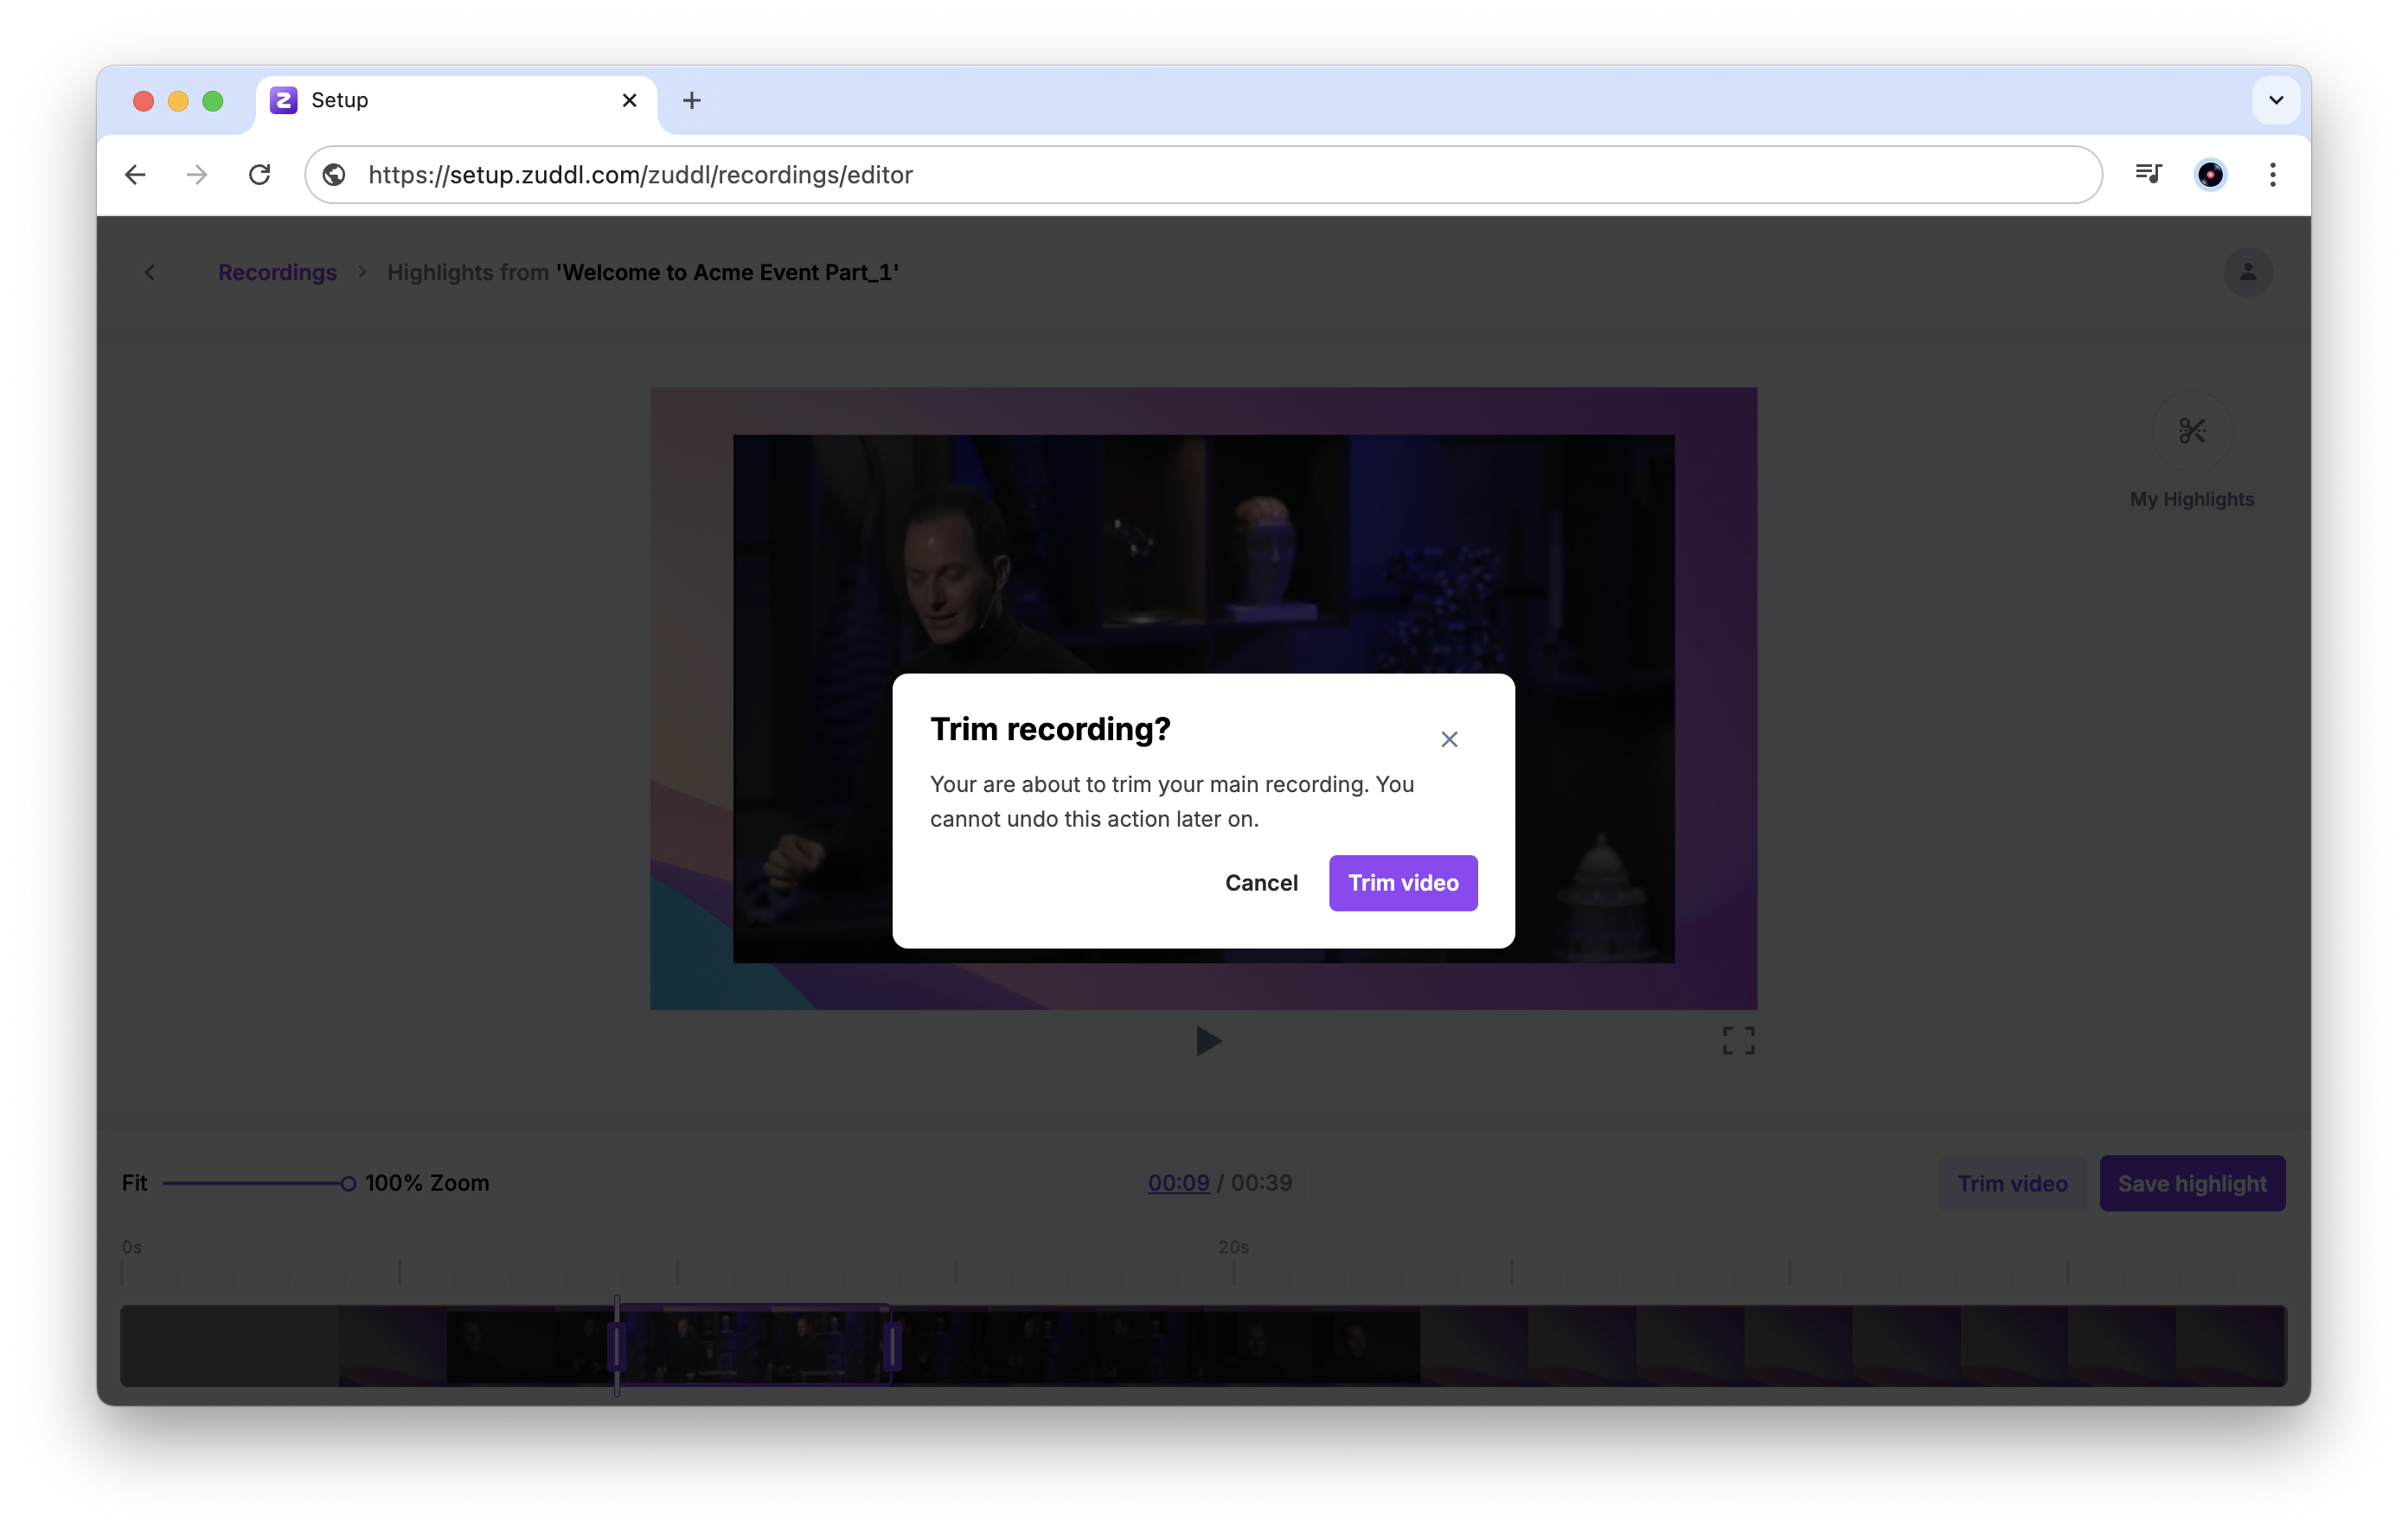
Trimming a recording
Trimming helps you clean up a recording, by deleting sections of the recording that are unnecessary - like extended beginnings or endings. Once you save the trimmed version, it replaces the original recording.
- Use the sliders at the beginning and the end to select the section of the recording that you want to keep. The parts of the recording before and after the selected duration will be deleted. You can play the selected section to review it before trimming.
Once you have the section finalized, click the Trim video button to confirm.
- In the popup, click Trim video.
Saving highlights
Highlights let you take short, shareable clips from a recording, without changing the original. These are perfect for sharing key moments on social media, with audiences, or internally with your team.
- Similar to trimming, use the sliders at the beginning and the end to select the section of the recording that you want to save as a highlight. Only the selected duration will be saved as a highlight. You can play the selected section to review it before saving.
Once you have the section finalized, click the Save highlight button to confirm.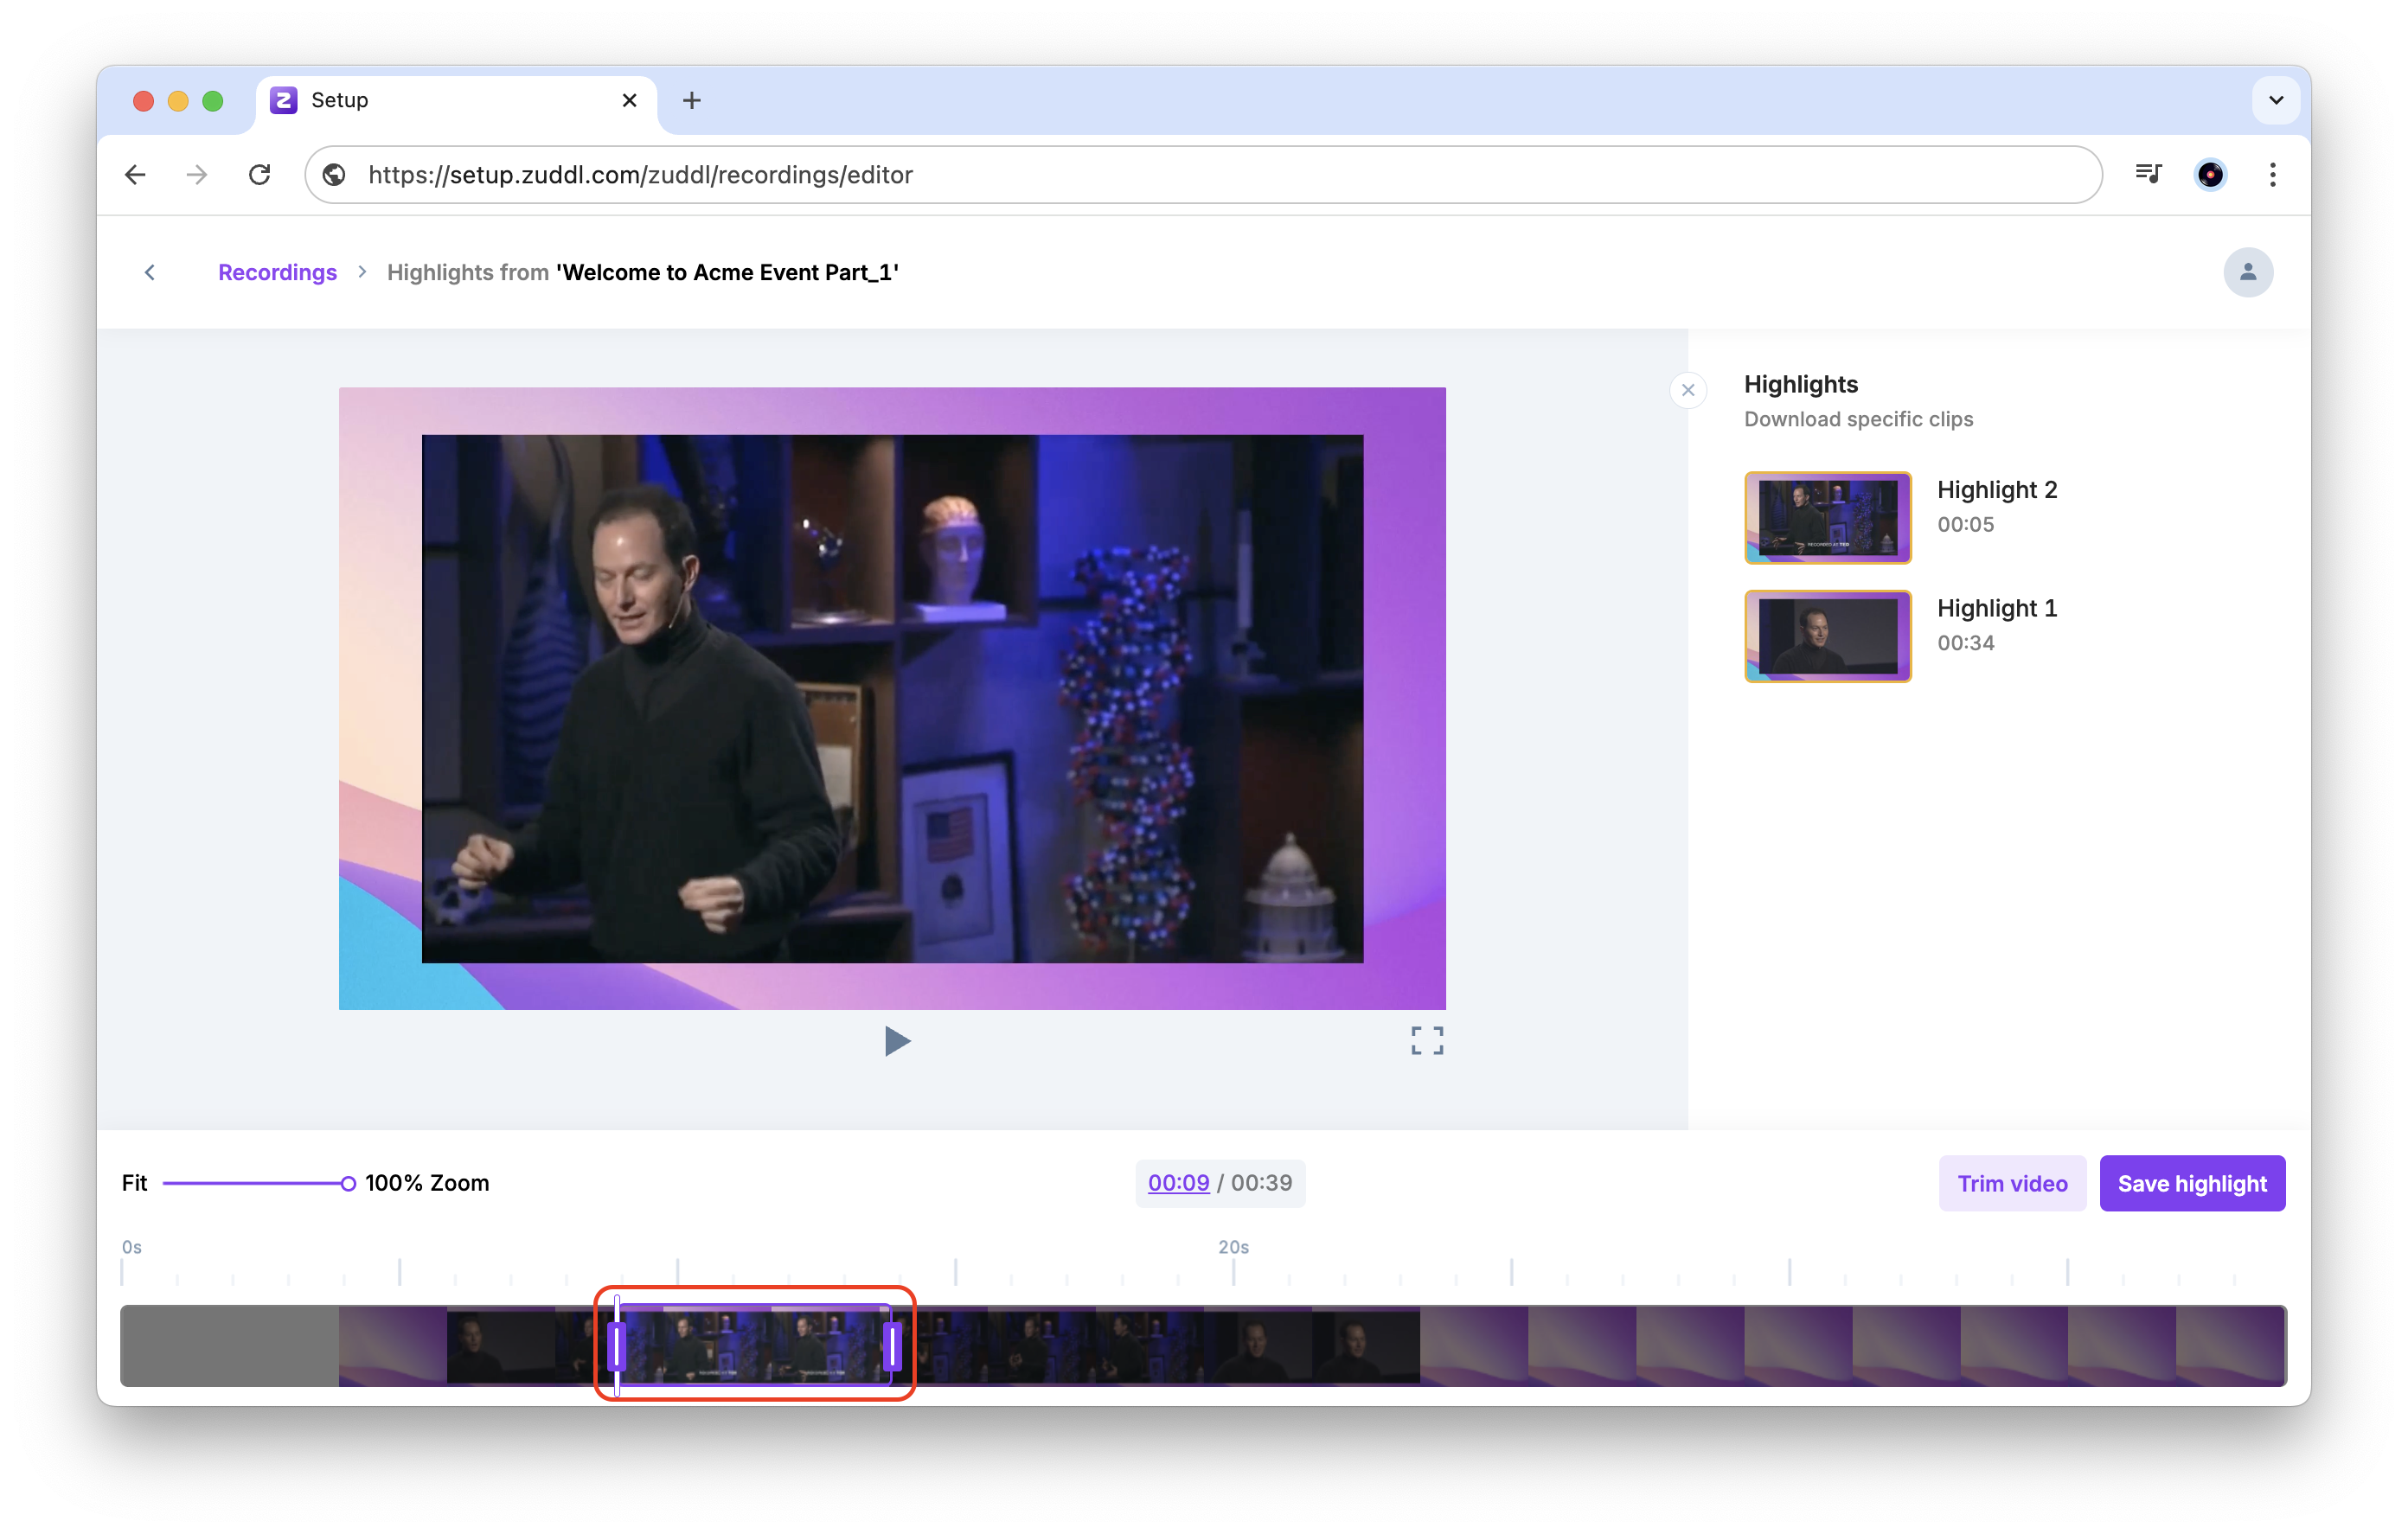
- The selected portion of the recording is now saved as a highlight. You can review it from the right side panel.
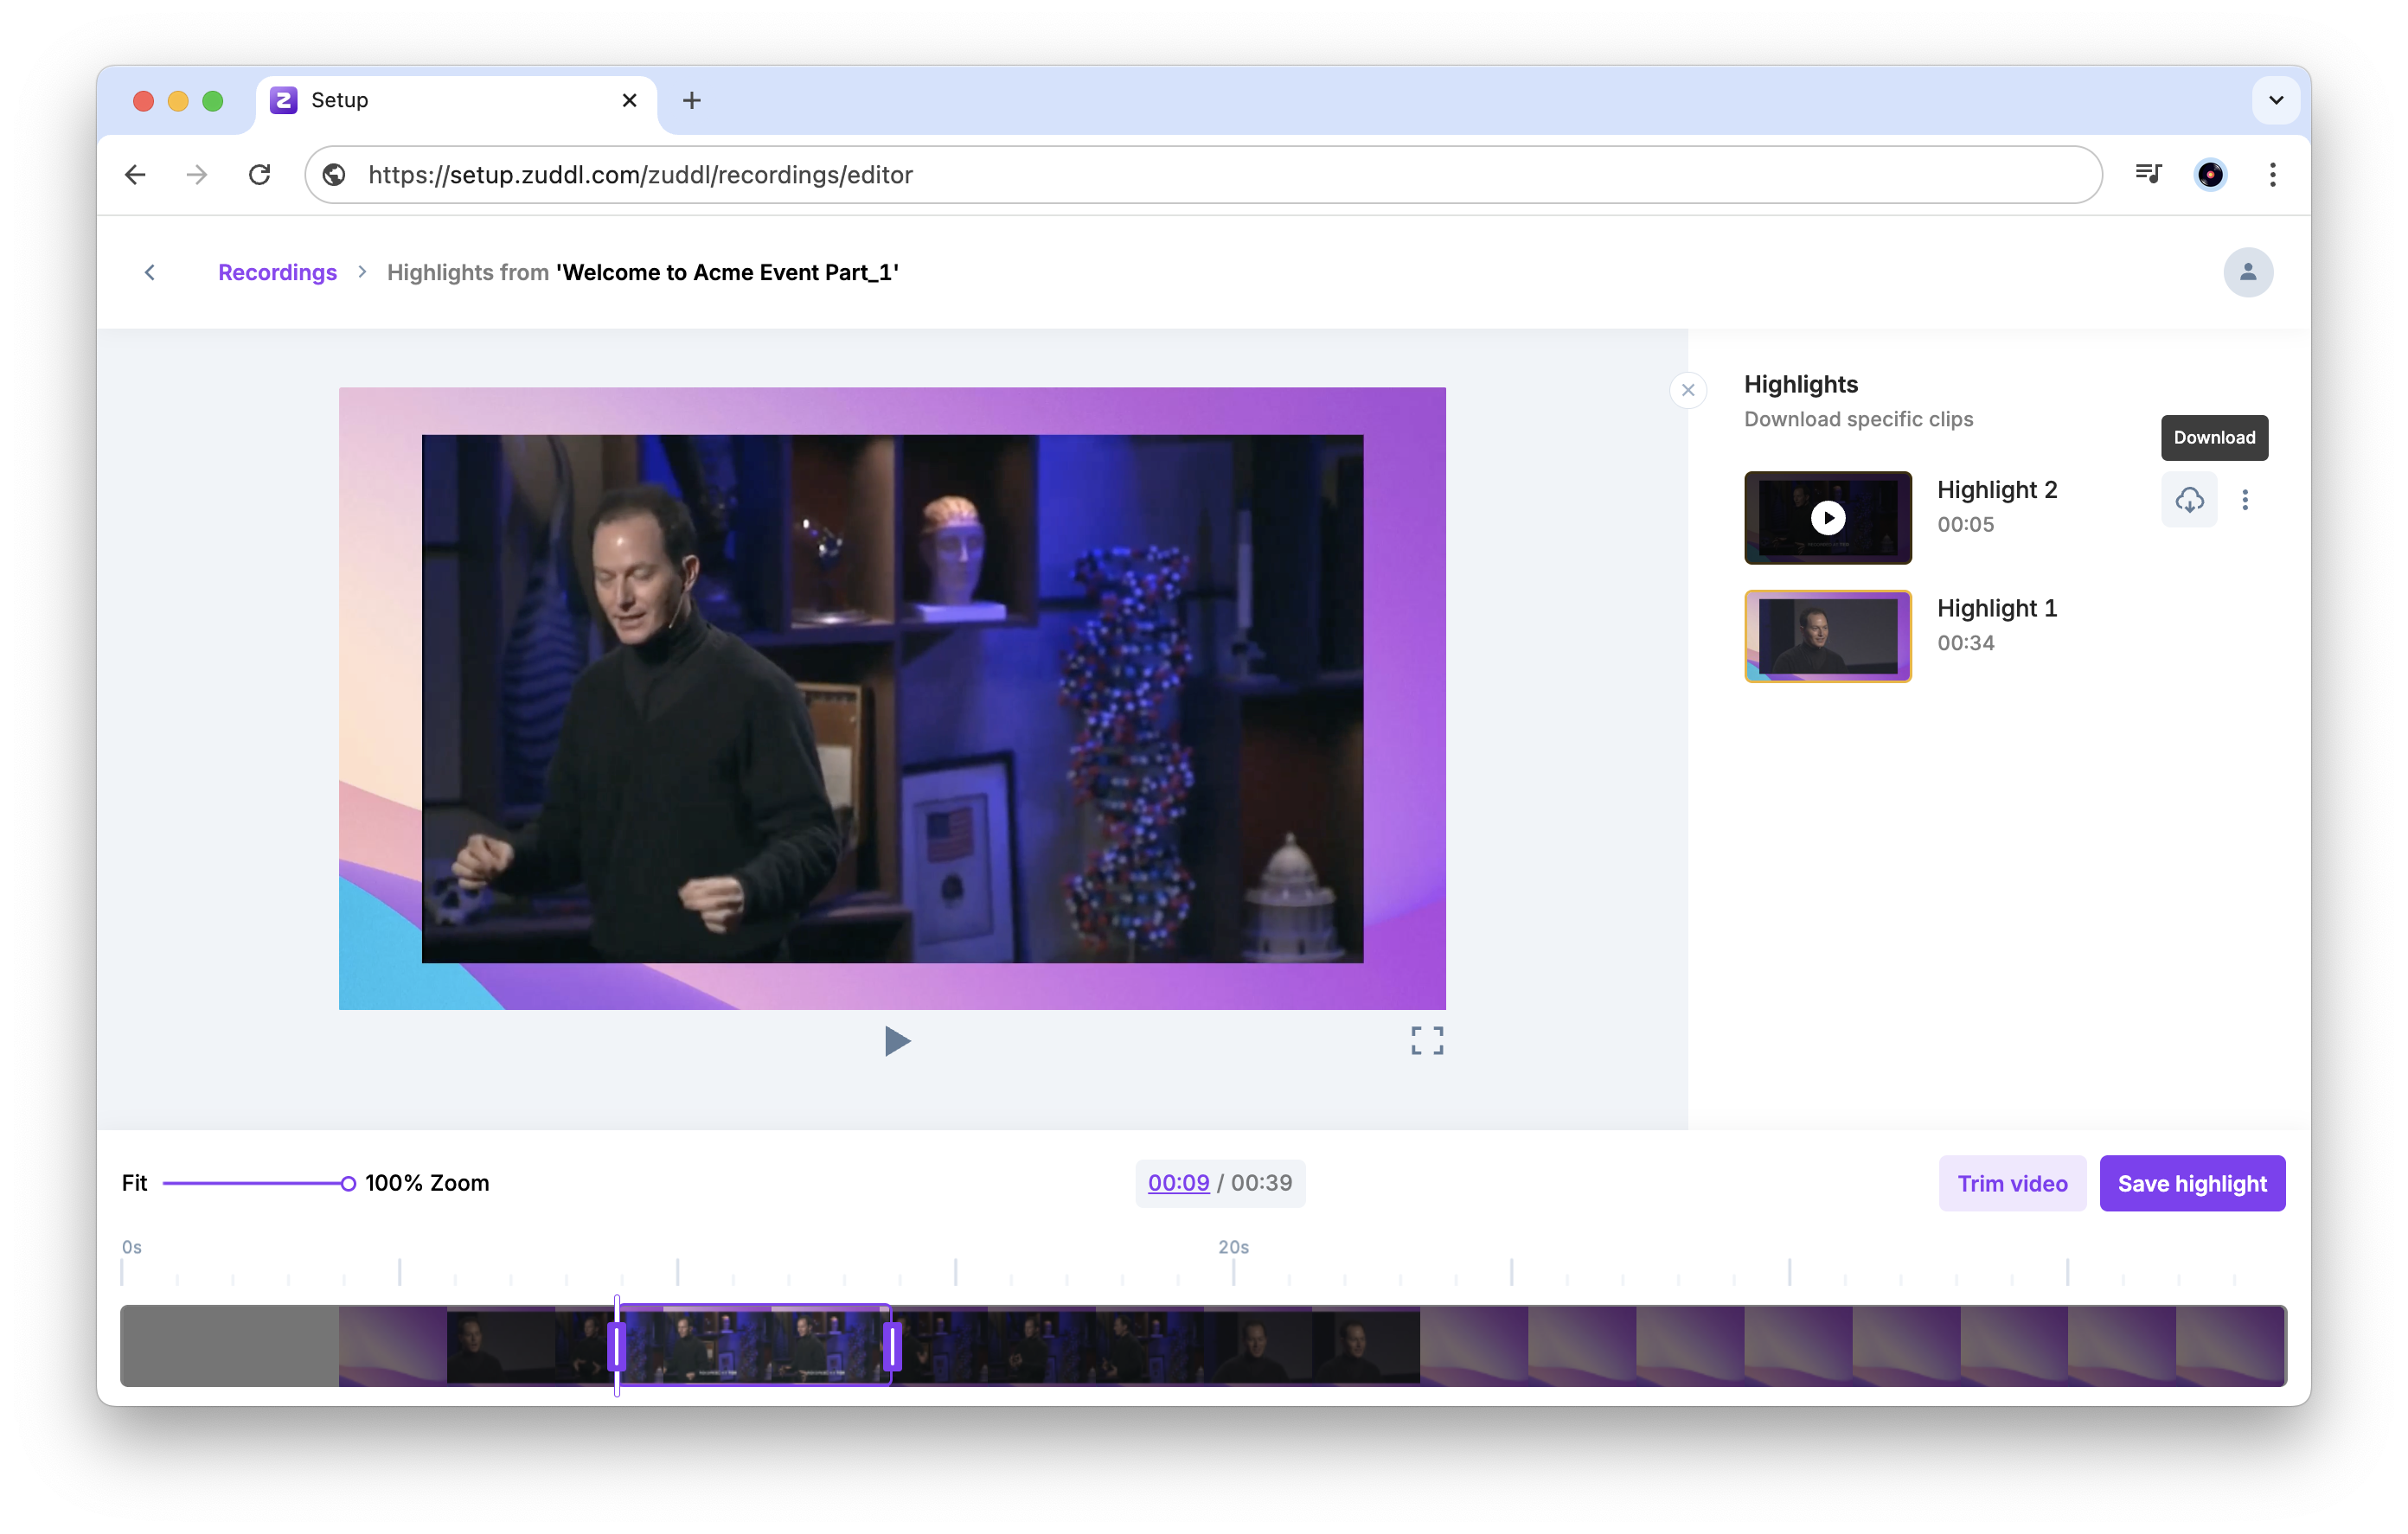
- From the highlights panel, click the download icon to download the highlight to your device. You can also Rename the highlight, Copy link to share it via a link, or Delete it from the options menu on the right.
