How to Add a Custom Email Address for a Zuddl Account
Last updated: November 7, 2025
As attendees stay excited about your next event, you can make them feel more connected by sending event emails directly from your own custom email address. This option is handy when using the Communications feature in the event setup dashboard for sending event-specific emails.
Learn how to use the Communication tool in Zuddl.
Transactional emails, such as emails with verification codes, will still be sent by Zuddl.
This set up may require you to reach out to your IT team.
Add a custom email address
Custom email addresses can be added only by Zuddl account owners and admins. Moderators and other team members cannot add custom email addresses.
To add an email address,
On the common dashboard, go to General settings.
Go to Email addresses option in the left navigation menu, click the +Add email address button.
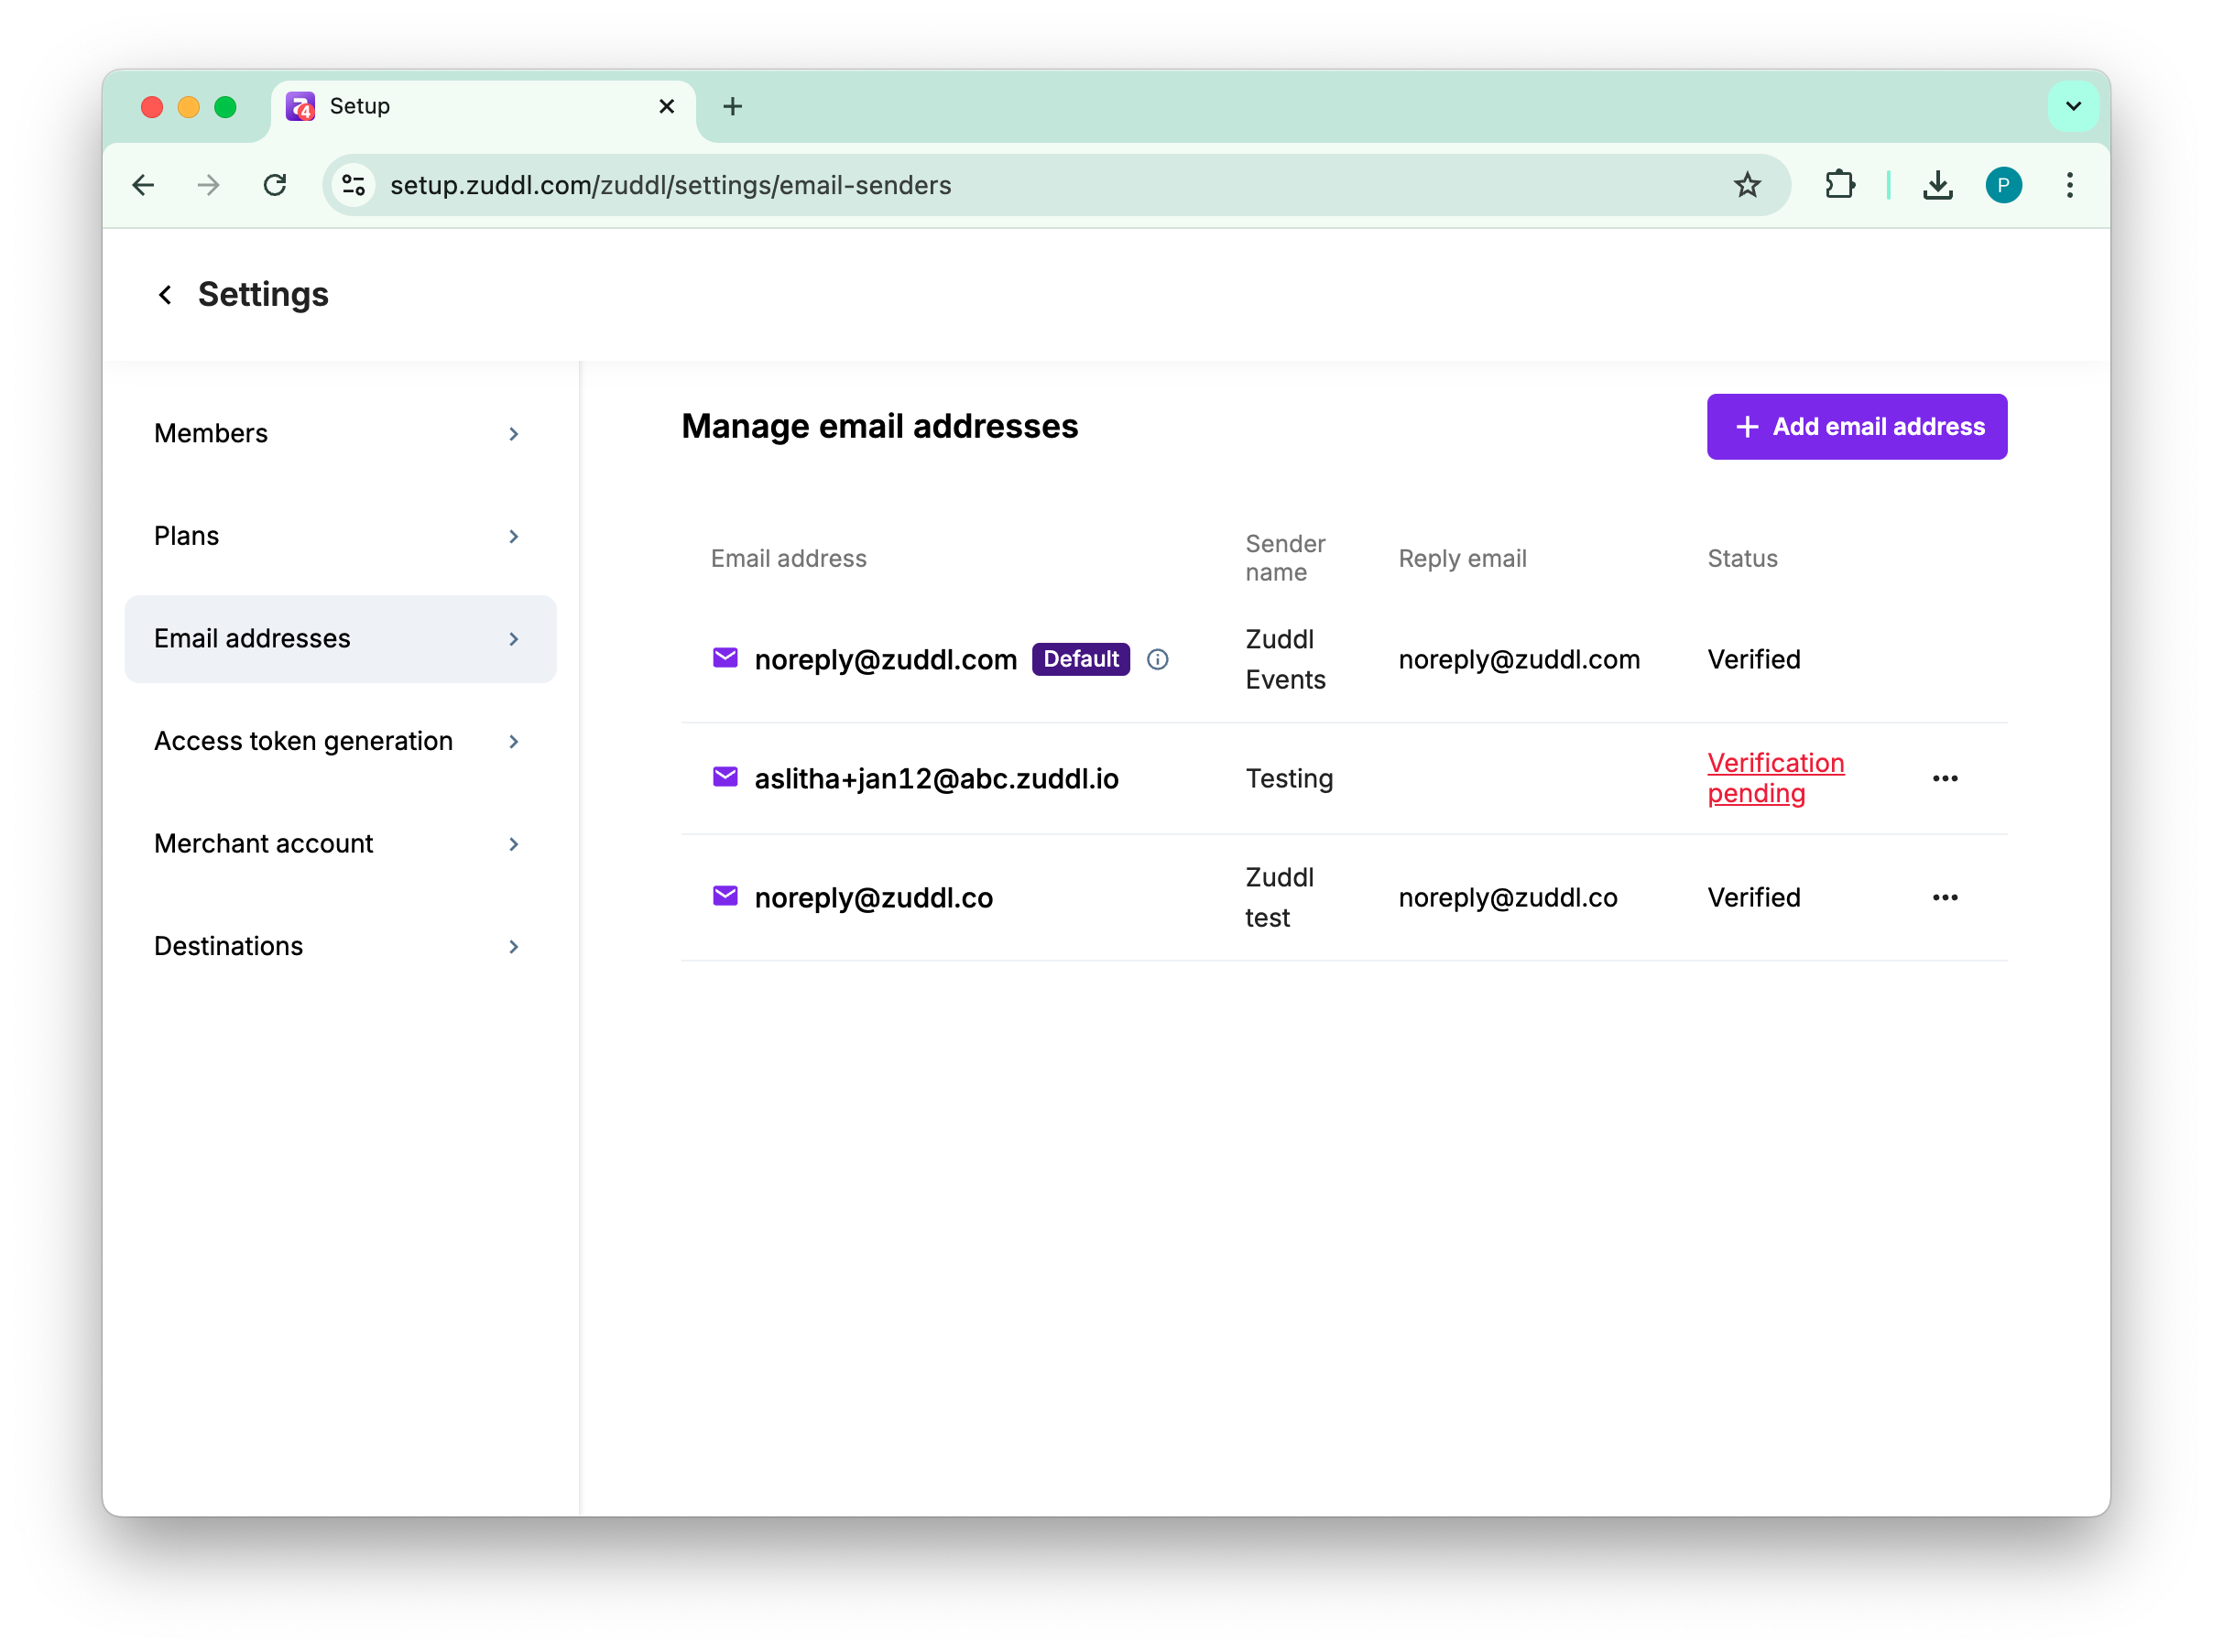
The email address list shows the default email address by Zuddl; noreply@zuddl.com in verified status. This also includes hello@zuddl.com and mail@in.zuddlevents.com, depending on the email type.
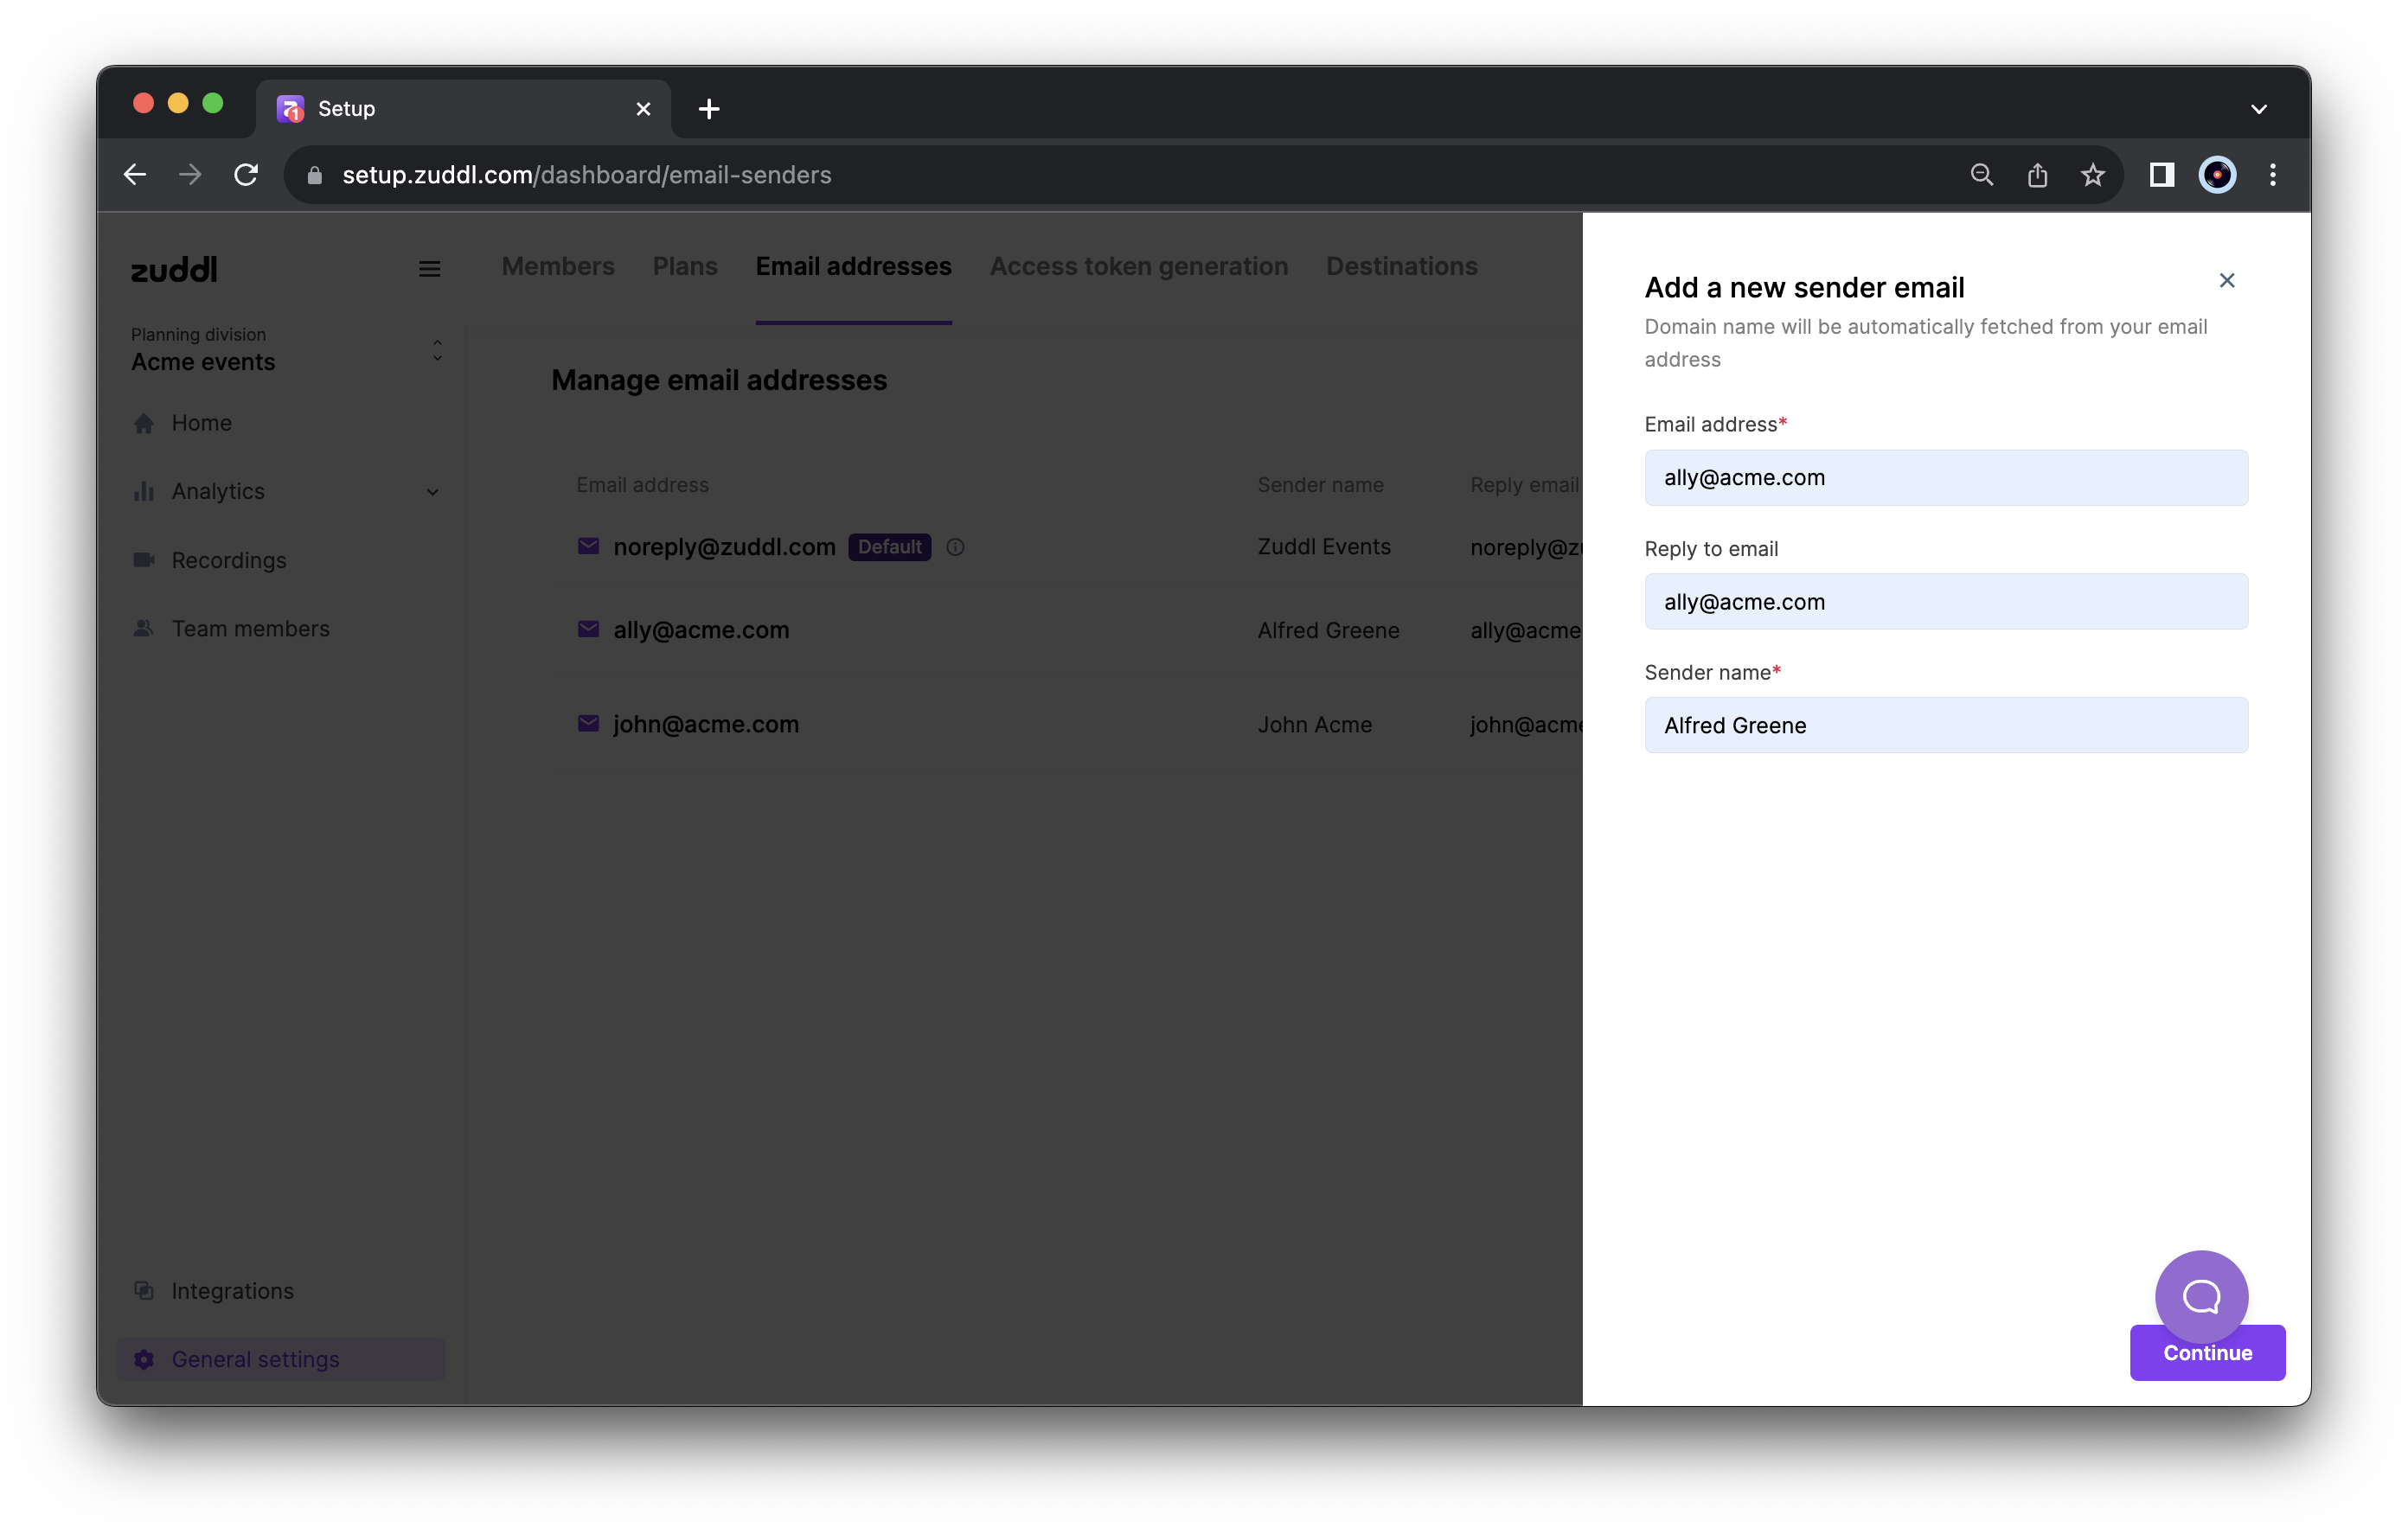
On the Add a new sender email, enter the following:
Email address
(Optional) Reply to email. Enter the email address that should be able to receive event-specific emails; you can enter a different or the exact address here.
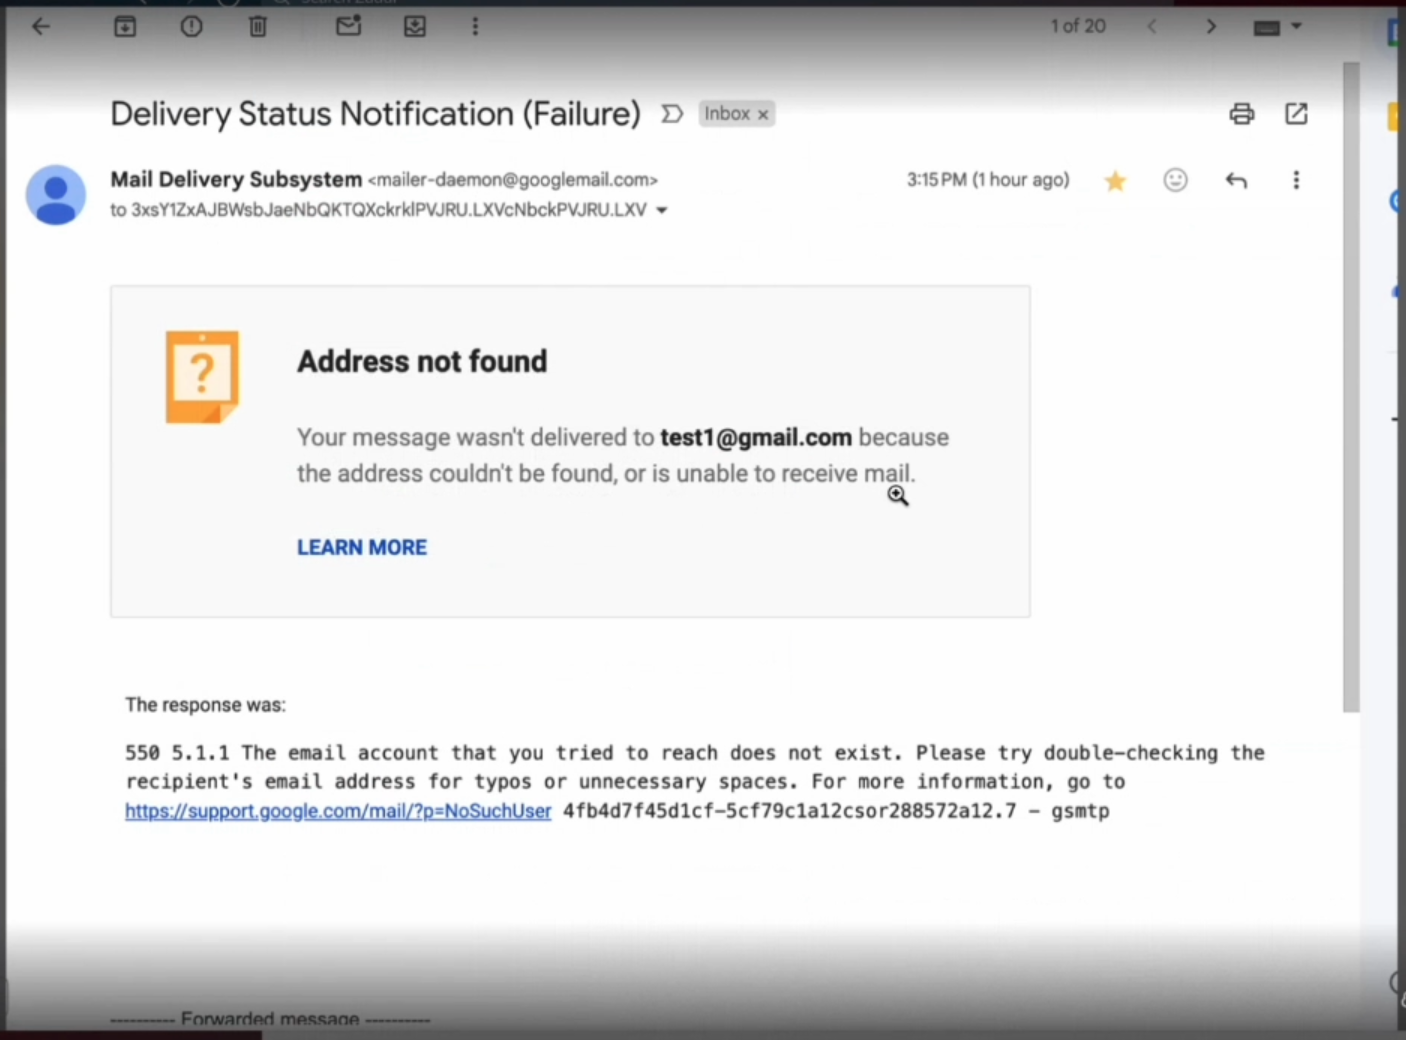
The Reply to email cannot be a no-reply email address, else the emails delivery fails with an address not found error email as shown below.
Click Continue. This takes the user to the verification step.
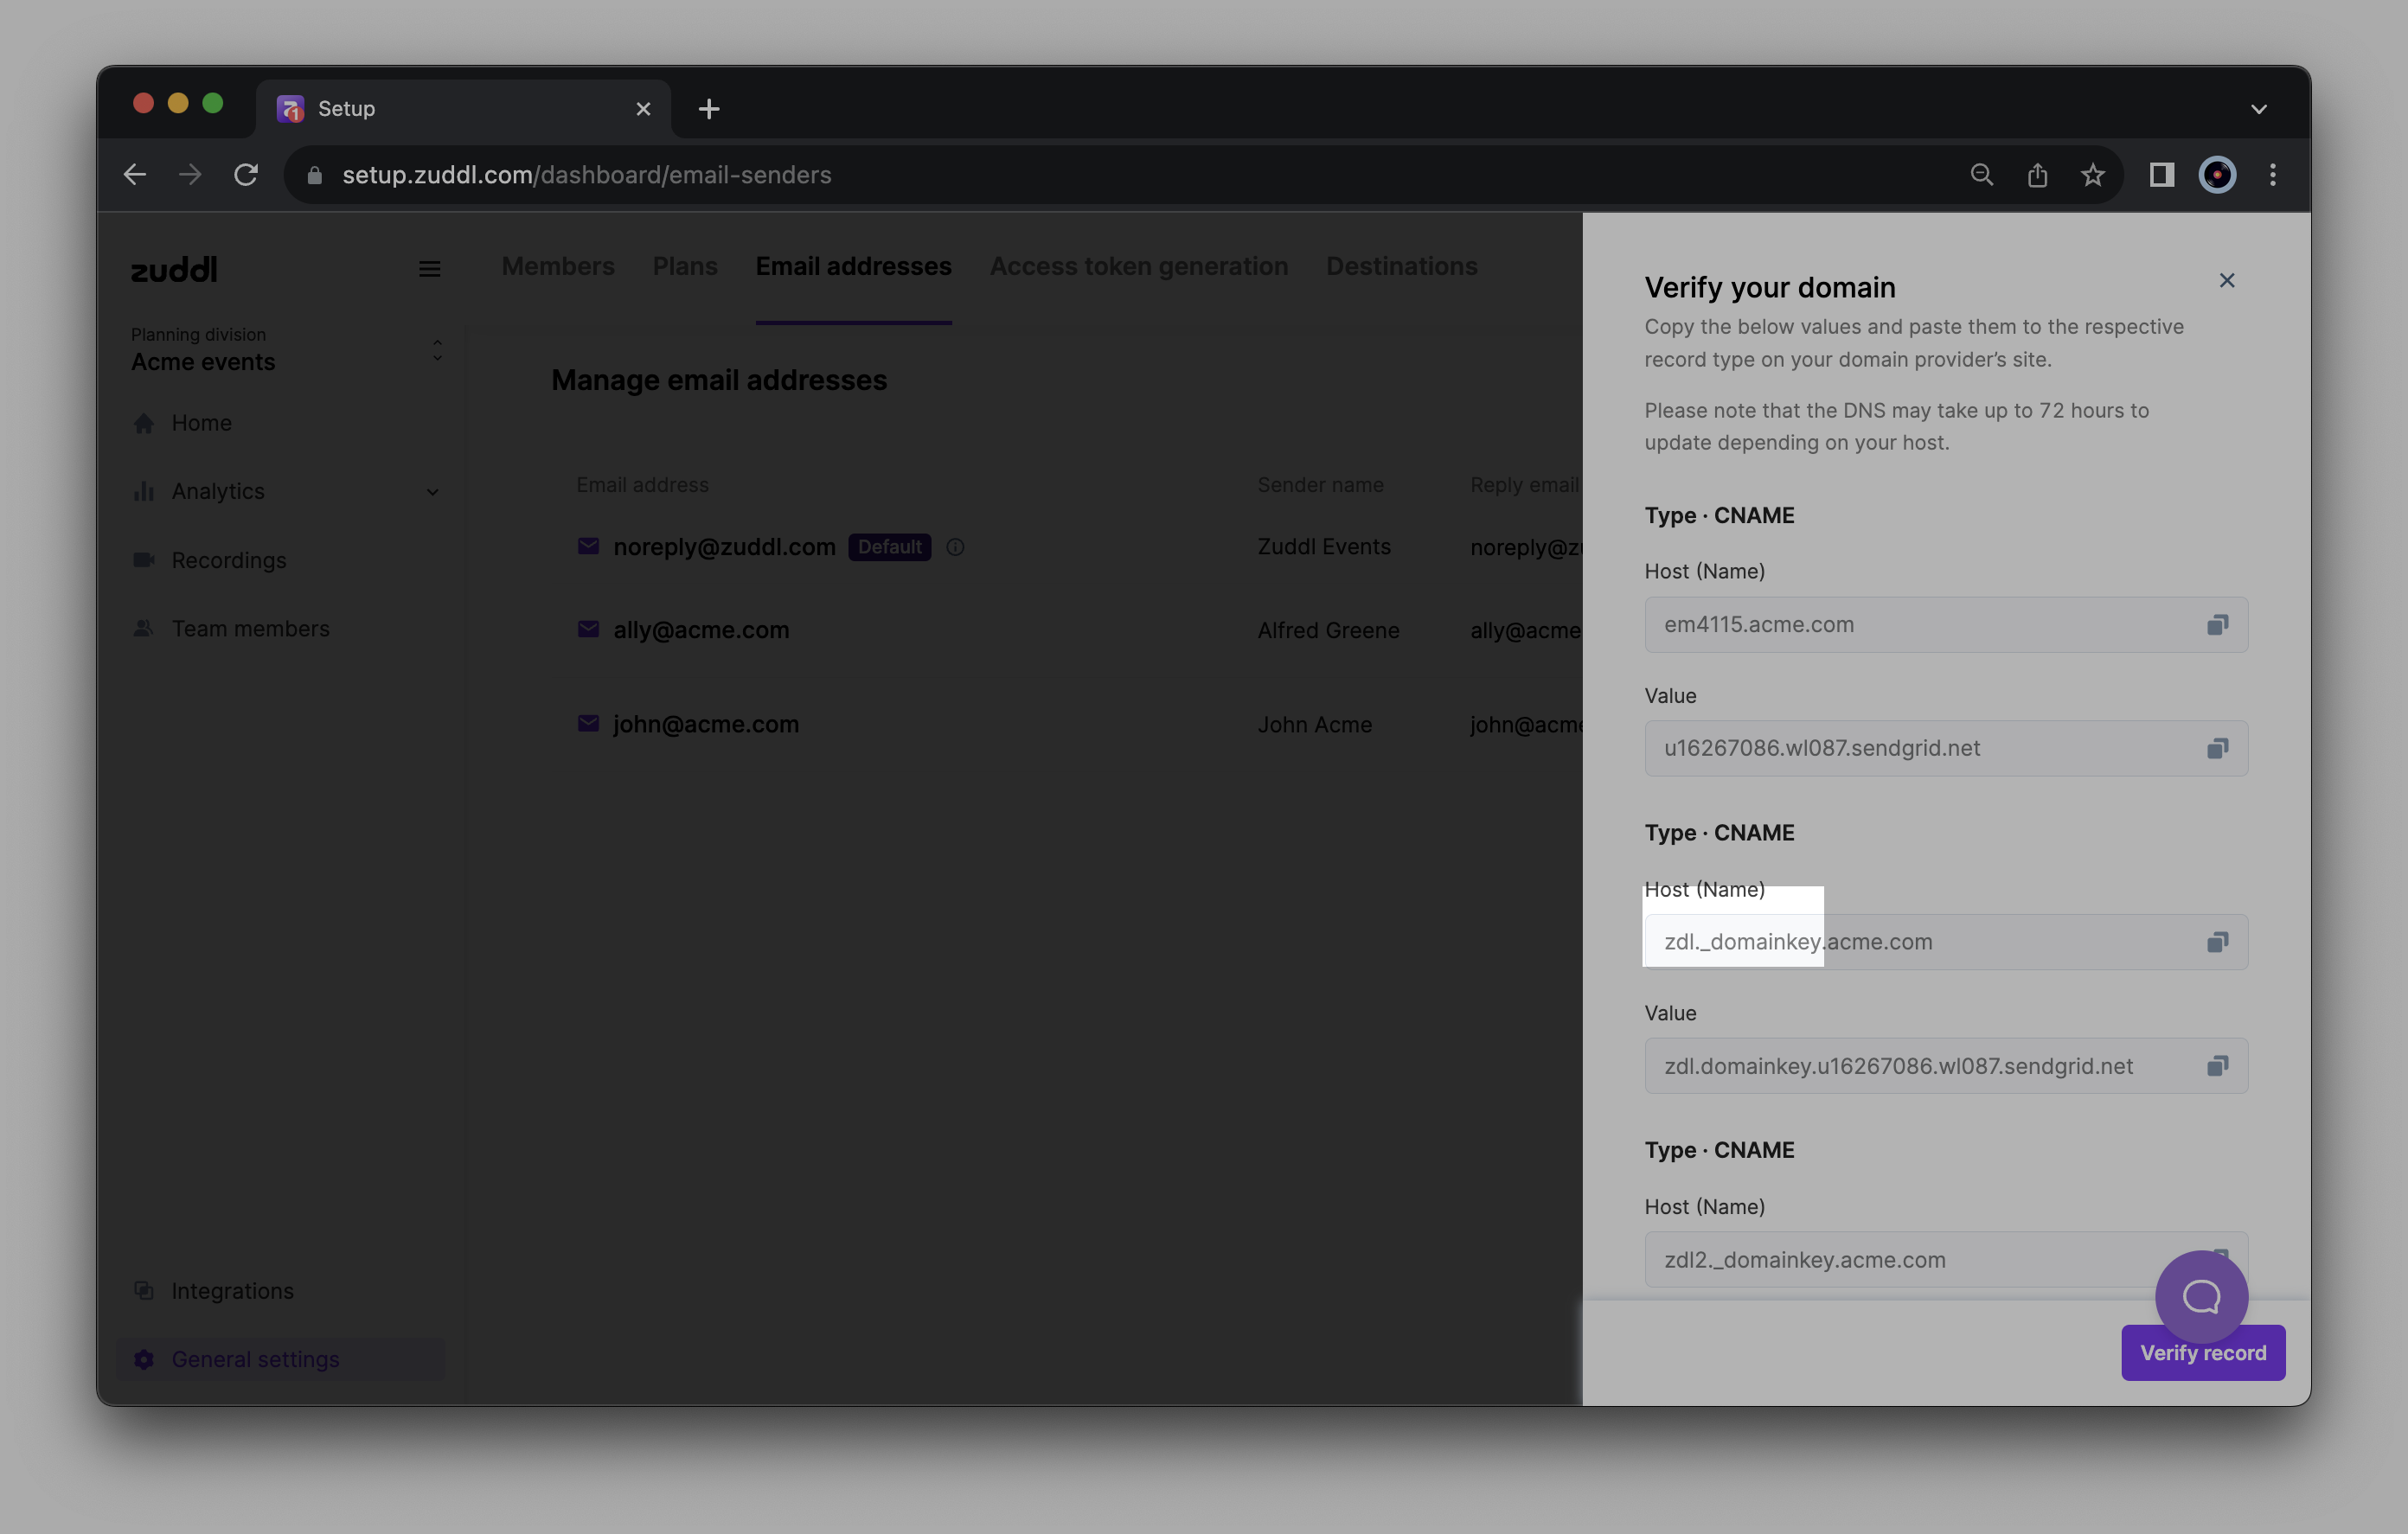
On the Verify your domain window, copy the CNAME records, Hostname, and Value and paste it in your DNS settings.
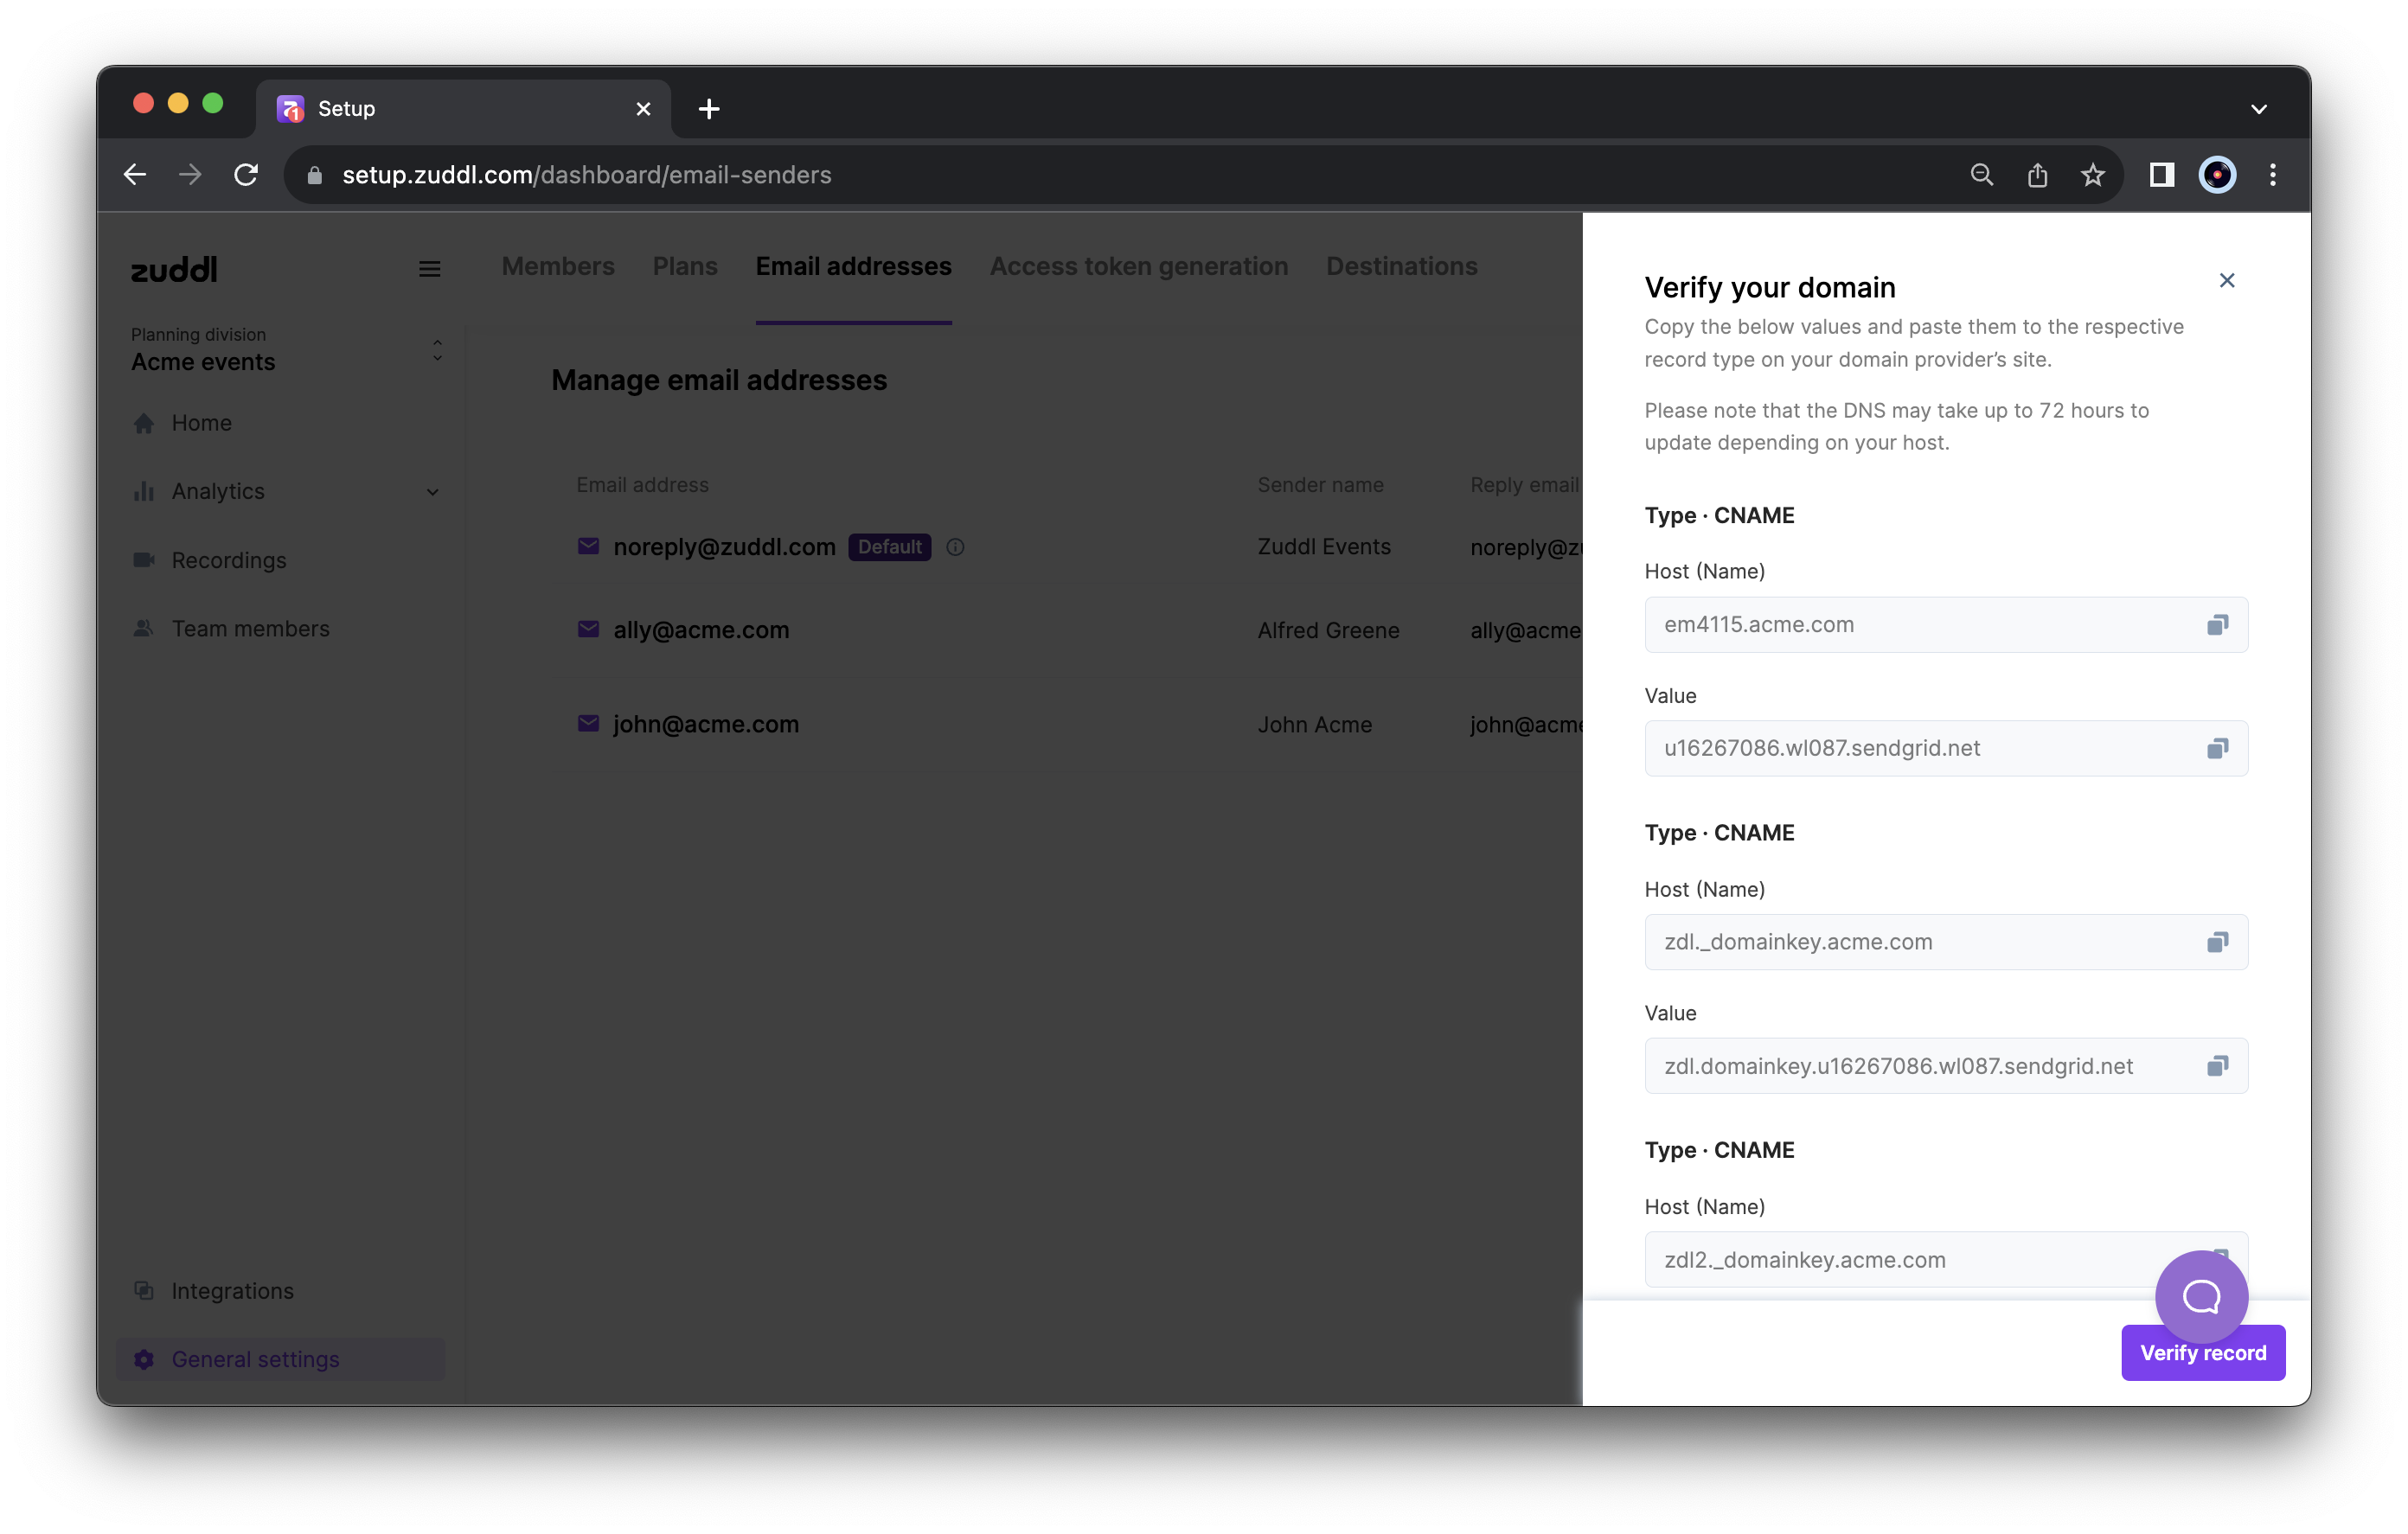
Click the Verify record button. Zuddl may take up to 72 hours to verify and update, depending on your host. If the verification fails, you must fix the errors and revert.
For a successful verification, all three host records must be added to your DNS. Failure to add any one record in your DNS results in an unverified email address.
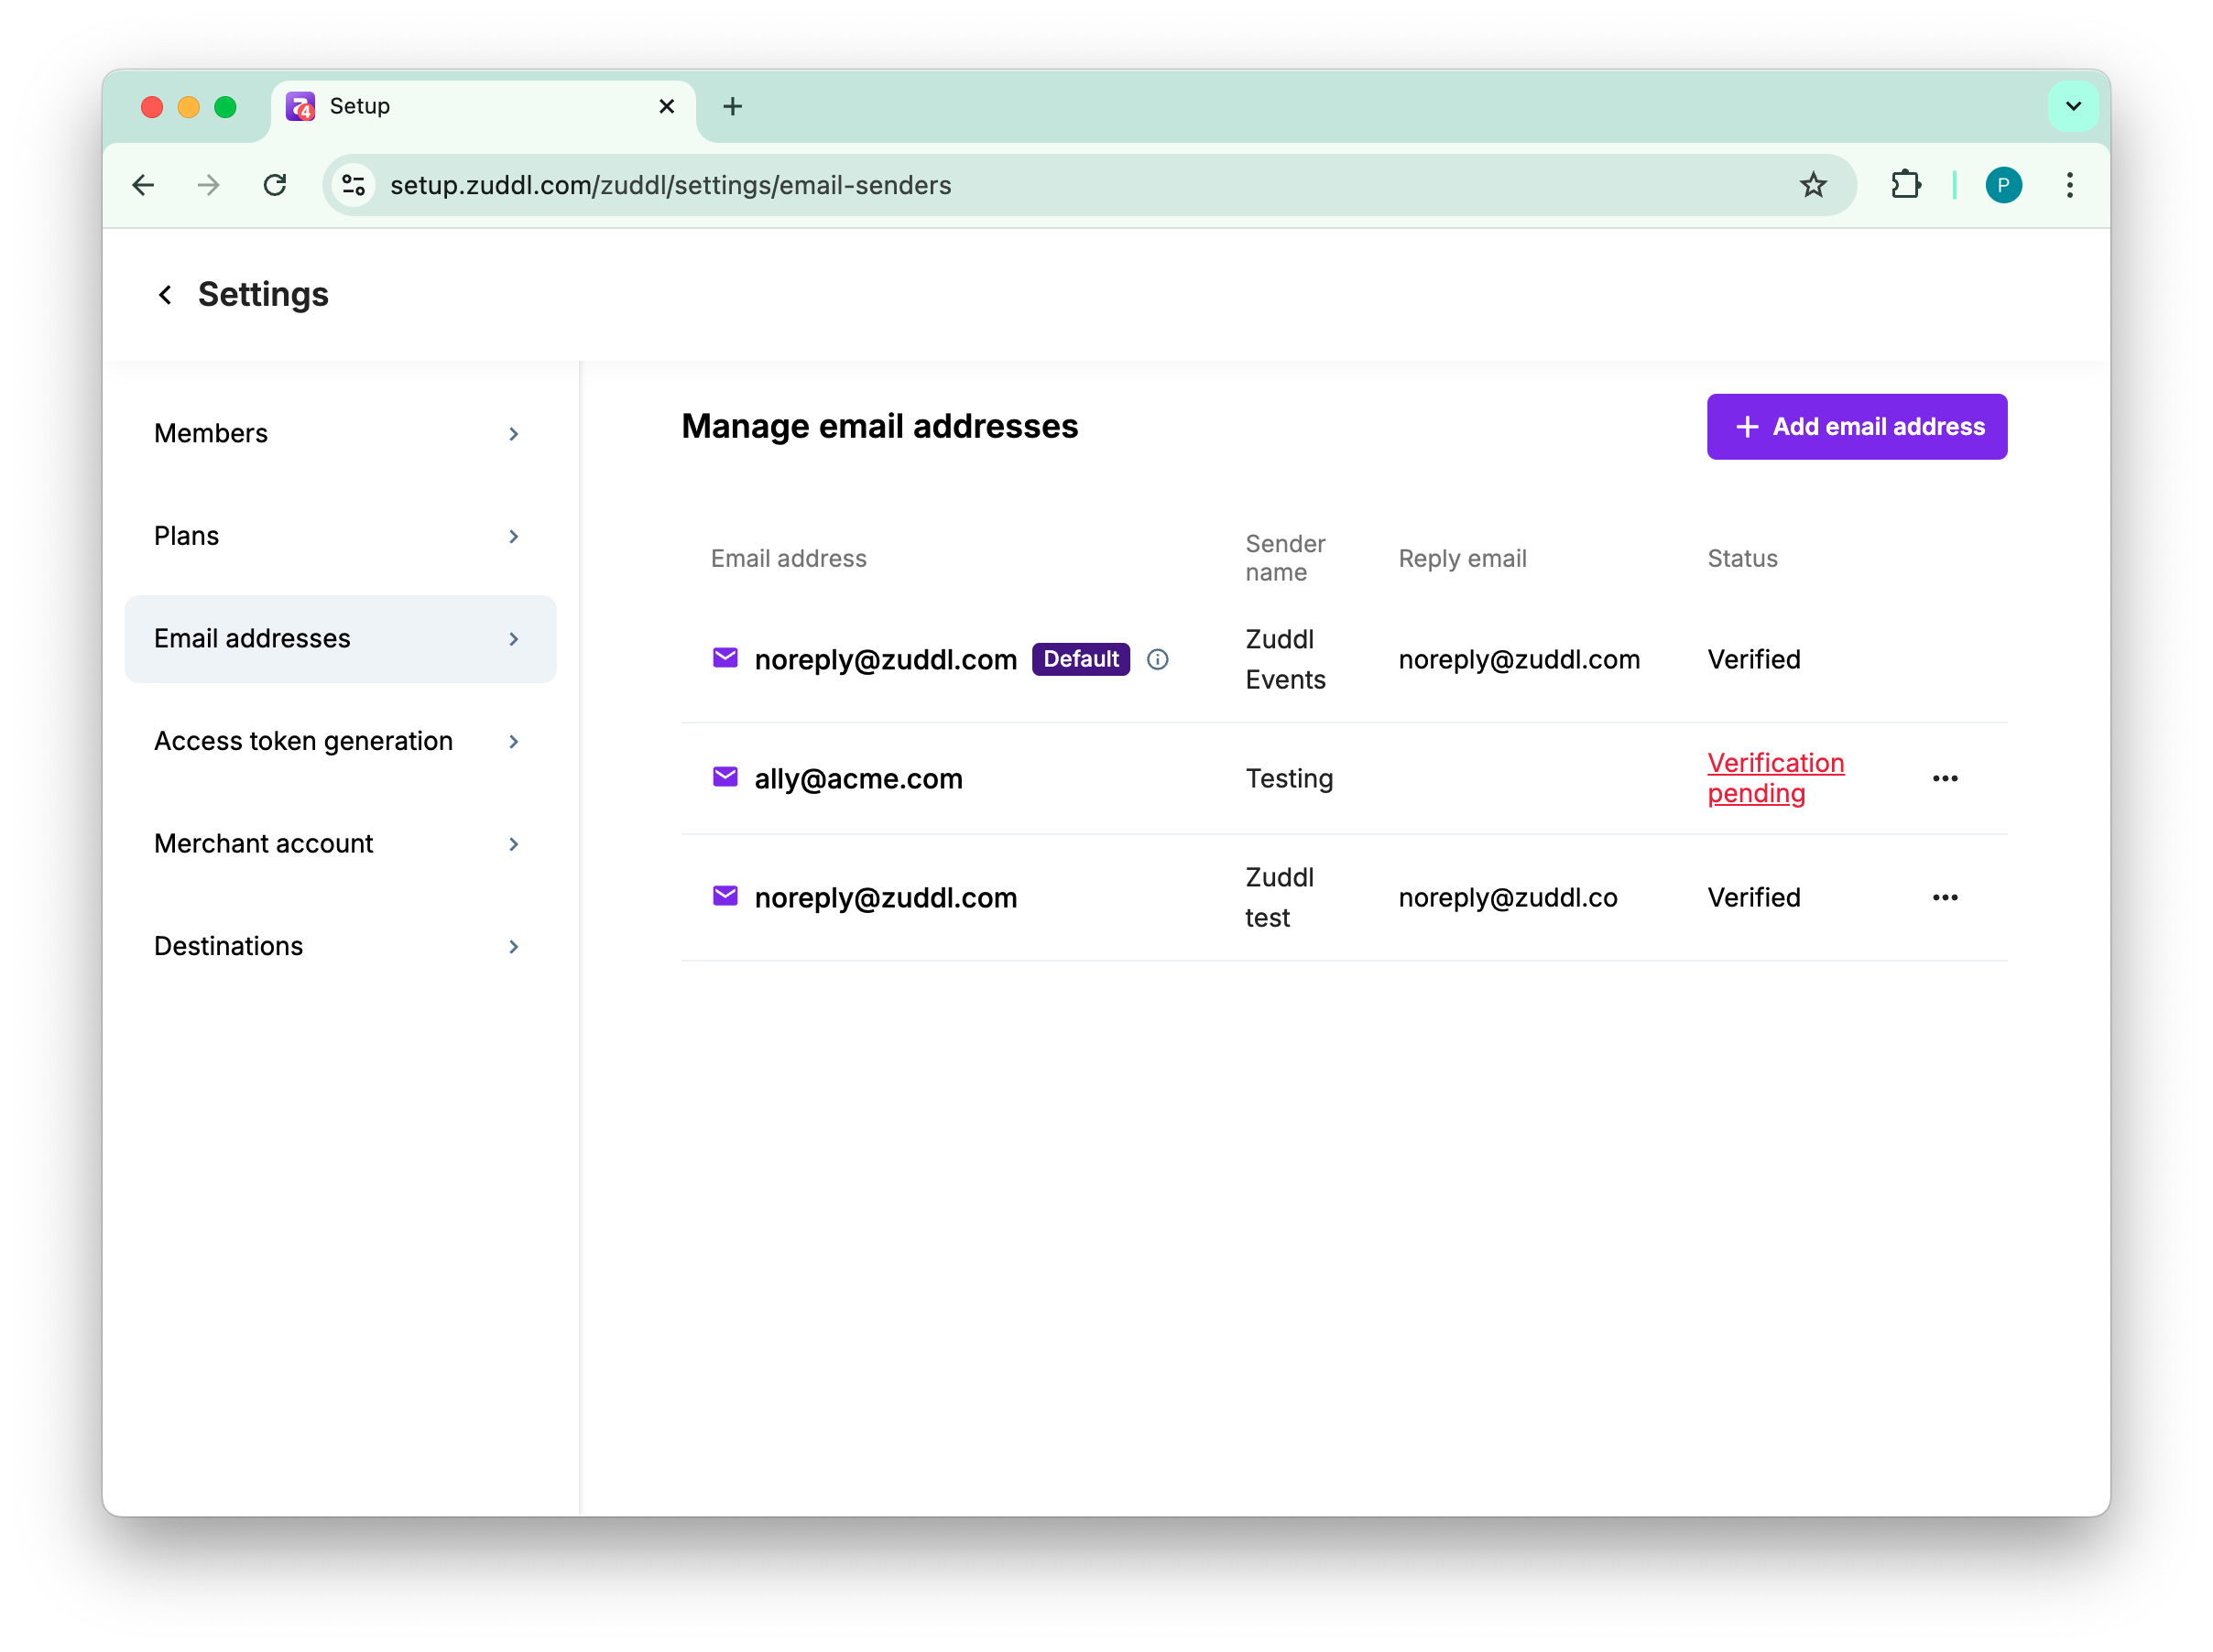
Once the email is verified, it shows the status as Verified.
Once an email address of a specific domain is verified, all email addresses with the same domain can be easily added.
More options
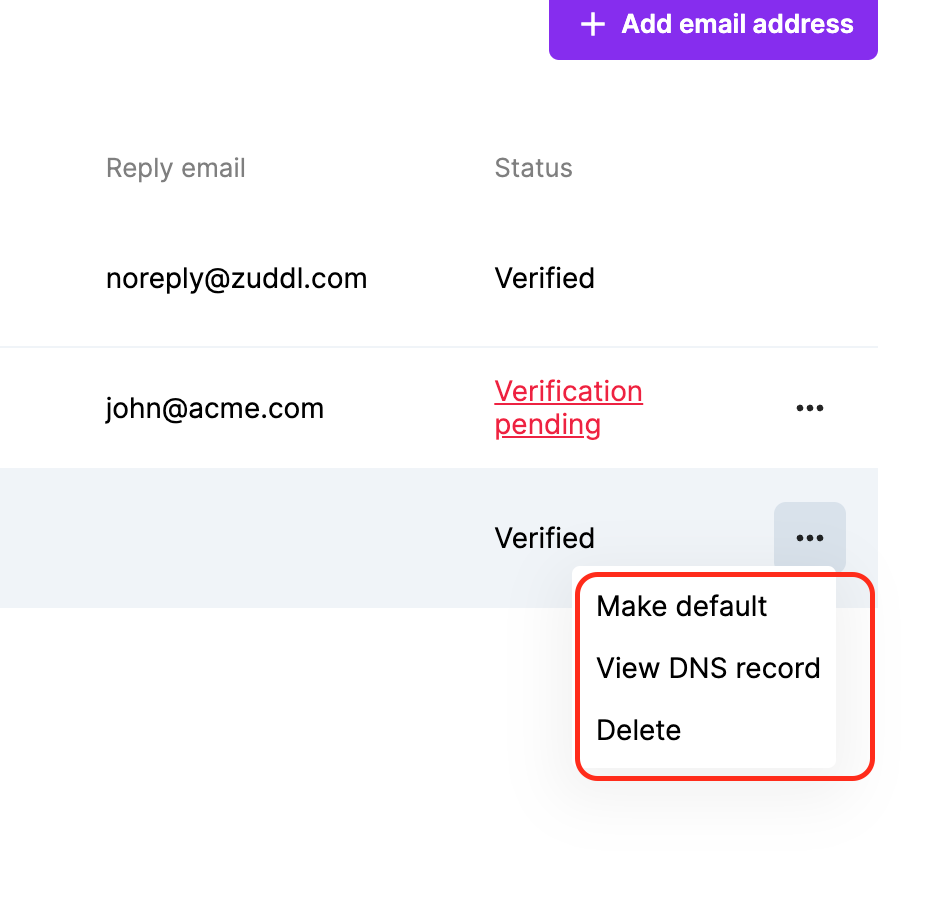
For the newly added email addresses, you can take the following actions:
Make default: Make the newly added email the default email.
View DNS records: View the DNS records which show the CNAME records.
Delete: Delete the email address.
Once you have configured your sender email addresses, you can now customize emails from the Communications menu.
Troubleshooting
When adding a CNAME, most DNS accepts the hostname that you’ve copied and pasted from Zuddl (for example, "zdl2._domainkey.domain.com"). However, some DNS requires you to remove the top-level domain and enter only the name part.
This can turn a CNAME for "email.domain.com" into "email.domain.com.domain.com".
Ensure that you follow the correct convention on the existing records in your DNS panel when adding new ones, as sometimes you will only need to add what is to the left of the top-level domain. For example, in GoDaddy and Squarespace:
For
ex0123.sub.domain.comyou should be adding onlyex0123as the nameFor
zdl._domainkey.sub.domain.comyou should be adding onlyzdl._domainkeyas the nameFor zdl2._domainkey.domain.com add only
zdl2._domainkeyas the name