Onsite Registration Flow
Last updated: September 3, 2025
This guide helps you understand the end-to-end flow of the kiosk registration.
Choosing the registration flow
To set up registrations:
Login to the Zuddl onsite app.
Select the event from the list for which you want to allow attendee registration.
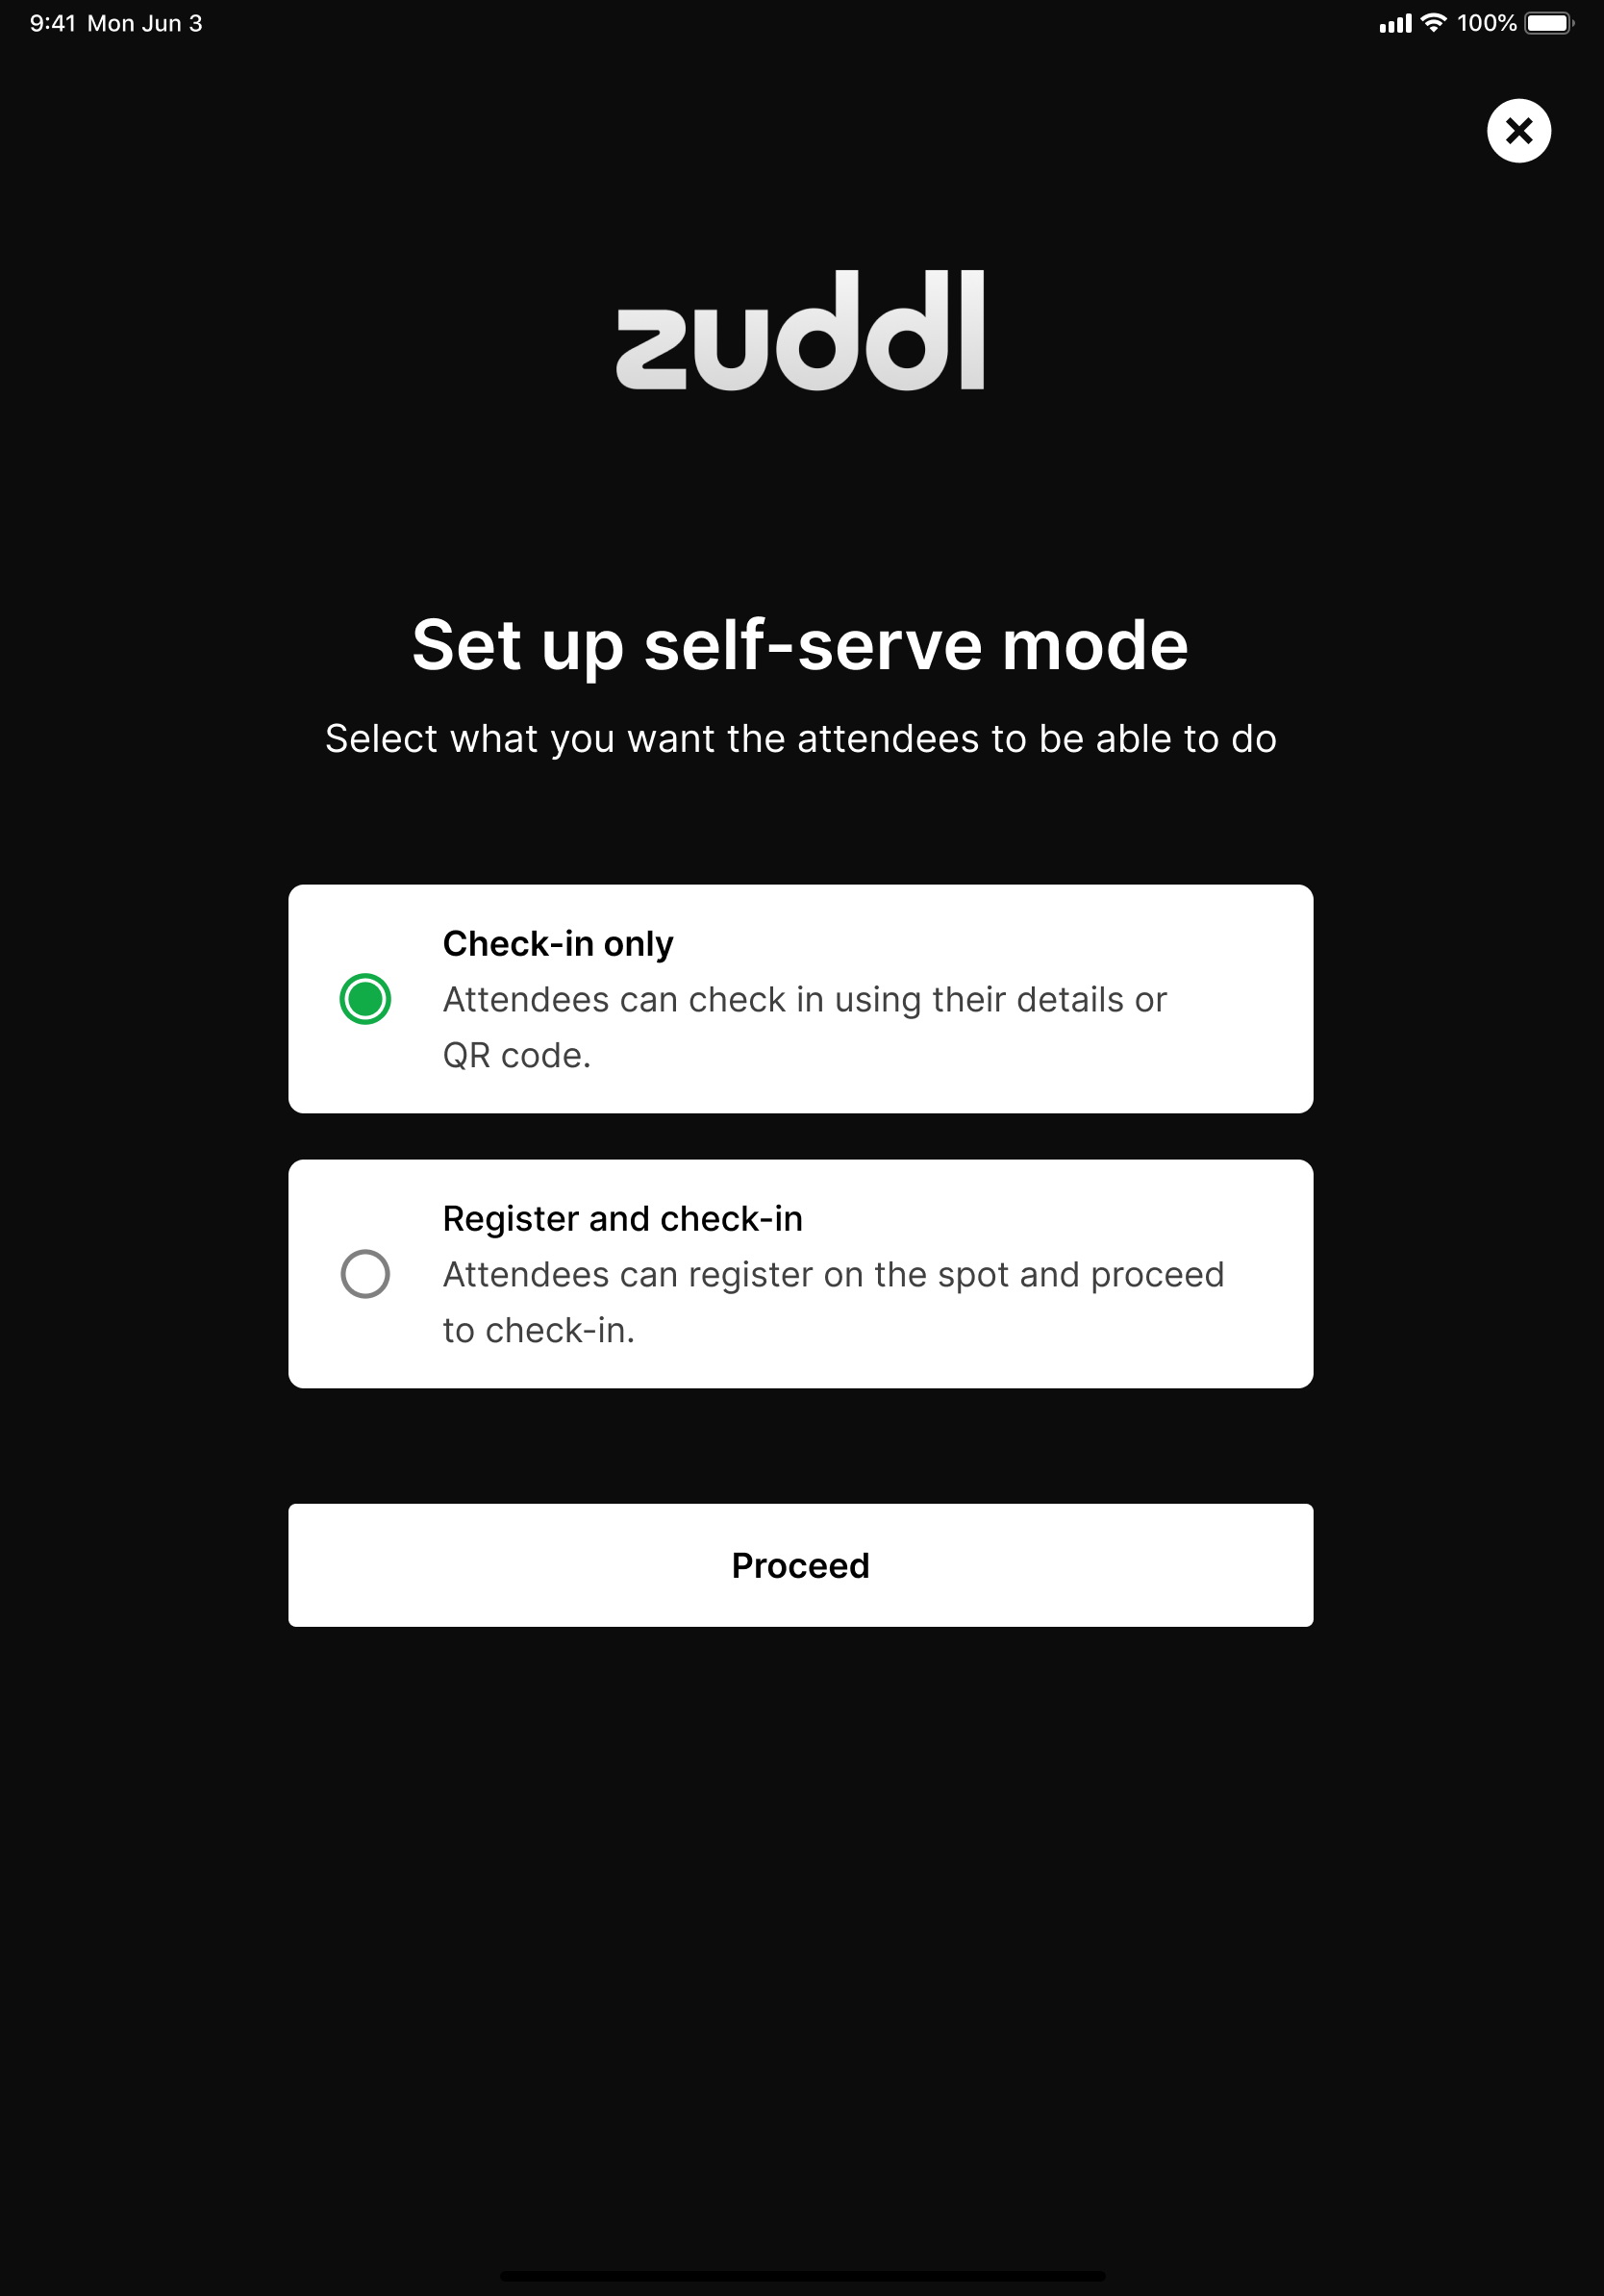
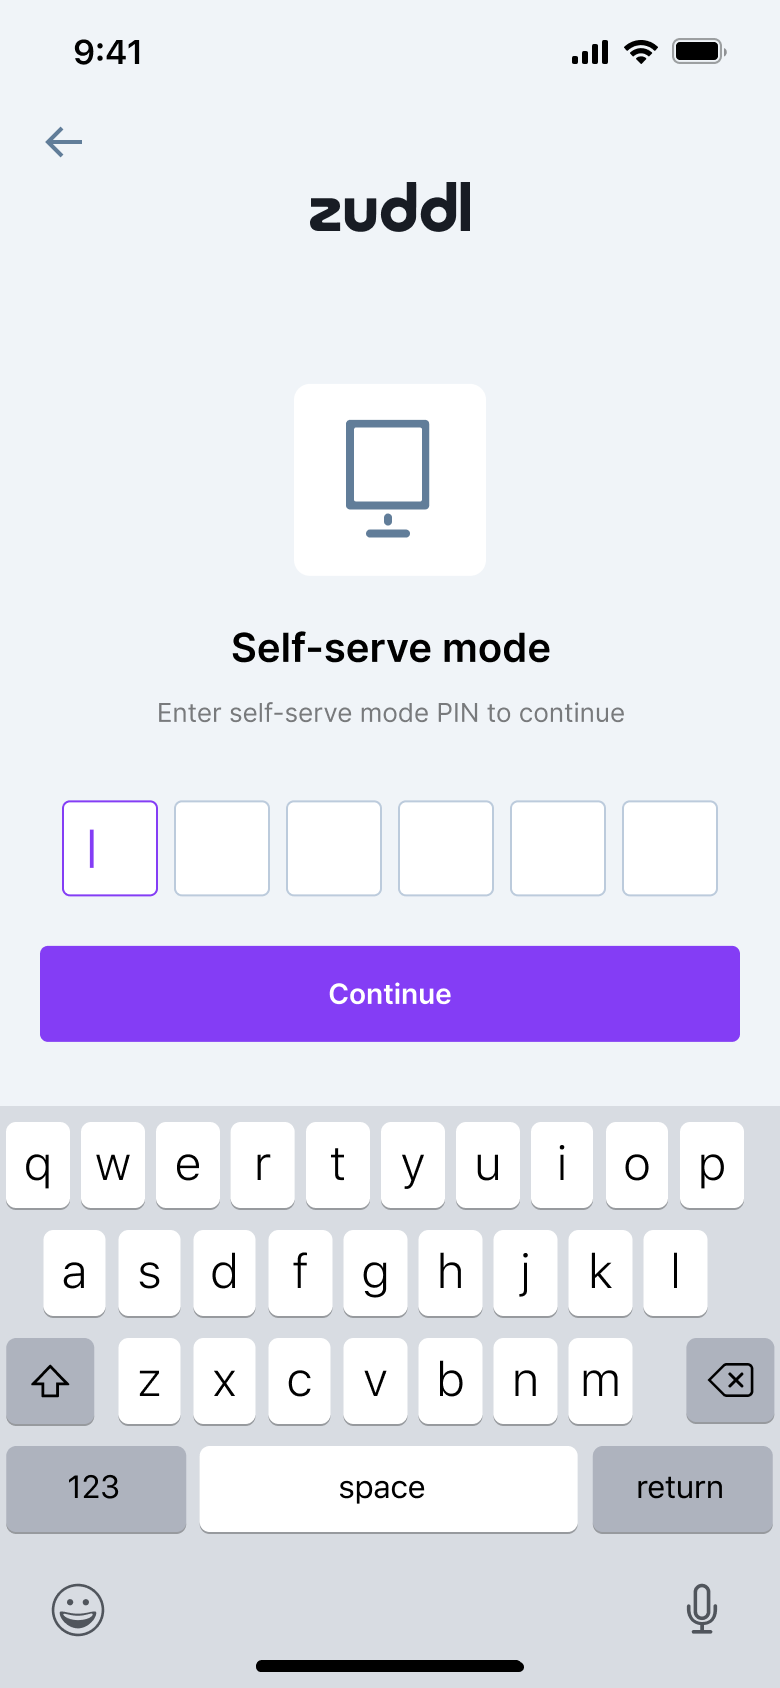
Click the Self-serve mode button on the top right corner.

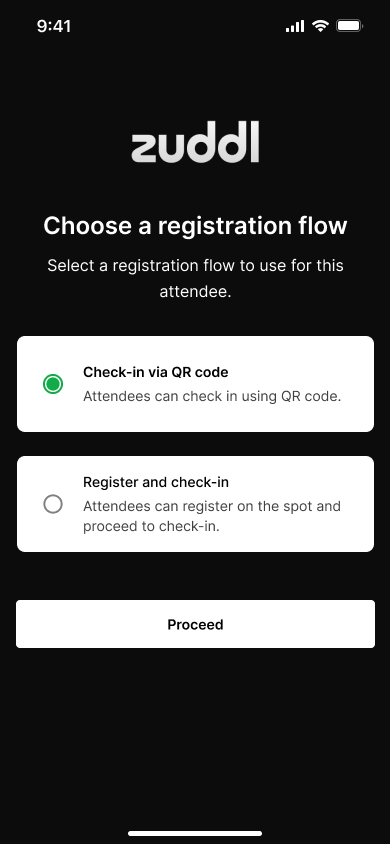
Choose the following actions:
Check-in only: for those who have registered and need to be checked in.
Register and check-in: for users to register first and then check in. We will explain this flow in the following sections.
Select Register and check-in, and click Proceed.
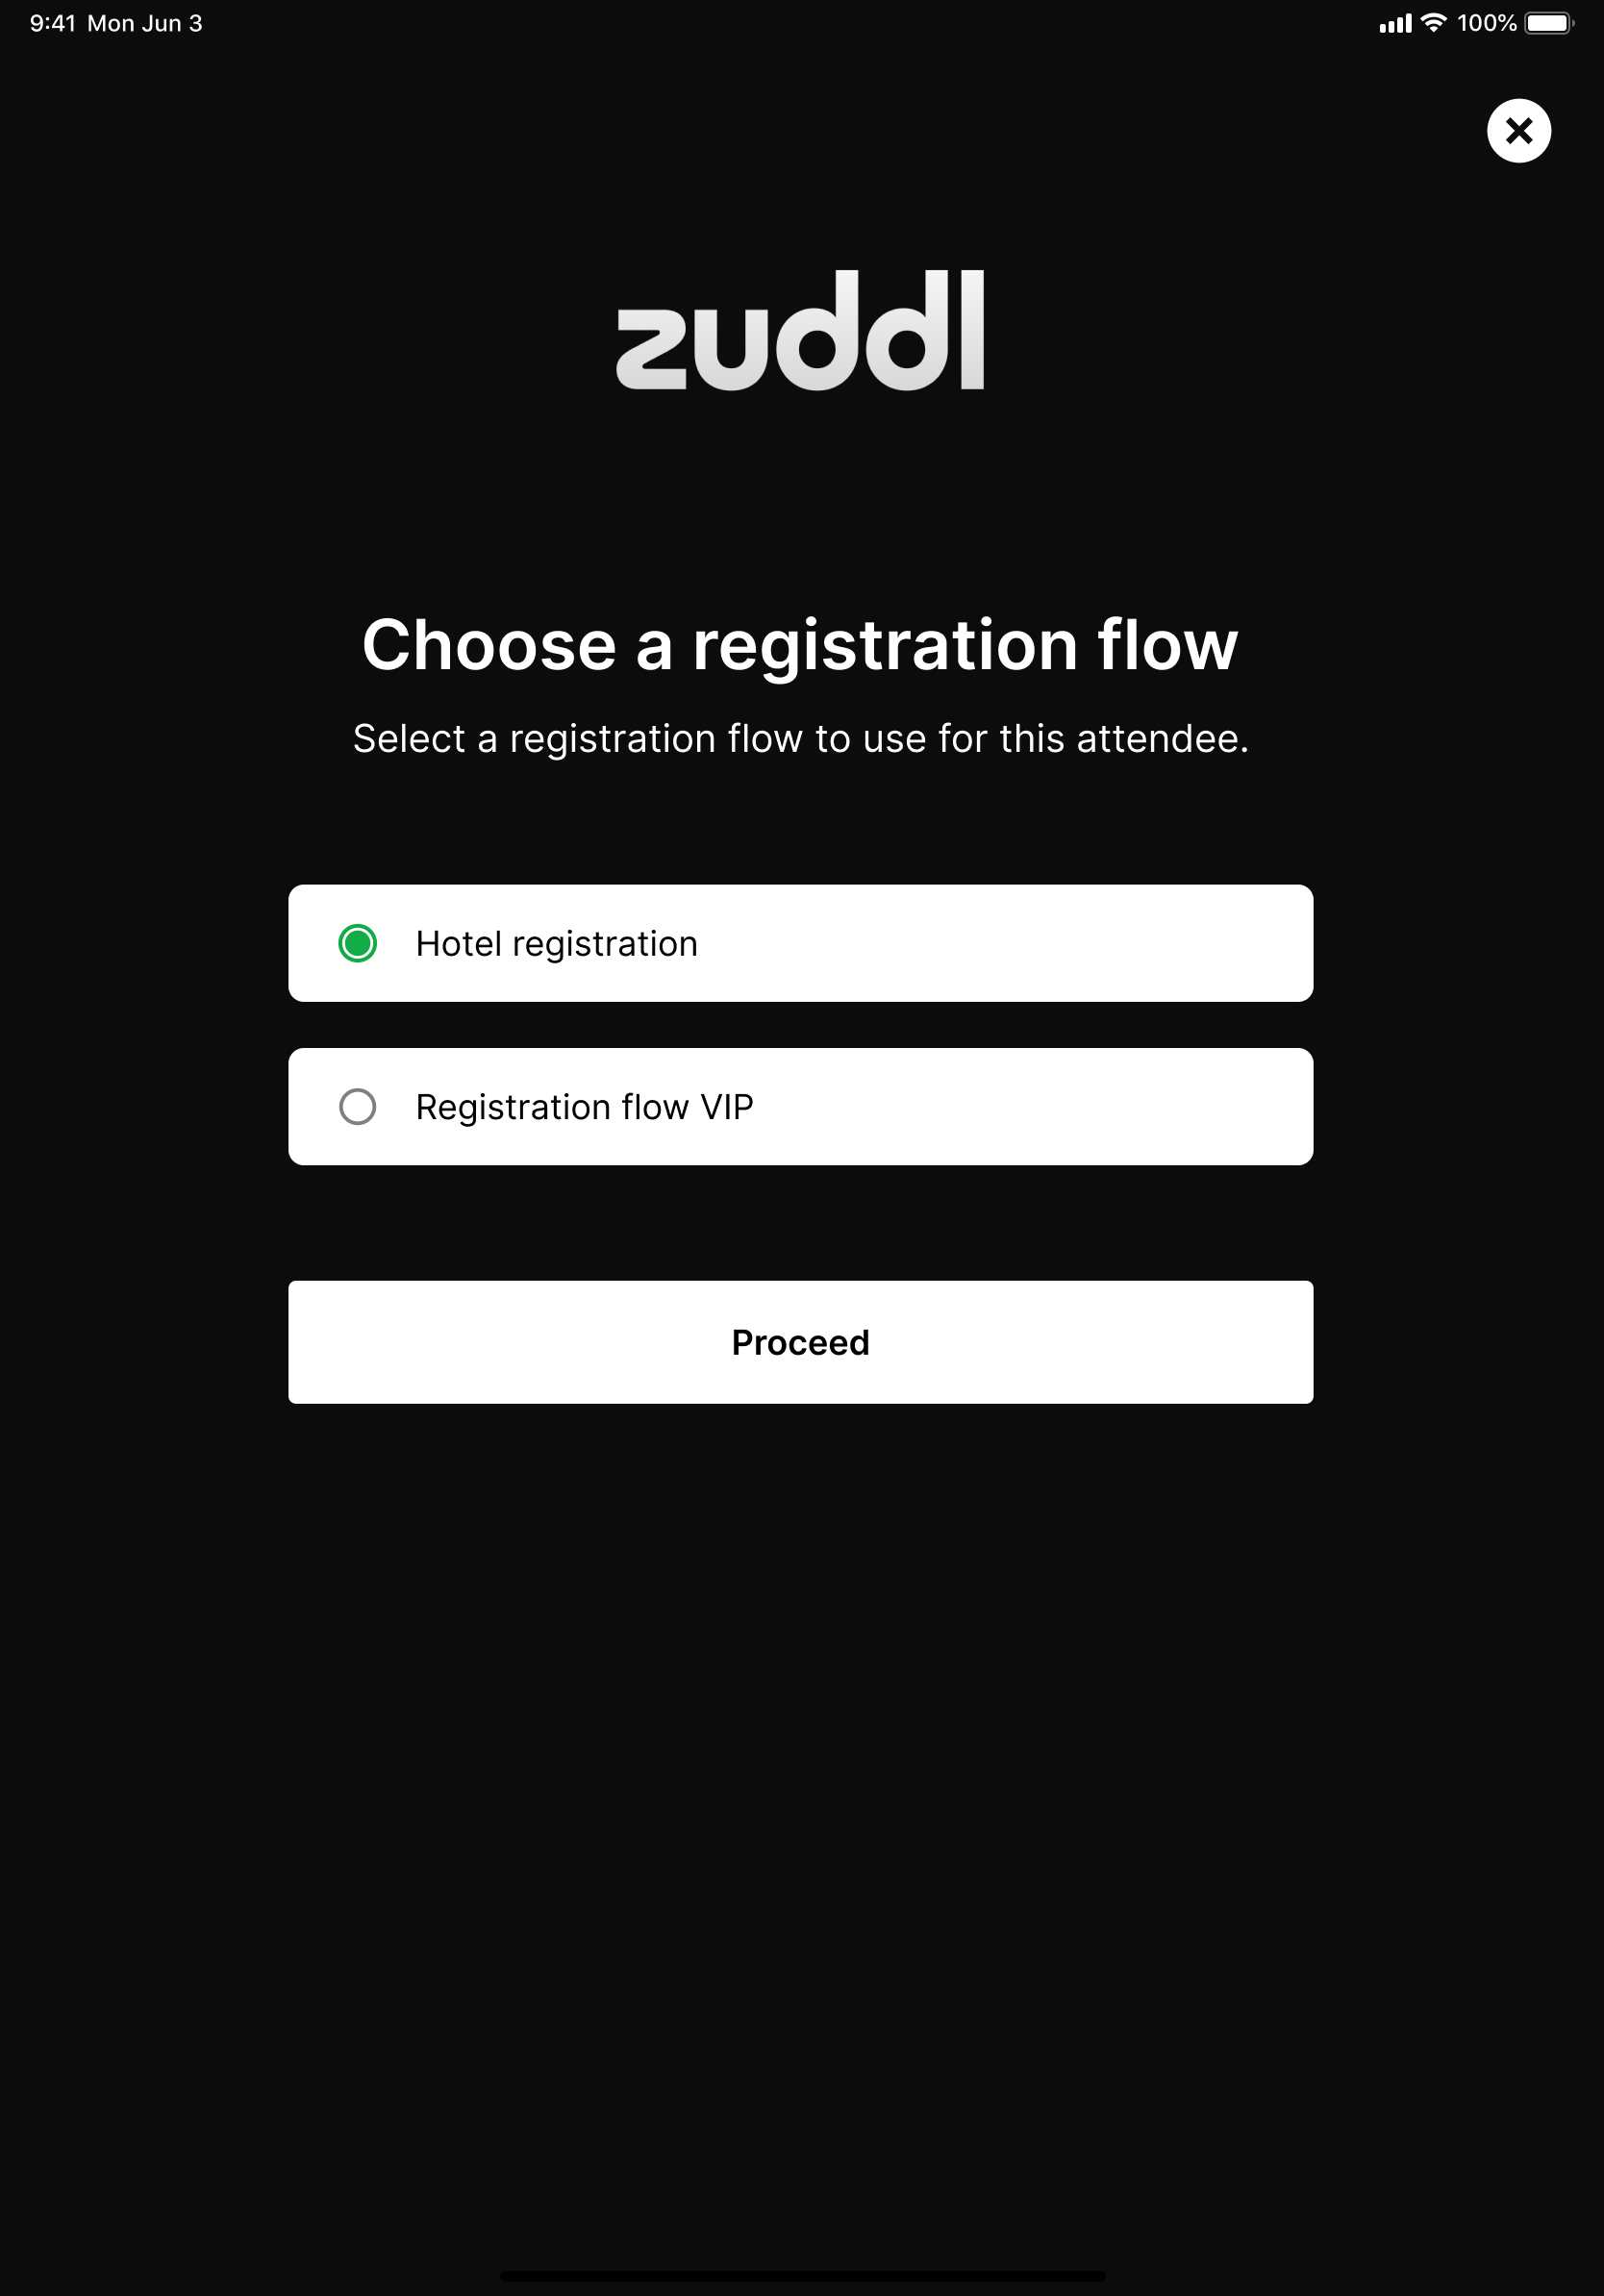
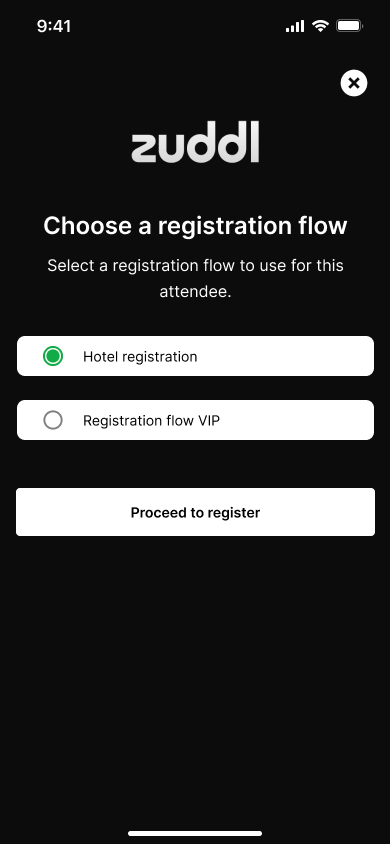
Choose the required registration flow. The default flow is selected by default. Refer to the best practices on how to show the registration. flows.
Enter the Self-serve mode PIN.
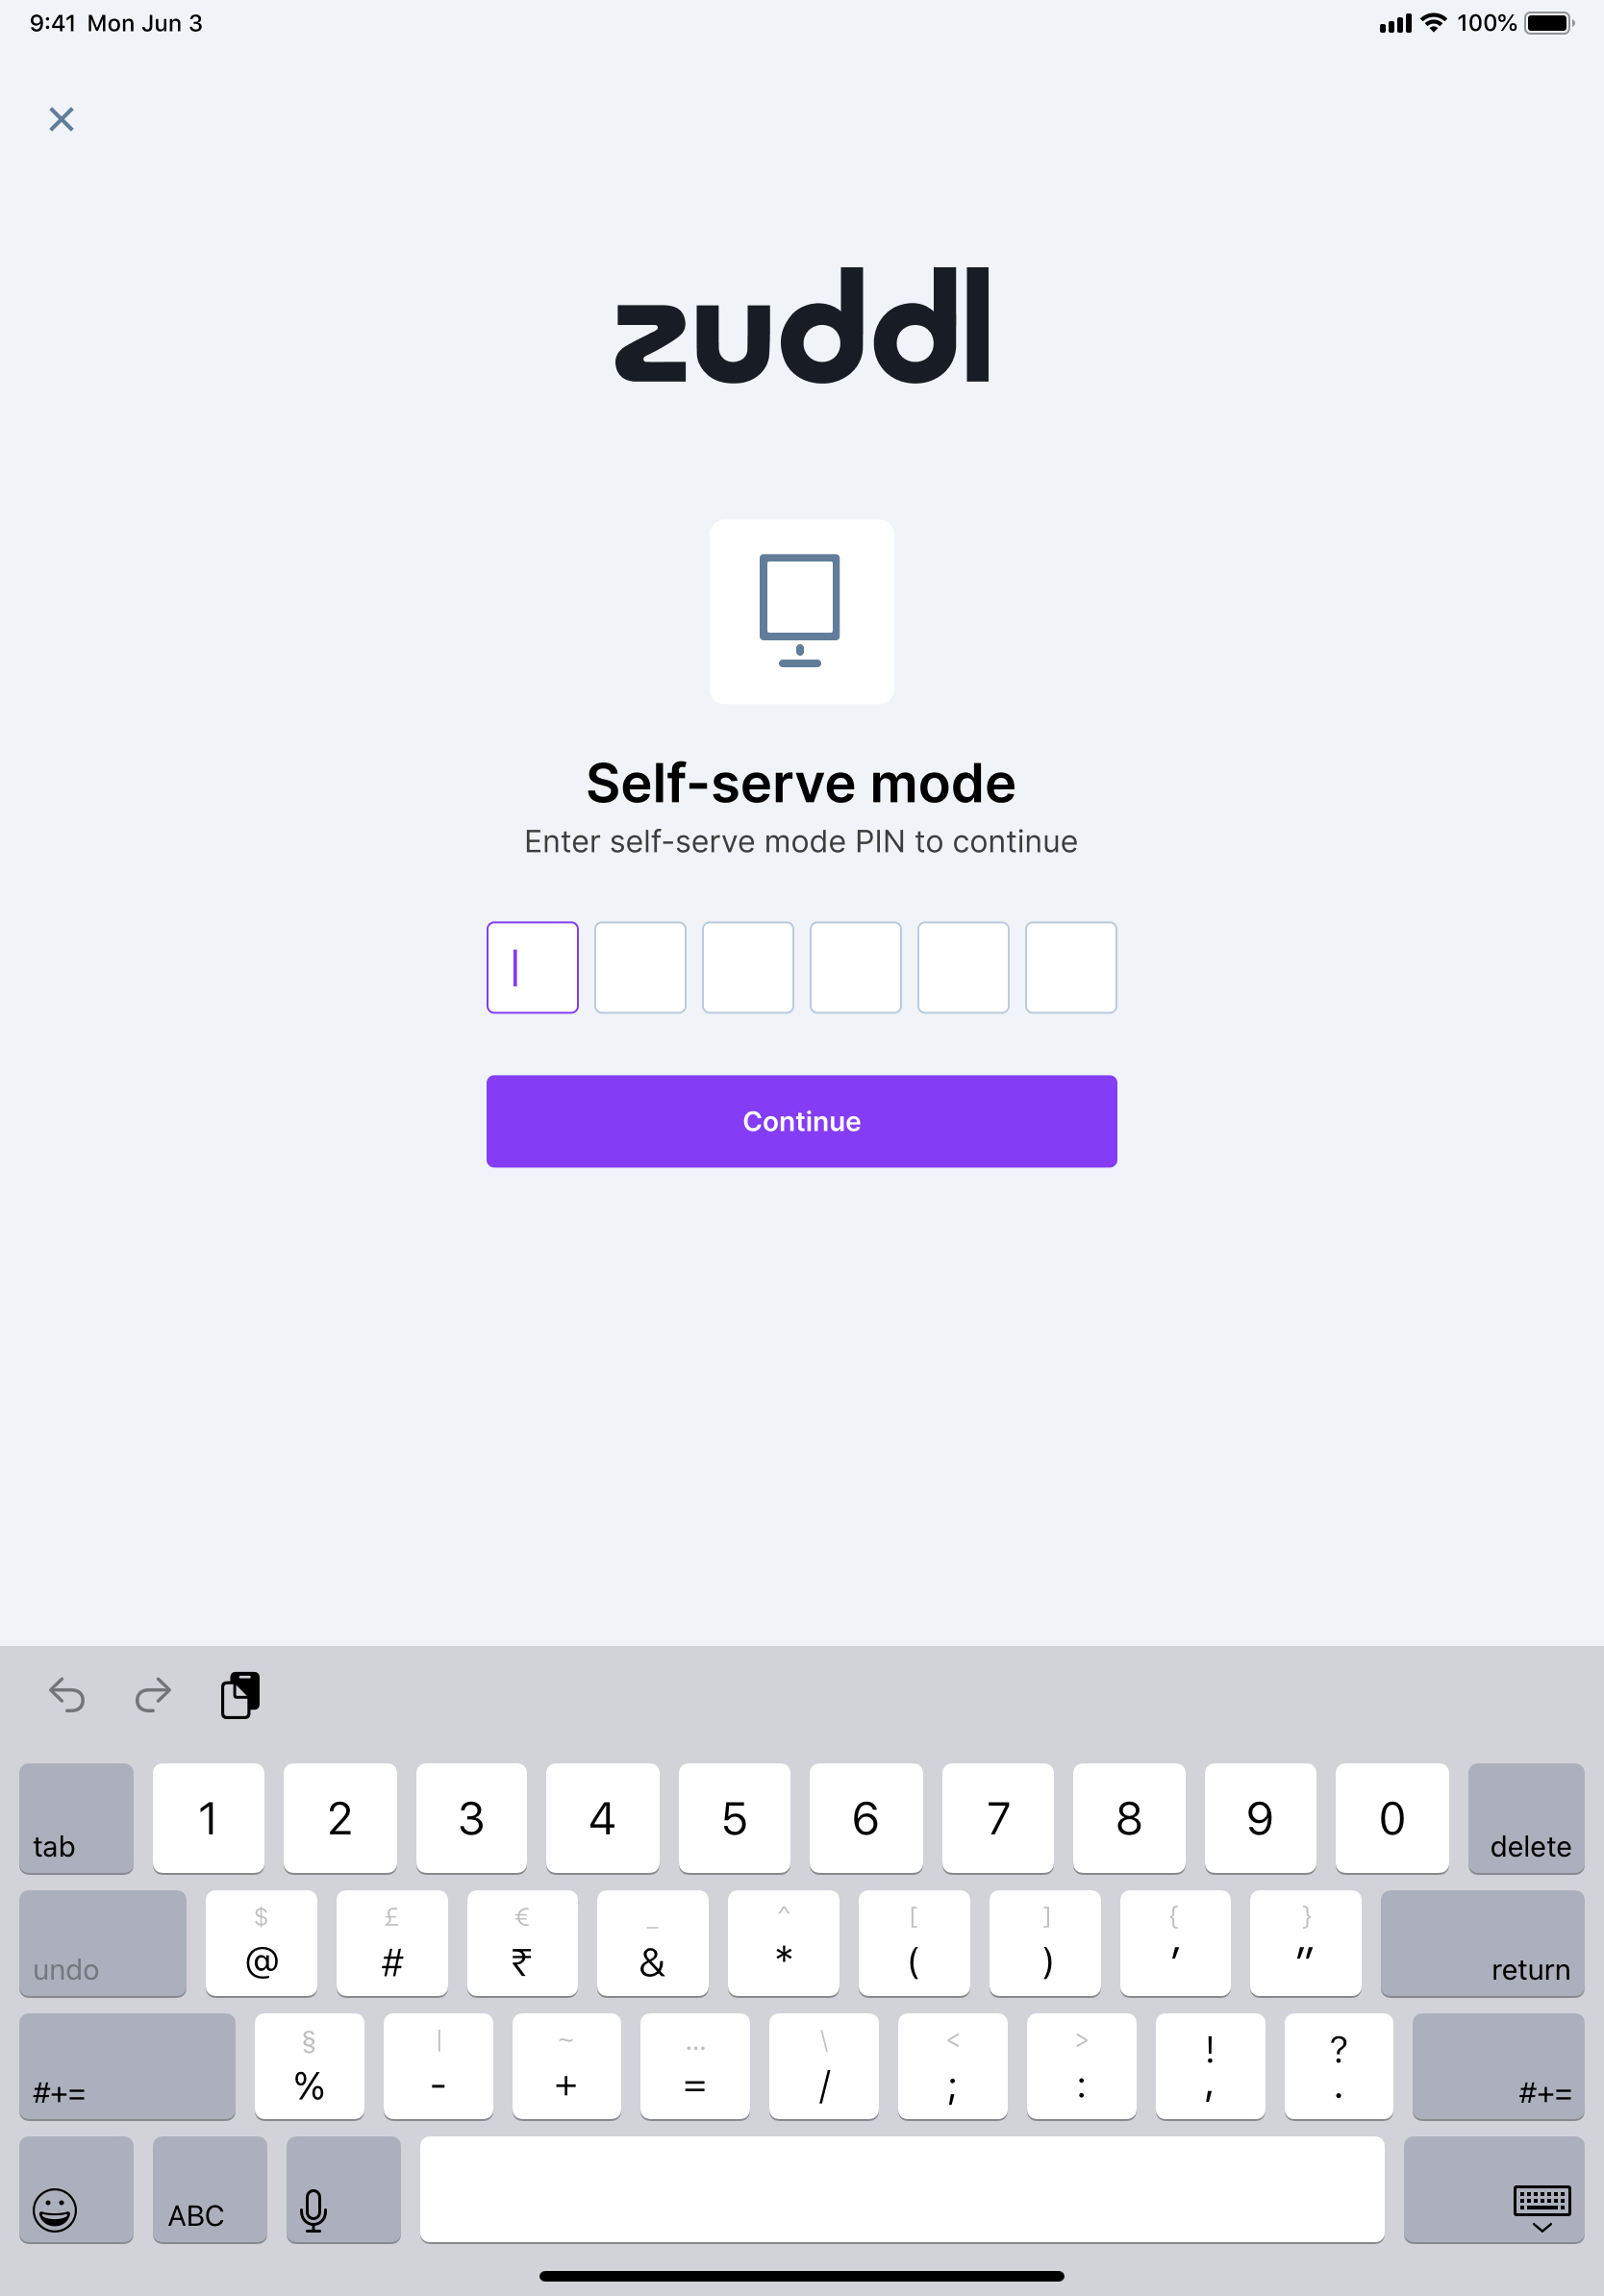
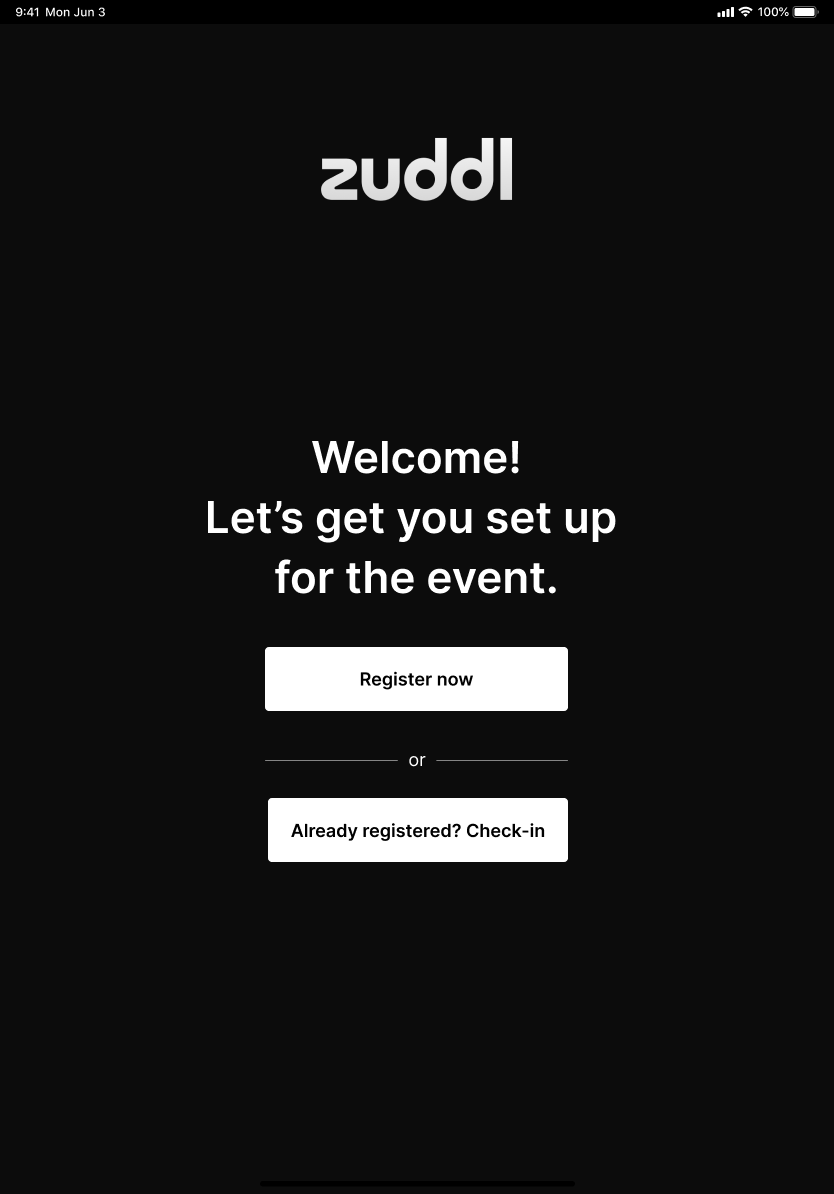
After you’ve authenticated using the PIN, the welcome screen is shown. Participants can begin the registration process here.

Registration flow - attendee-side
On the welcome screen, attendees can select the following actions:
Register now: Starts the registration process for the event
Already registered? Check-in: Starts the check-in process for the event
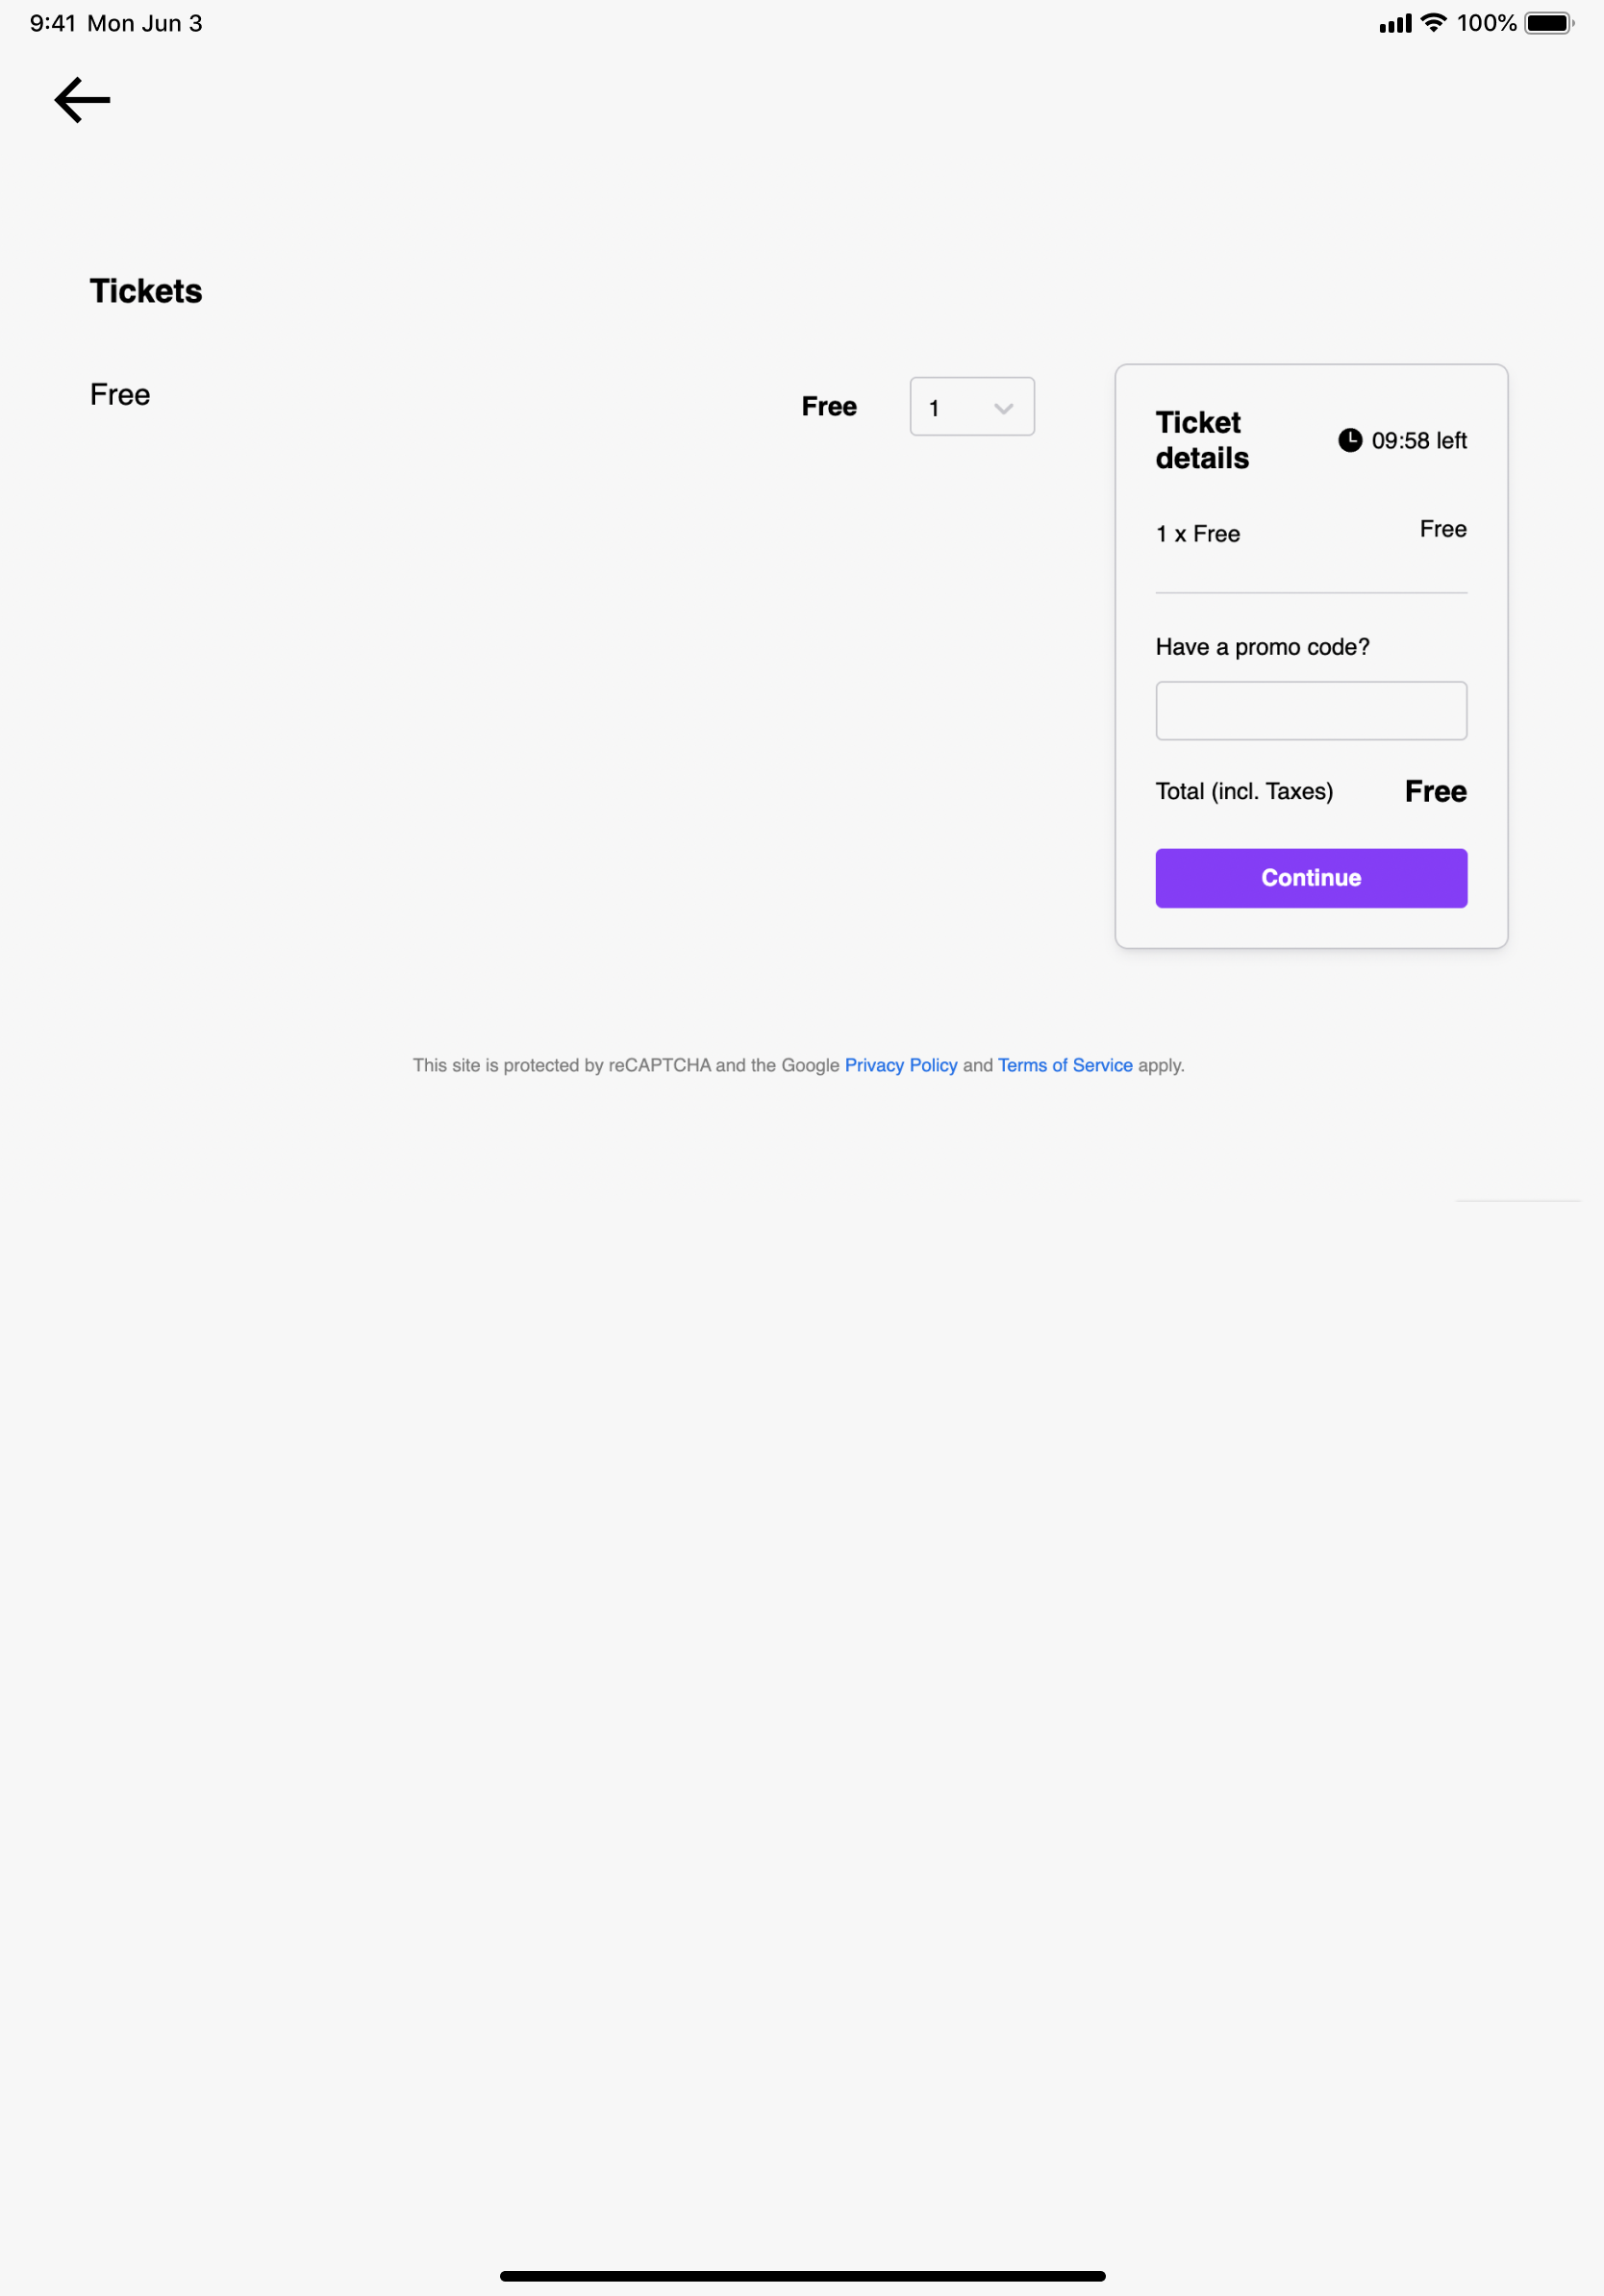
Click Register now to start the registration flow. The registration flow opens in a web view where you can proceed with the complete registration flow.
->
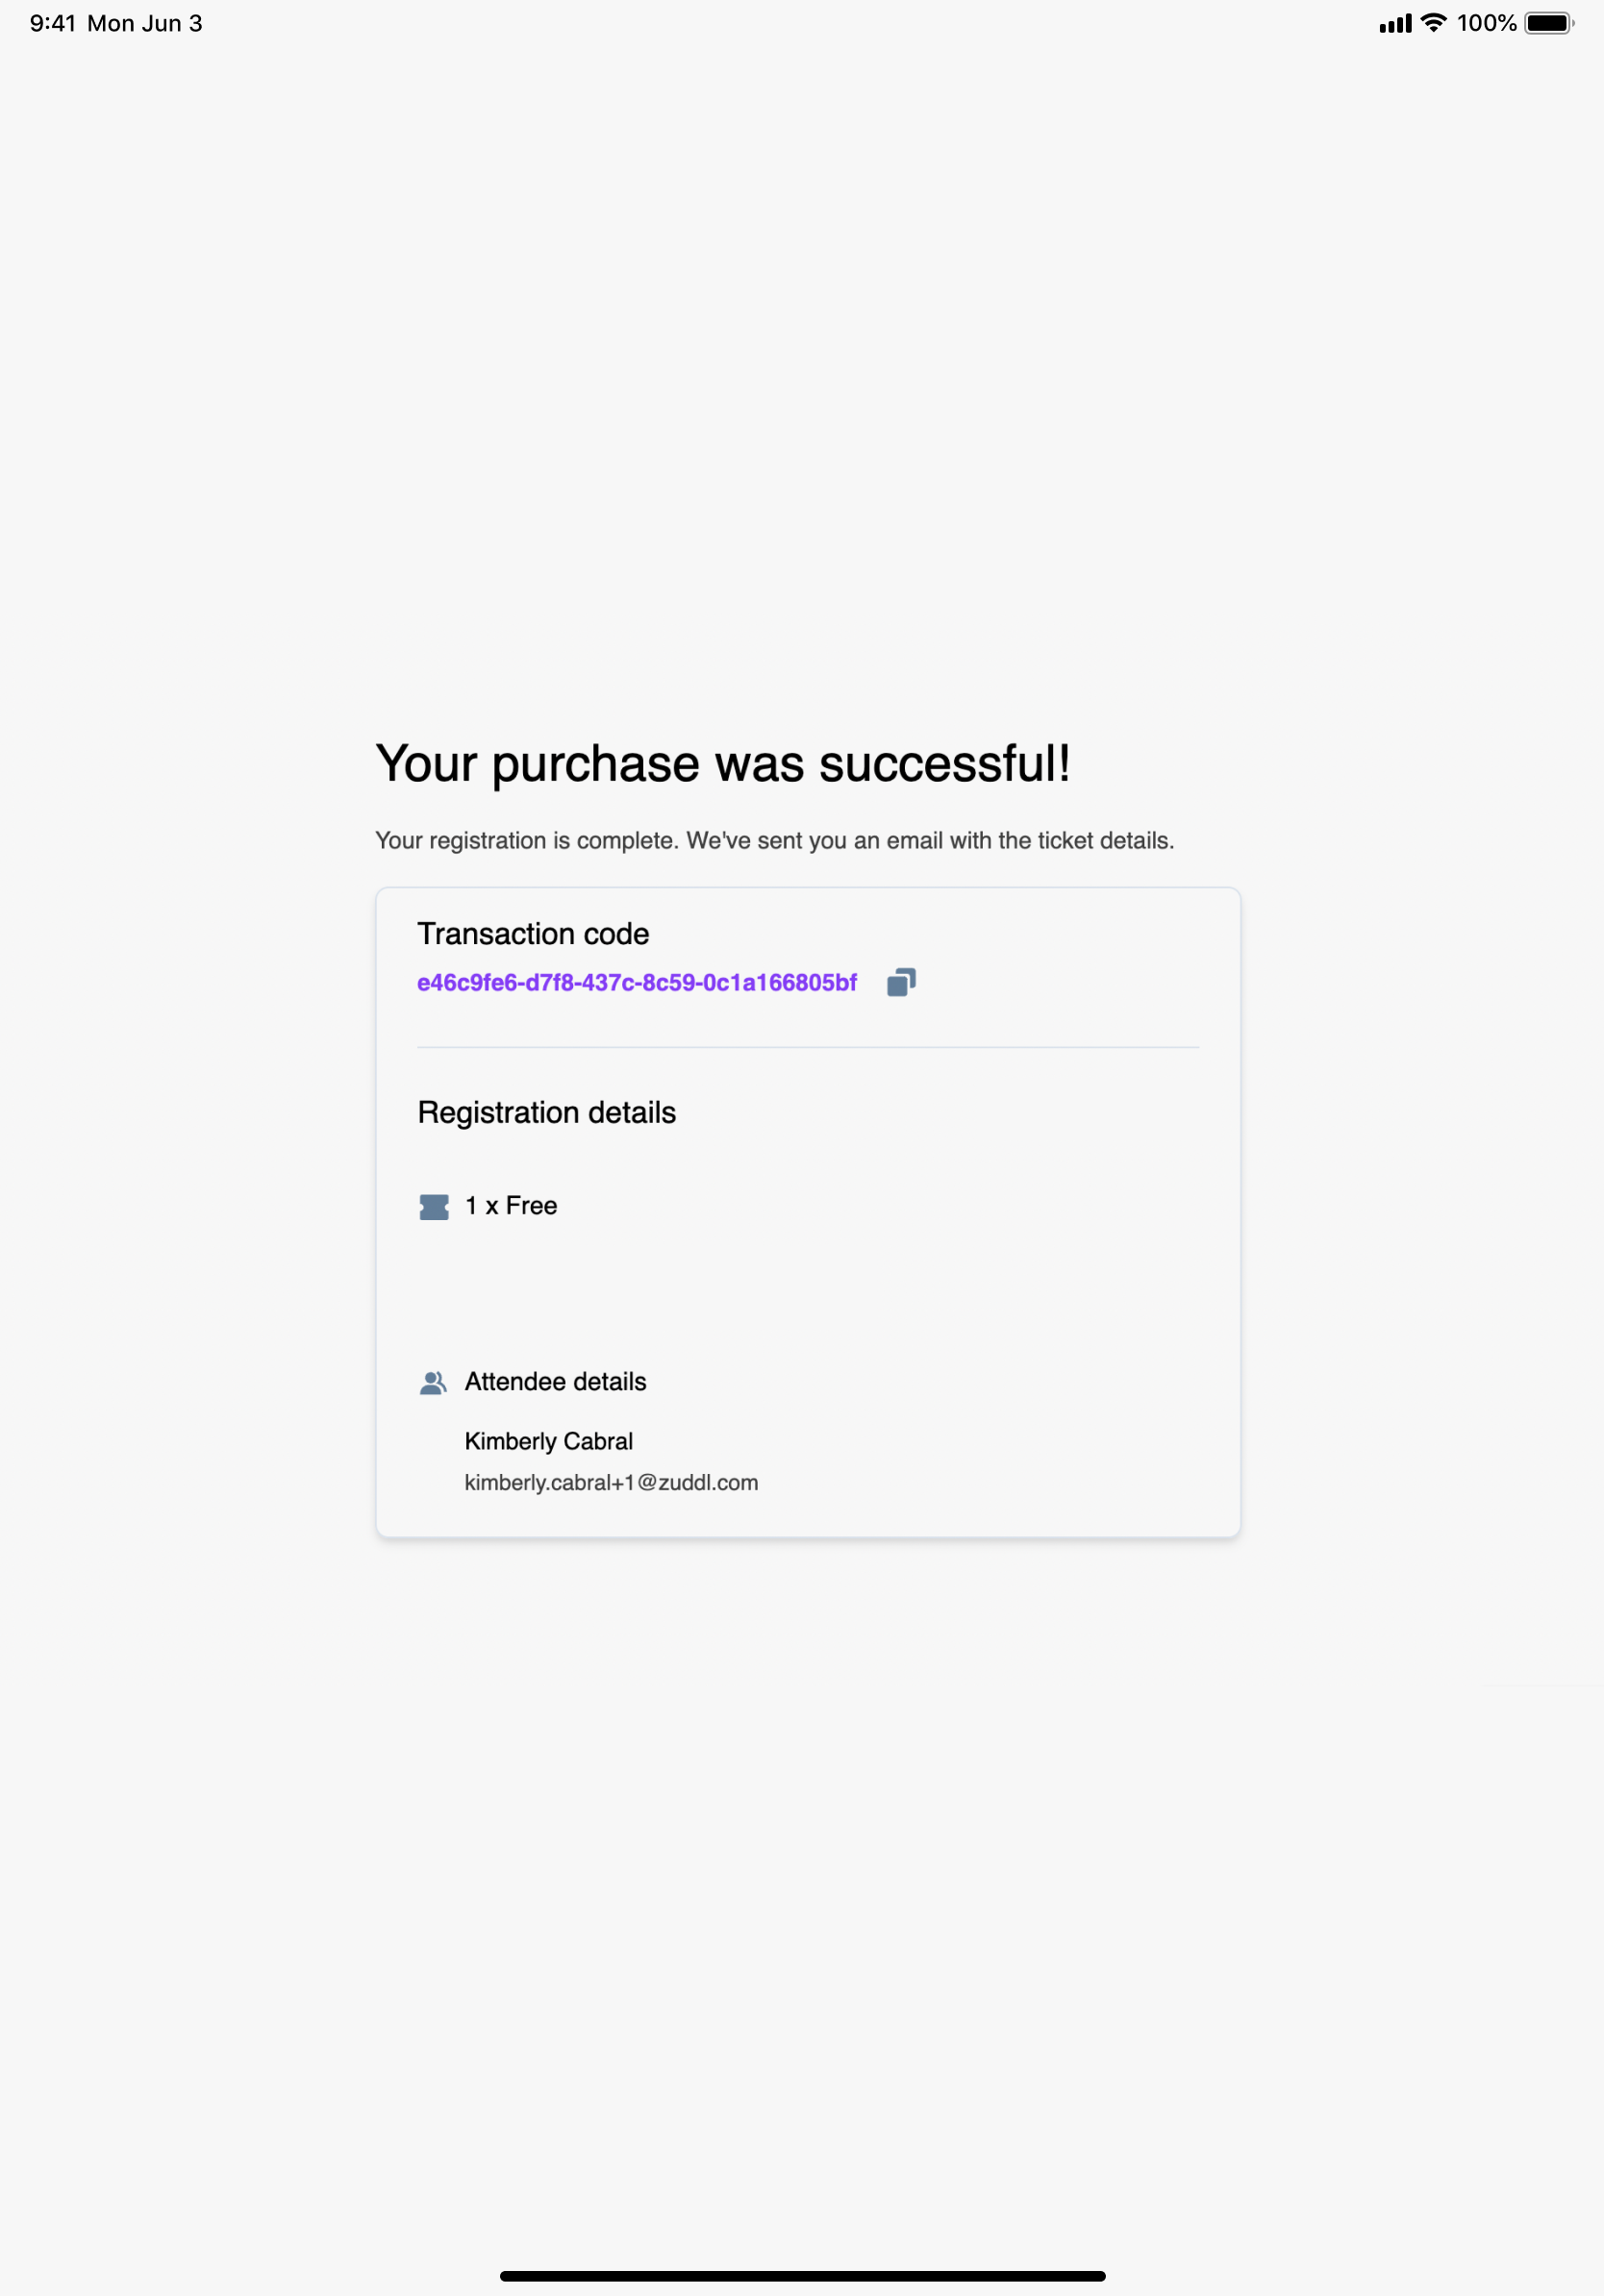
After the attendee has completed the registration process and if the registration is for a single person, the app automatically checks-in the attendee.

Next, you can review and print the badge.
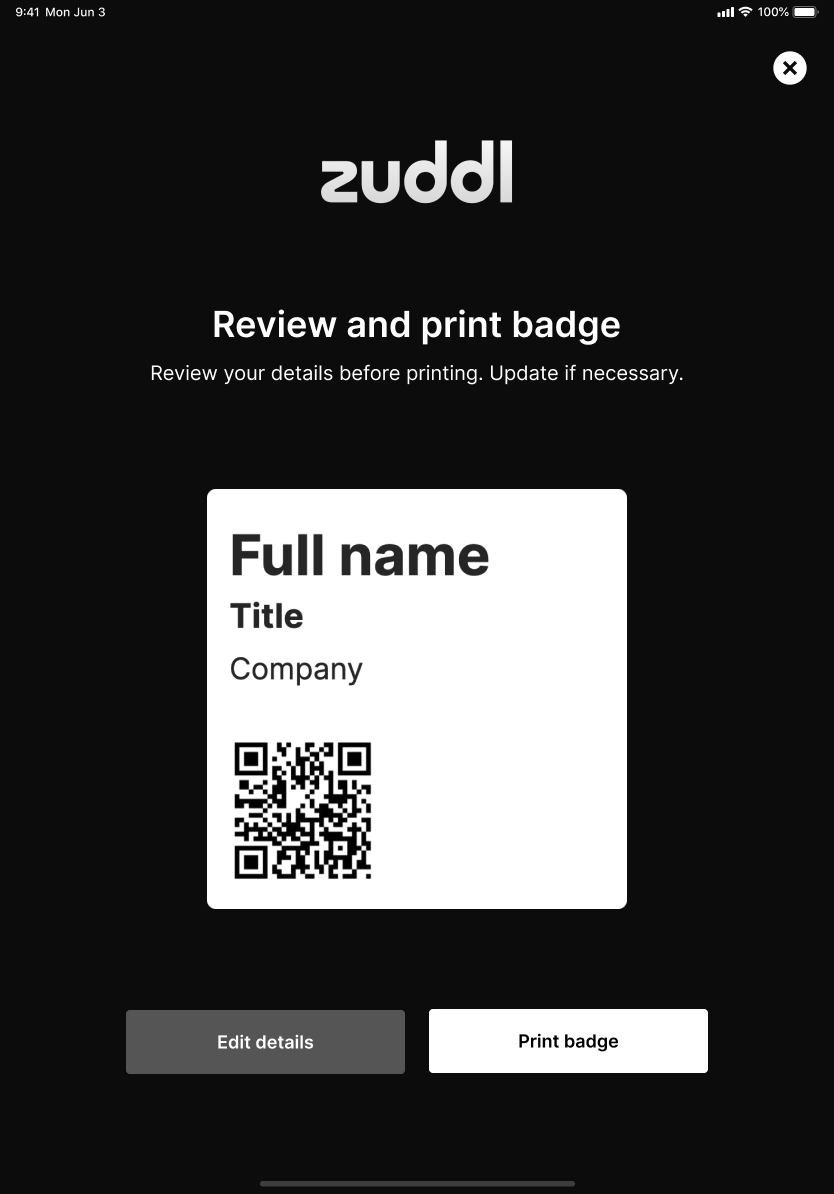
Editing badge details
To edit the badge details, click the Edit details button. This only updates the badge details and not registration detailsClick Save changes. The changes are updated on the review screen.
Bulk registration - Purchaser flow
The bulk registration flow by a purchaser is explained below:
The purchaser completes the registration.
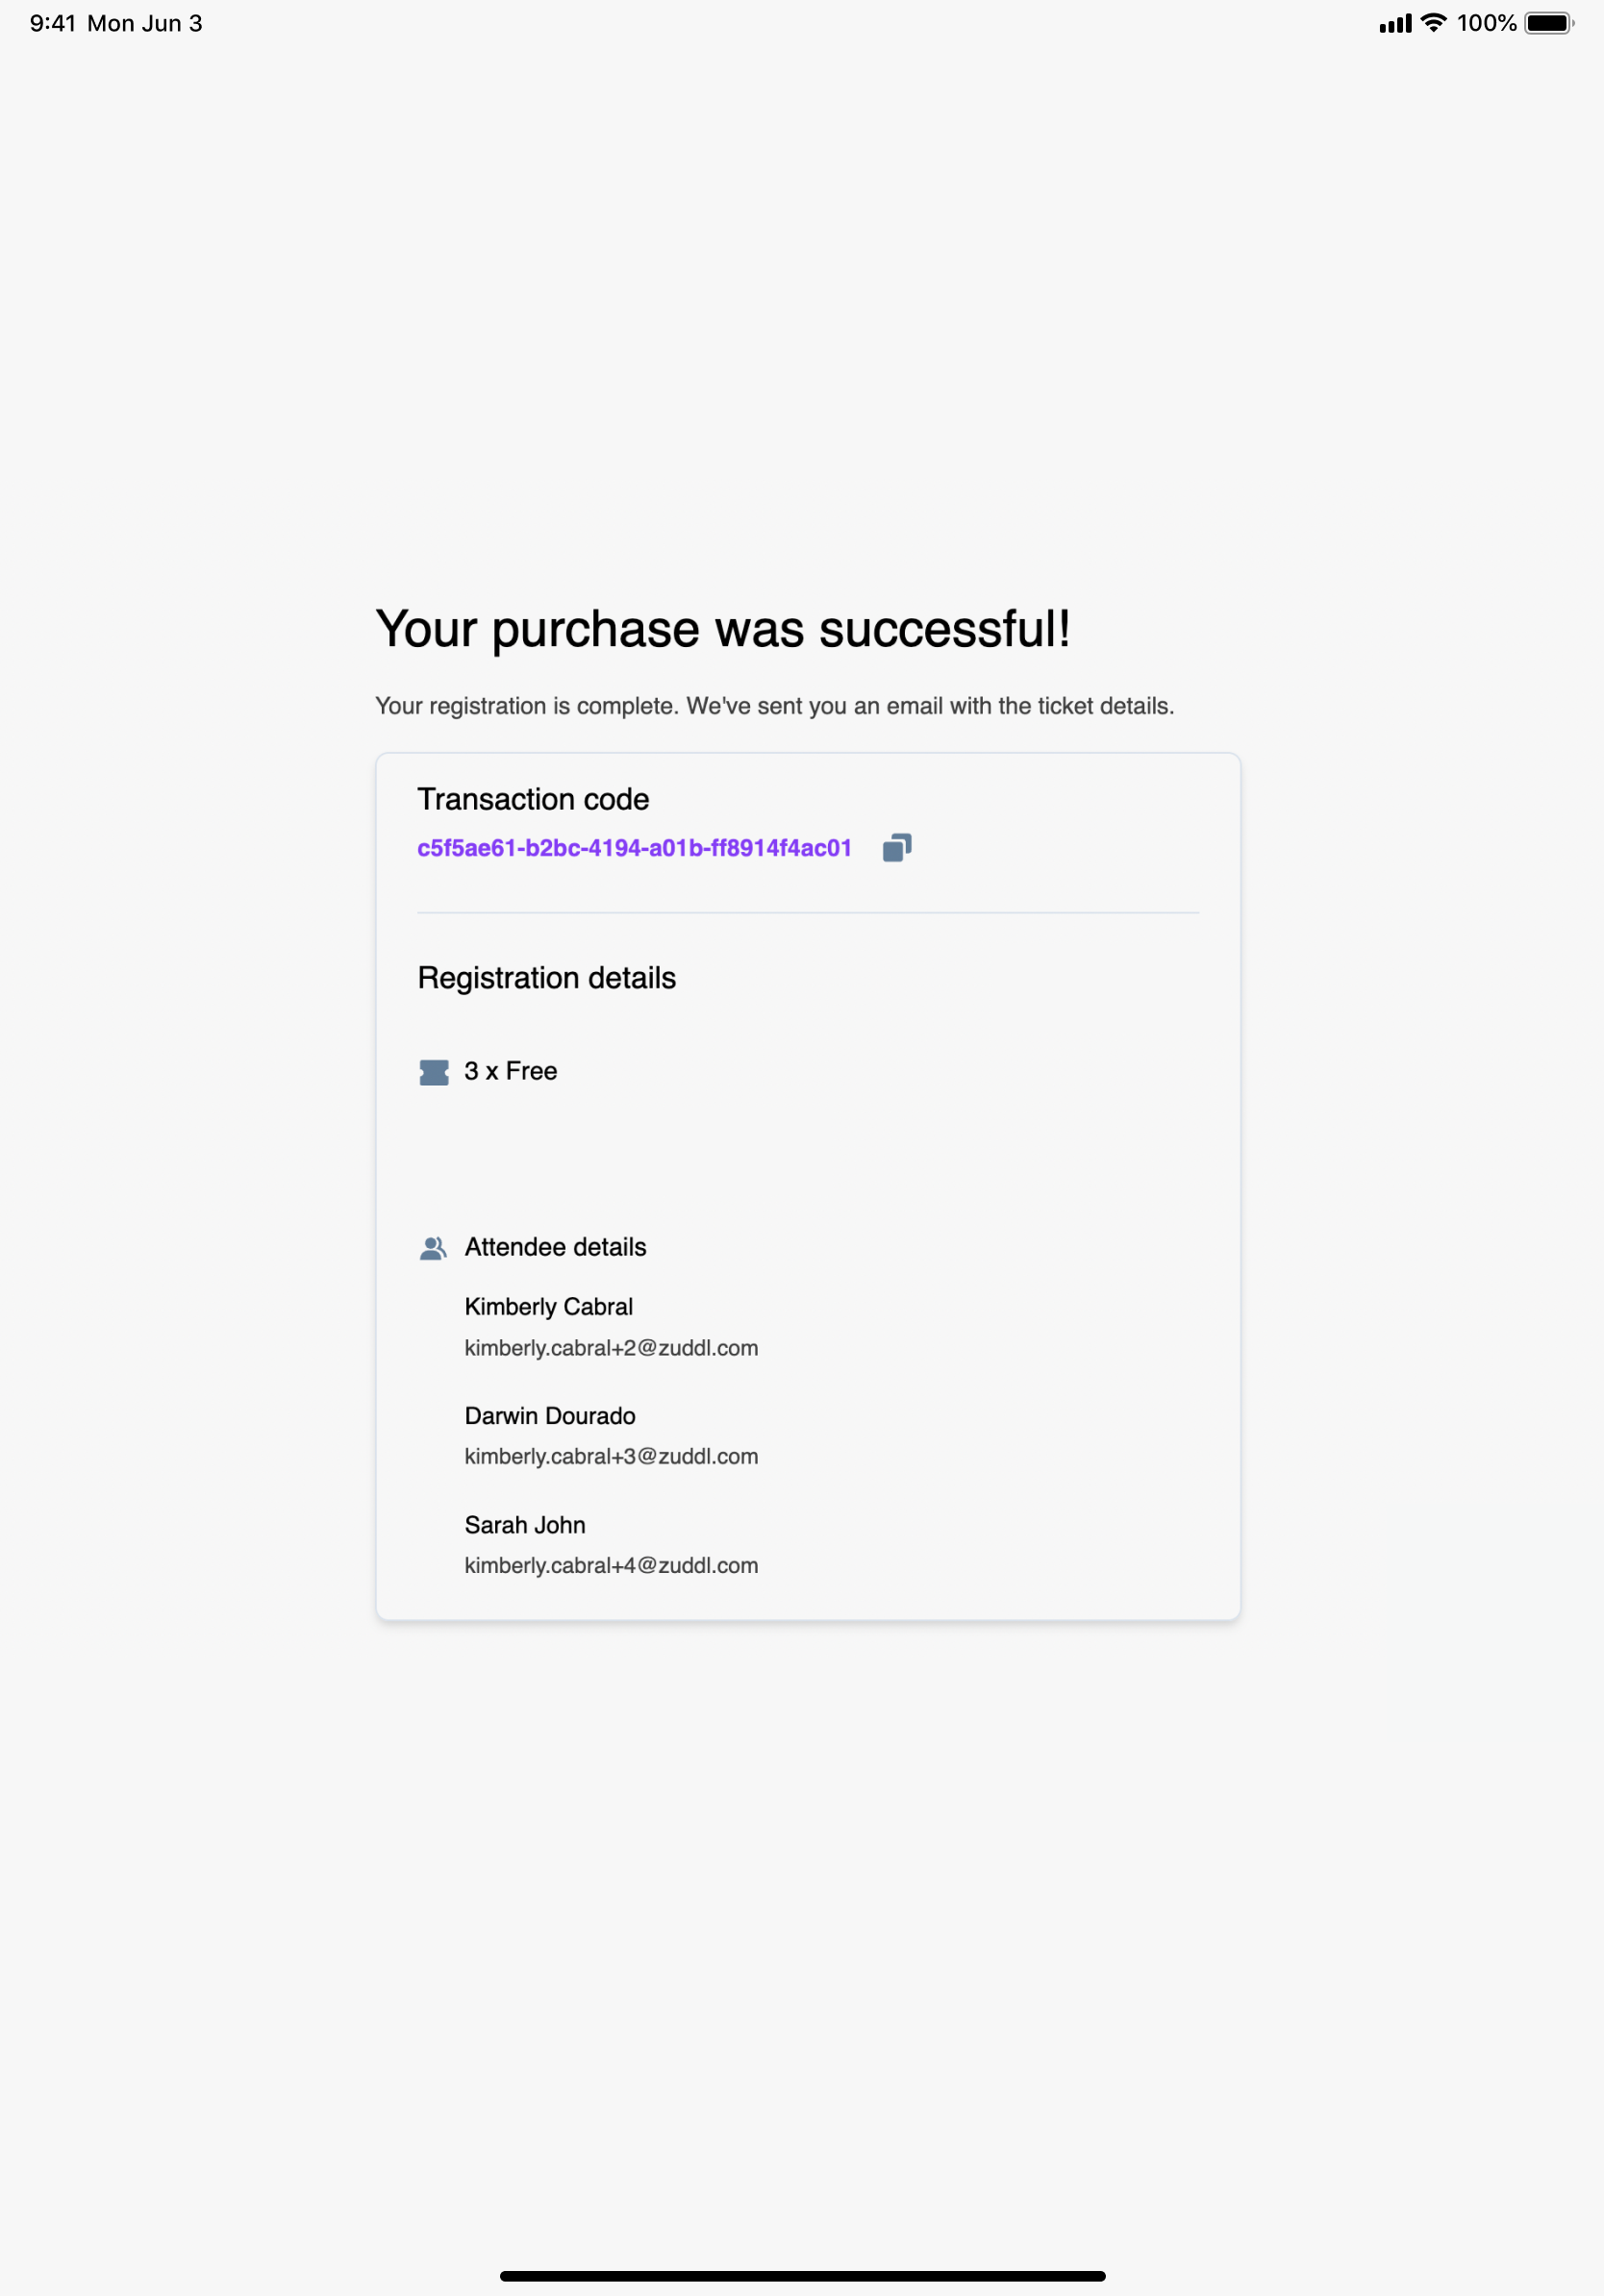
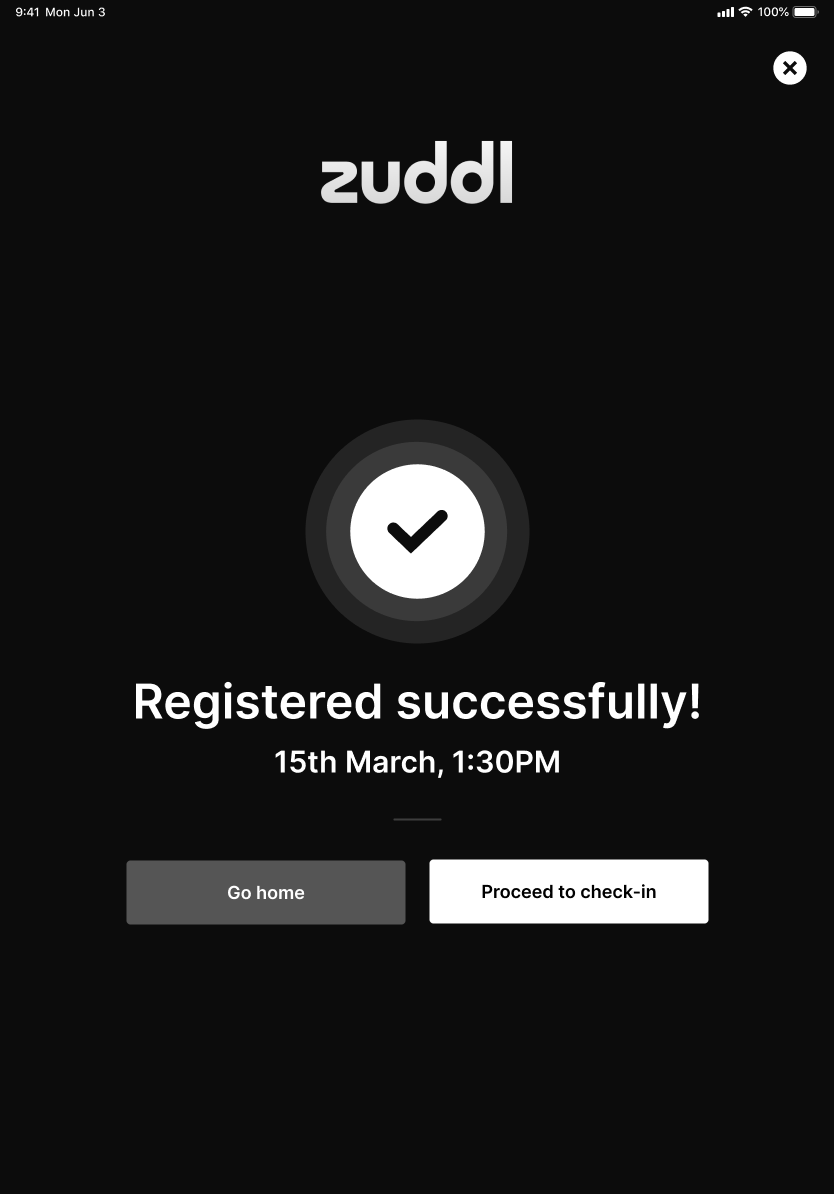
Once registered, it shows the success screen, but unlike single registration, attendees can only be checked in one at a time.
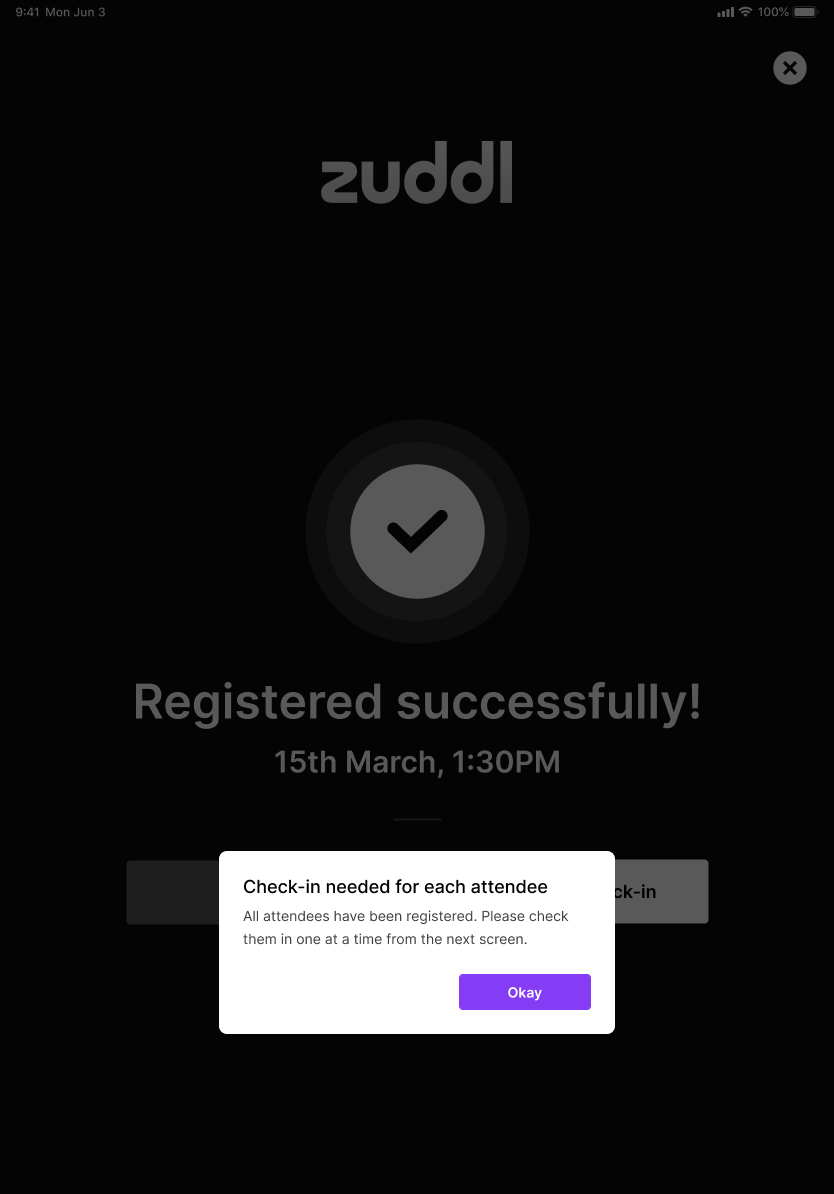
On the next screen, you can click Go home to go back to the welcome screen or Proceed to check-in to start check-in for attendees.
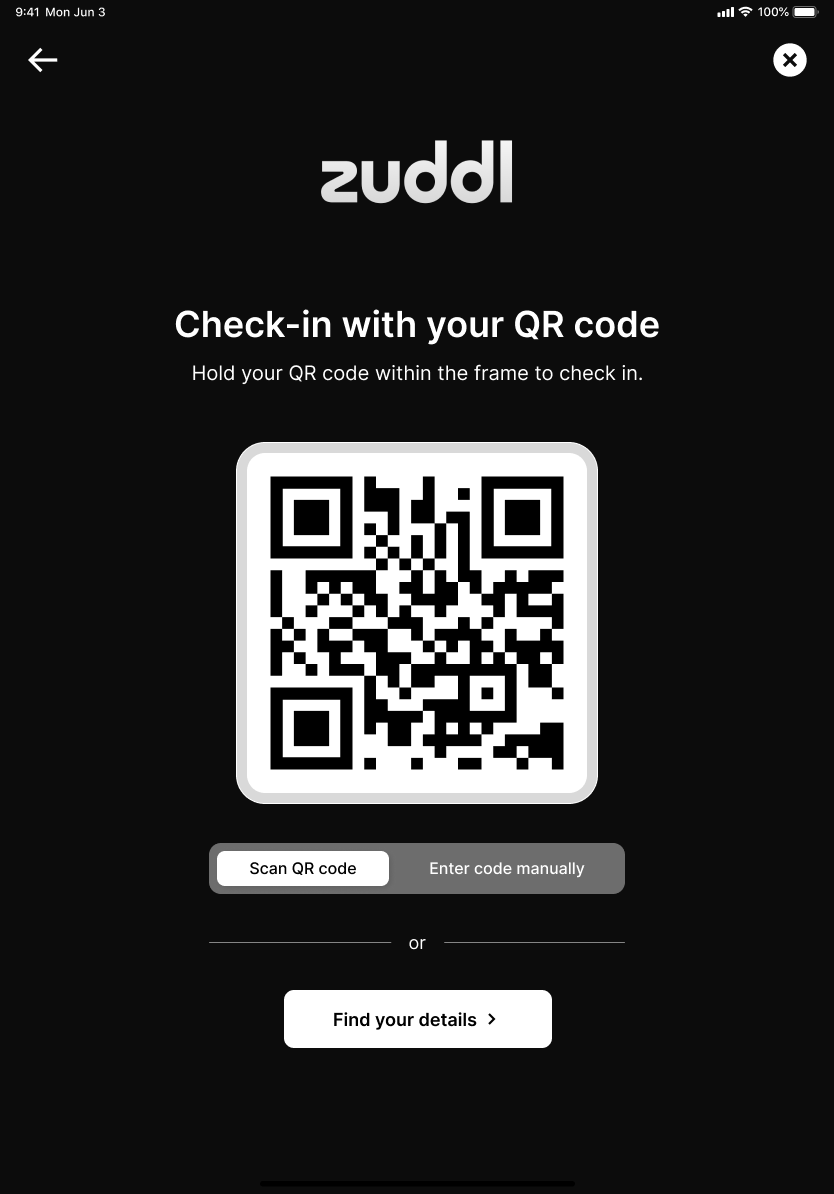
You can check in in two ways:
QR code
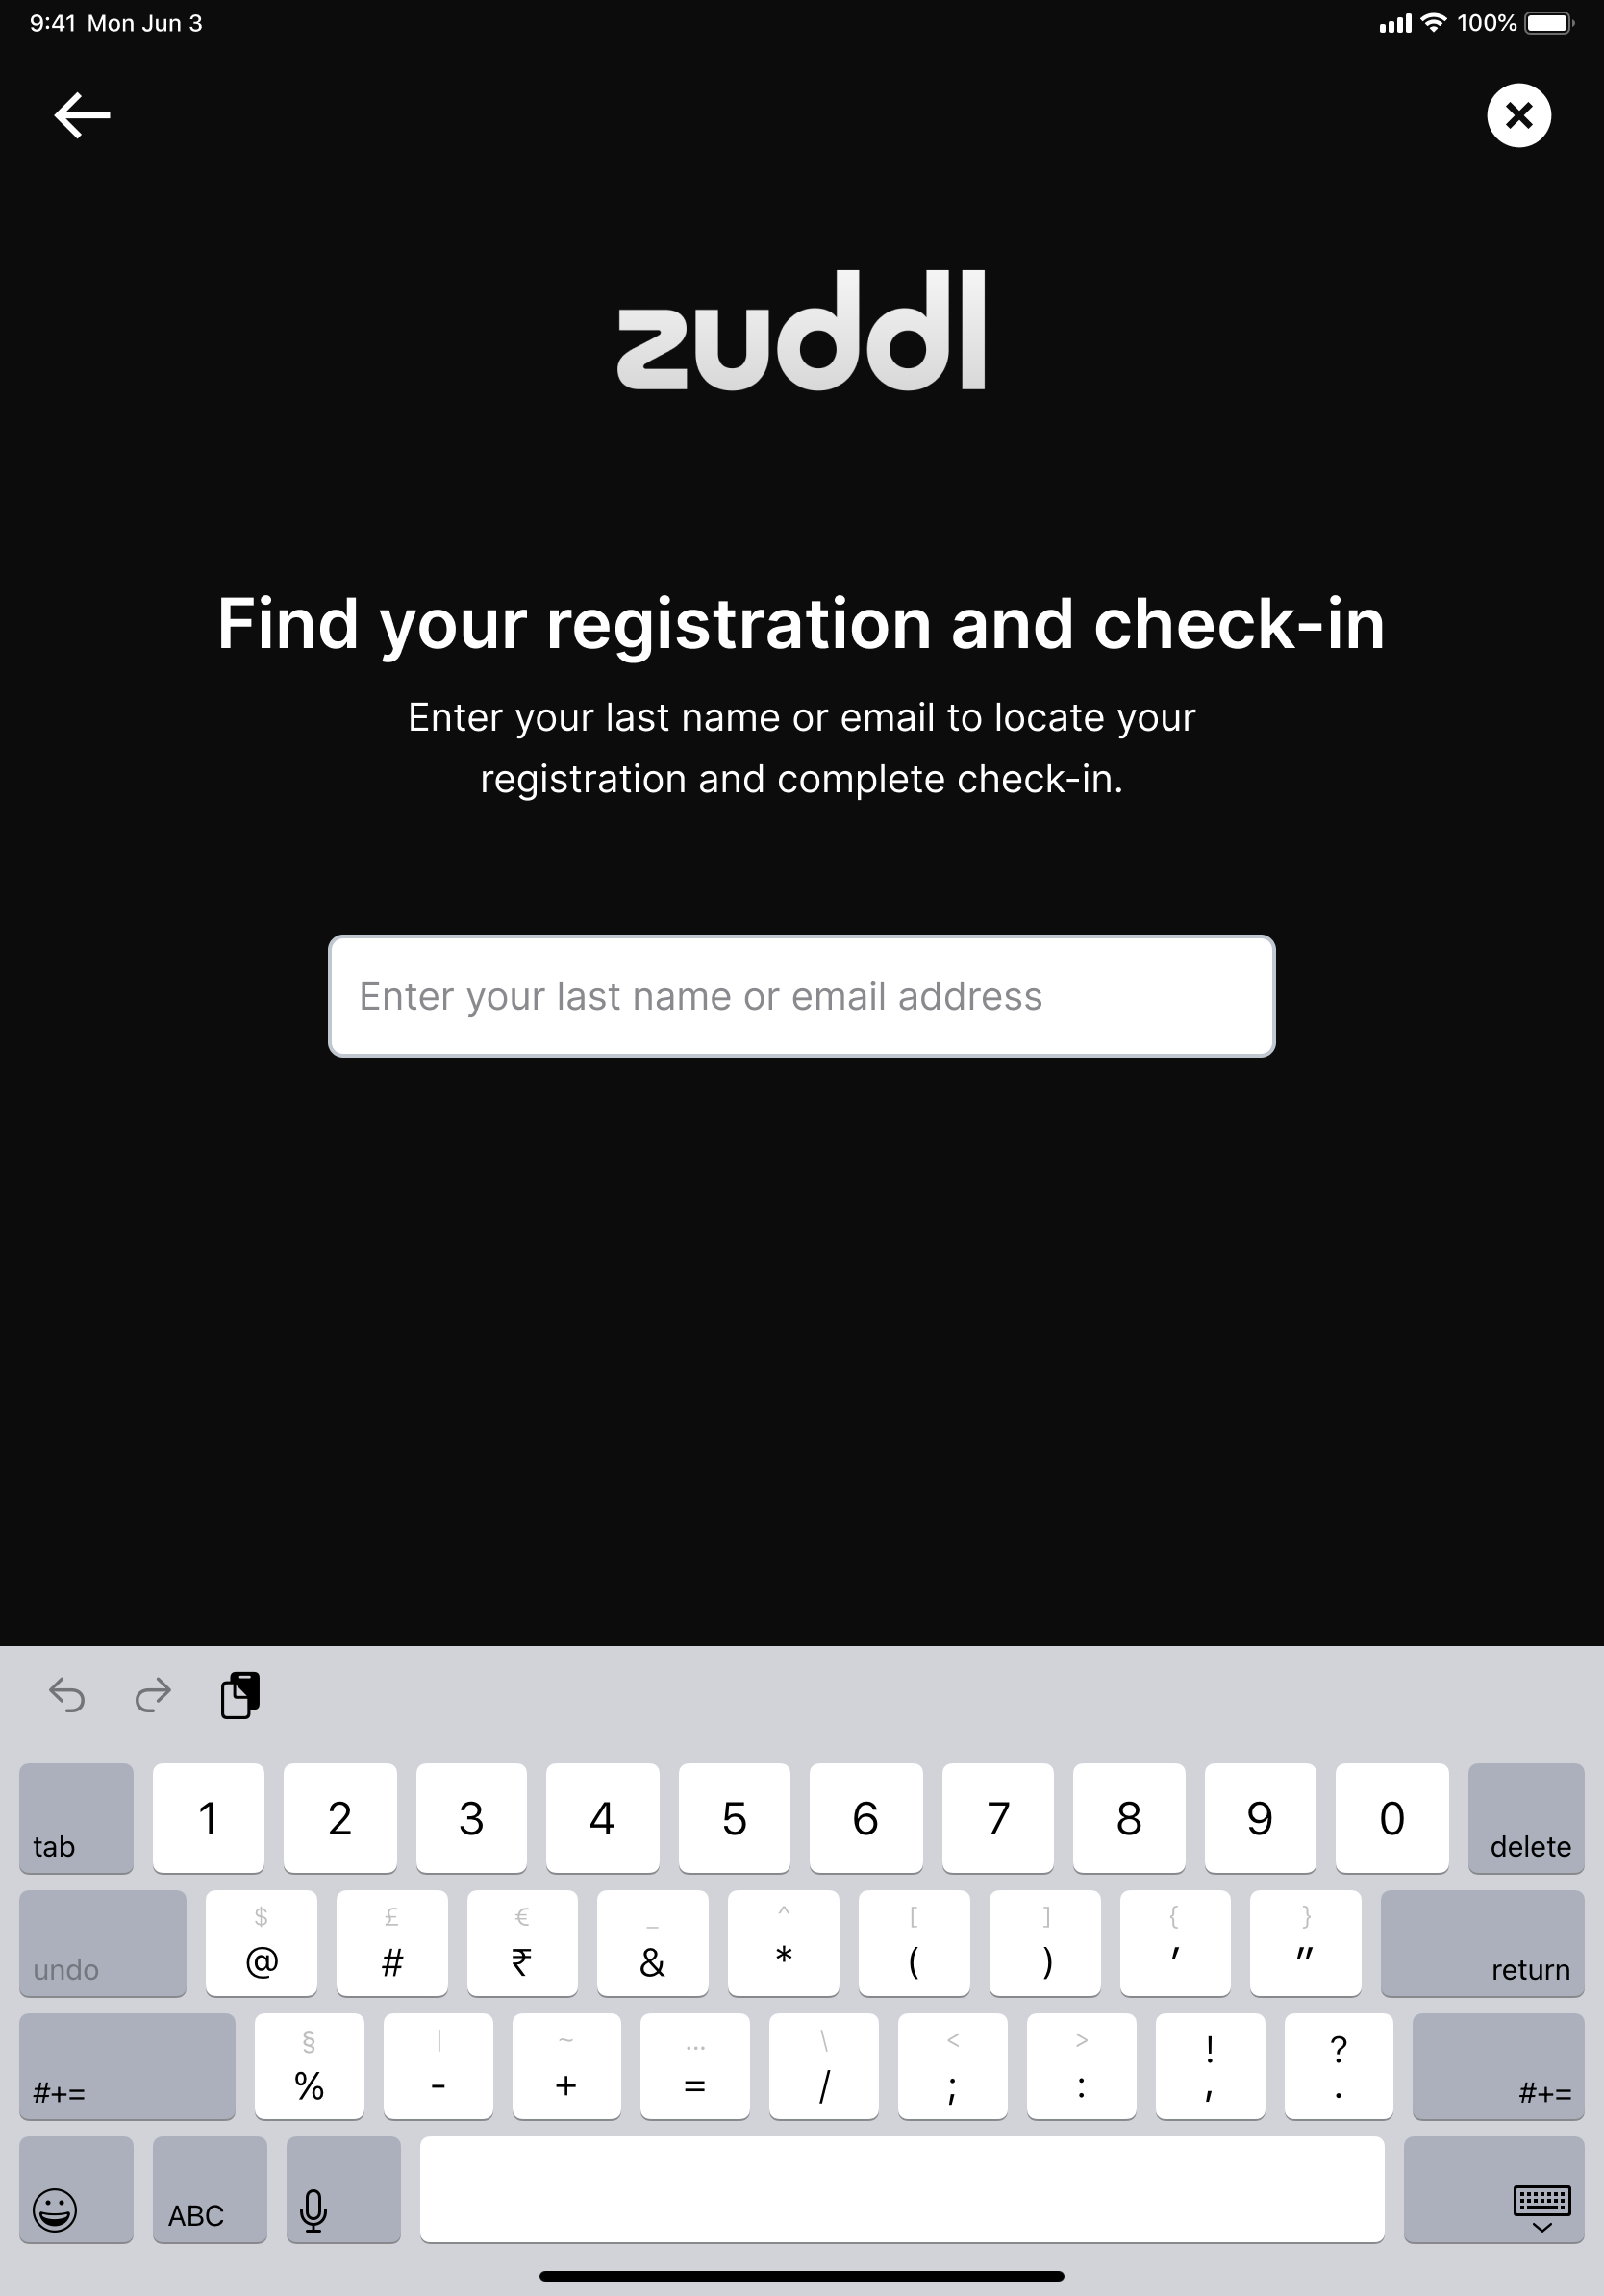
Check-in by last name/email.
To check-in manually, click Find your details.
On the next screen, you can find your registration by entering your last name or email address.
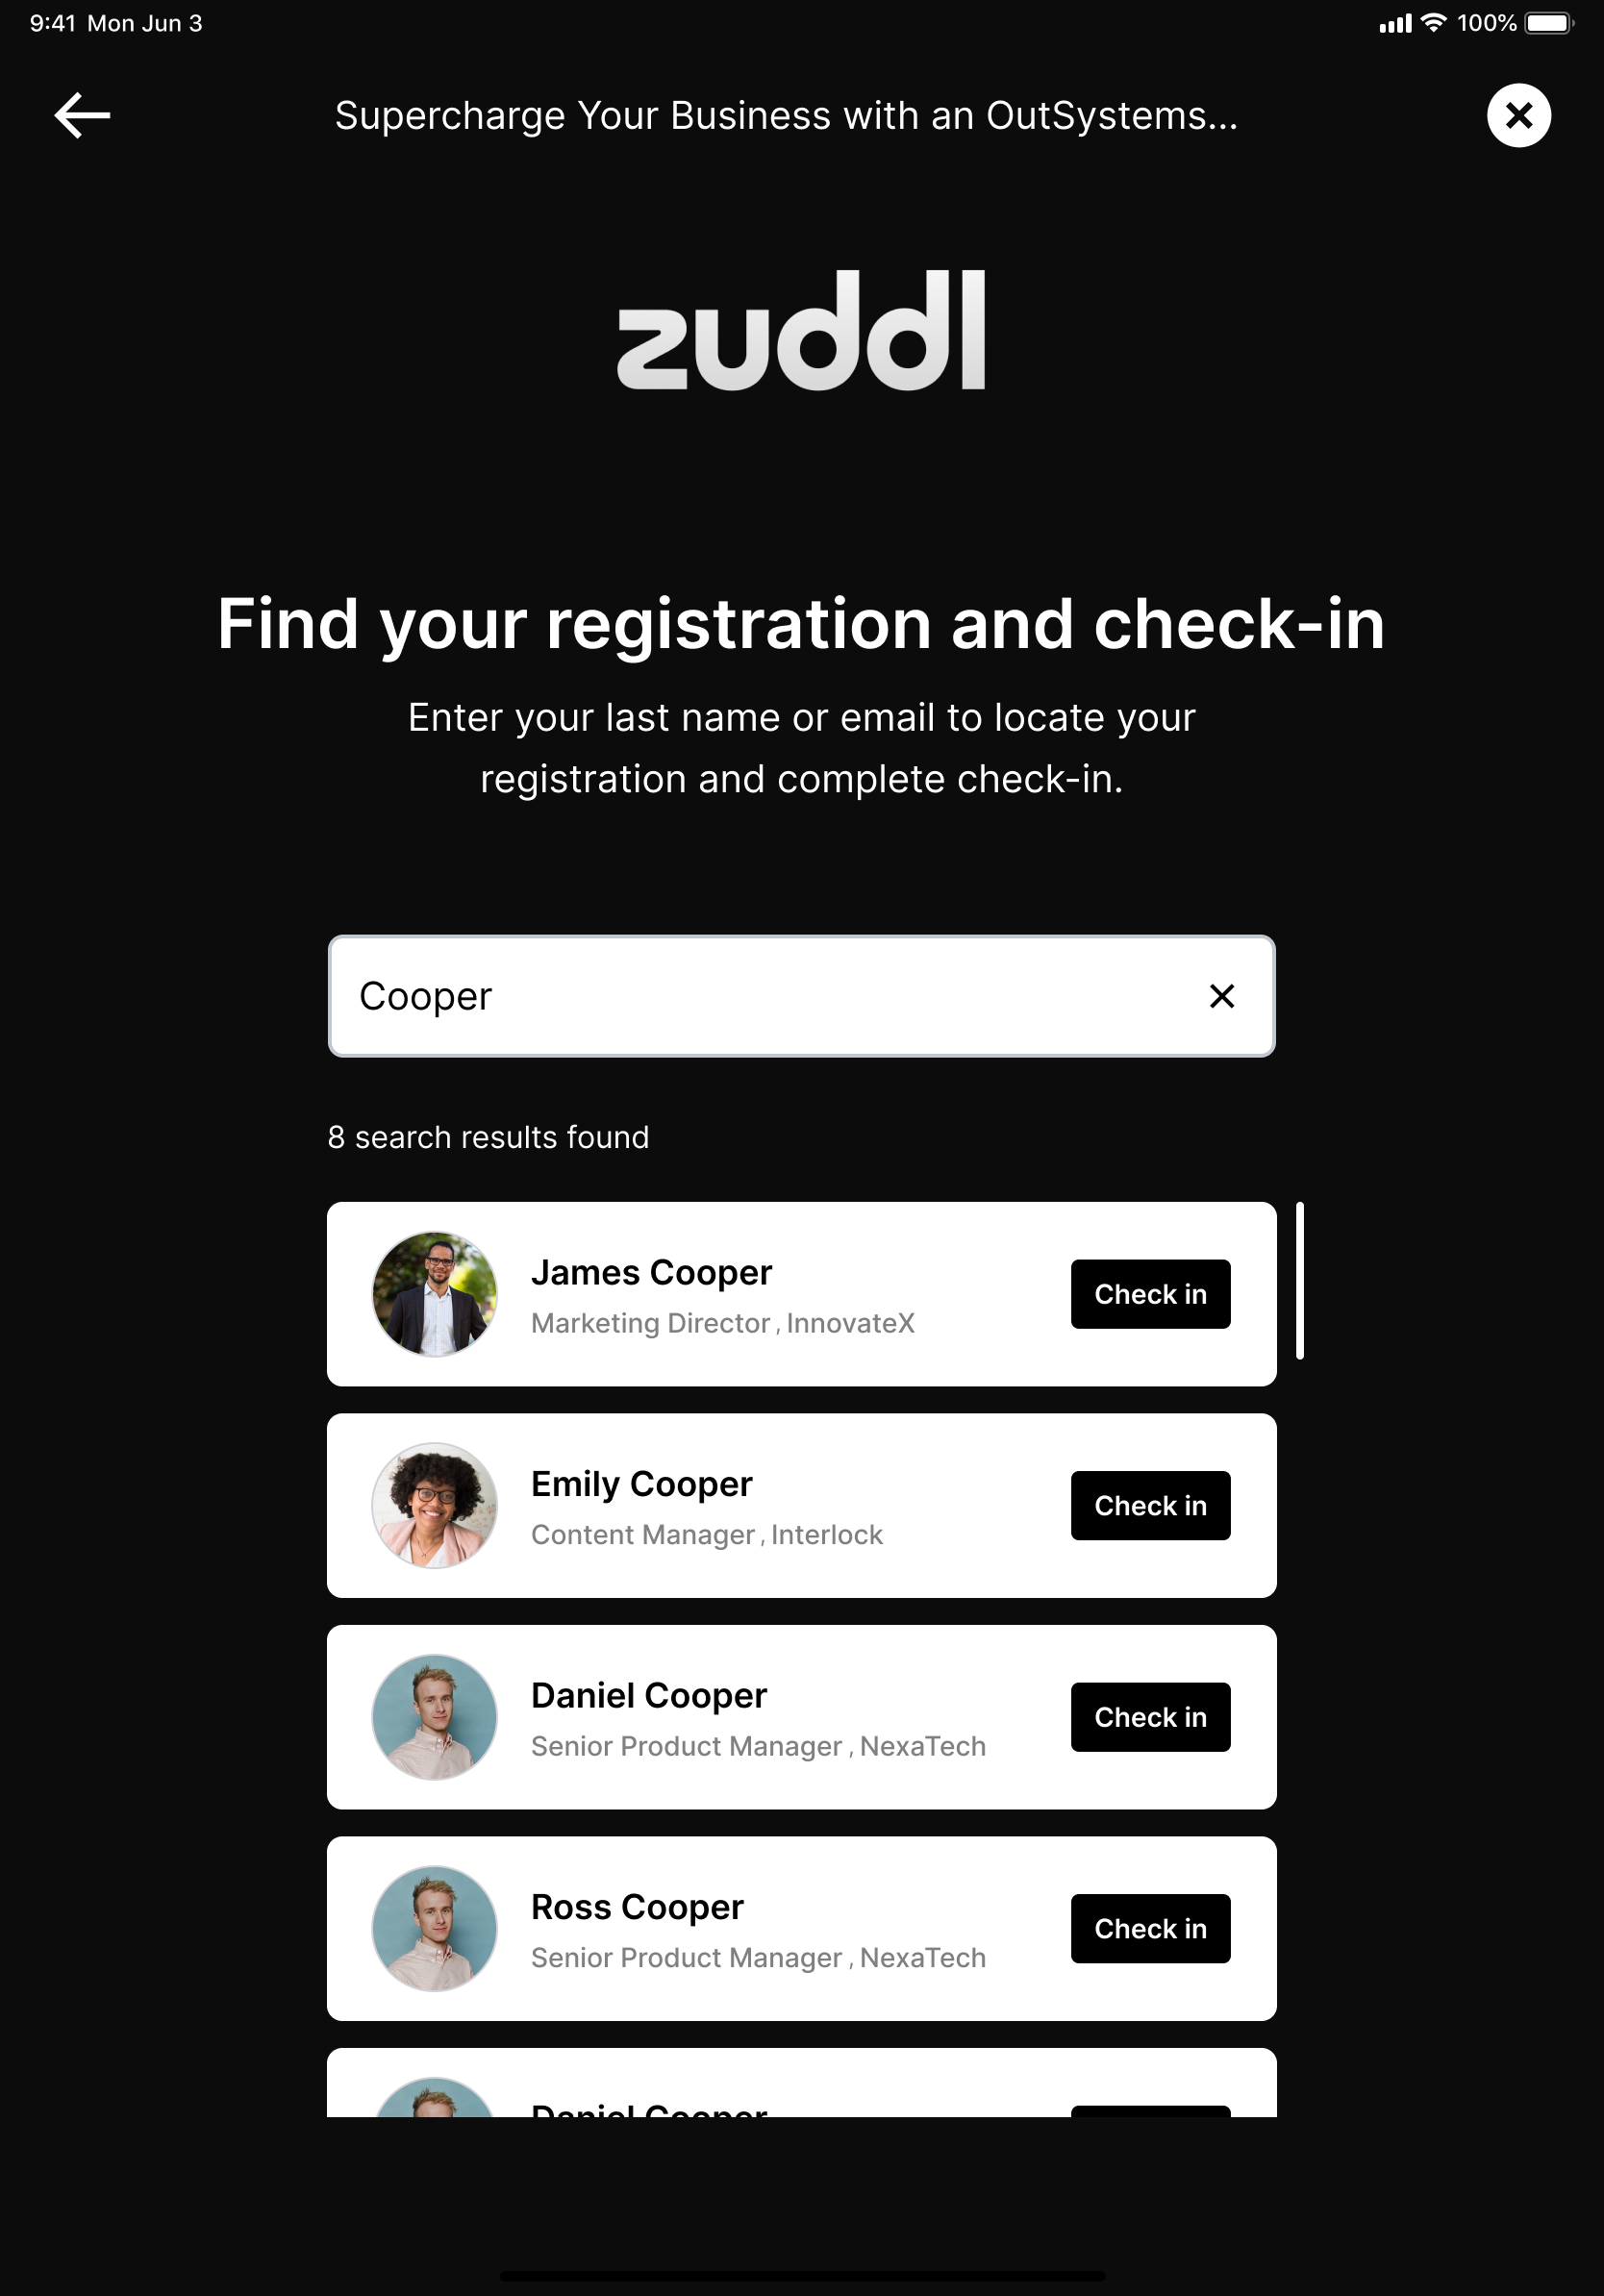
You can click on the check-in button to start the check-in process for the required attendee.
Registering on behalf of an attendee
To register on behalf of an attendee, complete the registration form and select the This is for someone else checkbox. Ensure that the assigned registrant completes the registration to proceed with check-in.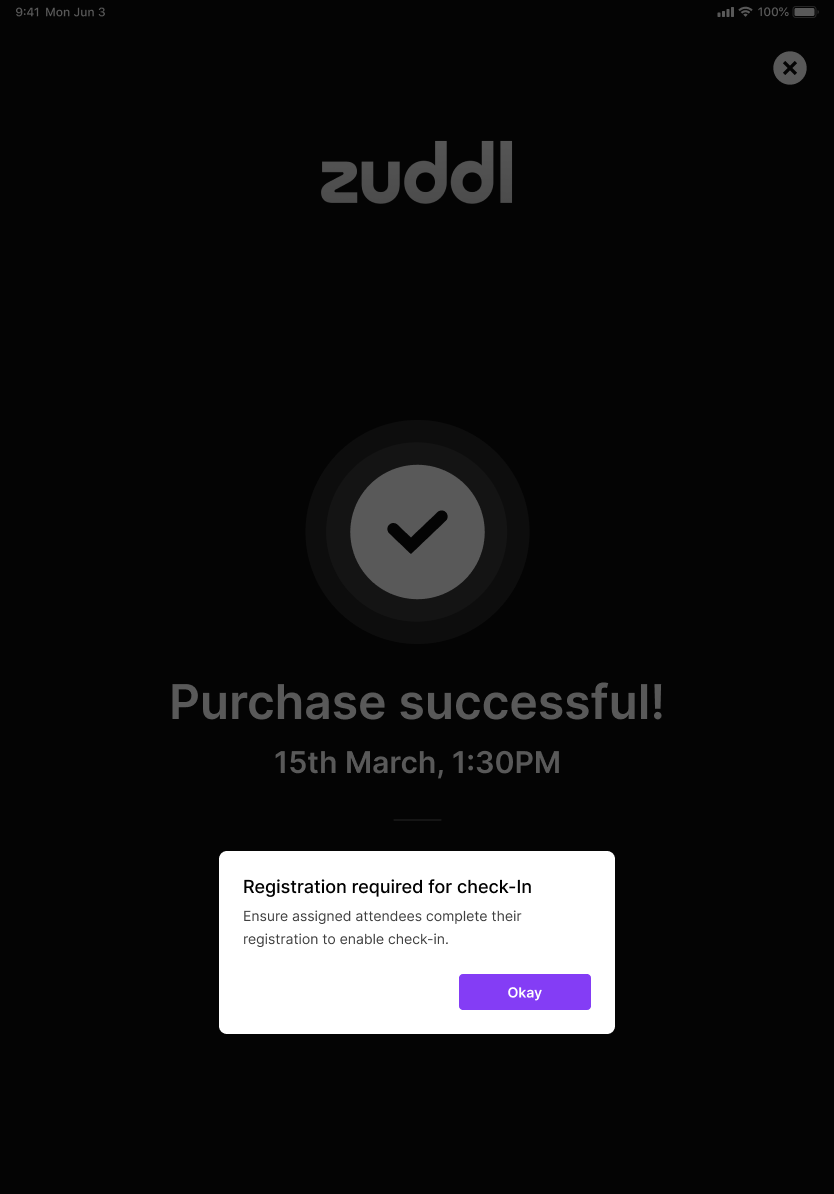
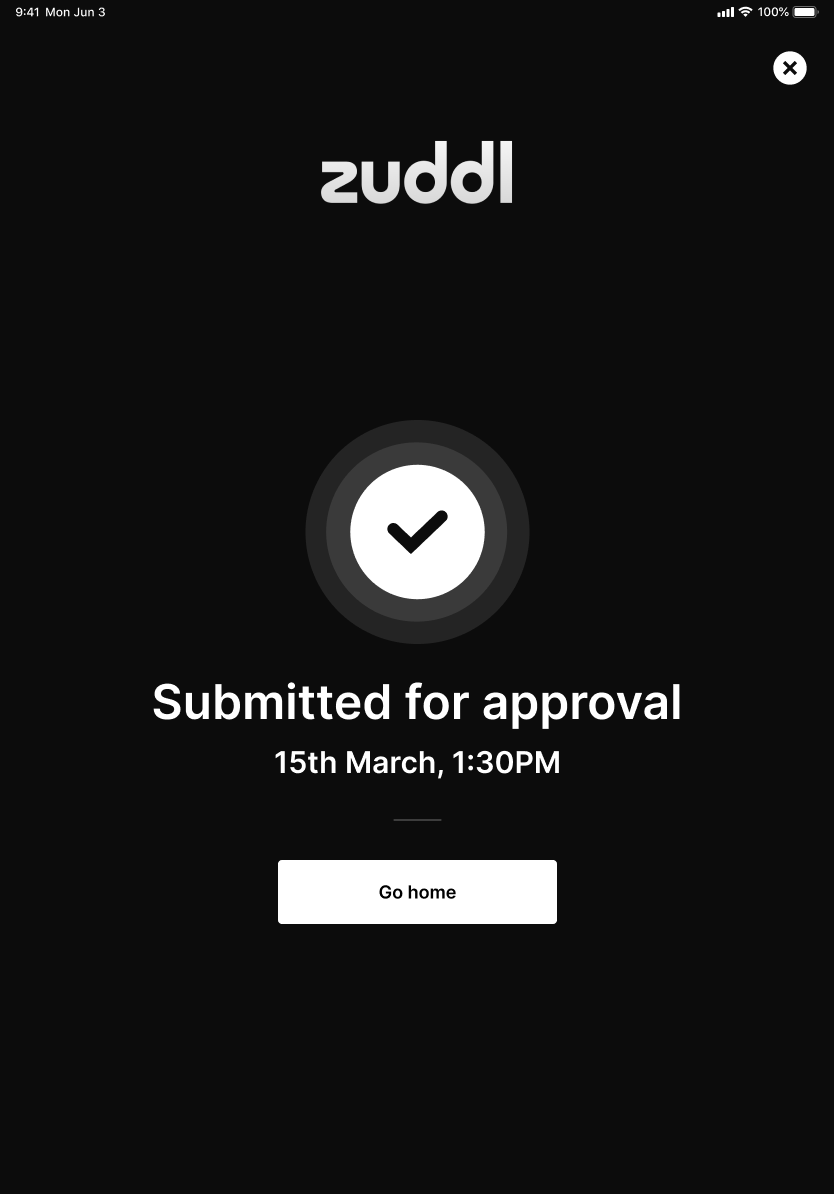
Approval flow
A registration flow with approval process enabled is shown below:
The registrant completes the registration form.
The label ‘The event organizer’s approval is required for this ticket’ is shown during the registration process.
Once the registration is complete, the following screen appears.
Check-in flow - attendee side
The check process for an attendee on the kiosk is explained below:
Organizer clicks the Check-in only option on the kiosk.
Organizer chooses the registration flow from the list.
The organizer enters the self-serve mode PIN.
On the welcome screen, attendee clicks Check-in.

There are two ways in which attendees can check-in:
Scan QR code: to check-in via your registration QR code
Find your details: to search for your registration using your last name or email address.
Attendee clicks the **Find your details** option and enters their last name or email address to locate their registration.

This shows the results in a list. The attendee then clicks Check-in.
Once the check-in is done, you can review and print the badge.

Best practices
The best practices to make the entire registration process easier for attendees is shown below:
Maintain a consistent naming convention for the registration flow. This makes it easier for the frontdesk team to choose the right flow during registration from the list. For example, for a registration flow with branches for dietary preferences, use “Branched flow - Dietary preference”.
Use the same treatment for registration with conditions, approval-based registration, flow with branches.
You can directly register and make payment from the app itself