How to Invite Attendees to your Virtual Event in Zuddl
Last updated: September 2, 2025
Attendees can be invited by adding them to the event using their email addresses.
If your event has a Flex registration style, a published registration flow is required to invite attendees.
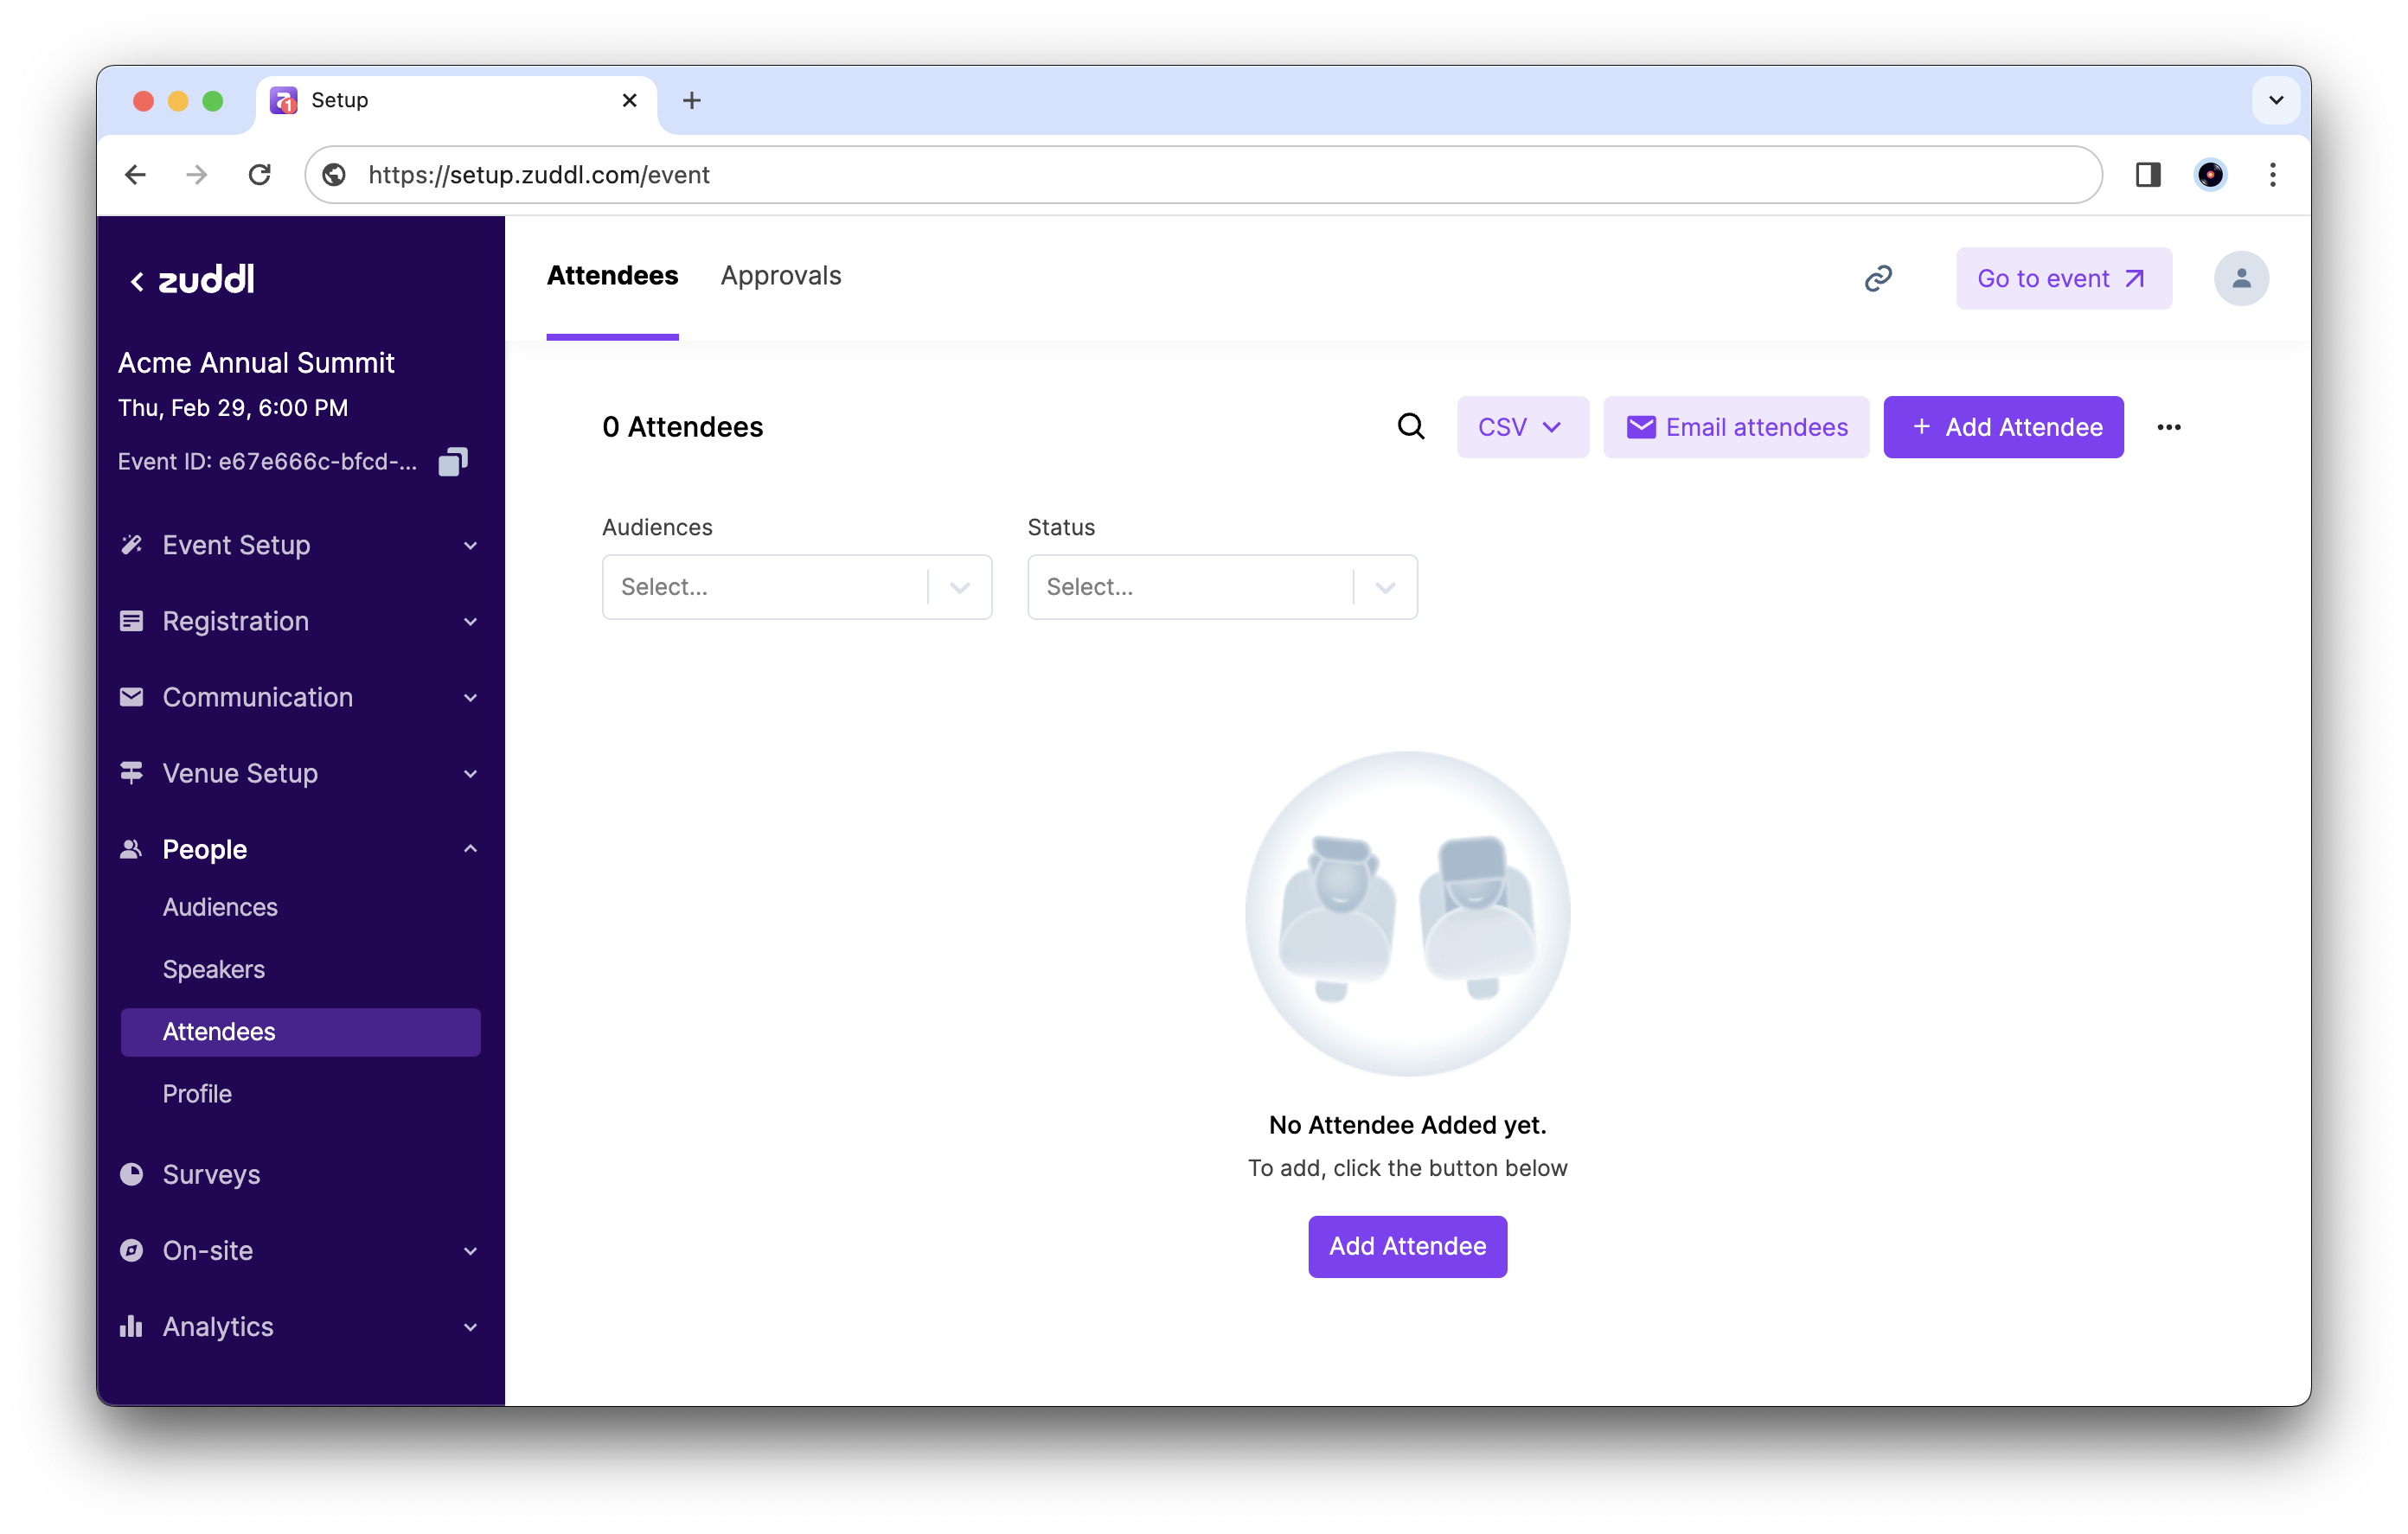
On the Zuddl dashboard, go to People > Attendees.
Click on the Add Attendee button.
On the Add Attendee form, enter the following details:
Enter the First Name of the attendee (up to 20 characters).
Enter the Last Name of the attendee (up to 20 characters).
Enter Email ID of the attendee.
Under Choose registration flow, select a published registration from the dropdown options for the attendees. By default, the Basic registration flow is selected.
The Choose registration flow field appears only for events with Flex registration style.
Optional. Select the Ticket Type from the dropdown. If it is a ticketed event, you can select the ticket type for the attendee.
Enter the Title of the attendee.
Enter the Organization name.
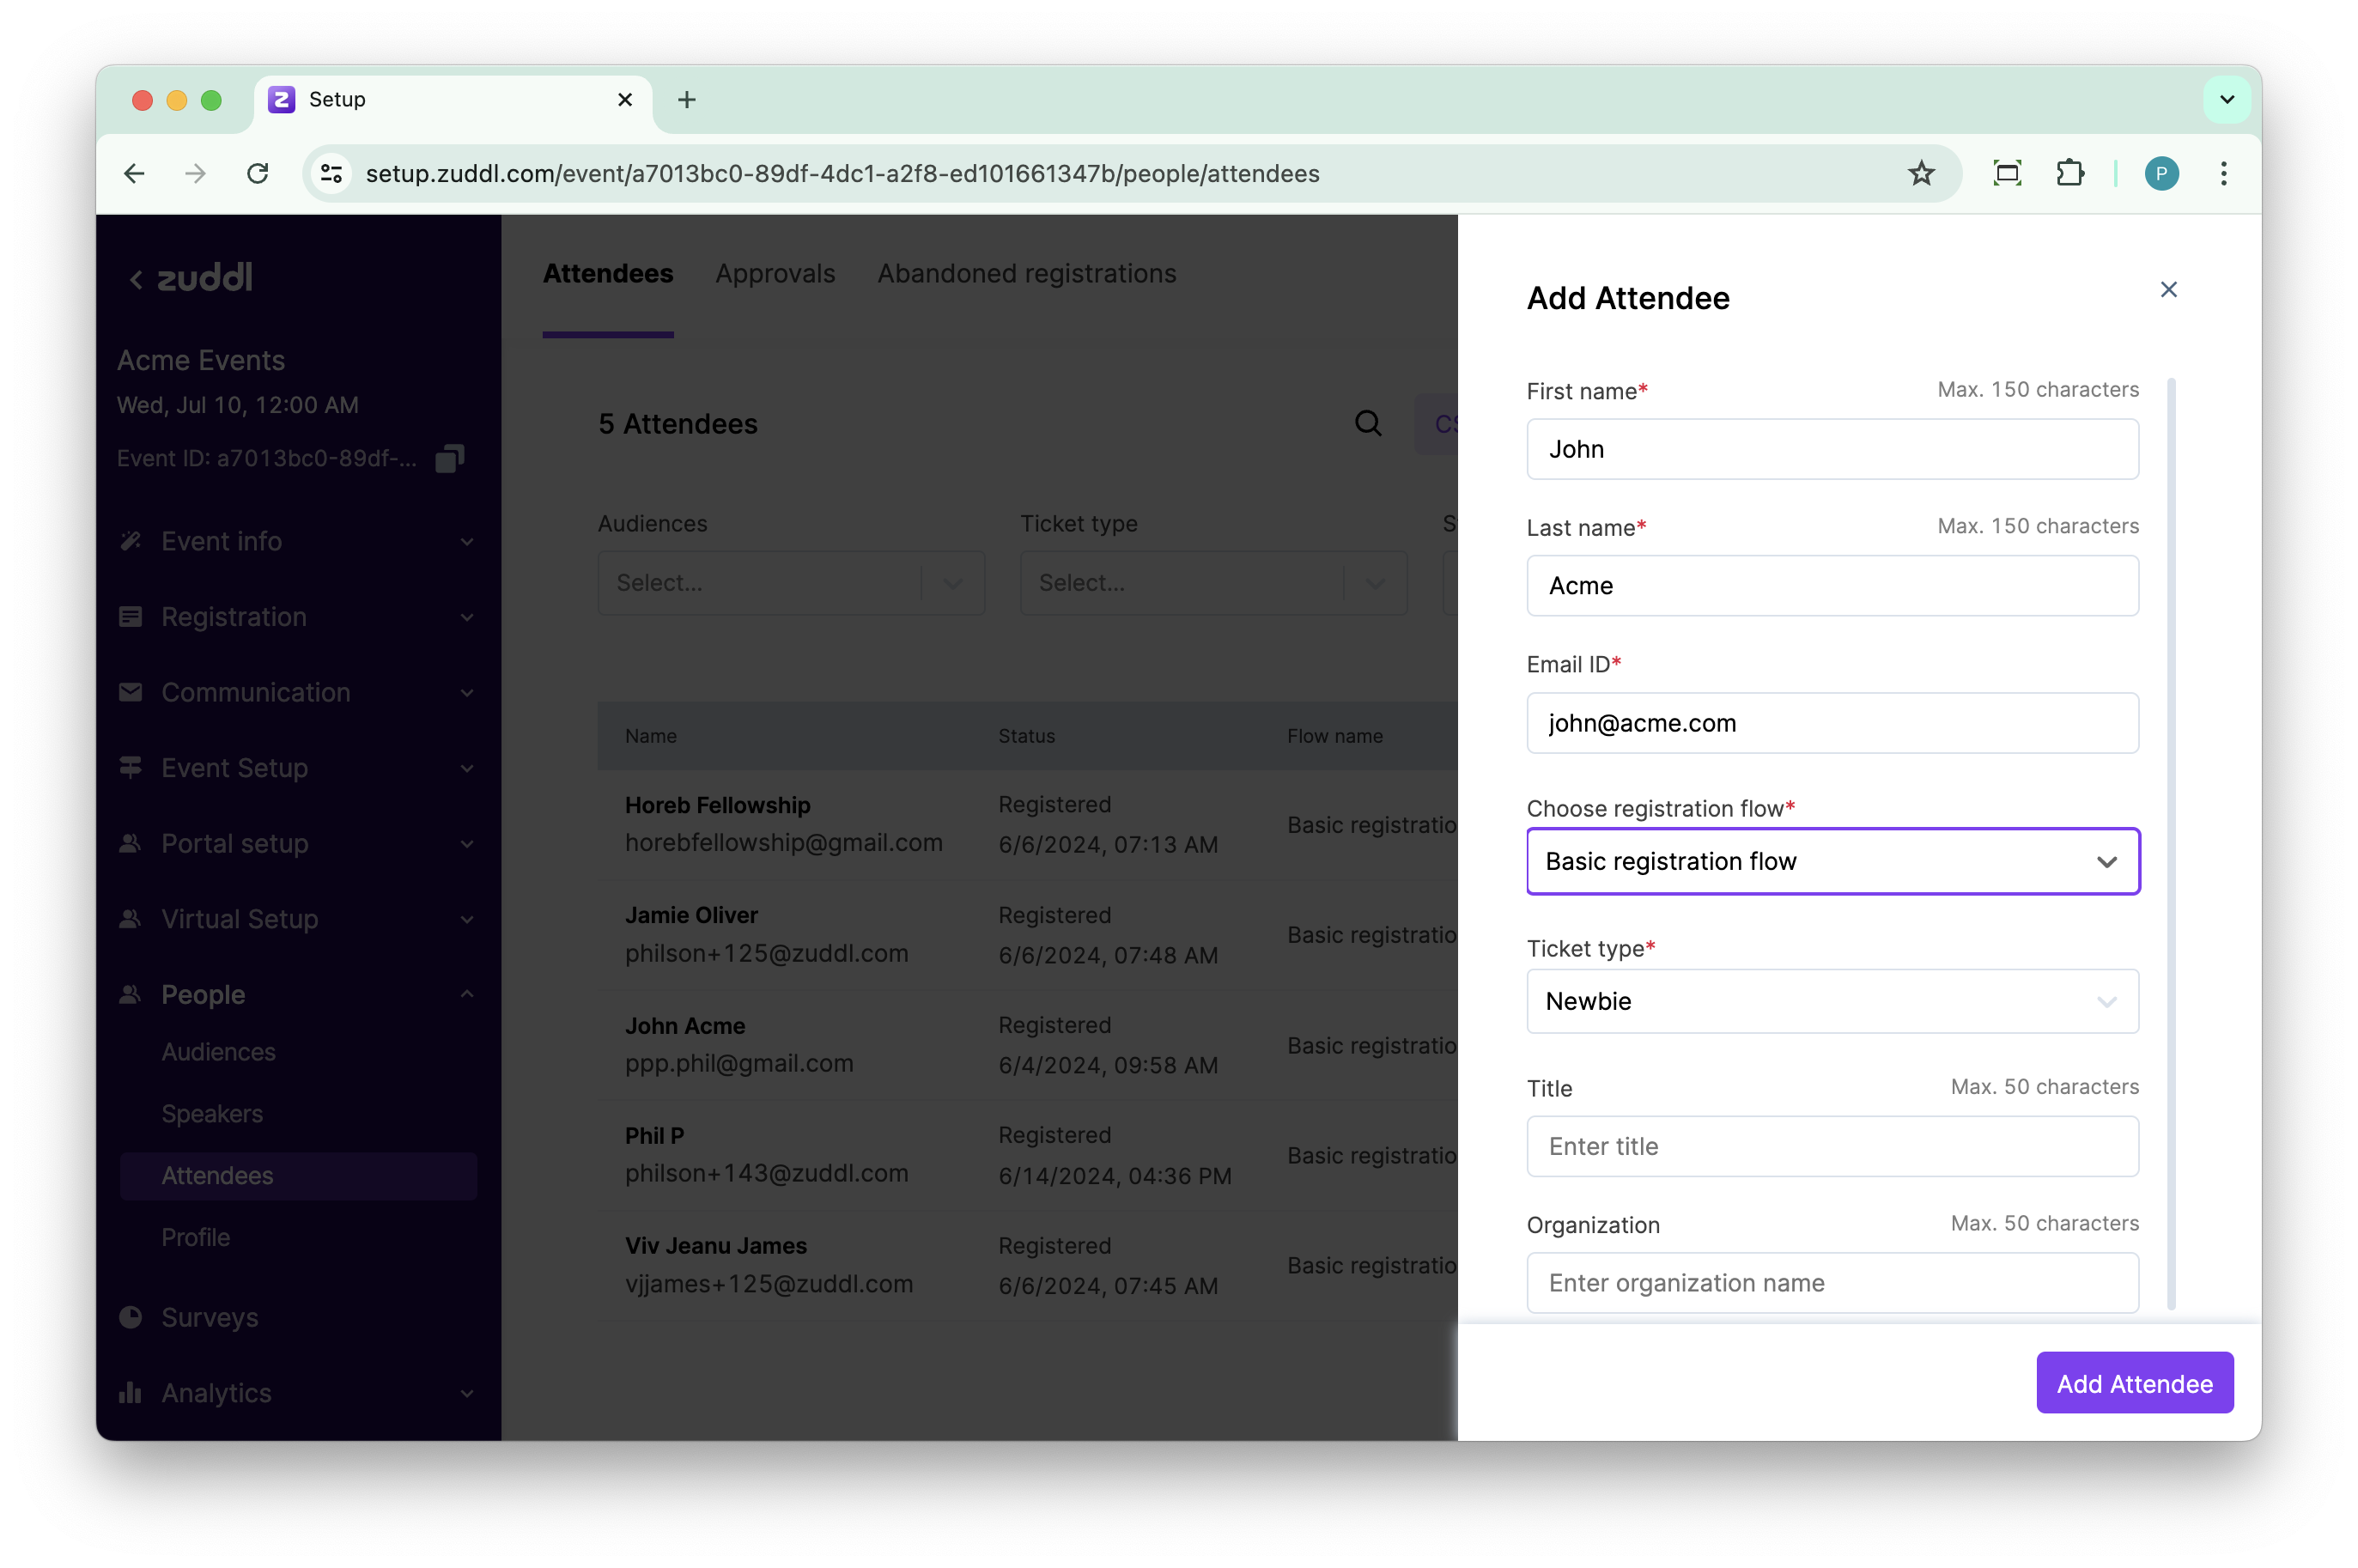
After you’ve entered all the details, click on the Add Attendee button.
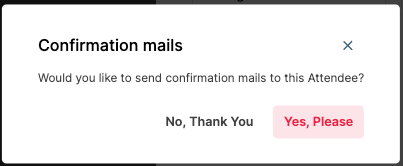
Choose a confirmation for the prompt message, Would you like to send confirmation mails to this Attendee? Select Yes, Please to send an email to the attendee.
This adds the attendee to the list. This also sends an invite to the attendee’s email address which contains the link to join the dashboard.
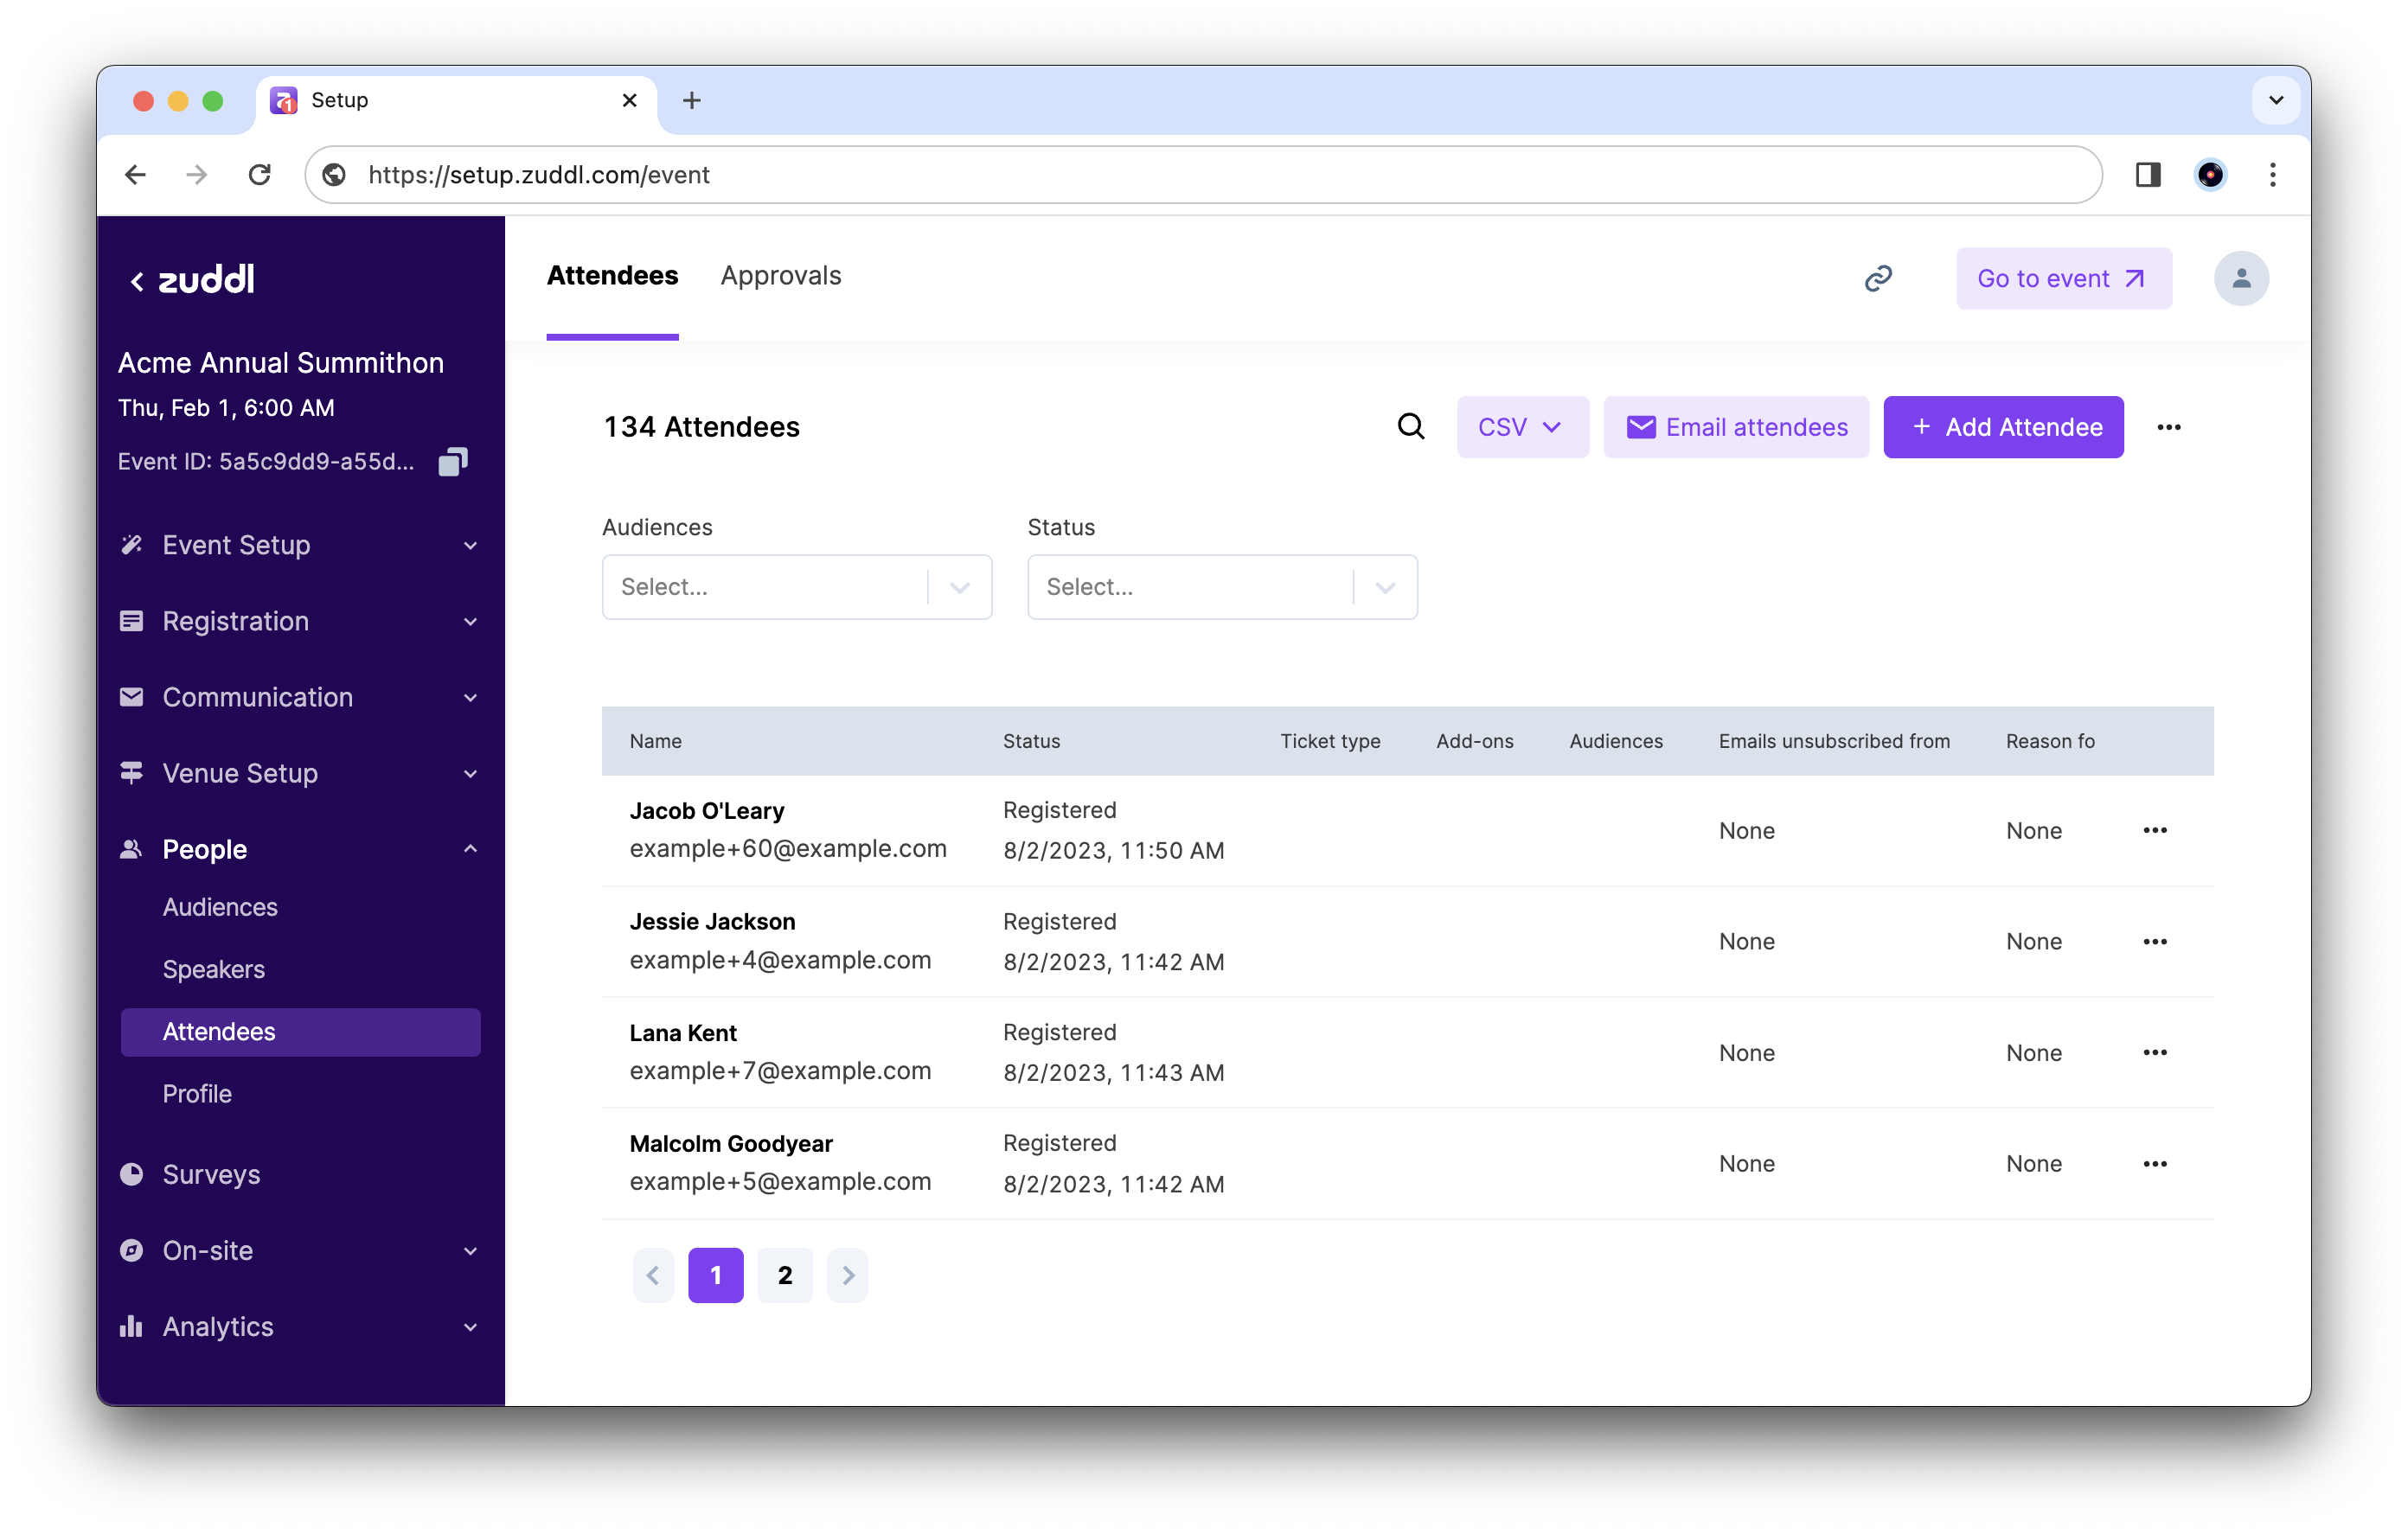
Attendee List.png
User downgrade
You can downgrade an event participant for individual events by changing their role to a less privileged role. For example, you can downgrade an organizer when you add them as attendees for your event. When you downgrade, you can confirm your action by clicking the Proceed button as shown here.
Once a role is downgraded for a participant, you can’t upgrade the role for that event. For reference, the order of roles is as follows: Organizer → Moderator → Speaker → Attendee.
Modify registrations
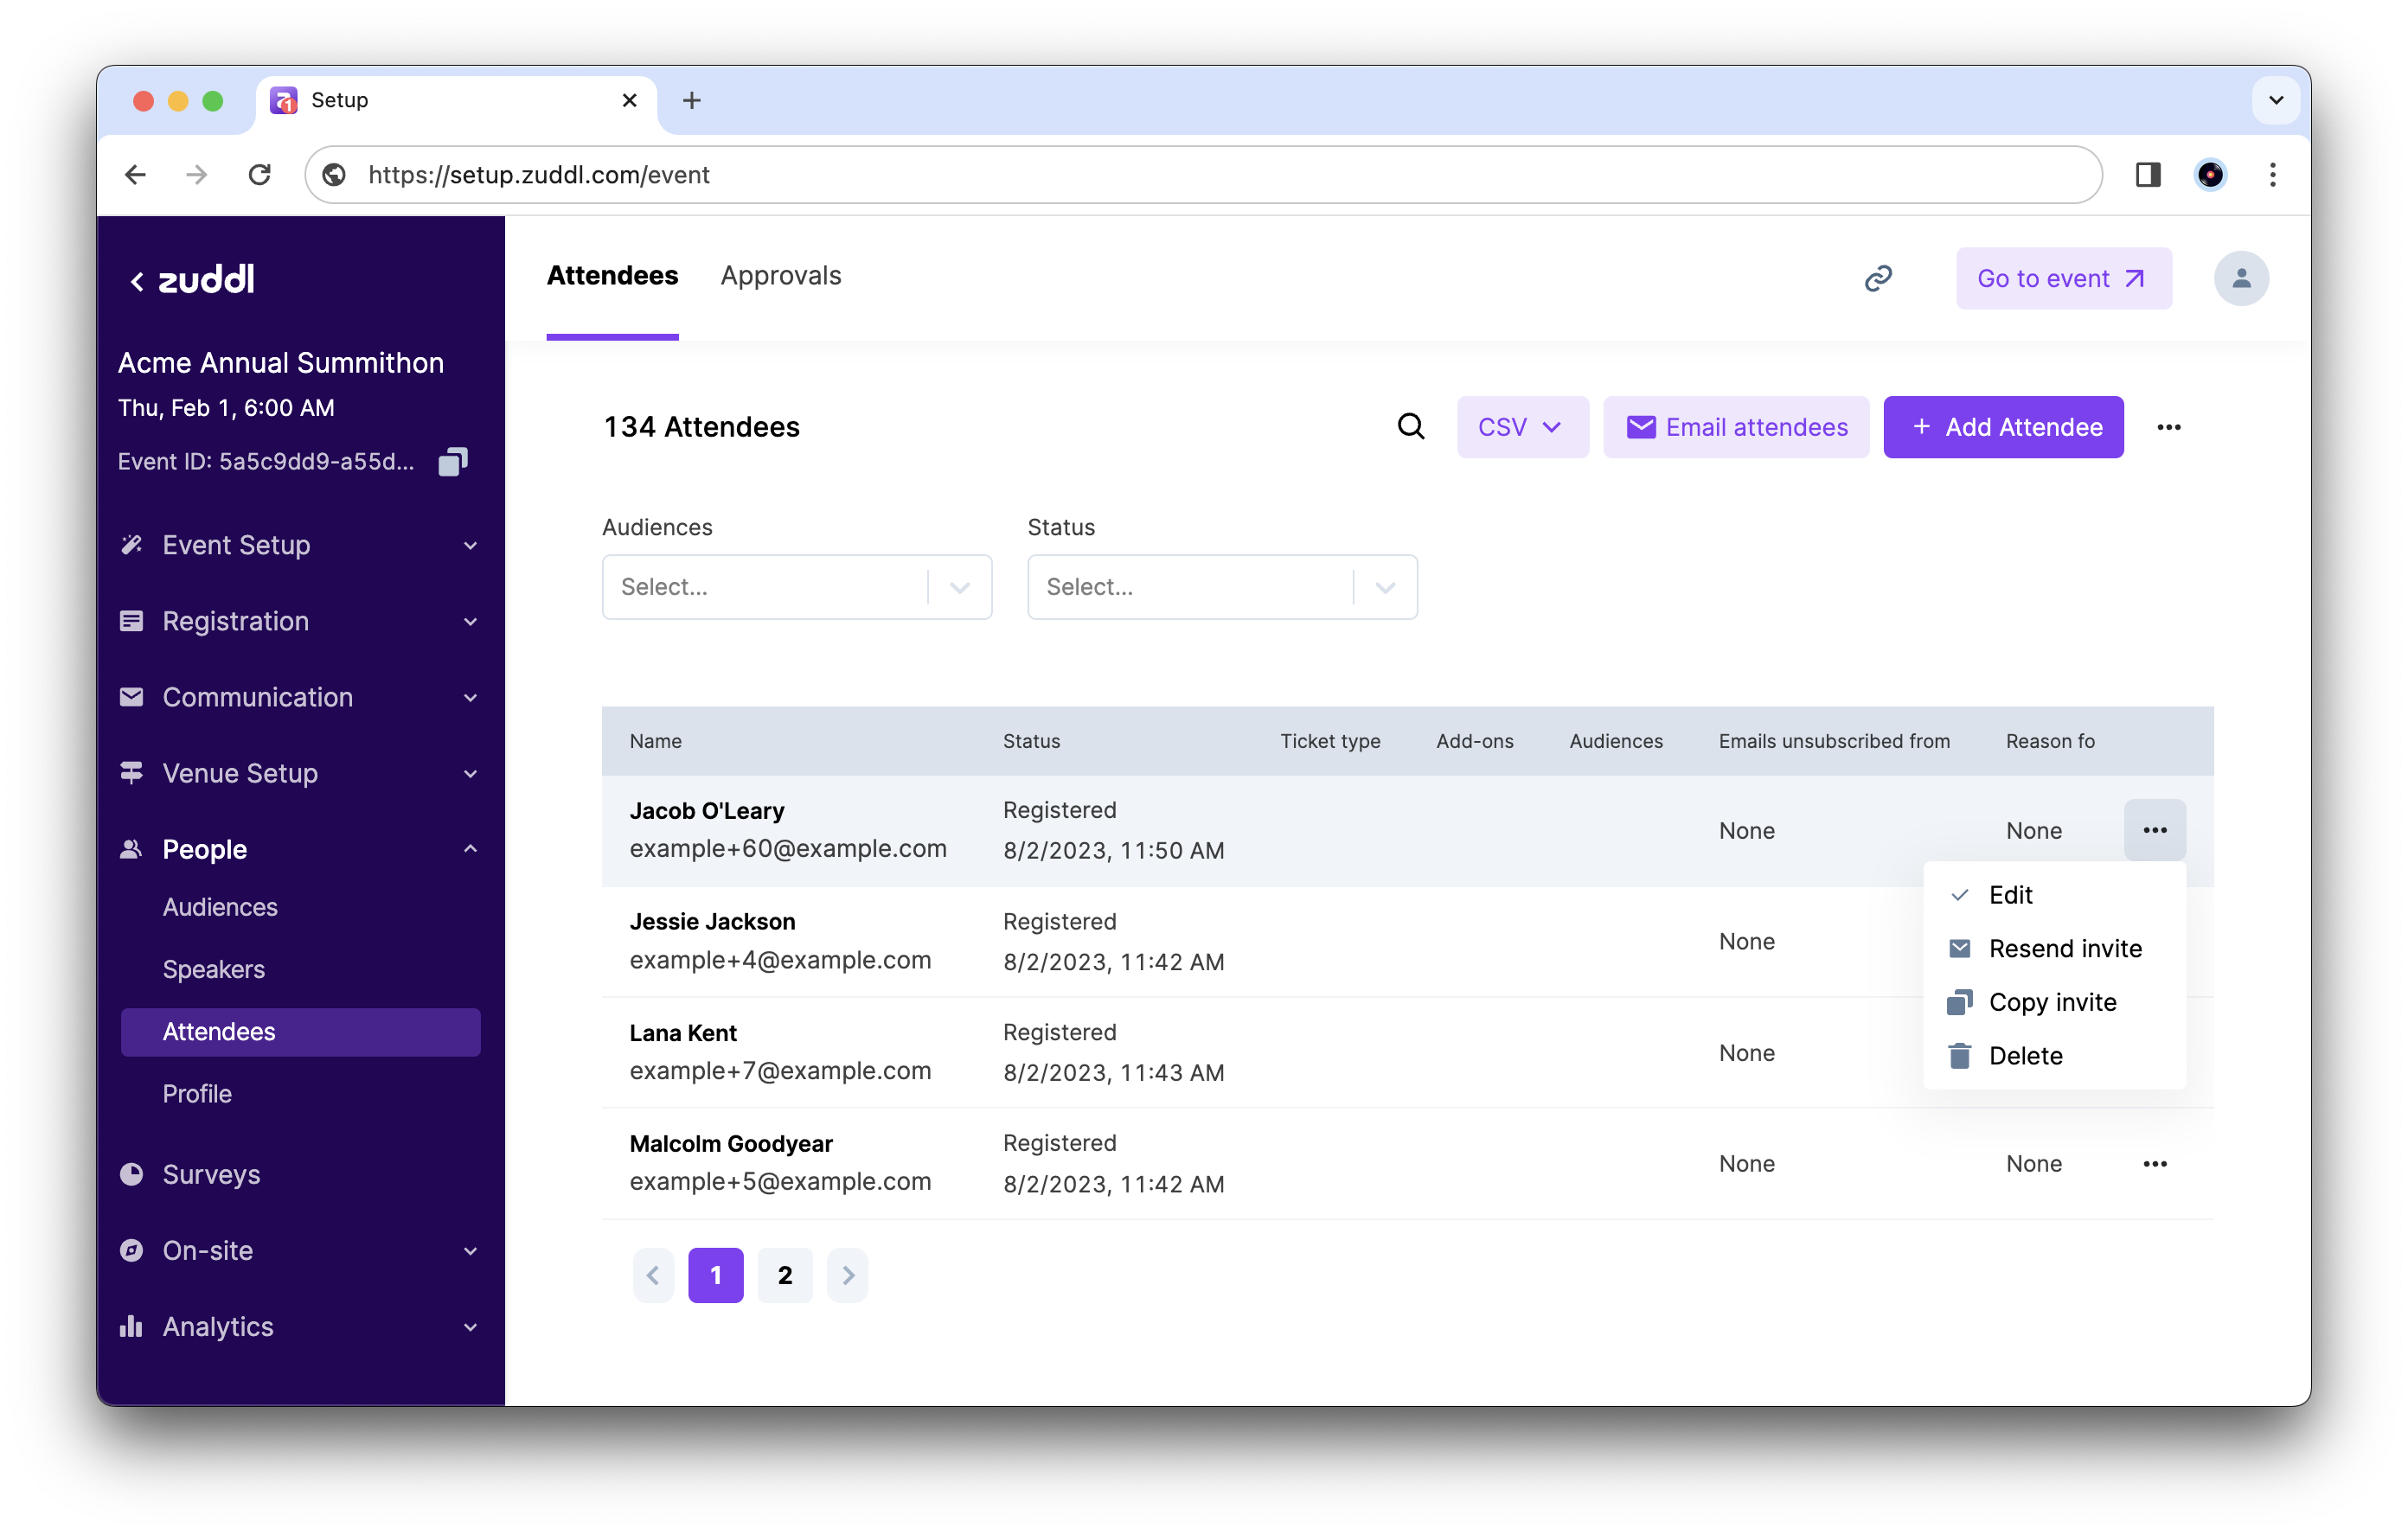
You can also click on the more options button to edit the attendee details such as audience groups. This option also allows you to modify registration details; First name, Last name, and Email address.
To modify attendee details,
Click on Modify registration button
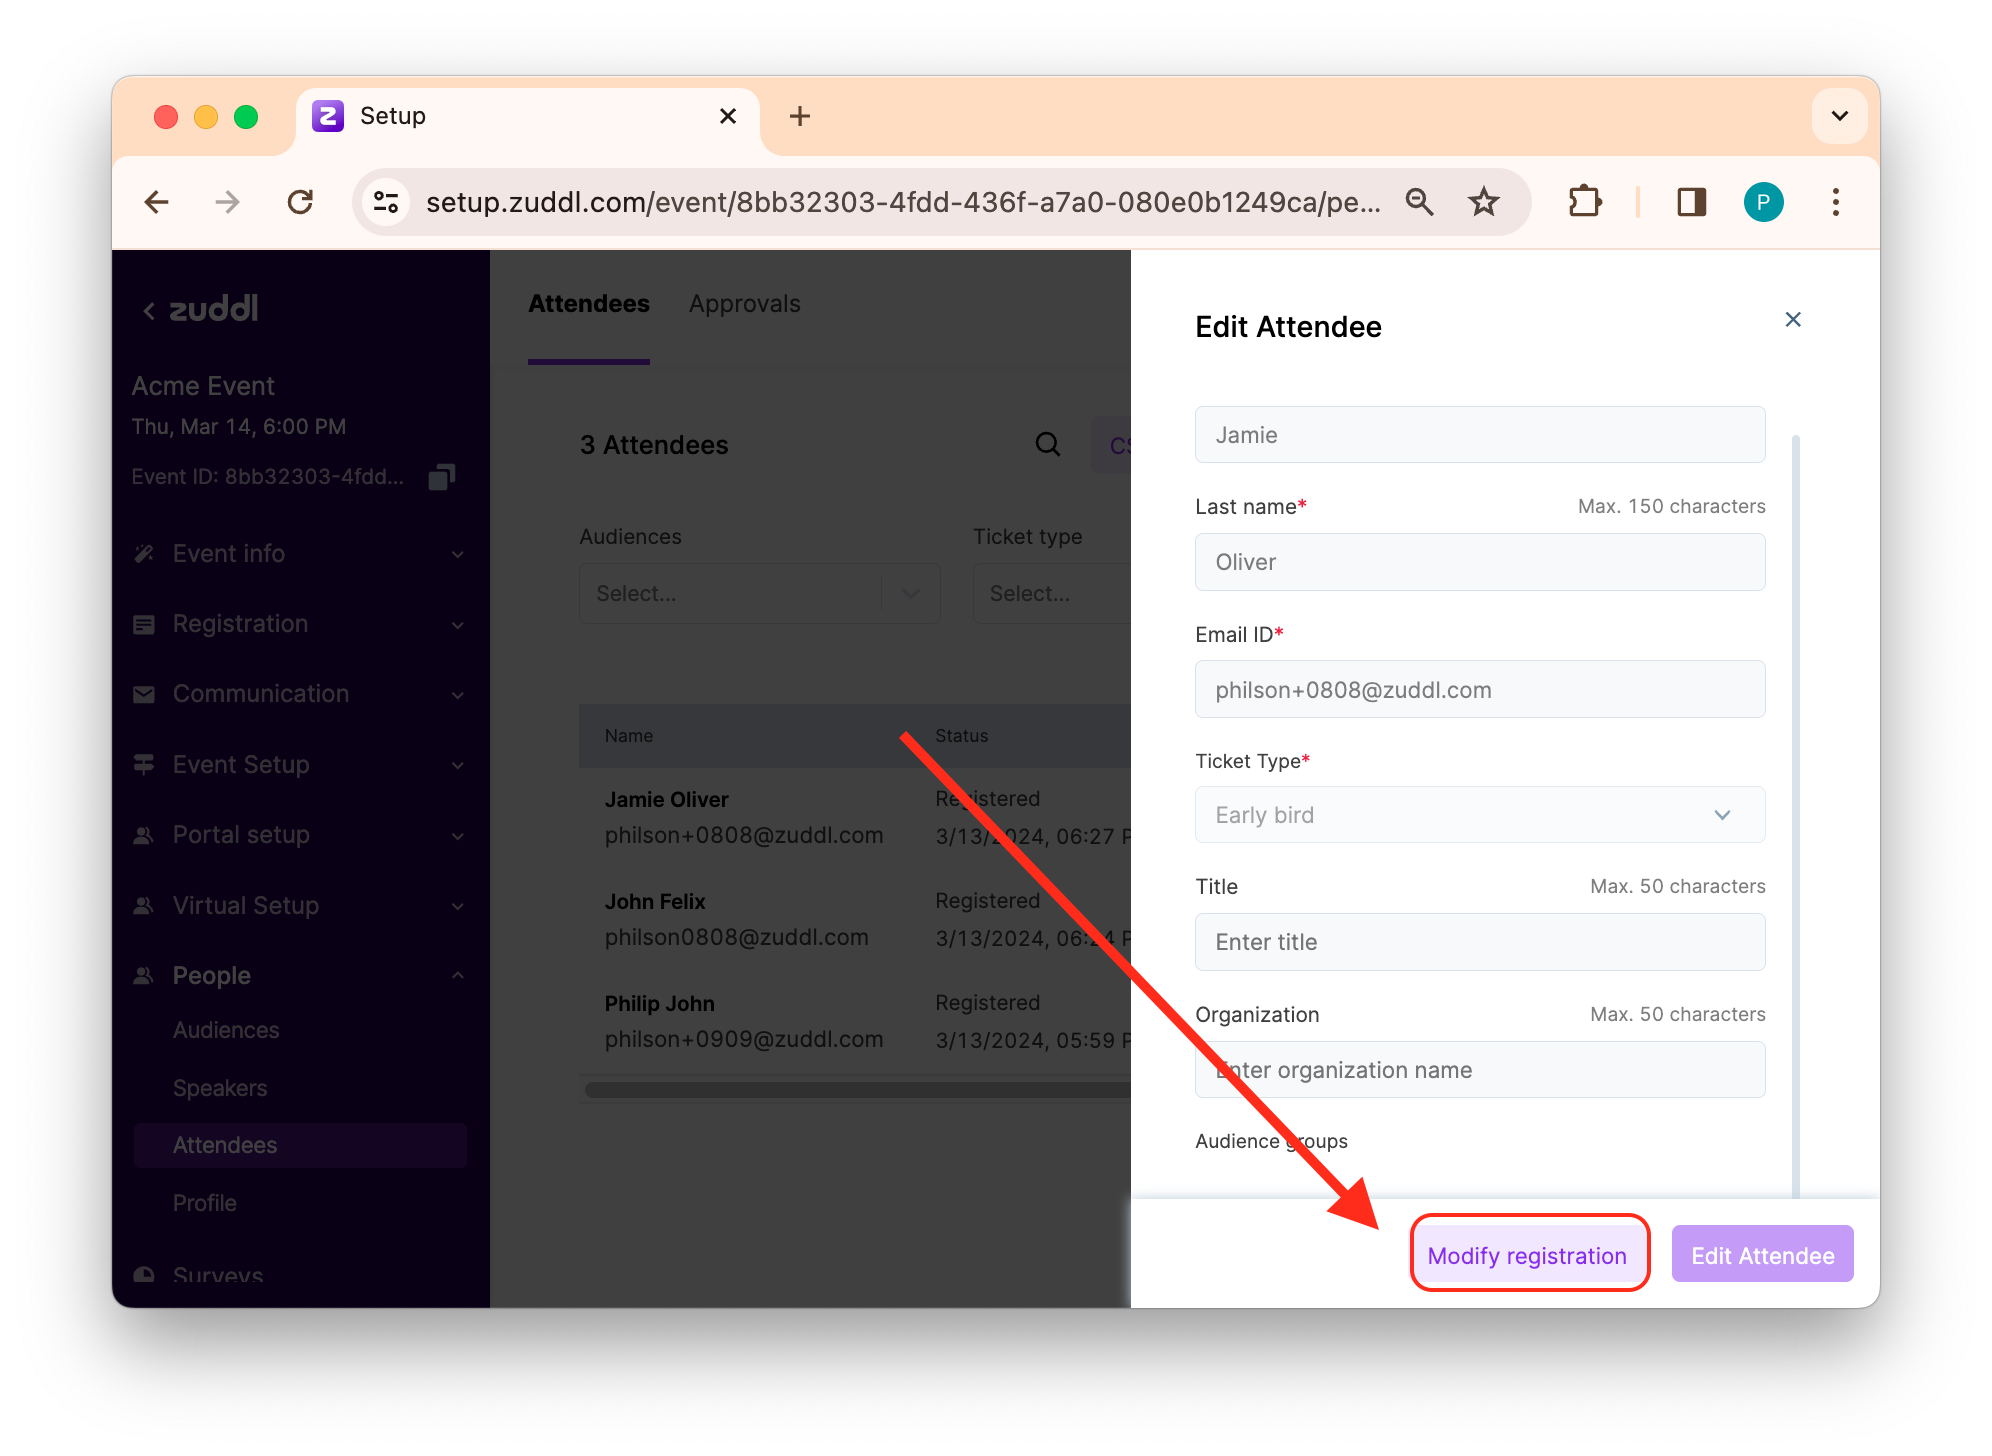
On the form, edit the required details:
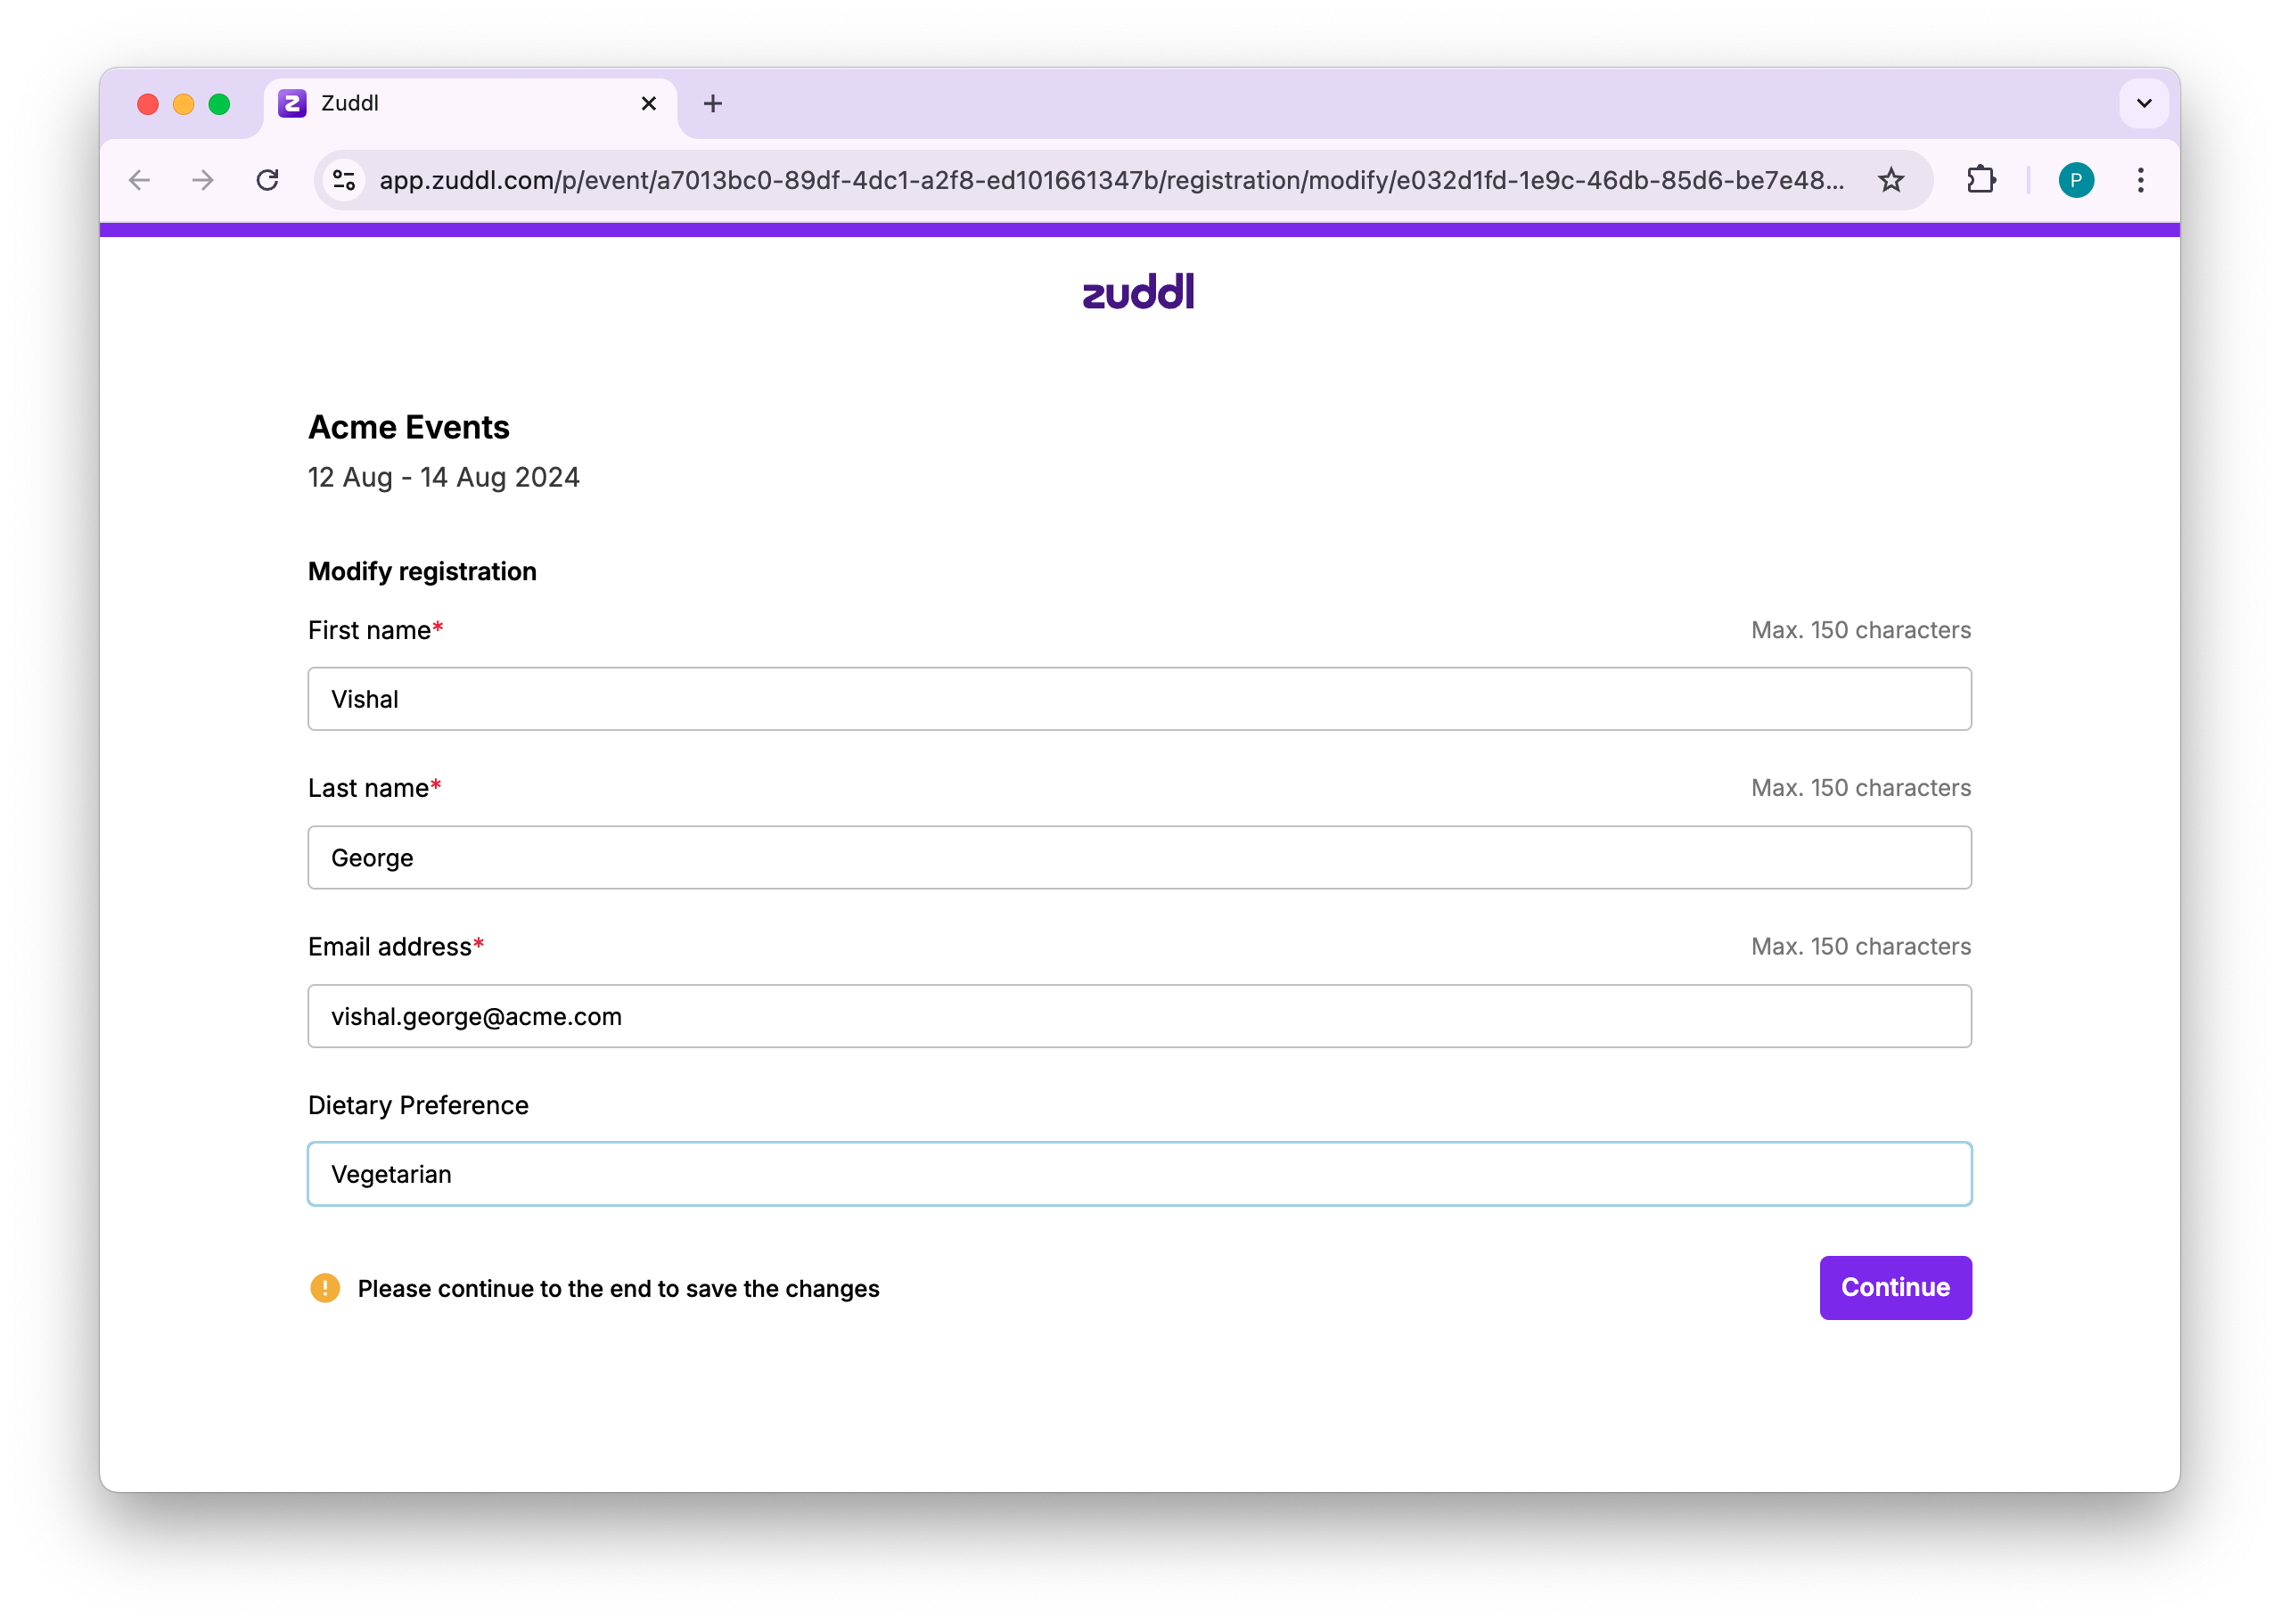
Click Continue. This updates the fields or if you have multiple forms, clicking on Continue takes you to other form fields for modifications.
An organizer can update the session picker field as well even if the session capacity limit has reached, provided all the session picker conditions are met.
Purchaser or attendee can update the sessions selected under the session picker based on the available capacity only.
The Modify registration button is applicable for registration from all entry points namely; Zuddl dashboard (individual via the 'Add attendee' button or in bulk via 'CSV'), registration page, onsite app, mobile app, and integrations.
RoleActions | |
Organizers | Can modify all details from the dashboard |
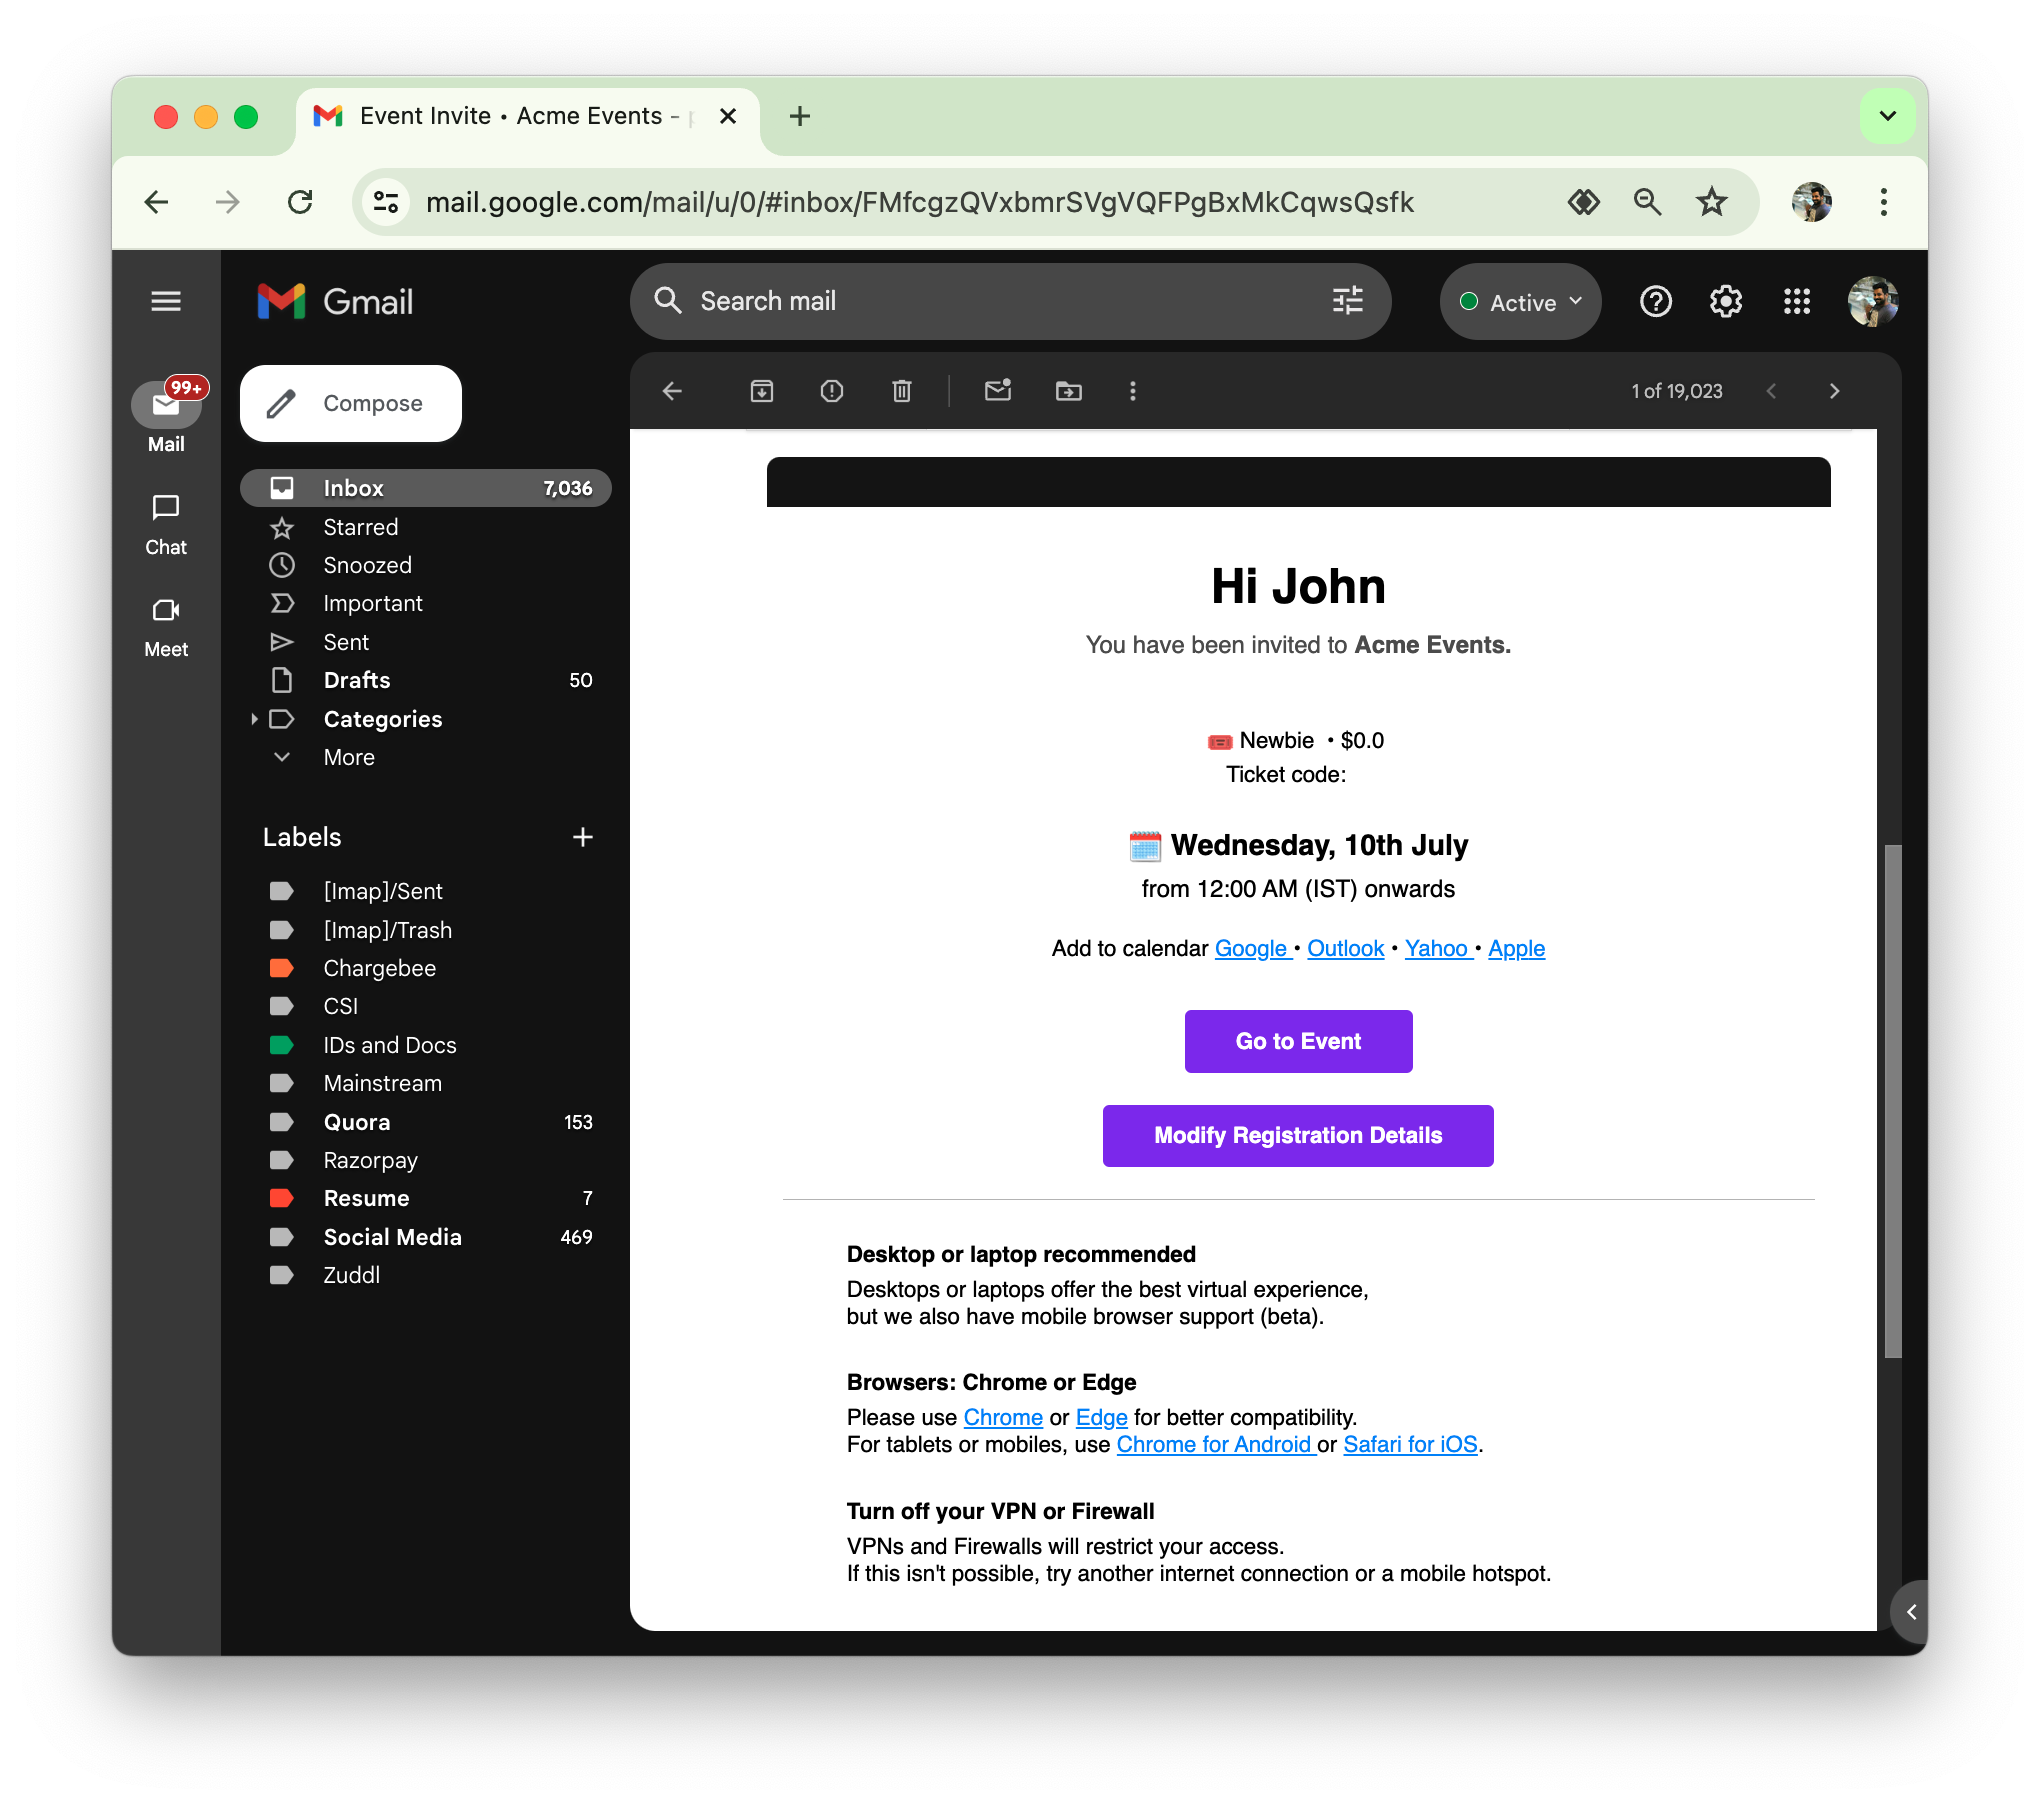
Attendees | Can modify all details from the invite email, except attendee email address |
Ticket purchasers | For a ticketed event, a ticket purchaser can modify all details till the attendee has checked in to the event. |
If you’ve created branches on forms, attendees can use the modify registration to edit all form fields including the ones in the branched out forms.
Other actions
Copy invite content. You can copy the invite content to use it elsewhere. A sample invite text is shown below: Hey John. You're registered as a speaker for the event "Acme Event". Use the following link to go to the event Hey John. You're invited for the event "Acme Event". Use the following link to go to the event
Delete an attendee
CSV actions
- Download CSV: You can download the current list of attendees in CSV format. Downloaded CSV files show all fields including hidden fields
- Import CSV: You can invite attendees in bulk by uploading a CSV file. Learn how to import attendees via CSV import.
Updating status manually
You can update the attendee status manually for any attendee. To update
Go to the Attendee menu and search for the desired attendee.
Click the more options button and click the Change status option. This expands to the following options:
Registered: Registered for the event. This status is also given to those who are added using the ‘Add attendee’ option in the event dashboard.
Attended: Participated in the event by engaging in event activities.
No show: Did not enter the event

This updates the current status of the attendee.
How Zuddl auto-update works
Status auto-updates for an attendee only moves in the following direction: Registered --> Attended --> No show (if not attended). The system auto-update does not flow backwards
For example, you manually updated the status to 'Attended' before the registrant entered the event. Now, if the registrant does not show up for the event, the manual status update is kept. Conversely, if you had manually updated the status to 'No show' before the registrant entered the event.
Later, the registrant does attend the event, Zuddl updates the status to 'Attended.'
Overwriting system update
If the system has updated the status of an attendee to 'Attended,' you can overwrite this system update to, let's say, 'No show.' The following pop-up is shown when you overwrite.
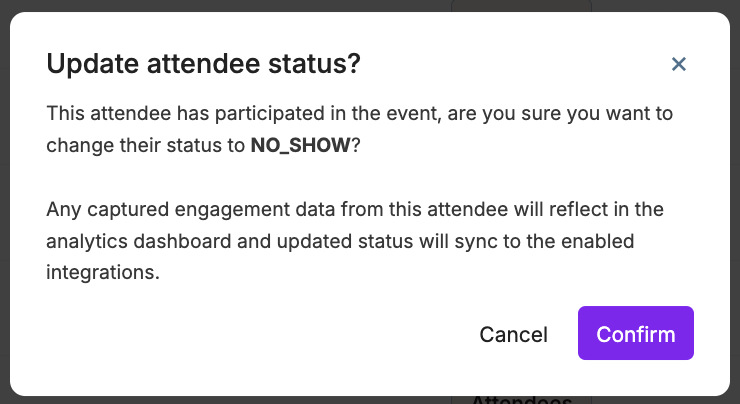
The status will remain the same until the same attendee drops out of the event and returns again. The natural flow of activity is honored and the status is overwritten to 'Attended'.
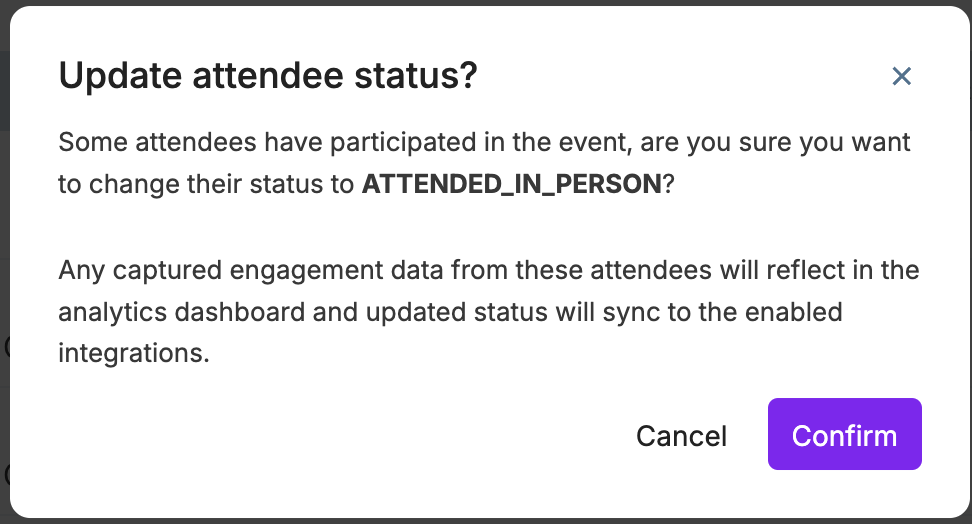
Updating attendance status in bulk
You can select multiple attendees and change status in bulk. To update in bulk
1. Select the checkbox for the required attendee.
2. Select the desired status from the Change status dropdown button.

3. Click confirm on the confirmation pop-up. This updates the status.
You can also select all attendees by select the header checkbox
The email communications will be triggered based on the attendee status at that point in time. For instance, if an attendee was marked previously marked 'No show', but before the event ends, the organizer updates the status to 'Attended'. The 'Thank You for Coming' email would be triggered instead of the 'We missed you at the event'.
Each status update is also passed to the integration.
If you have integrated with Marketo, it is highly recommended that you assign a step number for each status to prevent accidentally allowing a status to go backward in the user journey. Learn how to assign steps for status in Marketo.