How to Create a Registration Flow for an In-person Event in Zuddl
Last updated: September 3, 2025
Flow builder allows you to tailor your registration style for your event, enabling you to customize each registration step based on your business needs.
Editing the flow
In the form section, you can add or edit fields on the registration form
Log in to your Zuddl dashboard.
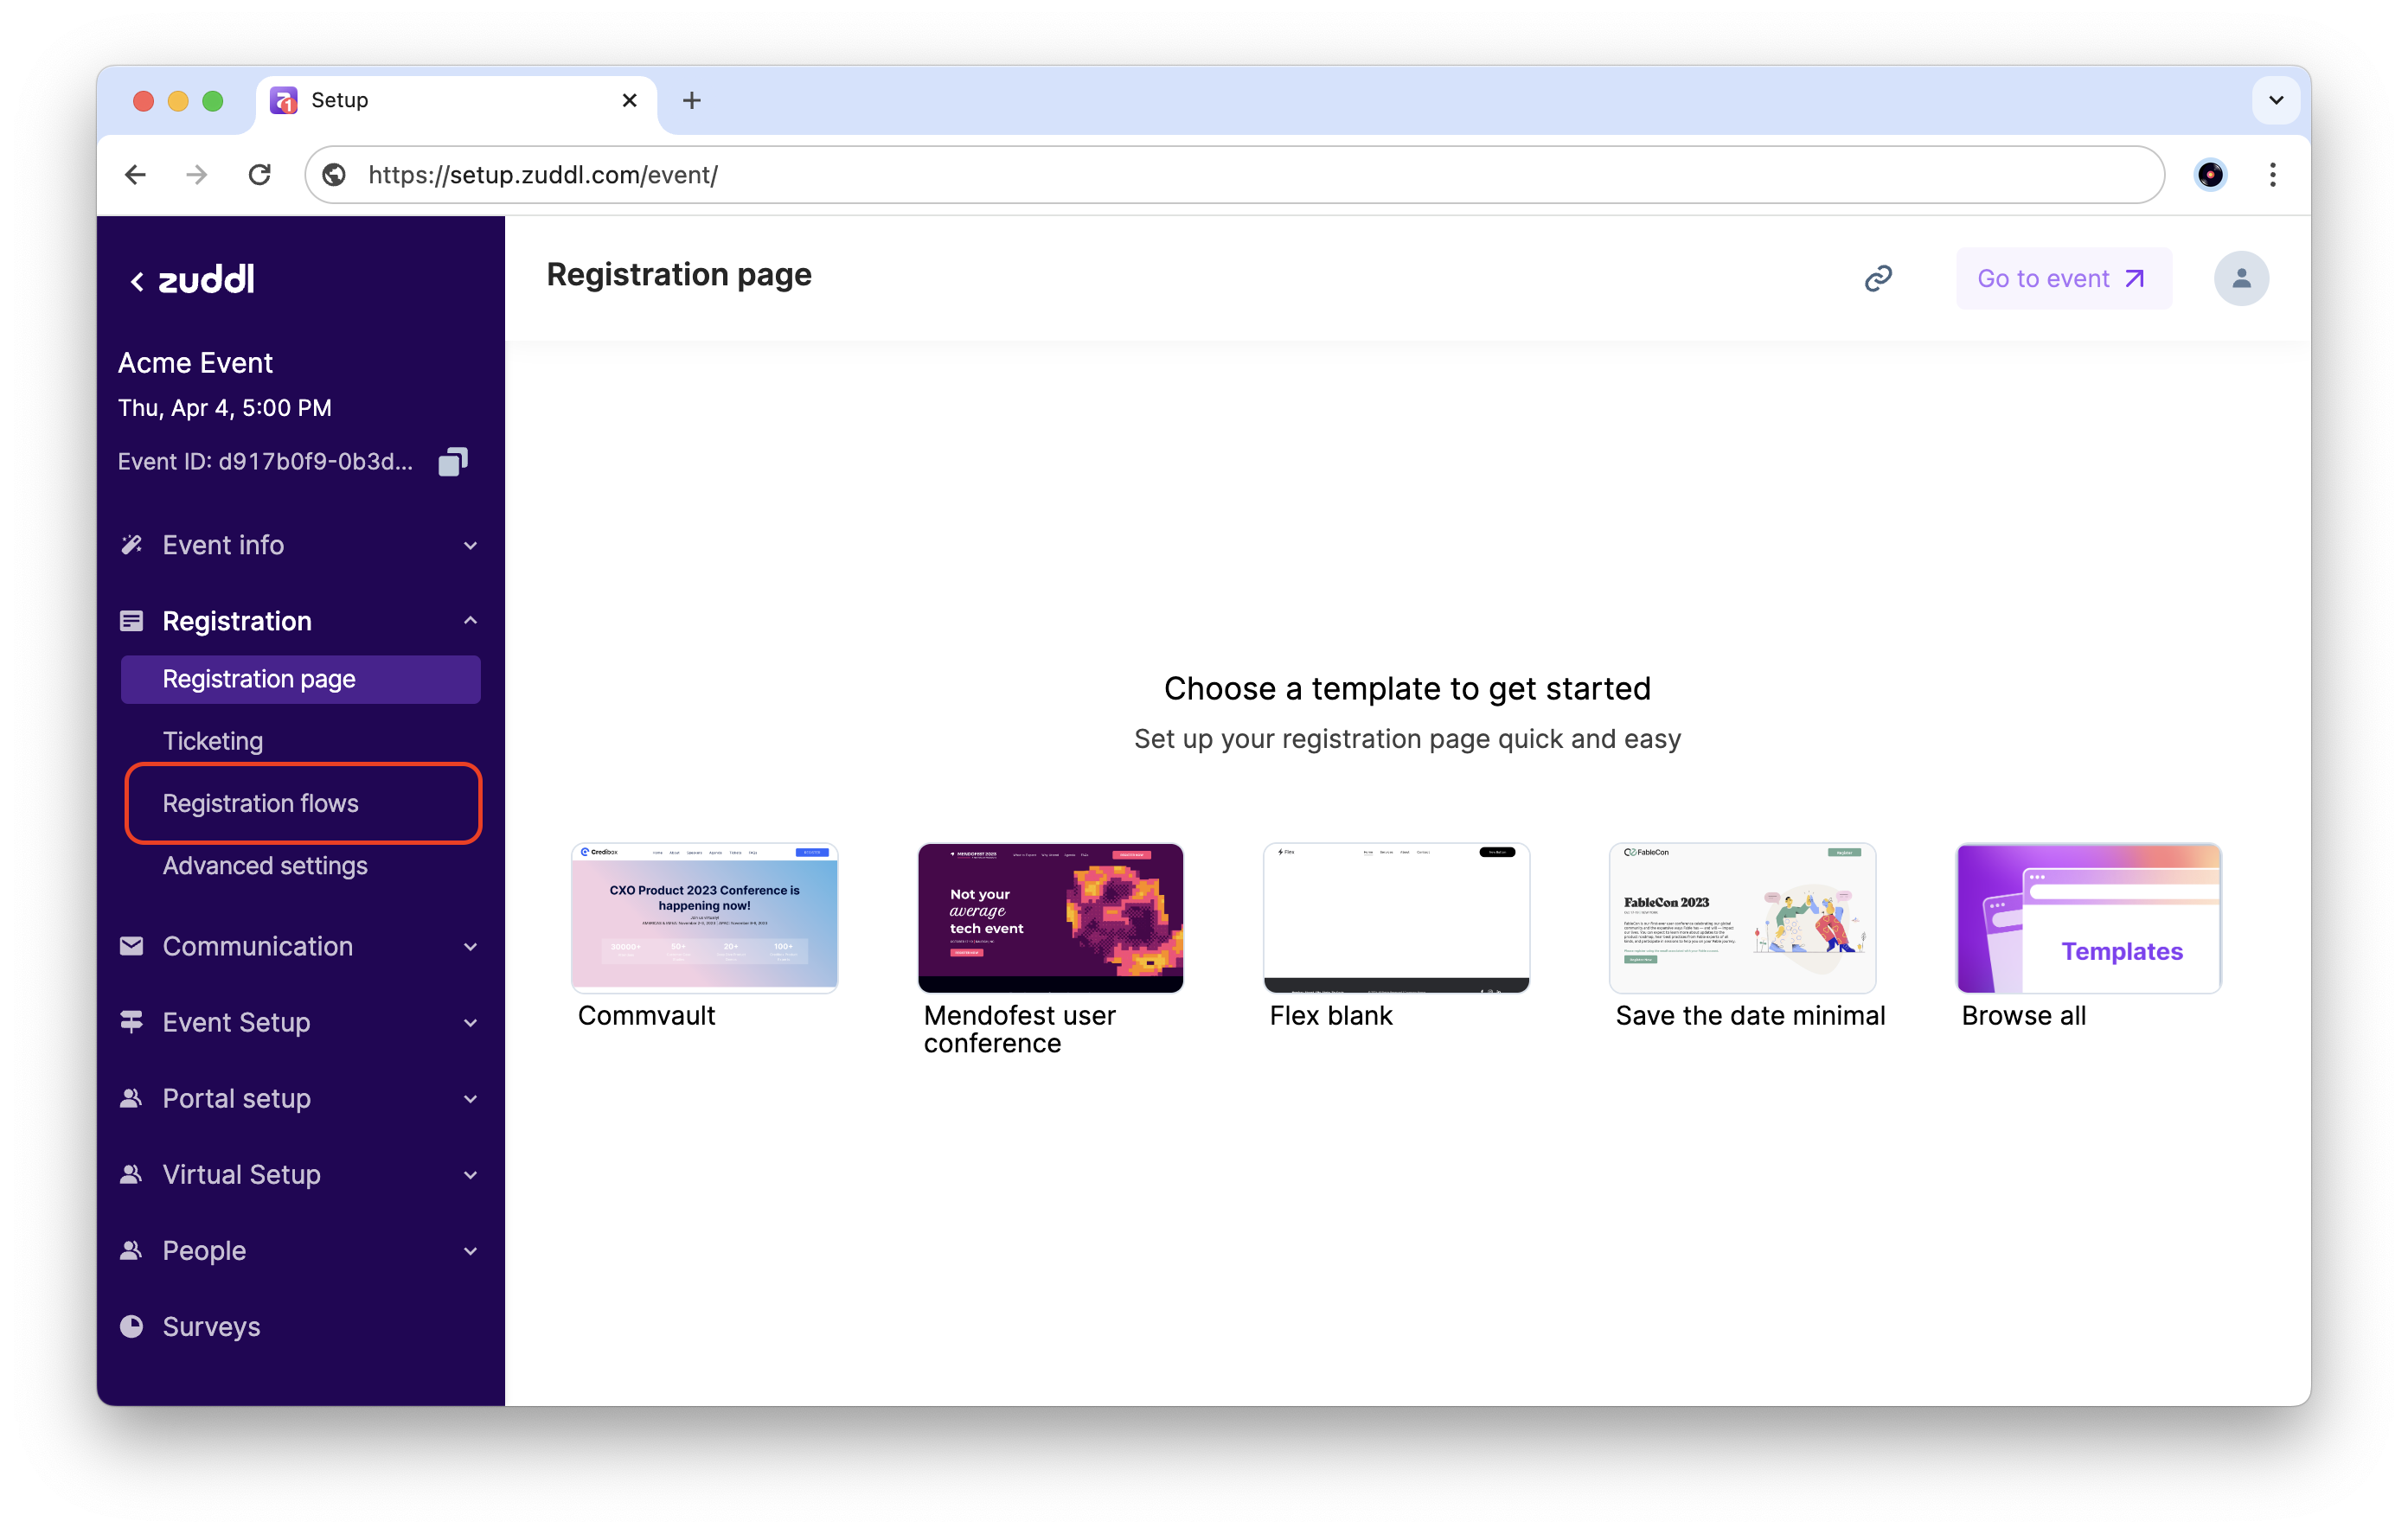
Navigate to Registration > Flow. This redirects you to the flow builder page.
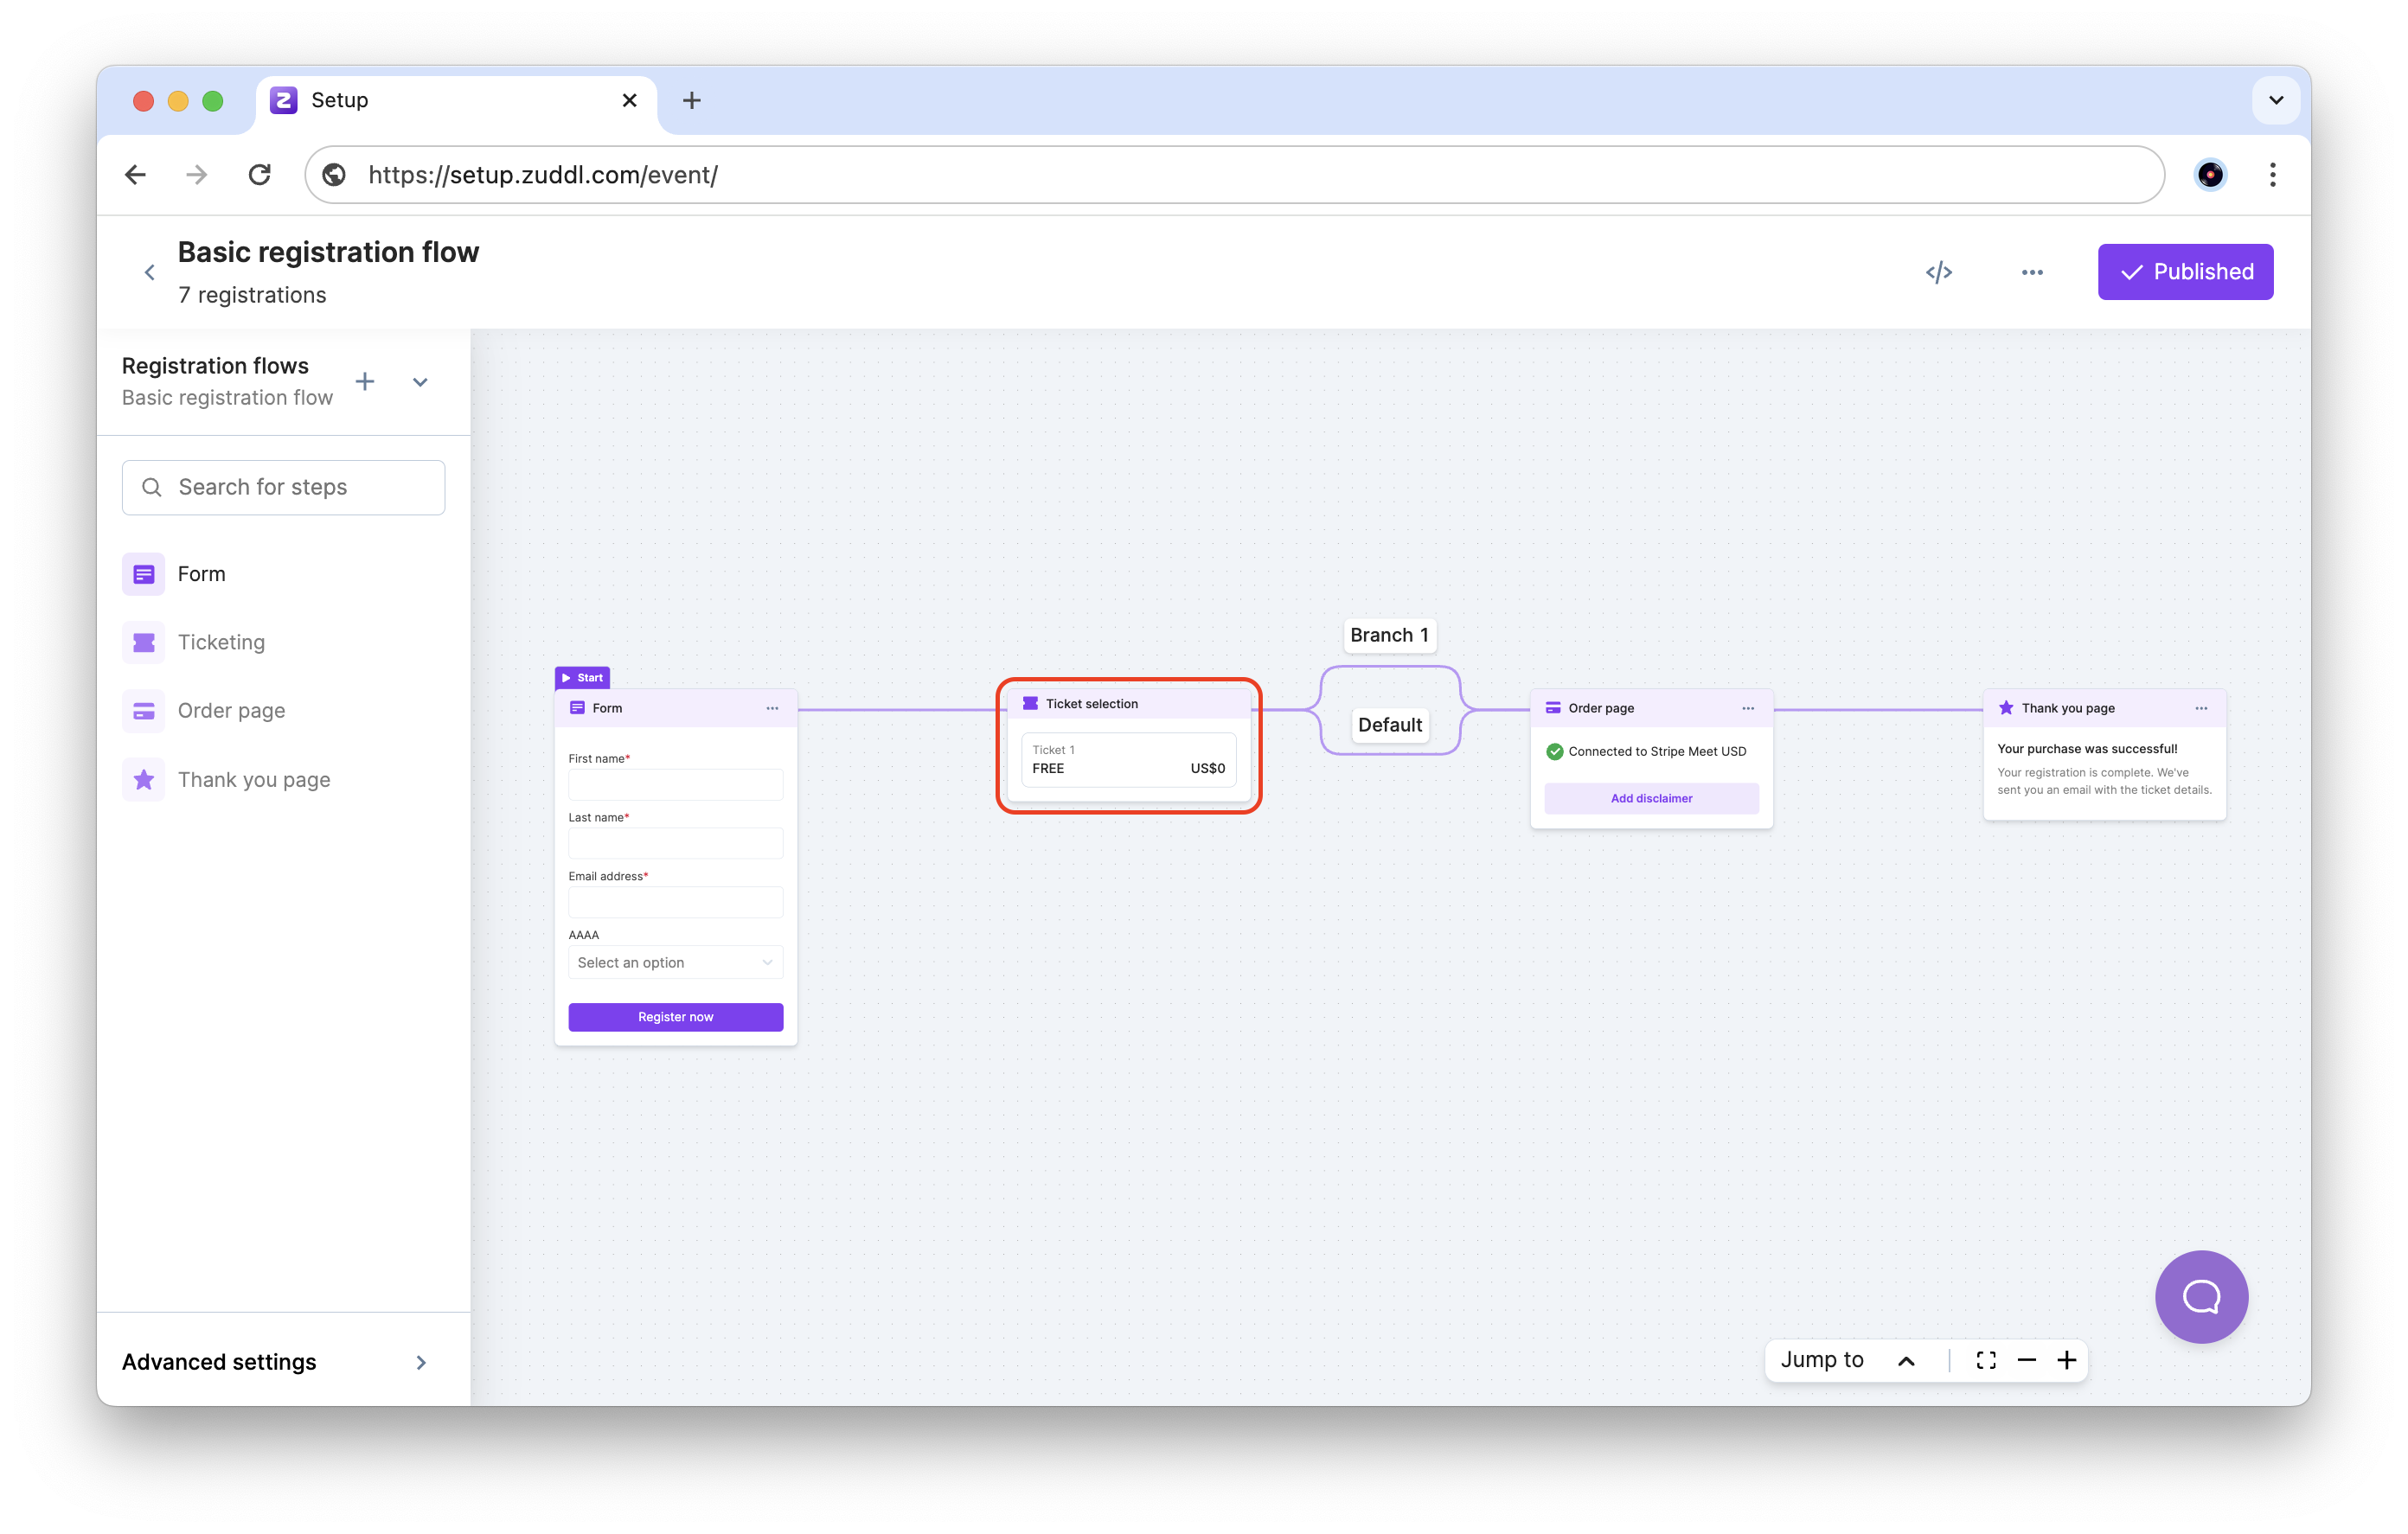
You enter the flow builder screen in the draft state.
Create a form
In the form section, you can add or edit fields on the registration form. Edit the display name of the standard fields.
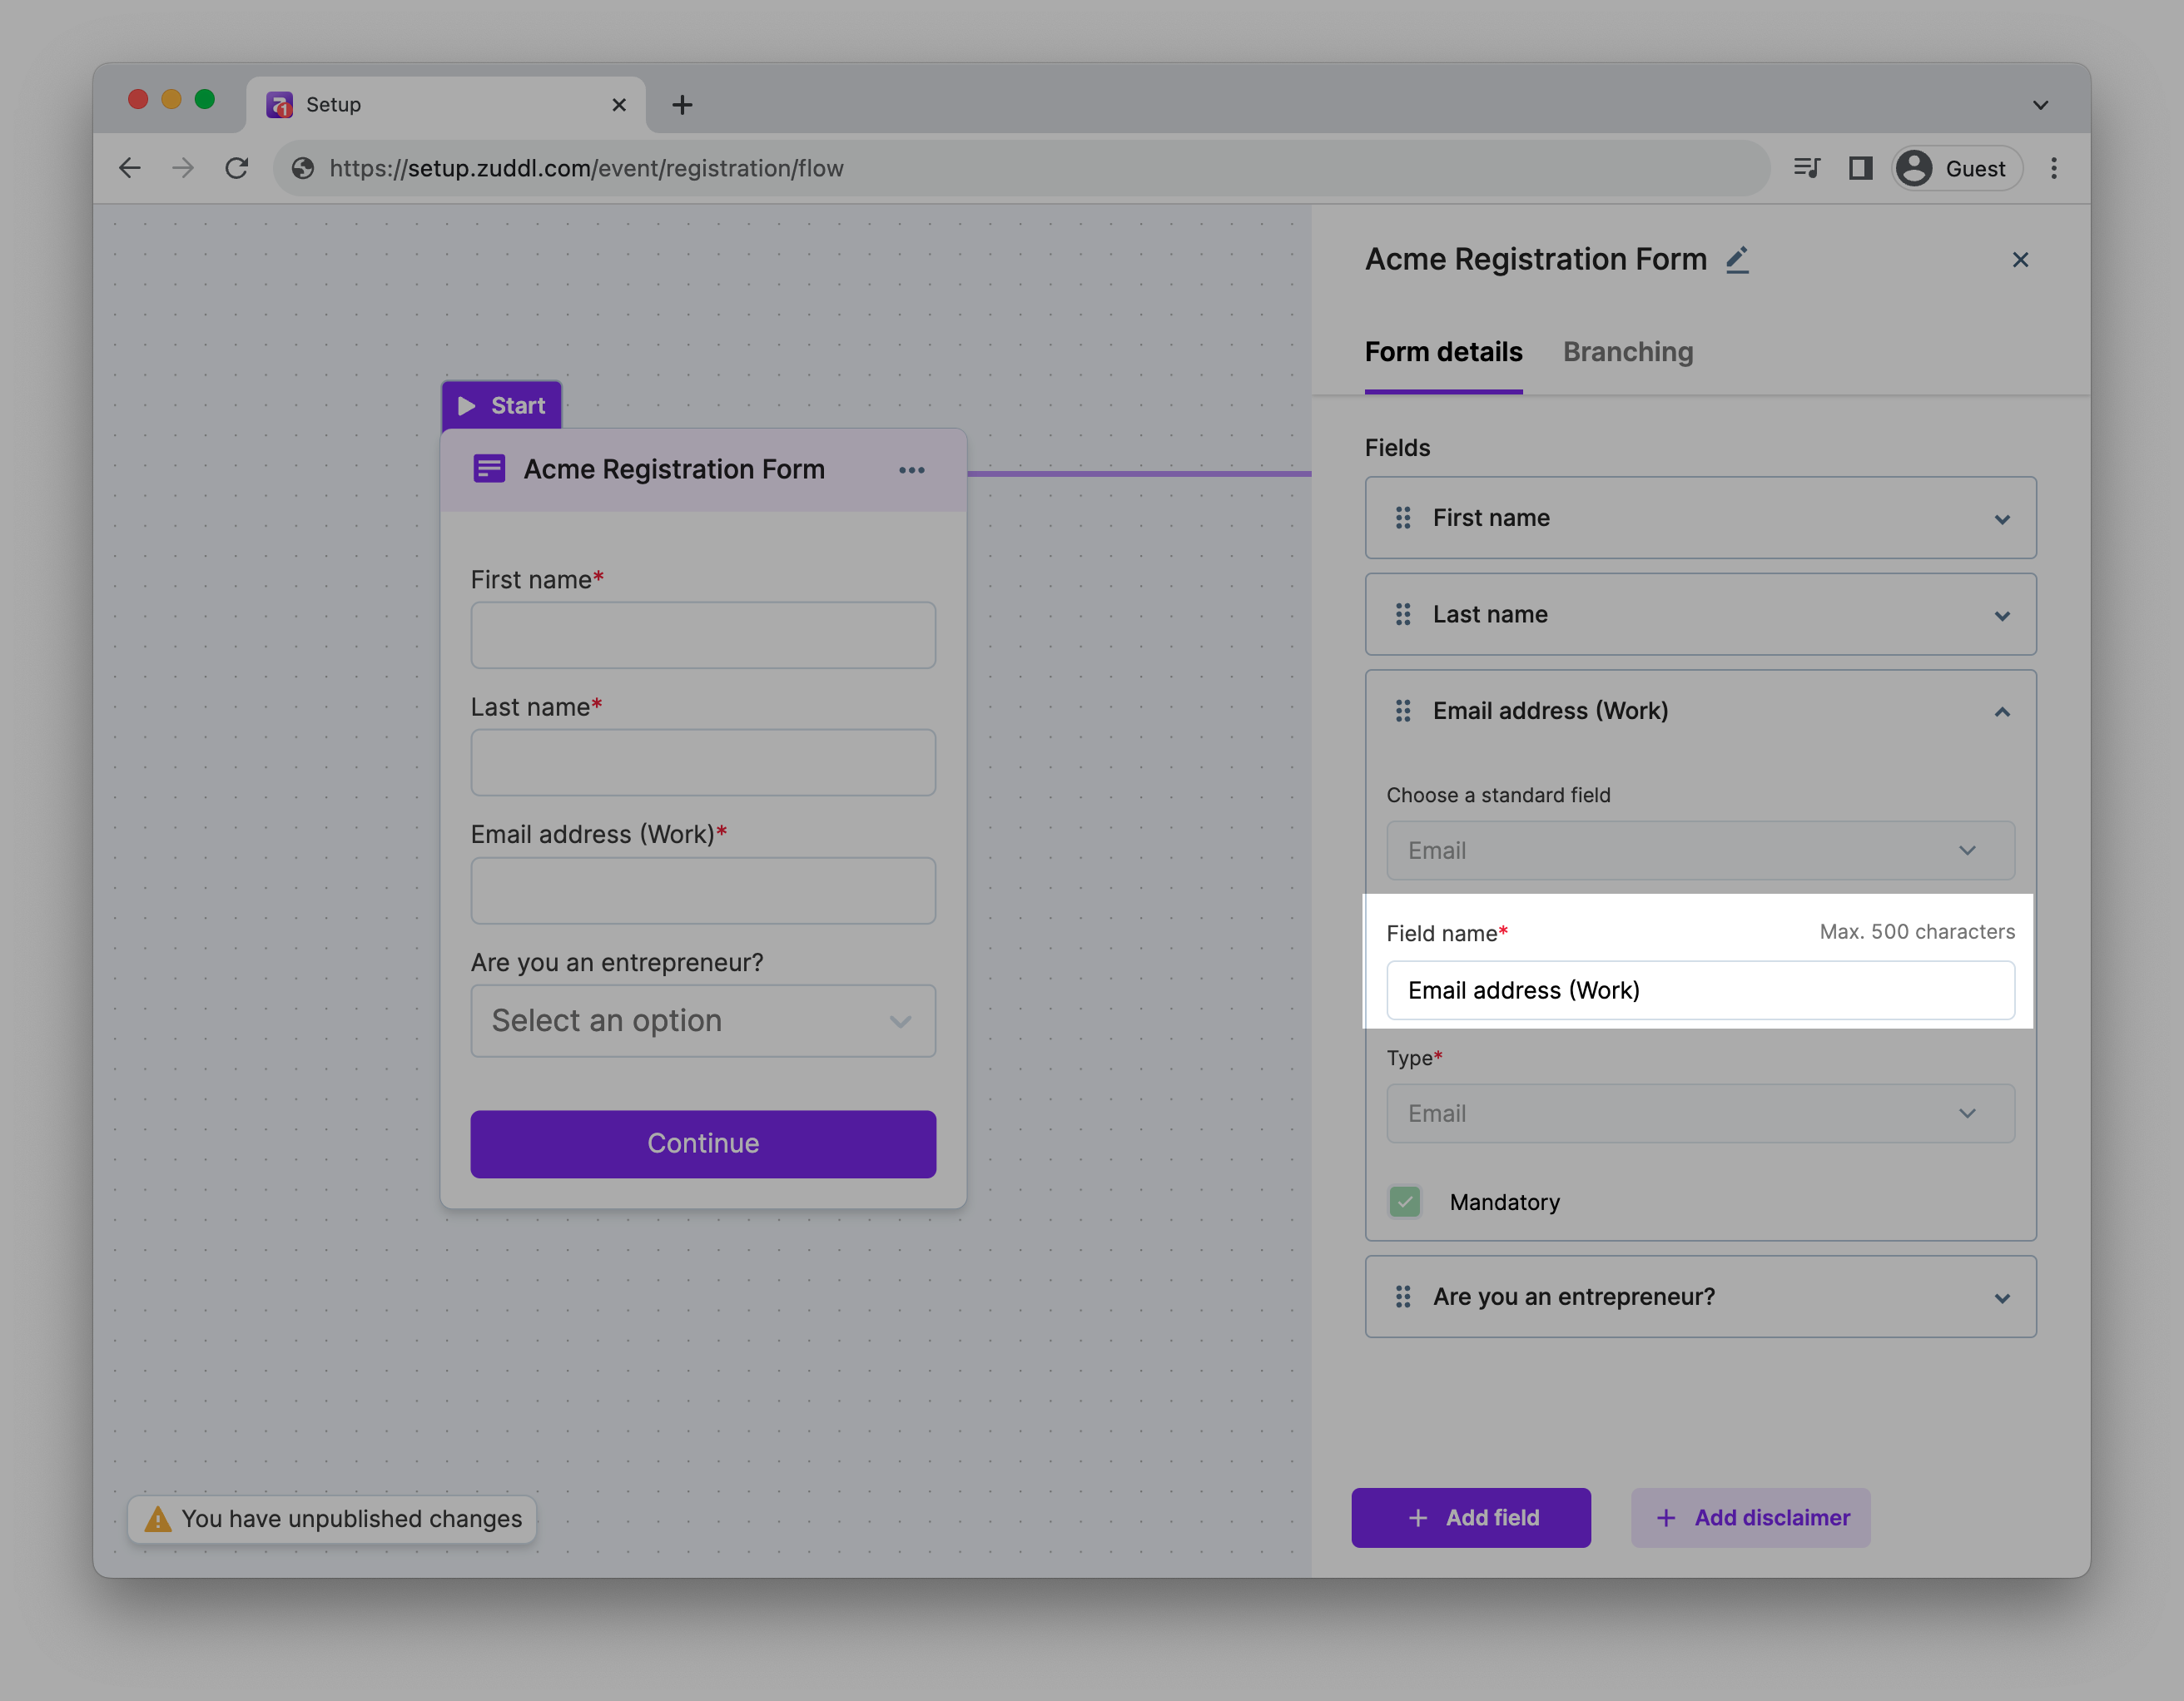
You can only edit the display name of the standard registration fields. Other properties cannot be edited.
Click +Add field to add a new standard or custom field.
You can choose from a list of standard fields or create a new custom field (default).
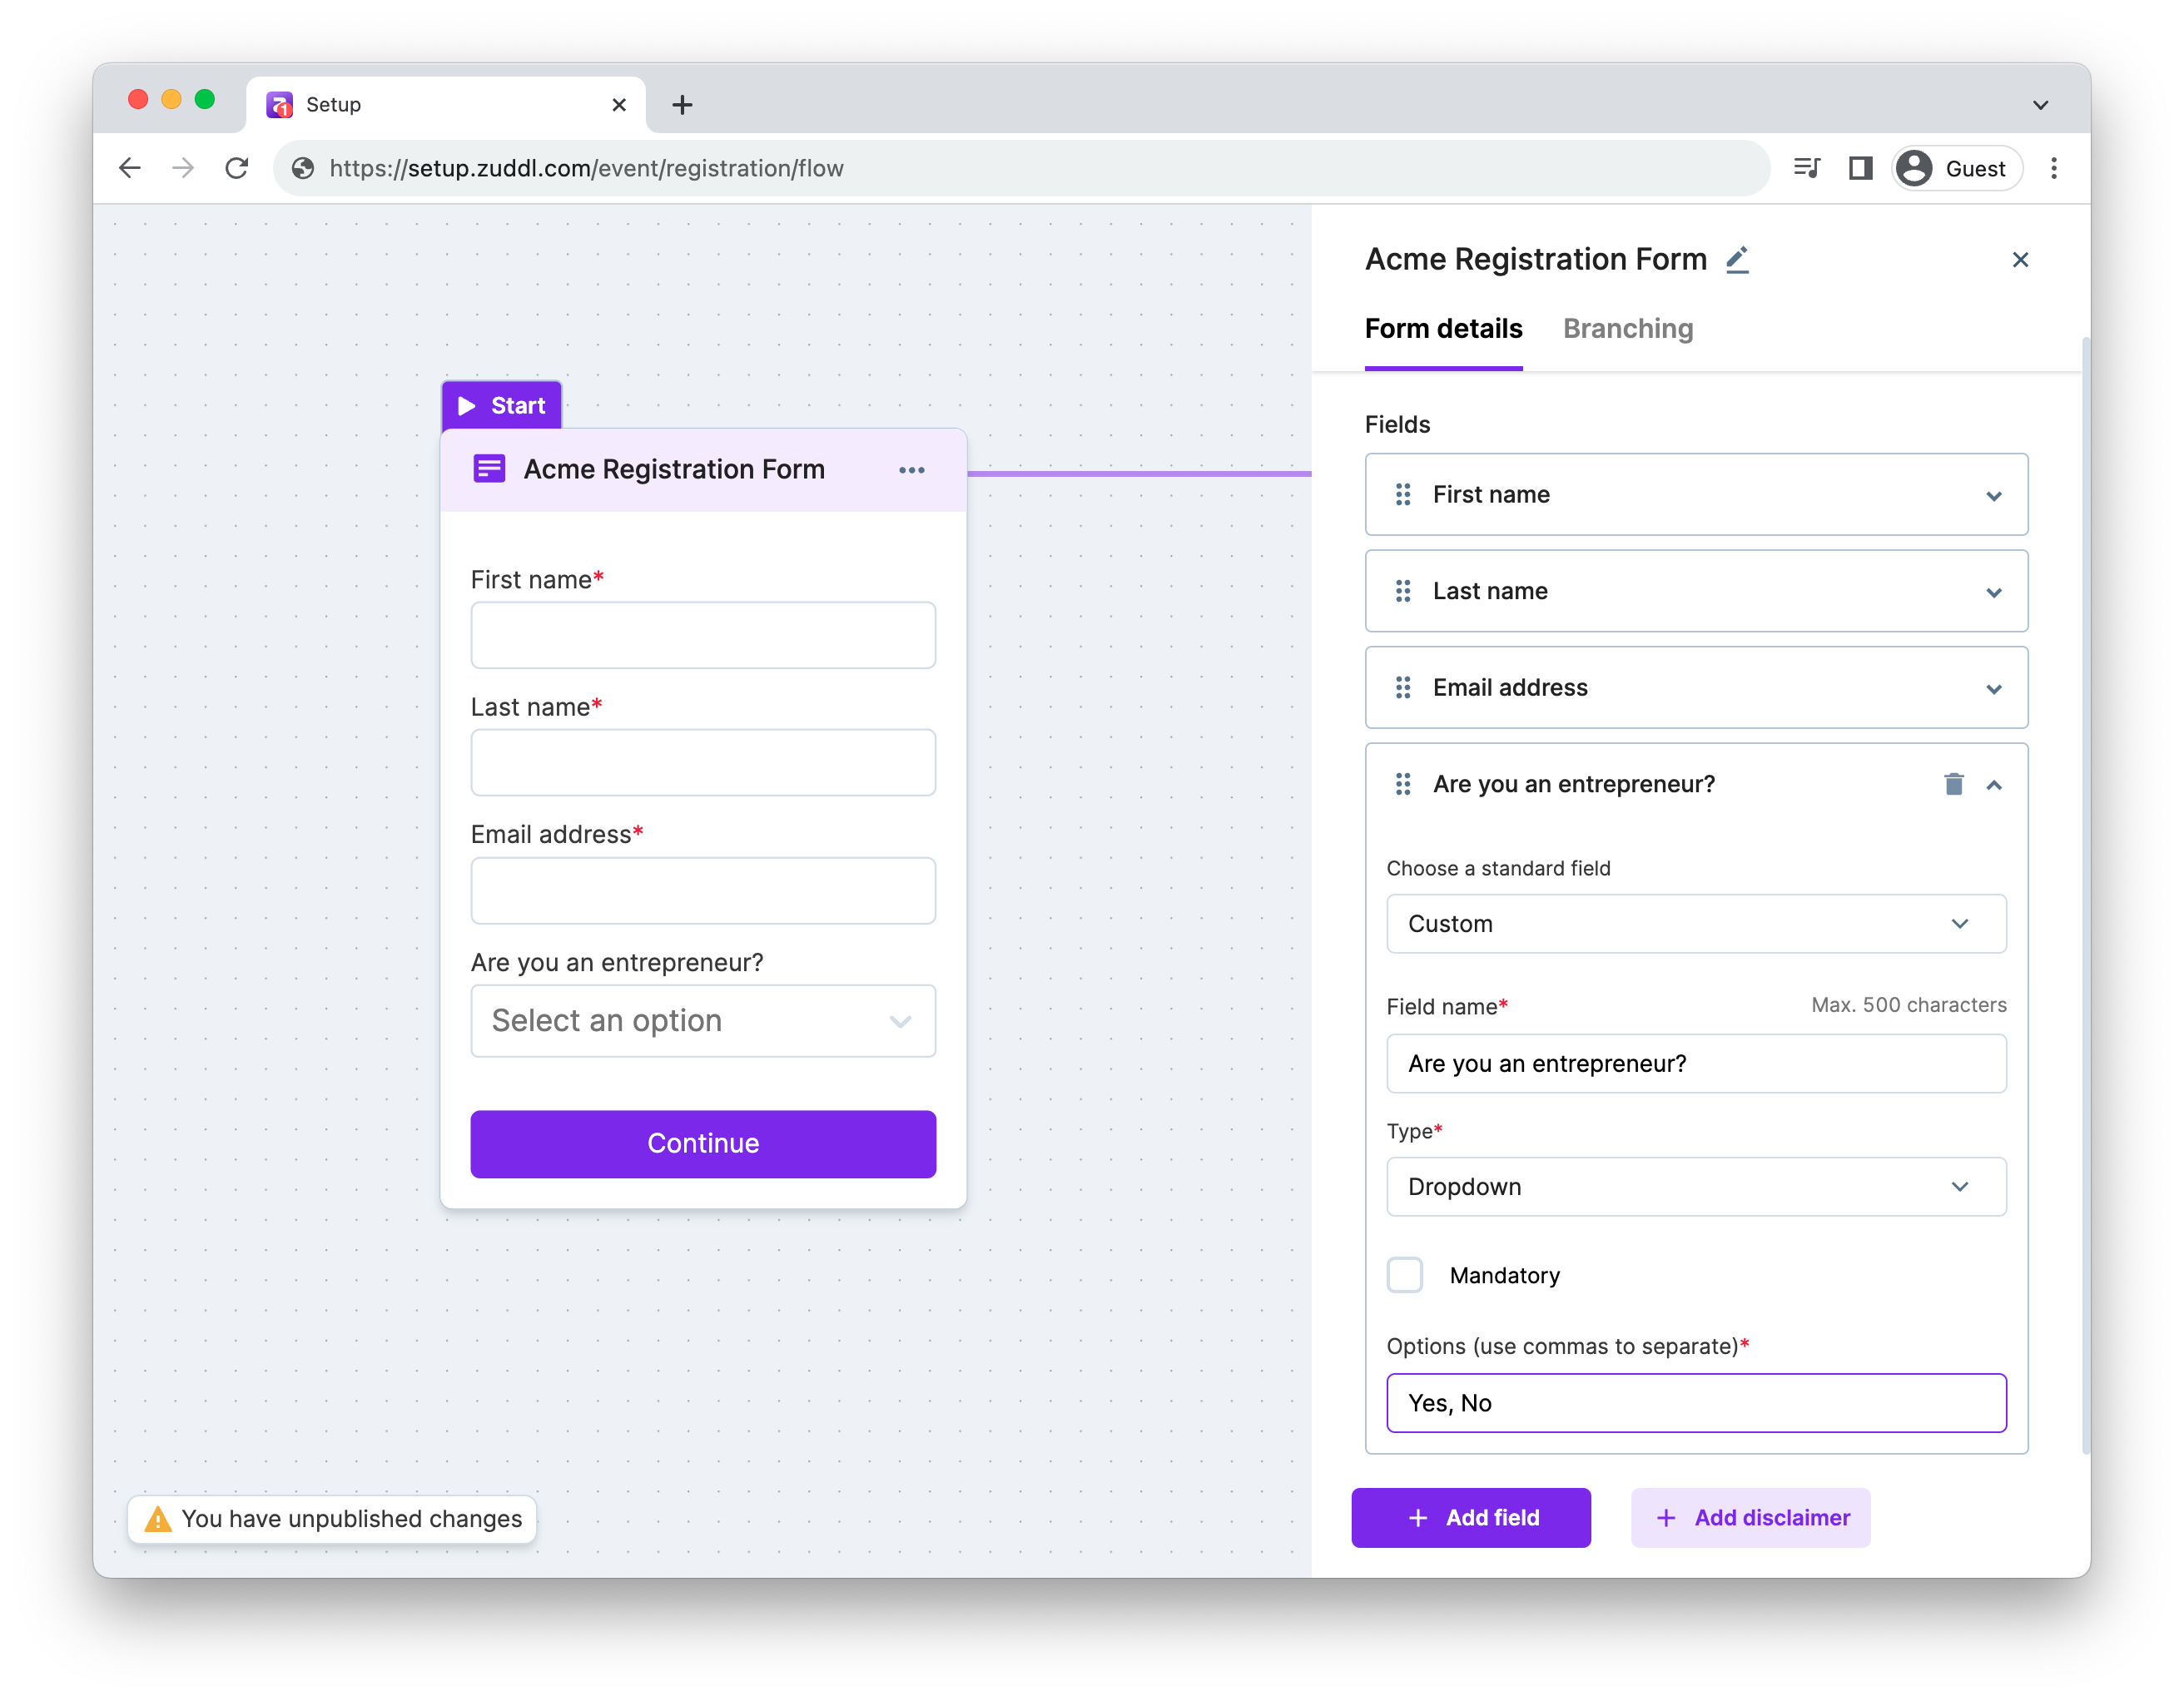
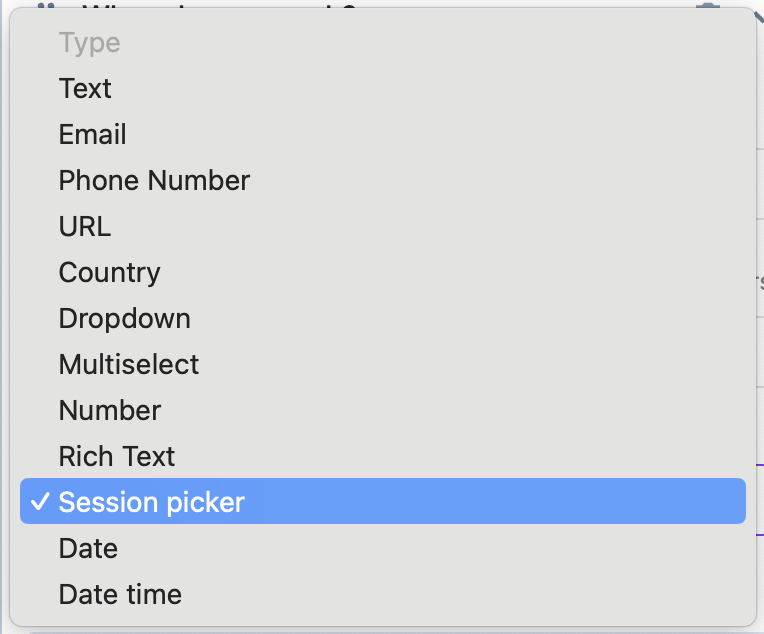
b. Select an option from the Type dropdown to select the data type.
Text: for text inputs
Email: for inputs in email format
Phone number: for inputs in phone number format
URL: for inputs in URL format
Country: This shows the country list as a dropdown
Dropdown: to select input from a list of options. You can add your options in an additional field called ‘Options.’
Multiselect: dropdown options with multi-select
Number: for inputs in number format
Rich Text: for inputs in rich-text format. You can add iFrames in rich text fields.
Date: for inputs where a date must be selected.
Date time: for inputs where both a date and a time must be selected.
Session picker: a dropdown which shows all sessions or session groups in an event. This field cannot be hidden.
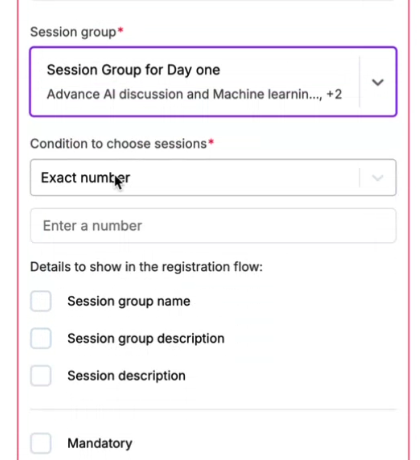
Choose a Session group. This is only available if you have created session groups. You can only add one group.
From the Condition to choose sessions dropdown, choose a suitable condition for the session group to be shown to users during add-on selection:
Exact number: Allow users to select a fixed number of sessions. Enter a specific number in the Enter a number field.
Range: Allow users to select between a minimum to maximum number of sessions
Minimum no. of sessions: Enter a minimum number of sessions a user should/can select. For example, if you specify a minimum of 3 sessions, the user can't proceed with the add-on selection if they didn't select 3 sessions.
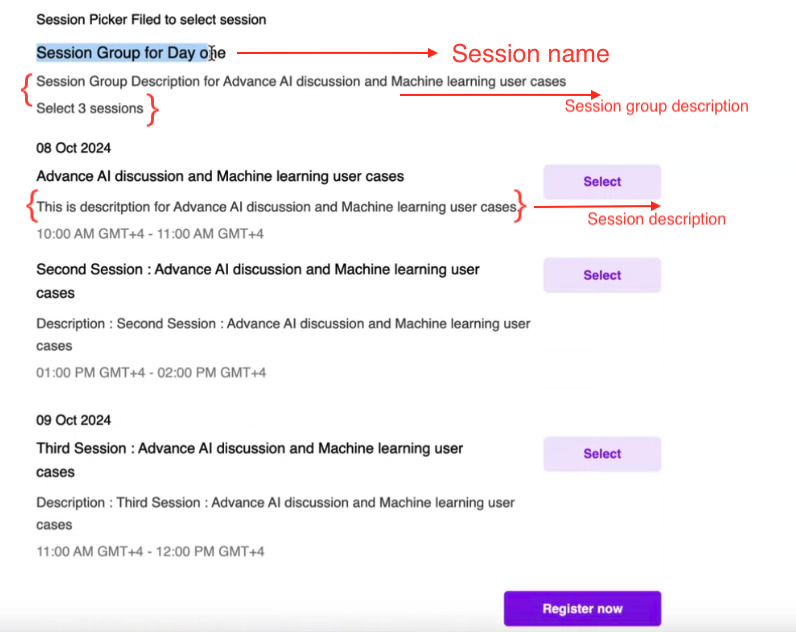
Optional. Show session group name in the registration flow. This helps attendees to quickly find the right groups to select.
Optional. Select the checkboxes for the required session details to be shown during session selection:
Session group name
Session group description
Session description
Edge-case:
If you wish to use both session picker and add-ons. You must keep few things in mind.
- If you wish to show same session groups for selection, you can either use session picker or add-ons based on how you wish to offer them (free or charged) as both features have similar functions - capturing attendee's session selections.
- If you wish to offer different session groups. The selections you make when buying add-ons will be an addition to any selections made on the form. For example, if an attendee selected session 1 & 2 (free sessions) while filling the form and session 3 & 4 when buying add-ons (charged sessions), the particular attendee will have access to session 1, 2, 3, and 4.
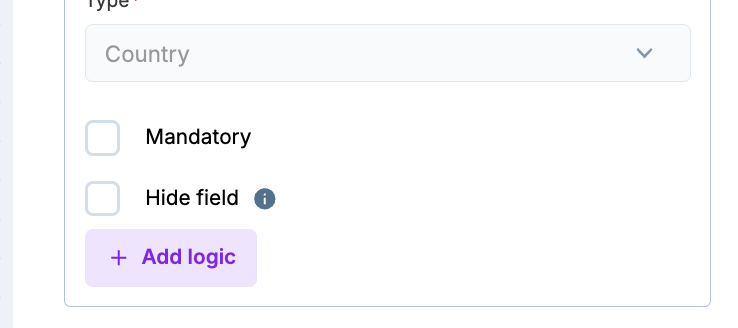
Optional. Select the Mandatory checkbox.
Select the Hide field checkbox if you wish to hide this field to people who register for your event. Click Hide on the confirmation prompt message. Click Hide on the confirmation prompt message.
For example, if you wish allocate hotel rooms to attendees for you in-person event, you can do so by allocating rooms internally first by modifying registration details of attendees. Once the bookings are finalized, you use merge tags to communicate the hidden fields information over emails.
Mandatory fields cannot be hidden.
Organizer can modify the field value for people who have already registered. You can also use merge tags to communicate such info
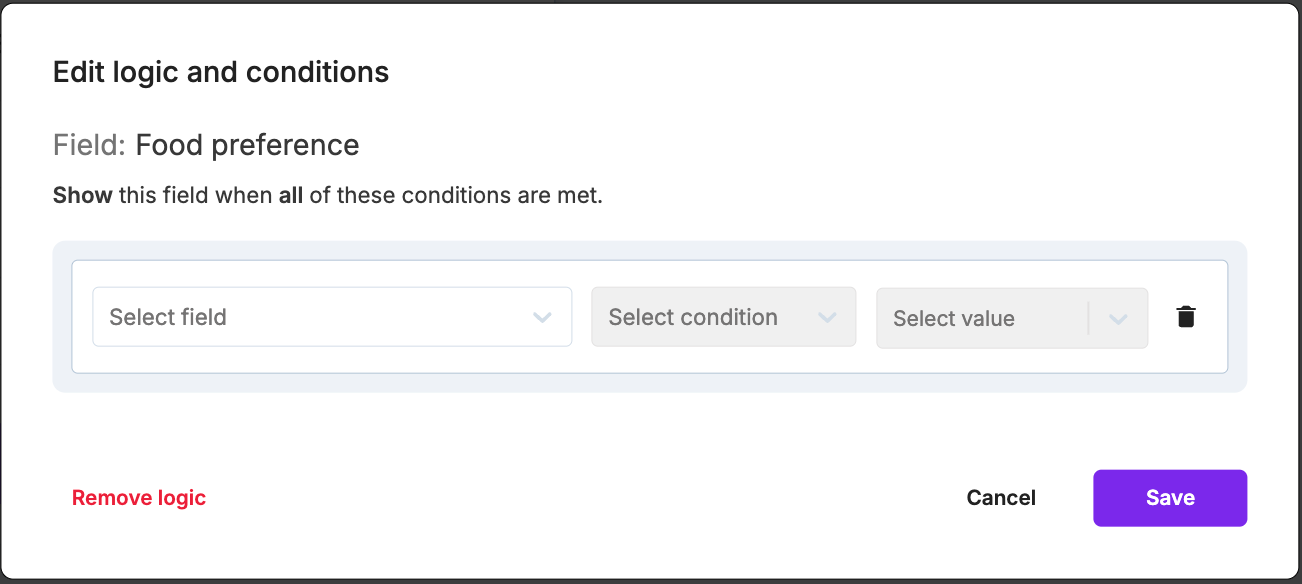
Click +Add logic button to add field condition in your form.
You cannot add logic to hidden fields
On the Edit logic and conditions modal, select a field from the list. Only those fields appear that come before this field (Food preference in the screenshot below).
Hidden fields do not appear in this list of fields.
Select a condition. The dropdown list option based on field type (is & is not, all of the & any of the)
Enter the value.
Learn more on how to create field conditions for your registration page/flow.
Now, in the Button section, rename the button name. Defaults to Continue.
In the same way, you can also add disclaimers to a registration form by clicking the +Add disclaimer button.
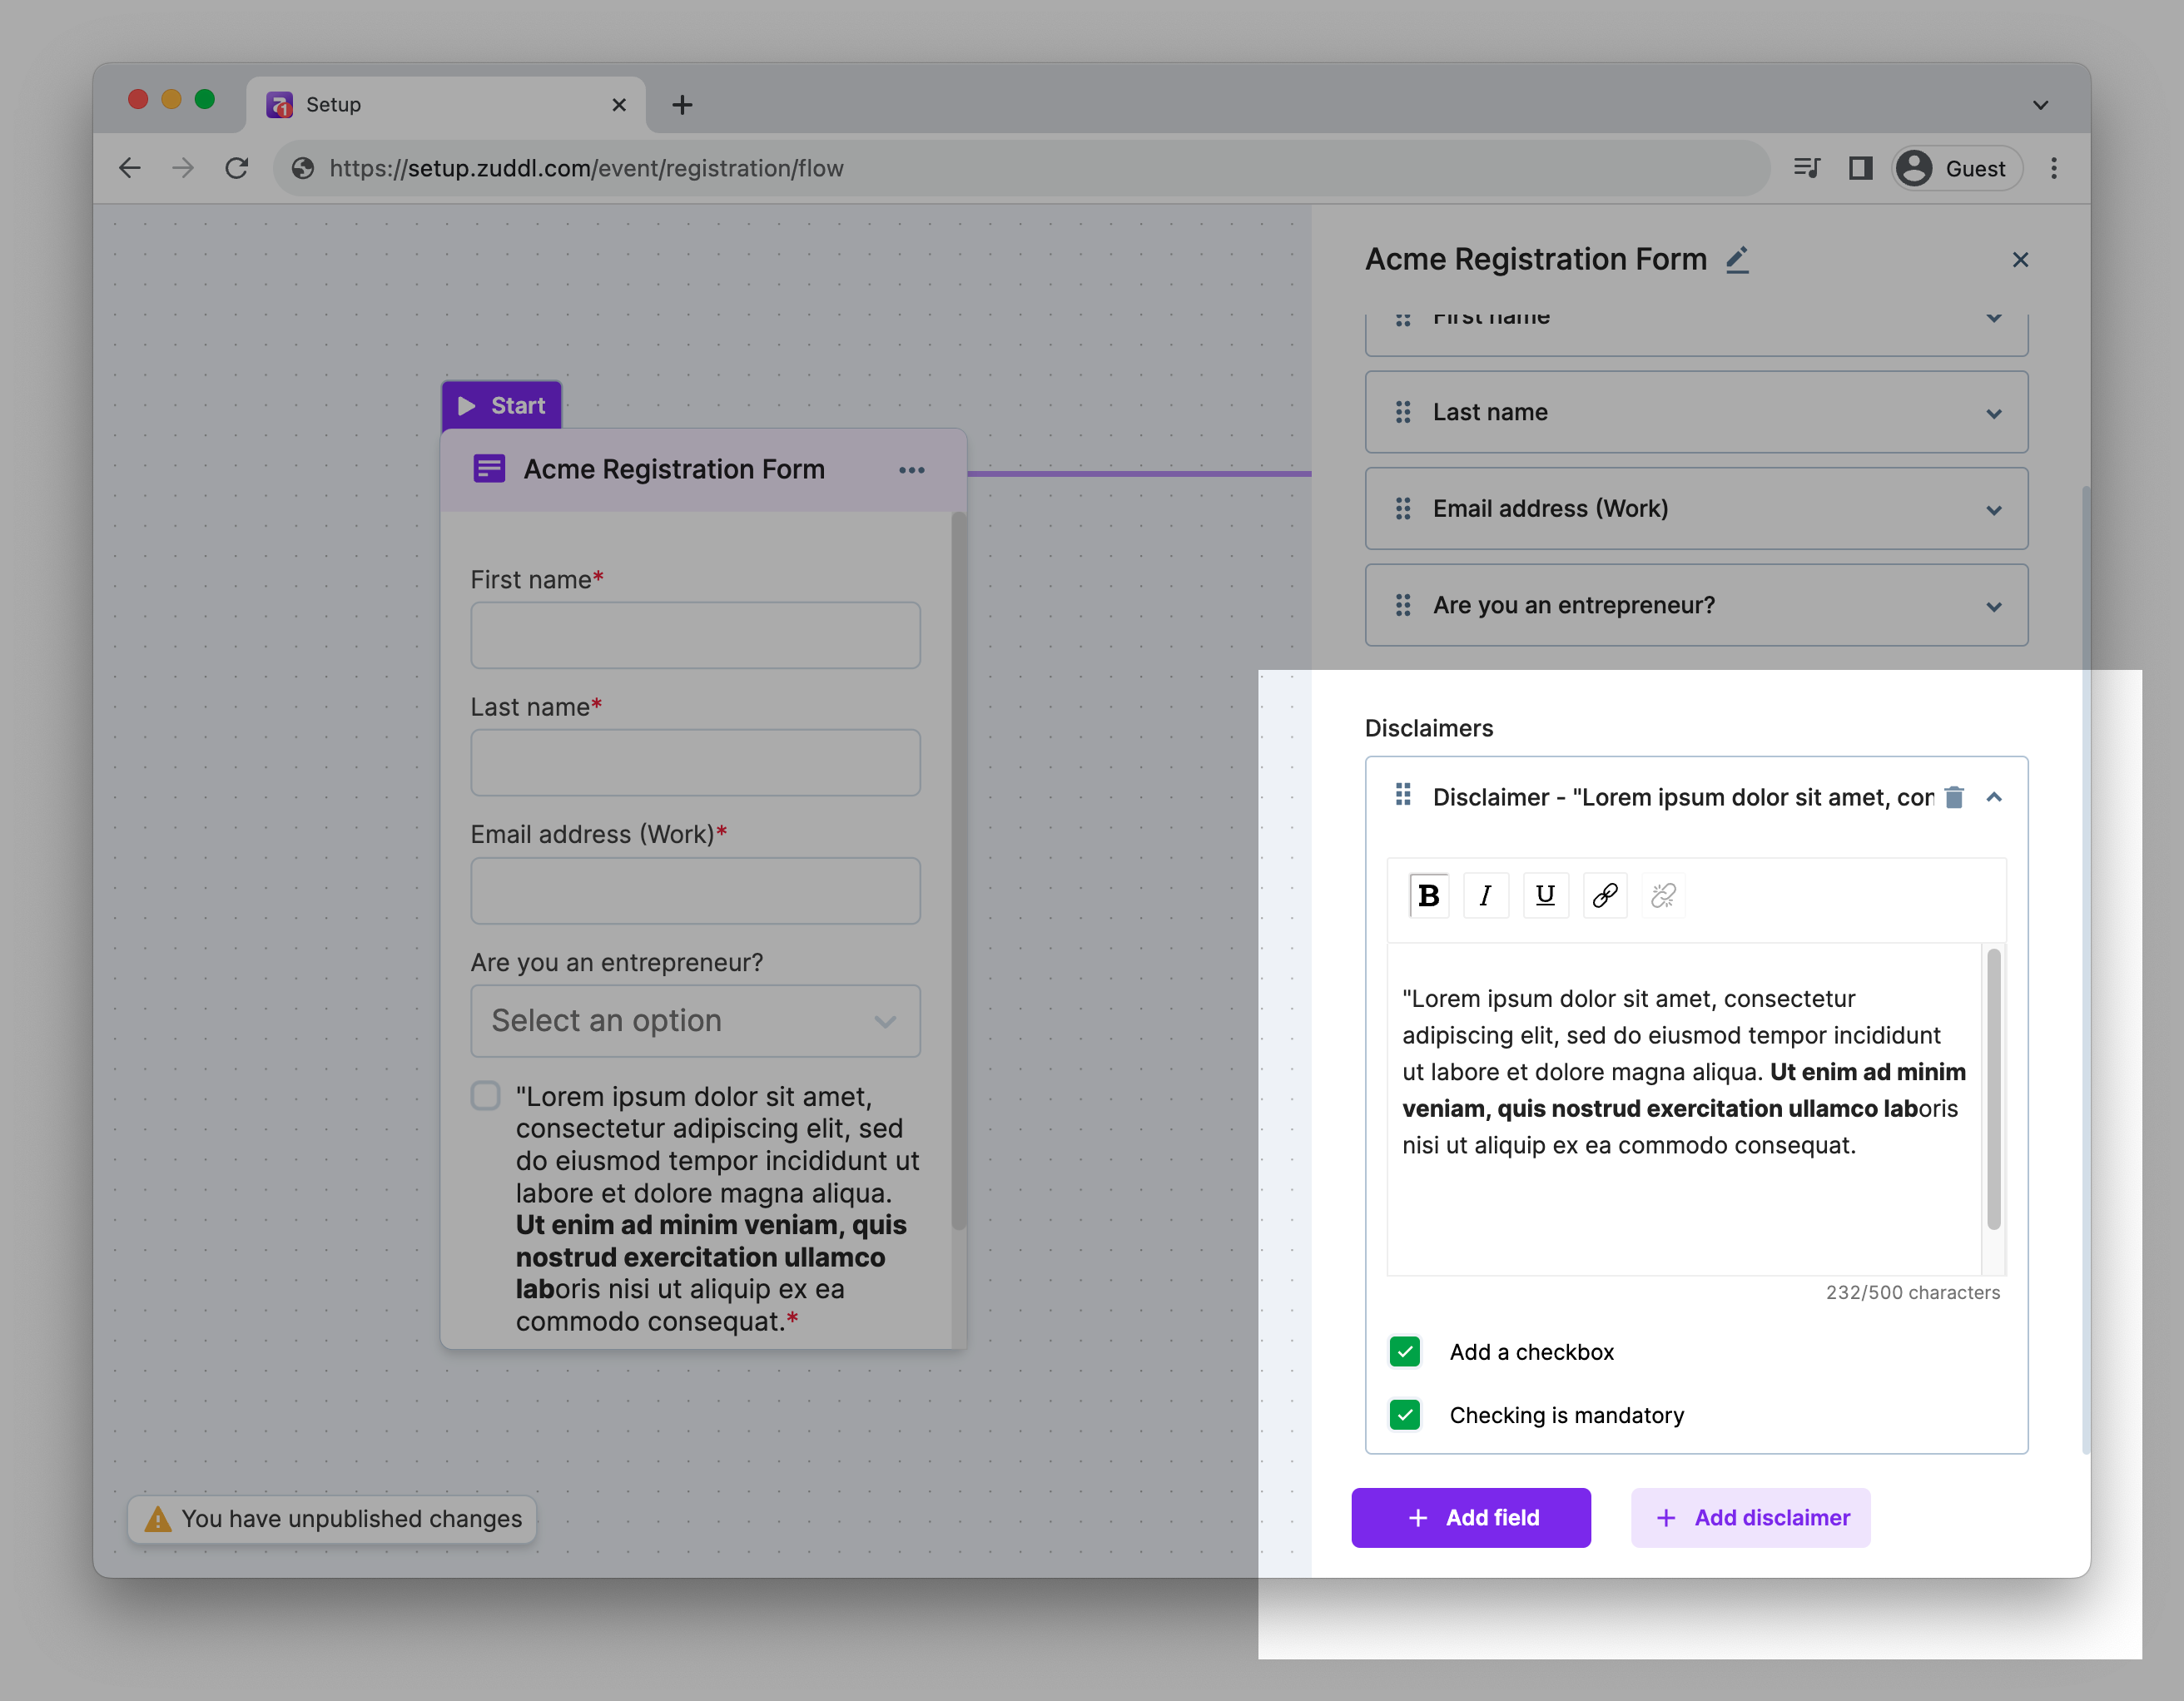
Conditional logic on disclaimers
You can also add conditional on disclaimers by clicking the +Add logic button
After you’ve finished the editing form, close the side pane to view the updated flow diagram.
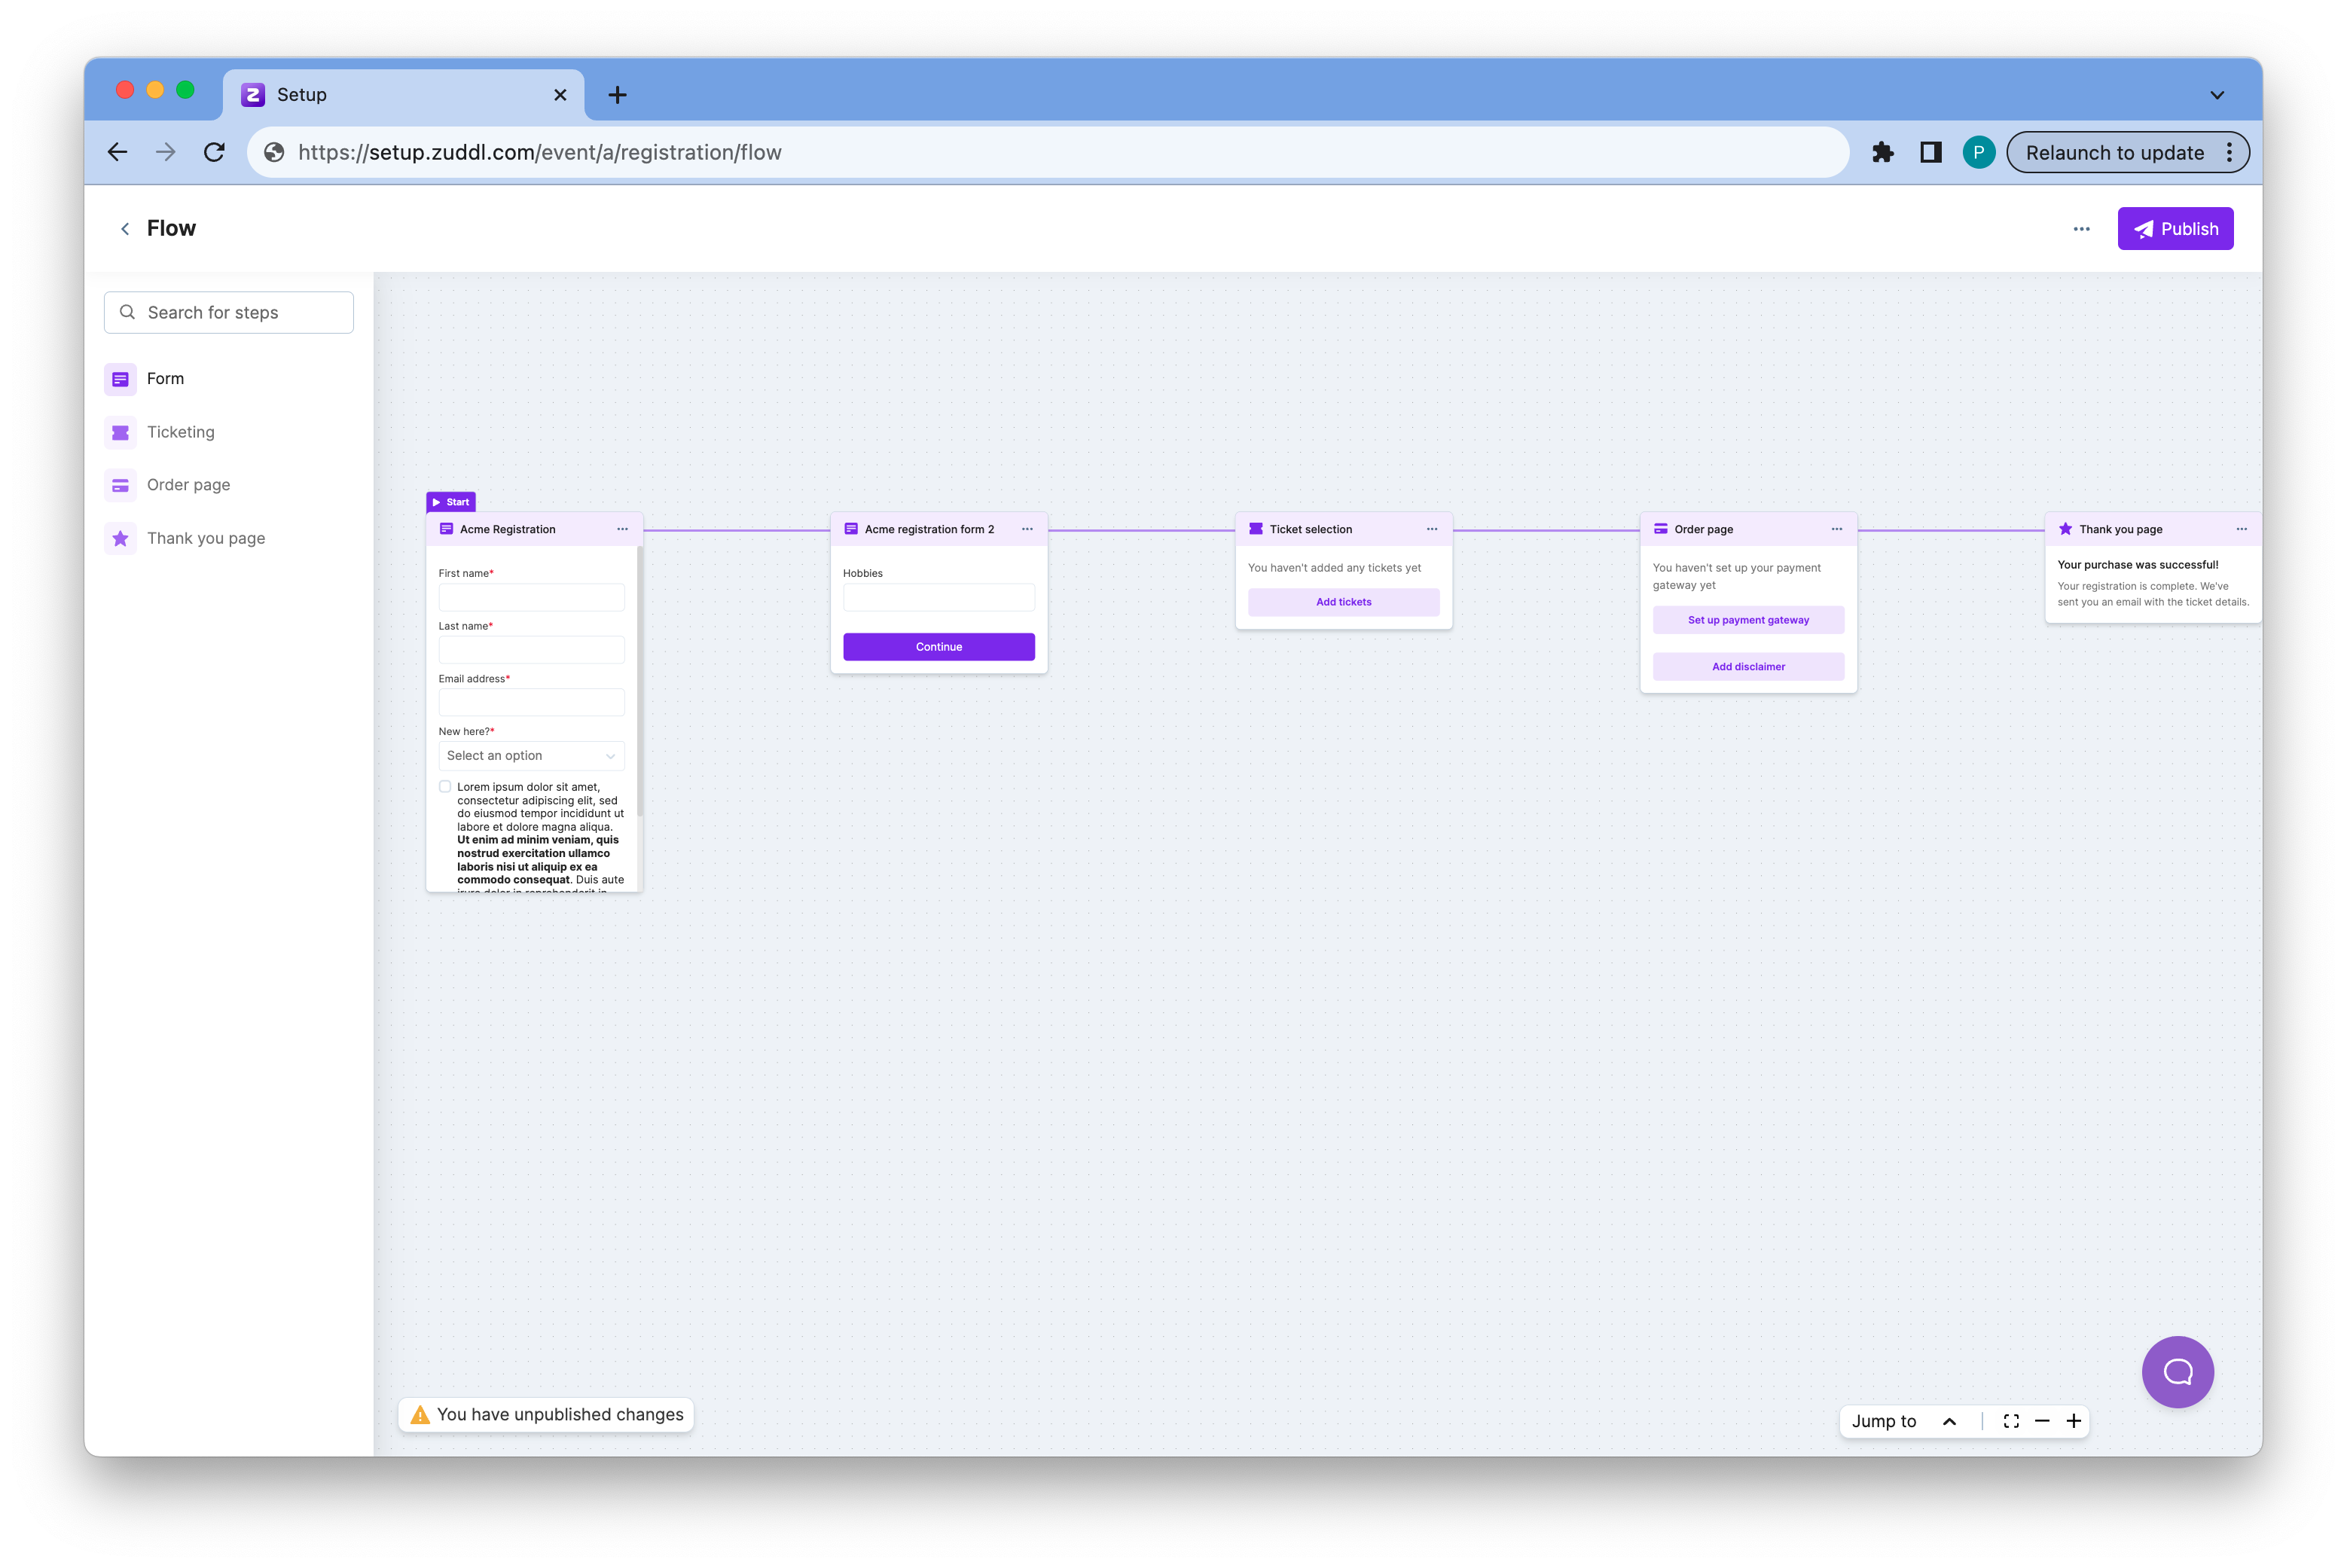
You can rename all forms and delete the additional forms that you created. The form that contains First name, Last name, and Email fields and the Thank you step can’t be deleted.
If a registrant leaves the registration flow after filling up some forms and returns to the flow, the previously completed forms will be automatically saved and you can continue with the next step.
This works only if the registrant fills the form again using same device and the same browser.
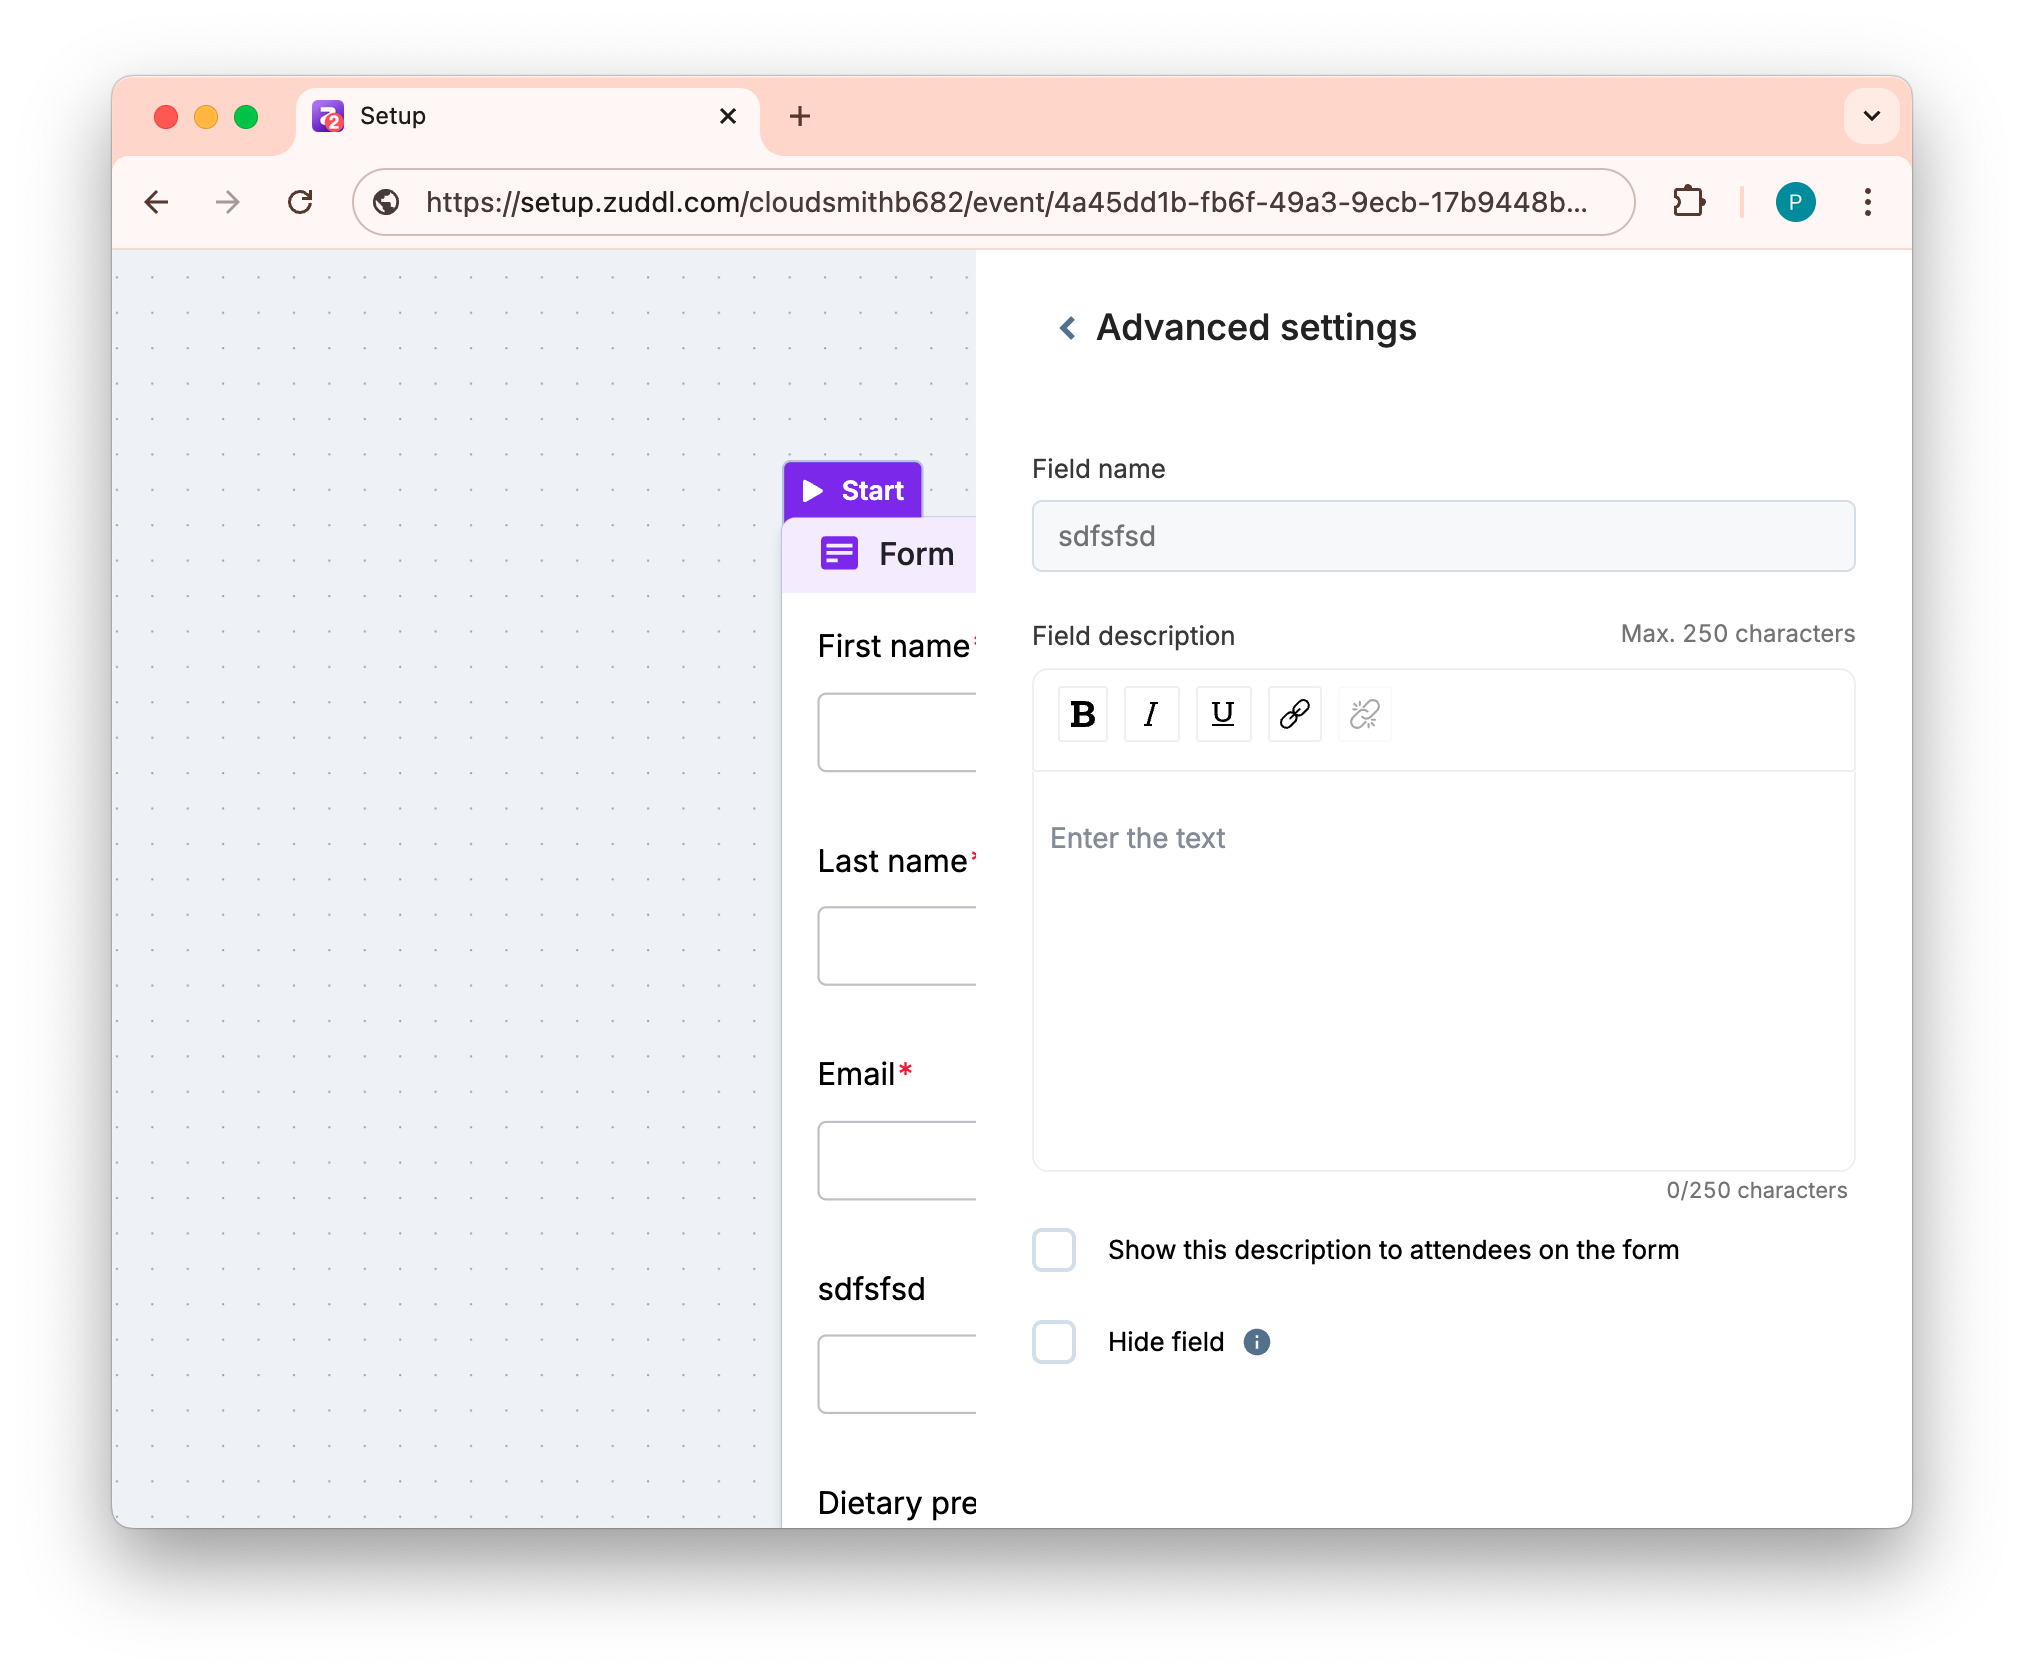
Advanced settings
Click on the gear icon to view the advanced settings for a particular field.
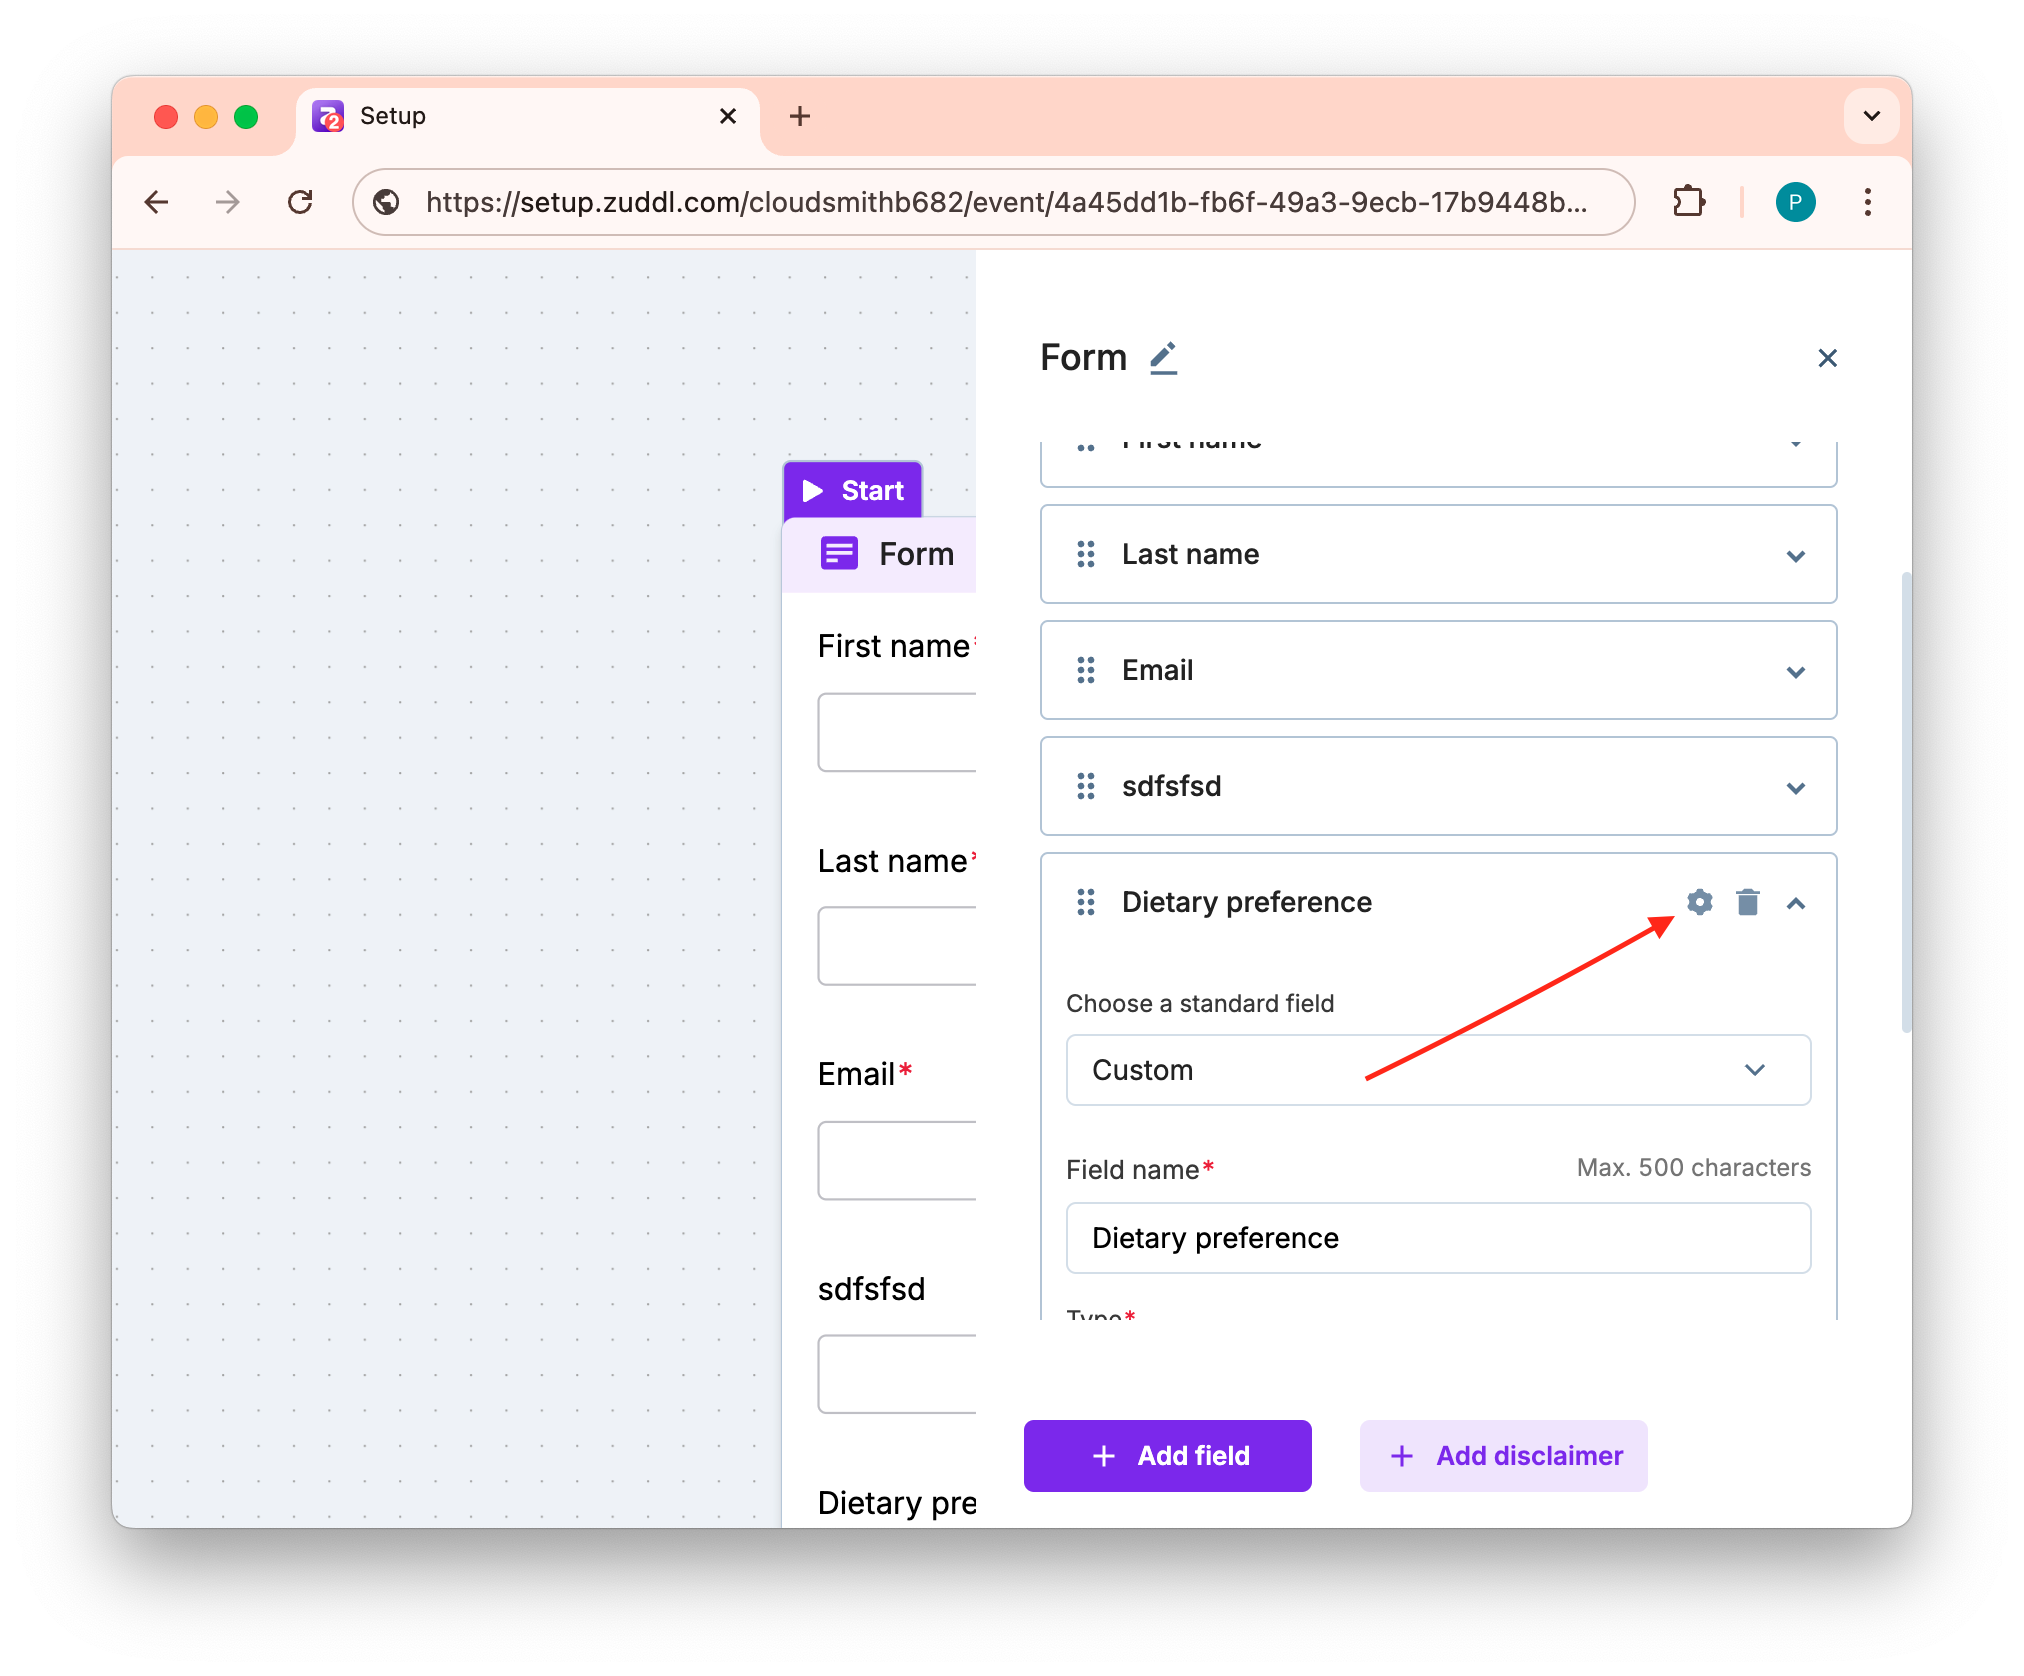
Add a Field description.
Under the Default value field, enter/select the pre-filled value to the attendees. For dropdown fields, you can select one of the added options or select No default selected to not show any options.
The default value is not applicable for Rich text fields, disclaimers, session picker, date and time, and phone number.
If you've received responses for this field before changing this setting, they remain unaffected.
Select/clear the Hide field to hide or show it to attendees on the form.
If you've received responses for this field before hiding, those responses remain unaffected. The default value for a field that is also hidden can be modified by the organizer later from the edit registration option from the dashboard.
New registrants, however, won't be able to see the field.
Consider a case where a particular field has both a default value and auto-fill configured. Now, if you overwrite the default value for that field for the first attendee, the same value is copied to other attendees by way of auto-fill.
If you want Zuddl to prefill the registrant's country value via geolocation, do not set default values for that field.
More about field descriptions
- Field descriptions can have a max char count of 250 and does not apply to rich-text fields and disclaimers.
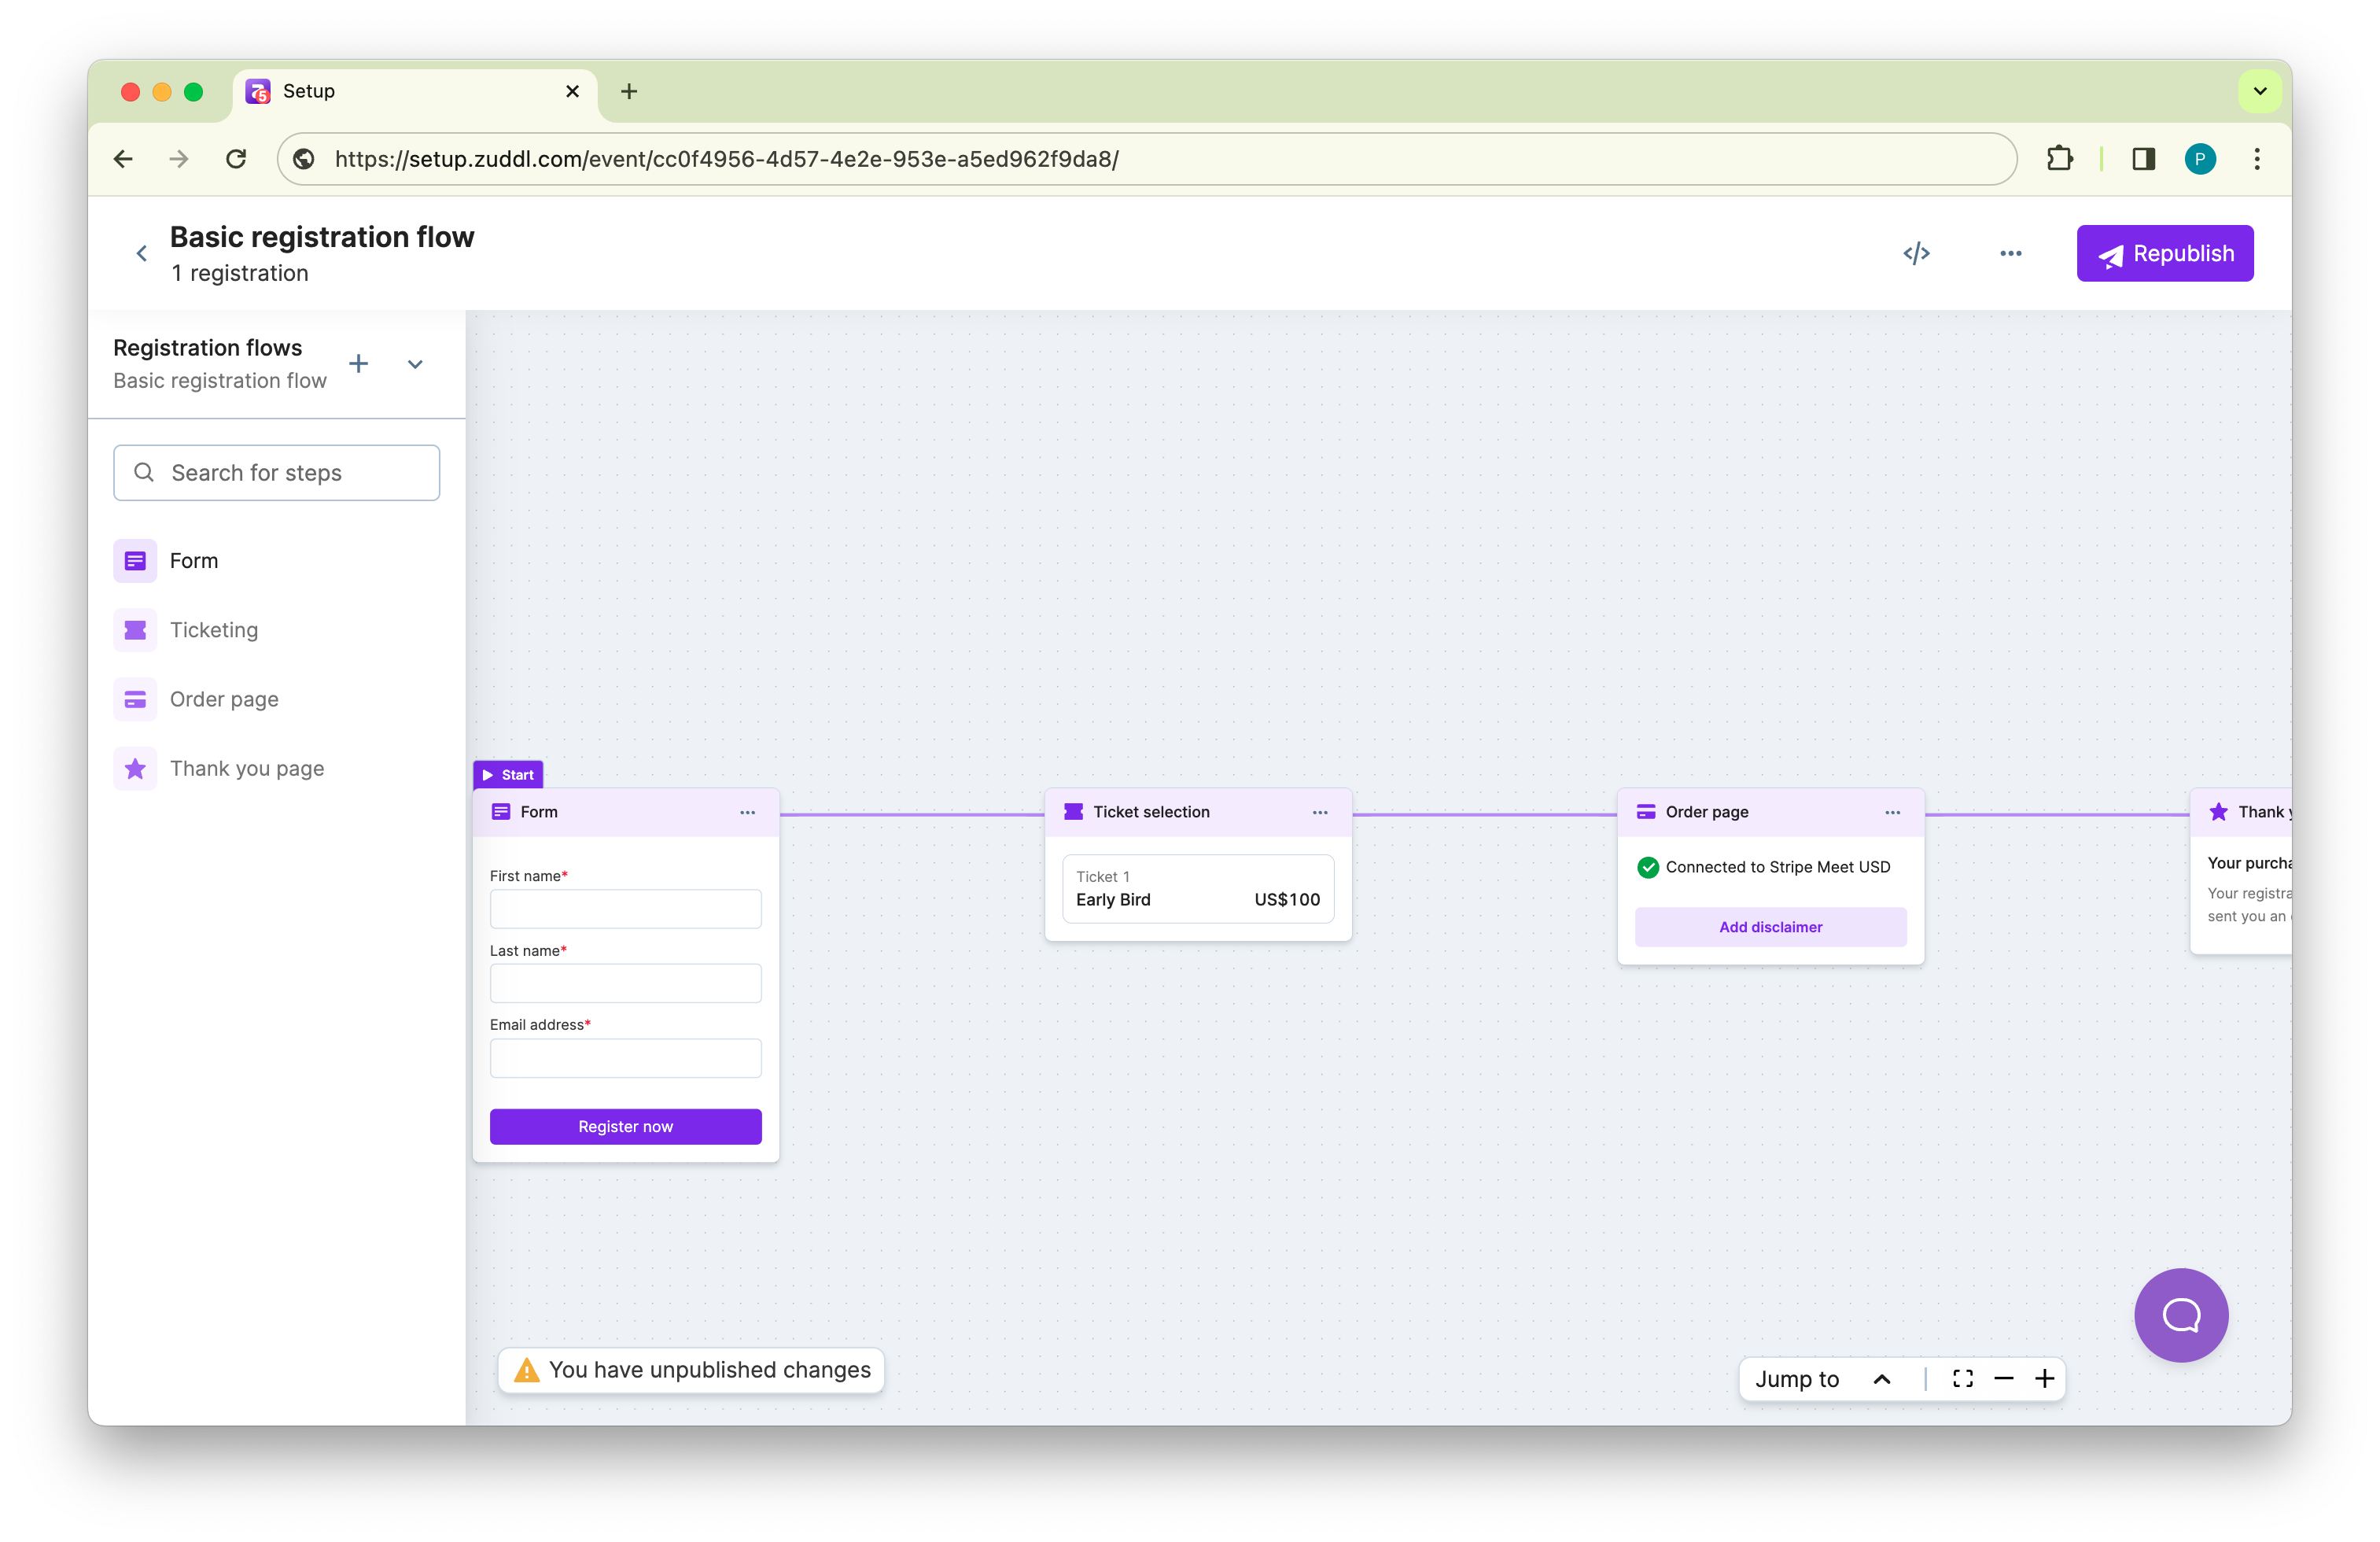
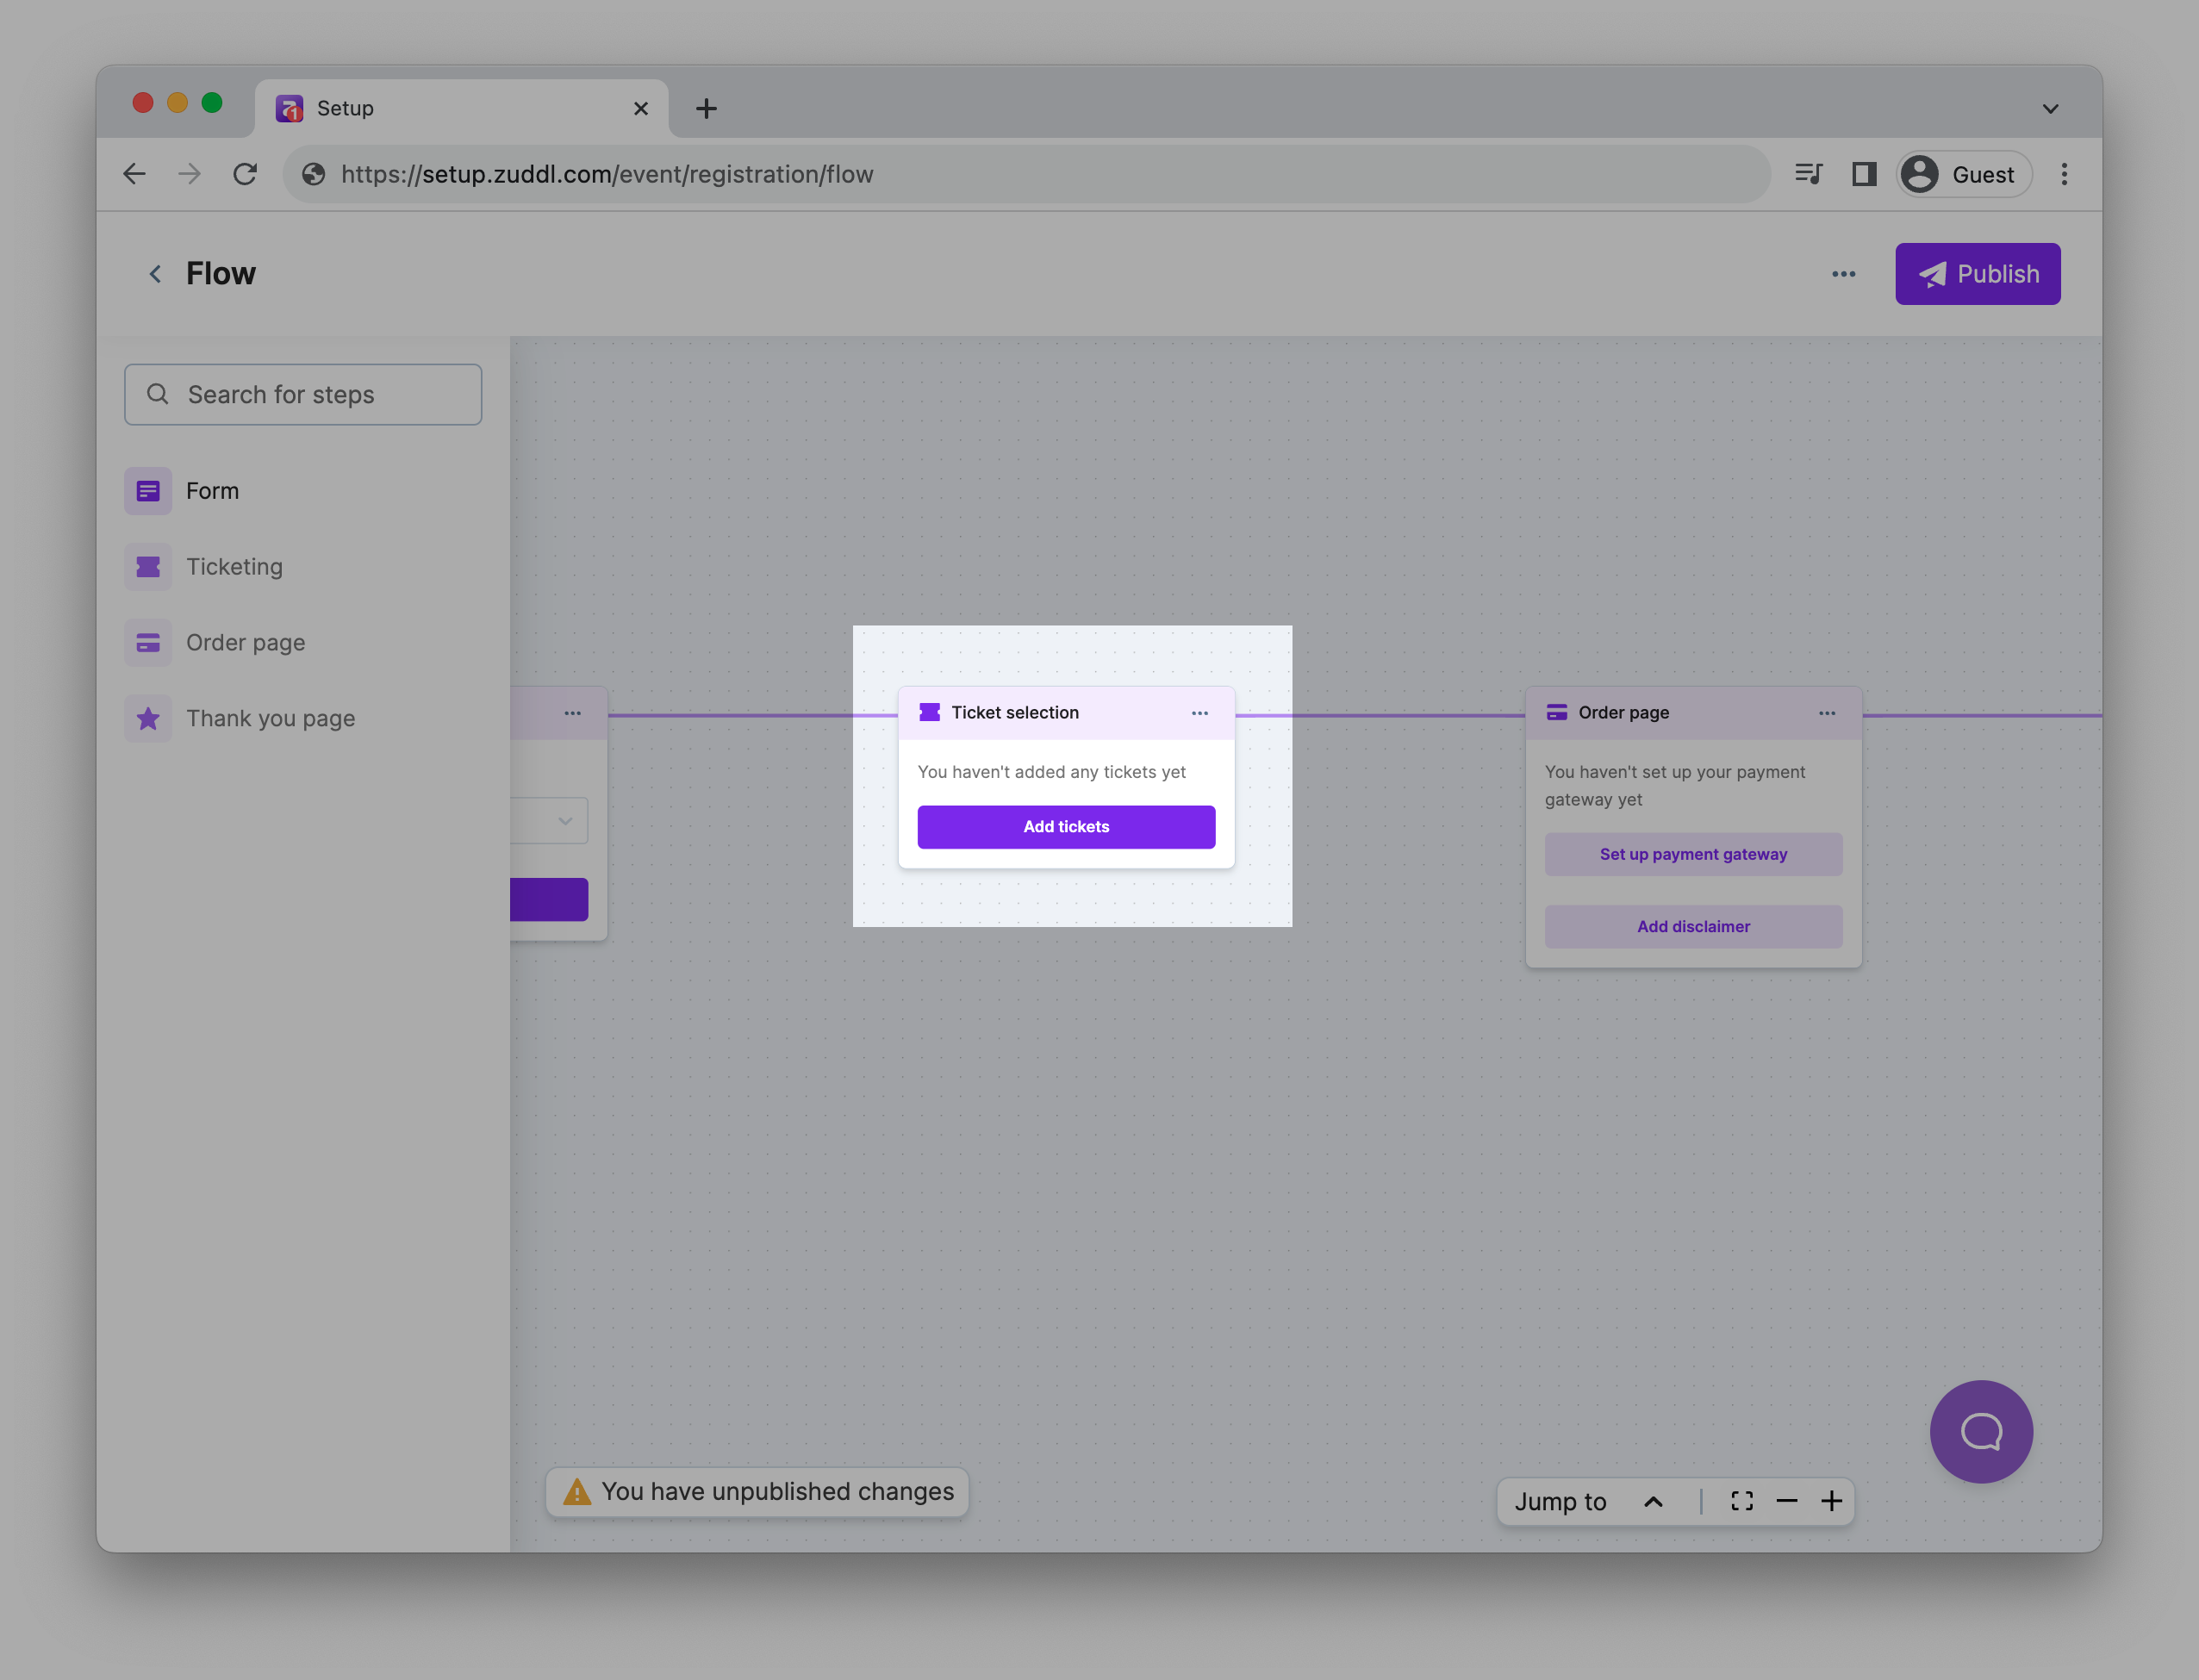
Ticket selection
The next step is Ticket selection. Click Add tickets. This redirects to the Tickets tab under Registration > Ticketing. Learn how to add Tickets.
You can also add additional forms in the flow before and after the Ticket selection stage
Note: You can drag and drop the ticketing step to and from the start of the flow.
Note: You can’t delete the ticketing step in the flow after the ticket sales have started.
Approval-based flow
You can add an approval step to your registration flow for your ticketed or non-ticketed events. Learn how the approval flow works.
Set up an order page
Once you’ve added the tickets, the next step in the flow is to set up your Order page.
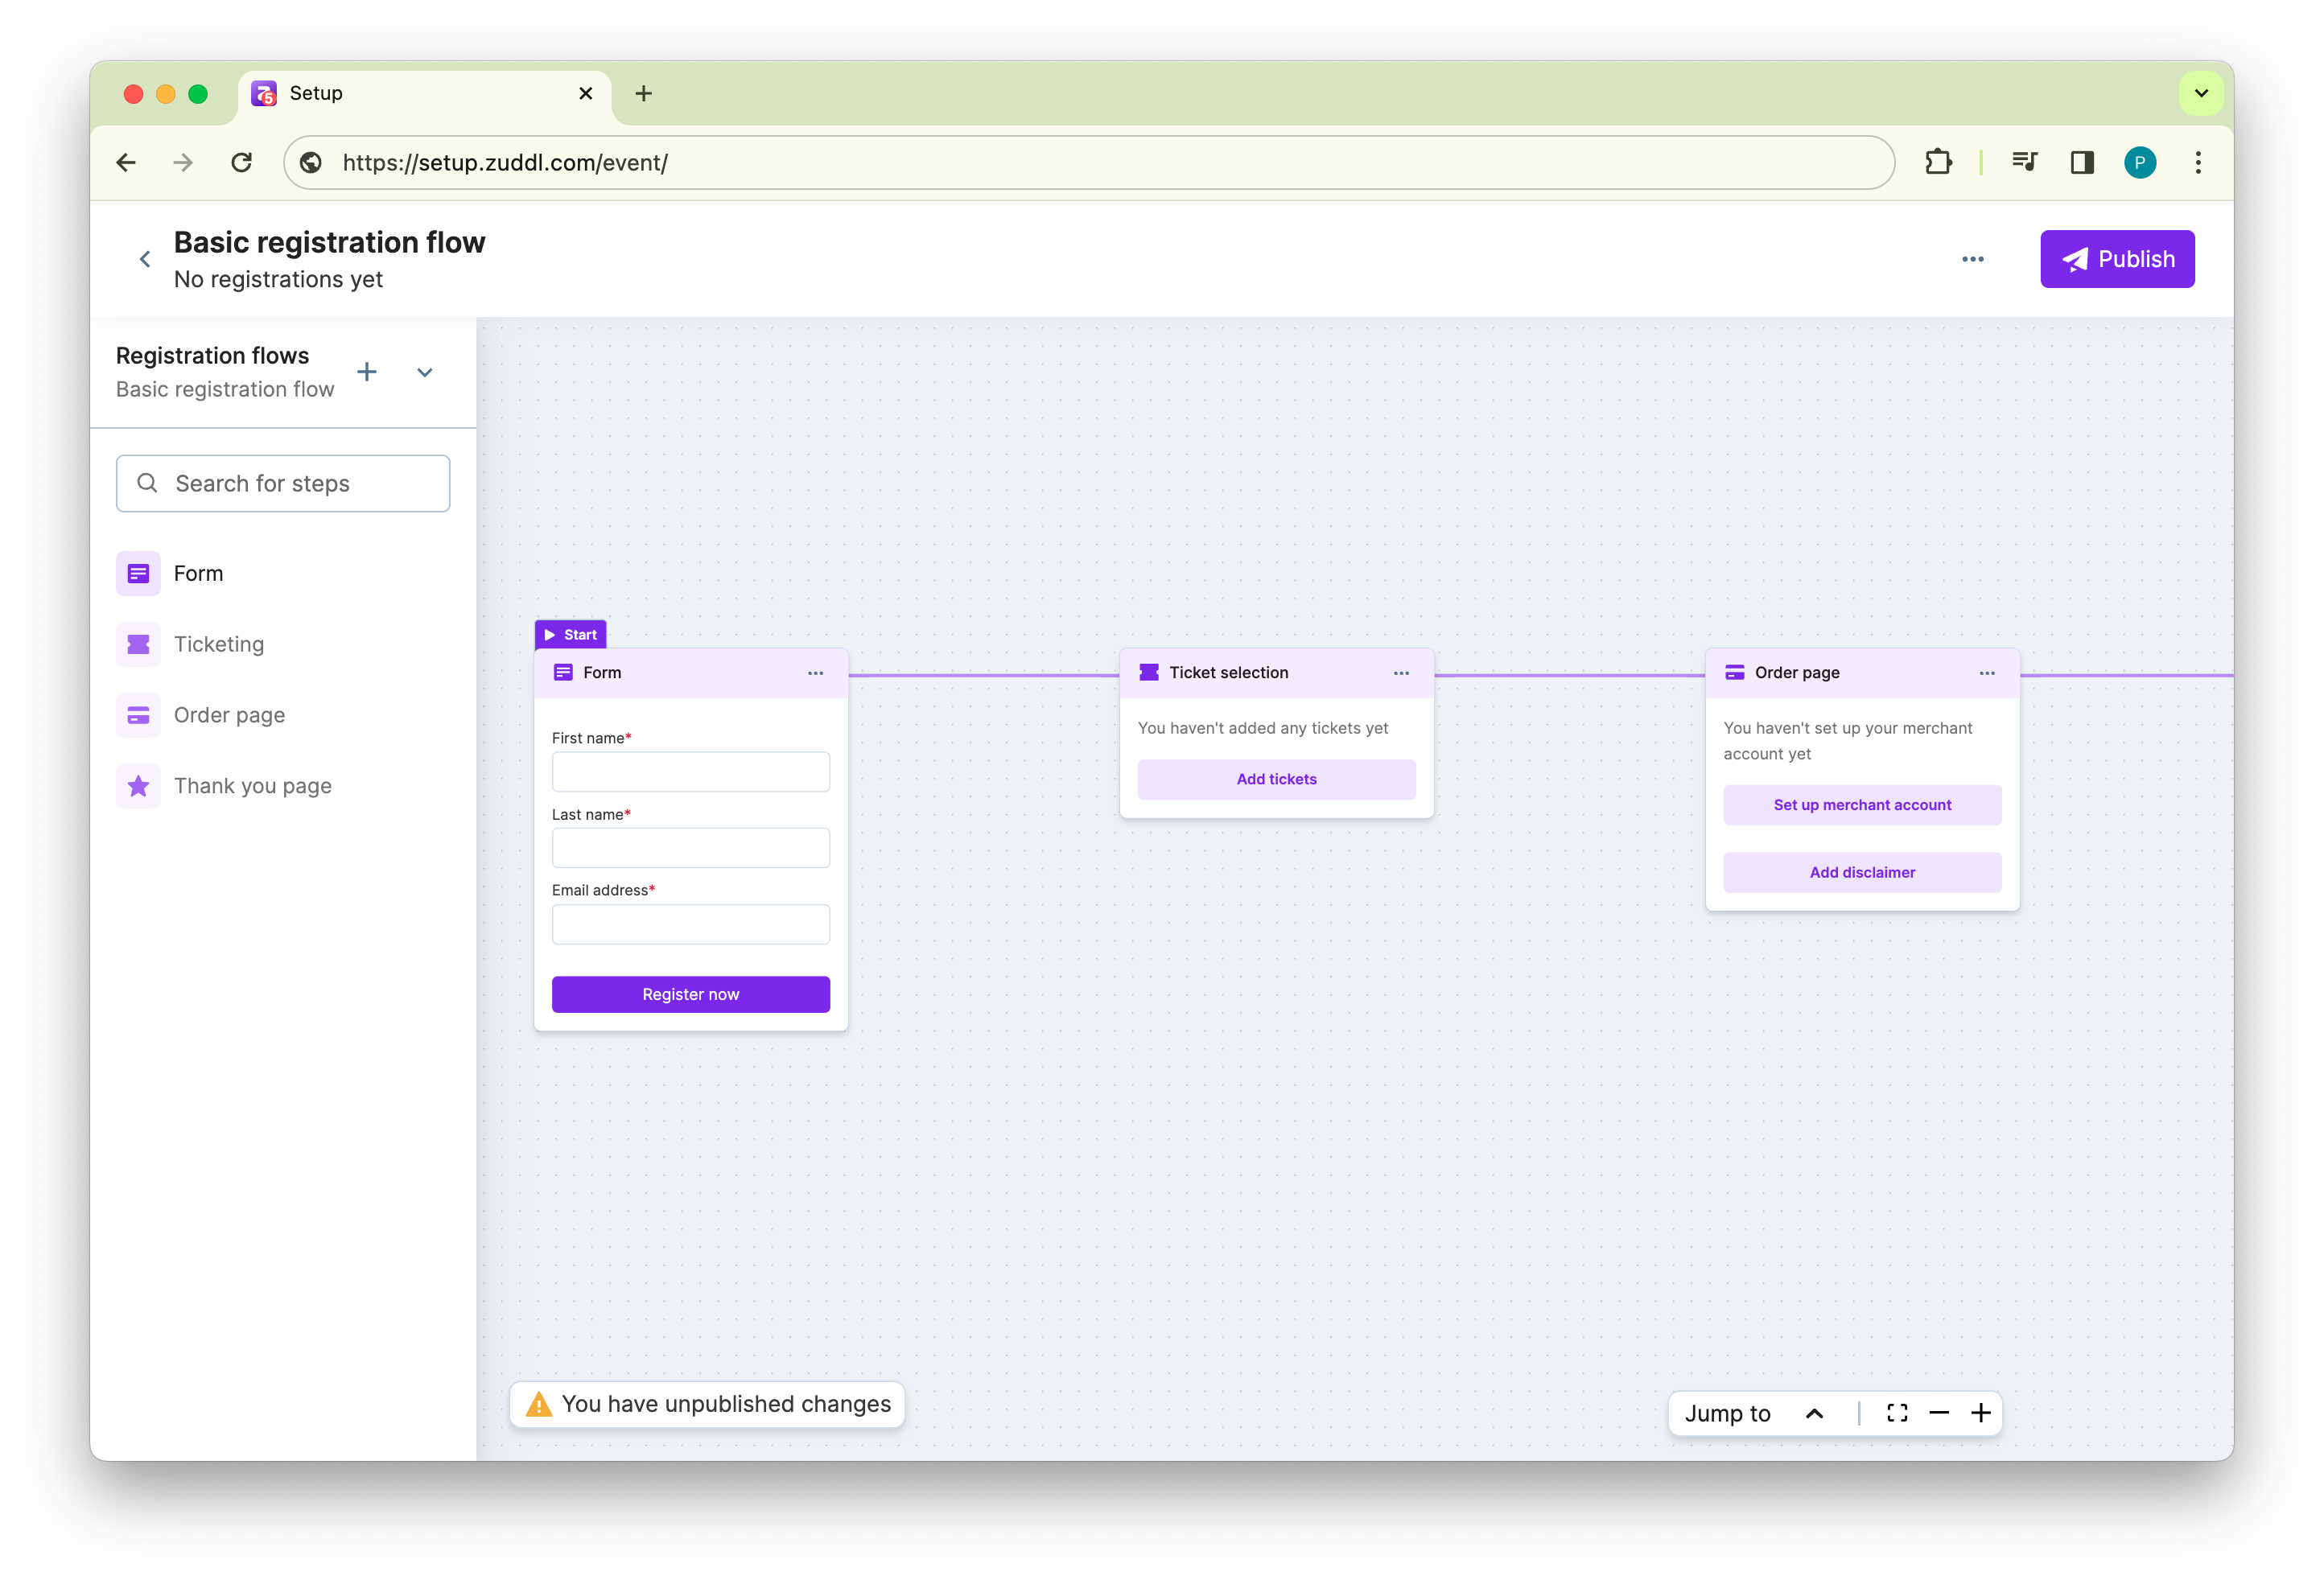
After you’ve added a merchant account, the order page step in the flow looks like this:
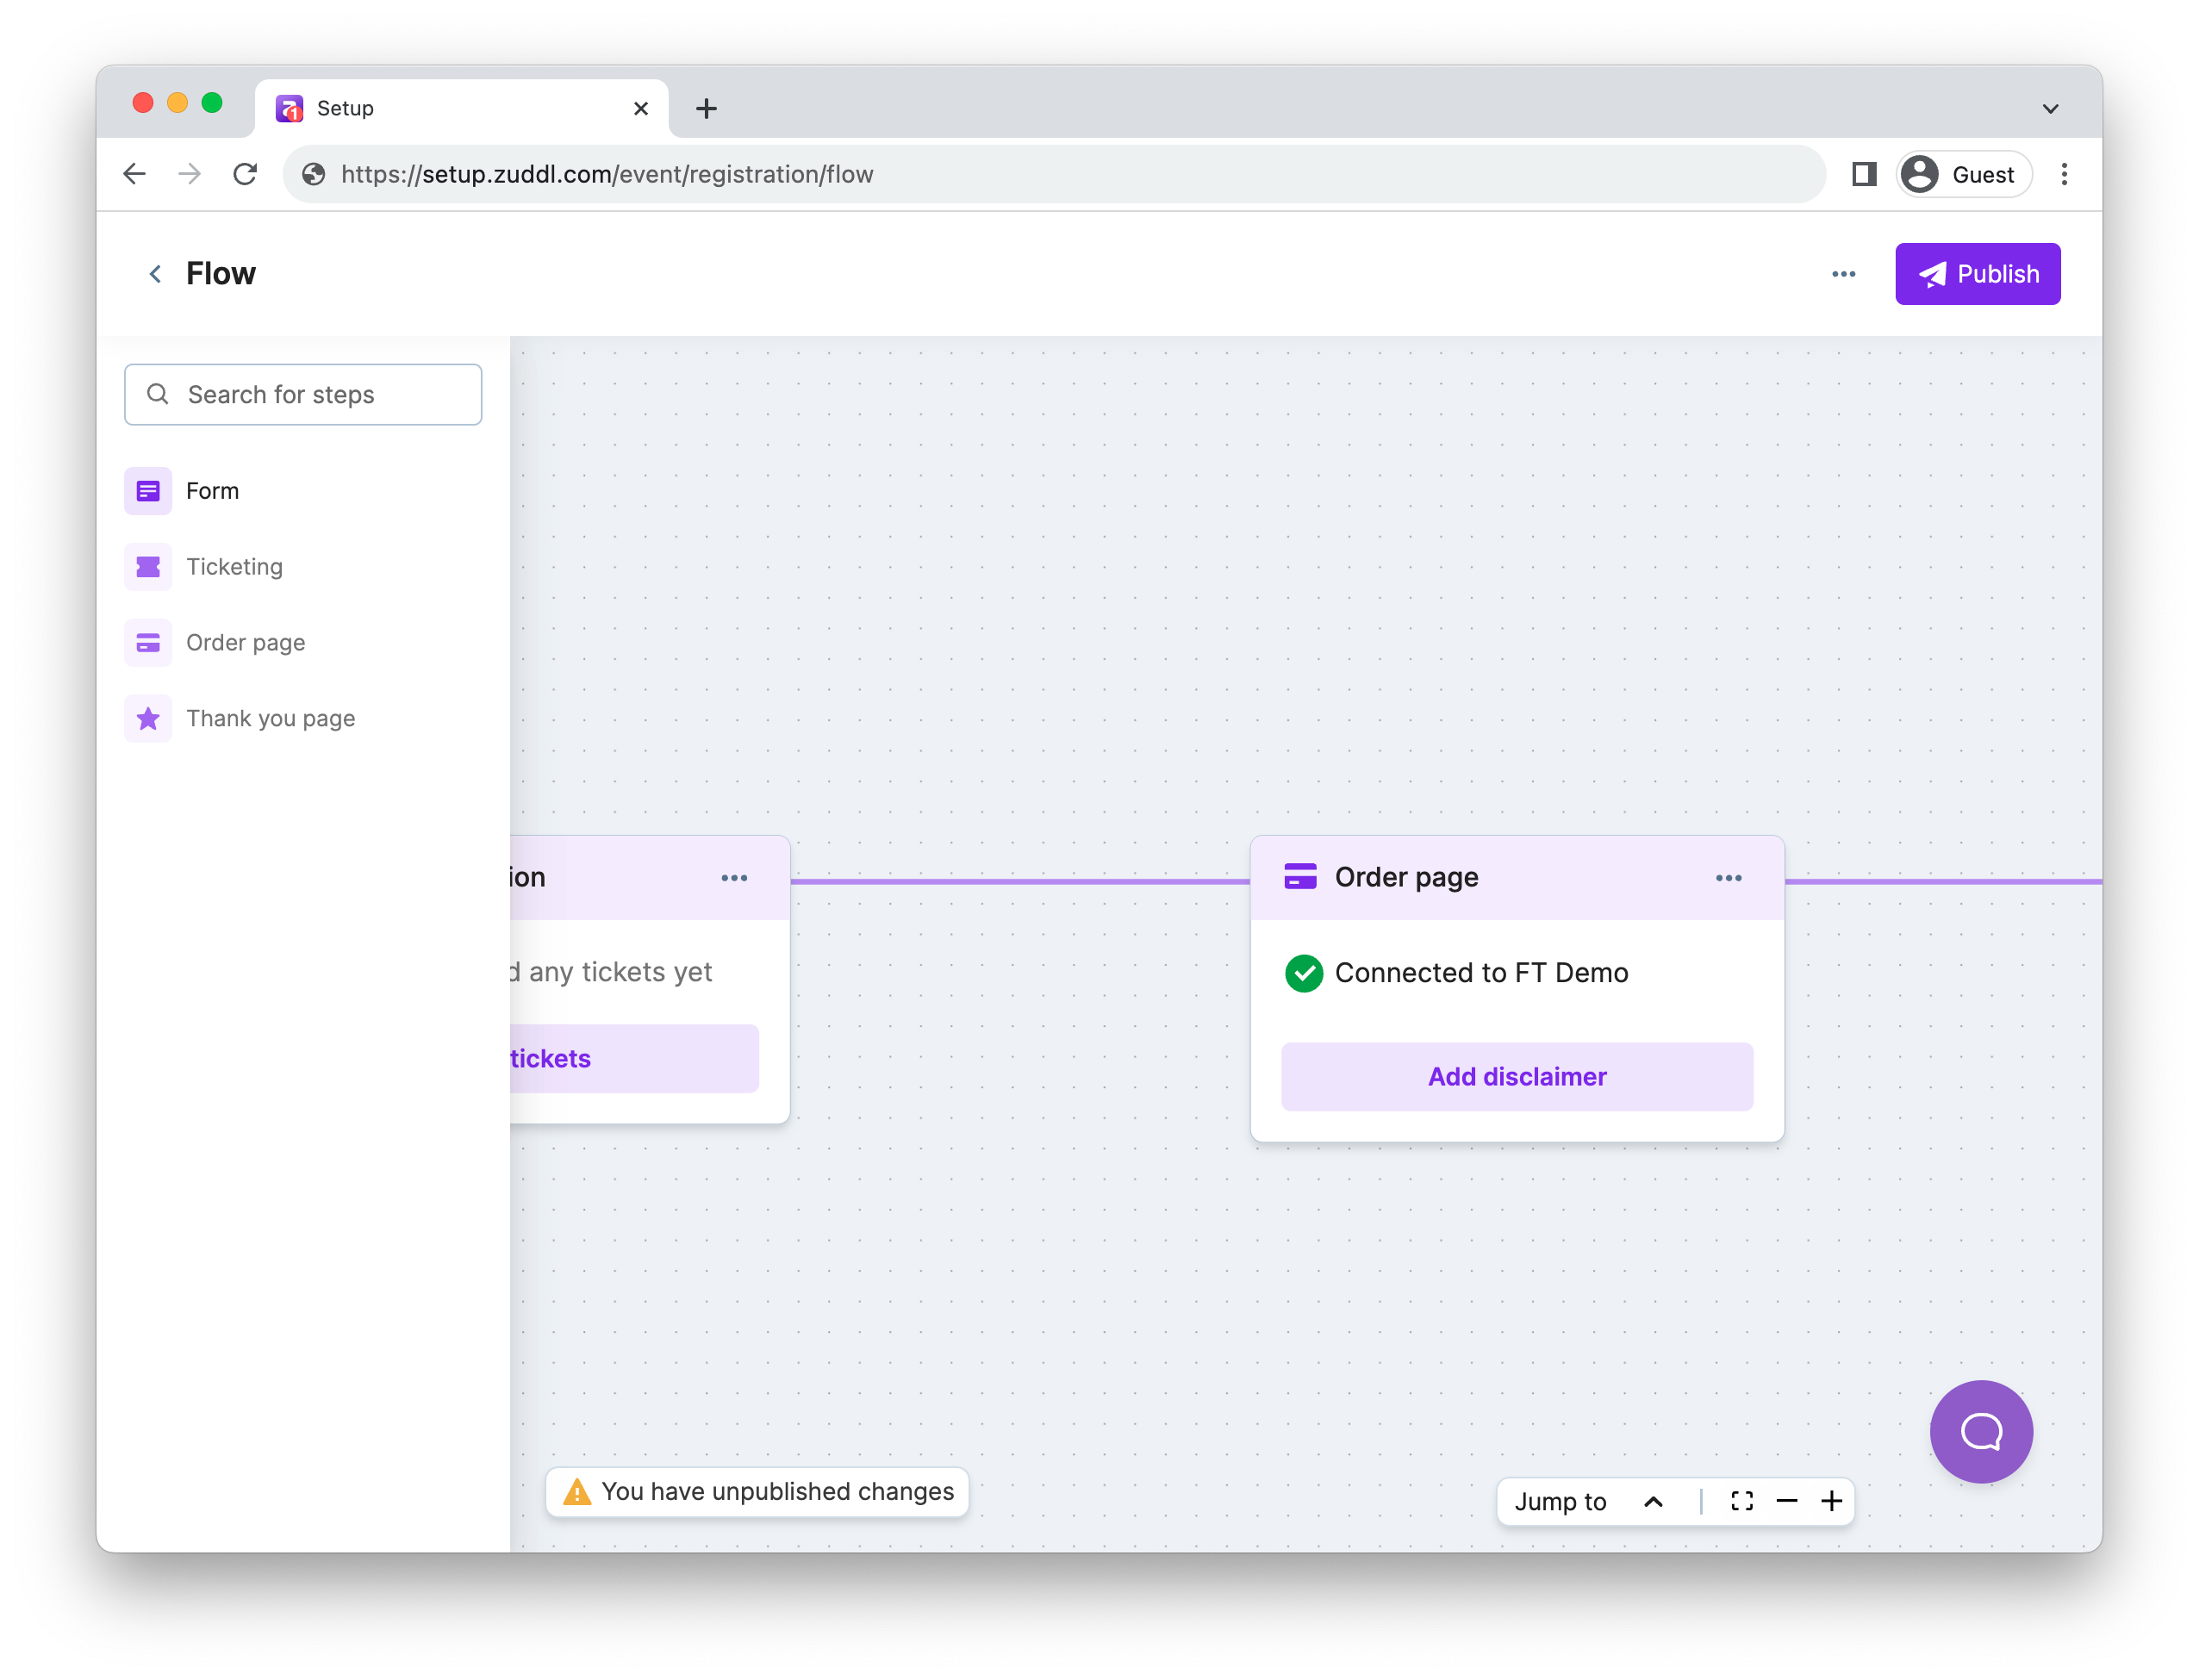
An Order page is where your customers make payments. A merchant account is required to facilitate ticket purchases by attendees using preferred payment methods. Click on Set up merchant account, this takes you to the Merchant account tab under Registration > Ticketing. Learn how to set up a merchant account.
You can also Add disclaimer.
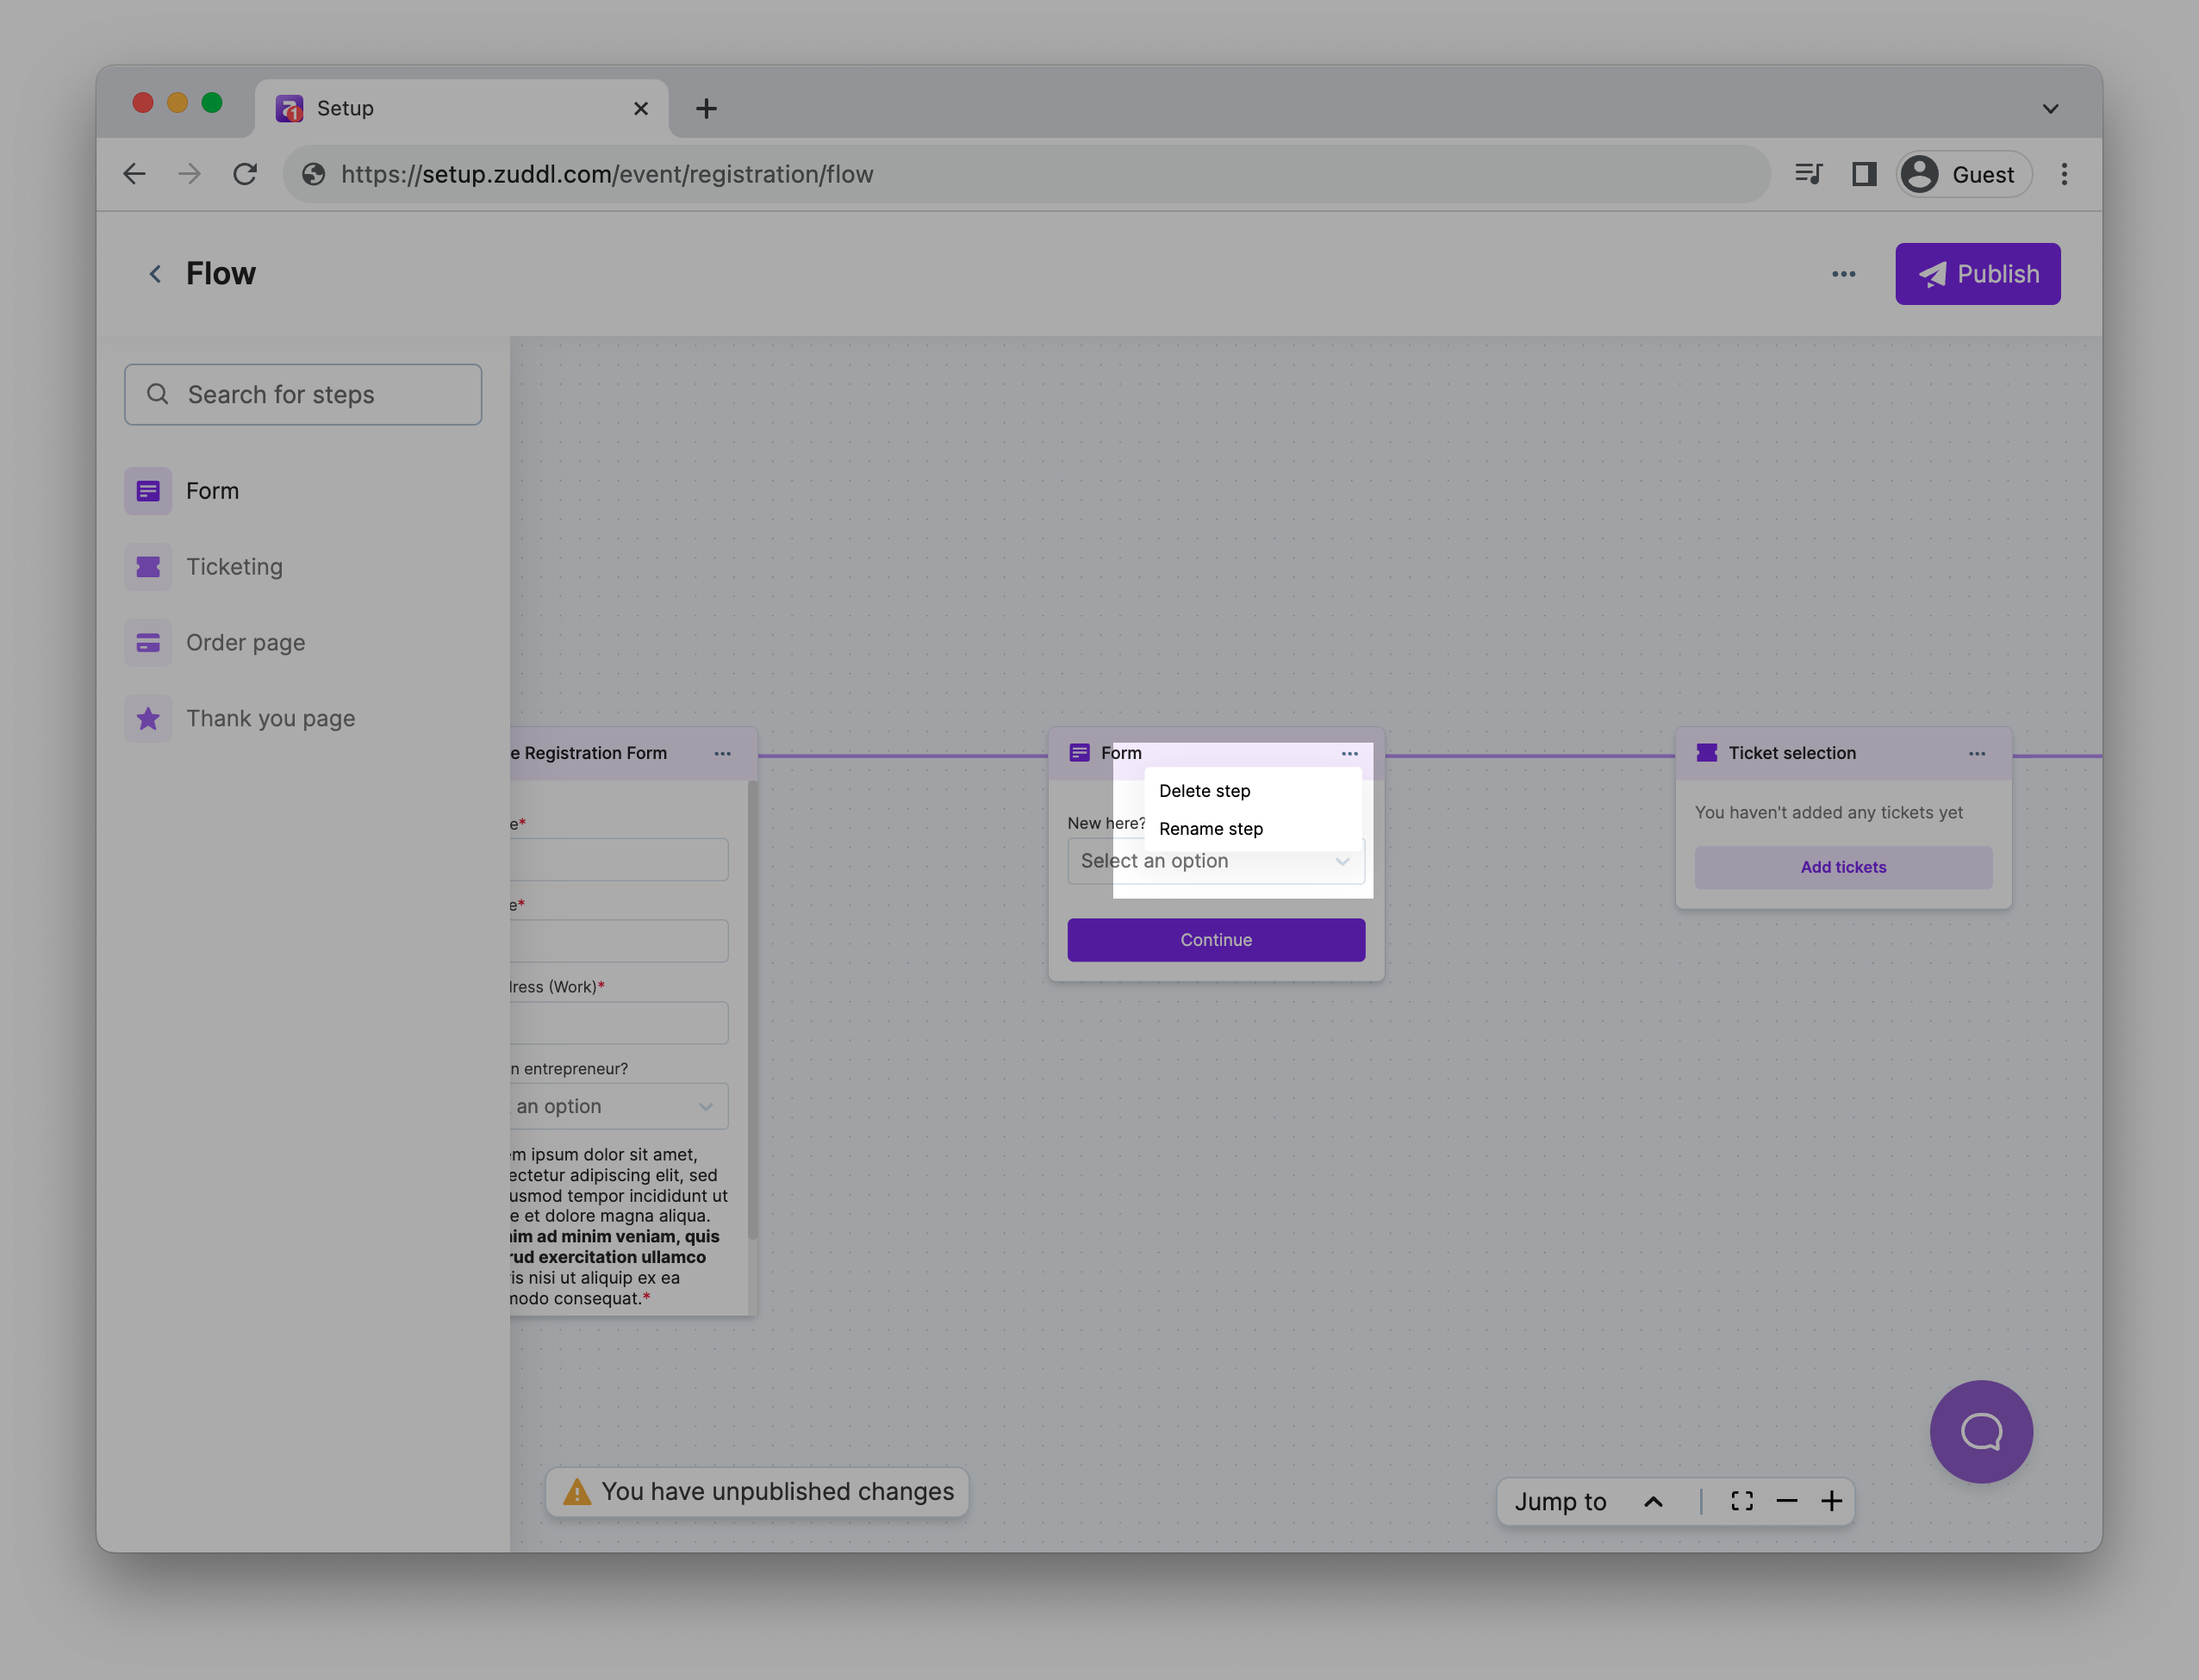
Note: You can also Rename/Delete the Order page step.
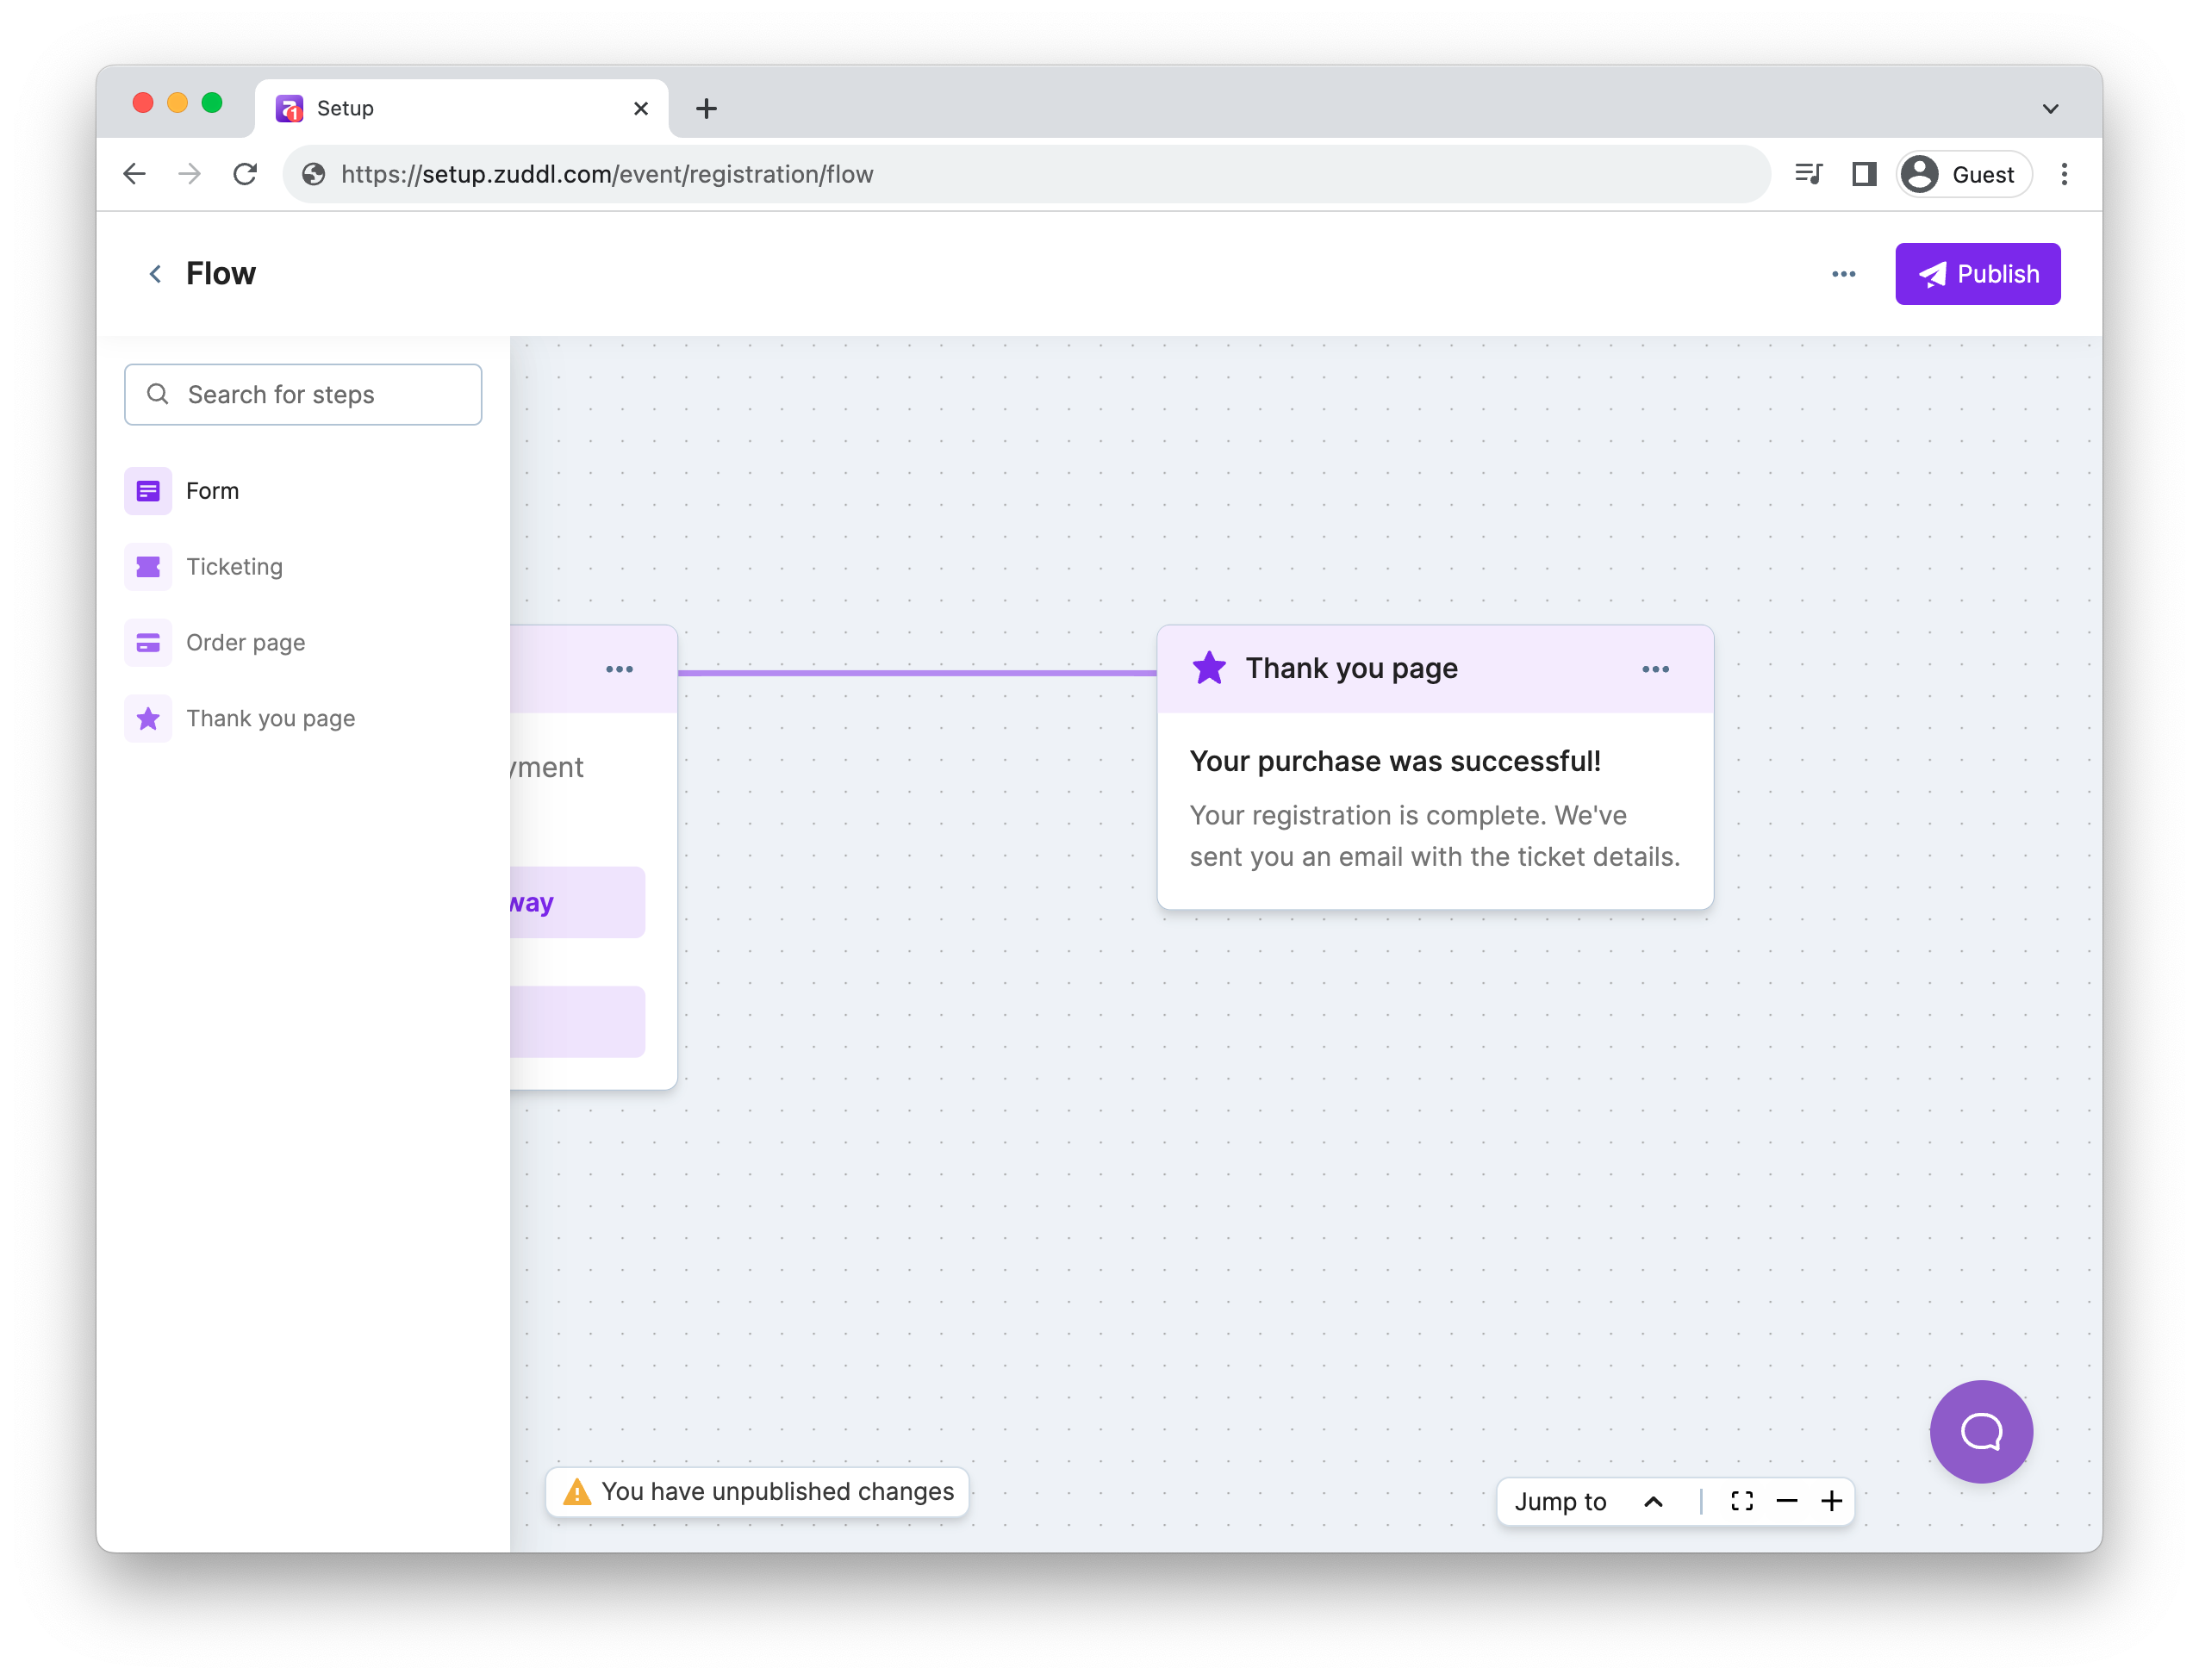
Finally, edit the Success/Thank you page content. You can edit the standard messaging for Page title and the Sub-text to be shown to your attendees.
Edit registration option
The edit registration option will not be shown if the attendee registration approval setting is toggled on.
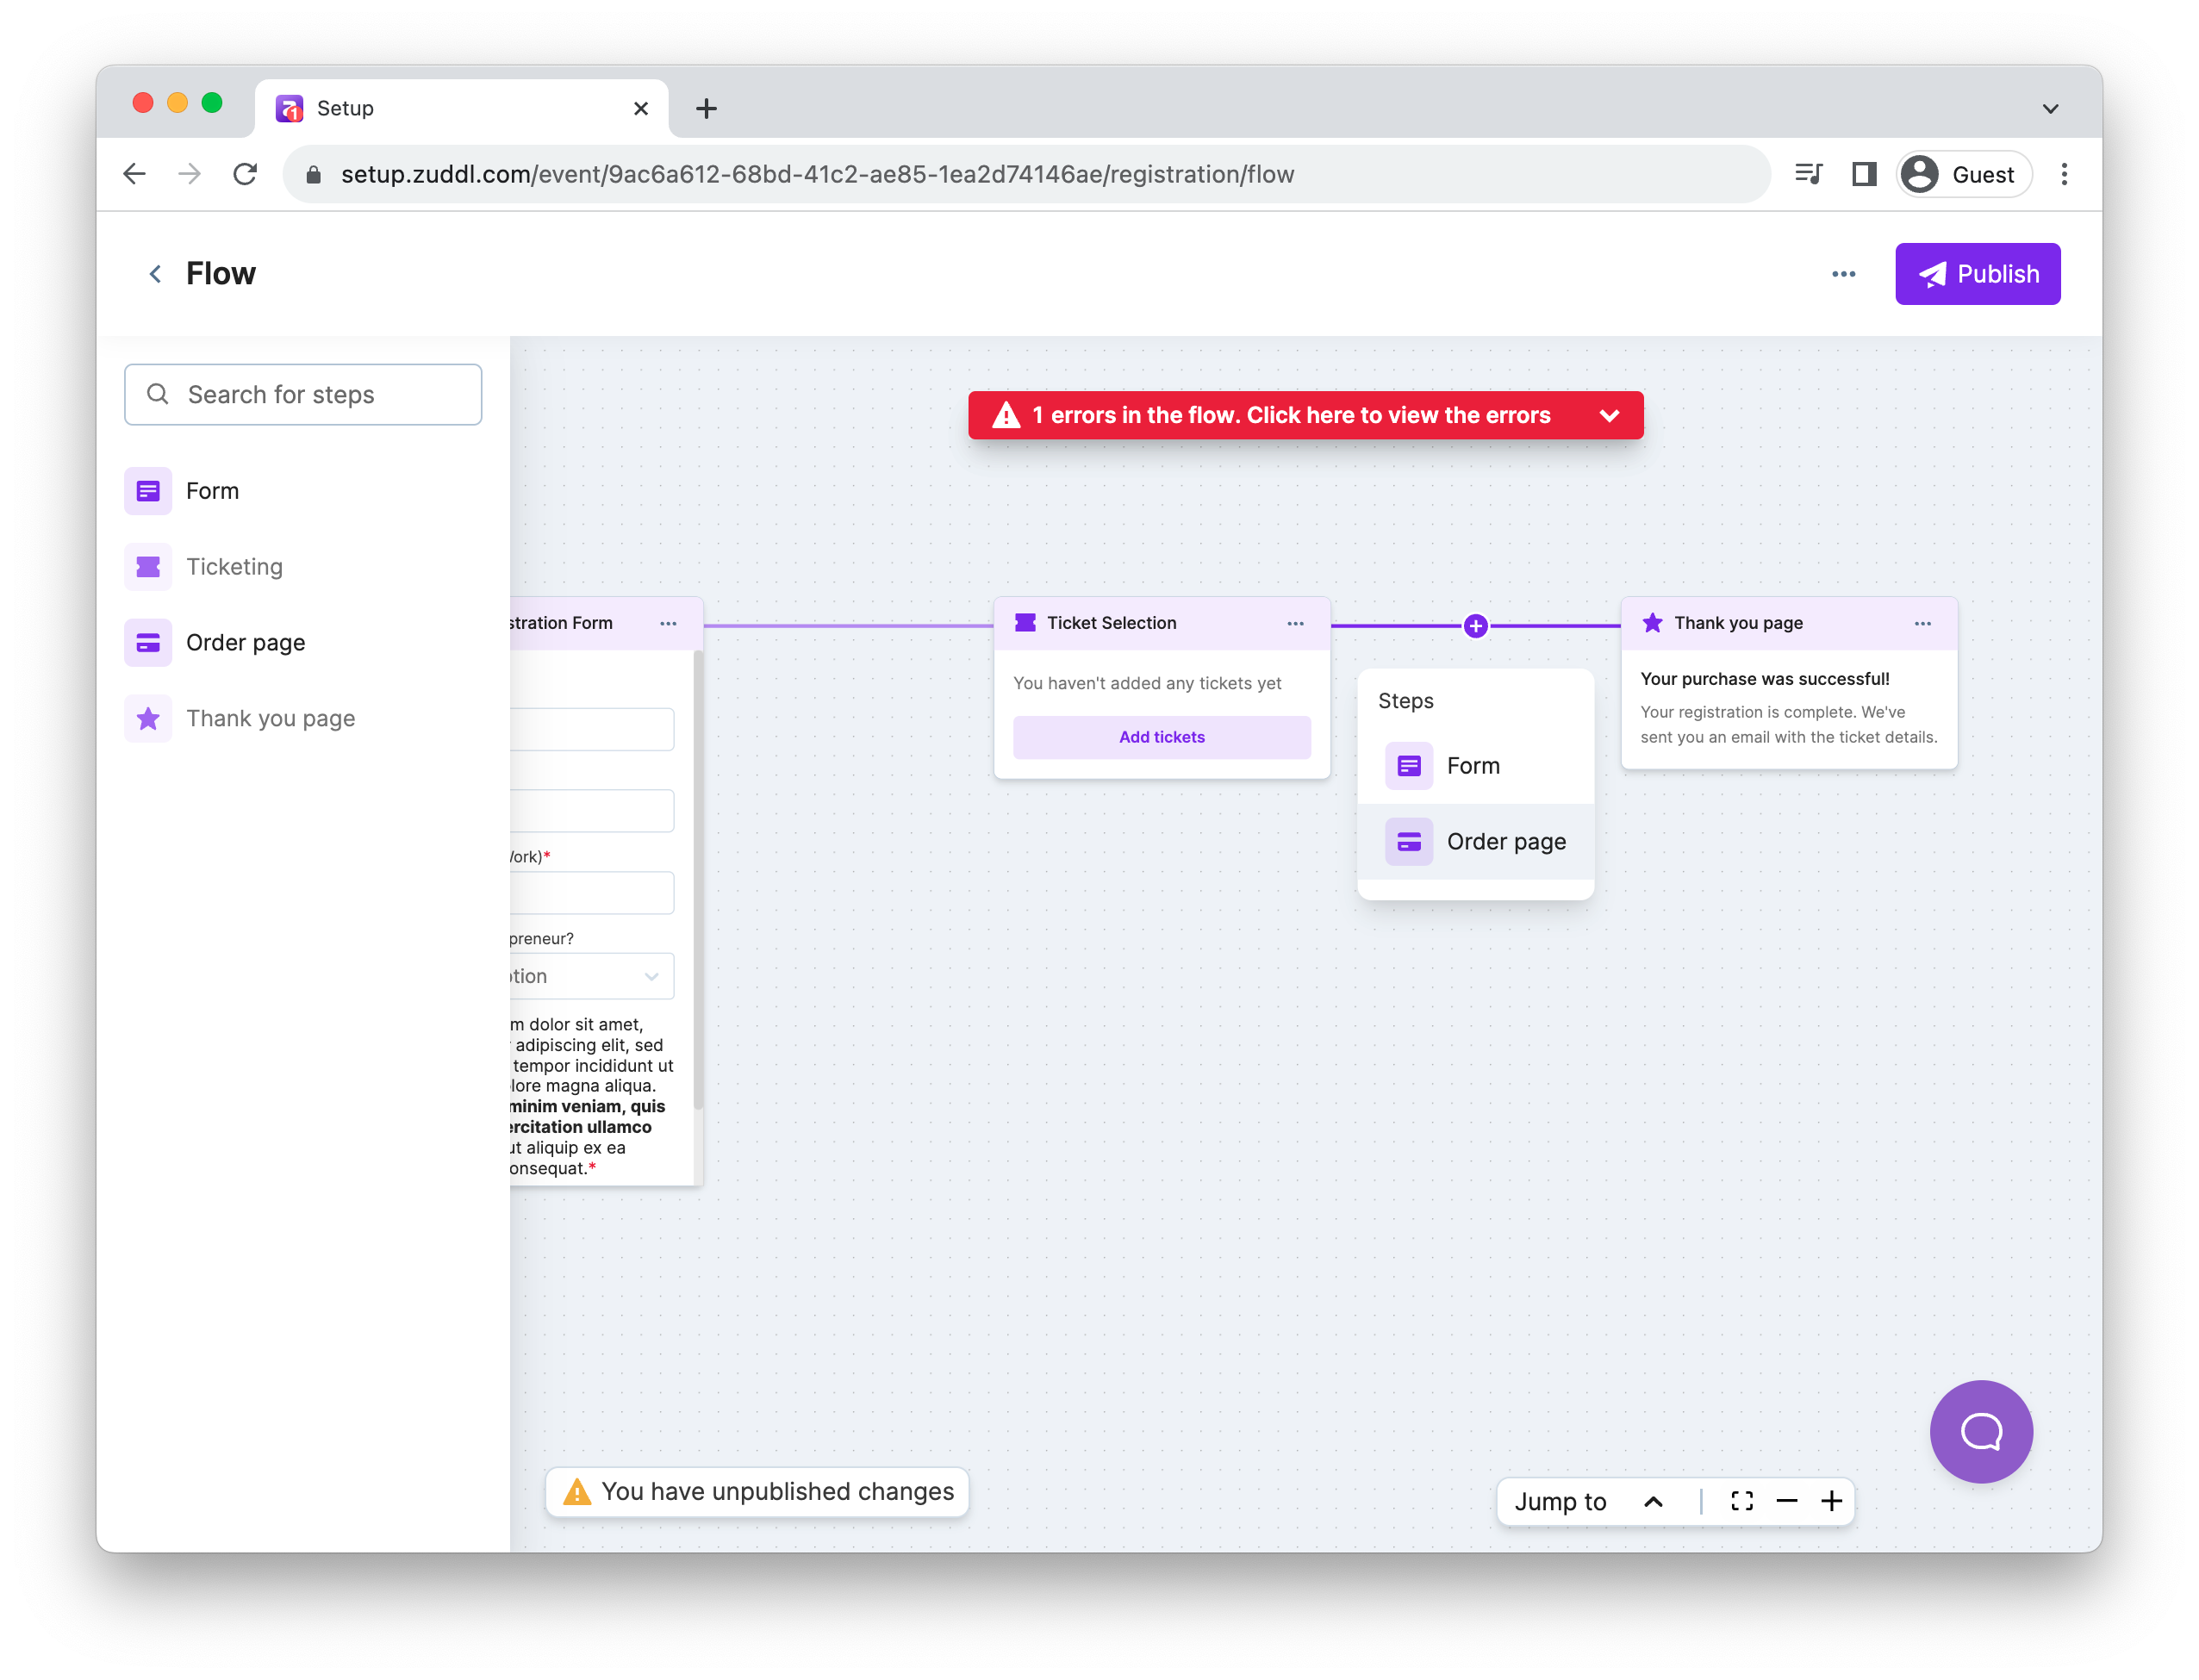
If you accidentally delete the Ticket selection and Order page. You can click on the + button in the connecting lines to add them back. The Order page step can only be added if the Ticket selection step is present.
This completes the flow setup, and the data flow is auto-saved.
Publishing the flow
Publishing the flow makes it visible to attendees who plan to register for your event. After you have made all the changes, you can click the Publish button.
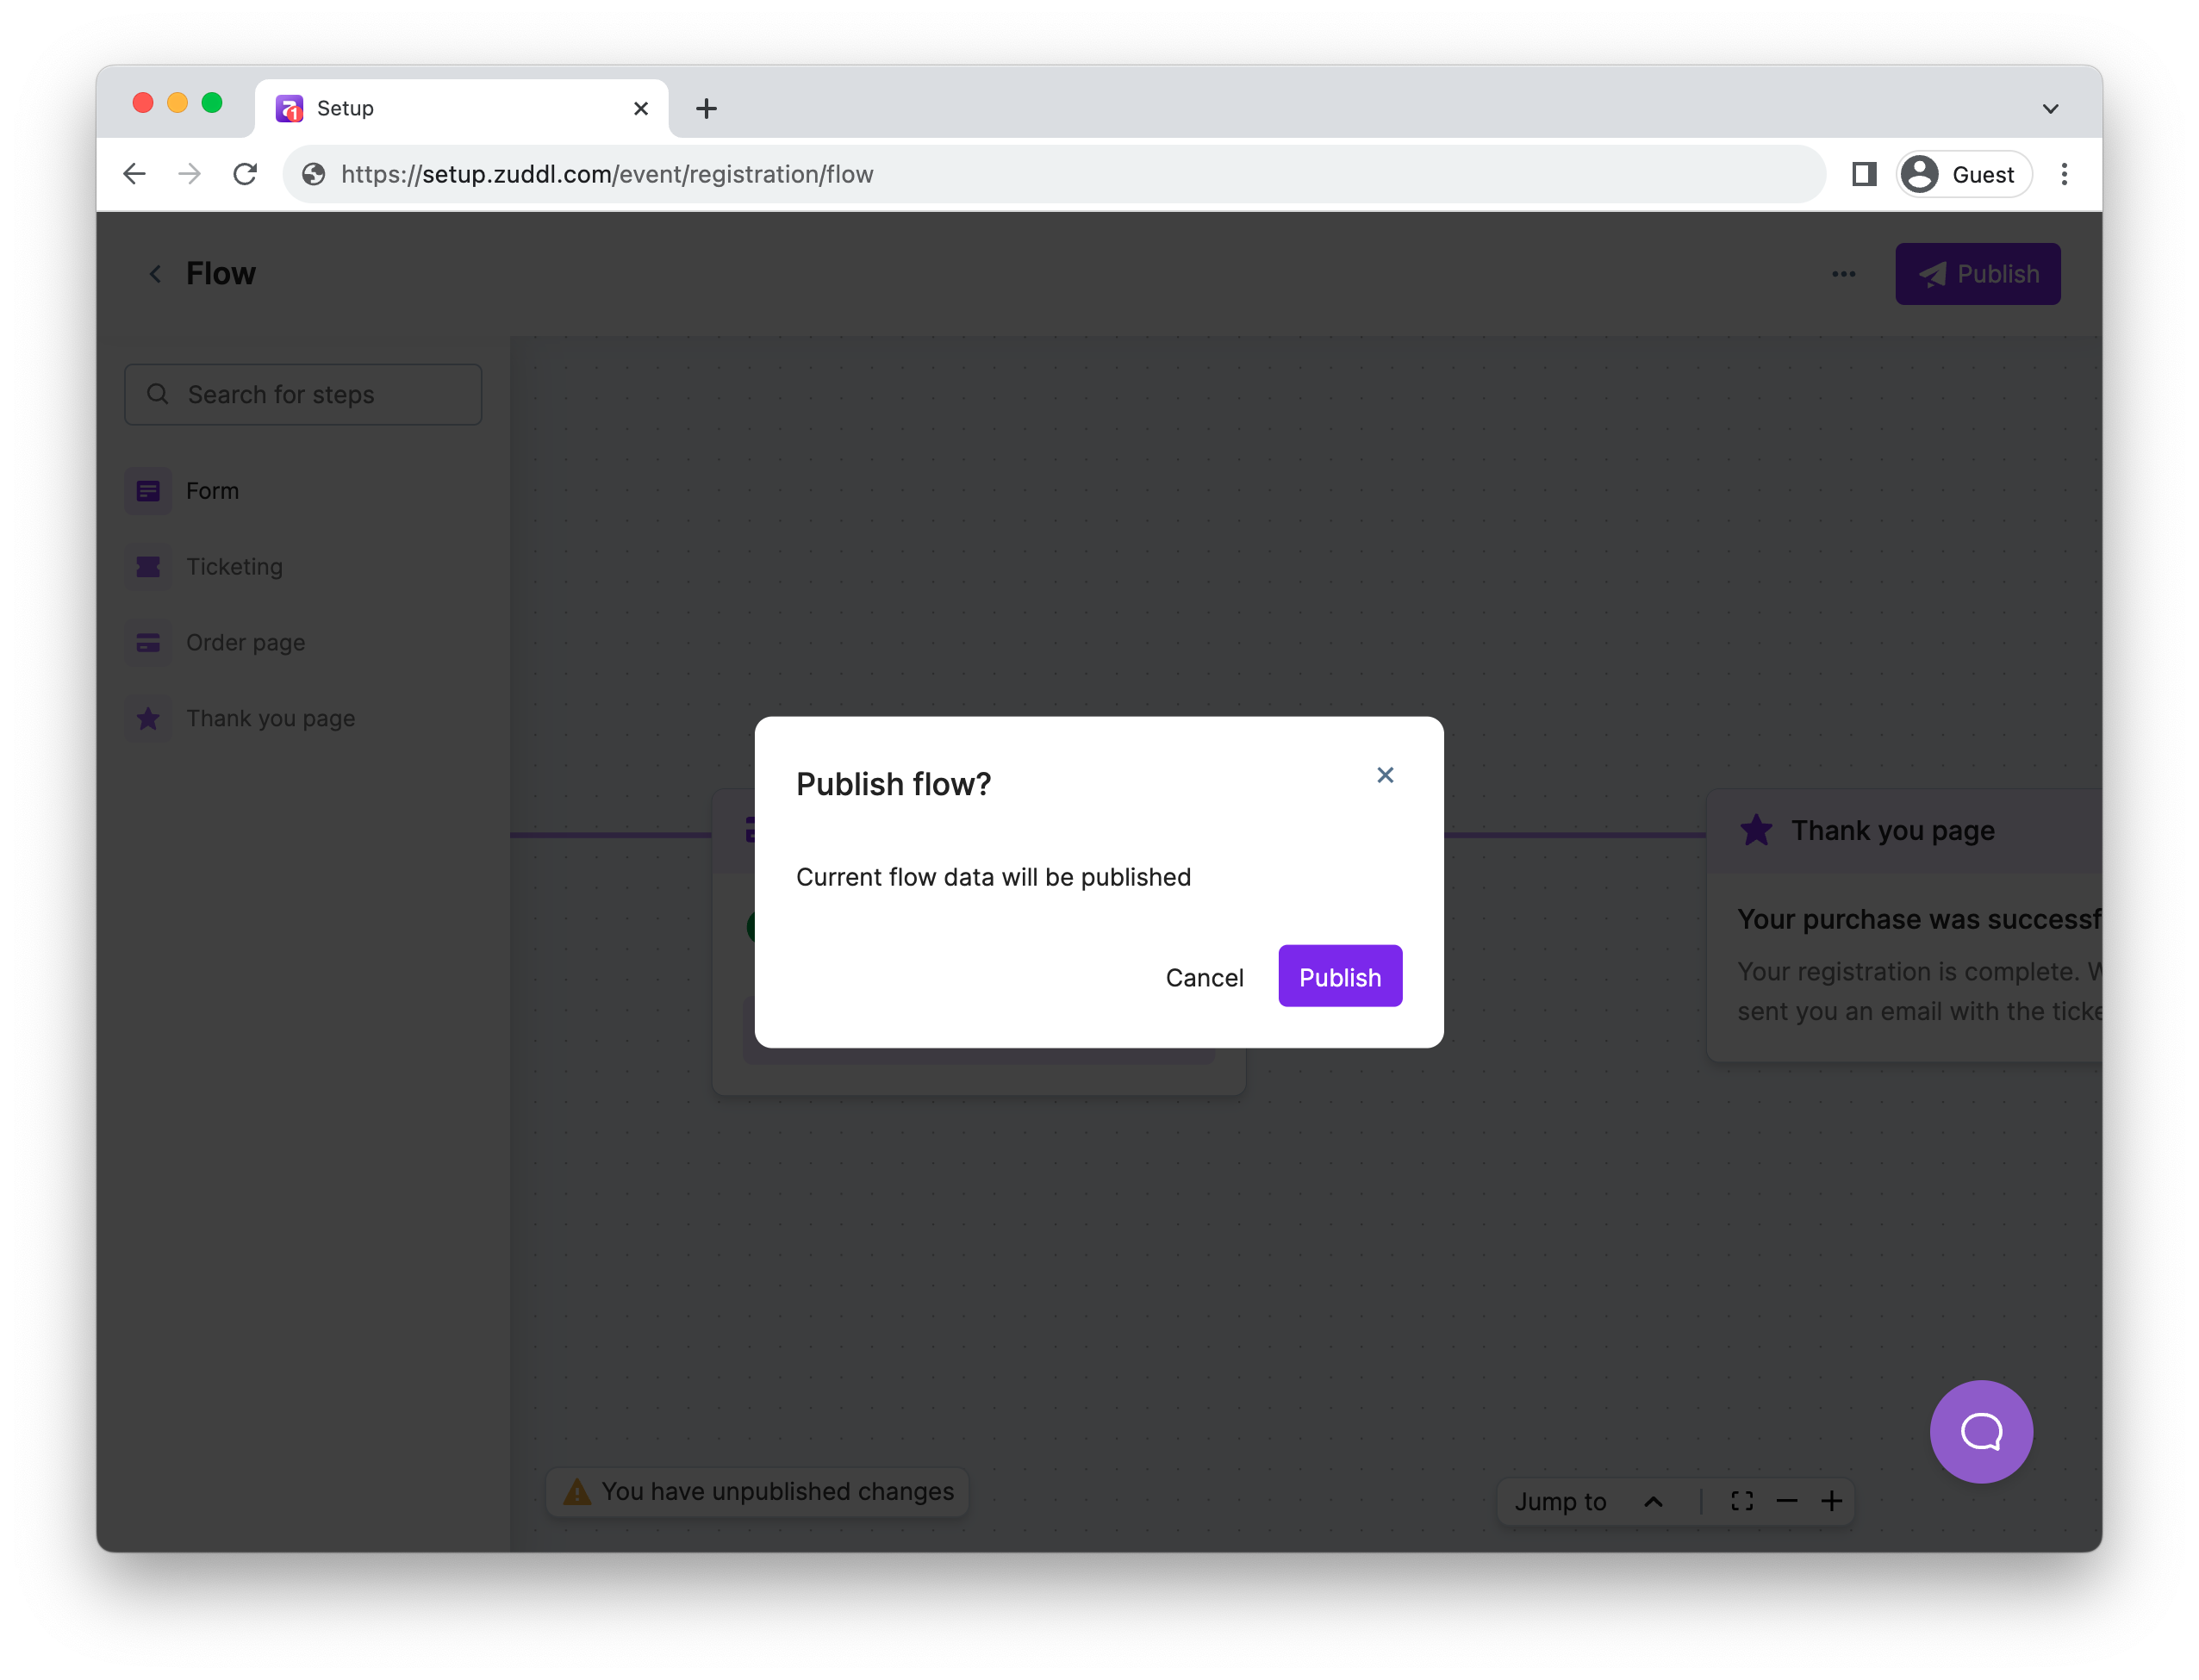
On the confirmation pop-up, click Publish. This makes the recently edited registration flow live for your attendees.
Note: The confirmation pop-up appears only when you publish a registration flow for the first time. After that, new changes are published when you click the Publish button.
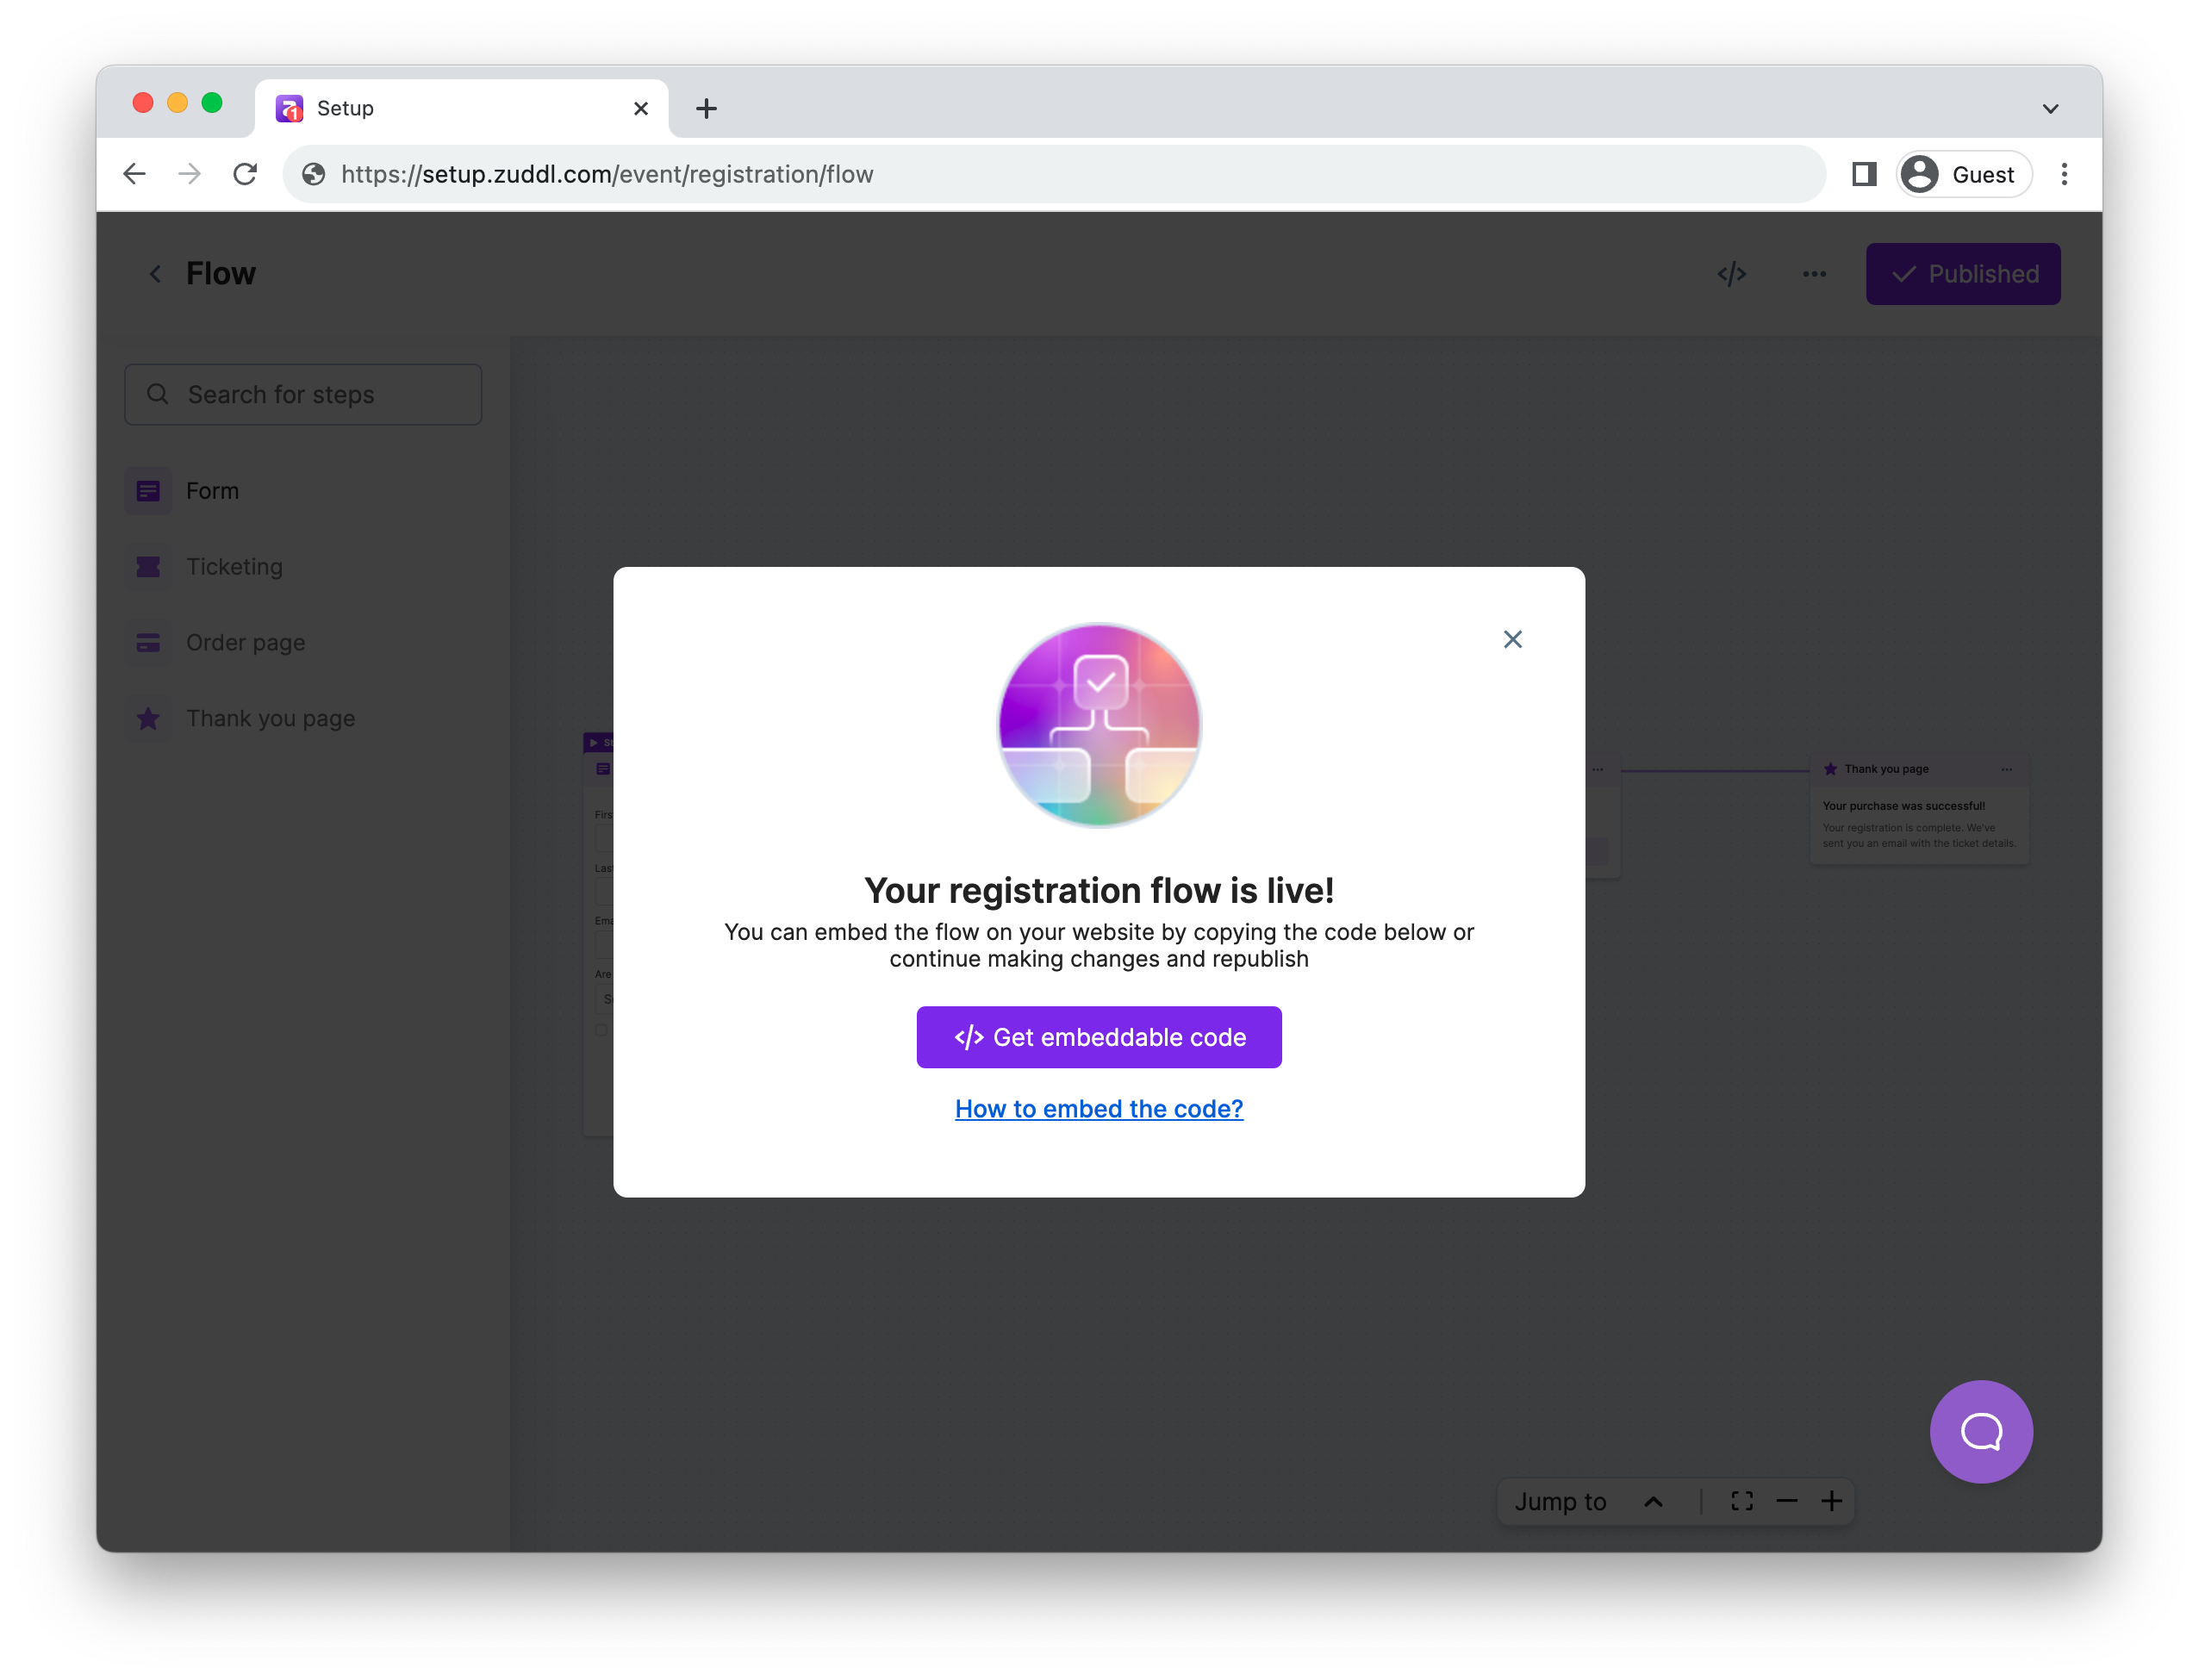
You can click the Get embeddable code to copy the embeddable code to your clipboard to paste it at any desired web page to show the Zuddl registration form and collect registrations.
Points to note:
- If you wish to embed flex widgets on third-party pages, you can use the ‘data-zuddl-sticky-header-id’ attribute, which needs to be added to the flow embed code if your page has a fixed (sticky) header.
- If the embeddable code for a particular registration flow is added twice to your webpage, it may cause some errors.
View and restore version
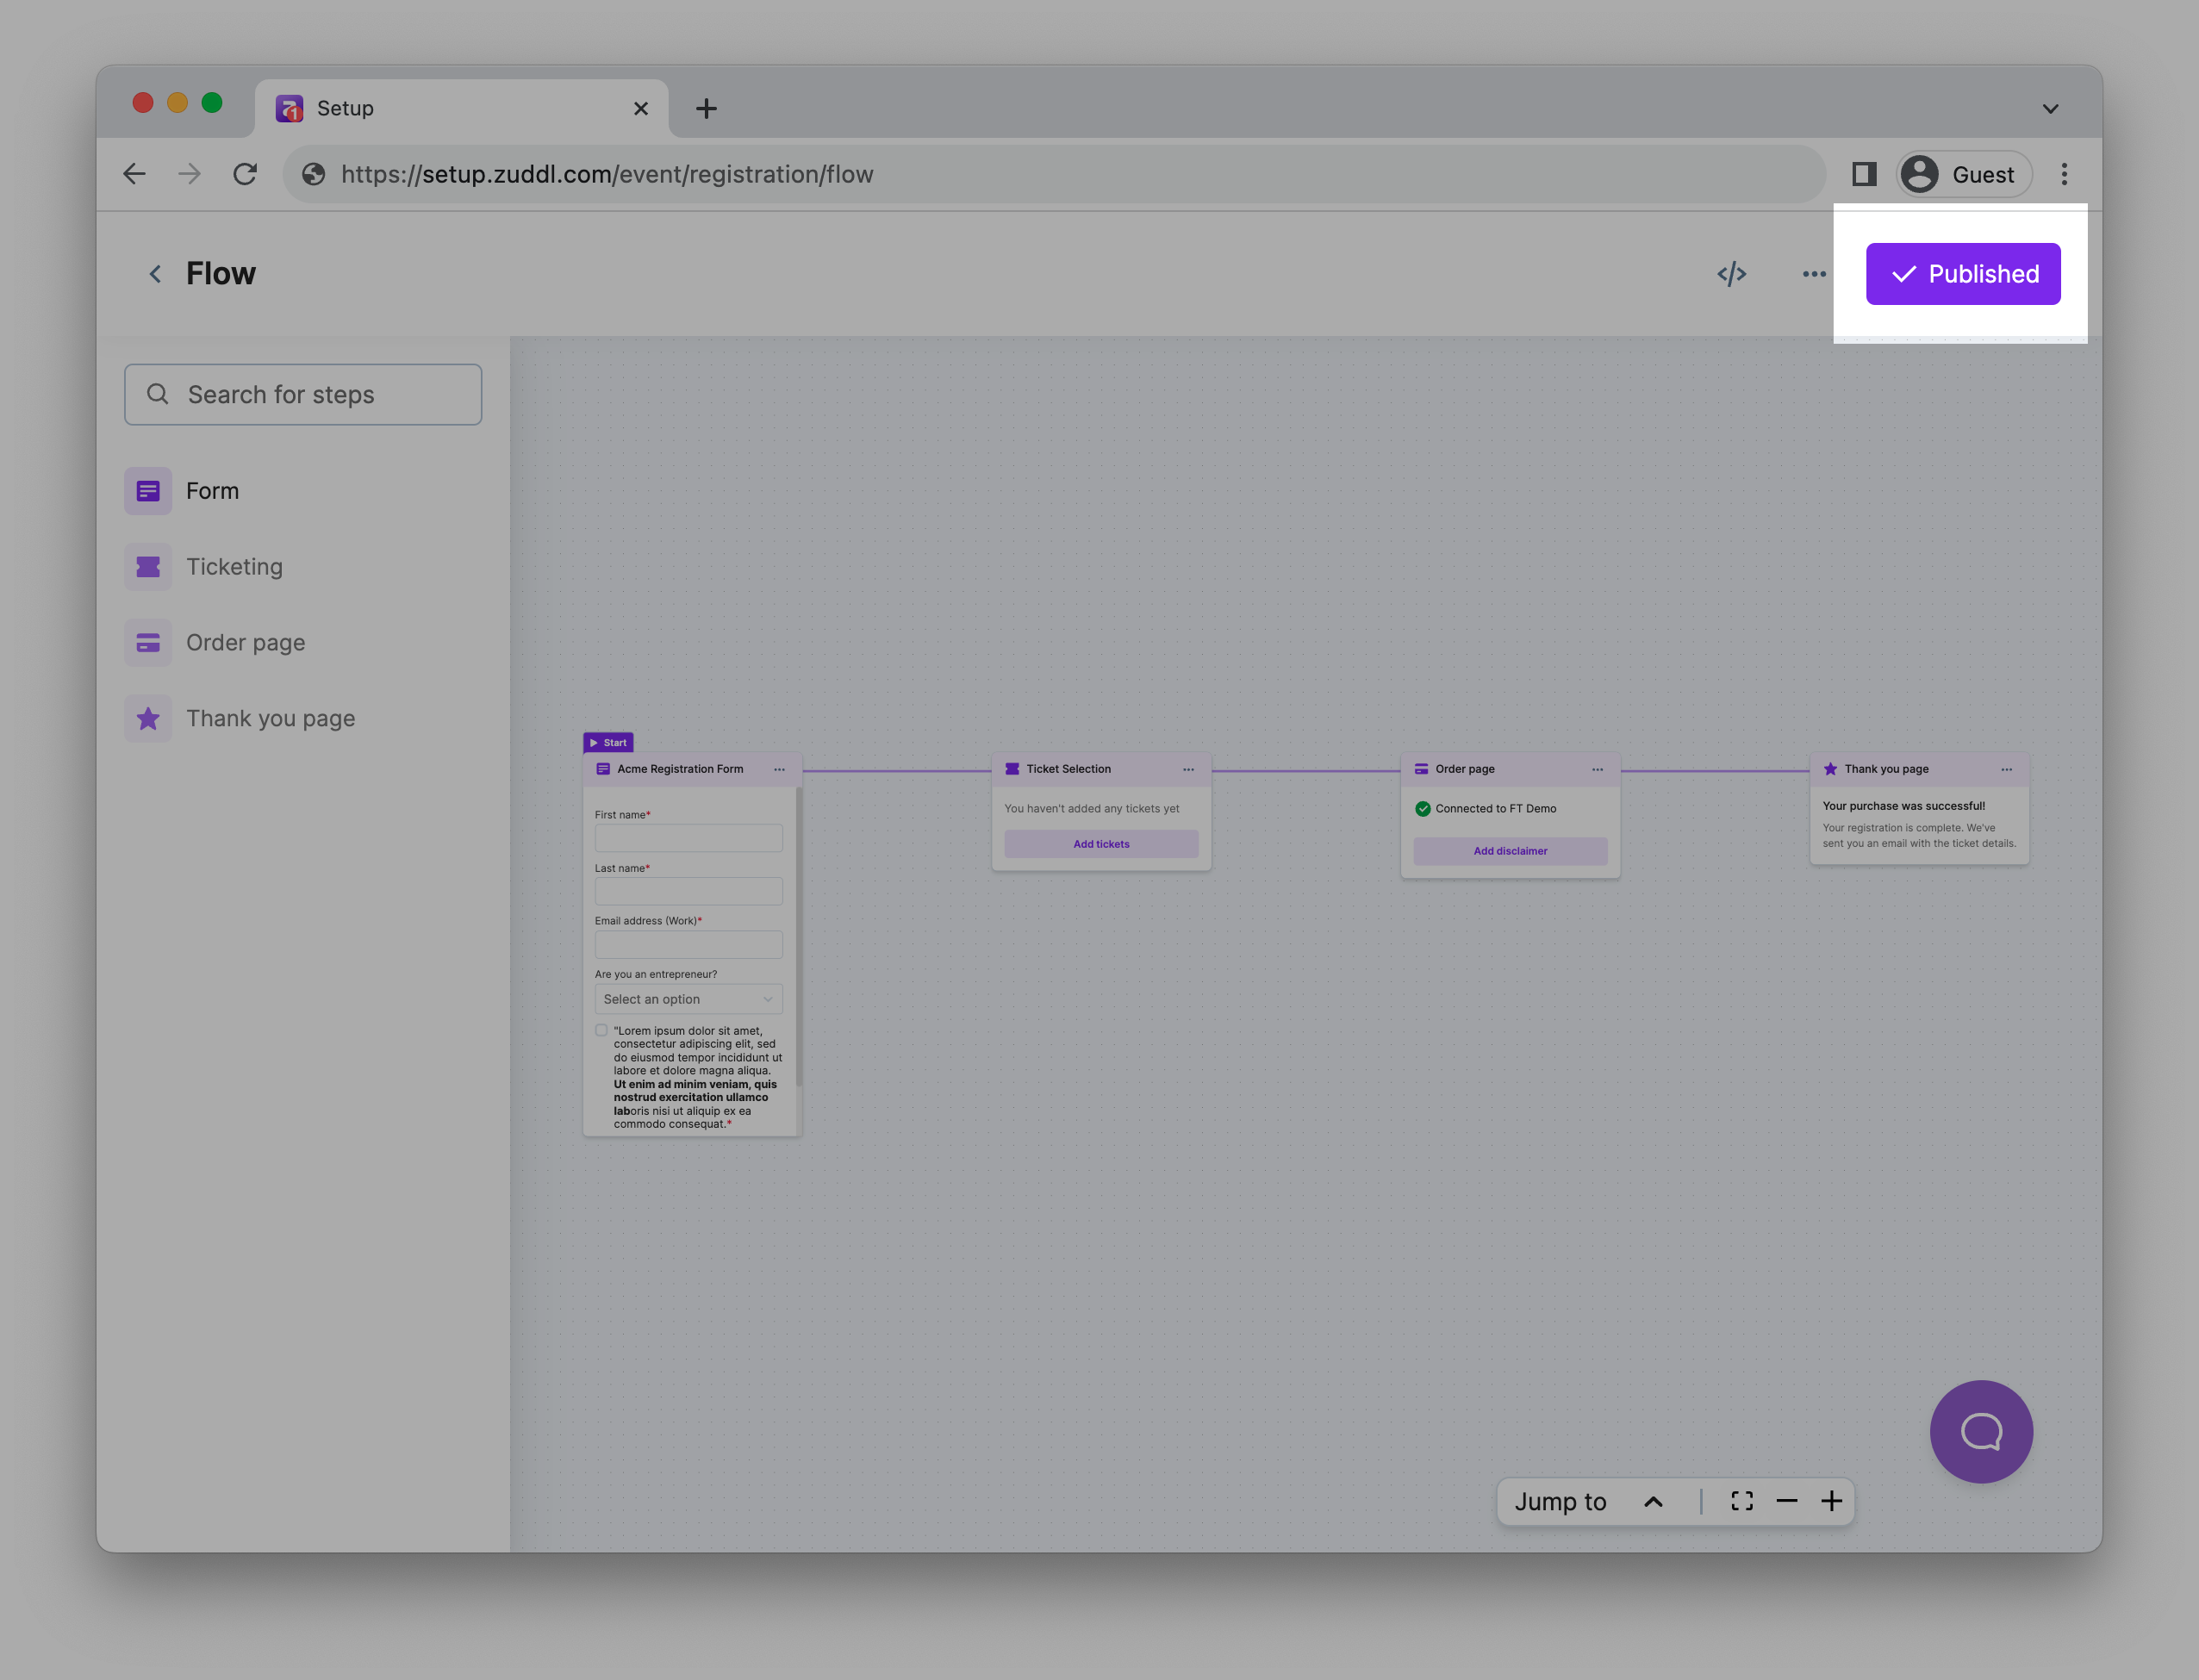
Once published, you can view the published flow by clicking the three dots icon on the top, as shown in the screenshot below:
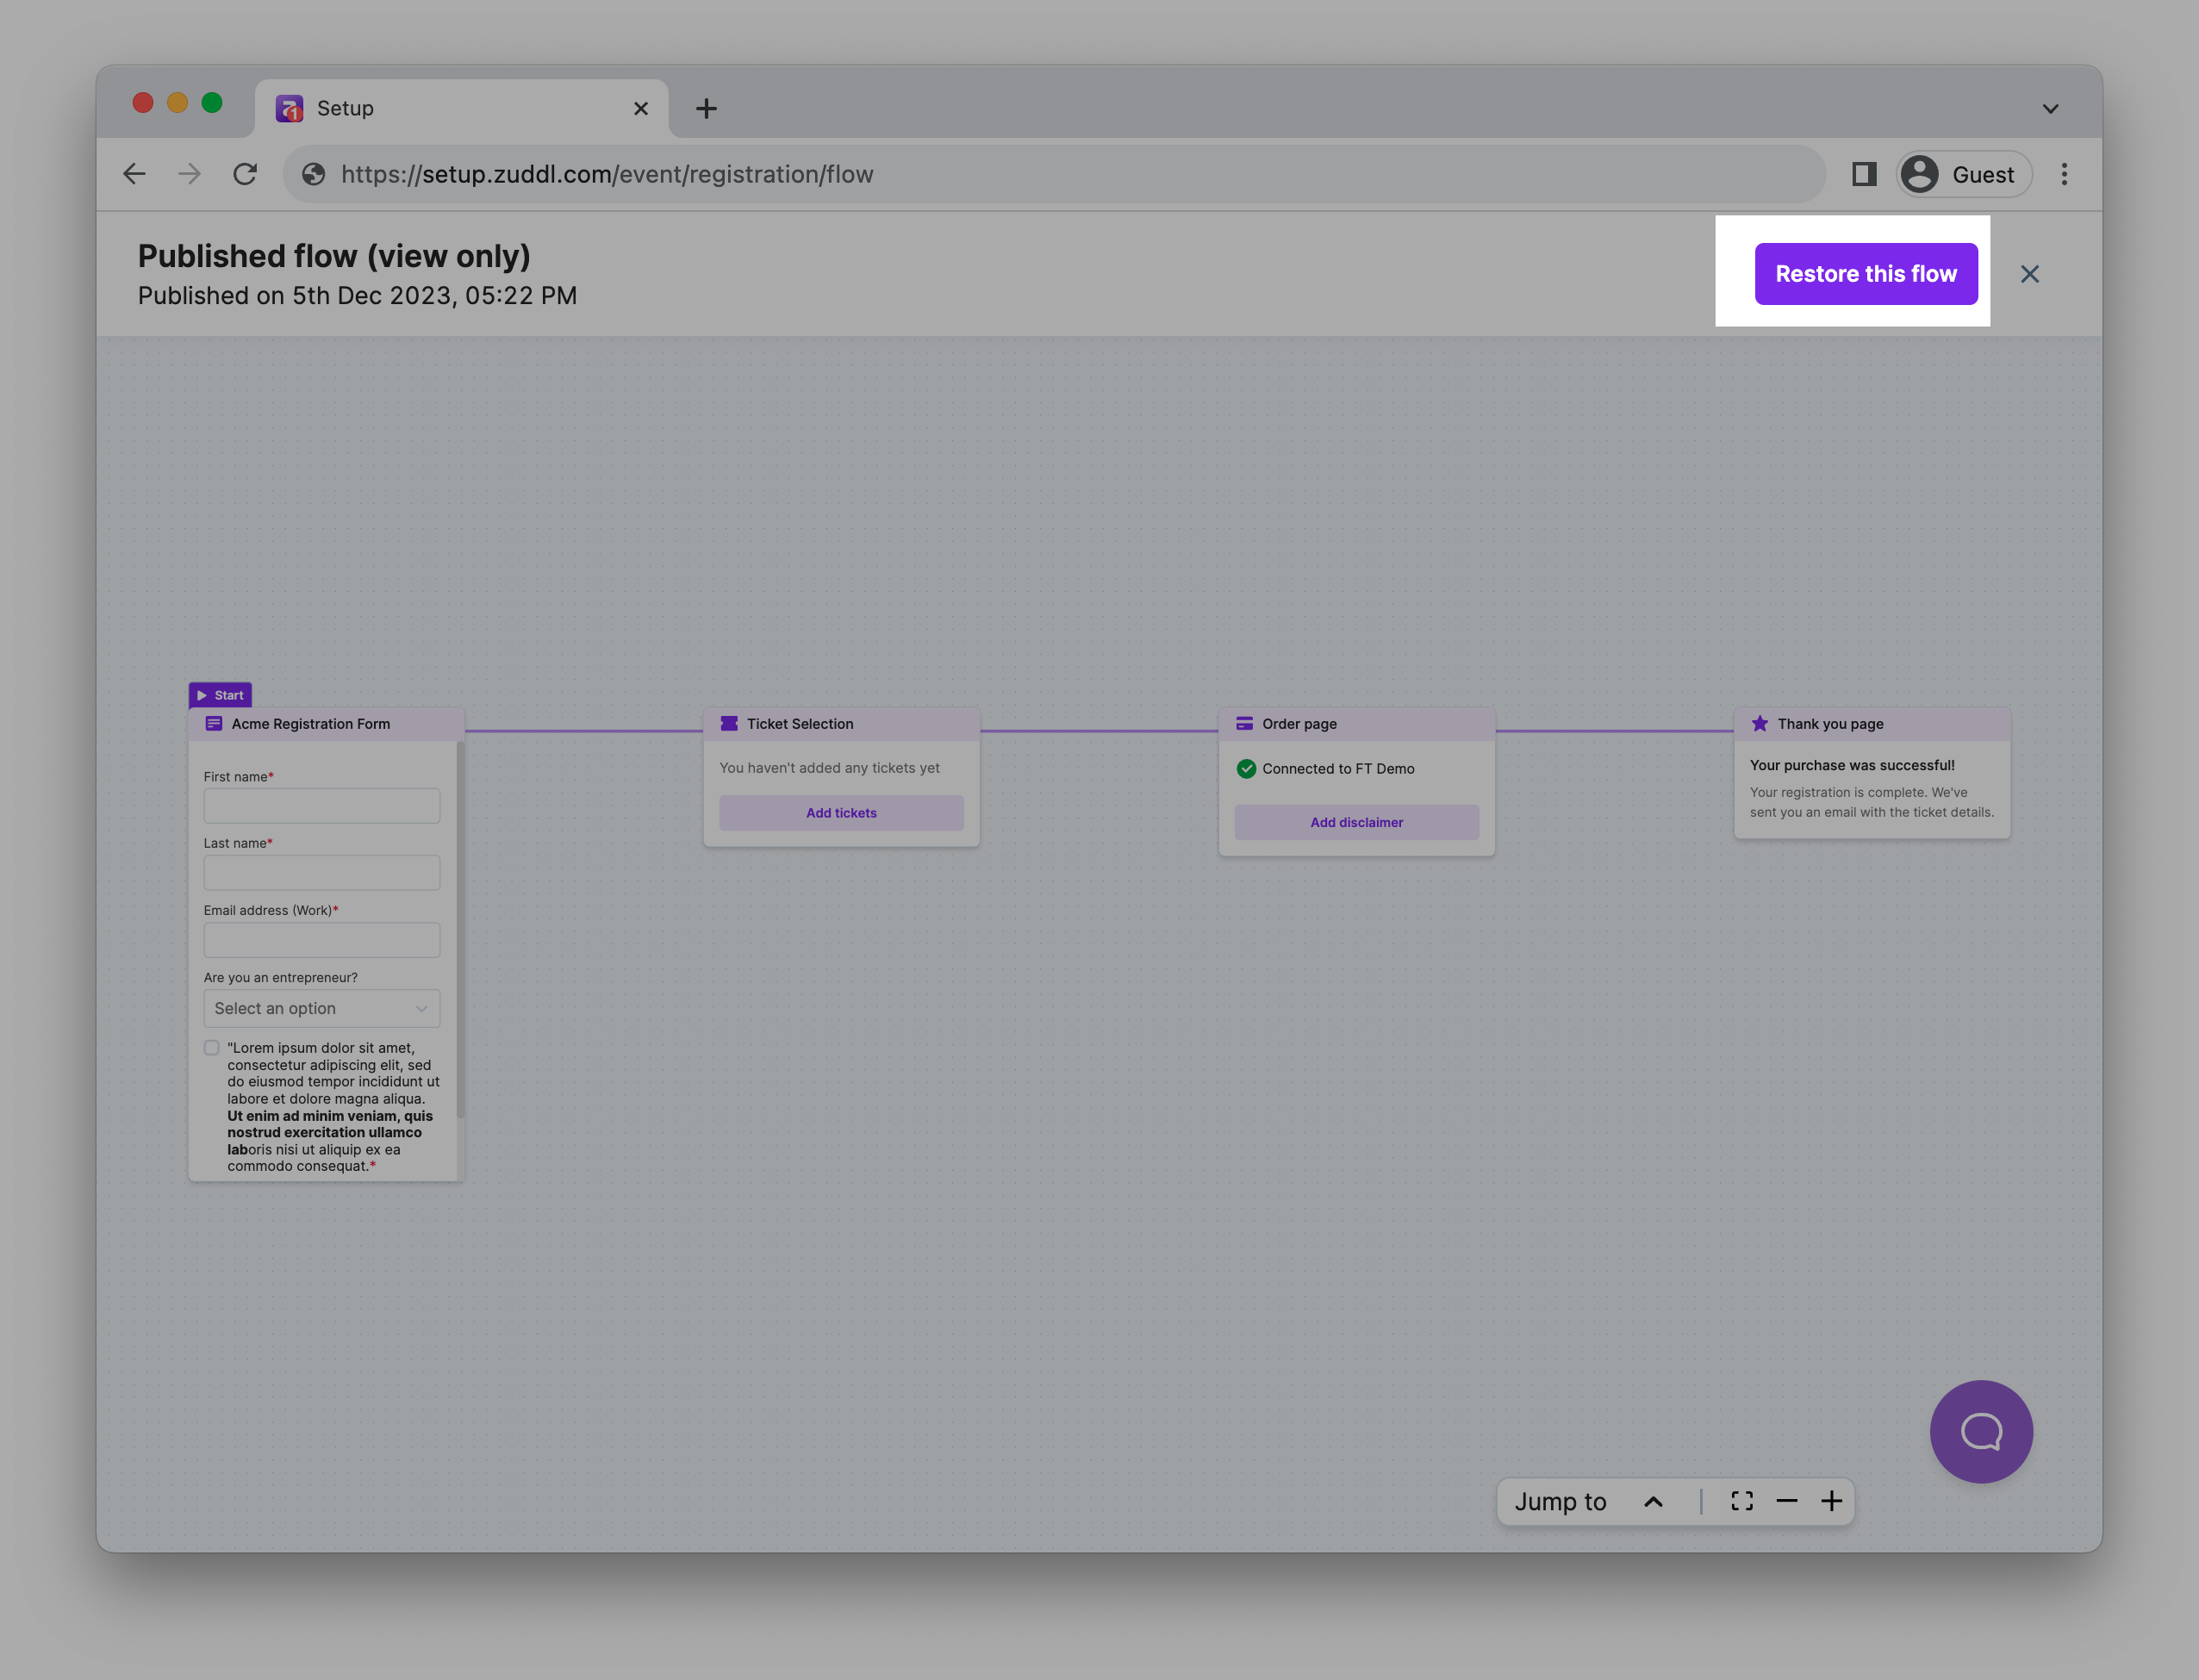
If you are making changes to an already published flow, you can restore the published version by clicking the Restore this flow button on the published flow view should you face any errors while editing the flow.
To view the previously published version, do not publish the data being worked upon.
Troubleshooting Errors
If there are any errors in the flow, they will be highlighted, as shown below. You can view more details to understand the error and fix it in the flow.
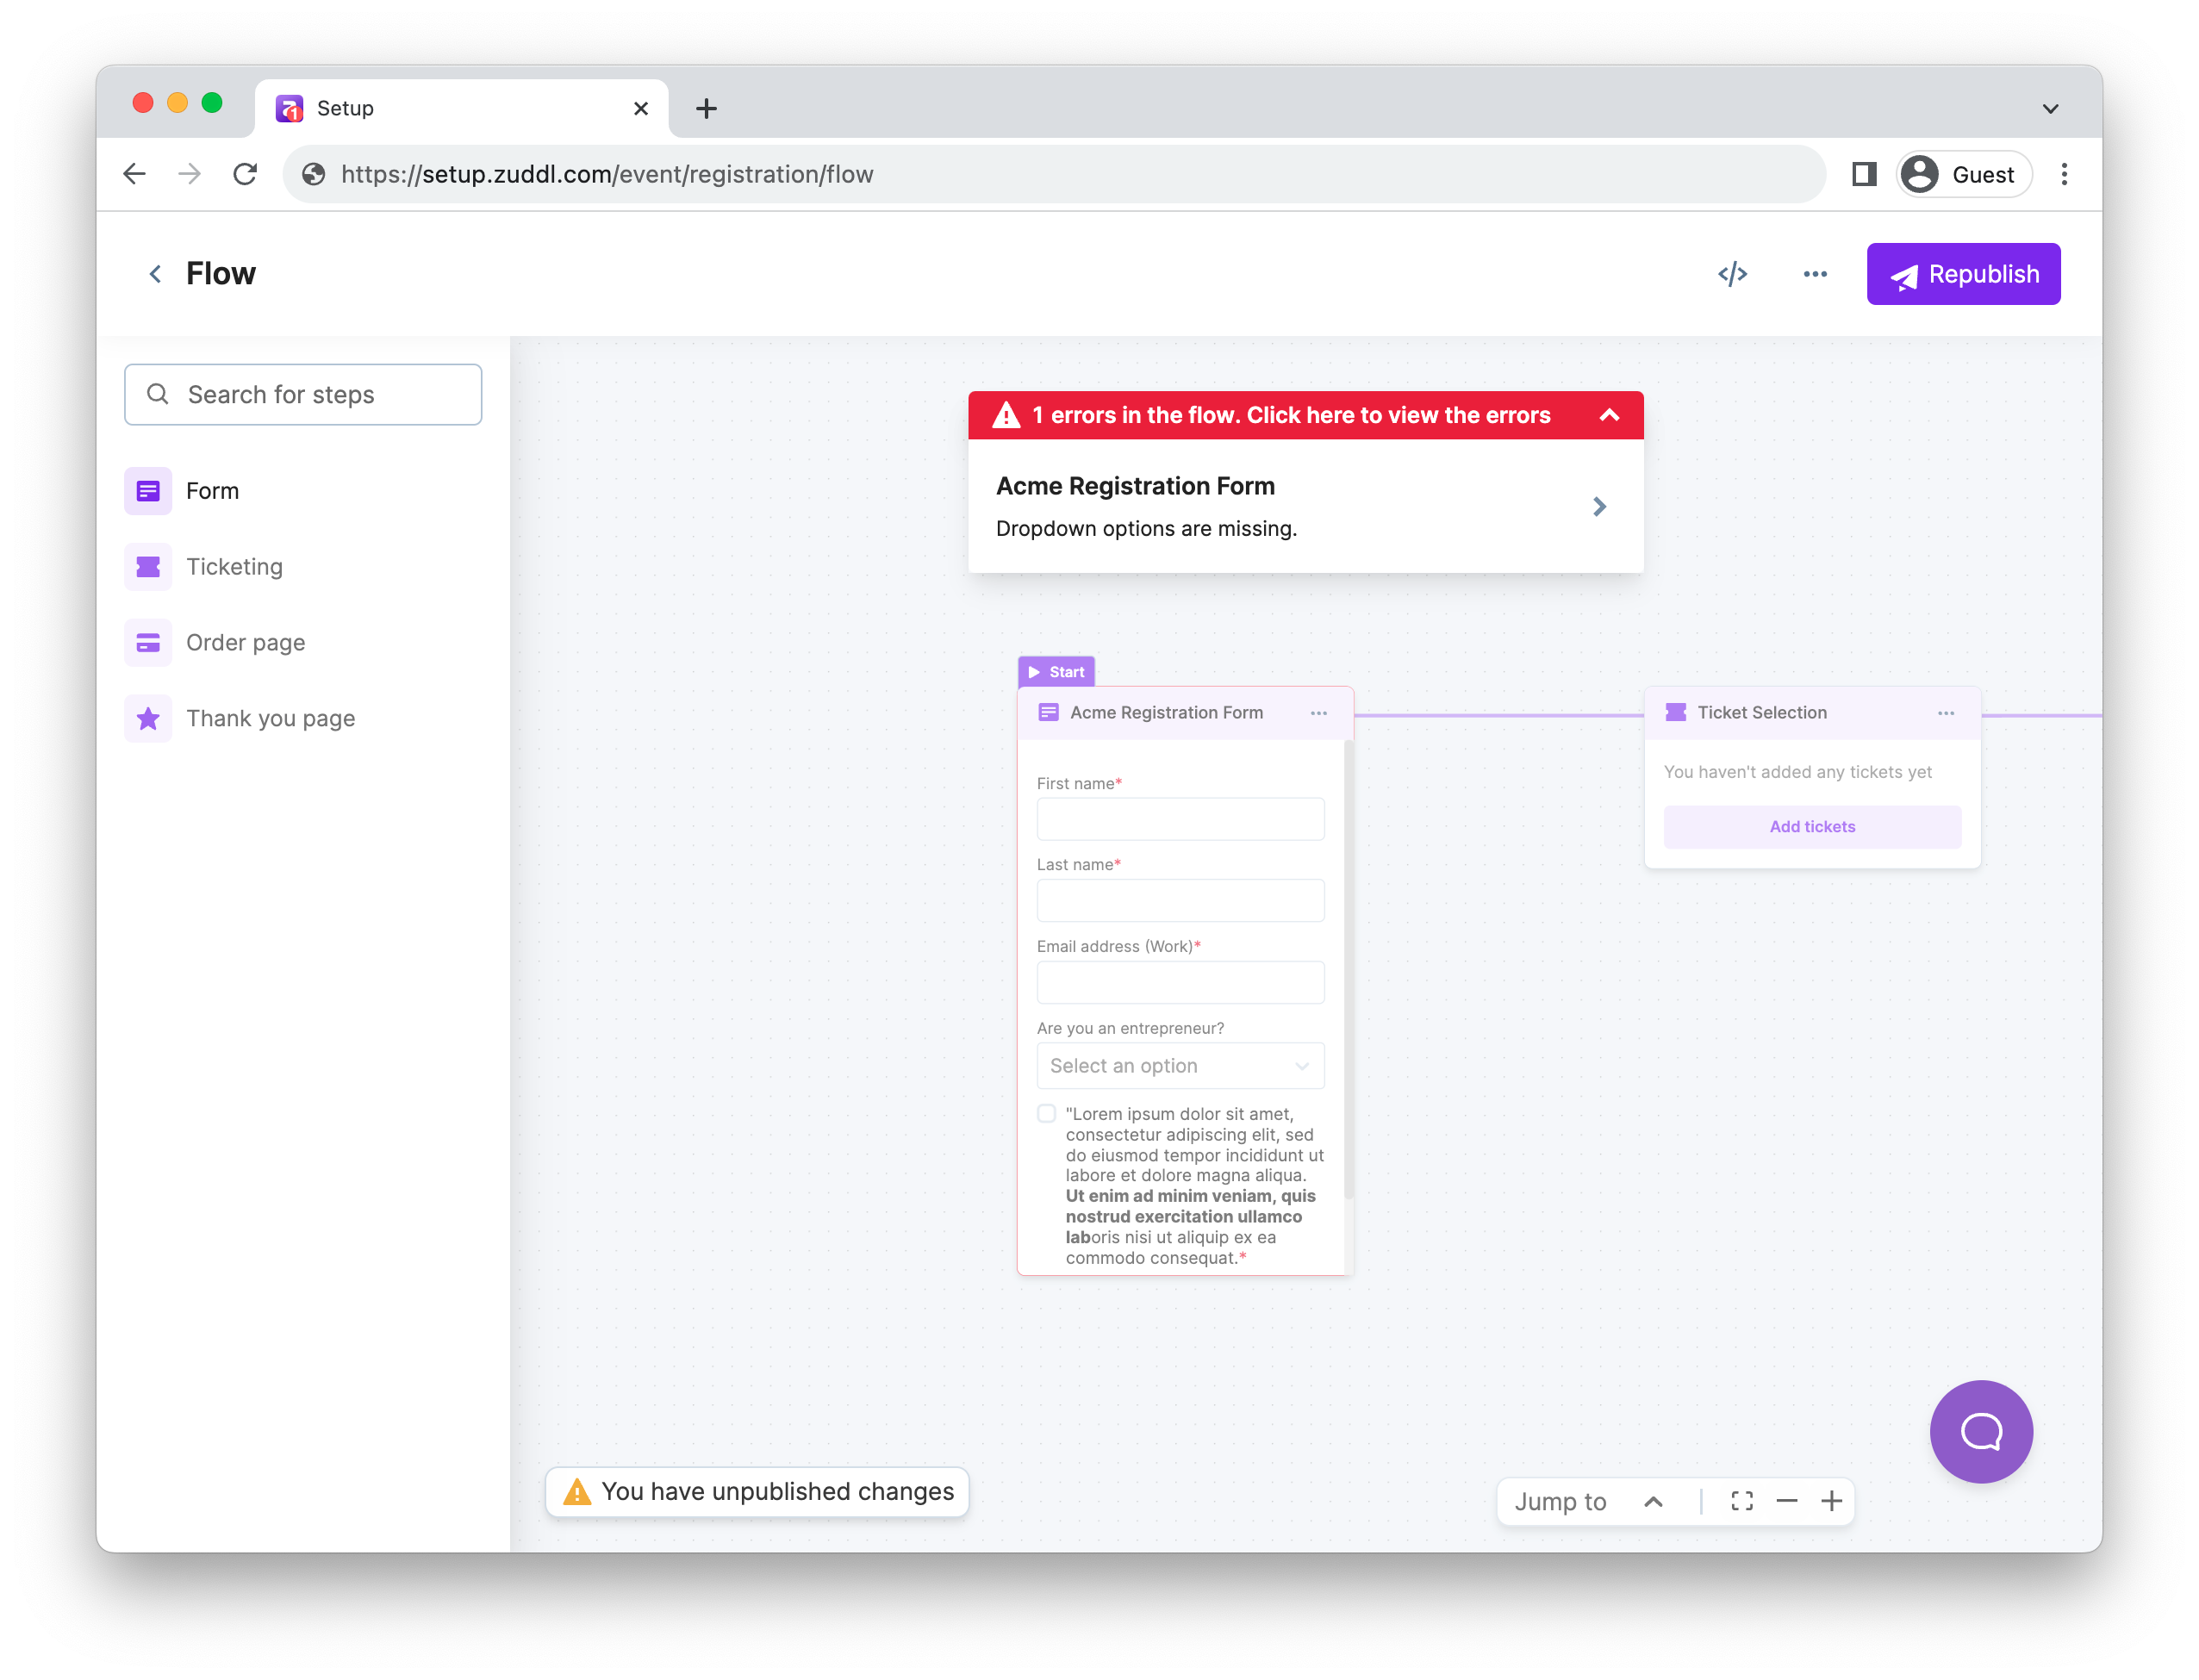
Since there is no undo option, all your changes are saved instantly and you would not be able to undo any changes made.
Setting up Ticket selection
The ticket selection step can be customized in the registration flow by changing the order of the tickets displayed, its position in the flow, or applying an auto-selection feature to make the process easier for your attendees.
Follow these steps to set up ticketing in the registration flow:
In the event setup, go to Registration > Registration flows.
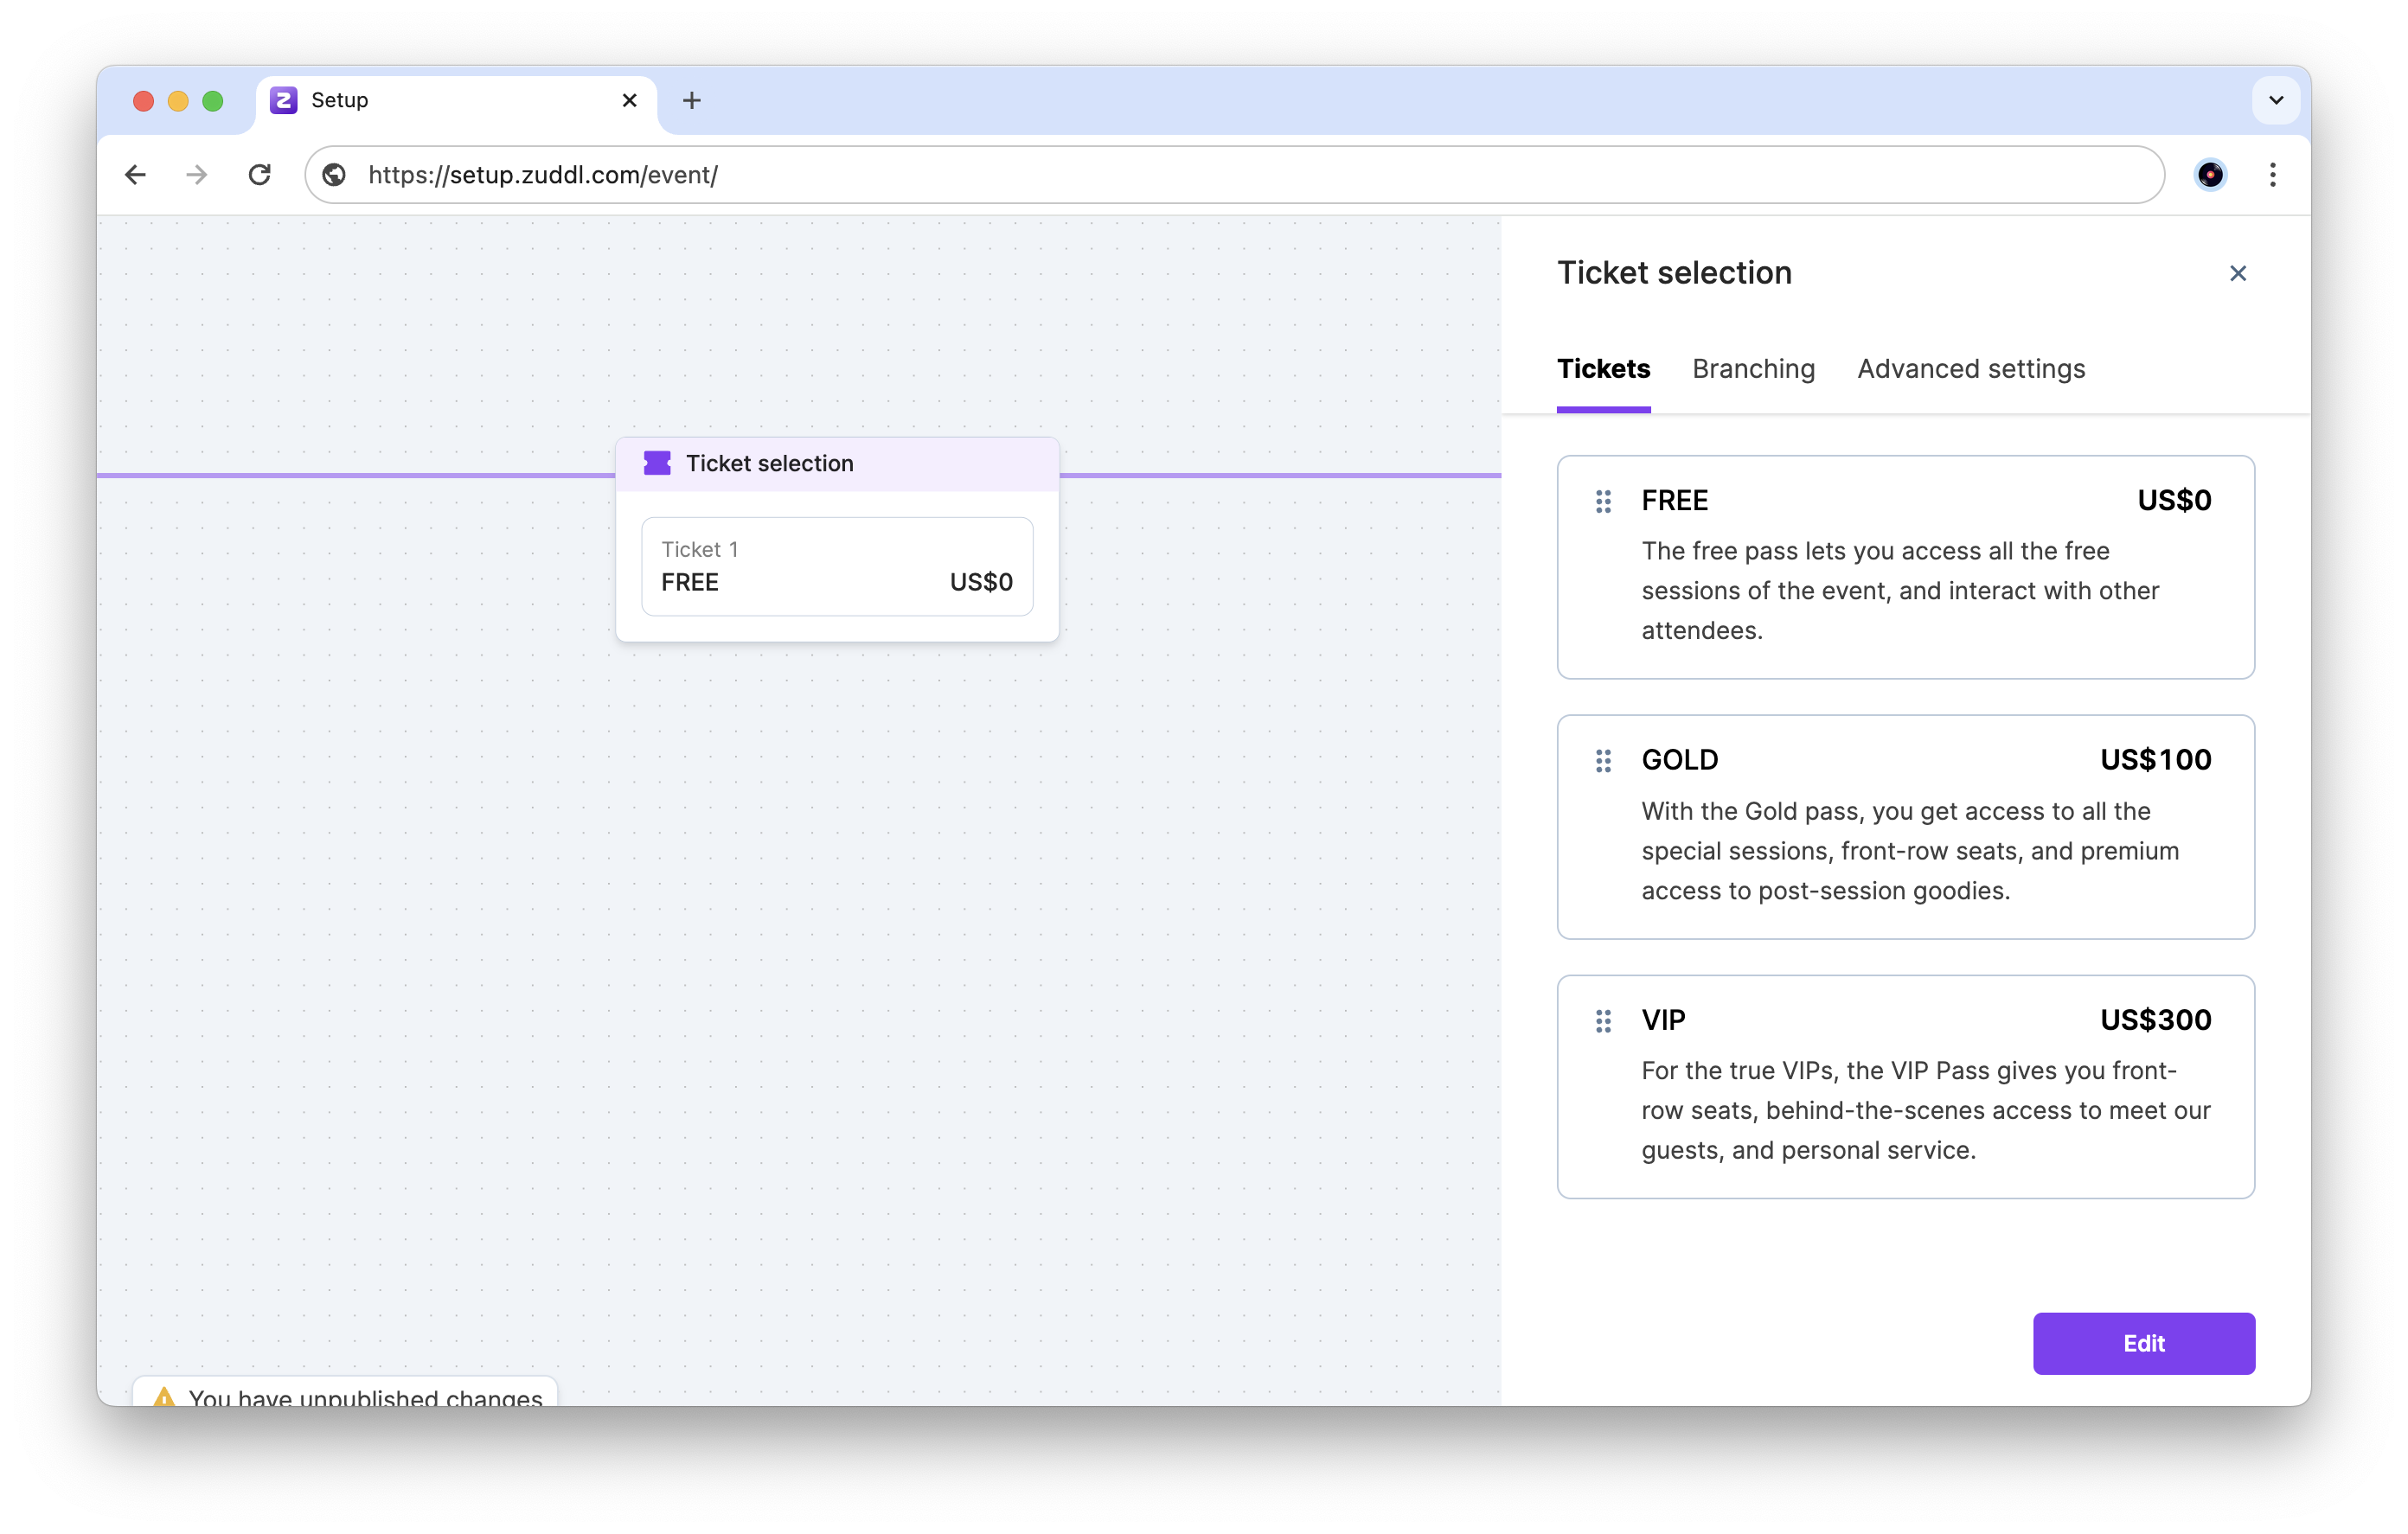
In the registration flow, go to the Ticket selection step.
Here you can review the available tickets for the event. Click the Edit button to go to the Ticketing setup, or reorder the tickets by clicking and dragging them.
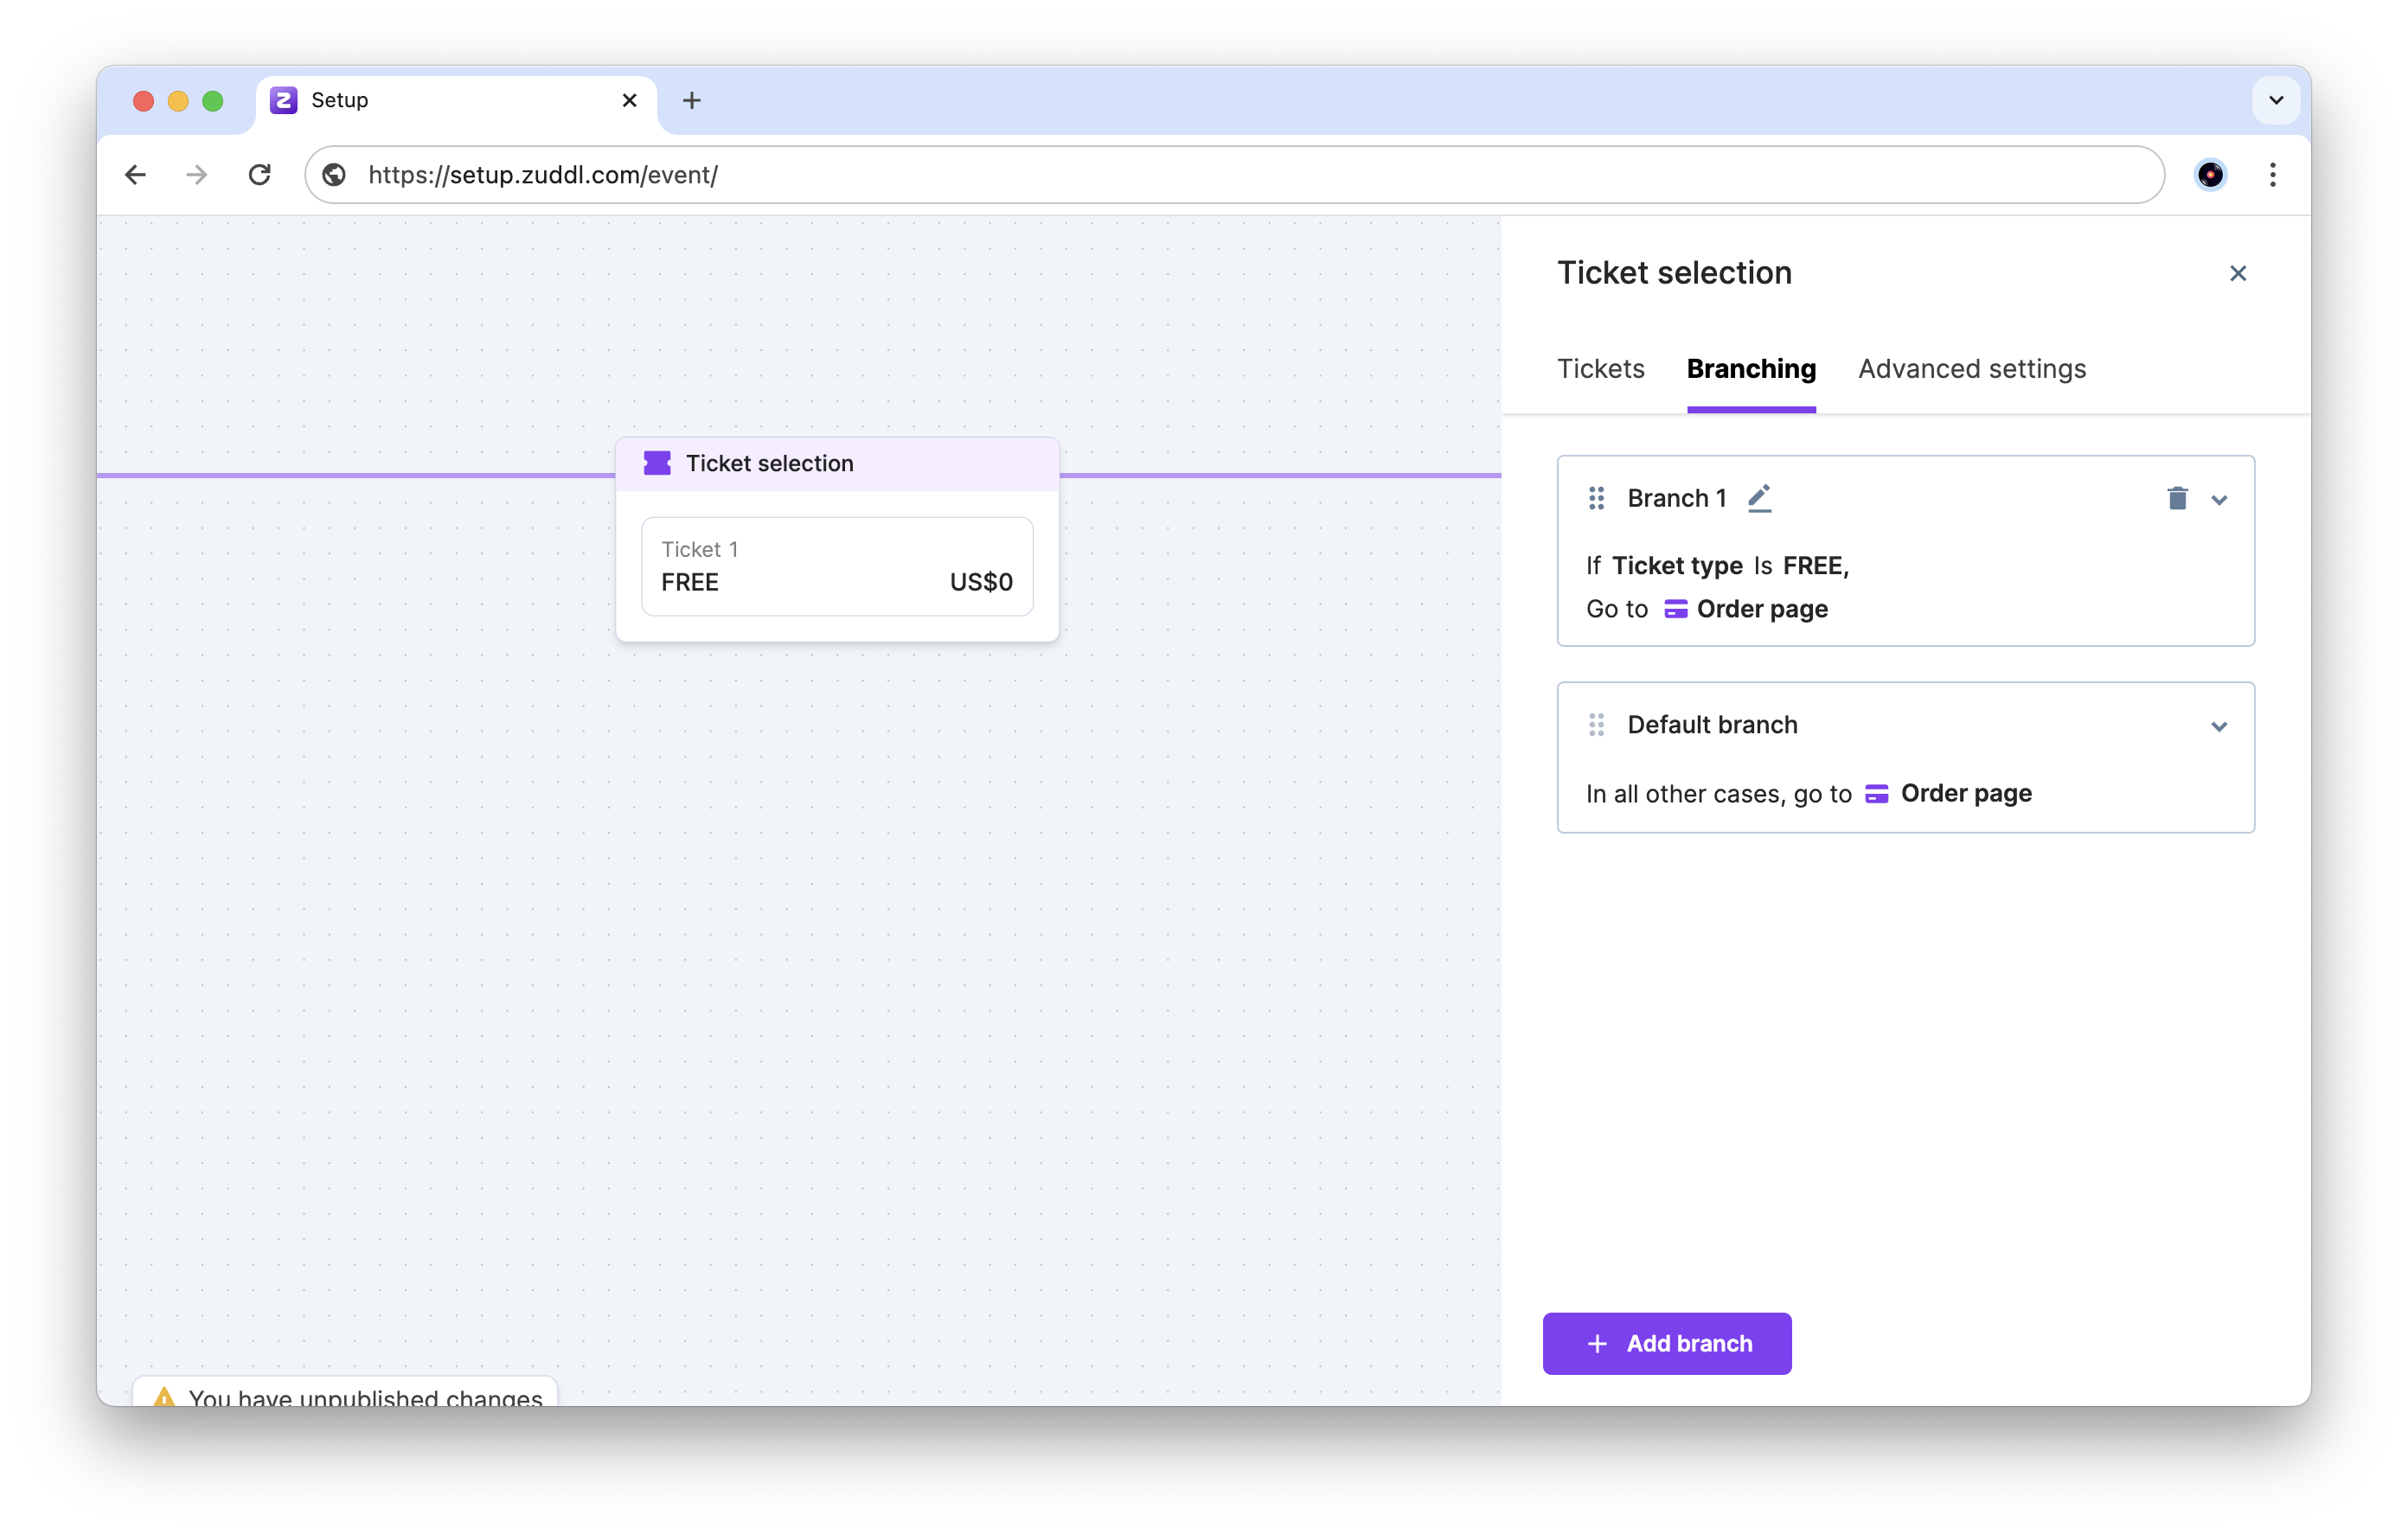
In the Branching tab, you can review the current branches and add branches as necessary.
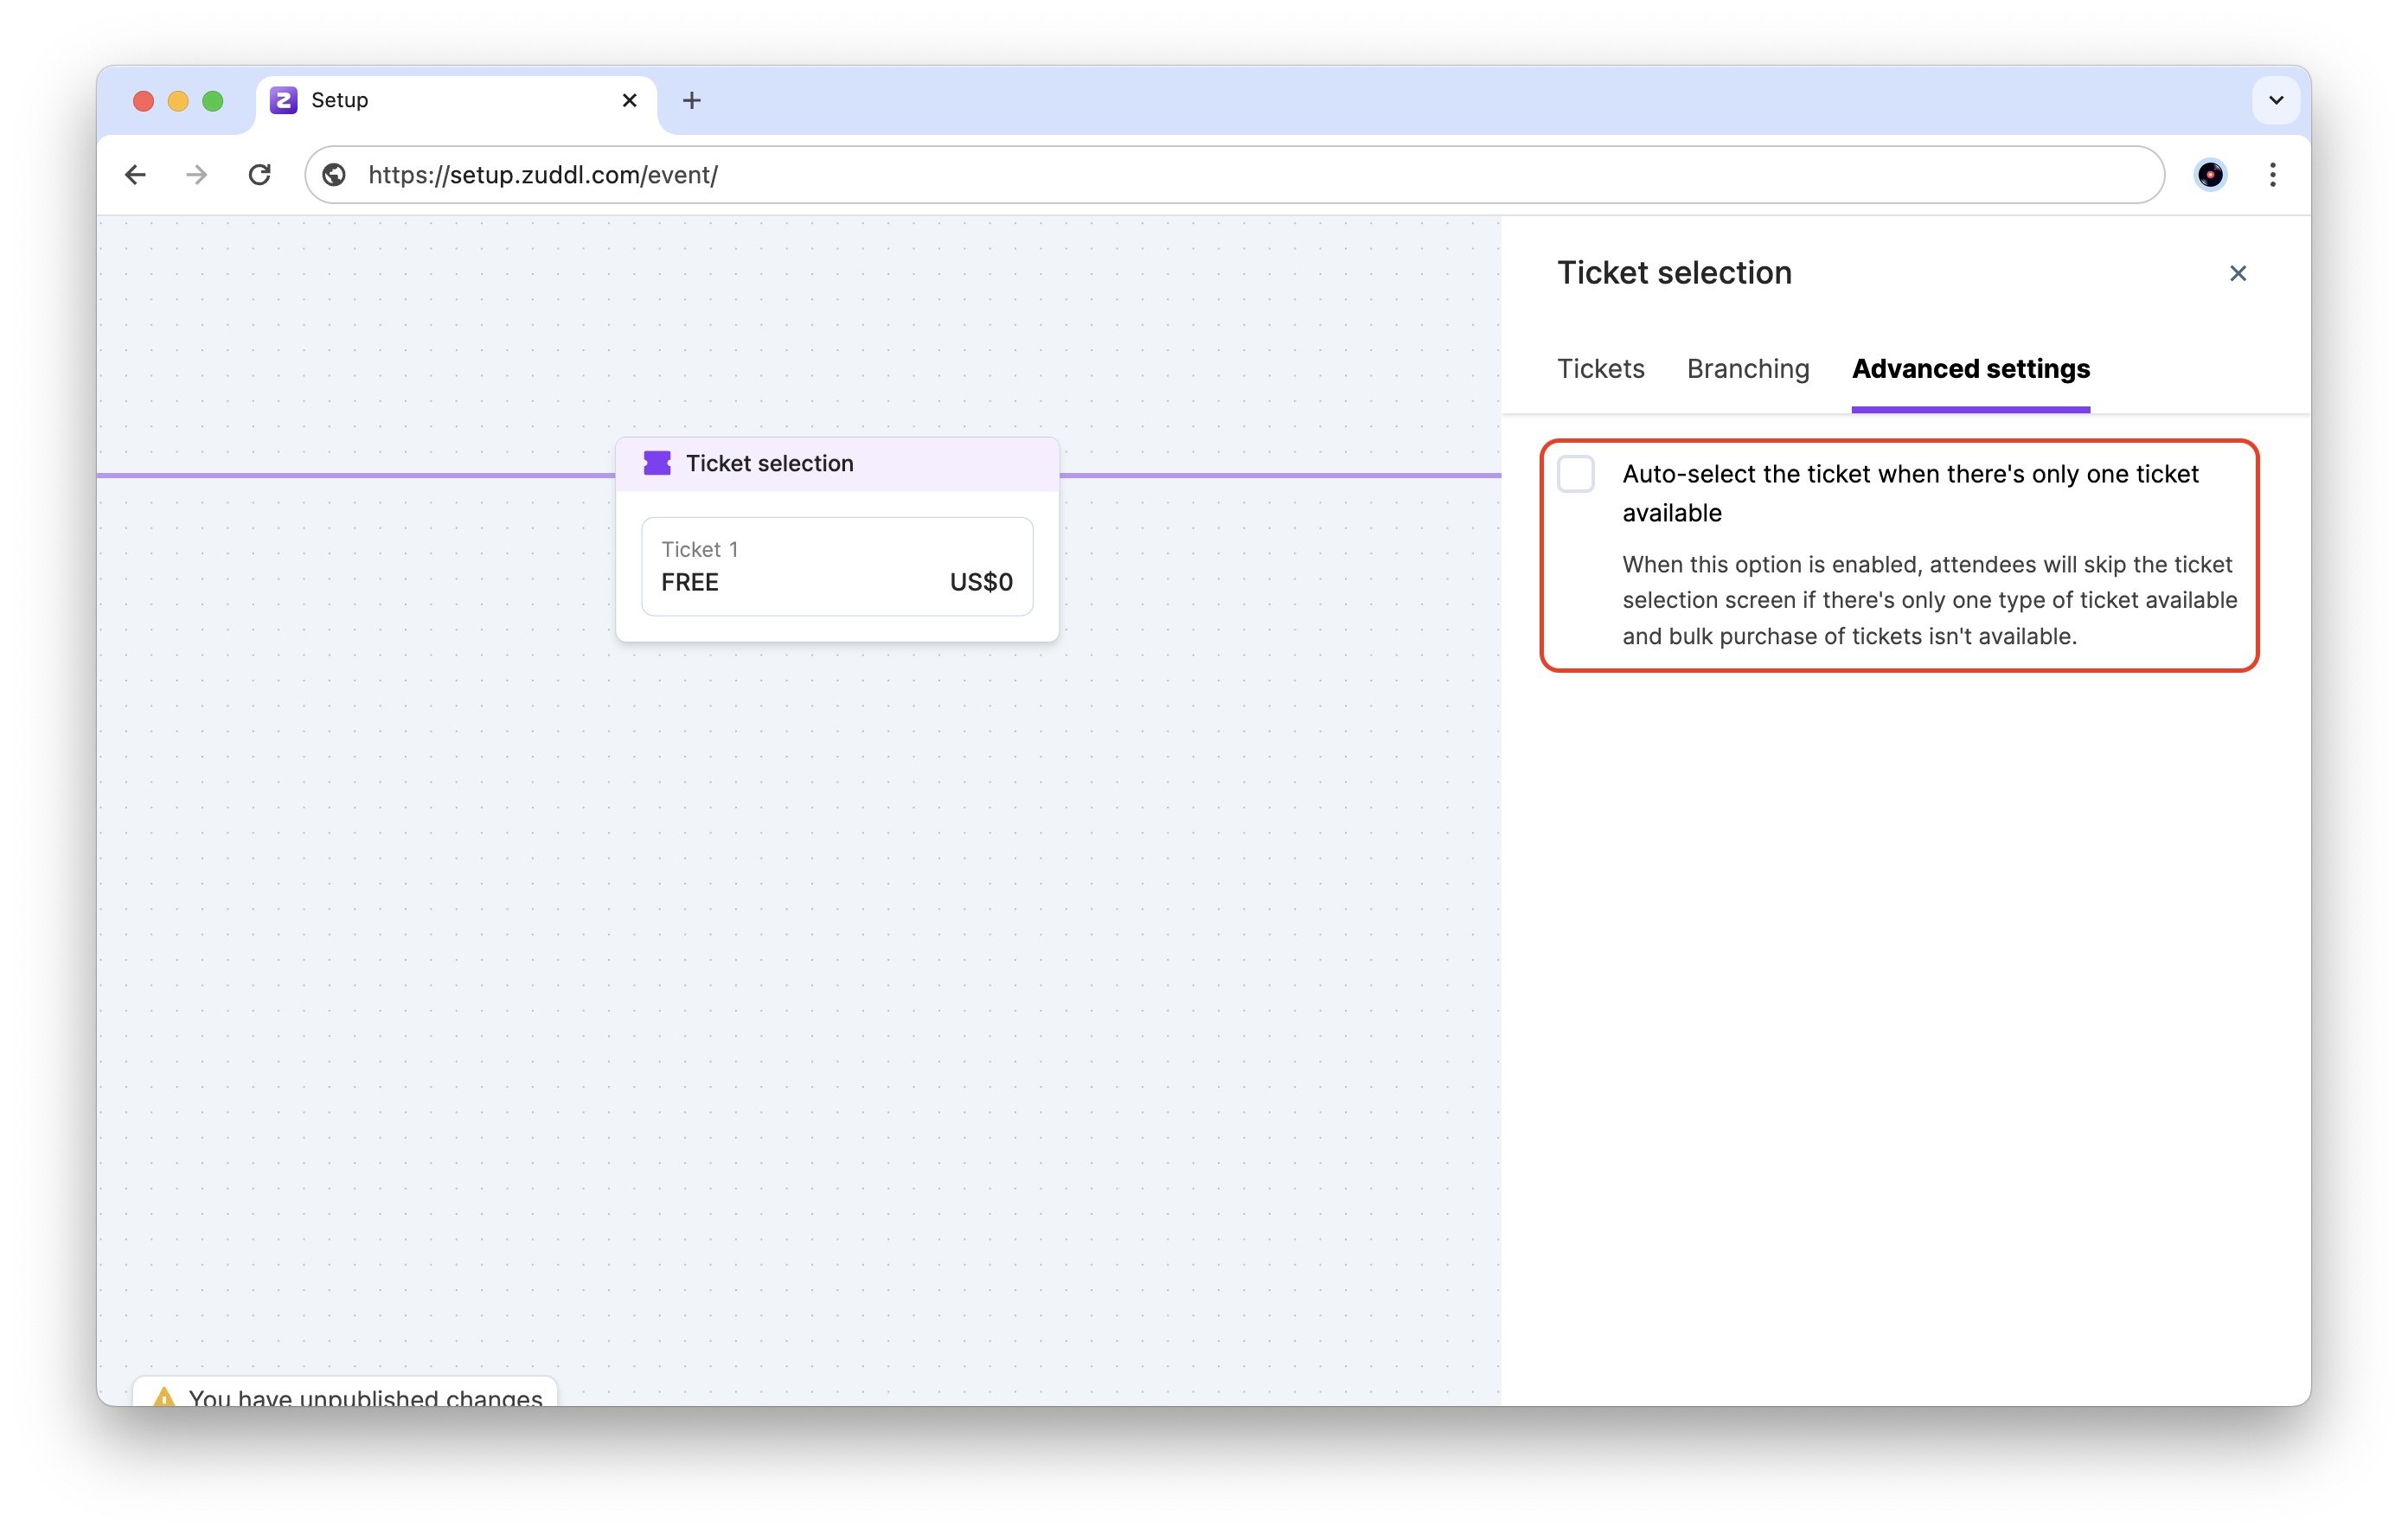
In the Advanced settings tab, you can find the checkbox for Auto-select the ticket when there's only one ticket available (unchecked by default).
If there is only one ticket available, this feature automatically selects that ticket and skips the ticket selection step altogether in the registration flow. This includes cases where other tickets may be sold out, or if other tickets are made inactive.
Note: This feature is not available for bulk ticket purchases, or if Ticket selection is the first step of the registration flow.
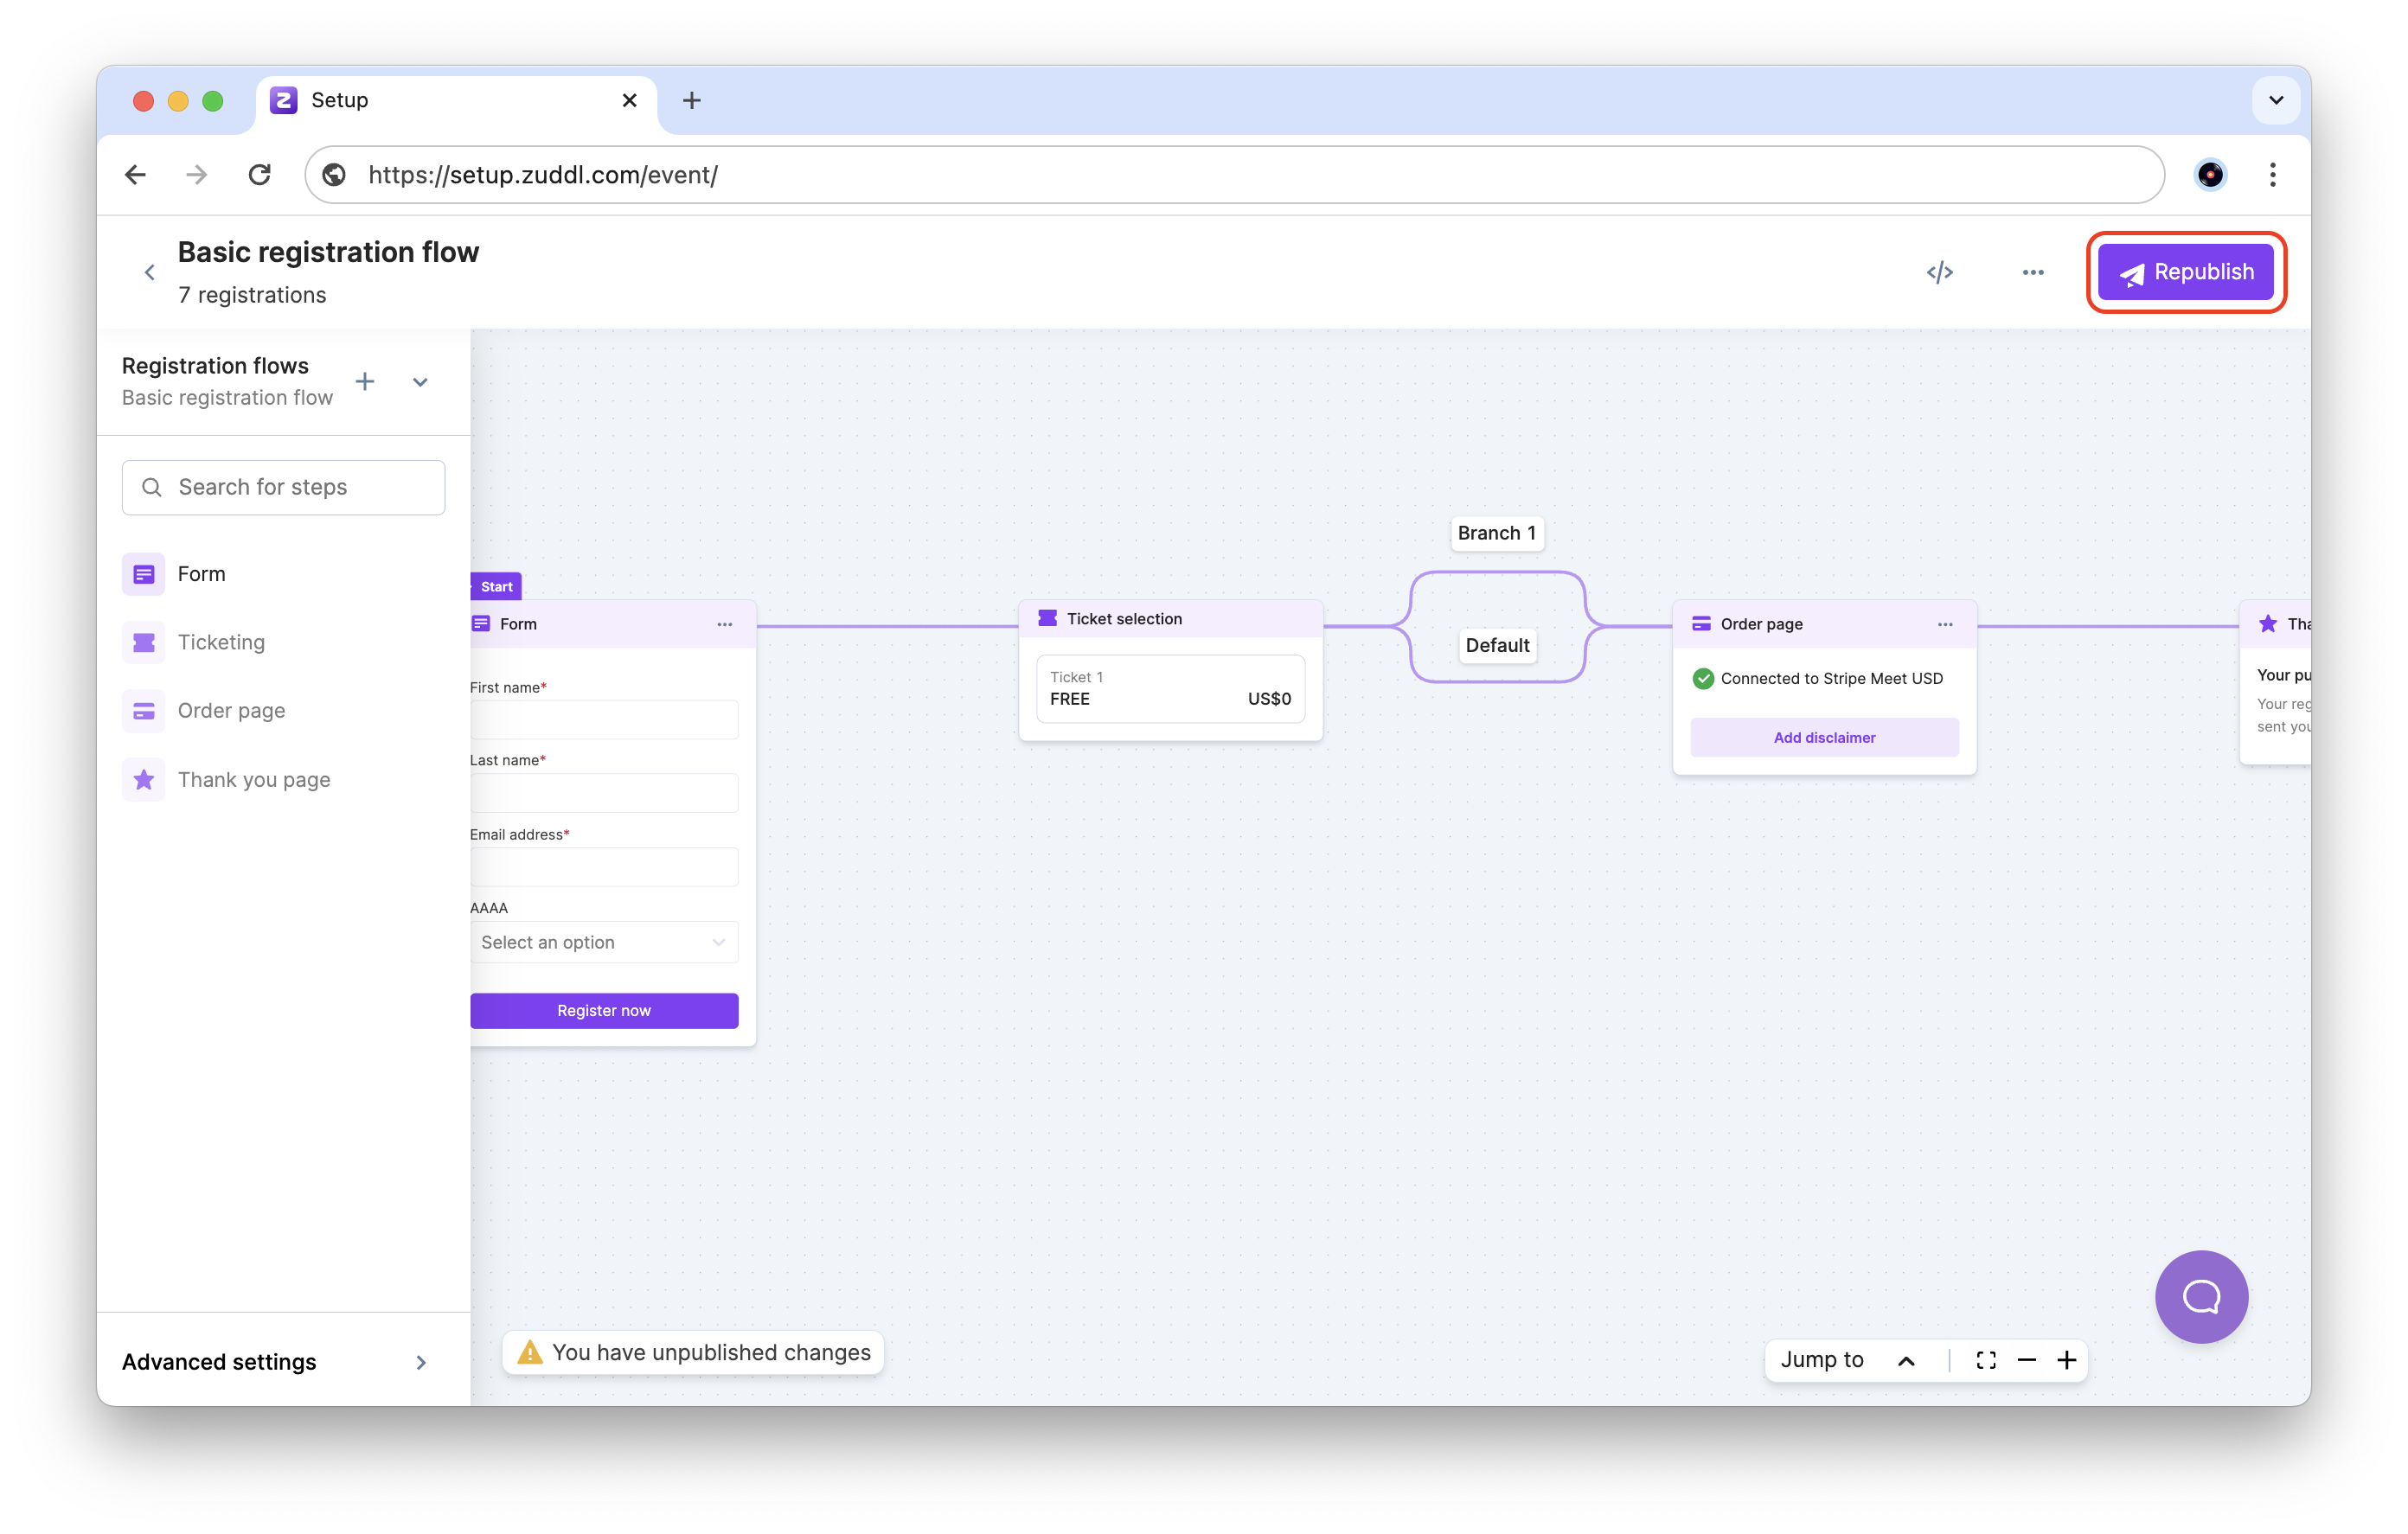
To apply your changes, go back to the registration flow and click the Republish button.
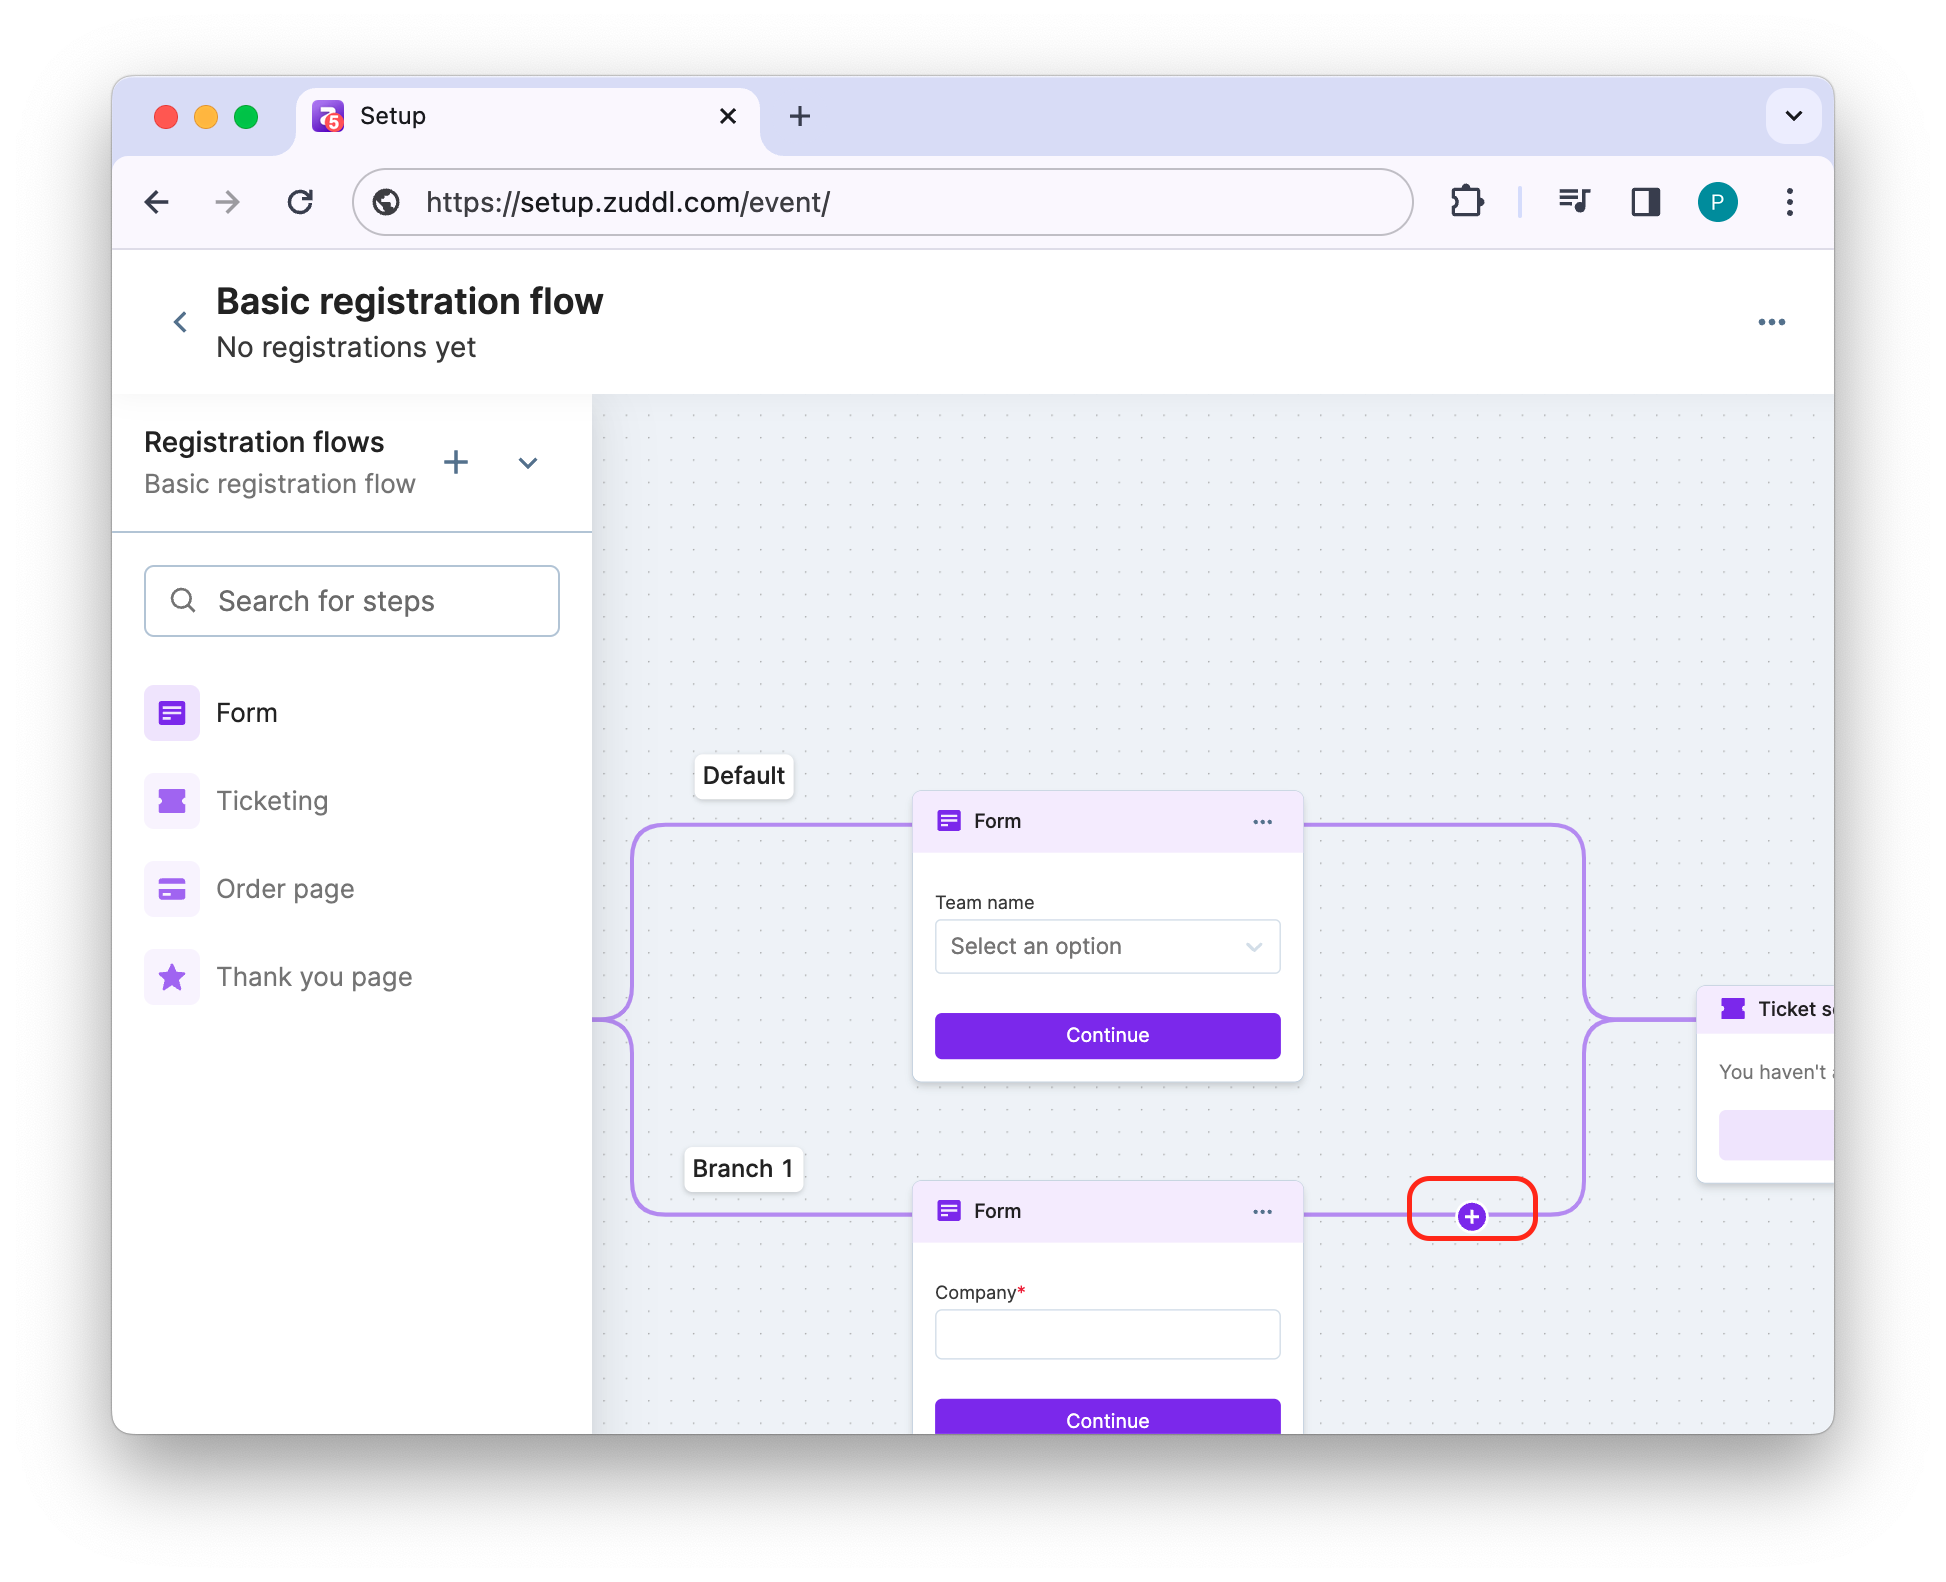
Create flow branches
You can create branches in the flow to cater to different audiences. For example, if an employee of your company tries to register for your event, you can take them directly to the thank you page, and you can take the rest of the users through the usual flow.
To create a branch:
Go to the step that requires branching and go to the editing page.
Select the Branching tab. The default branch step is the immediate step after the root step and the same is shown in the list.
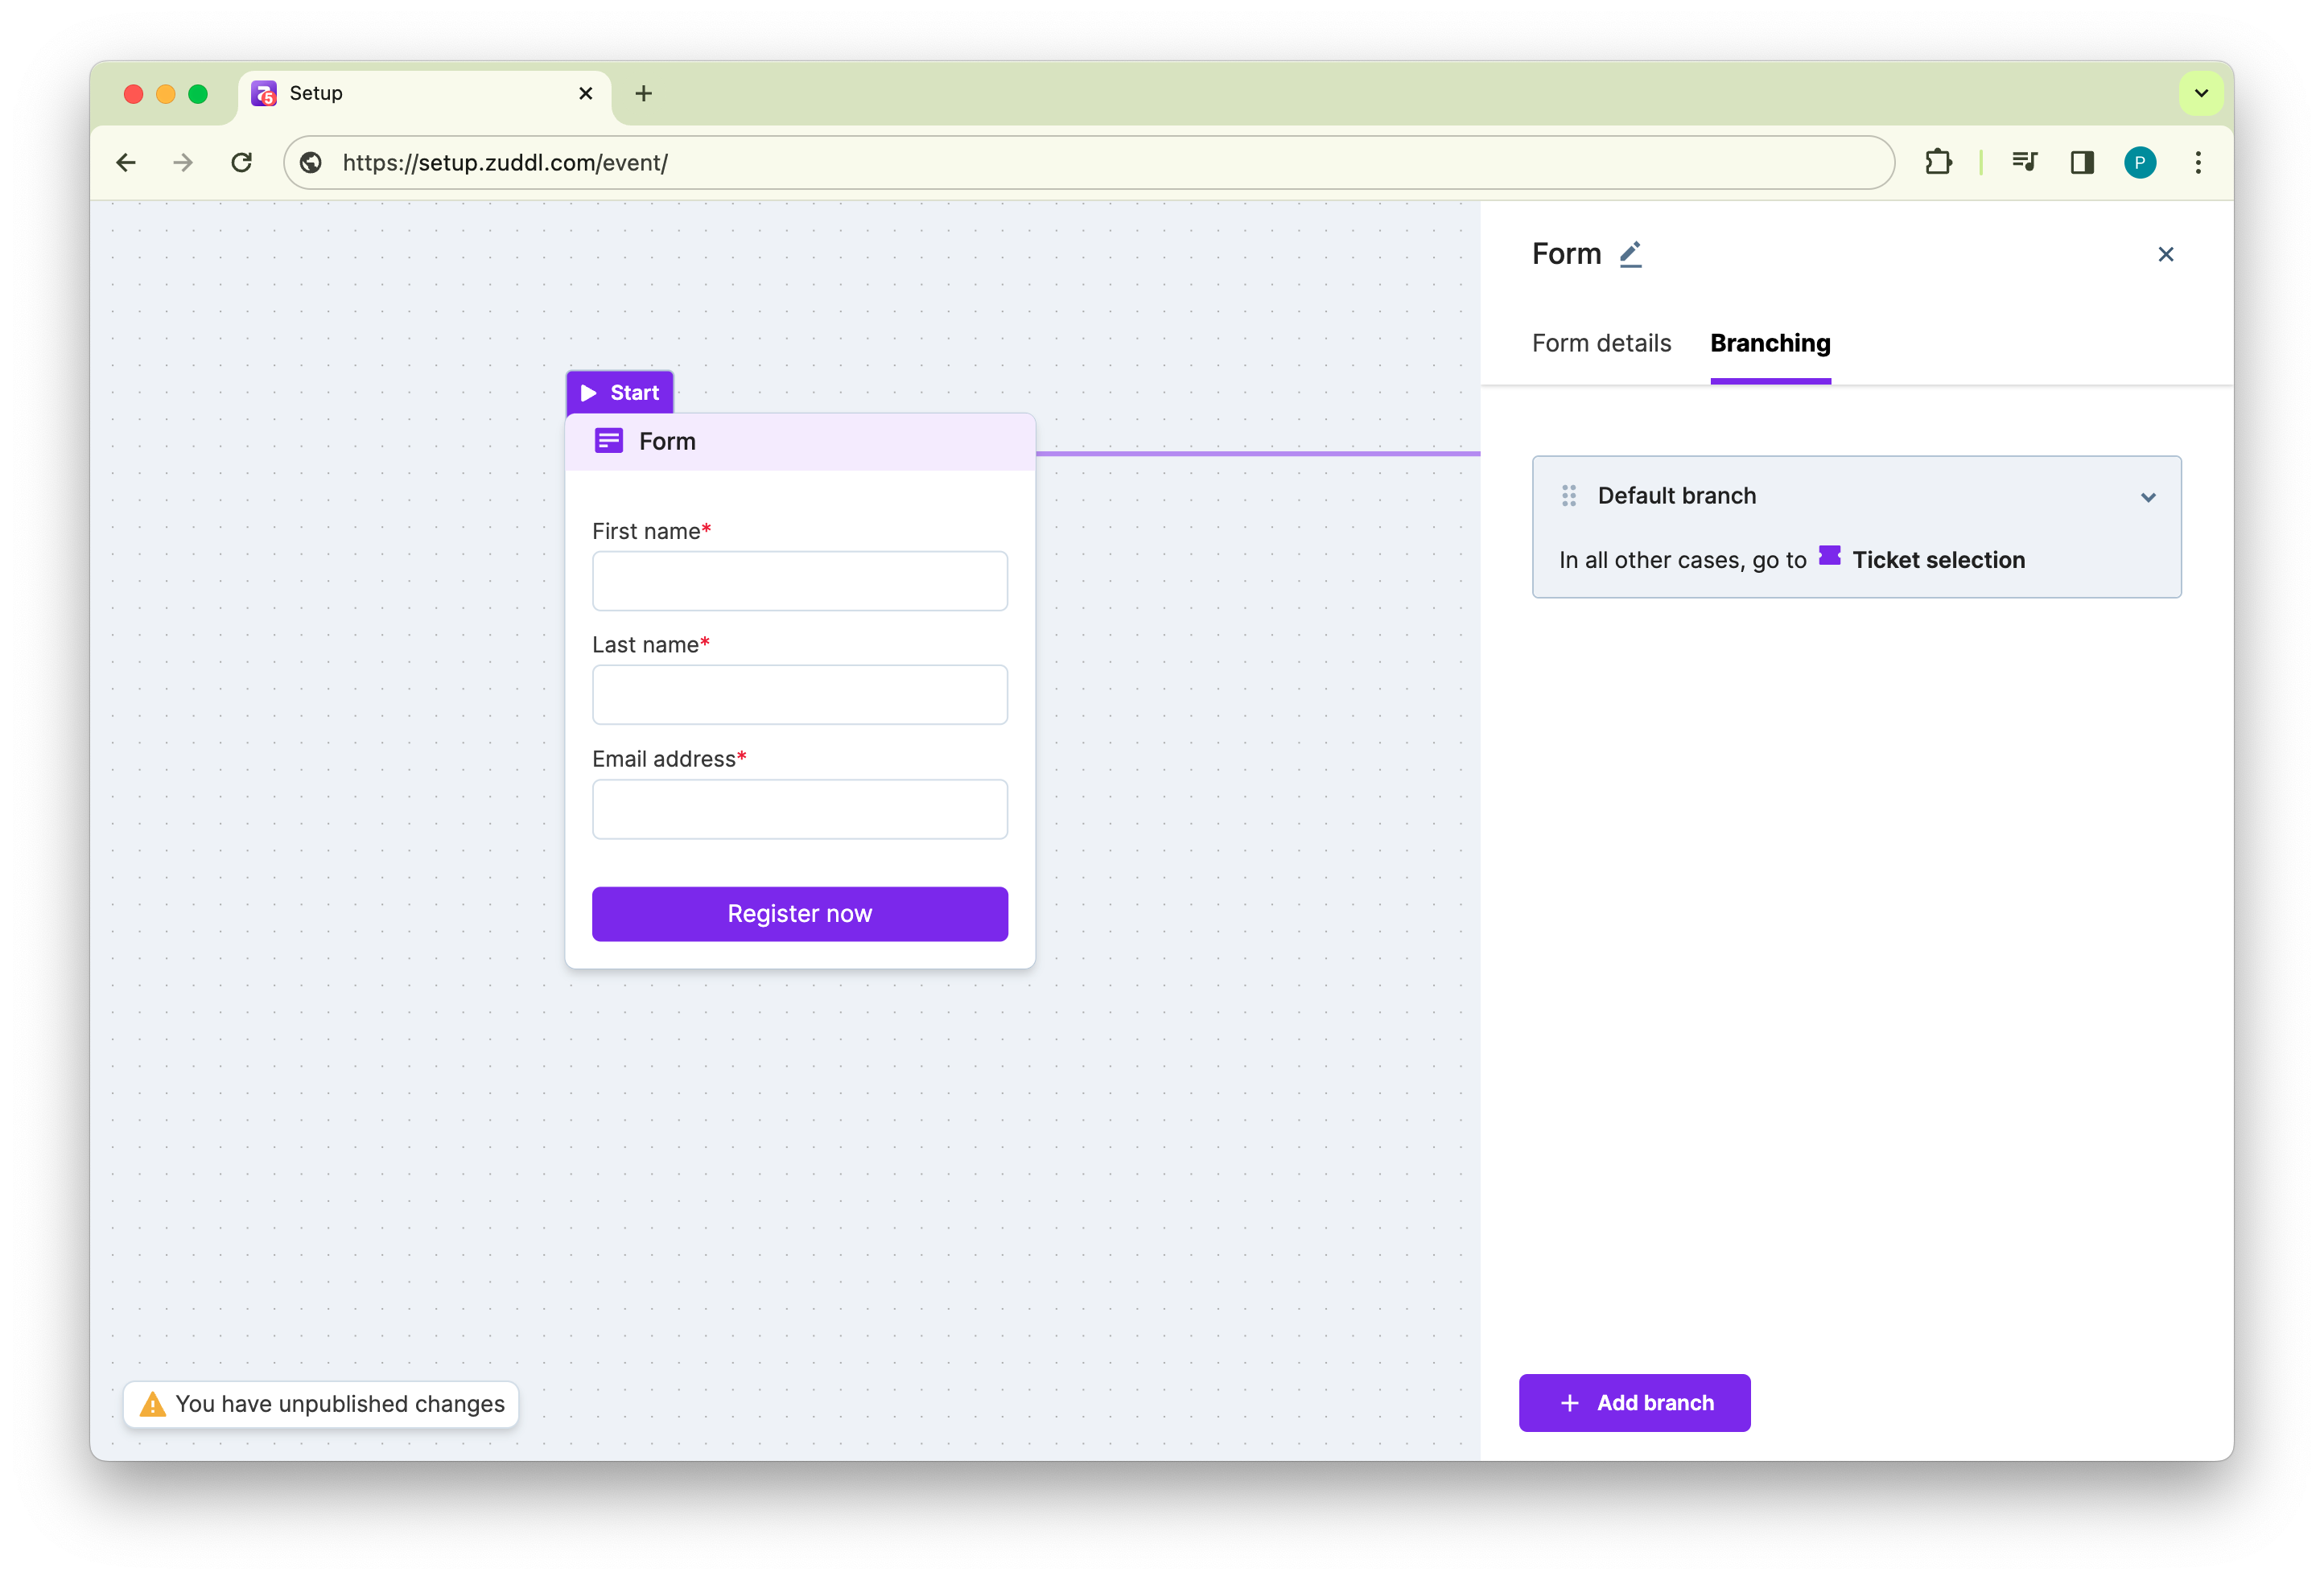
Click on the +Add branch button
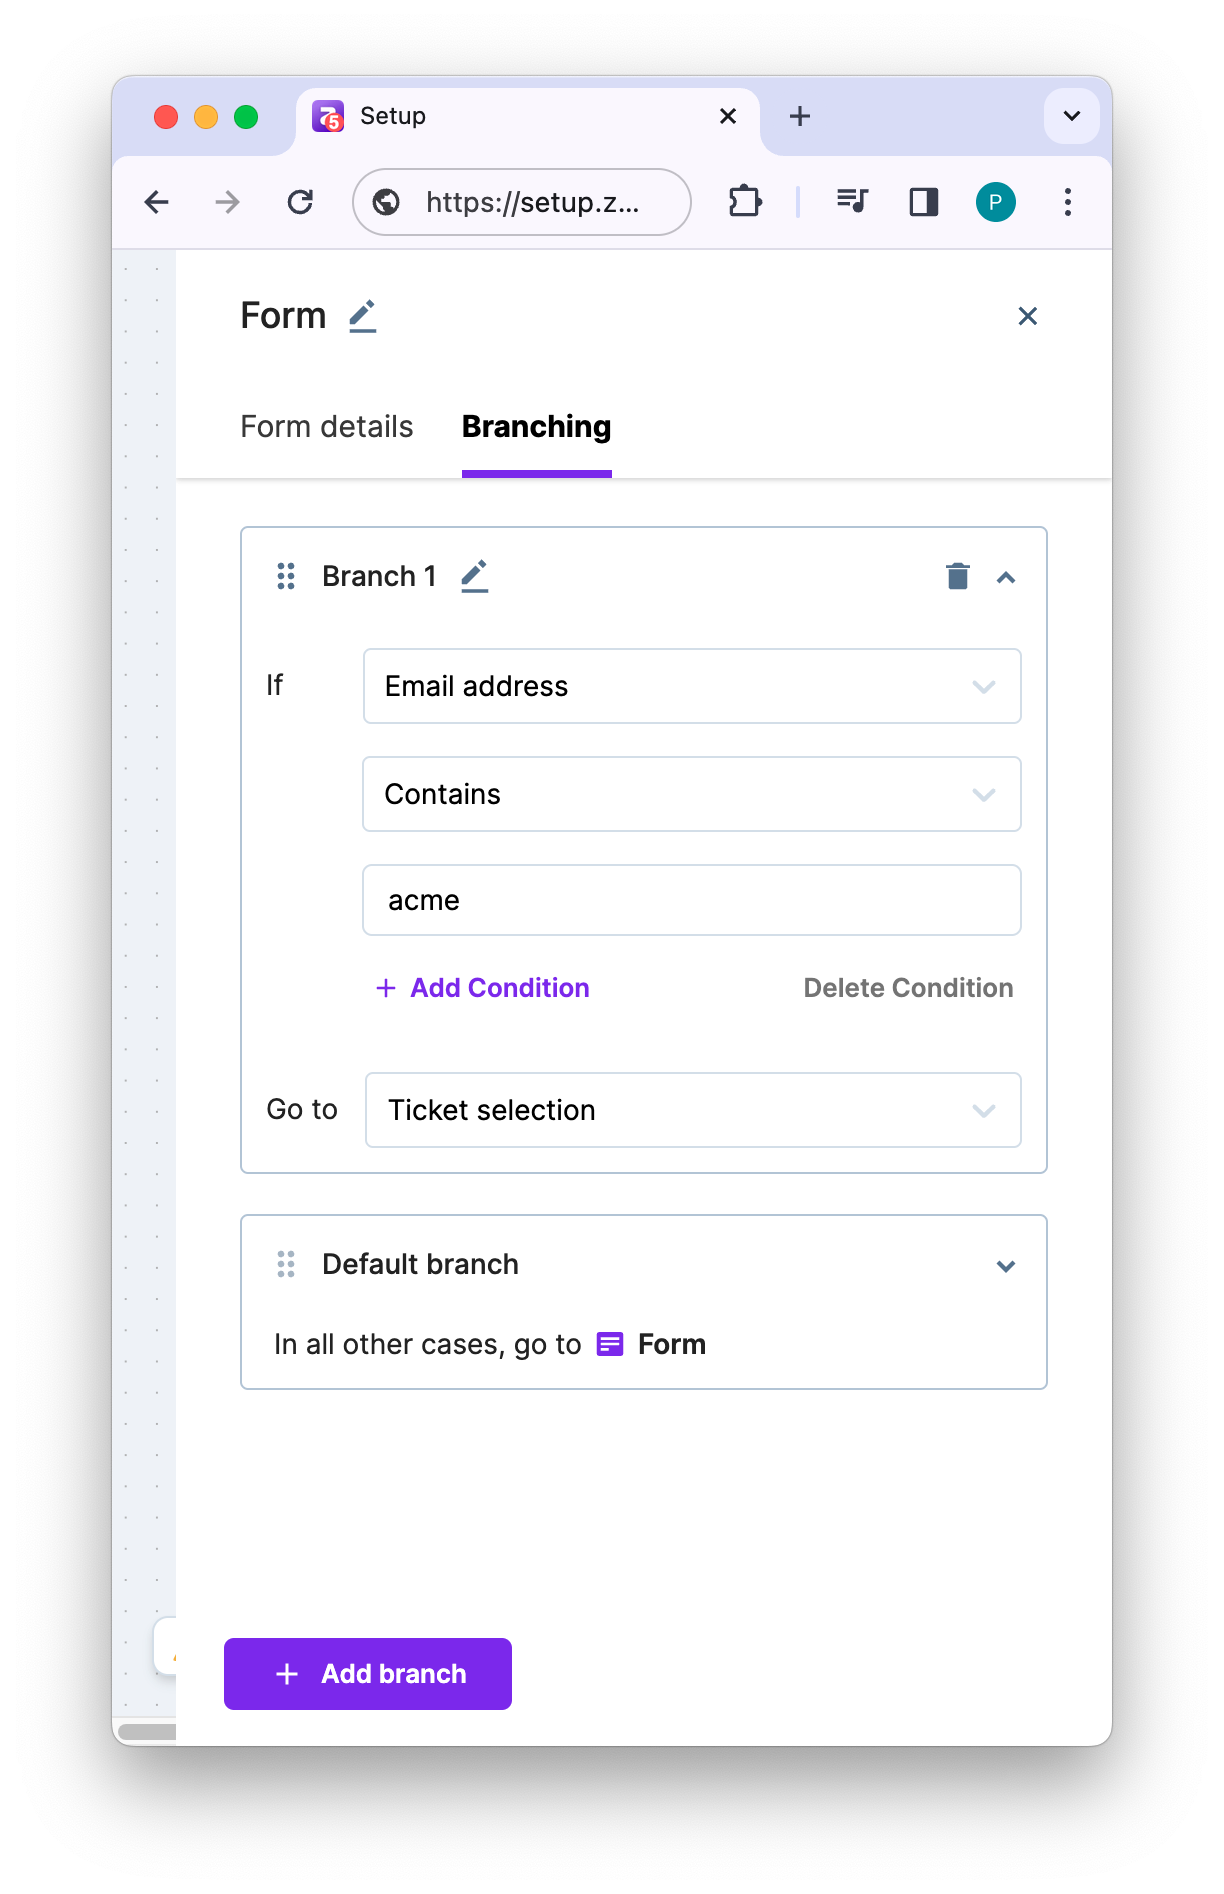
On the branch edit form, enter the following:
Select the field on which branching condition is to be applied.
Unavailable fields
Session picker field and hidden fields cannot be selected for branching.Select the appropriate condition clause
Enter the desired value.
Add more conditions if required by clicking the +Add Condition. In between two conditions, you can select an operator namely, 'Or' or 'And'. You can also delete conditions by clicking Delete condition option.
Select the Go to step from the dropdown with the default branch in mind. This is the step to which the branch should lead.
Once you've added the Go to destination, you cannot change it. You would need to delete the branch and start over.
Ensure that you've created all steps in the right order before you get started with the branching logic. You can use spreadsheets or drawing boards to visualize the flow before you create it.
You can edit your branch name if required. The branch names are displayed on the flow line and allows your team members to quickly identify the branch by its name.

This creates a branching logic for your registration flow. You can view the branching conditions by hovering over the branch name.
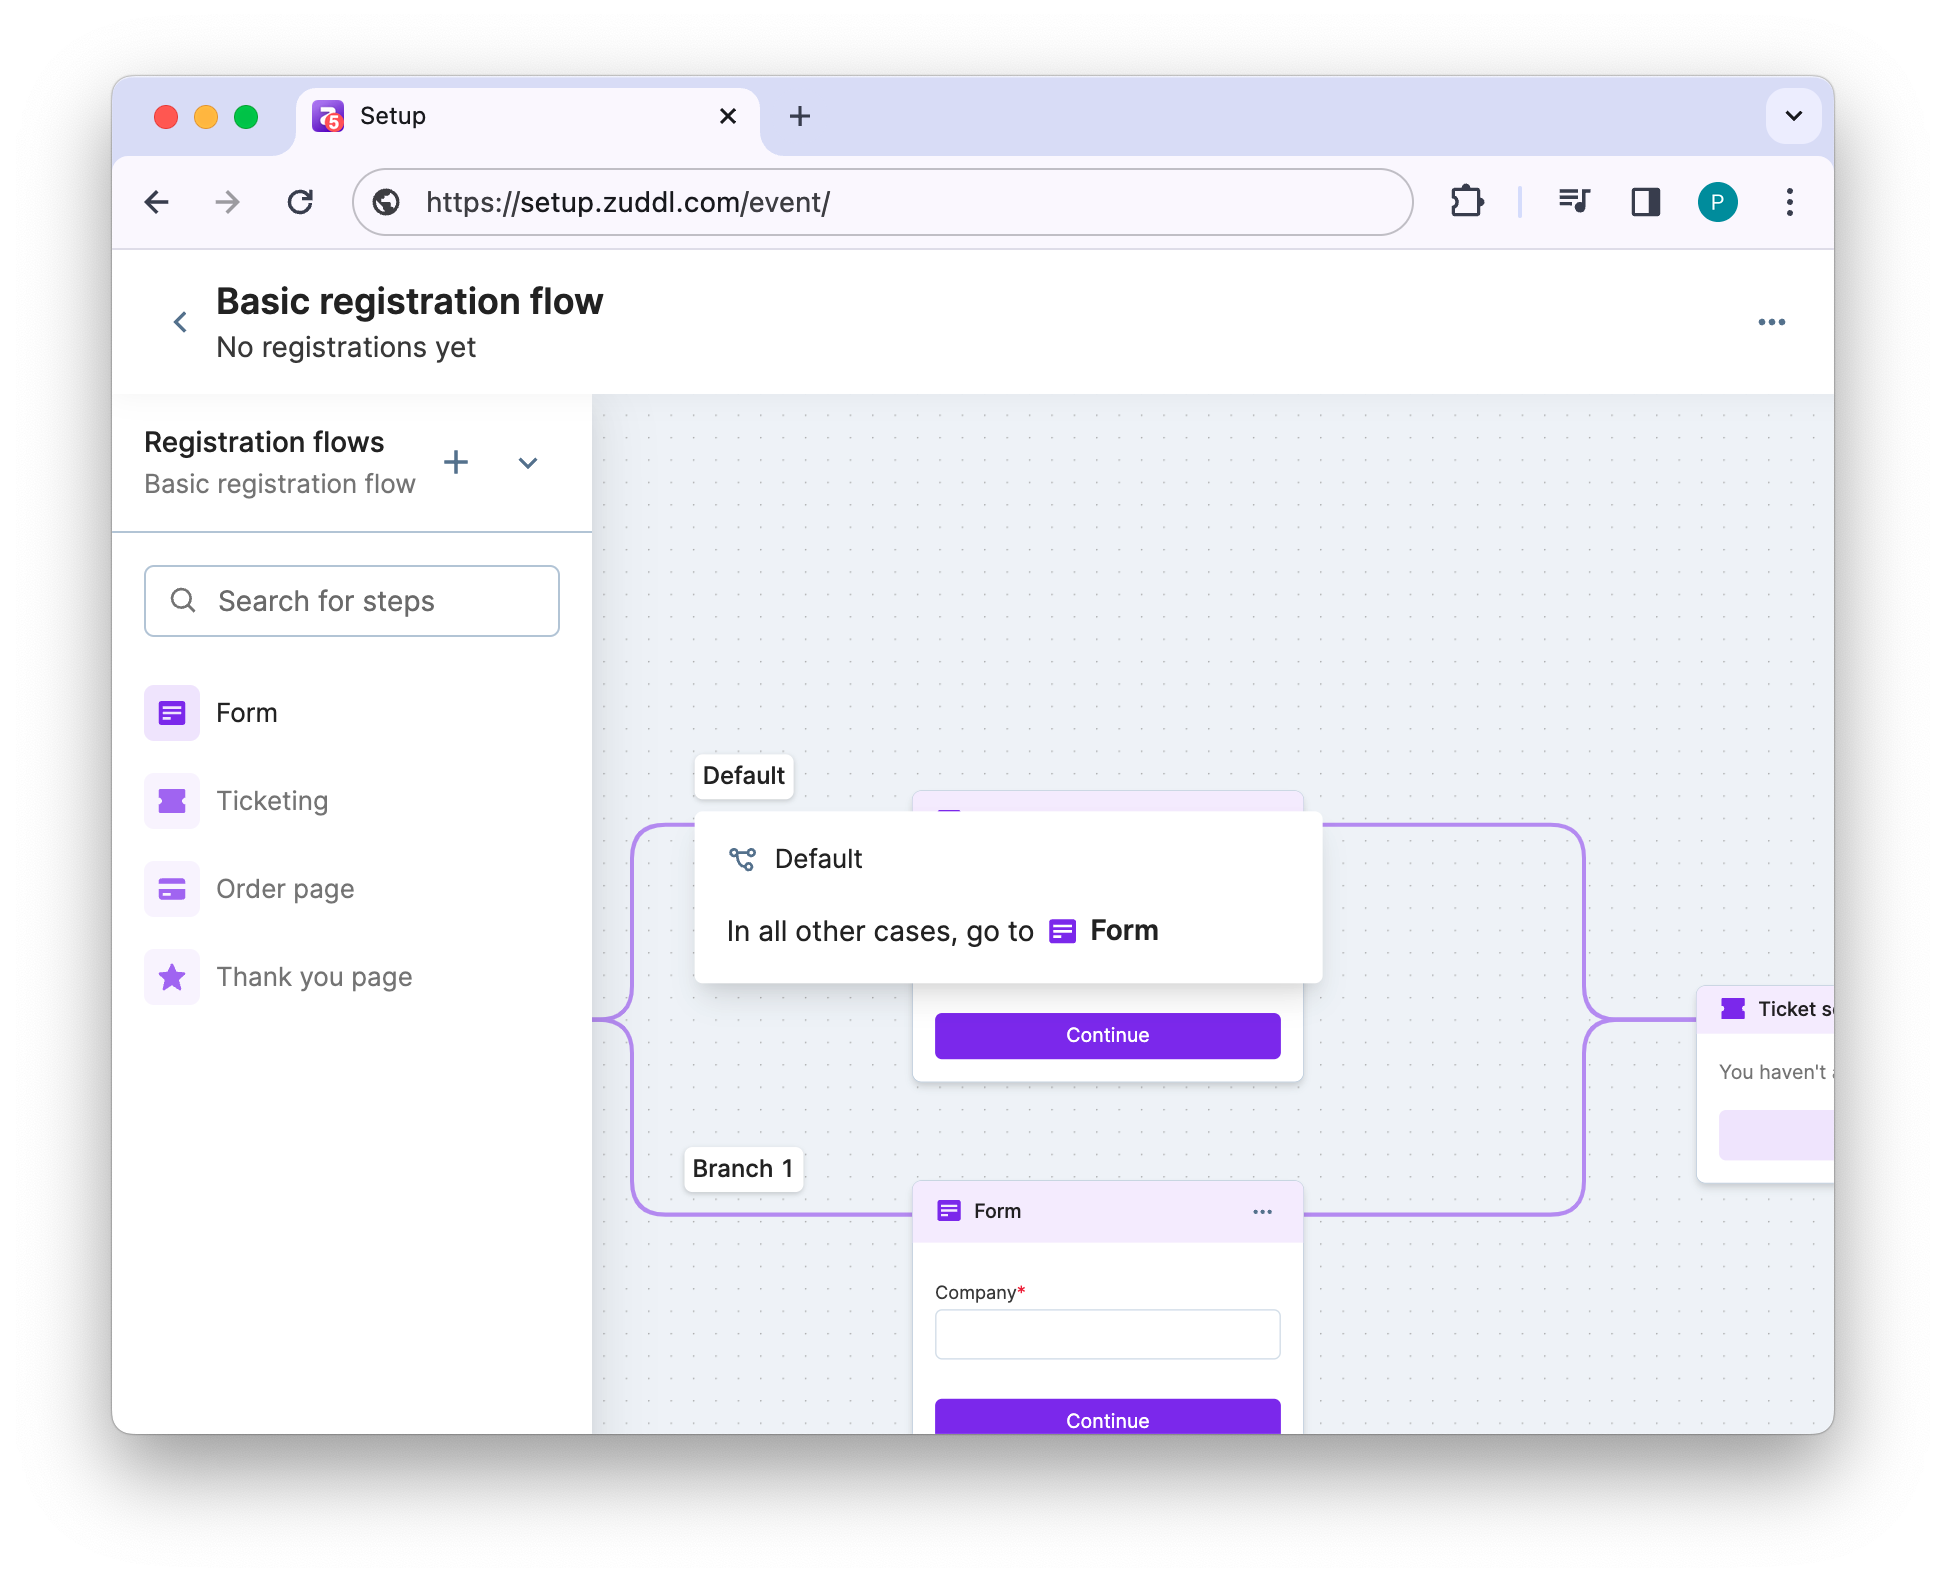
You can create steps in between a flow by clicking + button in the flow line, the step it was pointing to before creating a branch will be the default step