How to Create Custom Emails for Attendees for an In-person Event in Zuddl
Last updated: August 1, 2025
Create a mailing list
- Login to the Zuddl dashboard and create an event. Learn more about creating an event.
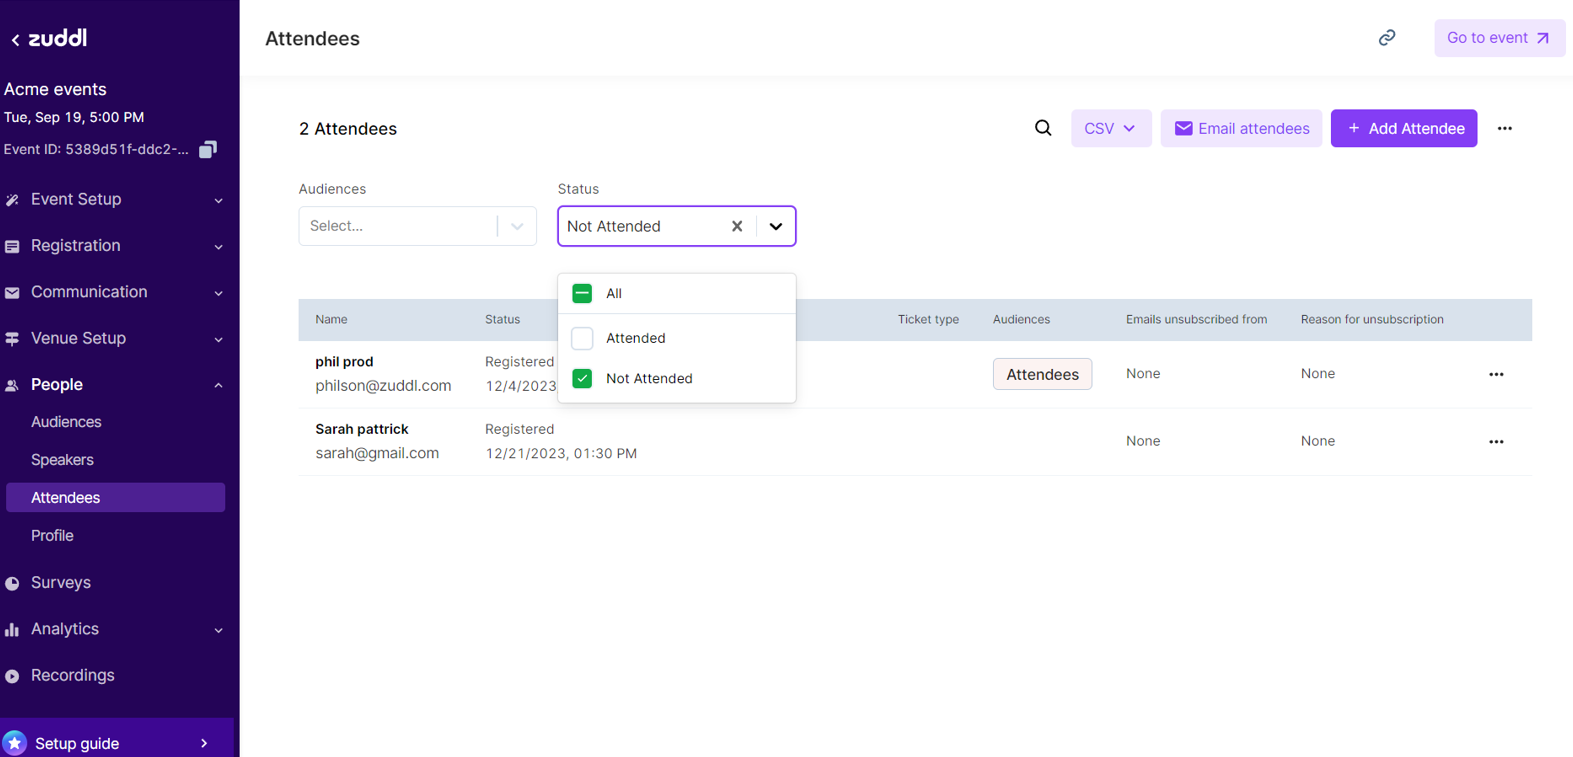
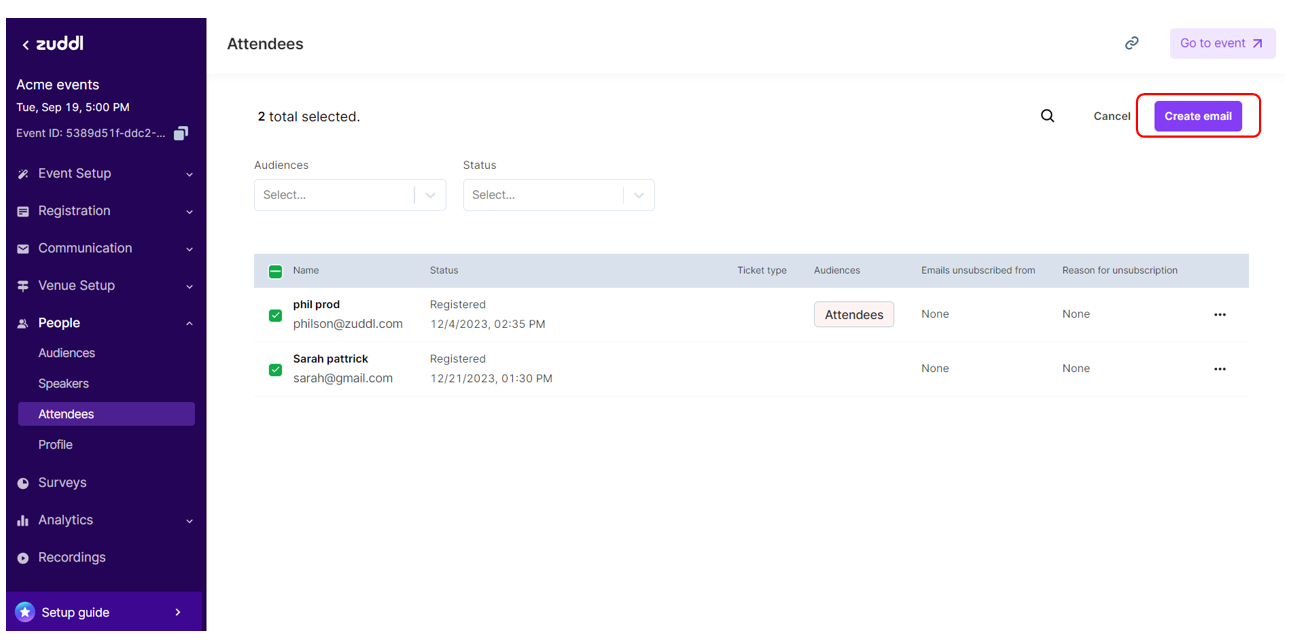
- In the event setup, go to People > Attendees.
From the Audiences and Status drop-down menu, select from the menu to sort through the attendees and help prepare your list.
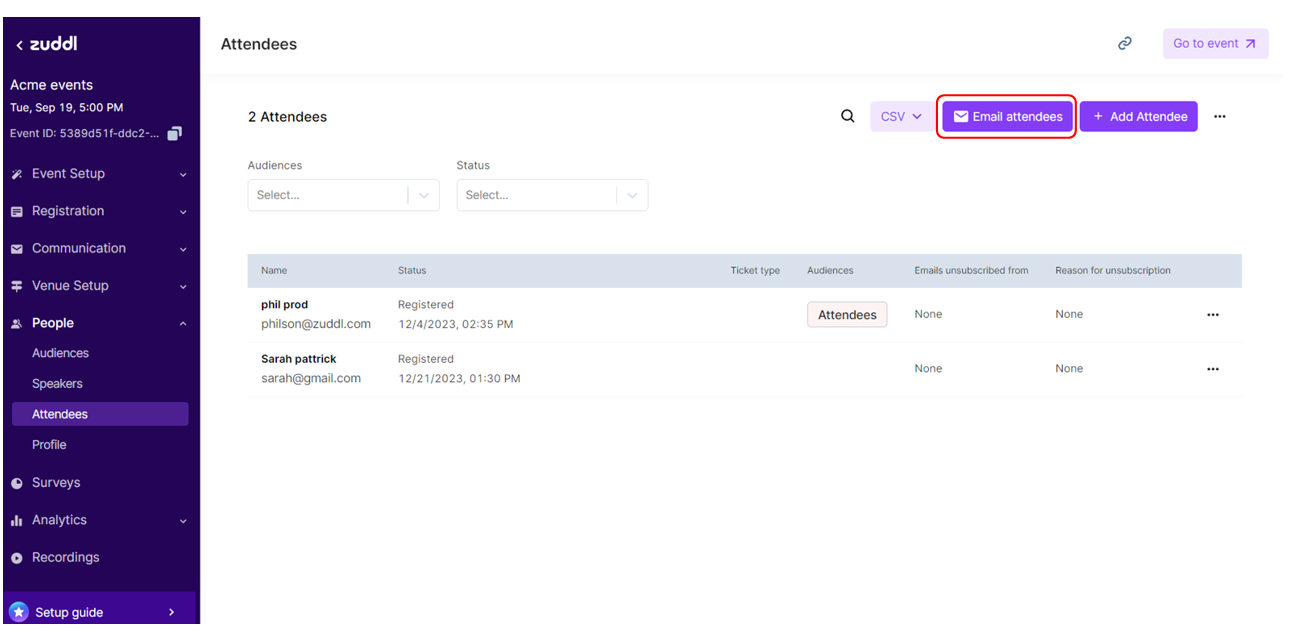
Click the Email attendees button on the top right corner.
Select recipients by selecting the check boxes next to the attendee’s name.
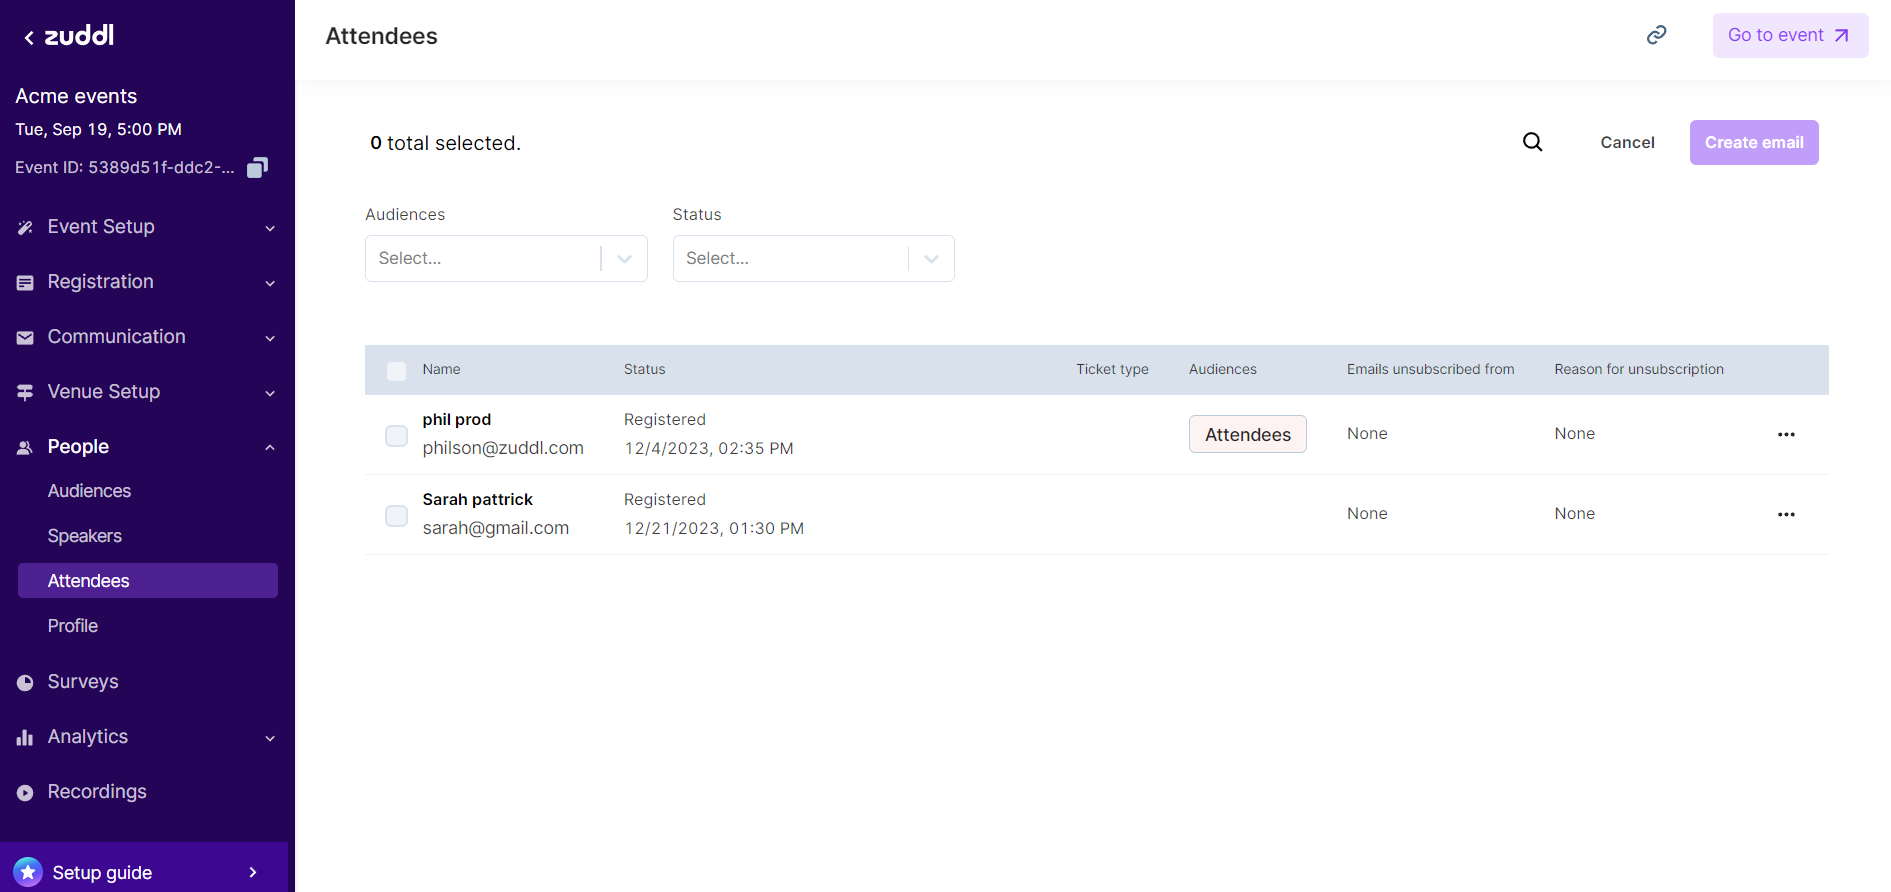
Click the Create email button to start customizing the email.
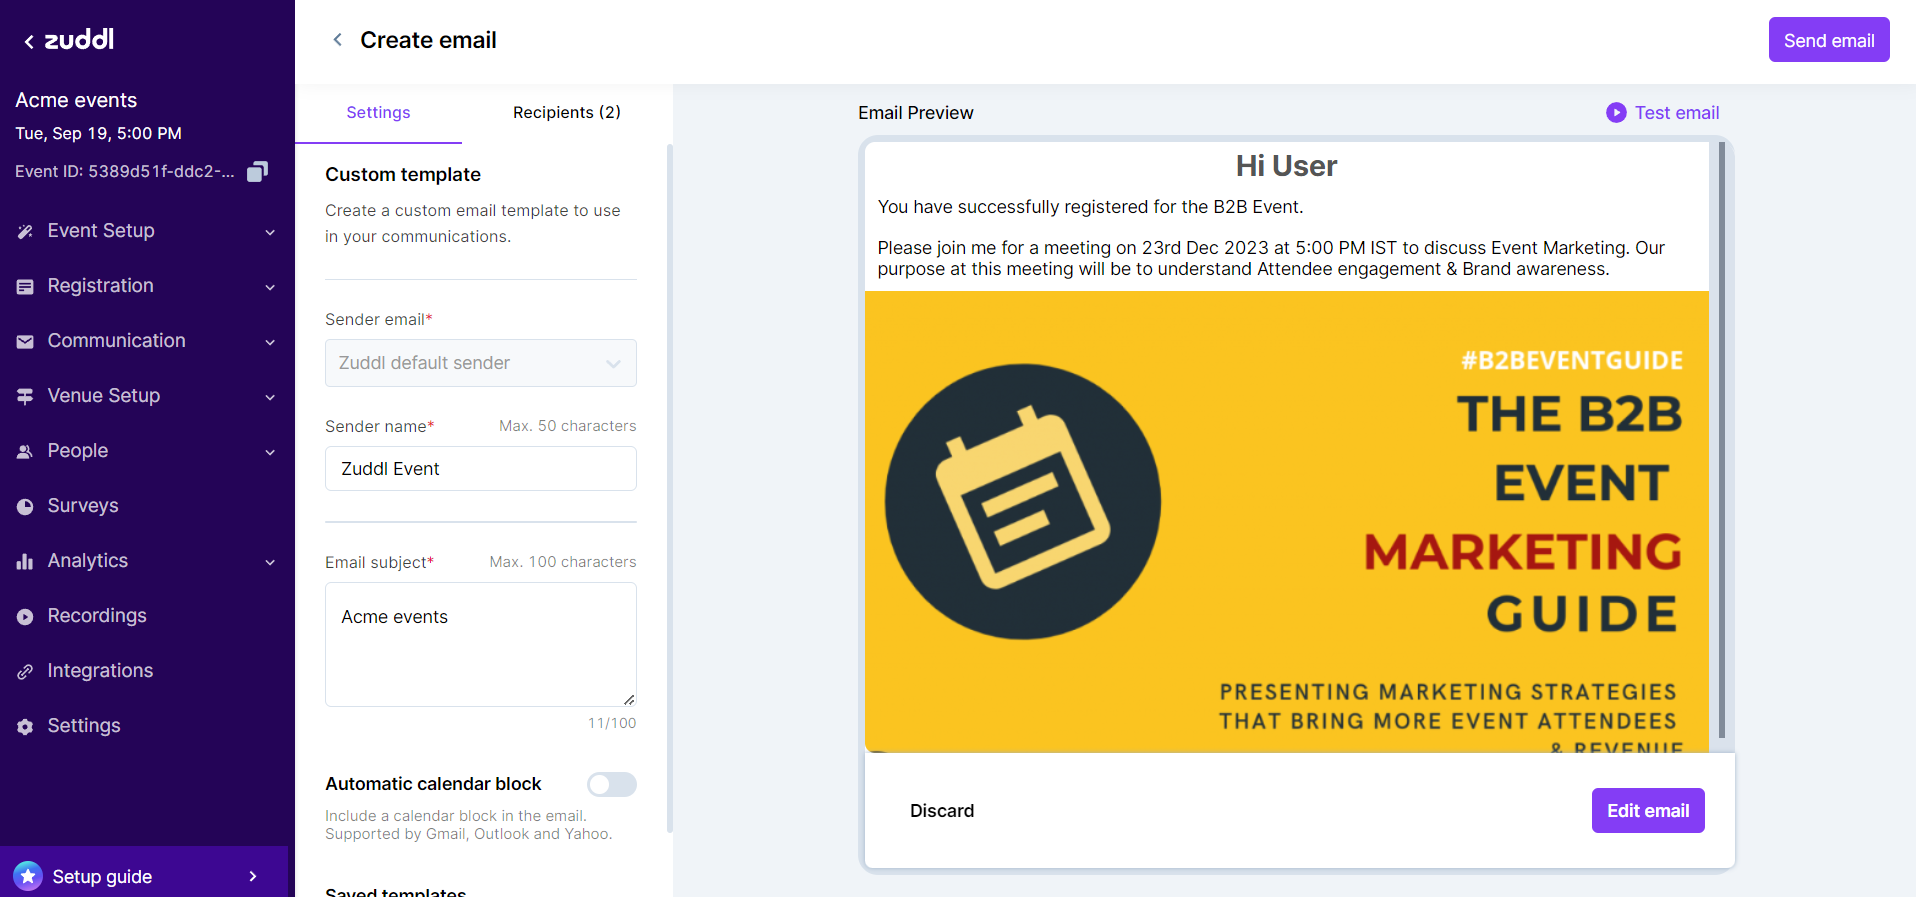
Create your custom email
After selecting recipients from the Attendees page and clicking Create email, you can set up the custom email.
- Edit the Sender name and Email subject as required.
- Toggle on Automatic calendar block if you want the email to include a calendar block for your event (not recommended for emails sent after the event starts).
In the Recipients tab, you can view and edit the list of selected recipients.
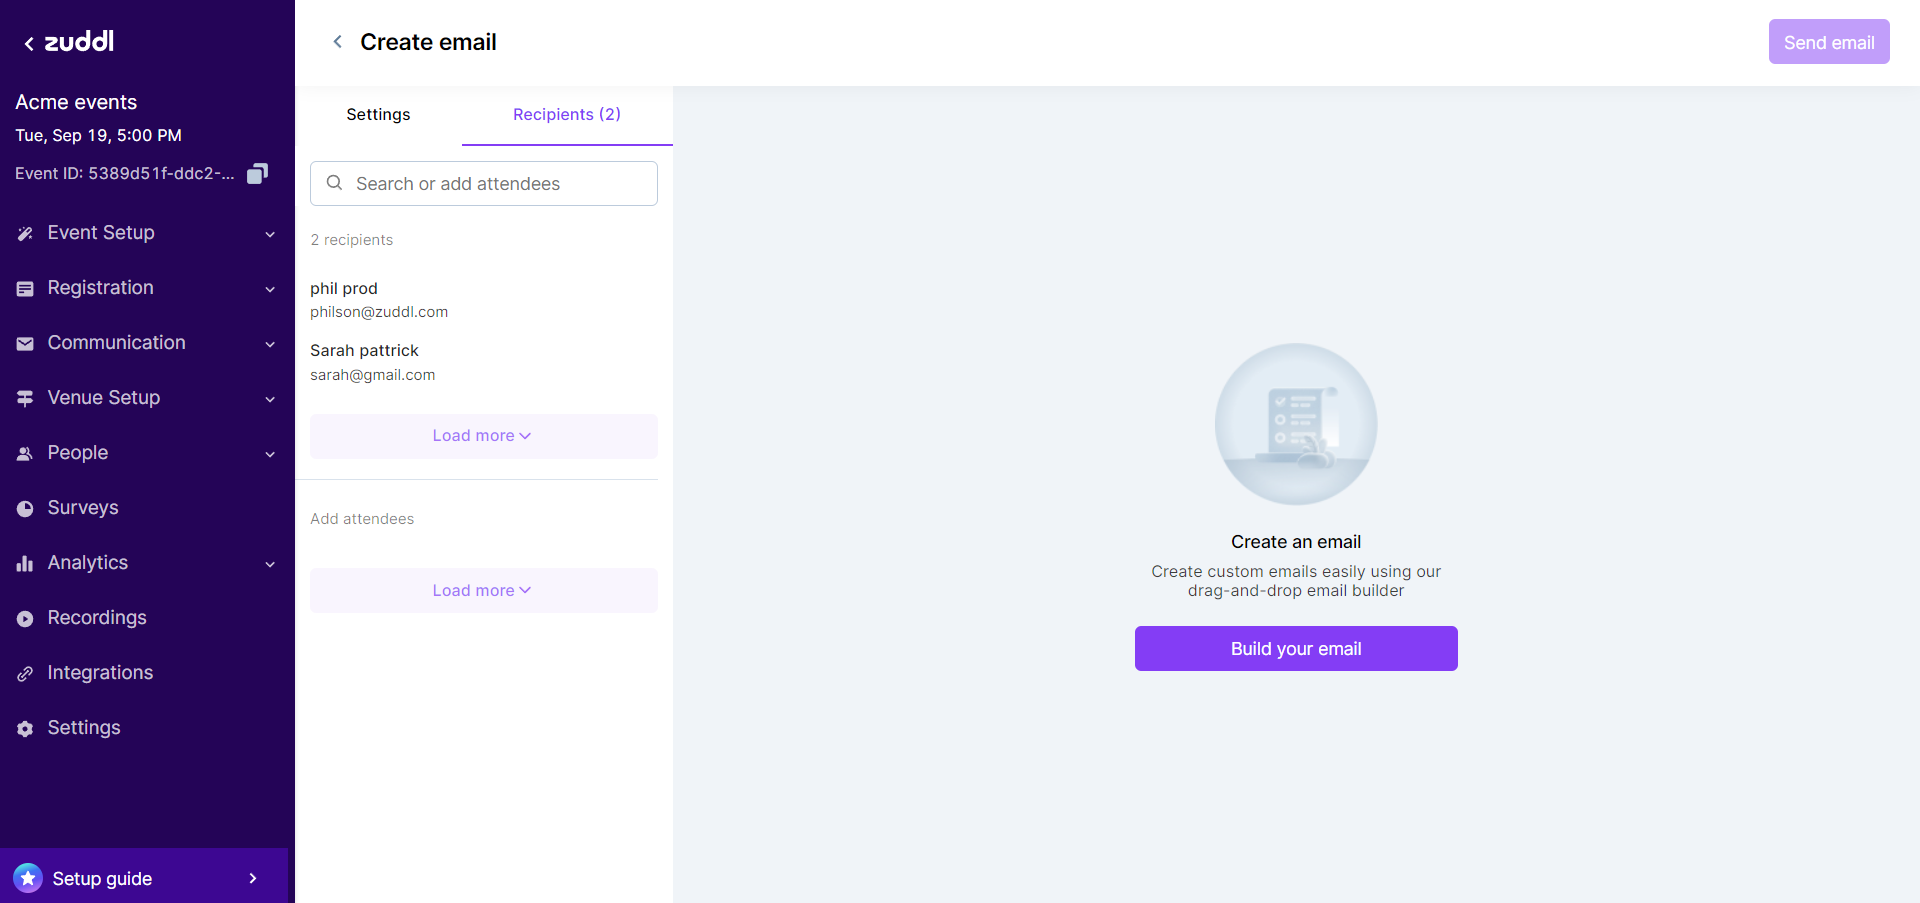
Click the Build your email button to start creating the email.
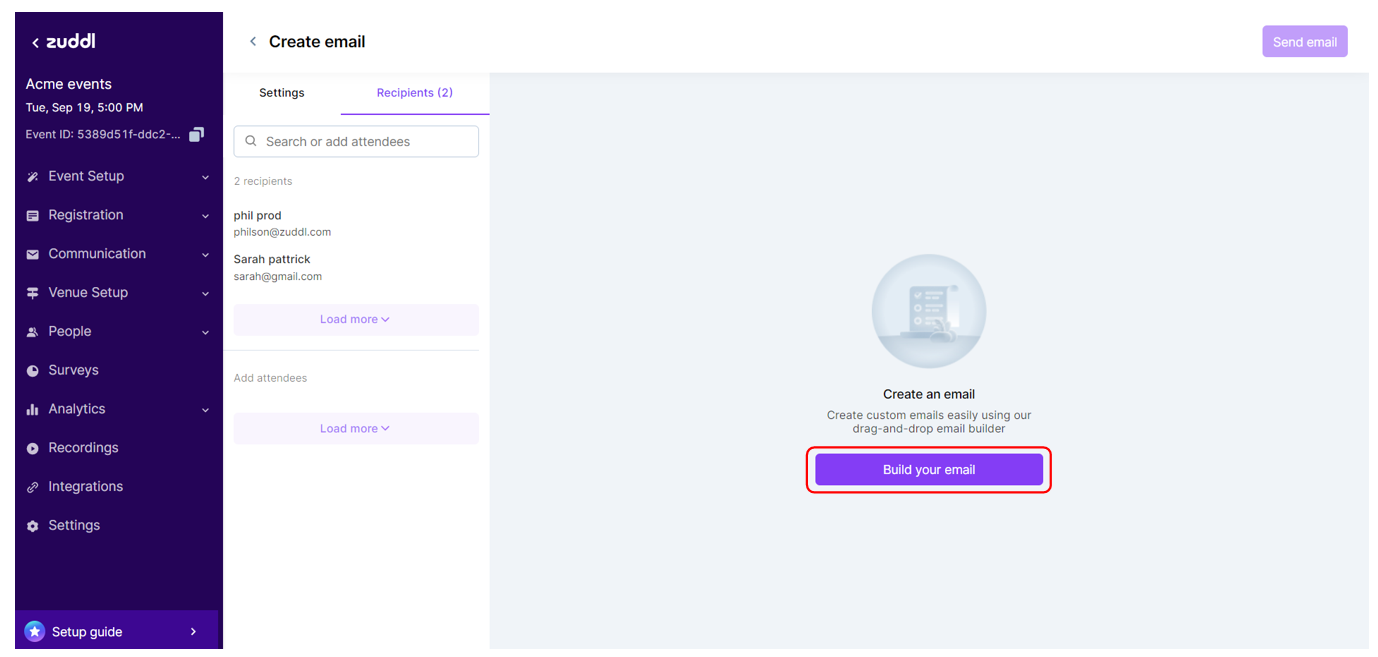
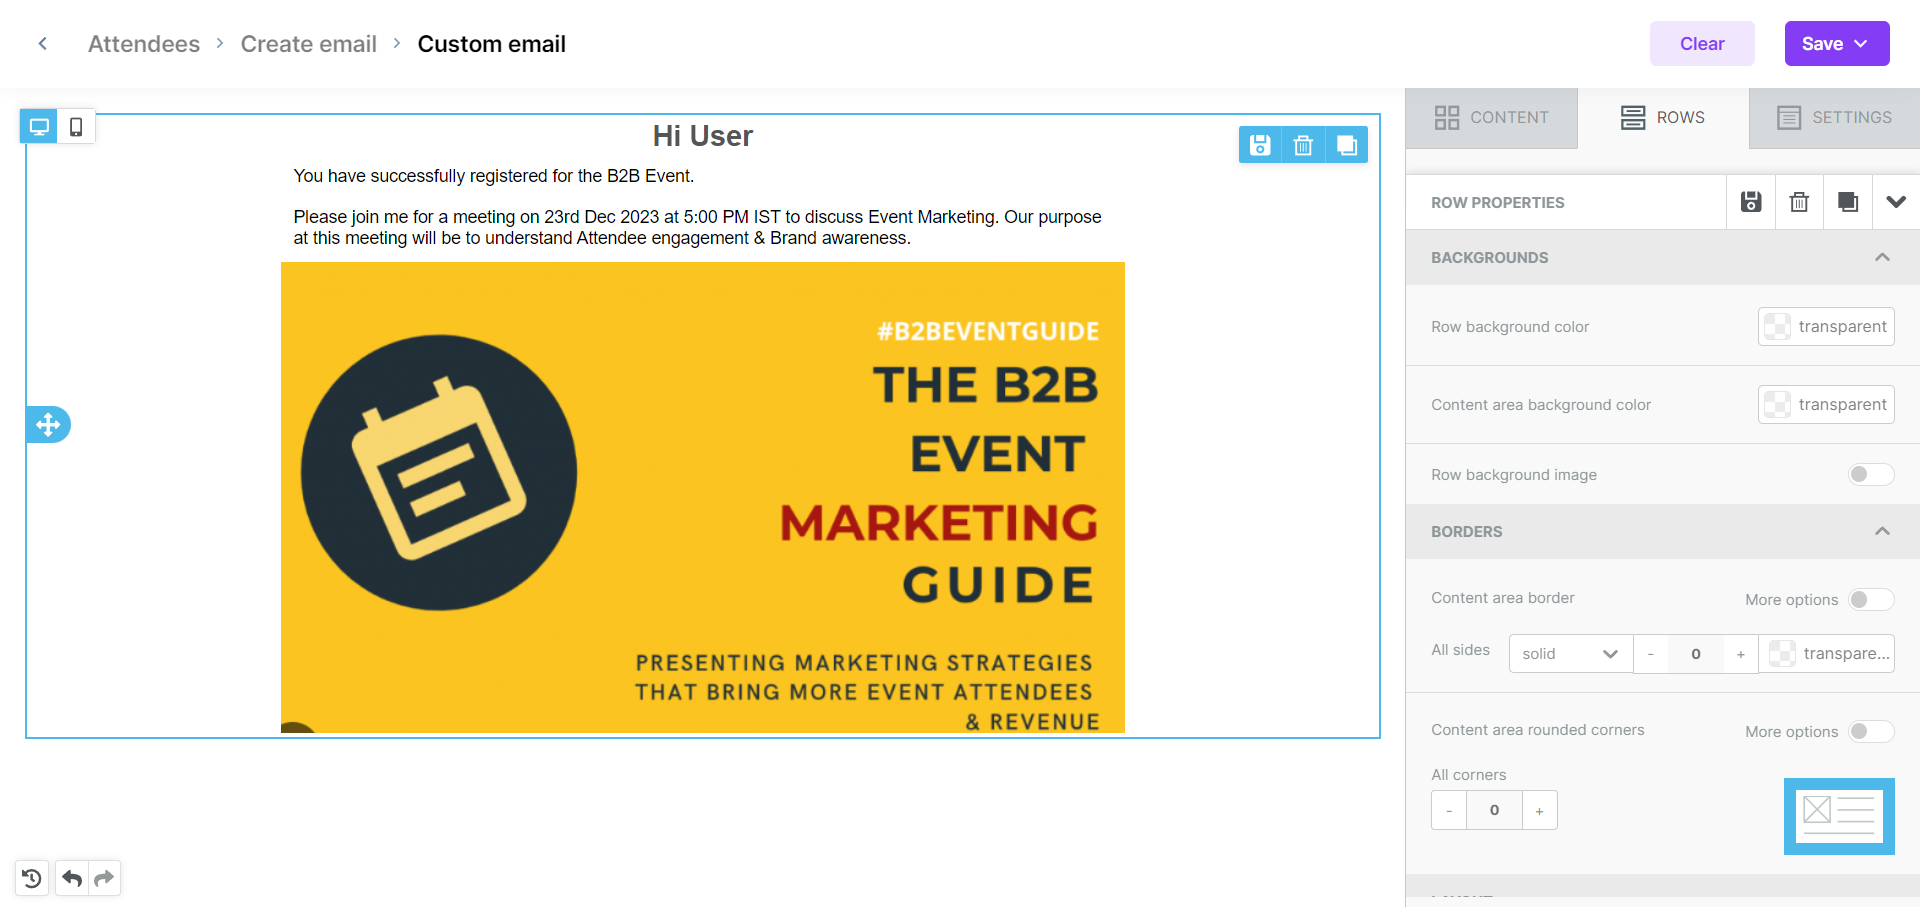
This opens the email builder, where you can create a custom email using various content blocks in the right panel.
Learn more about using the email builder here.
Once you create the email, click Save. Click Save and exit to save it for a one-time use, or click Save as template to save it as a template that can be reused later.
- Review your settings and click Send email to send the custom email to your selected recipients.