How to Set Up Helpdesk for an In-person Event in Zuddl
Last updated: September 4, 2025
Zuddl lets you enable a live chat widget integrated with tawk.to, to manage attendee queries during the event. The live chat widget is only available in the Lobby venue.
Tawk is a helpdesk application that enables agents to respond to incoming chat messages from any assigned properties. In Tawk terms, a property is a website (in this case, your Zuddl event website) where the tawk.to chat widget is added.
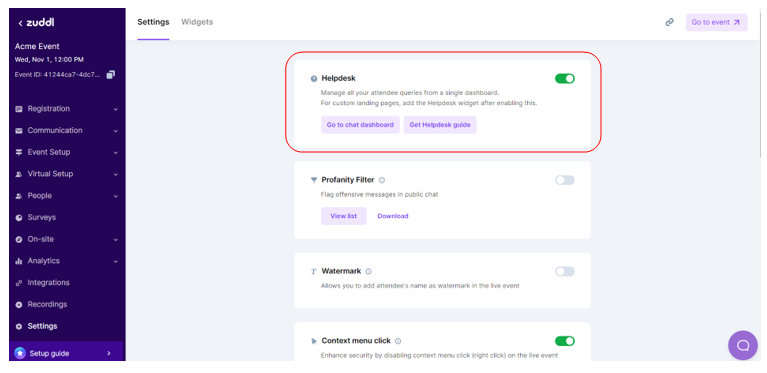
Enable the Helpdesk
In Zuddl, we’ve named this feature as Helpdesk. To enable the Helpdesk for your event:
Login to the Zuddl dashboard and create an event. Learn more about creating an event.
On the event setup page, go to Settings.
Toggle on Helpdesk. At this point, Zuddl automatically creates a tawk property for your event. Zuddl also sends email invites to all the team members added in Zuddl on your behalf, to access the tawk property.
This makes the helpdesk available for custom registration pages as well. Learn how to build a registration page.
If you already have a Tawk account, click the Go to chat dashboard button, which directly takes you to the tawk login page.
Alternatively, you can follow the instructions received via the email invite to log in or create an account.
Click the Get Helpdesk guide to reach this guide.
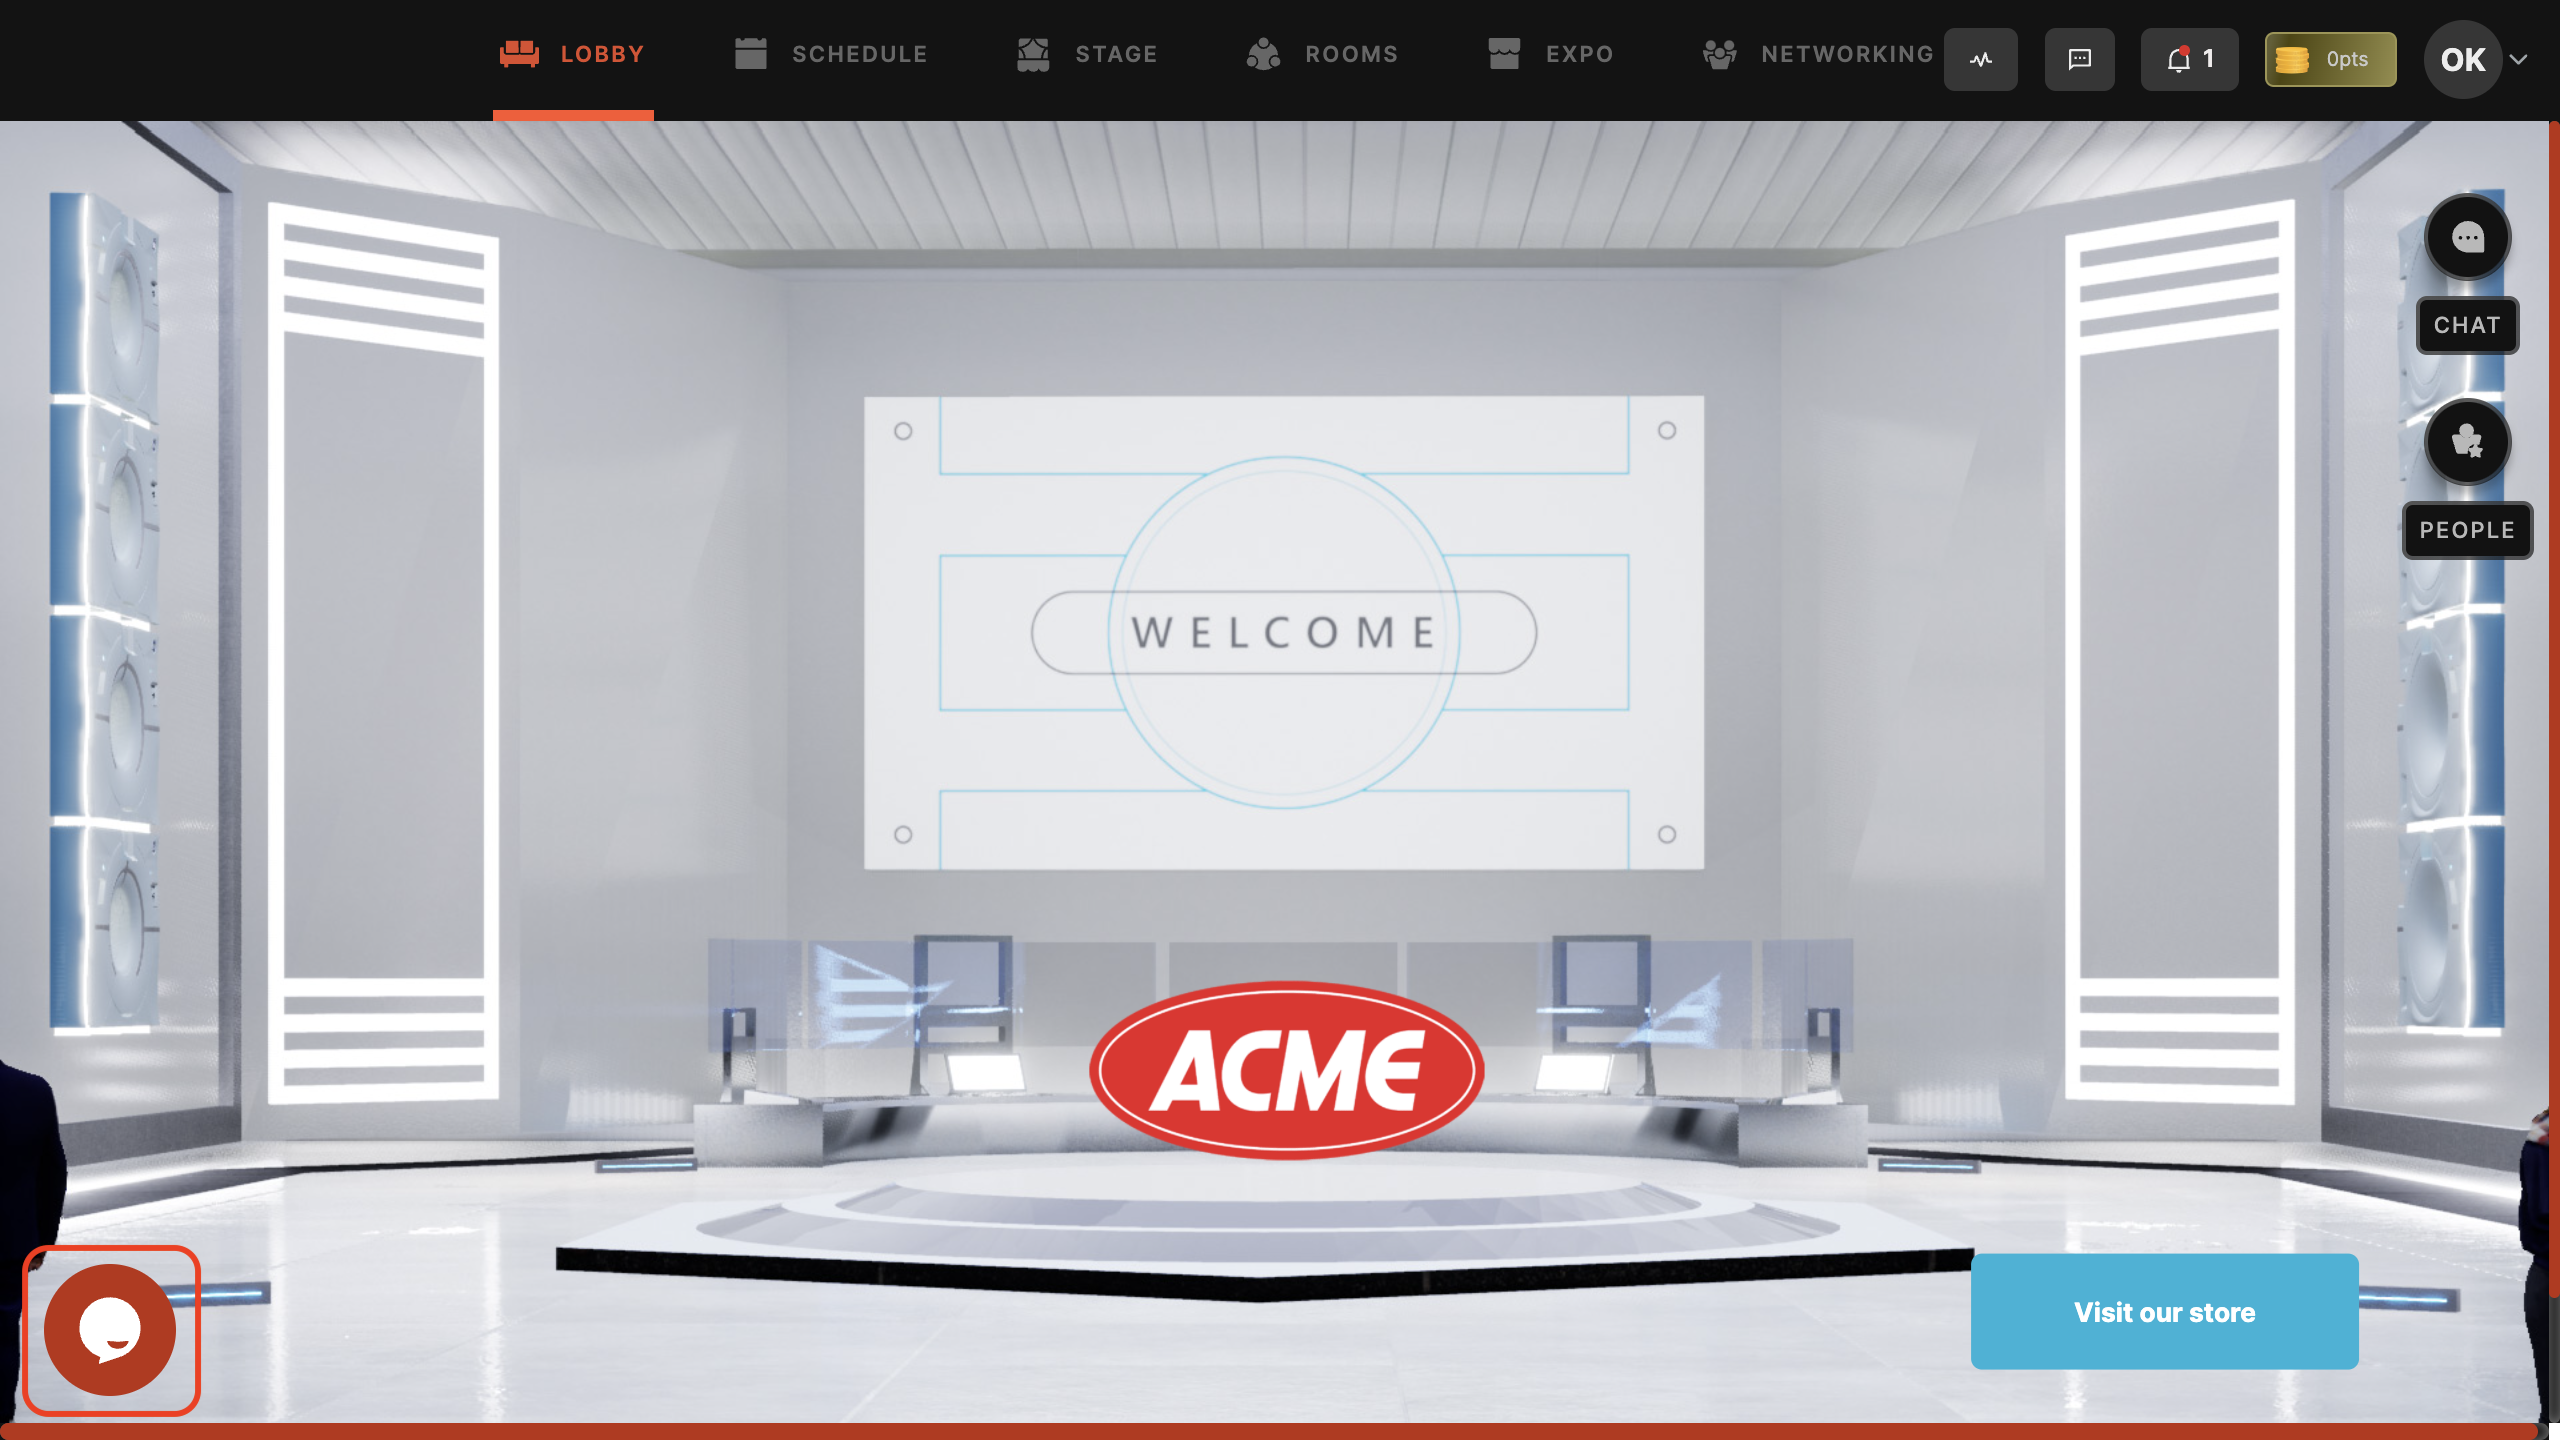
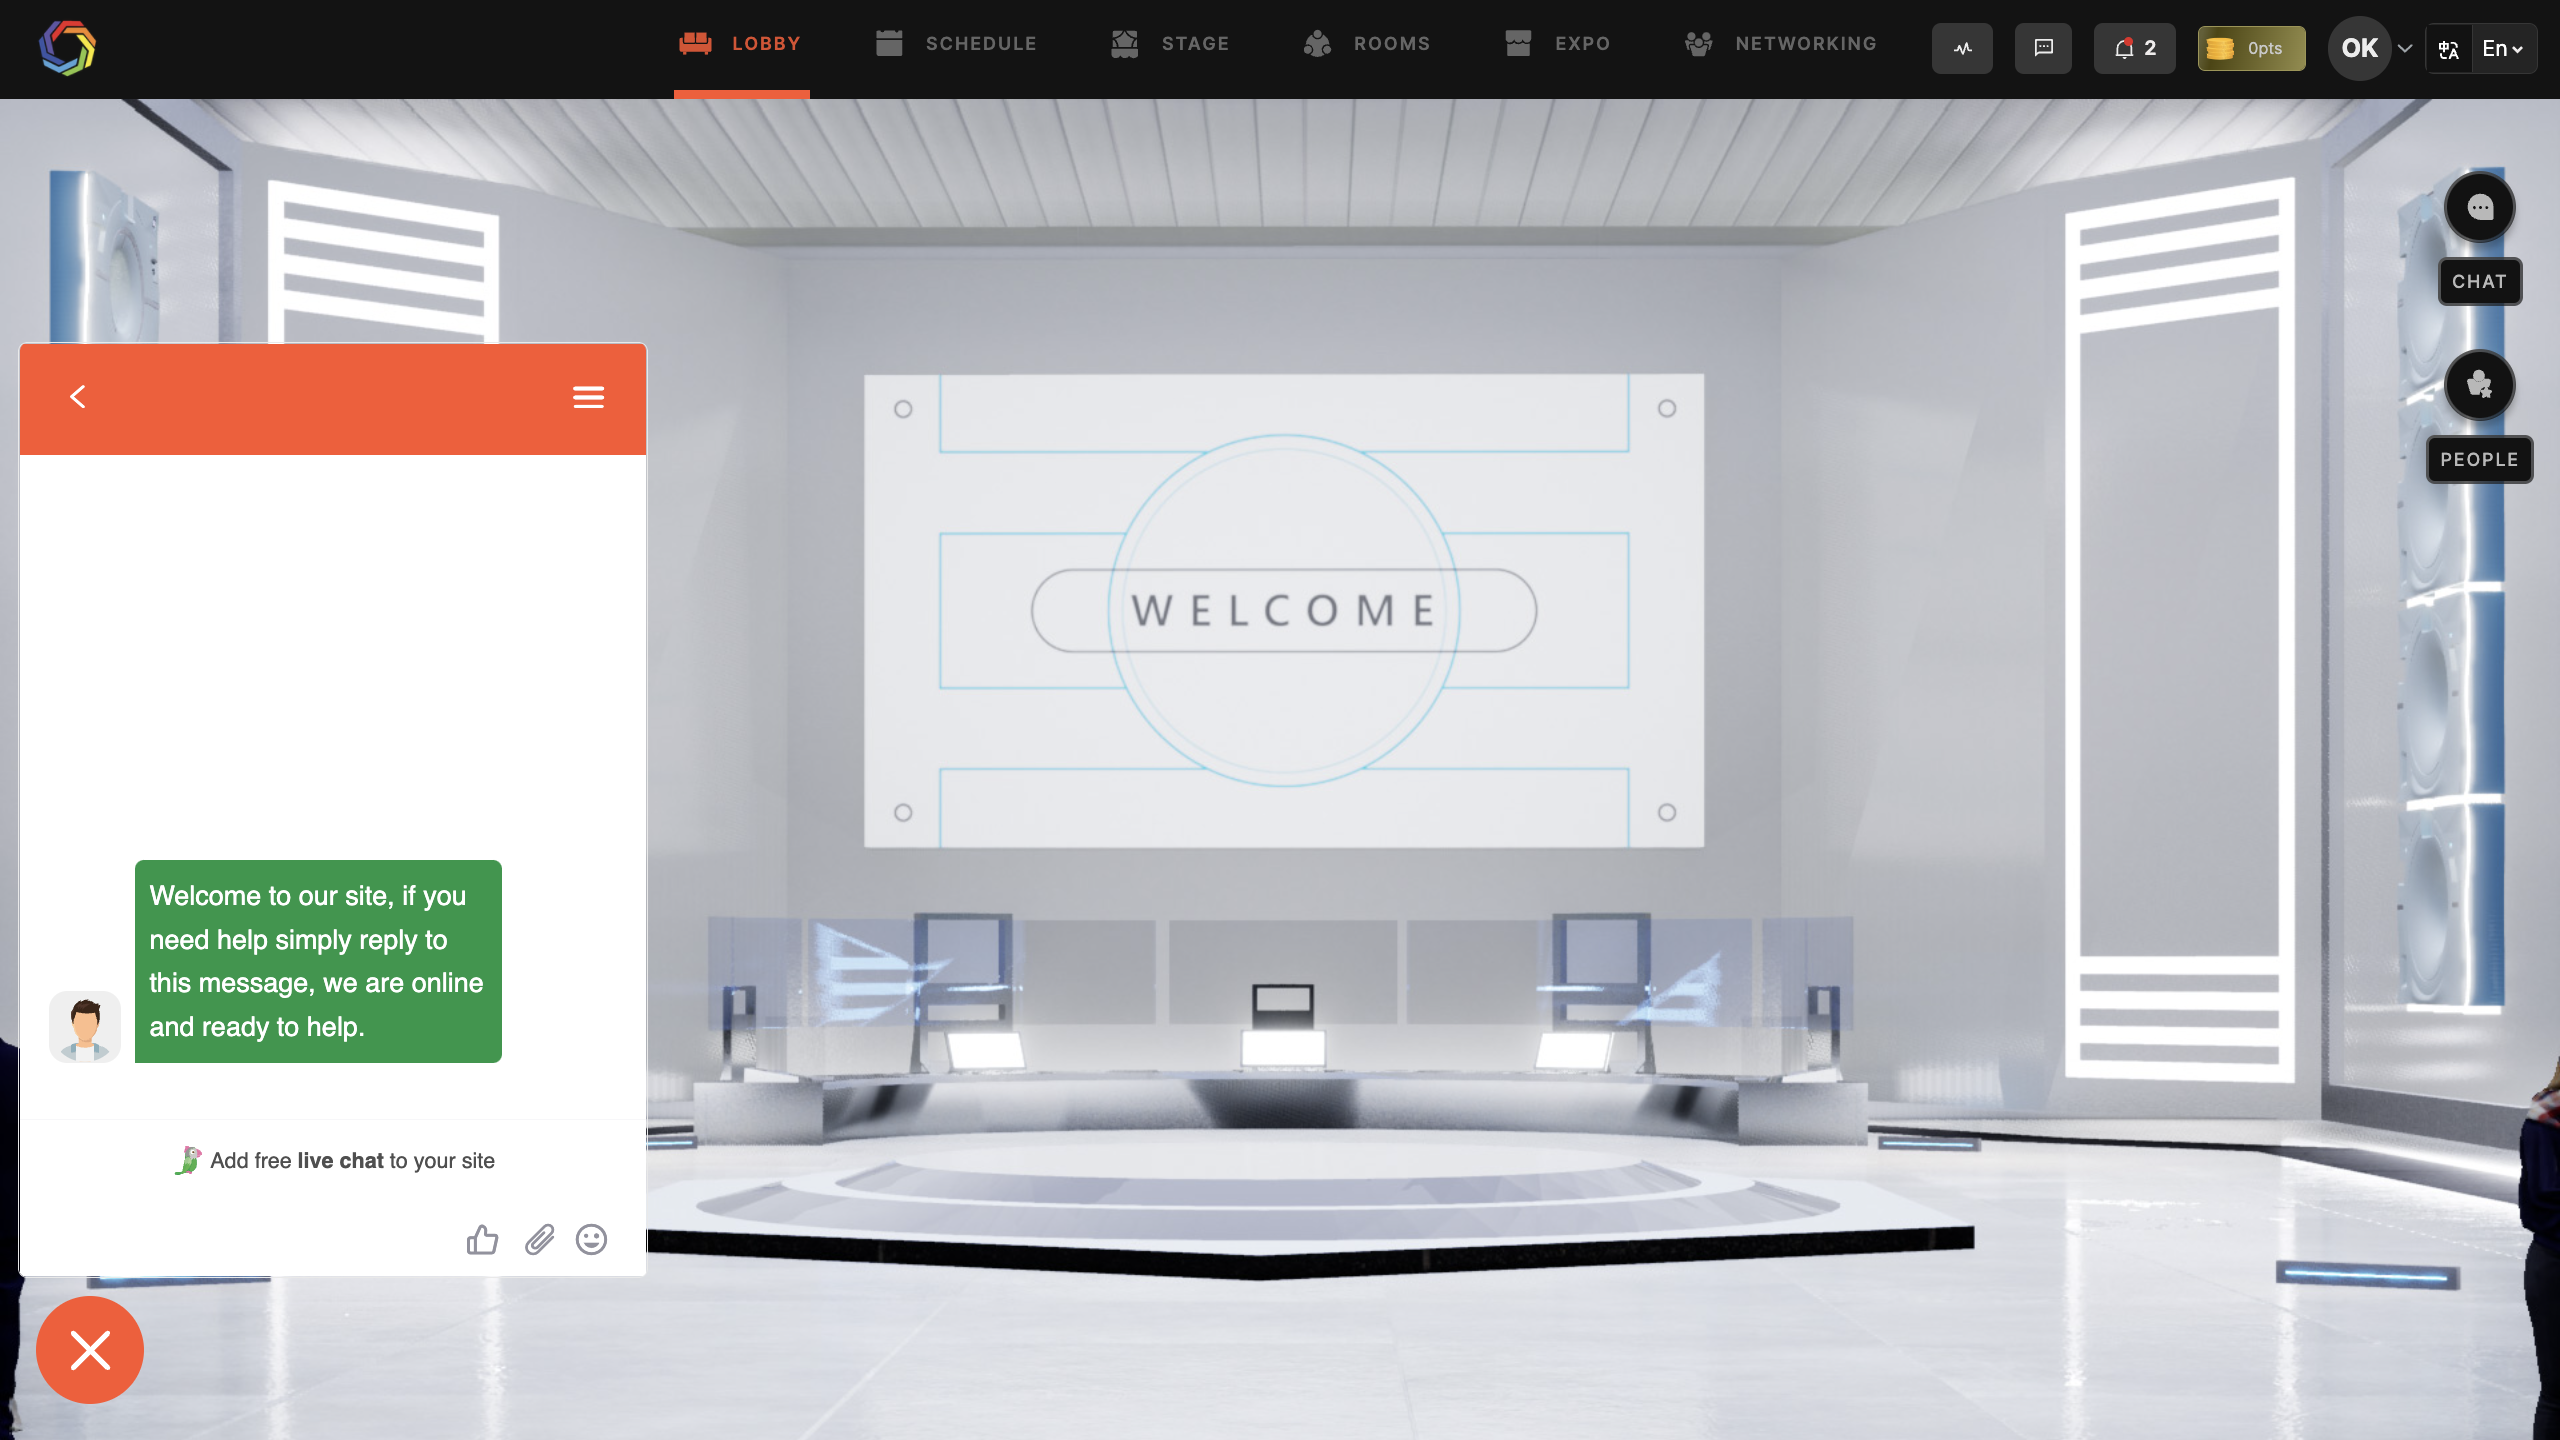
An attendee can find the Helpdesk at the Lobby zone as shown below:
Create a new Tawk account
If you have not signed up with Tawk yet, follow the below instructions to create a Tawk account.
Click on the Click here to Sign up for a Tawk account. On the signup form, enter your name, email, and password (refer to the image for password criteria).
Use the same email address here as registered on Zuddl.
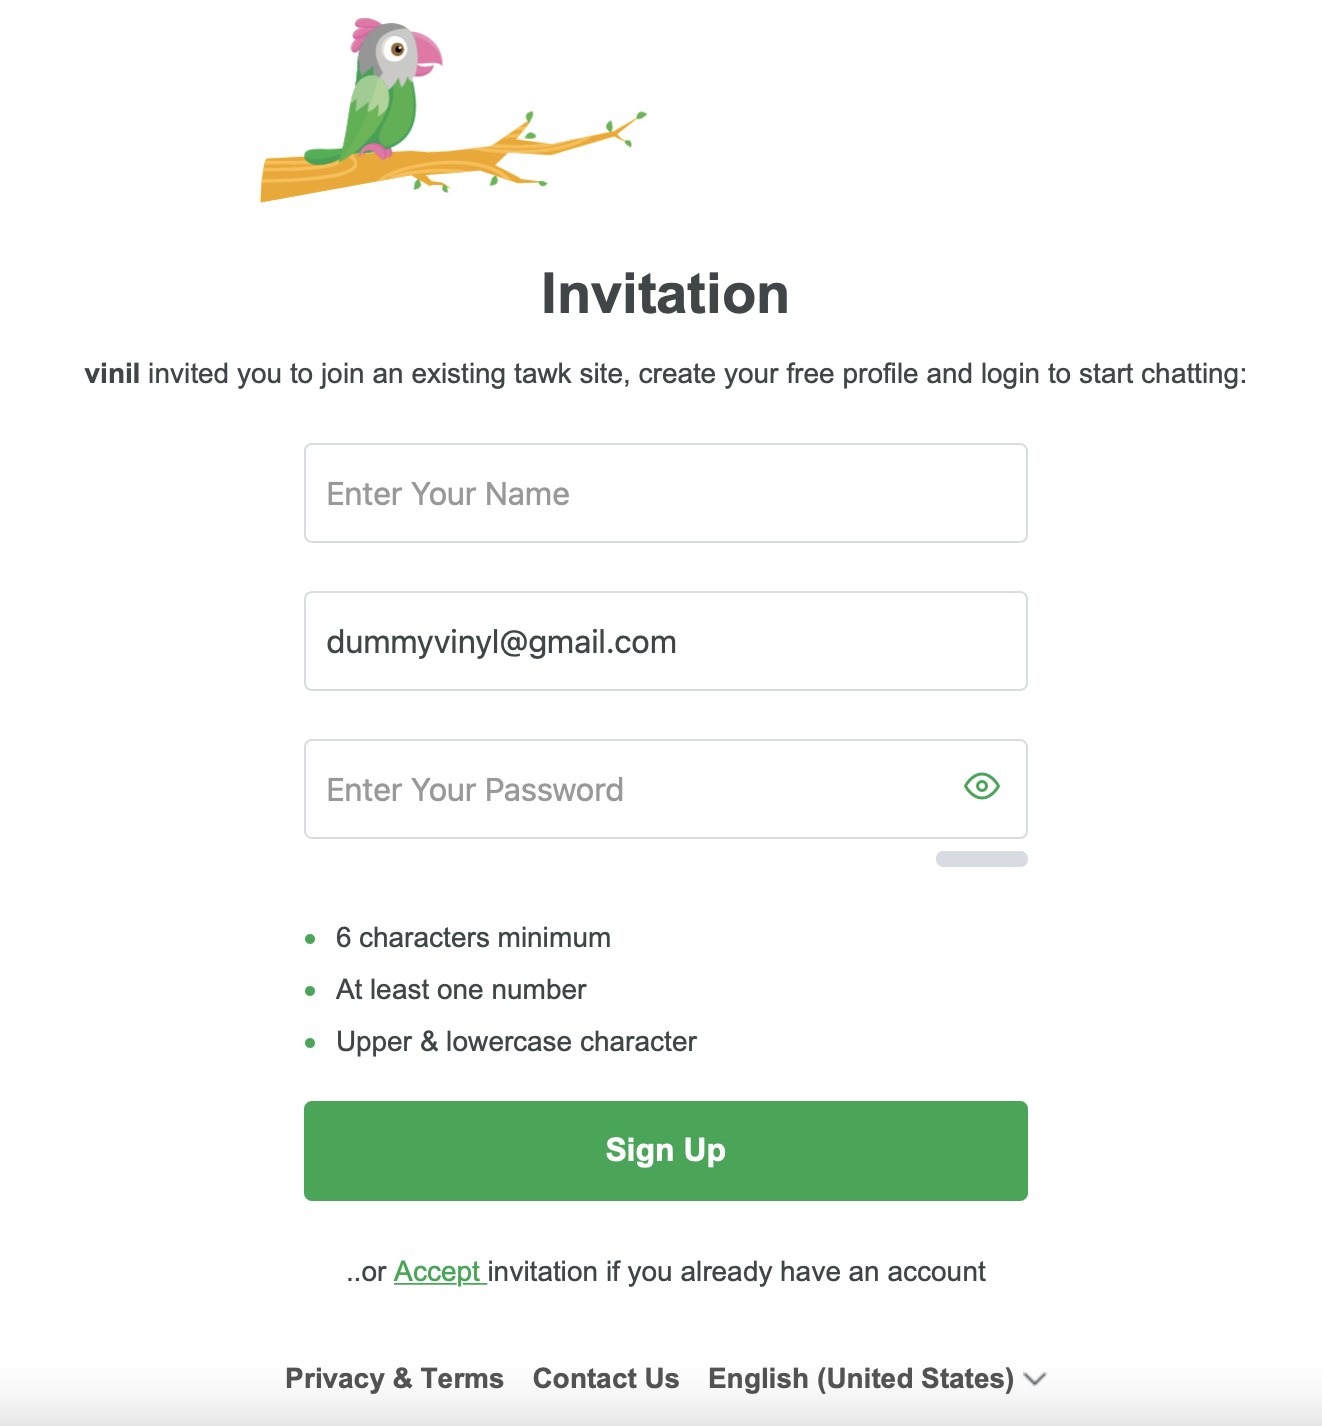
Tawk Invite.png
Click Sign Up. Tawk creates an account and redirects you to your dashboard setup.
To set up your dashboard, select the desired language from the dropdown.
Click Set up Later. As soon as you create an event, Zuddl makes a tawk property and invites all the team members from your organization to the tawk property.
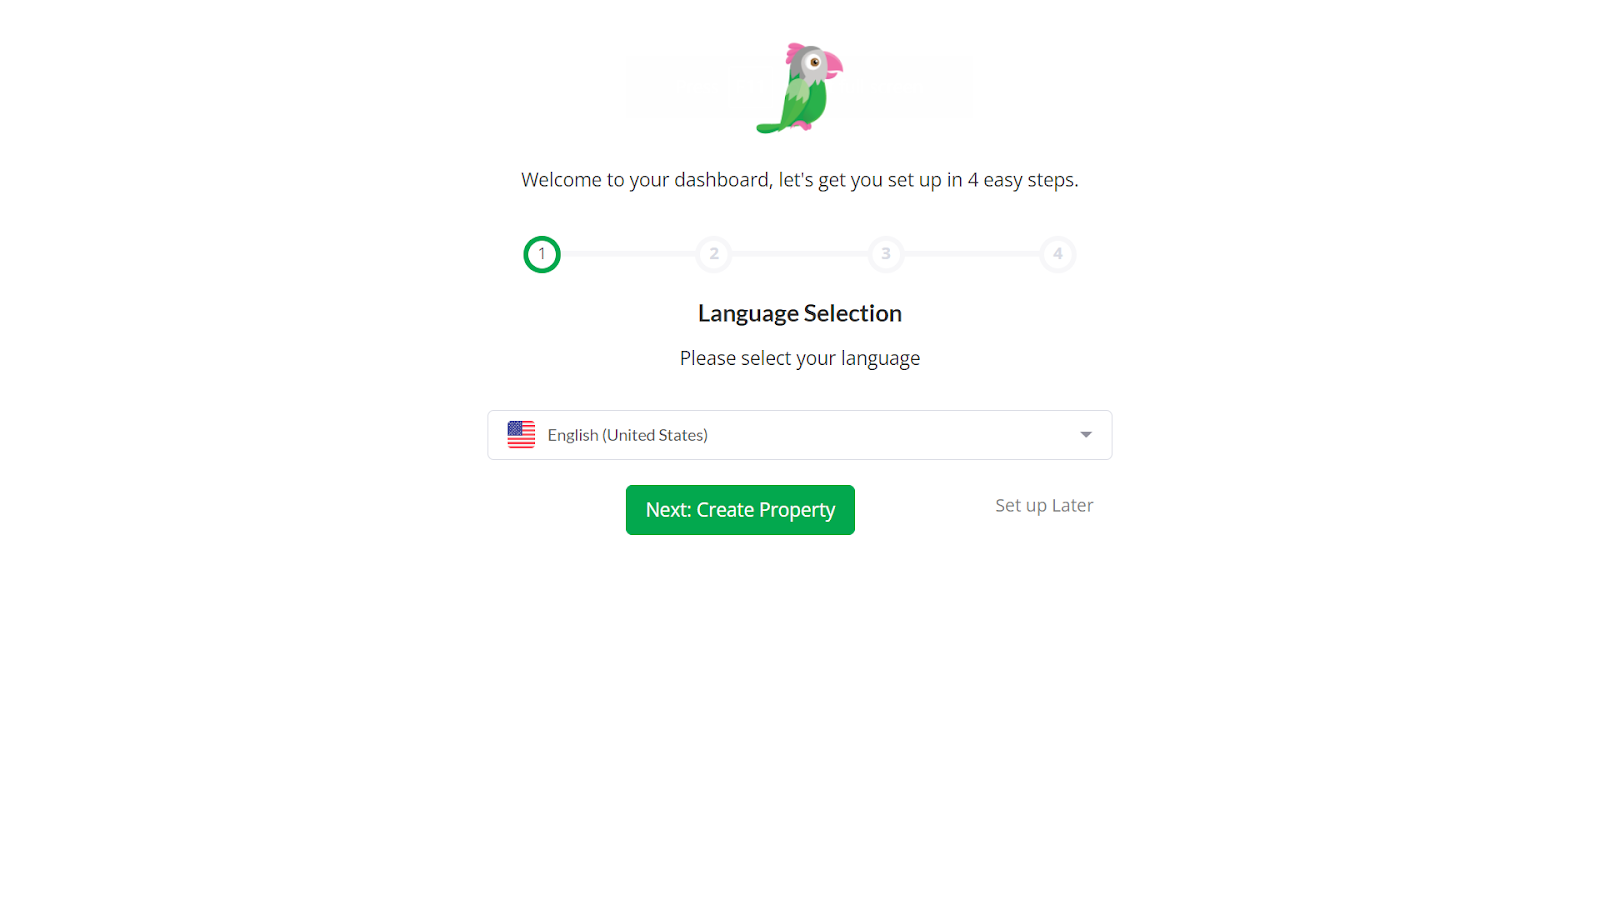
Language Selection.png
Existing users would be asked to log in to their account, and new members would be asked to create an account.
Inviting an Agent
To manually invite team members or agents outside your team in Zuddl,
Log in to your tawk dashboard
On the dashboard, go to Administration > User Management > Invite Member.
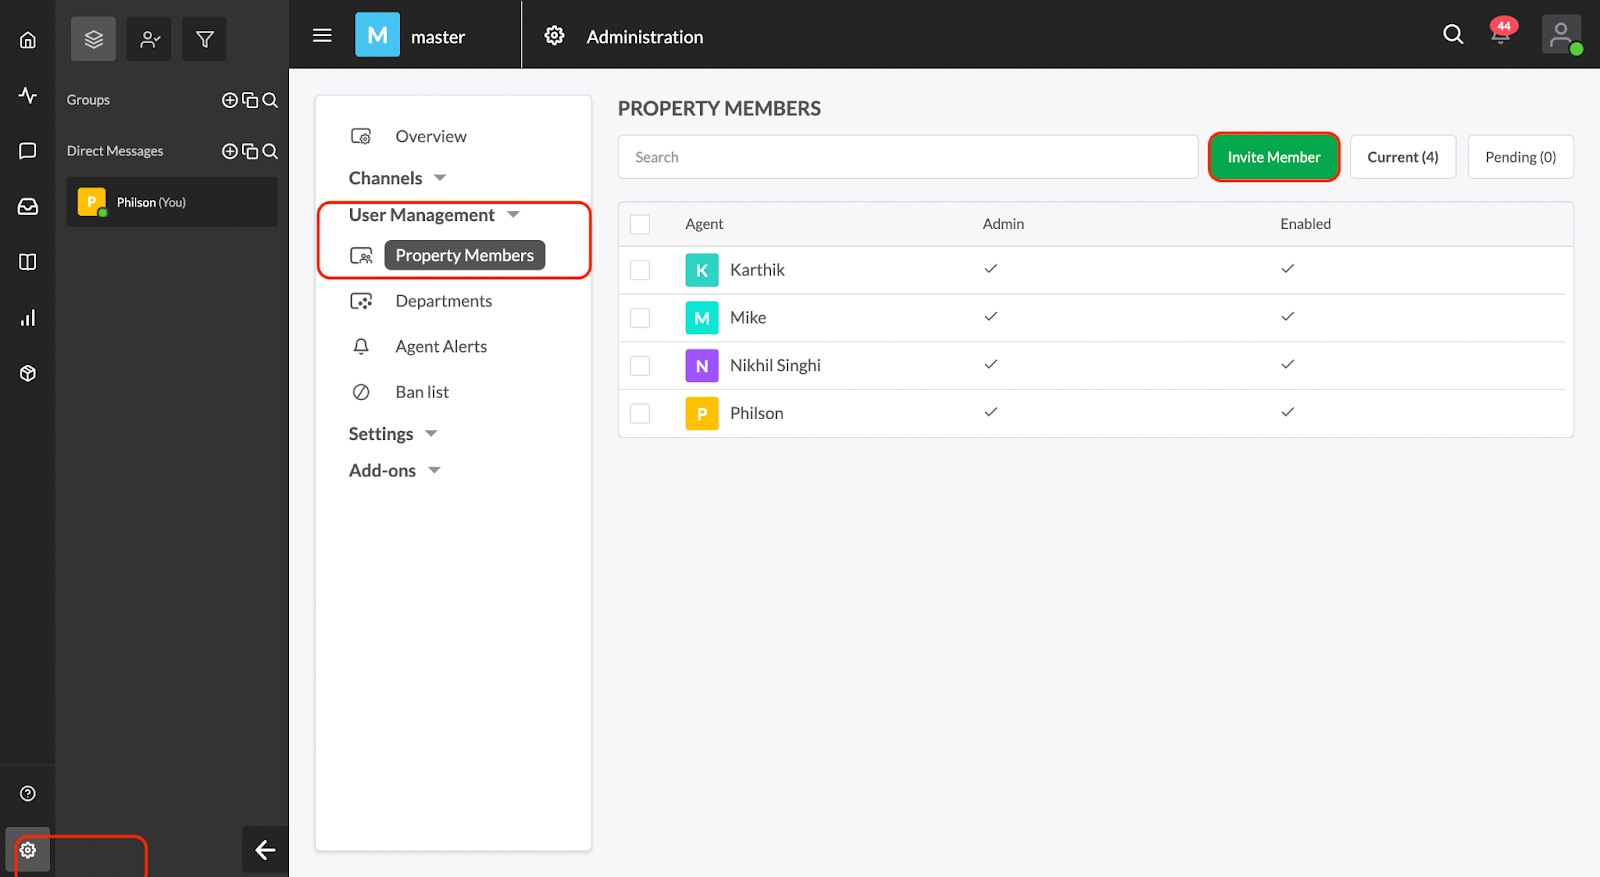
Tawk Dashboard.png
Under the Invite Member section, enter the email address of the recipient.
Select the role. You can either choose Admin or Agent.
Agent: An agent can be assigned one or more properties and respond to visitor queries over chat from those properties.
Admin: An admin can perform all actions an agent can, and in addition, admins can create new properties, invite members as agents (or admins) to properties, modify all settings, and perform a few other actions.
The team member receives an email invite to create a tawk.to account or log in to their existing account as shown below:
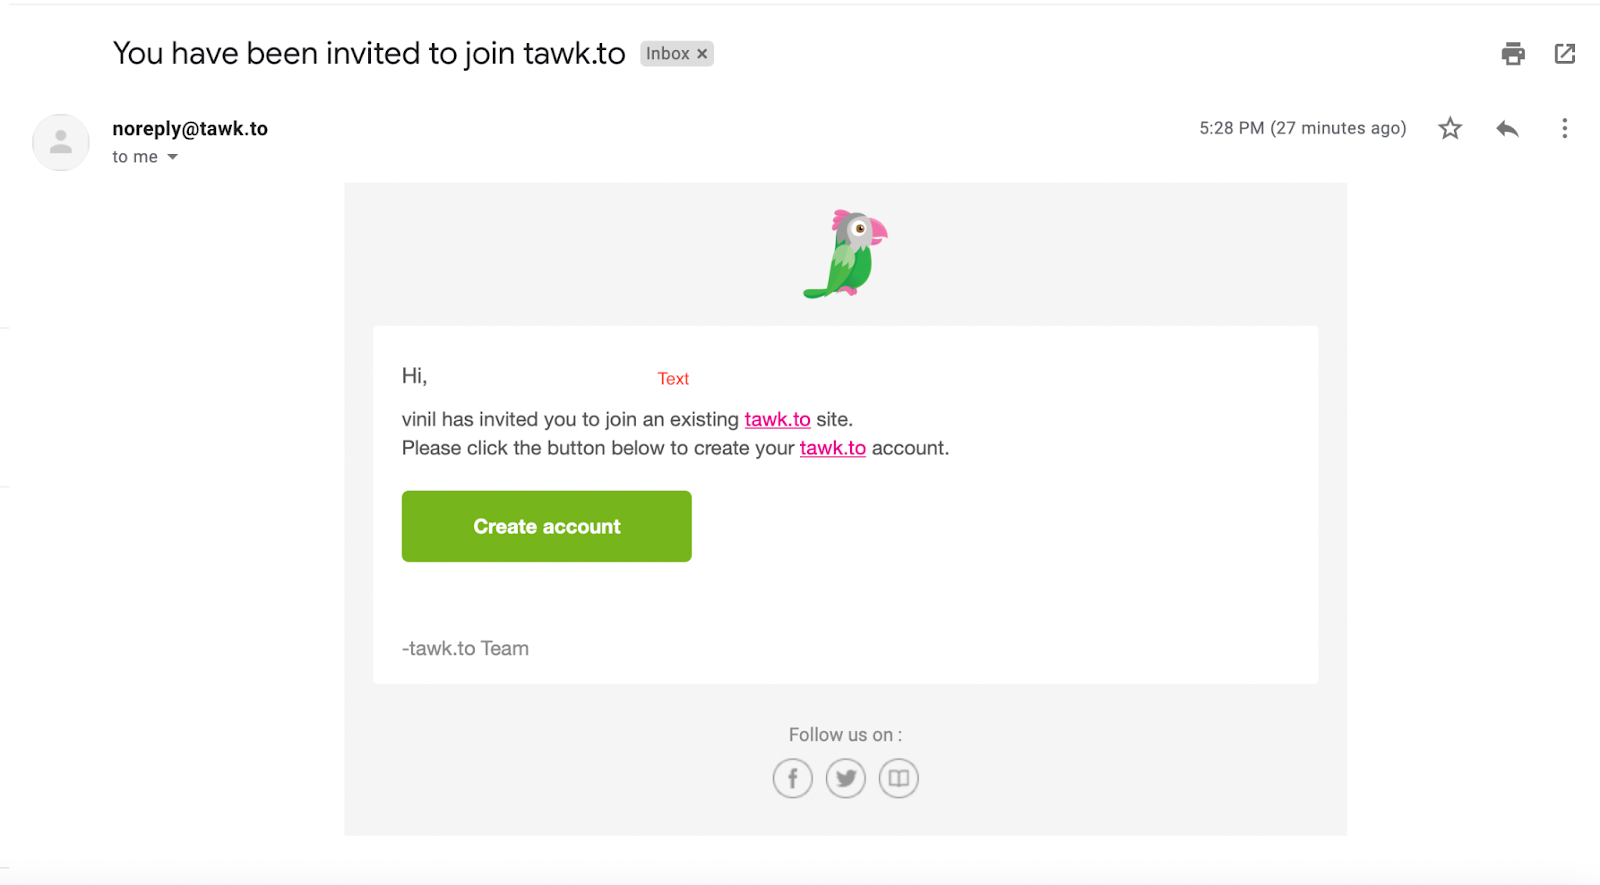
Email Invite.png
If the team member already has a tawk.to account but associated with a different property, they can accept or reject the invitation from the notifications menu after logging into their dashboard.
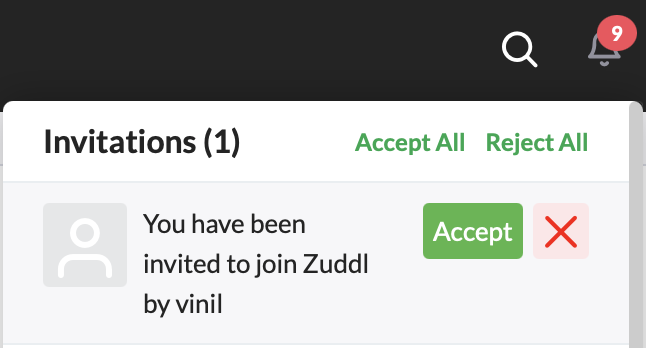
Accept Invite.png
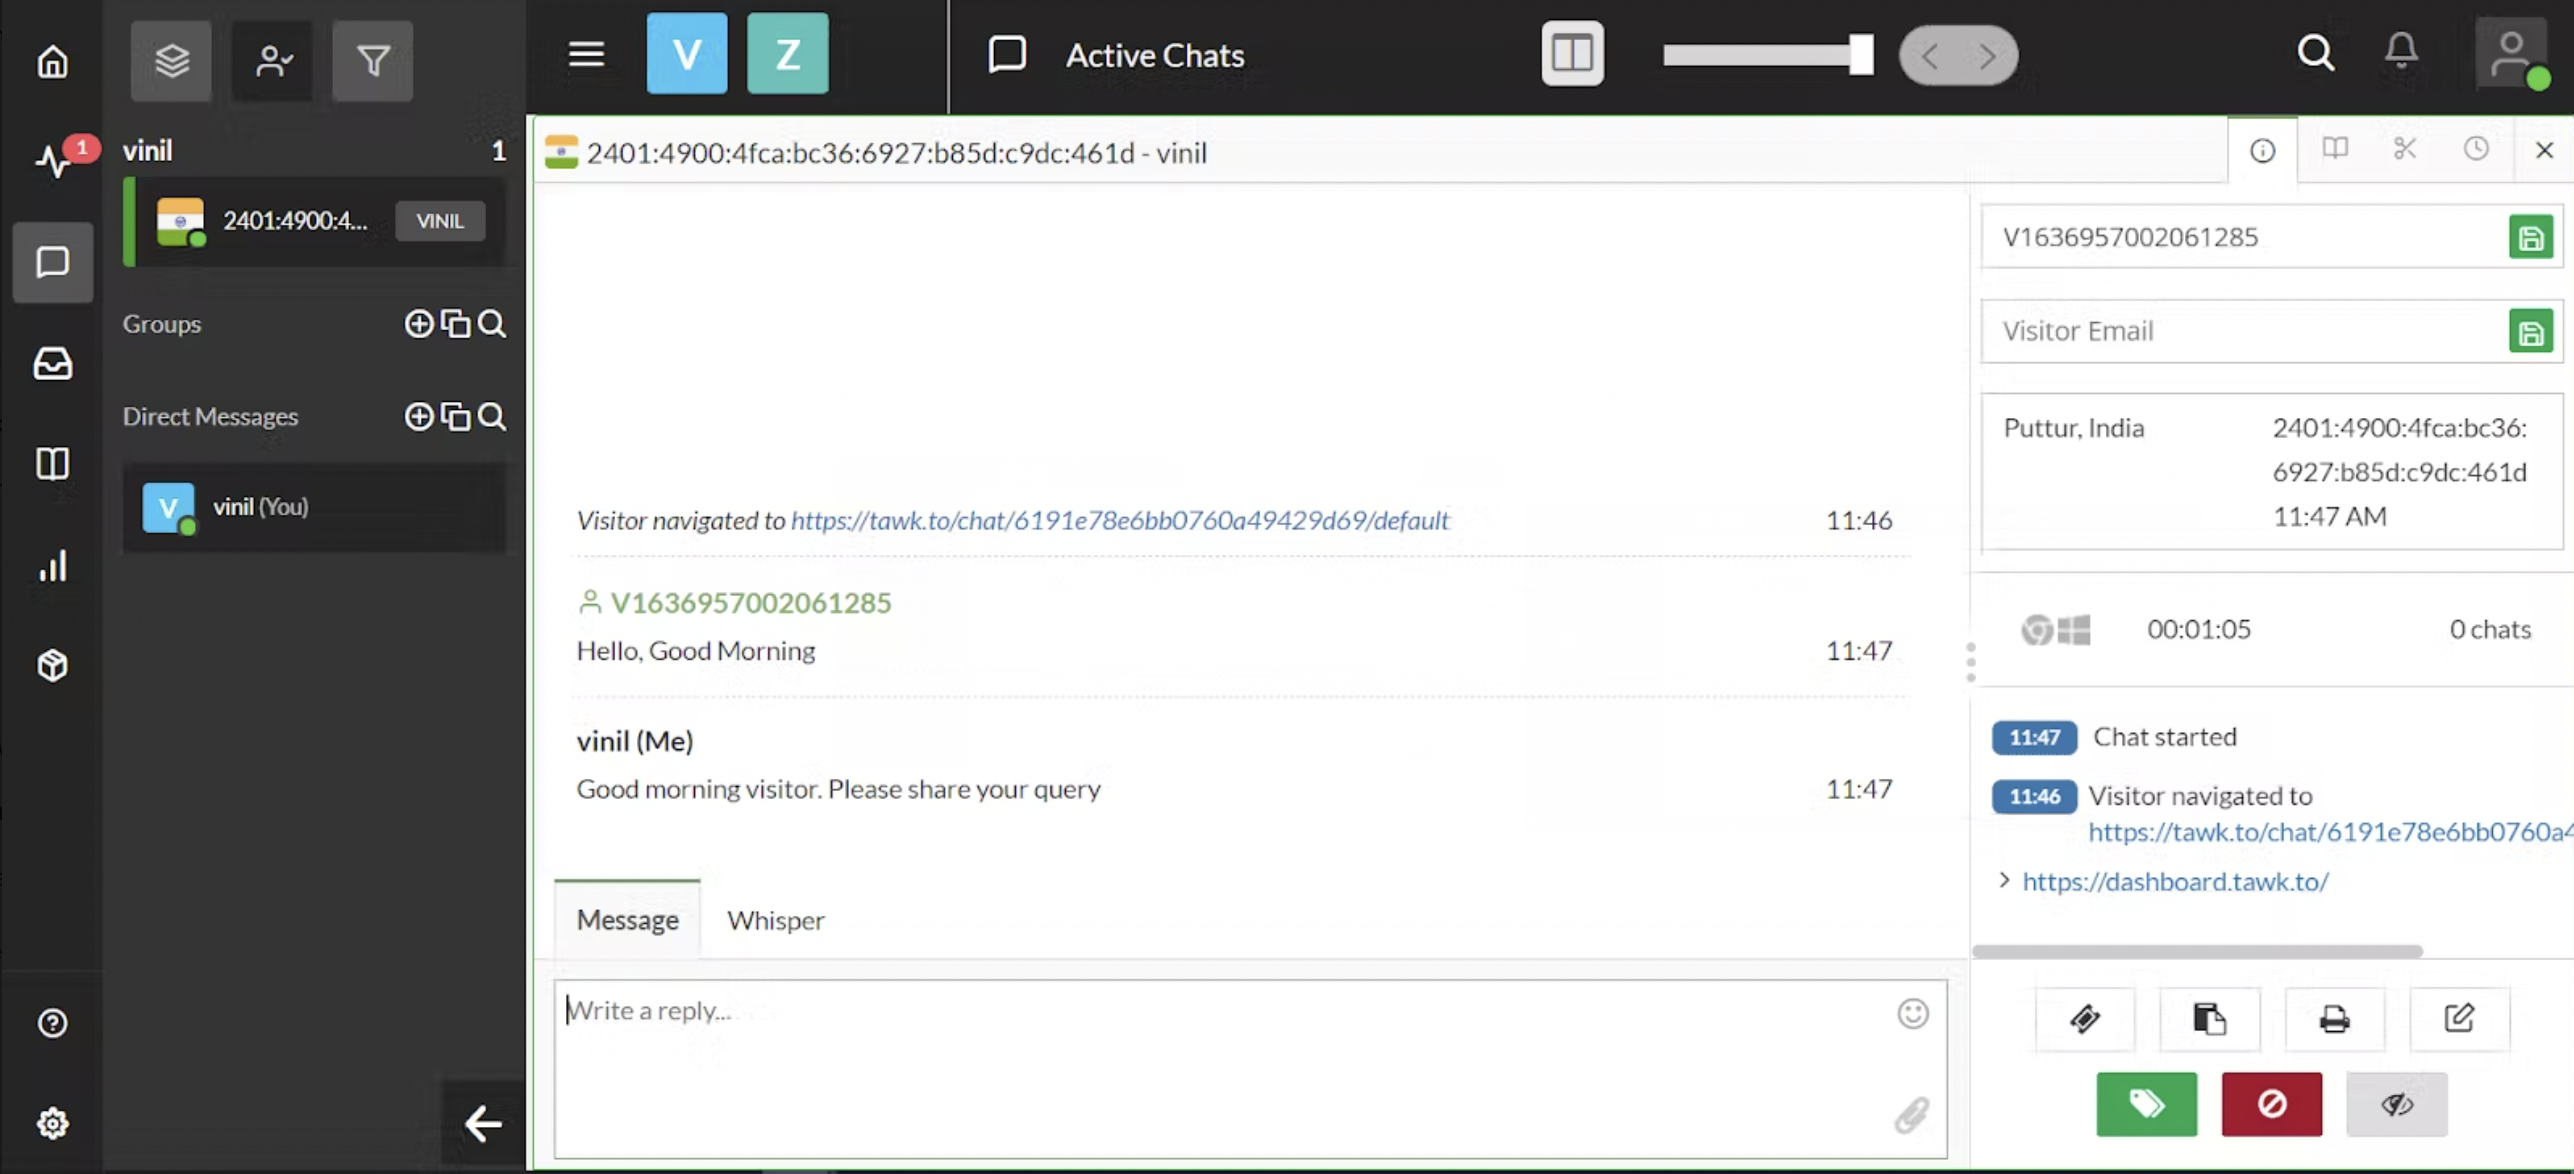
Responding to visitors
Once the widget is installed when a visitor sends a message via the chatbot, the admin/agent is notified of the incoming message by a ringtone.
You can choose to Join, Ignore, or Block the conversation. You can respond directly from the dashboard. To reply to the visitor’s messages, click on Join. The visitor gets replies from the admin/agent and continues with the conversation.
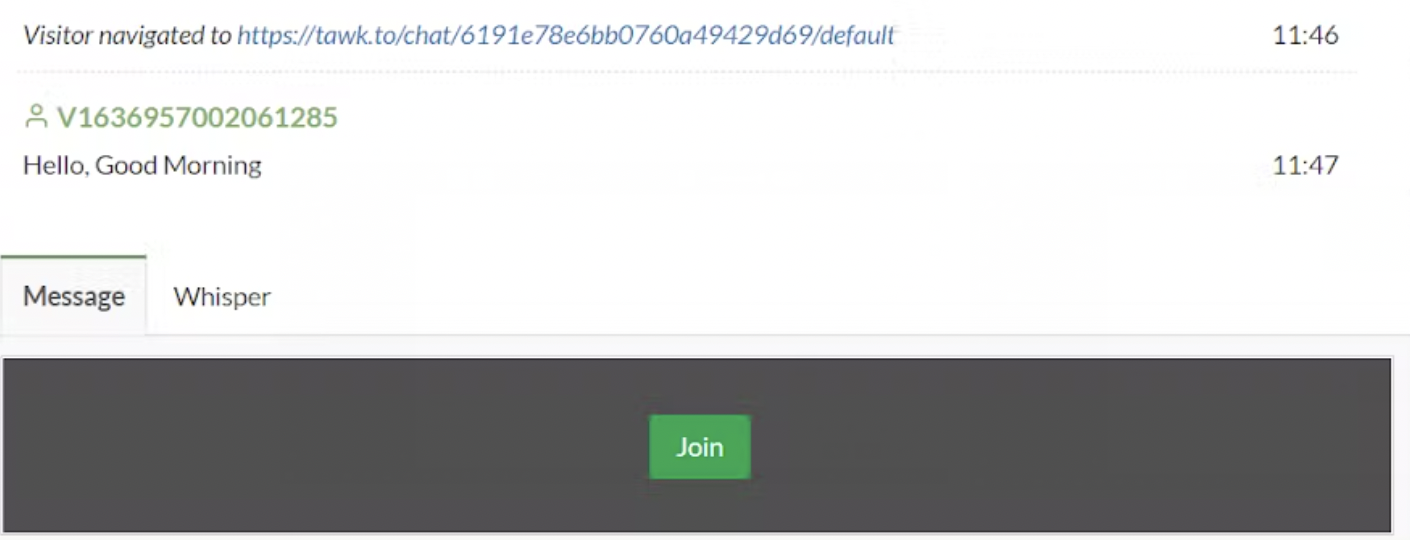
The agent and visitor views are shown side-by-side below:
Visitor viewAgent view | |
 |  |
Disabling Browser Notifications
If you do not wish to see the browser notifications for chat messages, you can disable them:
Go to your Tawk.to dashboard.
Select your property.
Click Administration > Channels.
Under the Widget Behavior section, turn on the Disable browser tab notification.