How to integrate Eloqua with Zuddl
Last updated: September 29, 2025
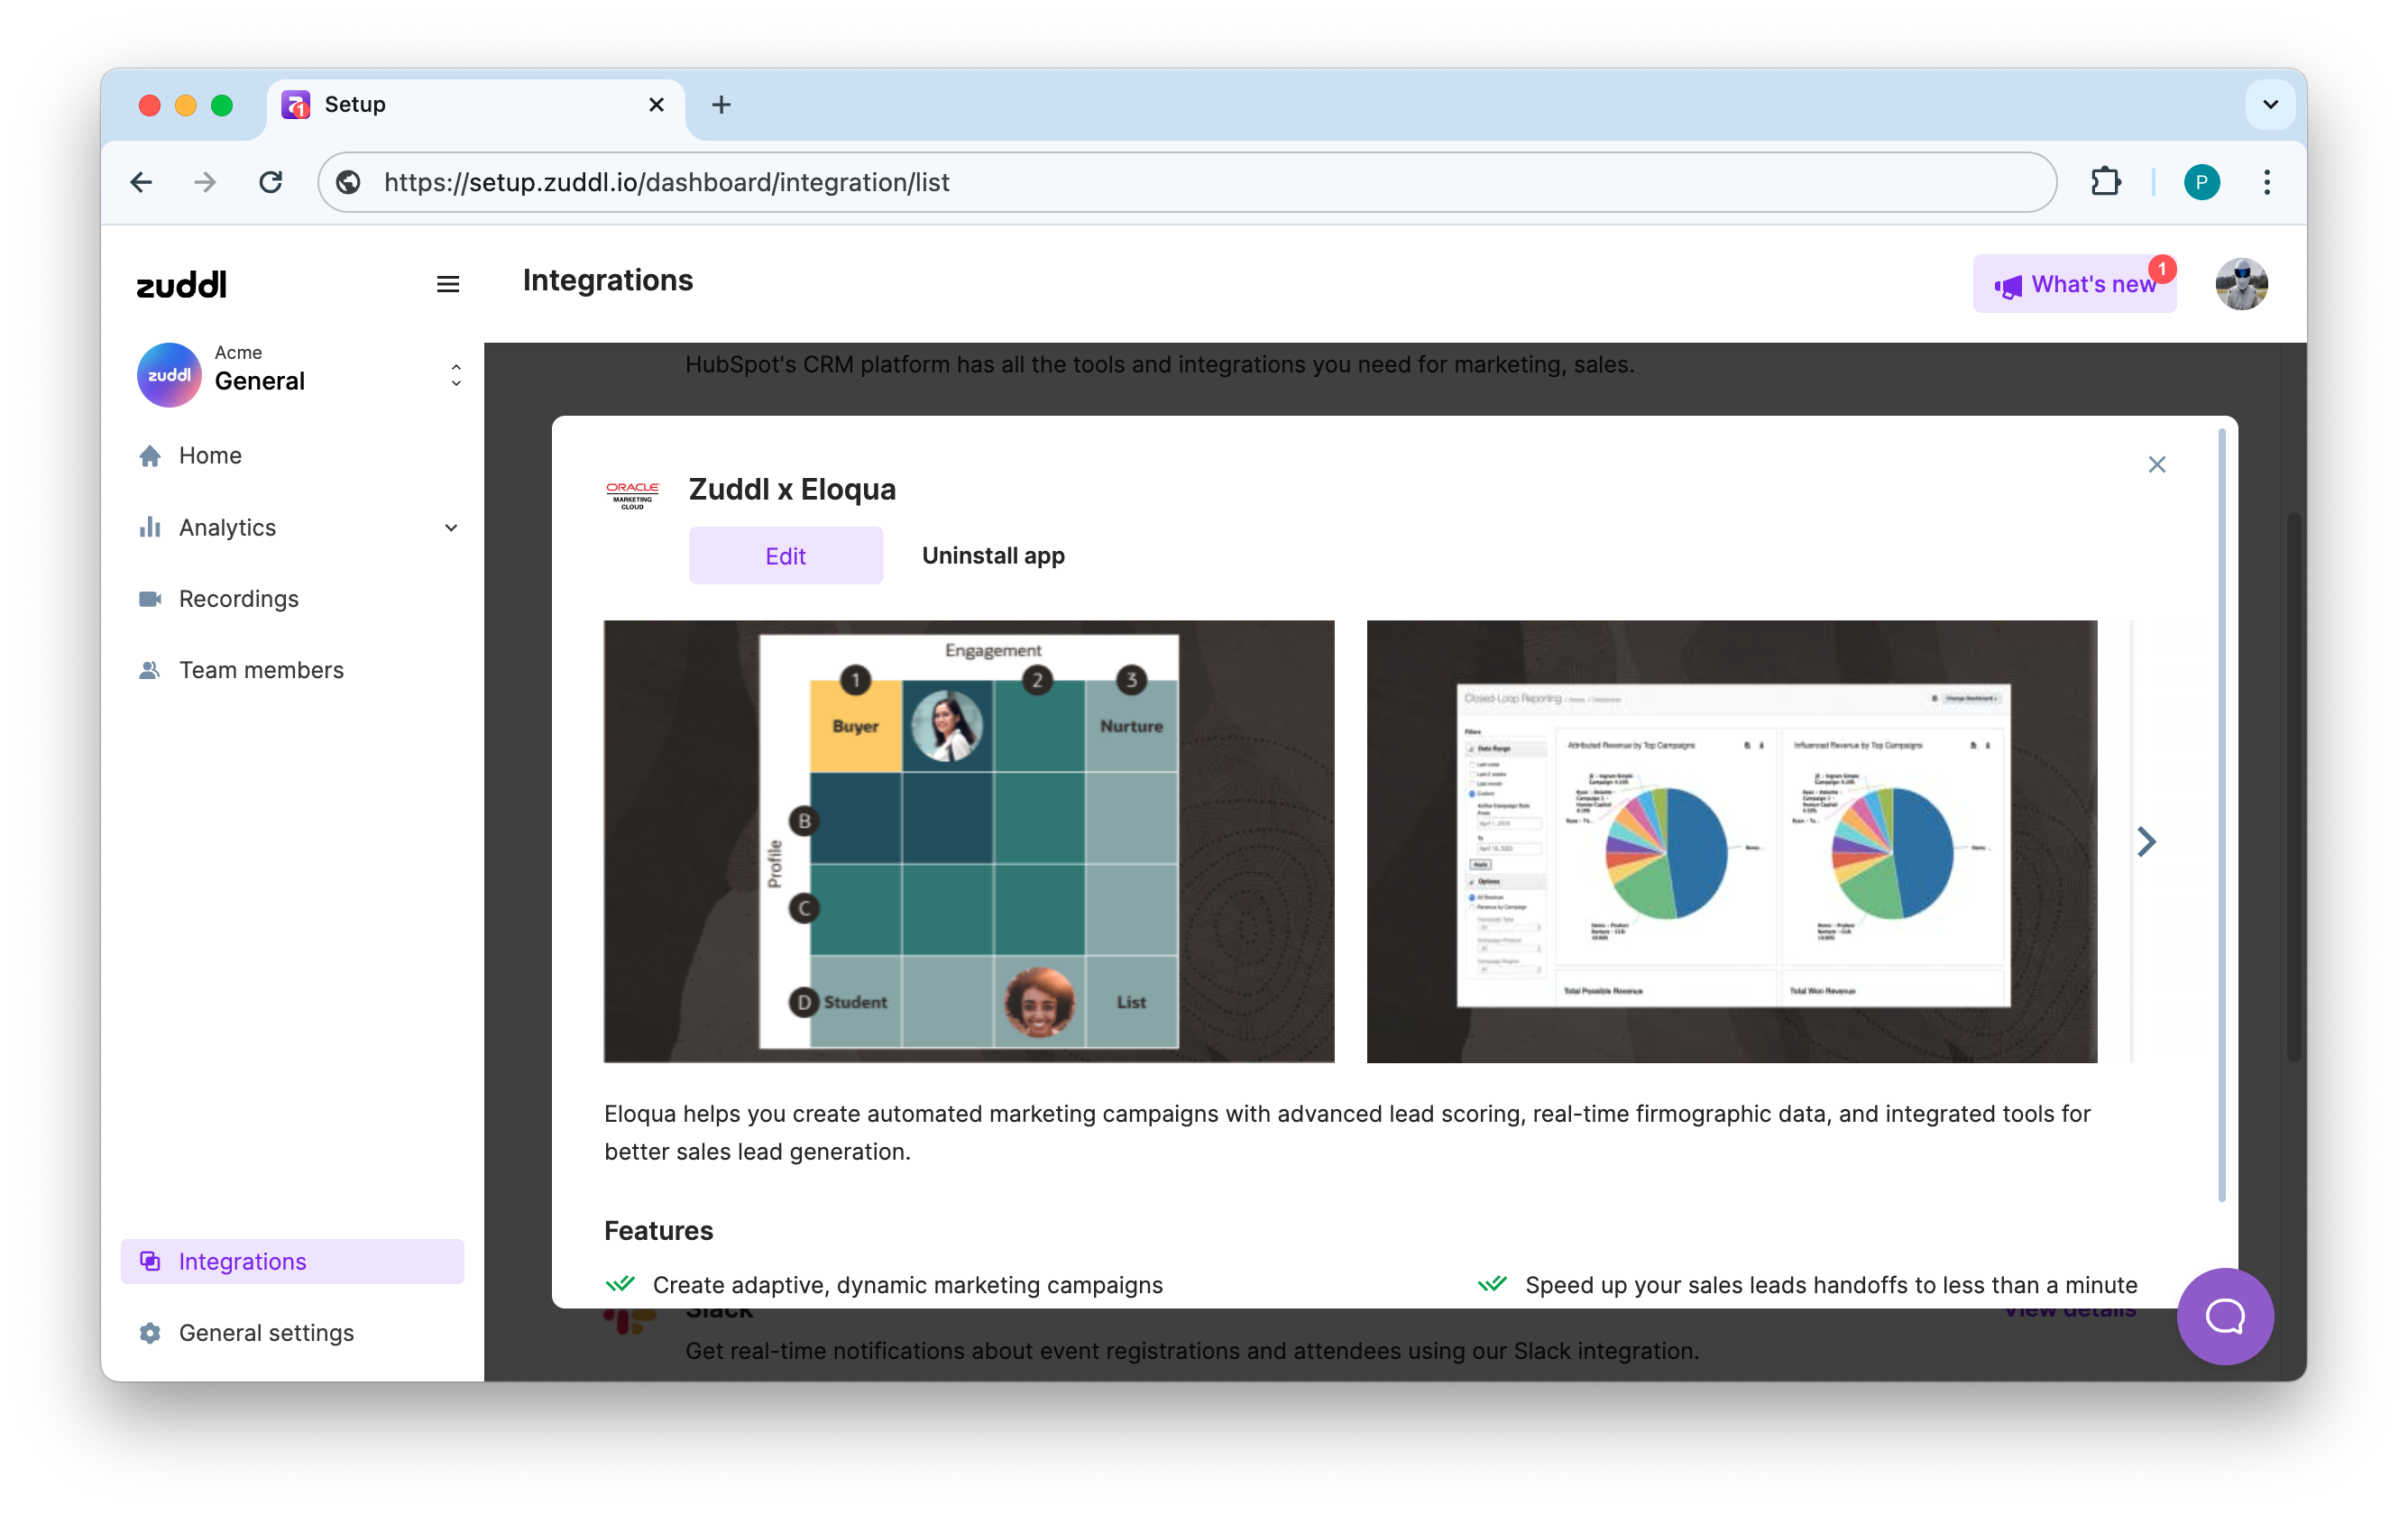
The Eloqua-Zuddl integration allows you to pass registrant data of your Zuddl event to your Eloqua account:
With this data, you can segment your audiences so you can accurately target individuals with customer profiles based on event-specific attributes. You can use this data to
Generate and manage quality leads
Create marketing campaigns
Deepen customer relationships
Improve sales readiness
Prerequisite
You must create an Eloqua form with all fields required for your event. During the integration setup, these Eloqua form fields must be mapped to appropriate Zuddl fields to correctly pass registrant responses from Zuddl to Eloqua. Refer to the steps explained below to create an Eloqua form.
Ensure to configure mandatory fields in your Eloqua form. See the list of mandatory fields.
Steps
Login to your Zuddl dashboard.
On the common dashboard, click on Integrations.
Click View details on the Eloqua integration card on the integration listing page.
Now, click the Install button.
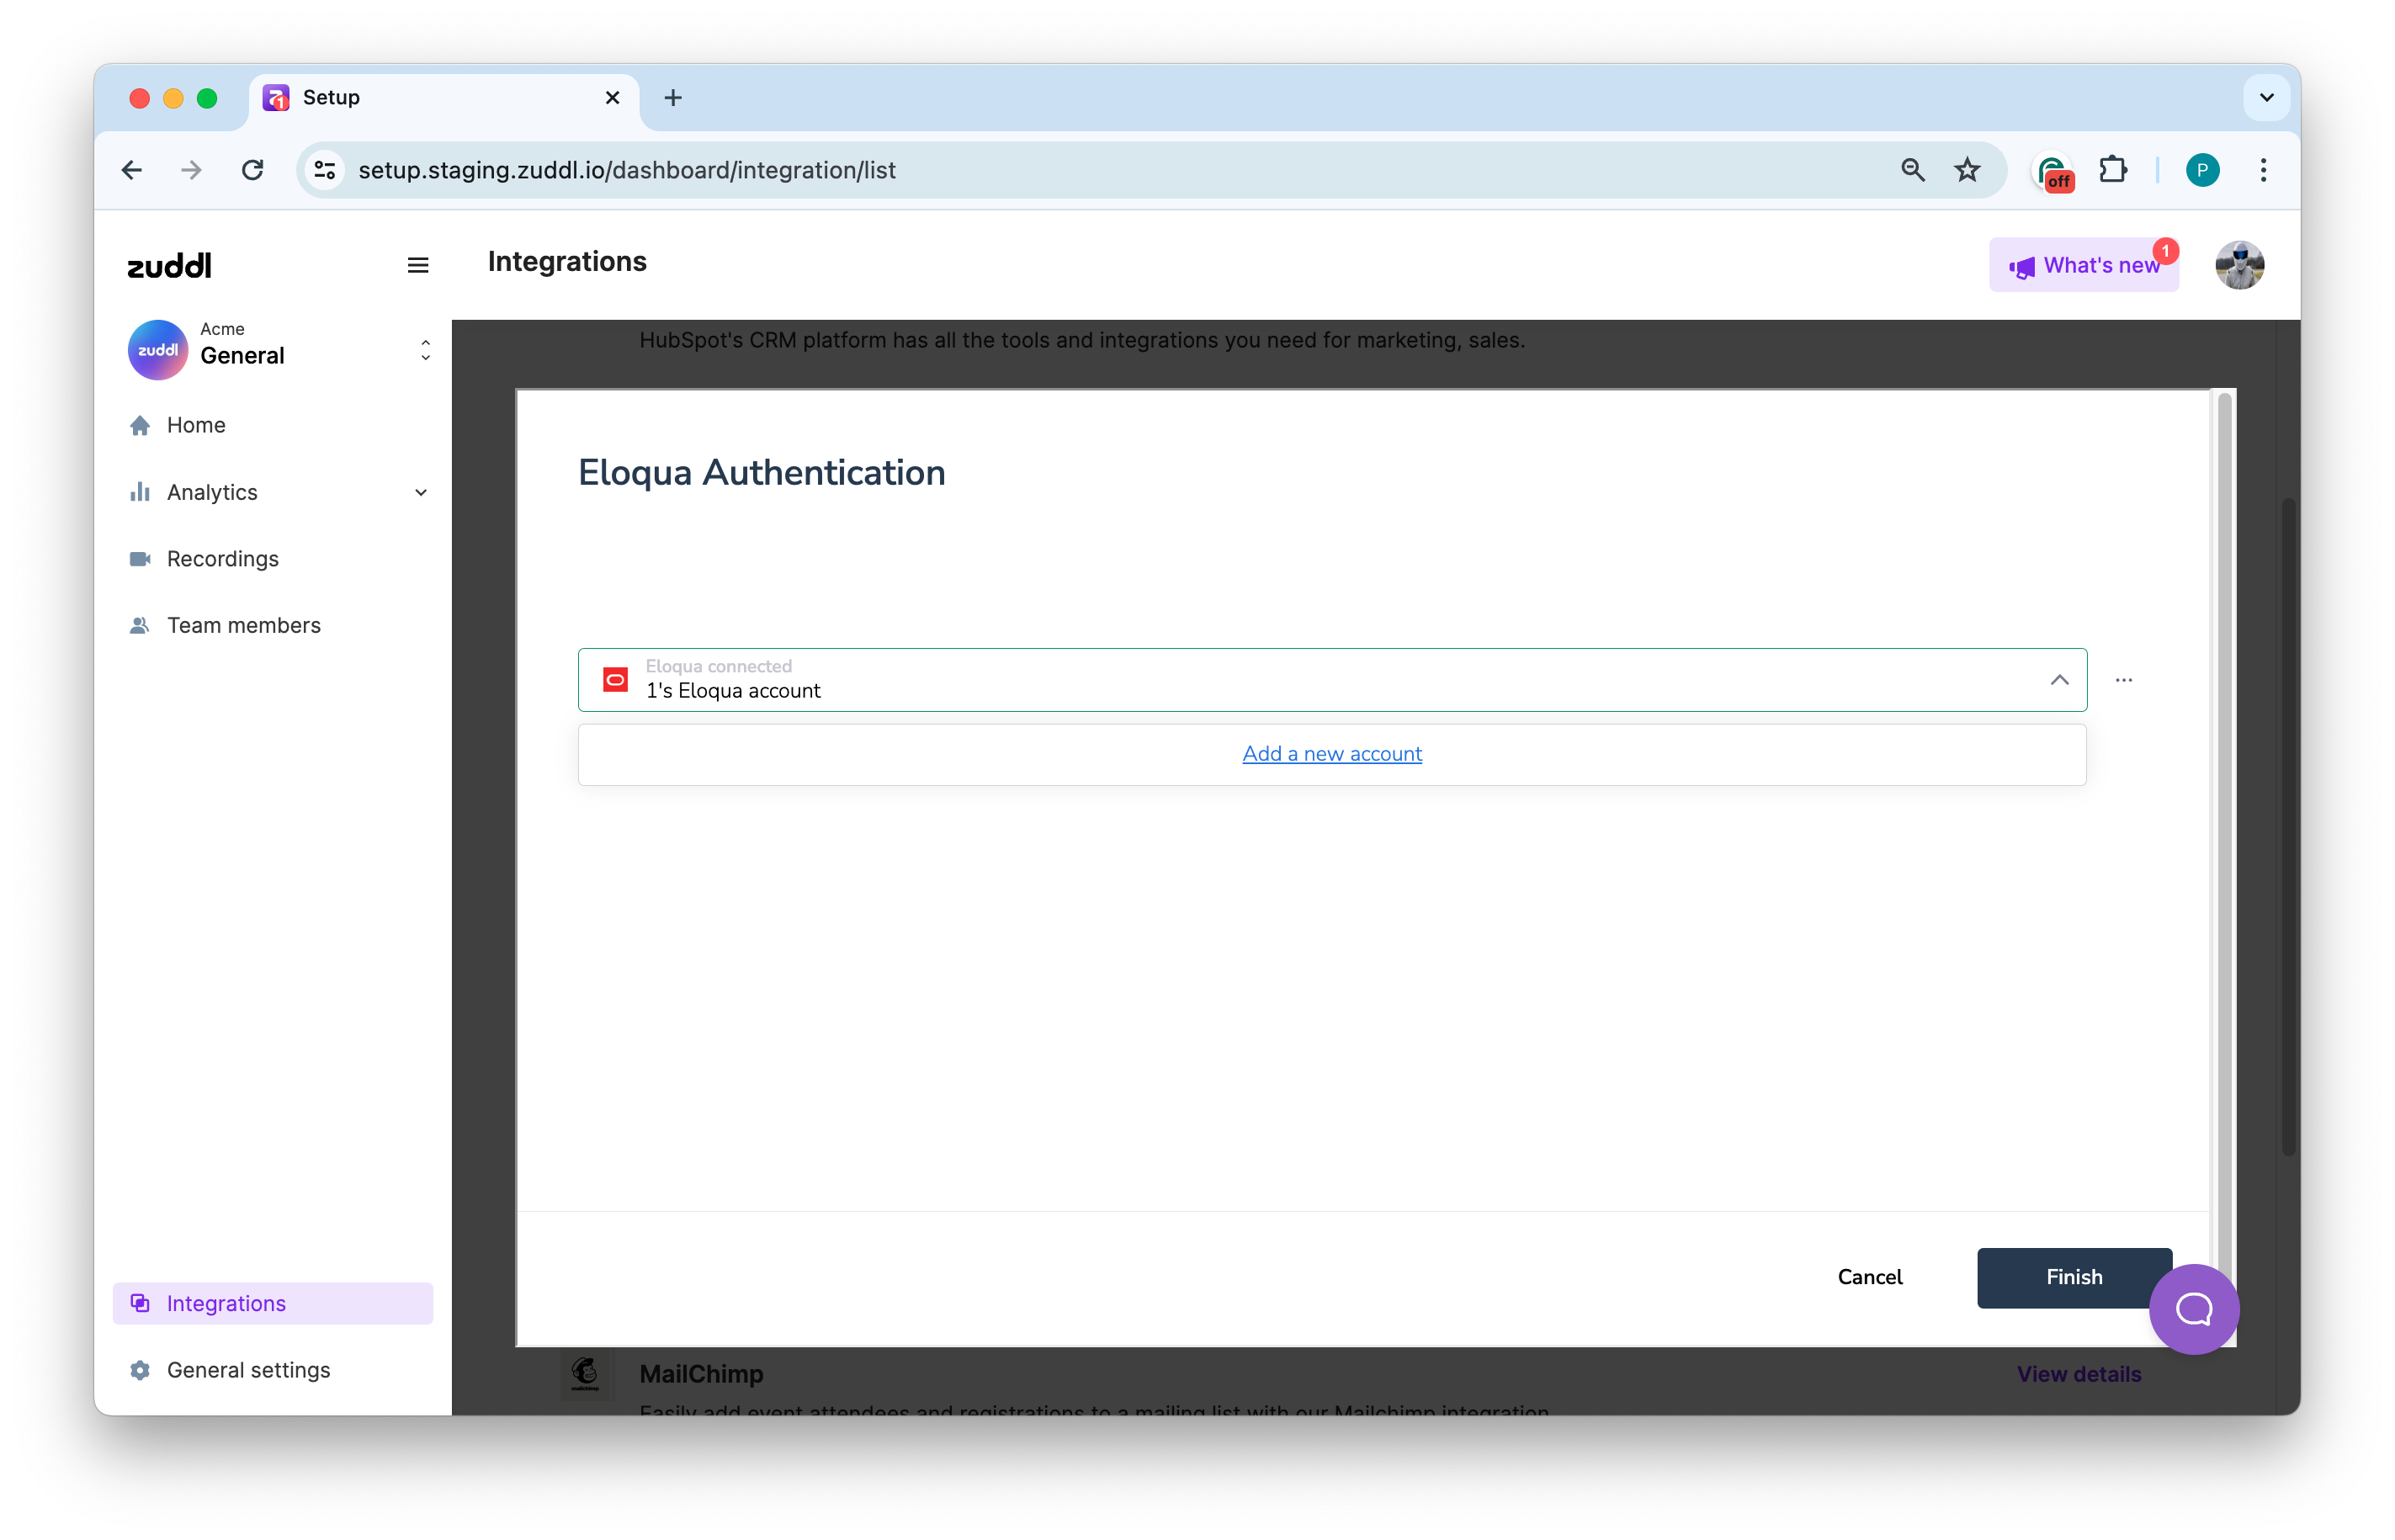
Click Add new account to connect your Eloqua account to Zuddl.
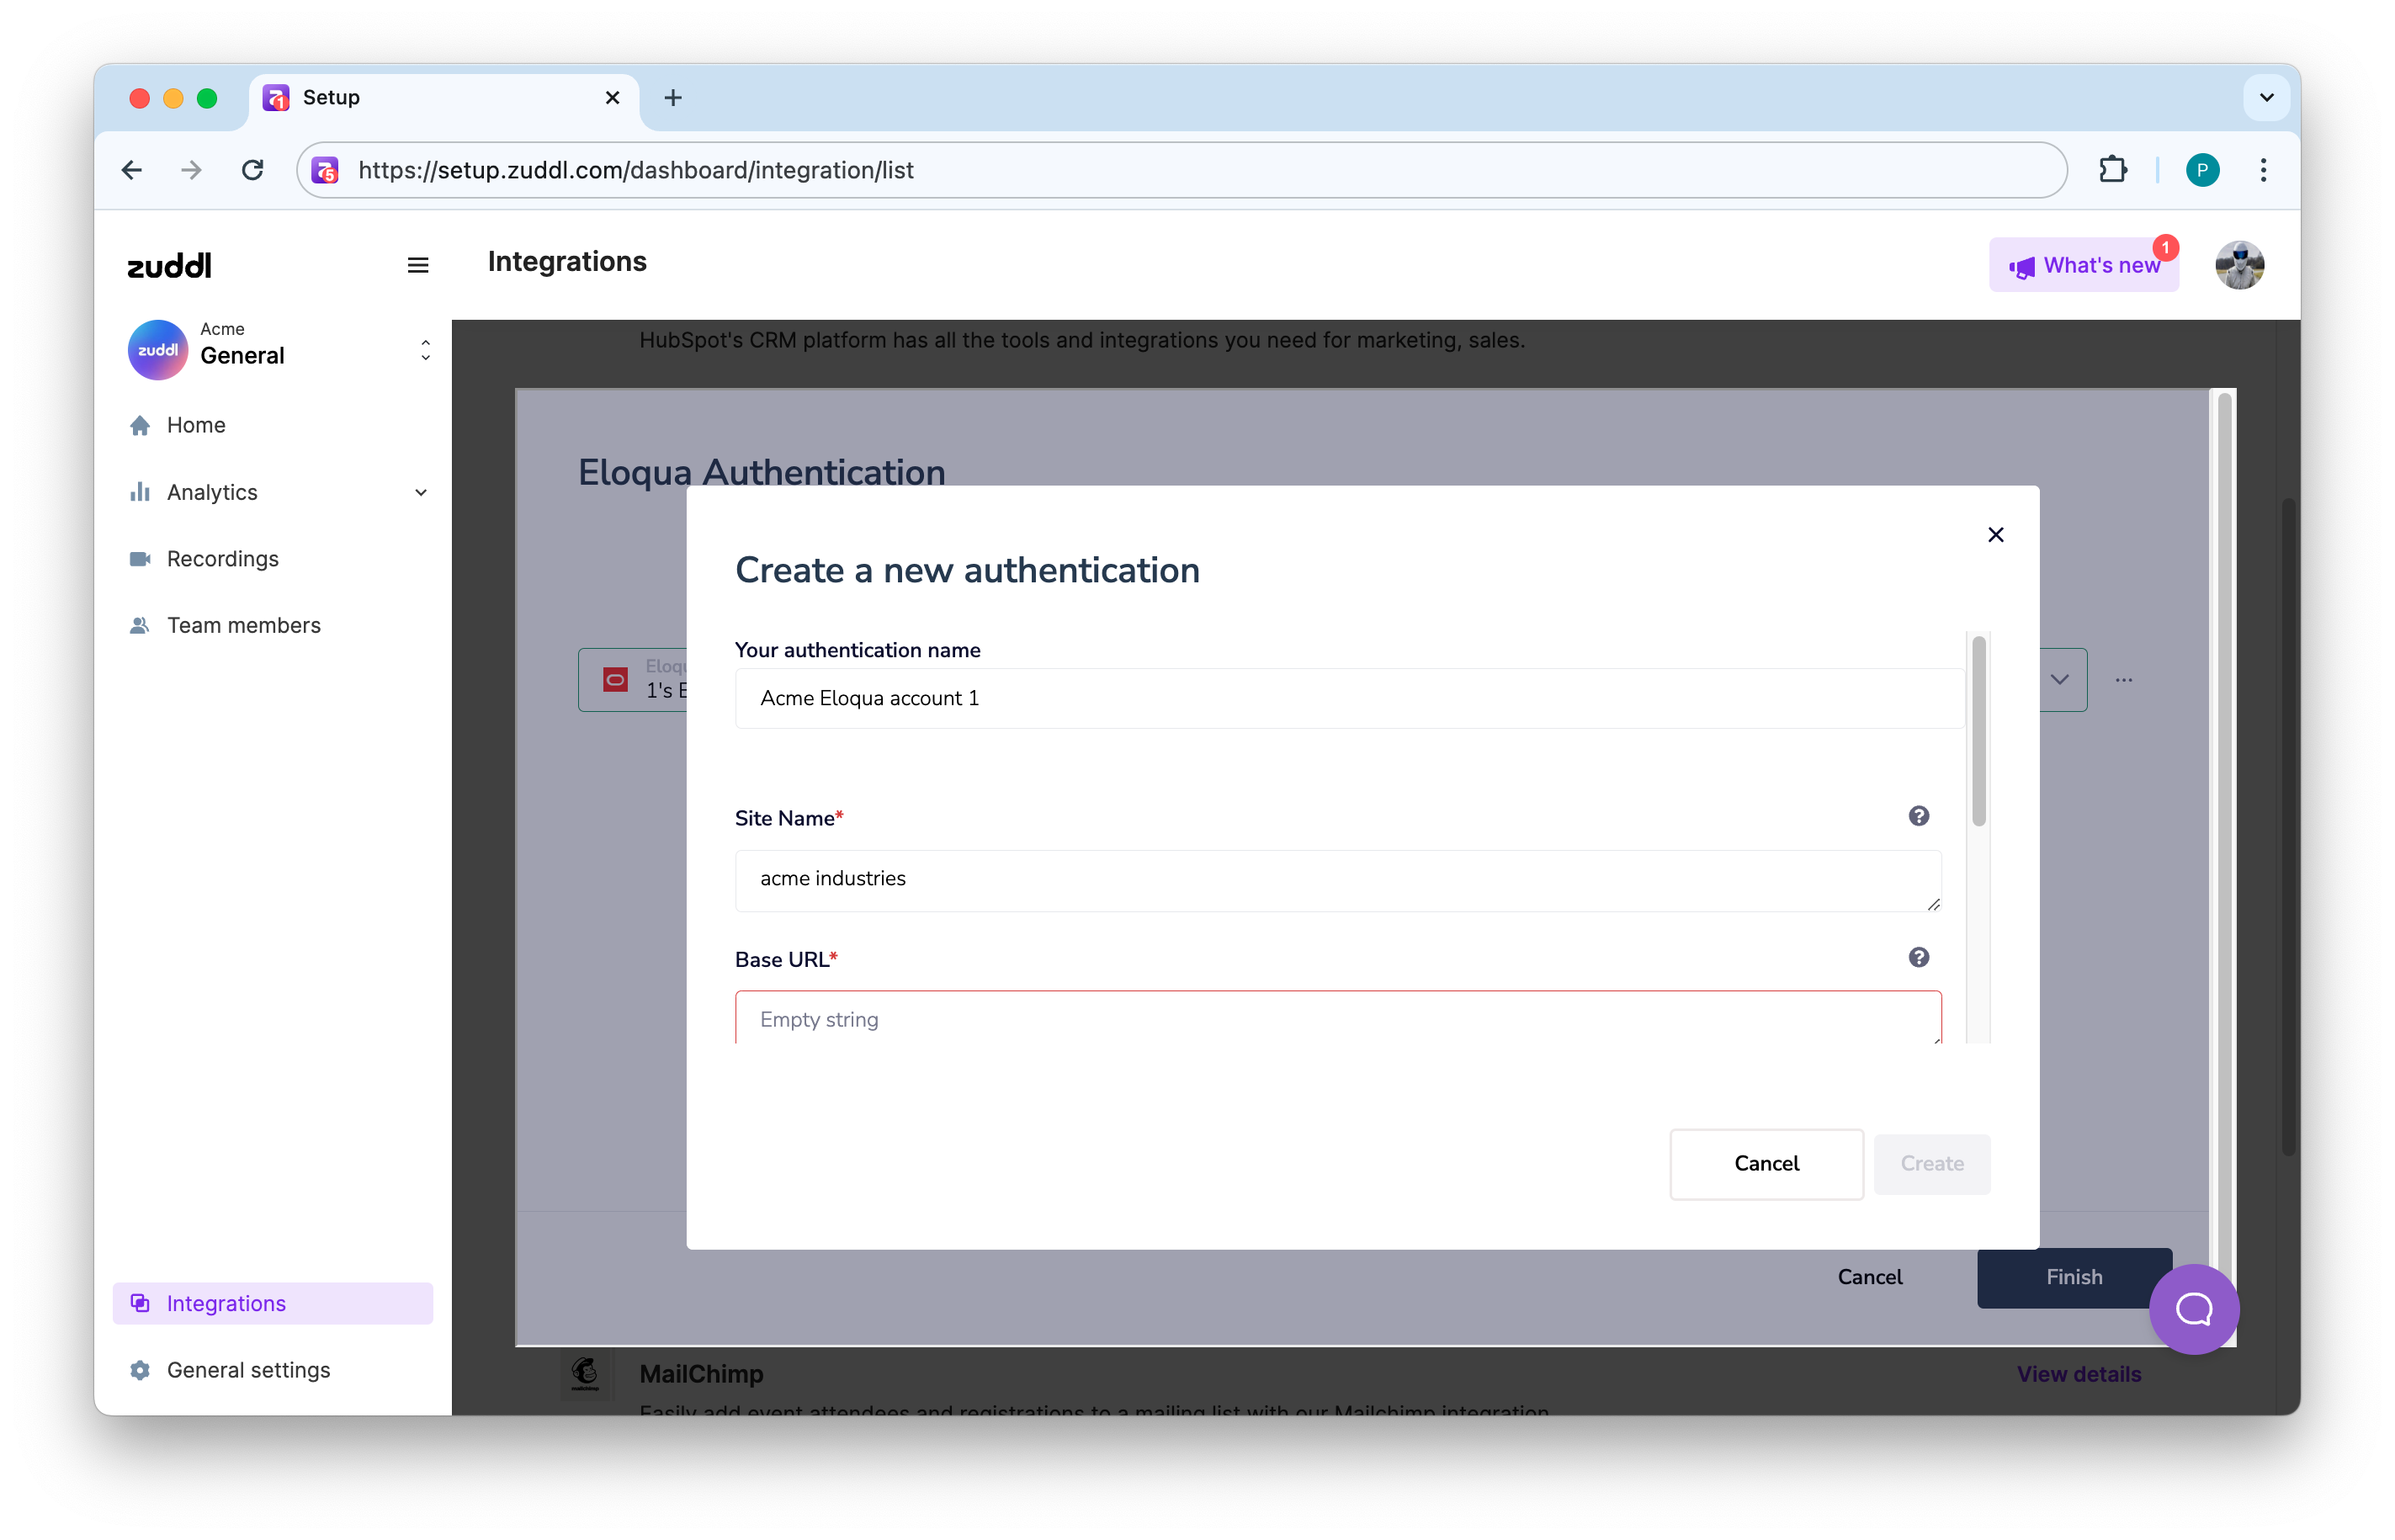
On the Create a new authentication screen, enter
Your authentication name: Your Eloqua company name
Site Name
Base URL: The 'base' or "root" URL of your Eloqua company account. For example, "https://secure.p01.eloqua.com". A base URL must not end with /.
Username: Your Eloqua username. We recommend creating a new integration user.
Password: Password for your Eloqua account.This connects your Eloqua account with Zuddl.
Click Finish. This complete the installation and authentication step.
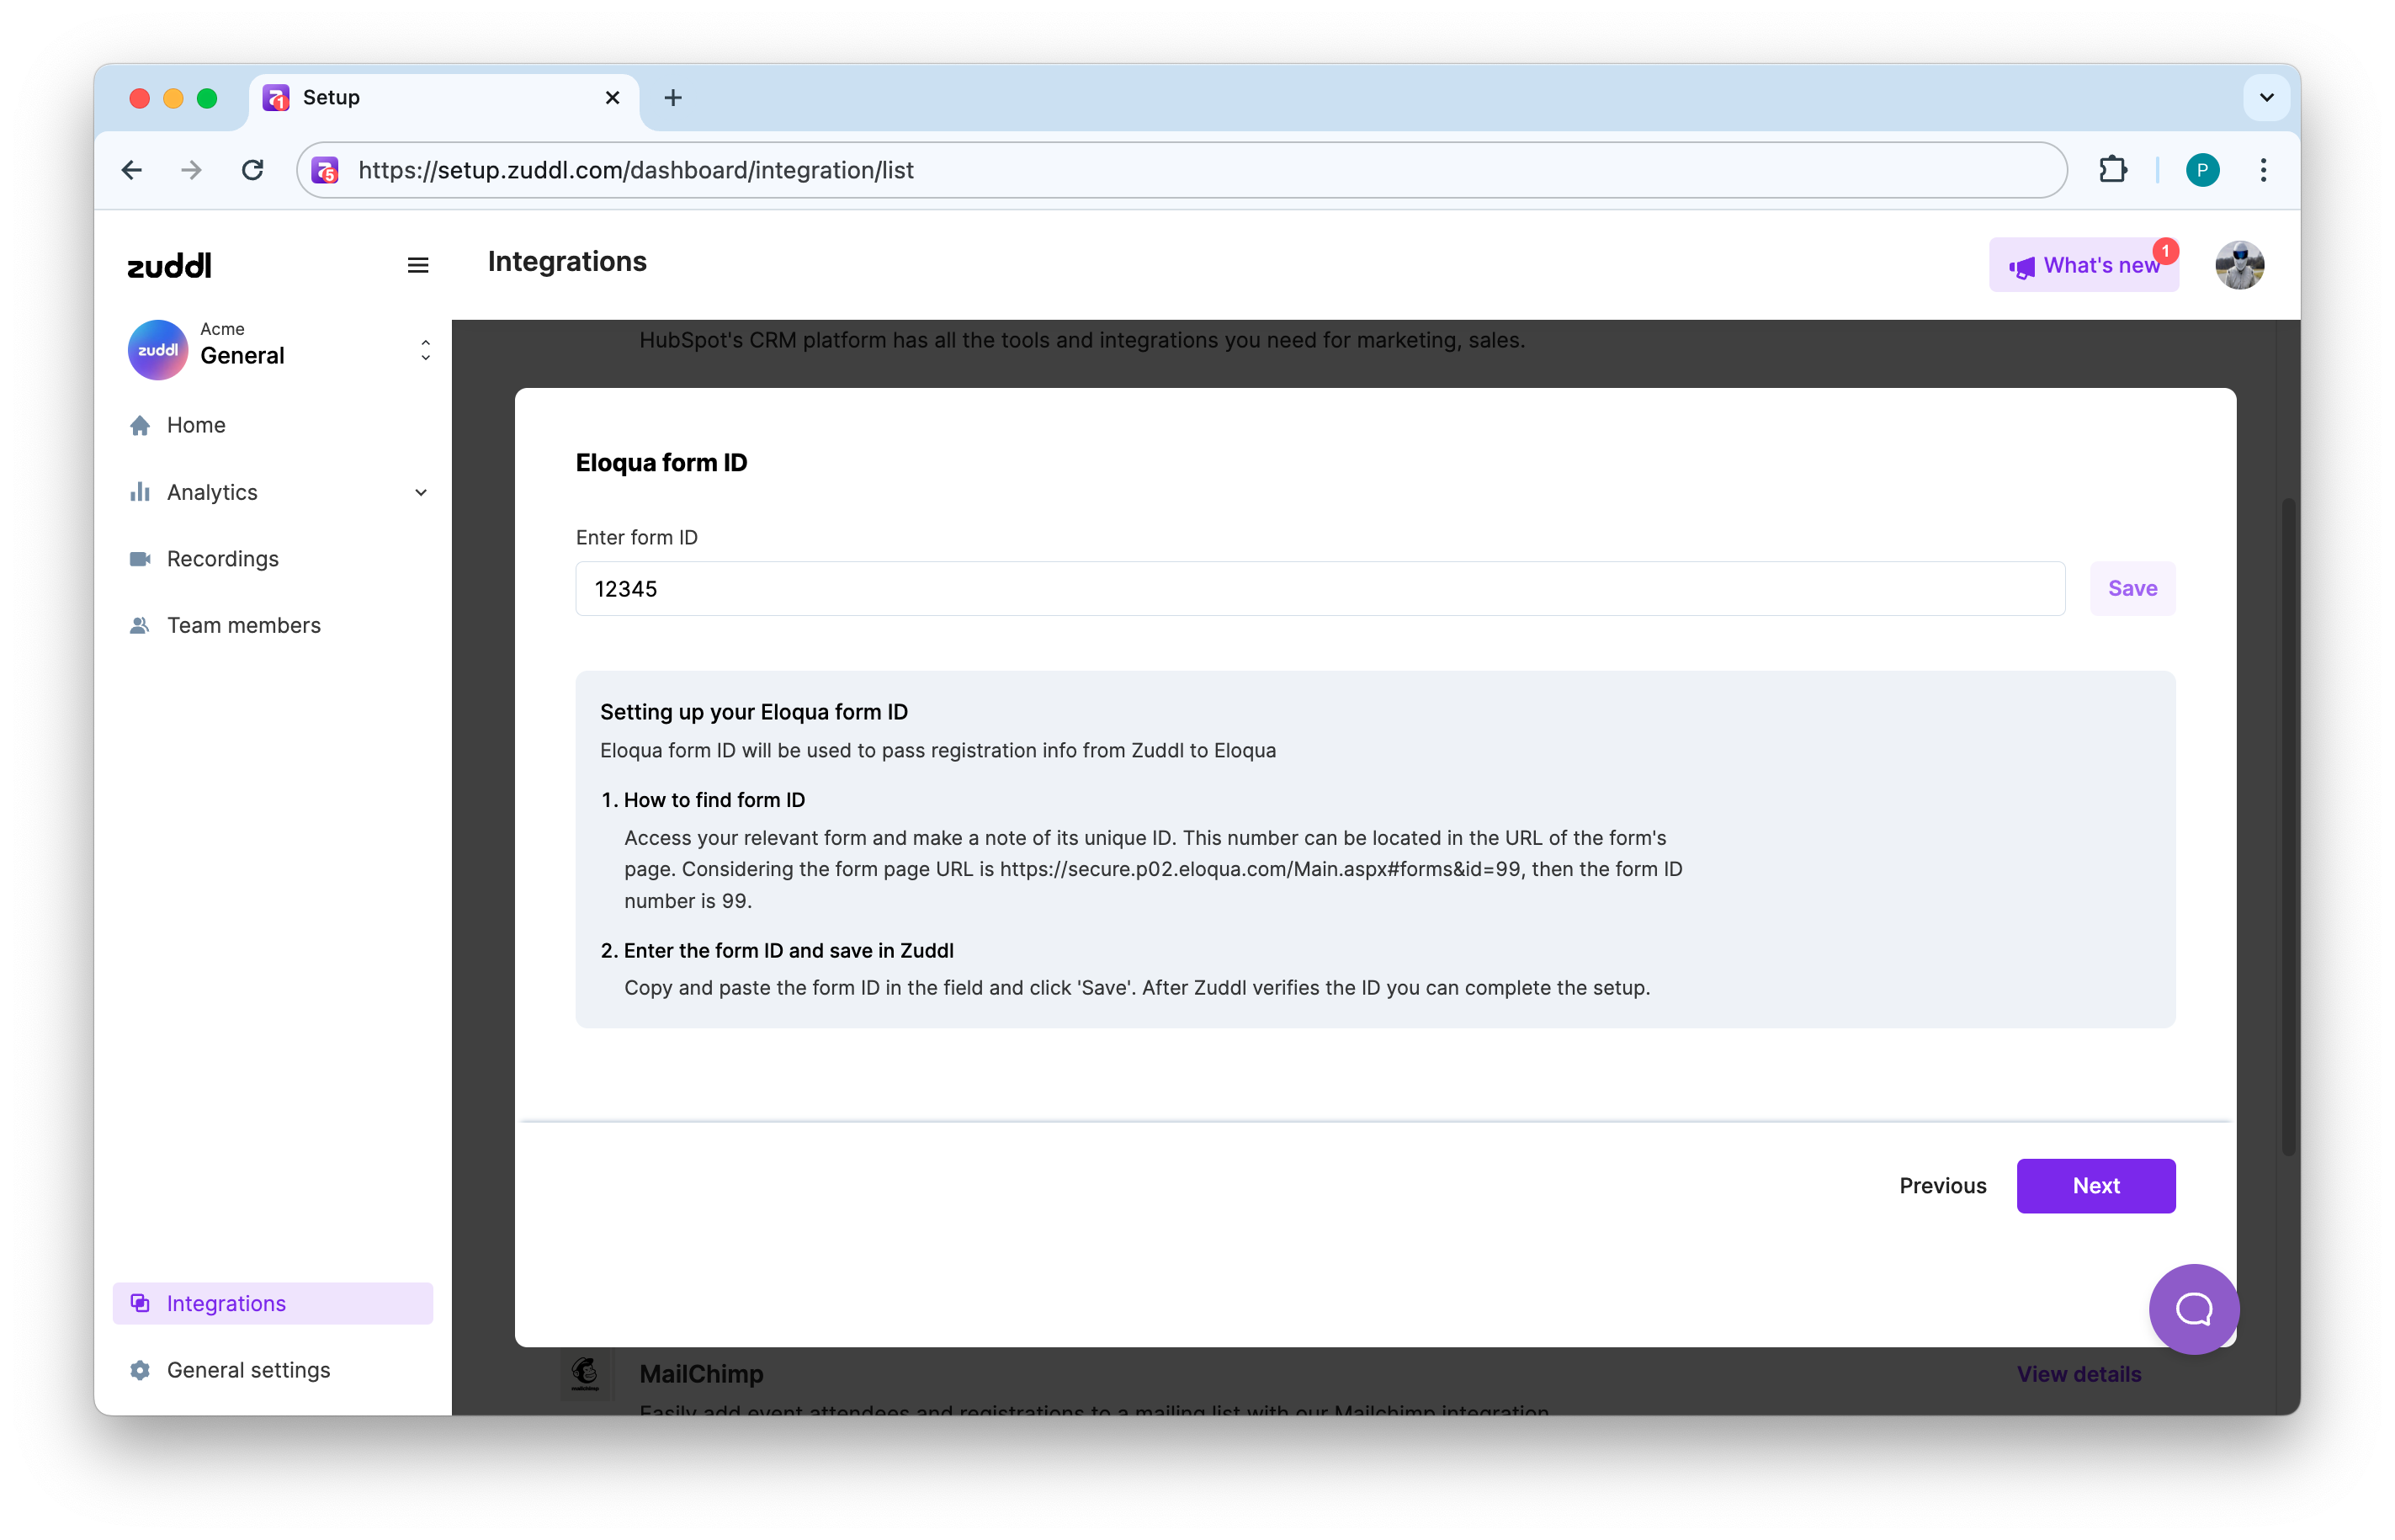
Eloqua Forms
After you've successfully installed the app. You must link your Eloqua form to Zuddl. The form that you created in Eloqua is used to pass registration data from Zuddl to Eloqua.
Enter the unique ID of the form in the Enter form ID field and click Next.
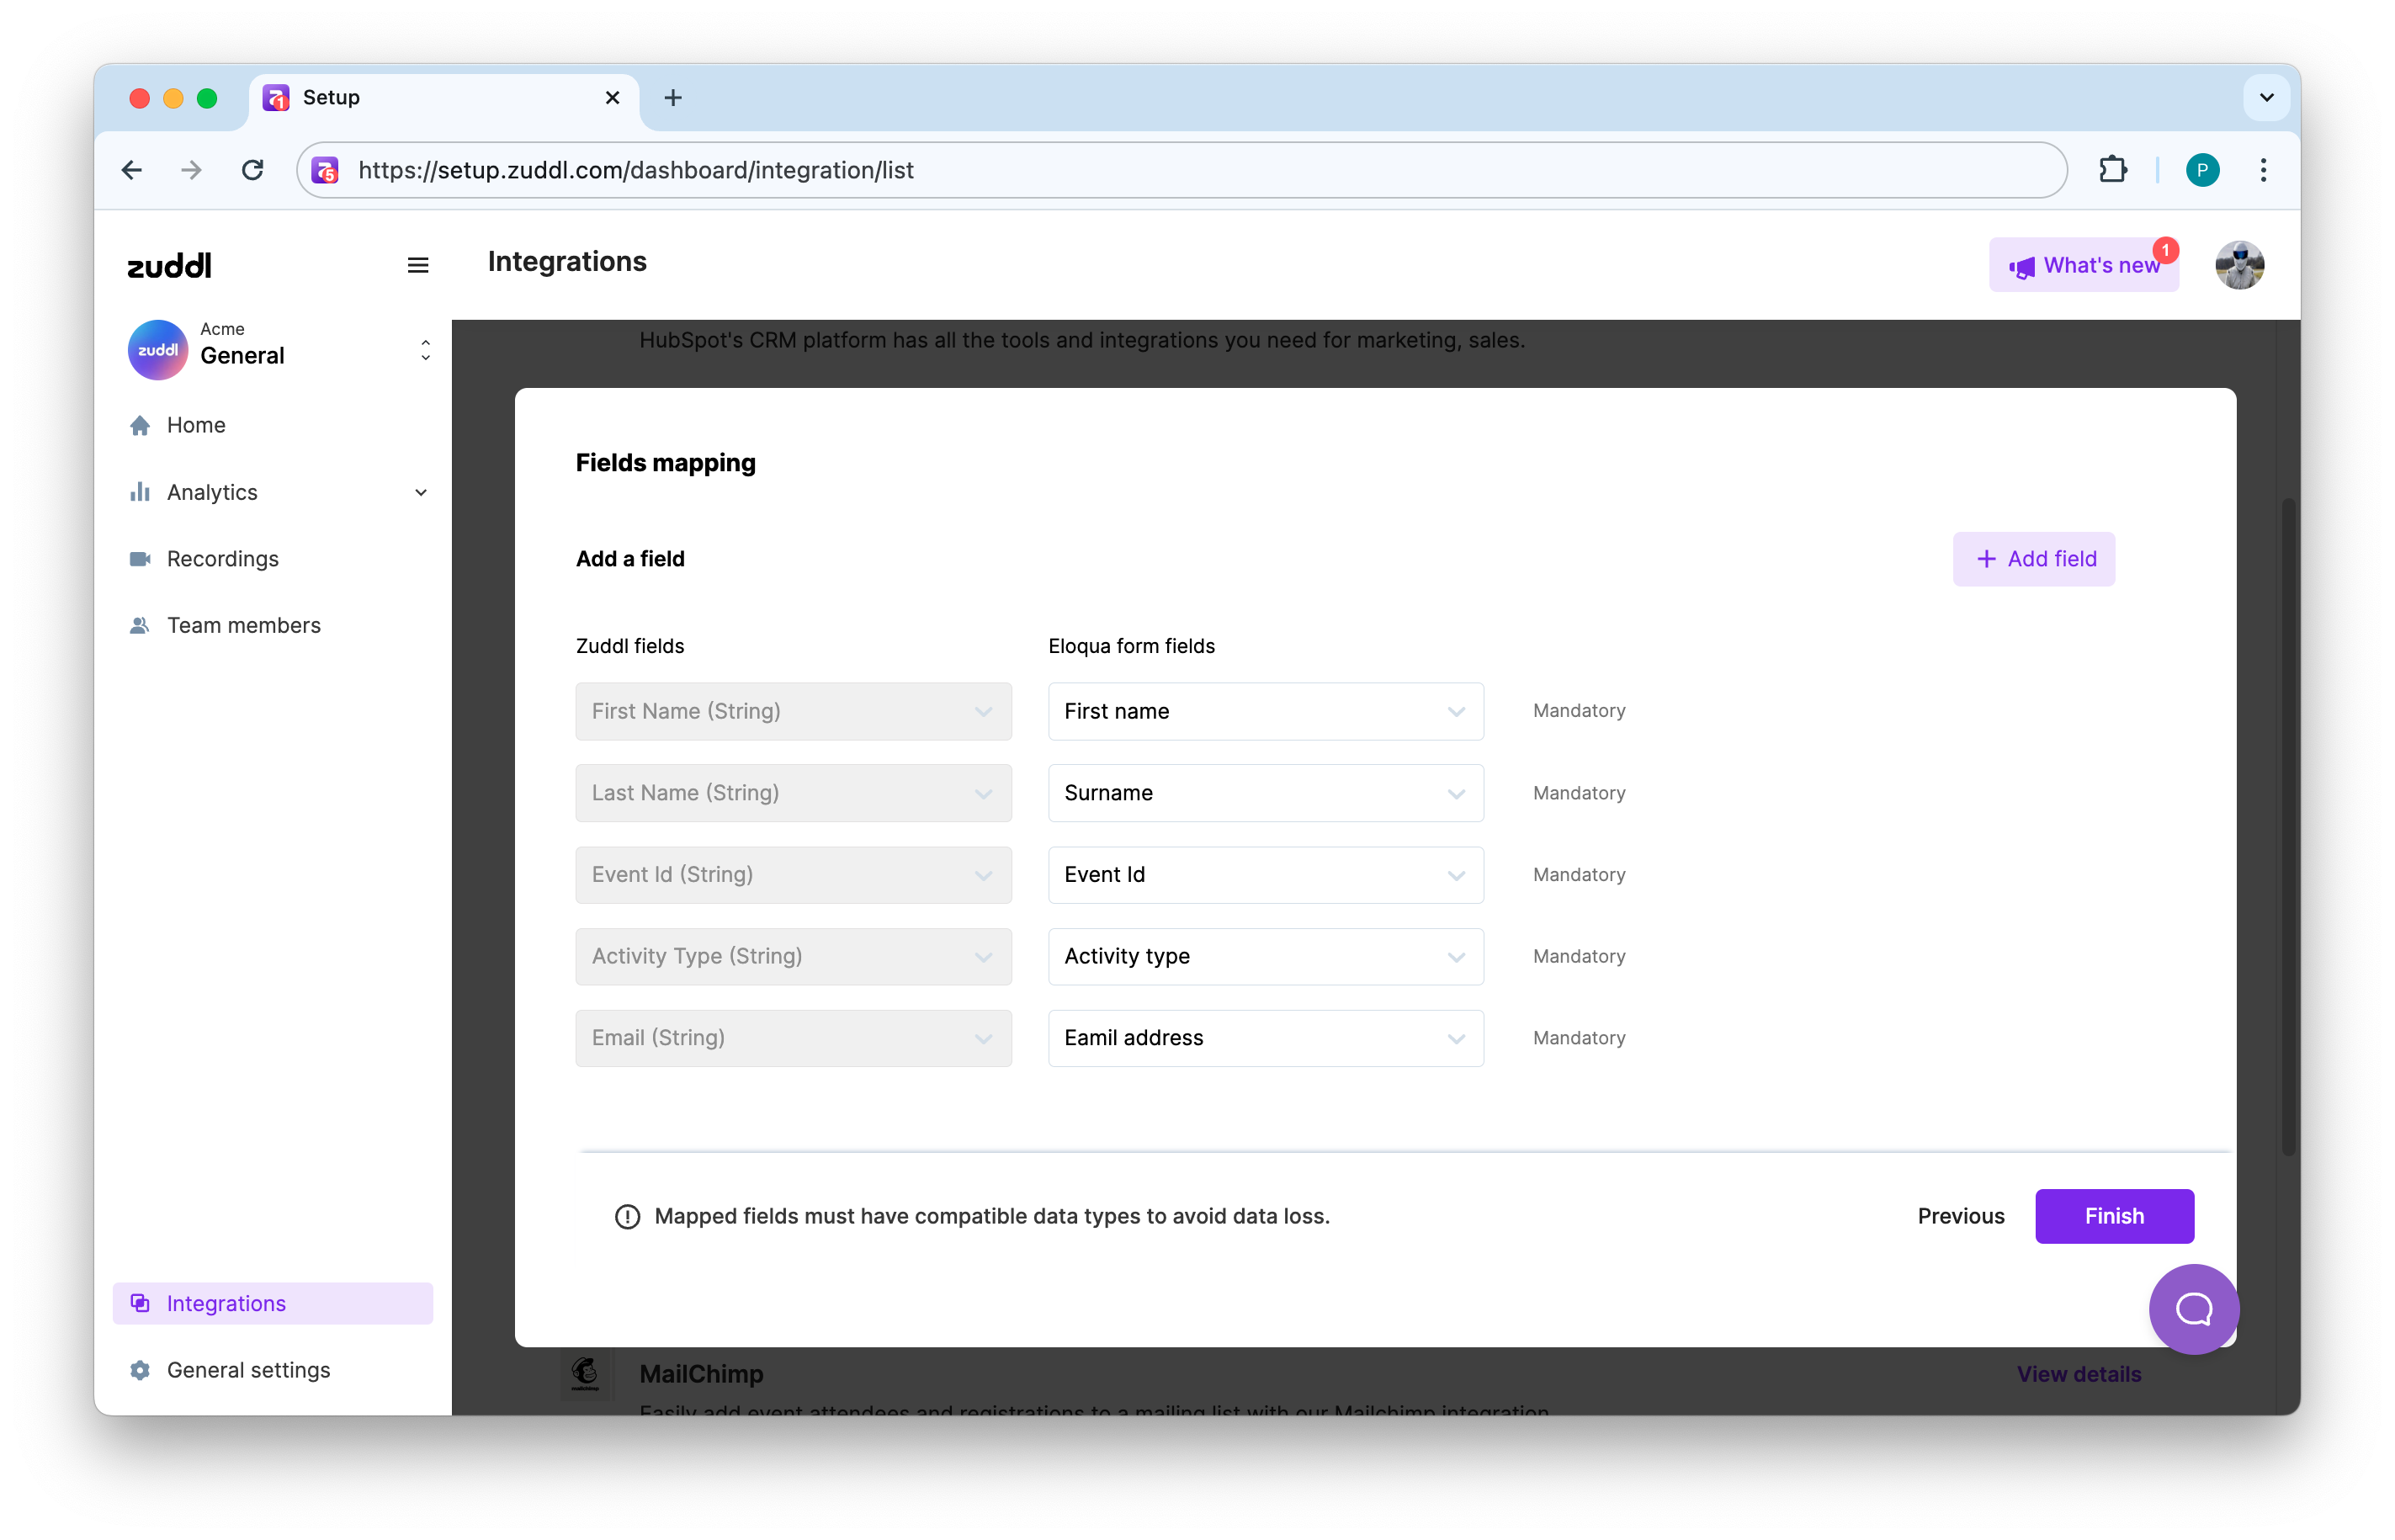
Field mapping
After you've linked your Eloqua form, you must also map its form fields to Zuddl's registration fields.
Mandatory Fields
Zuddl mandates five necessary fields for integration:
First Name: The first name of the attendee
Last Name: The last name of the attendee
Event Id: The unique ID of the event
Activity Type: Determines the activity type: ‘Registered’ or ‘Attended’.
Email: Unique email address of the registrant
To map fields:
Choose the suitable Eloqua fields for the mandatory fields from the Eloqua form fields dropdown
To add more field mappings, click +Add field. You can map the following fields:
Field
Data type
Phone Number
String
Country
String
Title
String
Company
String
Industry
String
UTM Source
String
UTM Medium
String
UTM Campaign
String
UTM Term
String
UTM Content
String
UTM Id
String
Ip City
String
Ip Country
String
Magic Link
String
Event Name
String
Attendance Type
String
Ticket Name
String
Ticket Type
String
Click Finish. The data sync will follow this mapping for all the registrations from now.
On the confirmation message, click Confirm.
This completes the org-level setup. You can anytime edit the installation by going to Eloqua integration page.
The organization-level settings, and once configured, it applies to all events in your Zuddl account.
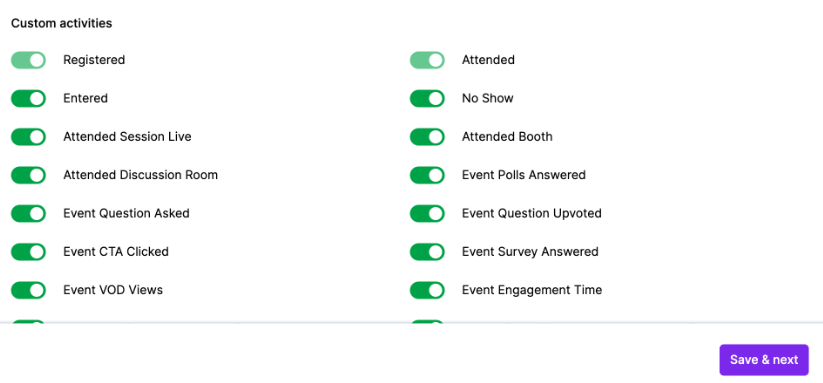
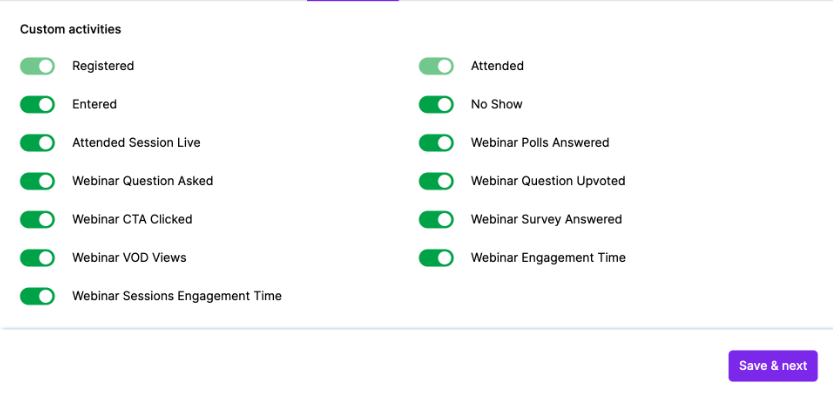
Event engagement activities
Zuddl captures the following event activities of a registrant for events and webinars.
Activity Name | Events | Webinar | Sync time |
New user registration | ✔ | ✔ | Immediate |
Attended | ✔ | ✔ | 5 minutes |
Event Polls answered | ✔ | ✔ | 5 minutes |
Event Questions Asked | ✔ | ✔ | 5 minutes |
Event Questions Upvoted | ✔ | ✔ | 5 minutes |
Event CTAs clicked | ✔ | ✔ | 5 minutes |
Event VOD Views | ✔ | Every day at 12:10 AM and 12:10 PM (UTC) | |
Event Survey Answered | ✔ | 5 minutes | |
Attended Session Live | ✔ | ✔ | 5 minutes |
Attended Discussion Room | ✔ | ❌ | 5 minutes |
Attended Booth | ✔ | ❌ | 5 minutes |
Event Engagement Time | ✔ | ✔ | 1 hour (after event ends) |
Event Discussion Room Engagement Time | ✔ | ❌ | 1 hour (after event ends) |
Event Session Engagement Time | ✔ | ✔ | 1 hour (after event ends) |
Event Booth Engagement Time | ✔ | ❌ | 1 hour (after event ends) |
Entered | ✔ | ✔ | 5 minutes |
No Show | ✔ | ✔ | 1 day after event ends |
Toggle on the custom activities you want Zuddl to capture
Events | Webinar |
 |  |
Event-level settings
On your Zuddl dashboard, go to your event setup for the event for which you want to collect registration.
On the Eloqua card, click the Enable option.
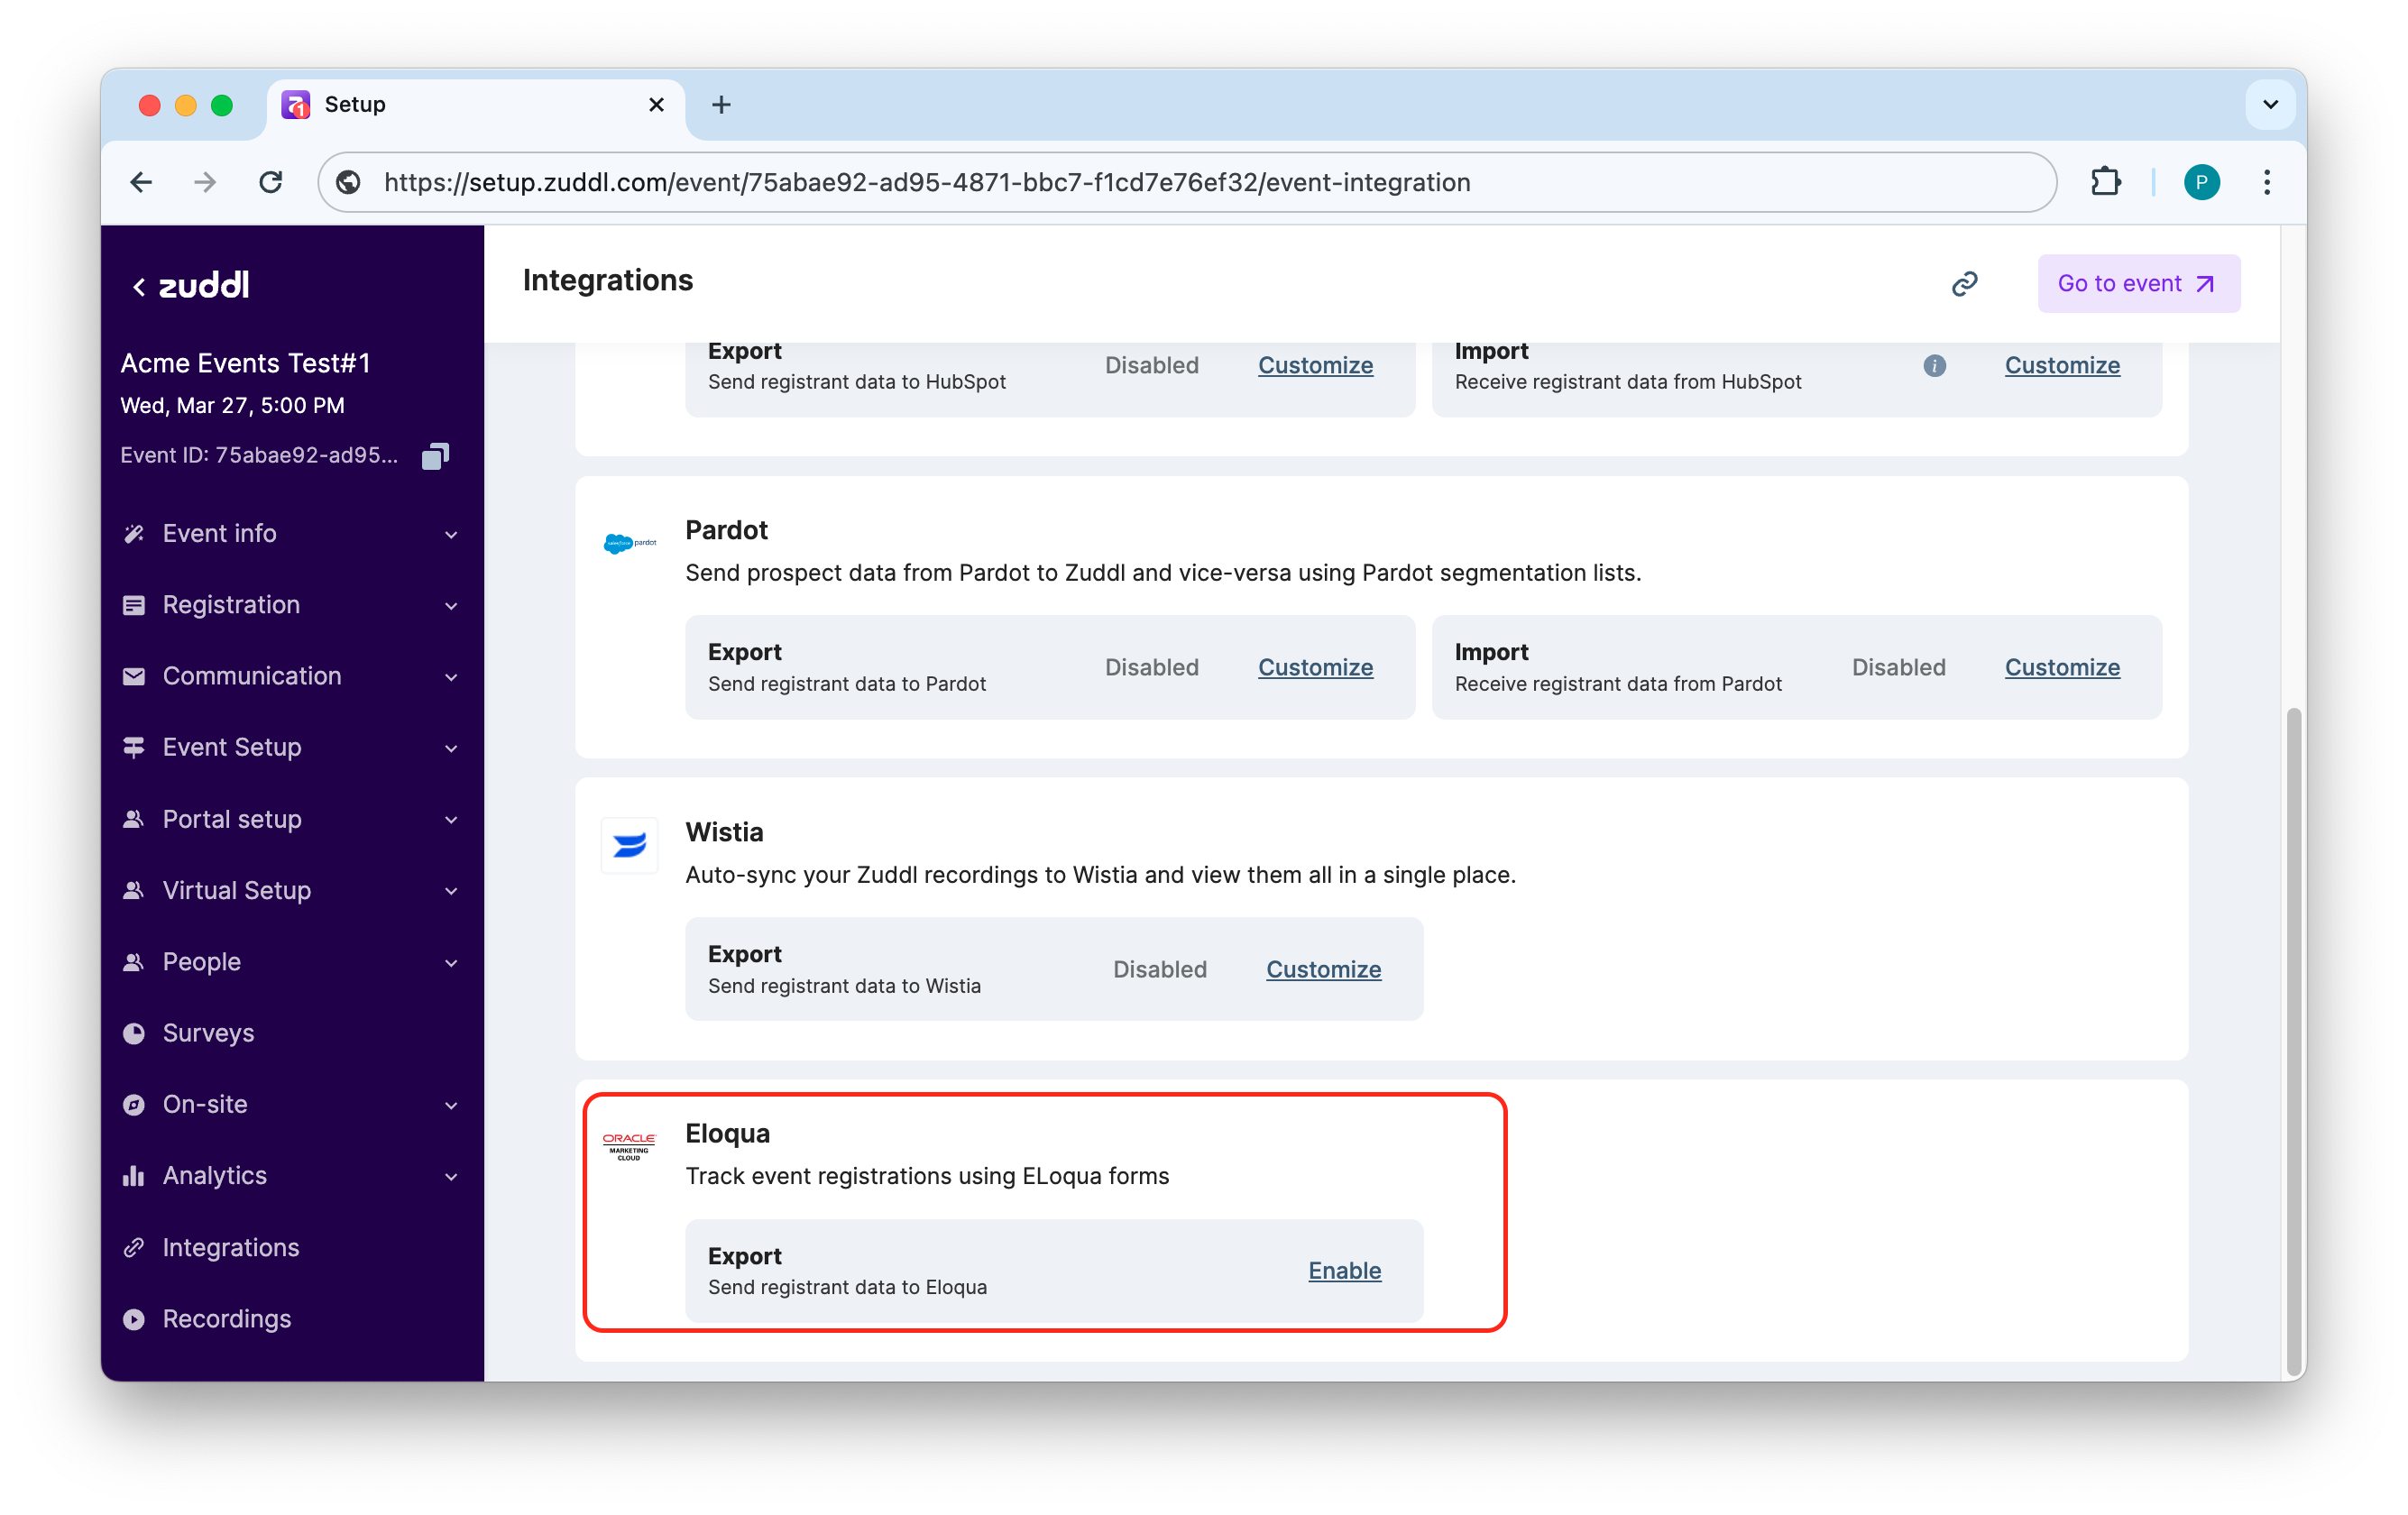
This enables Zuddl to capture the attendee data every time a user registers or attends an event.
How to access Zuddl data in Eloqua
Log into your Eloqua account using your credentials
From the menu, go to Assets -> Forms and open the form (search by the form ID) that you have connected with Zuddl.
On the top menu, expand the Actions and select View Submission Data.
The entries for registrations and attendance will be shown in this list with each column showing the respective field values. Since you would see data from all events for where this integration is enabled, you can filter by Event Id to view a particular event data.