How to Create a Zapier Workflow to Capture New Registrants in Zuddl
Last updated: September 5, 2025
The New Registration workflow triggers when a user registers for your Zuddl event from the registration page. All registration form details are passed to Zapier as a response which can be used in any suitable action.
Custom fields in the registration form are also passed to Zapier.
Steps
To capture new registrations on Zapier, you need to do the following:
1. Choose app & event
On your Zuddl dashboard, create a new event.
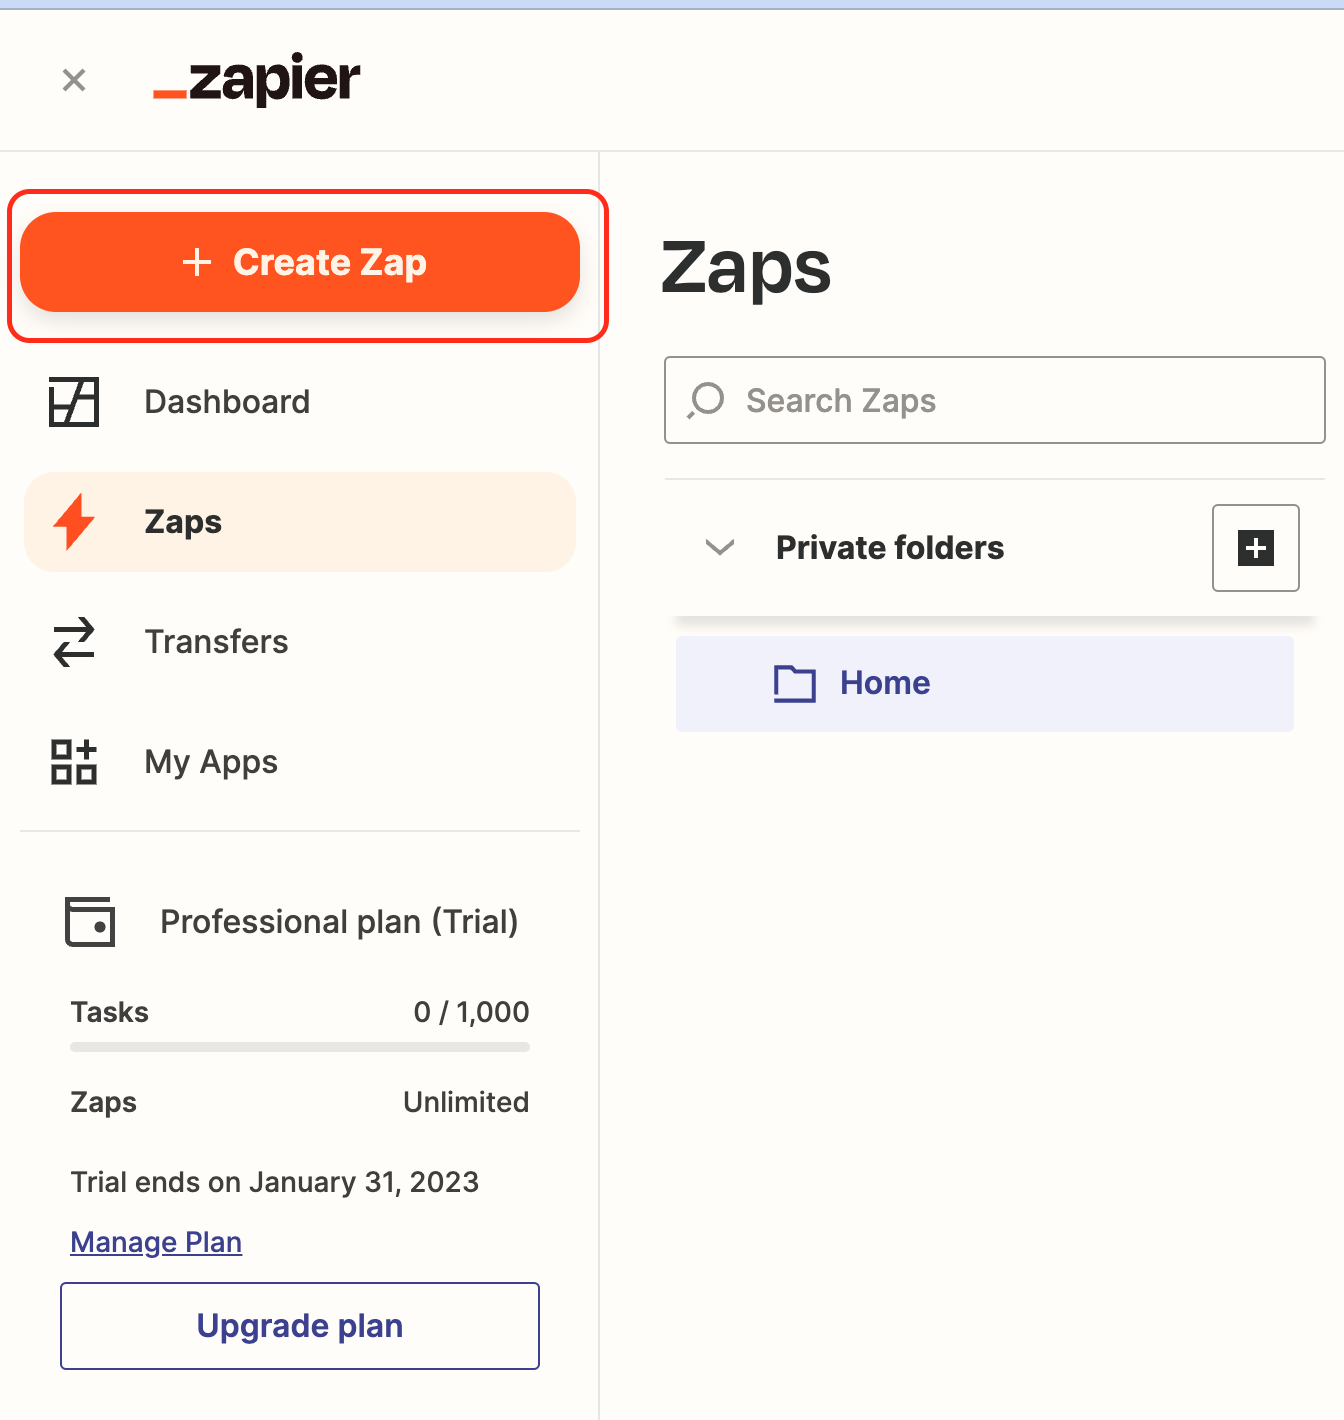
Now go to your Zapier dashboard, click + Create Zap , and select New Zap.
On the Change trigger screen, search for the Zuddl app, and click on the required version of the Zuddl app. Refer to the table for the app versions and their supported features.
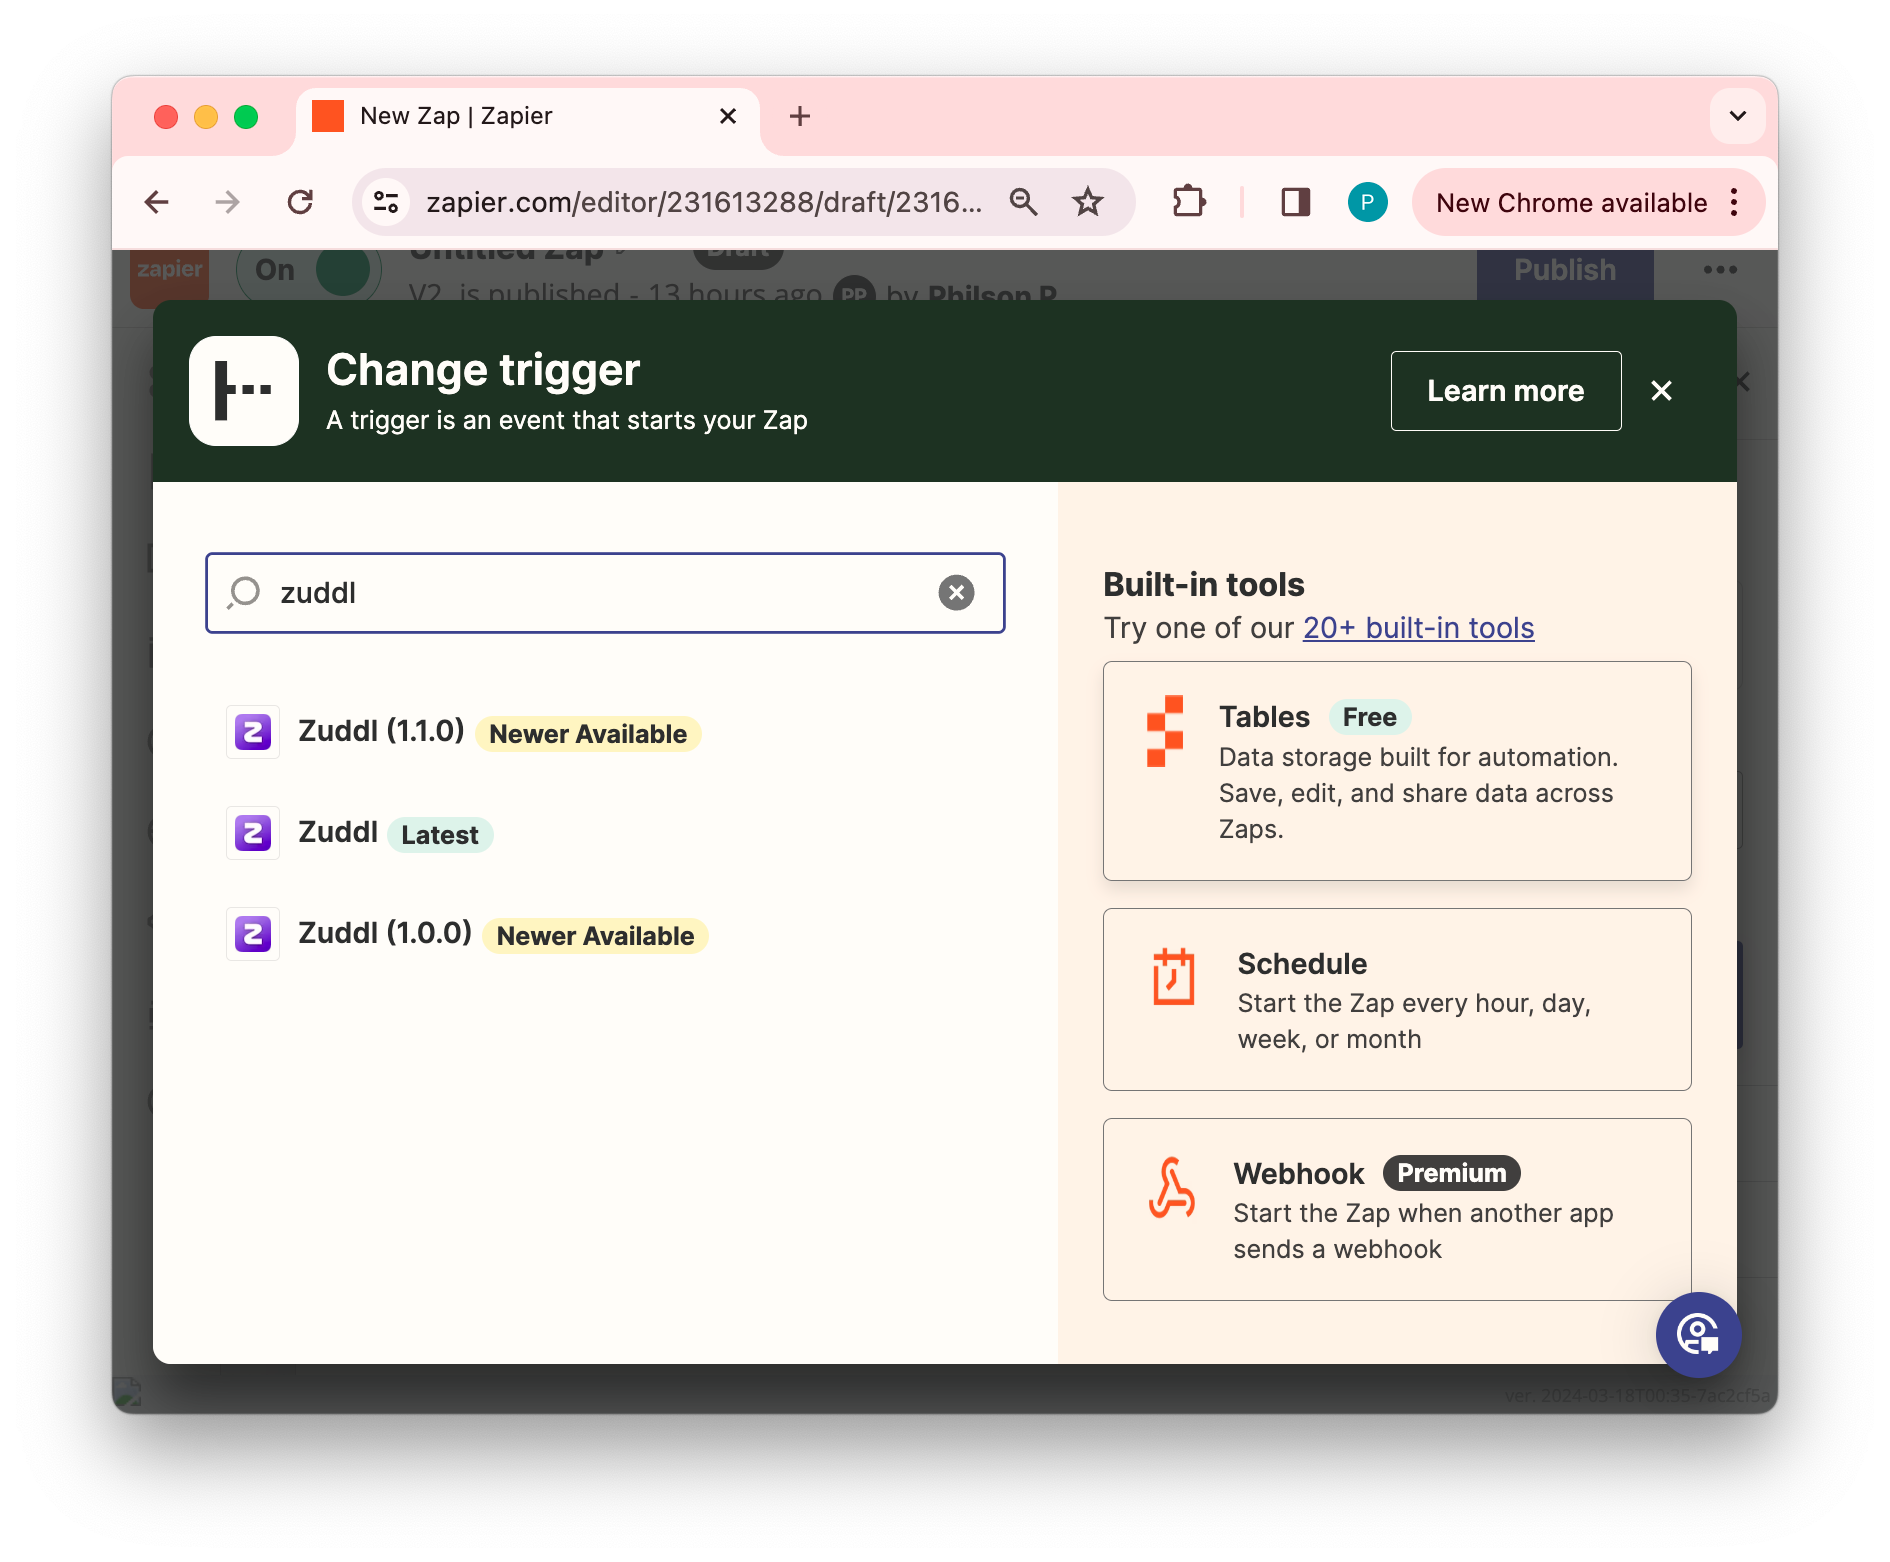
Under Choose app & event in the Event dropdown, select New Registration and click Continue.

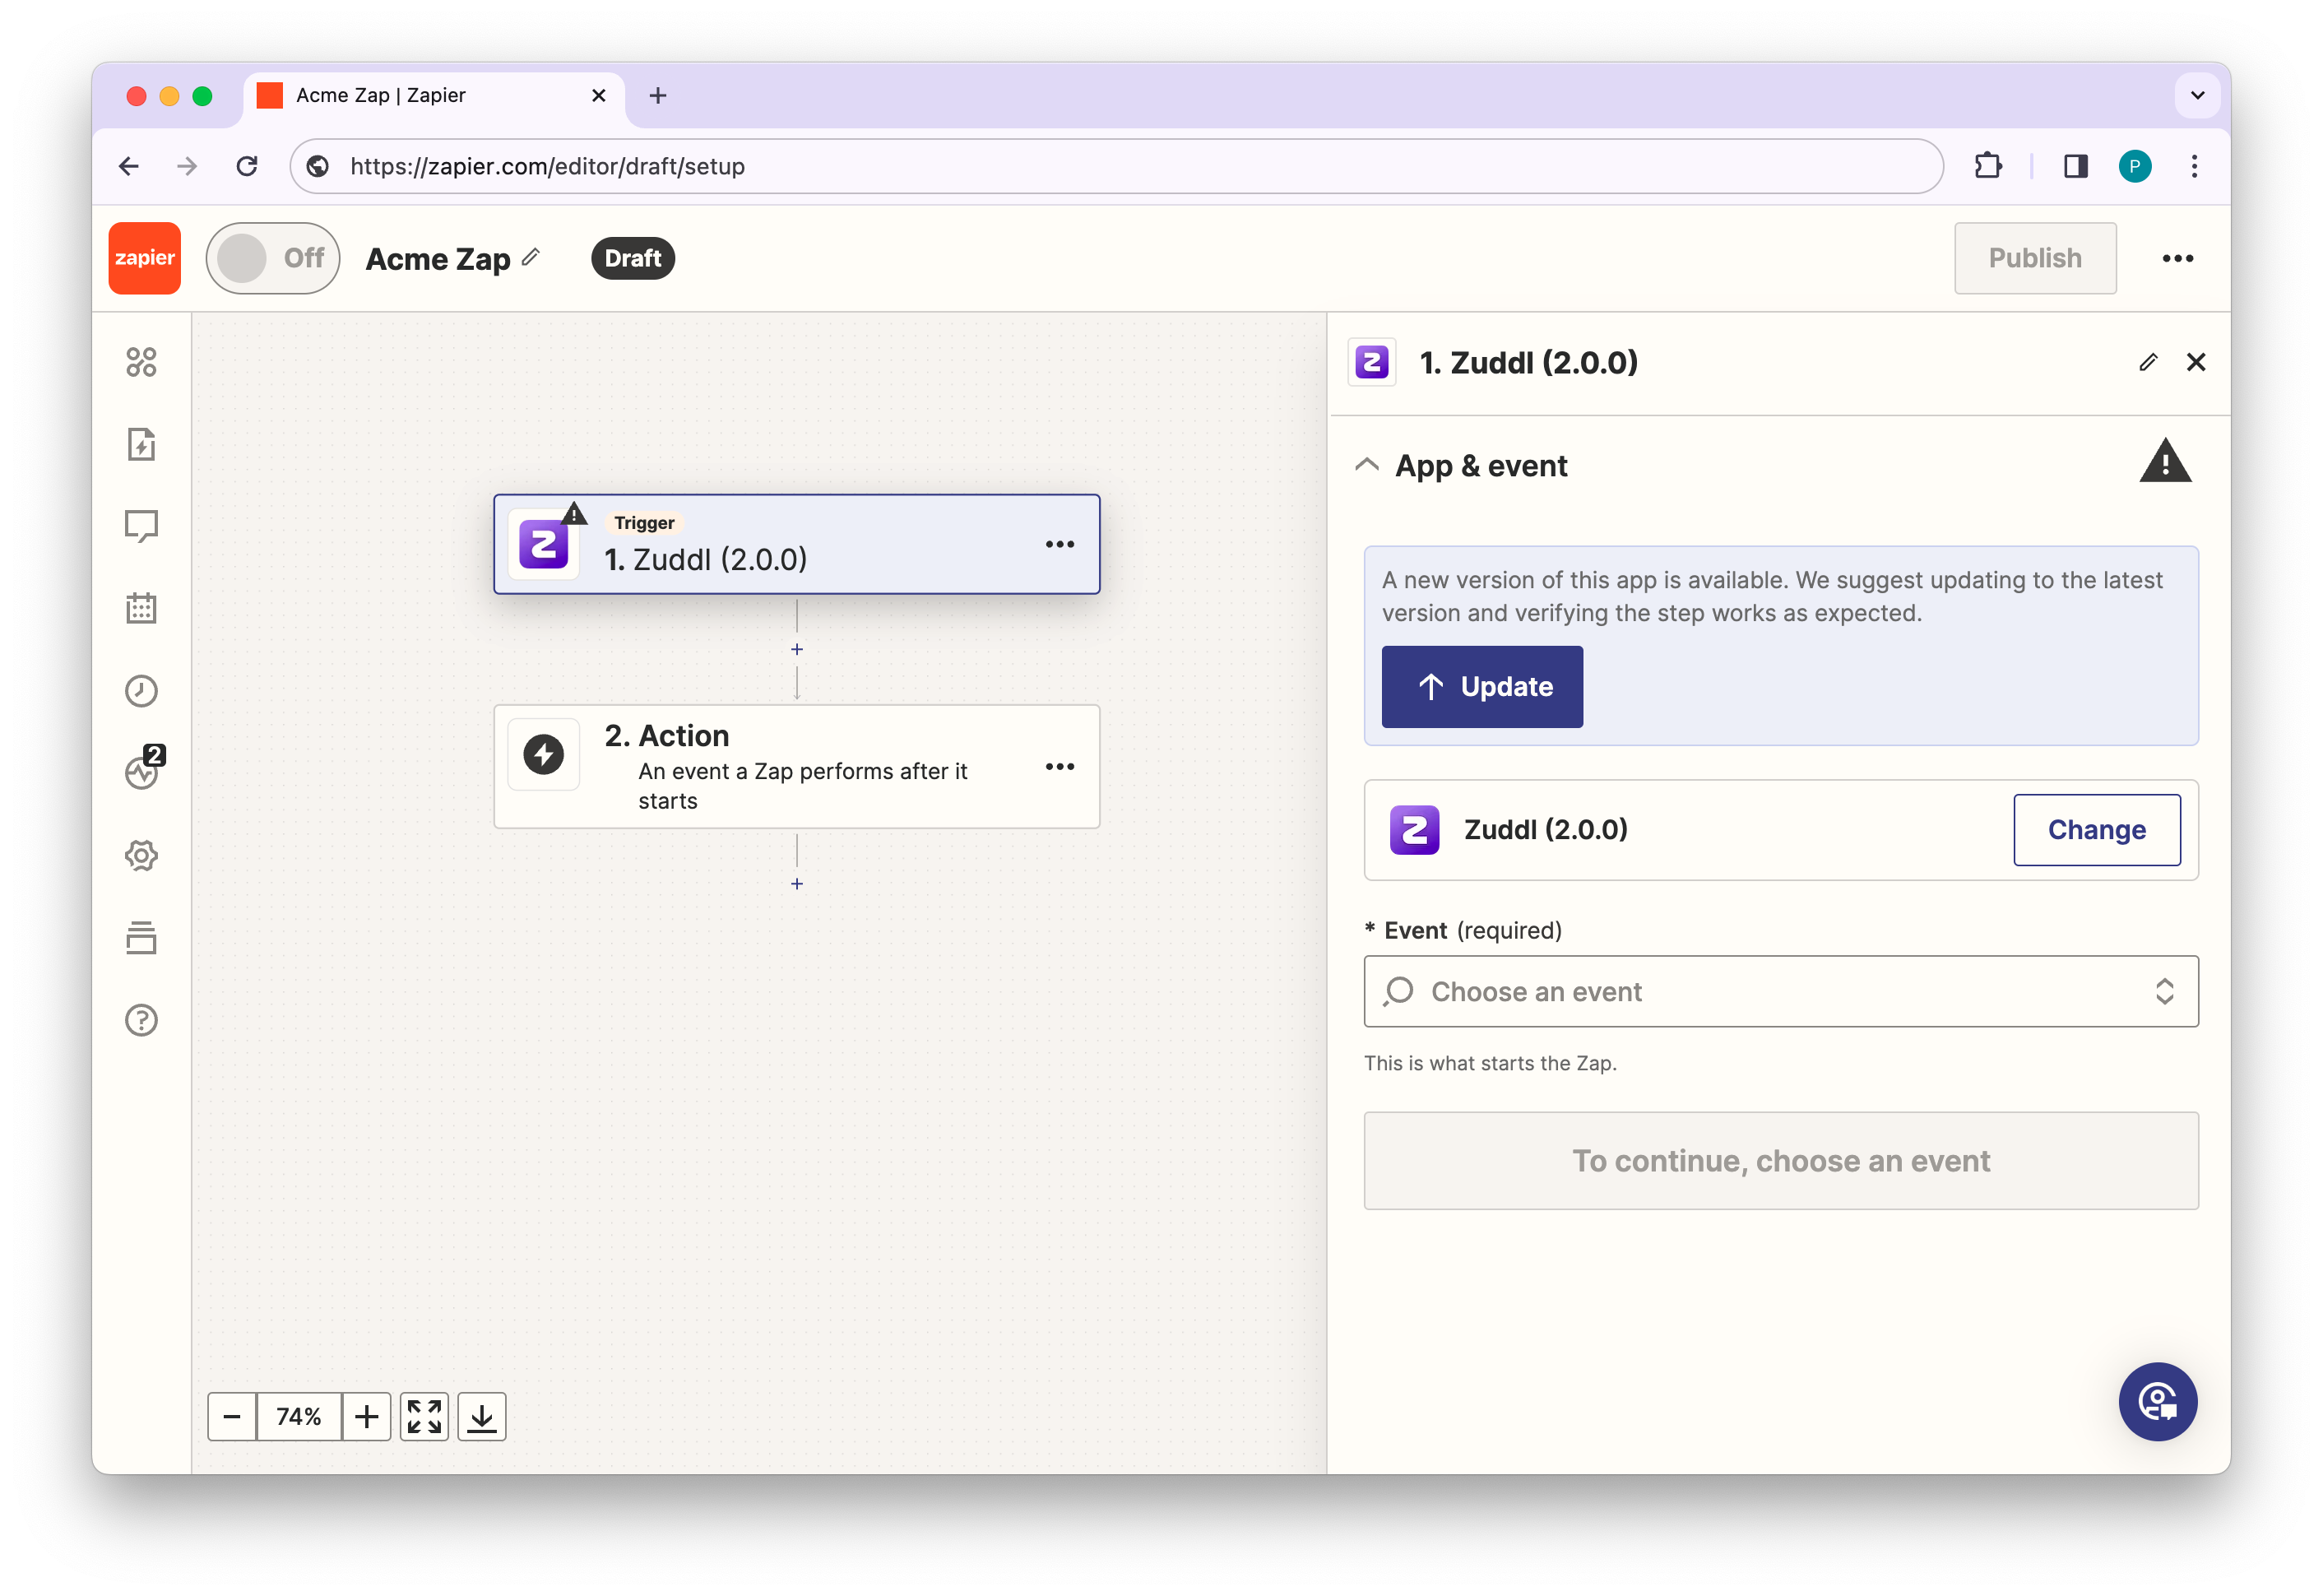
If you are on an older version, an Update button is shown to update the Zuddl app to the latest version.
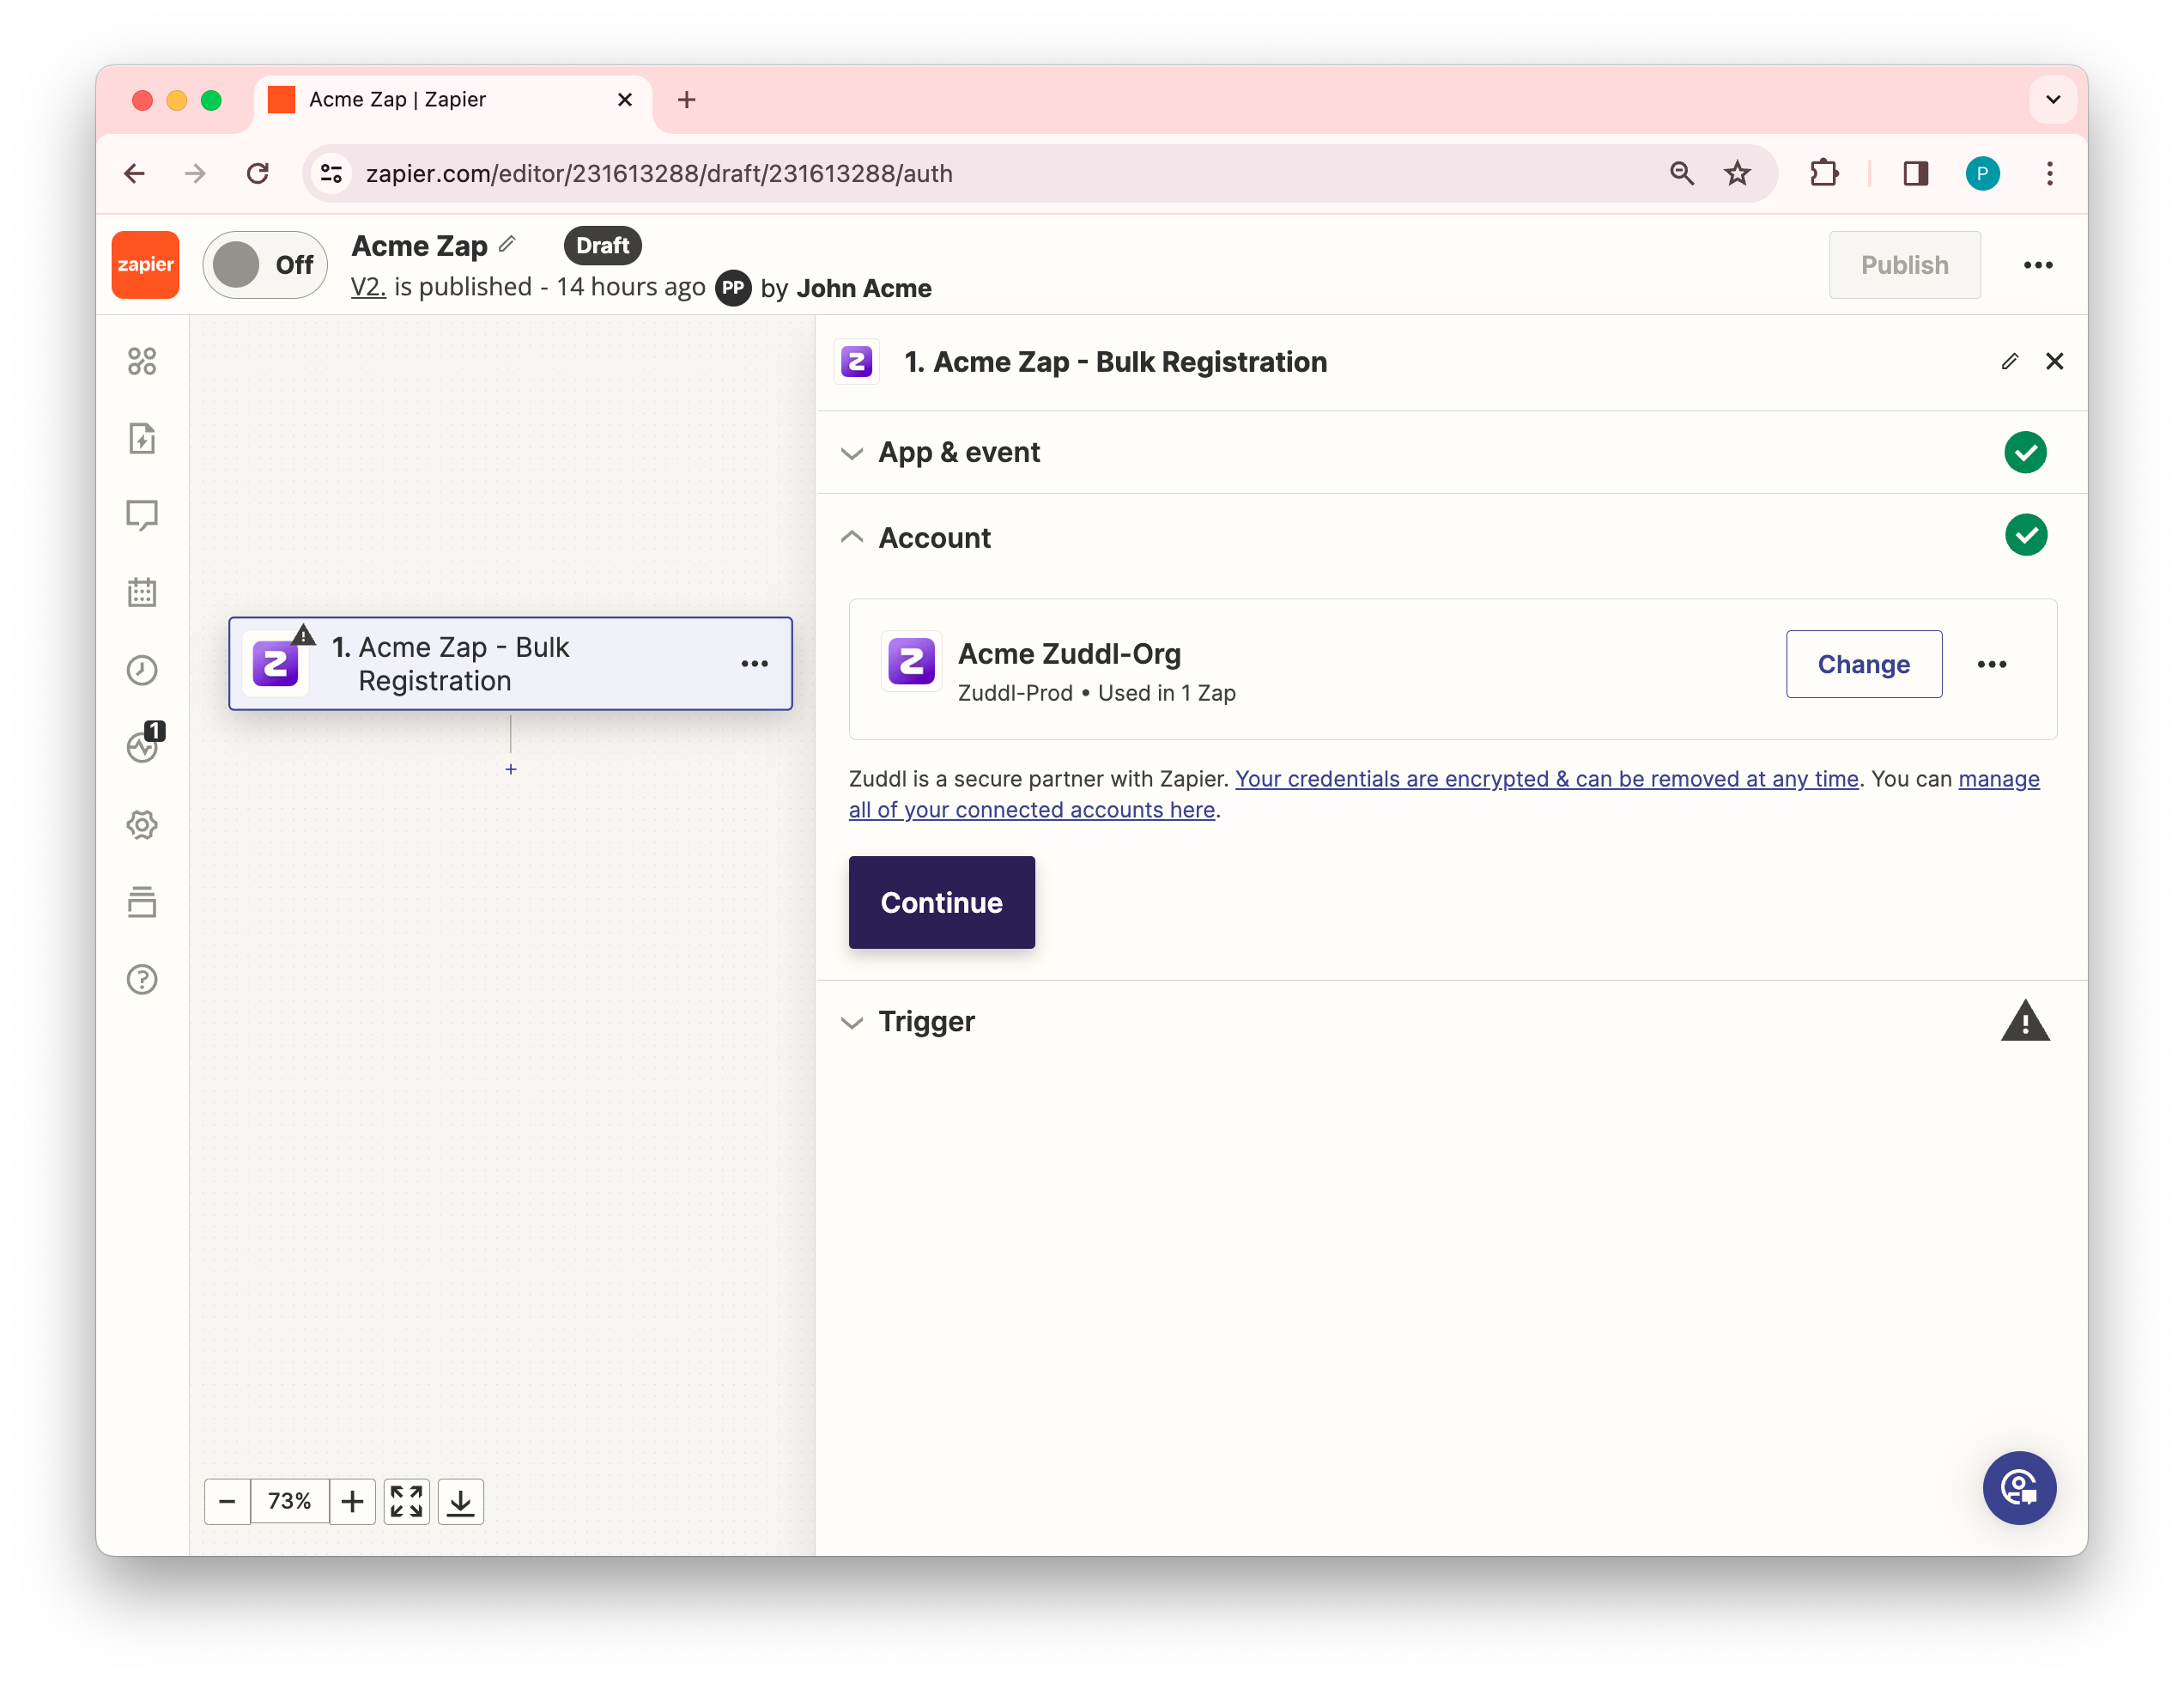
2. Choose an account
Under the Account section, you need to authenticate your Zuddl organization. To authenticate a new account, click +Connect a new account.
If there are accounts that you had previously connected to, they get listed in the drop-down menu as shown below.

On the consent screen, enter the Token Key and Token Secret. Learn how to generate tokens for your Zuddl account.
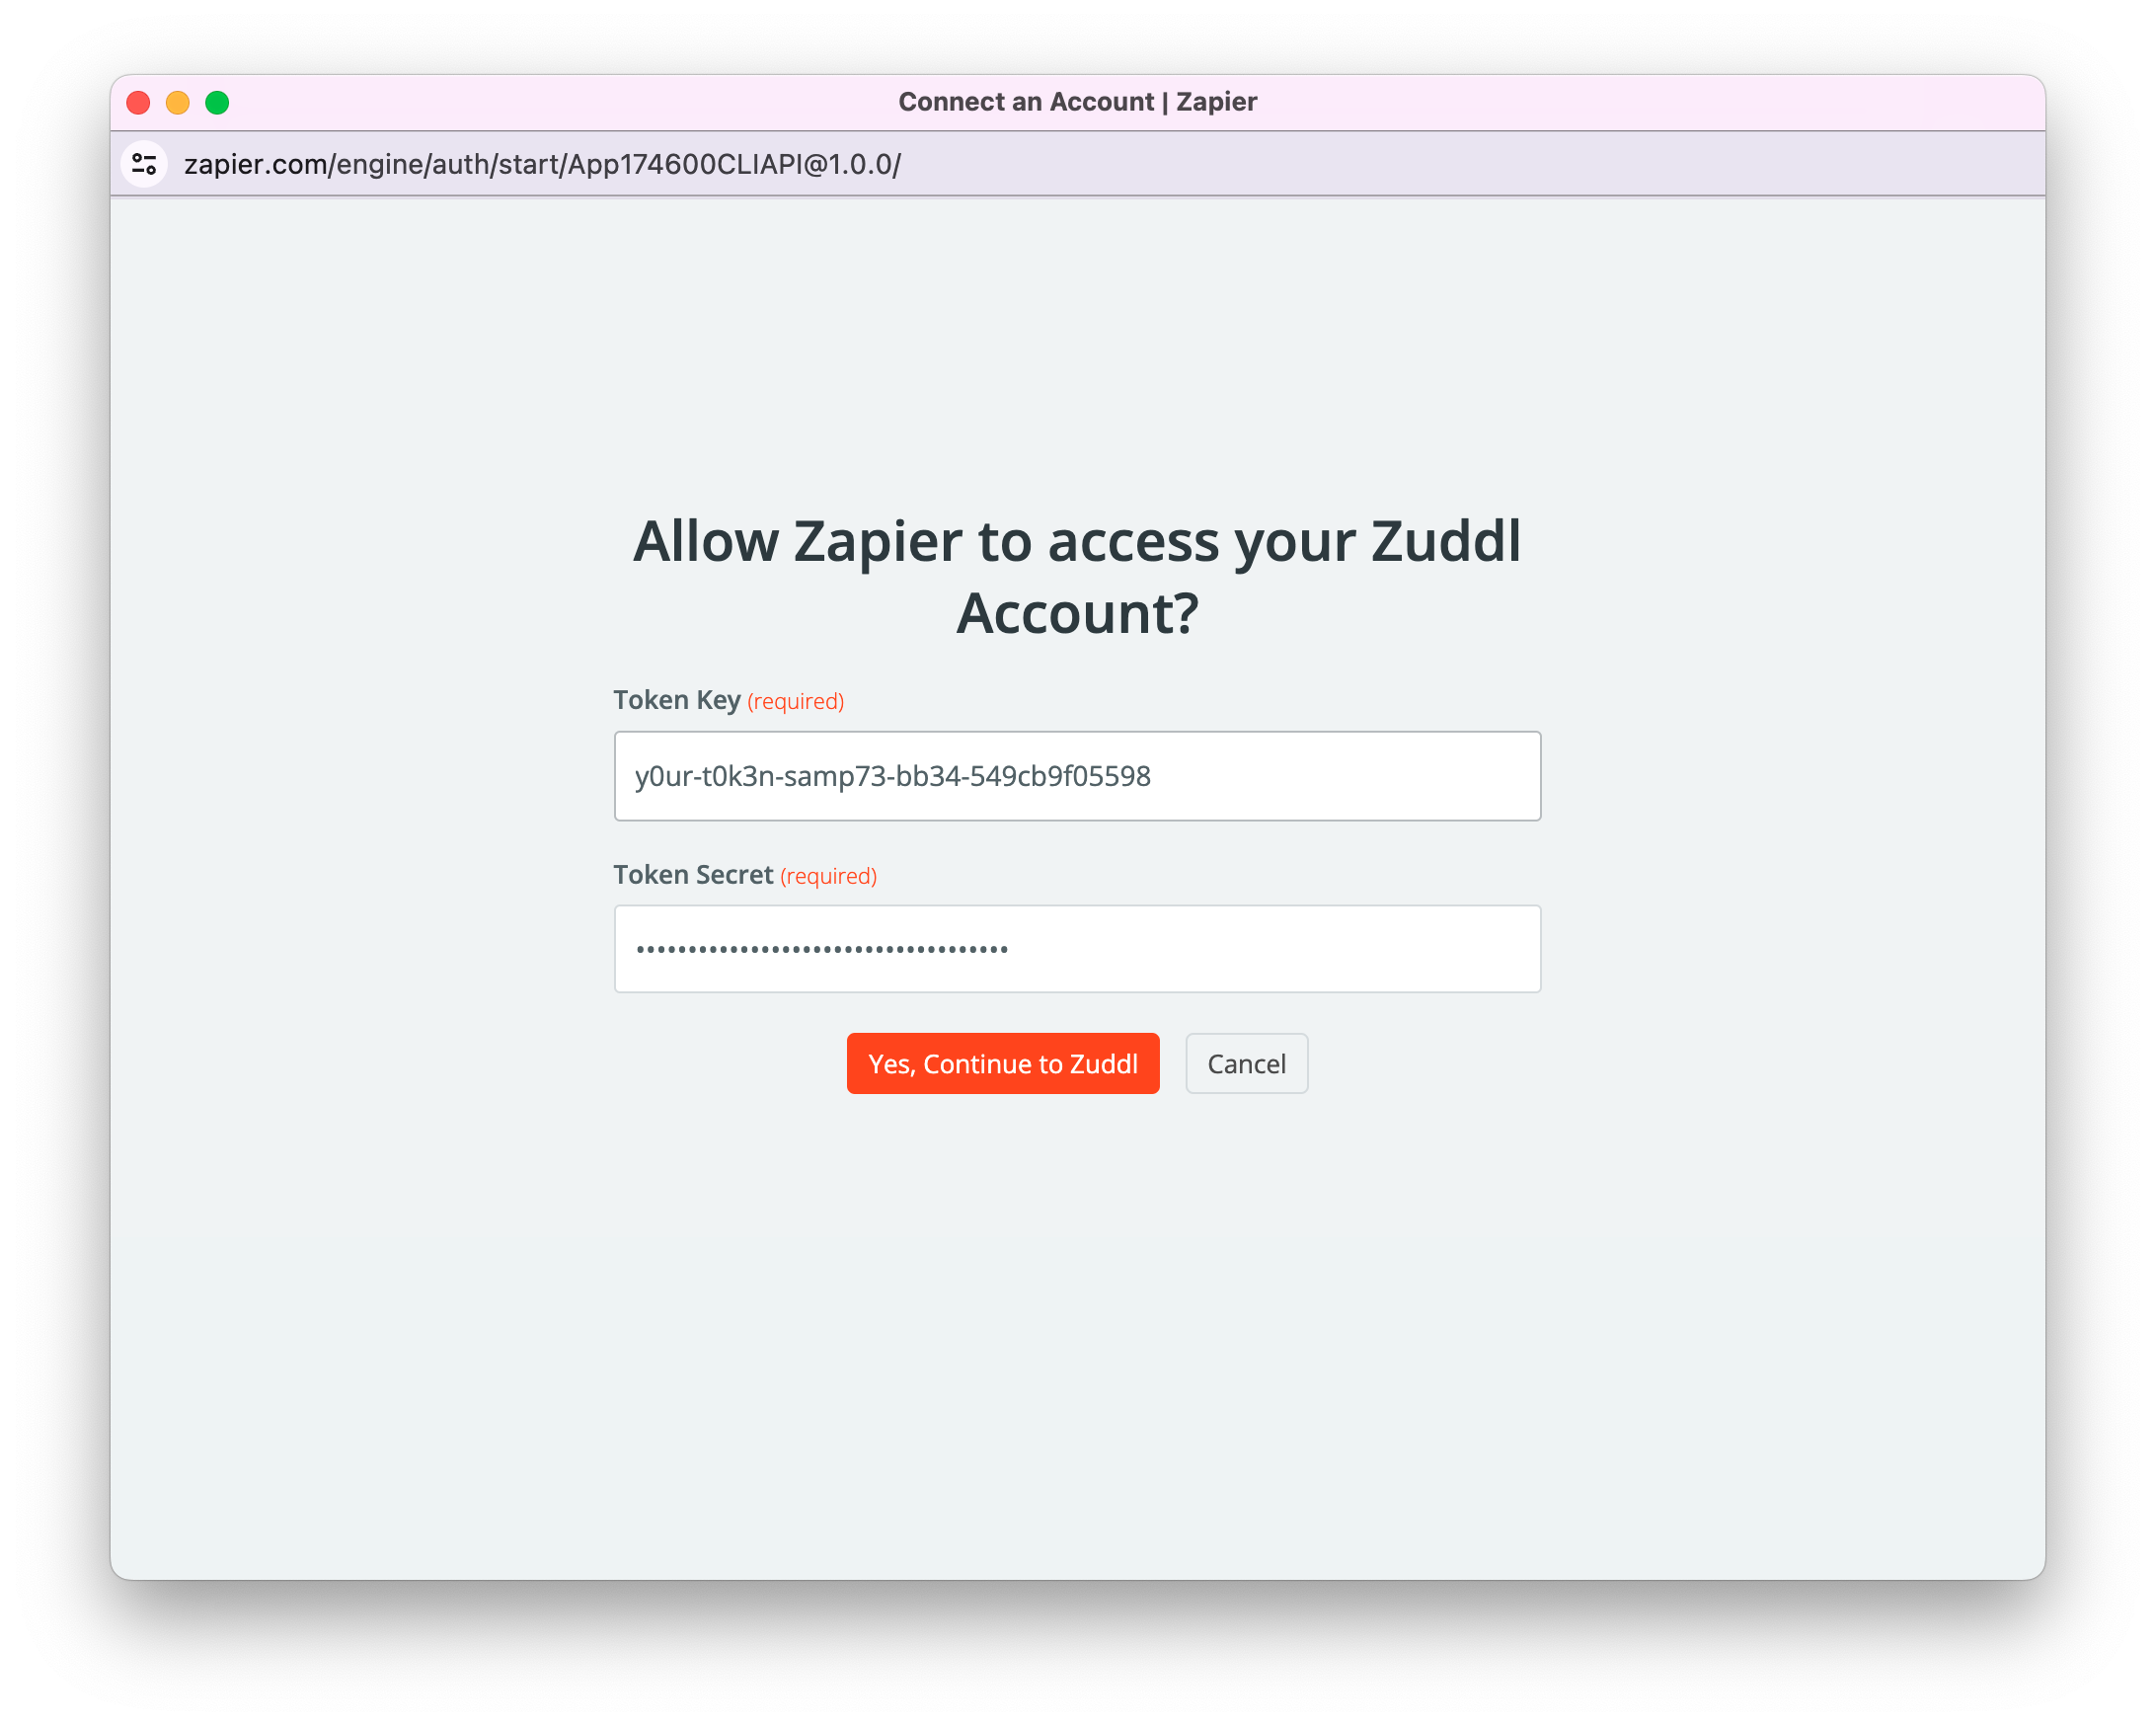
Click Yes, Continue to Zuddl. This authenticates your account and redirects you to the Zap creation page.
On the trigger set up page, click Continue.
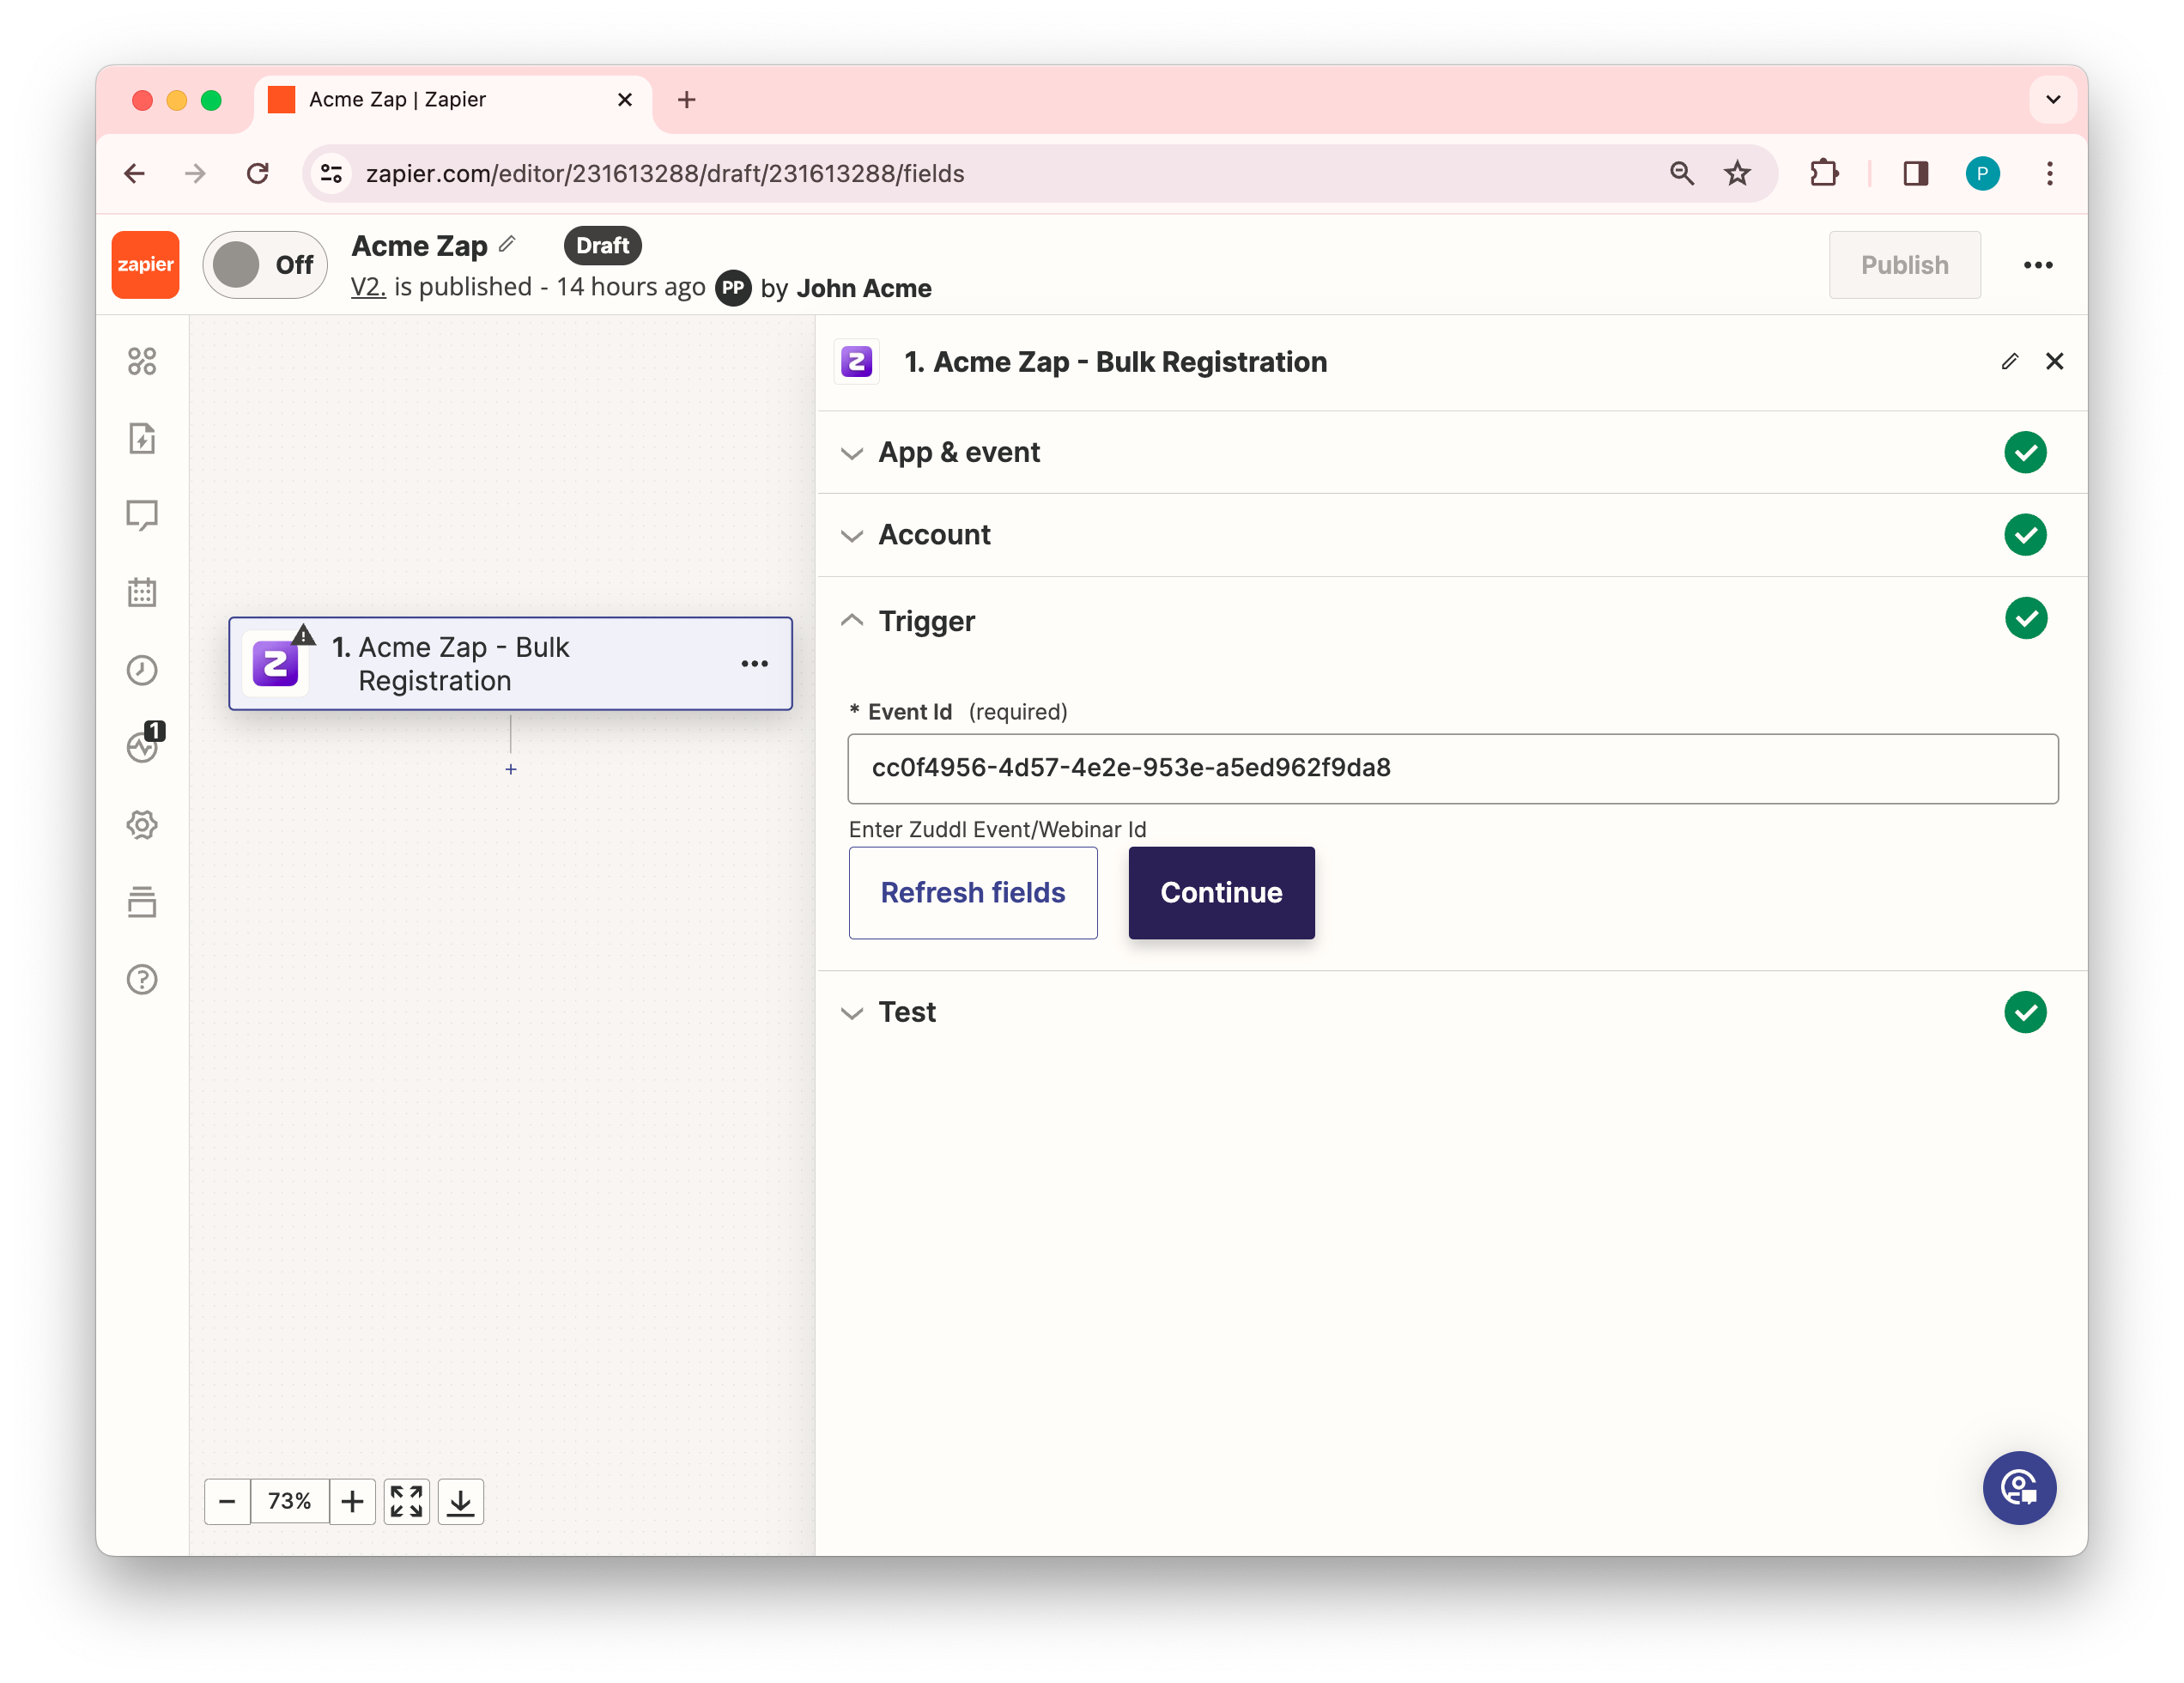
3. Add a Trigger
Under Set up trigger, paste the Zuddl Event/Webinar Id. The event or webinar Id is an alphanumeric string that can be easily copied from the event/webinar URL.
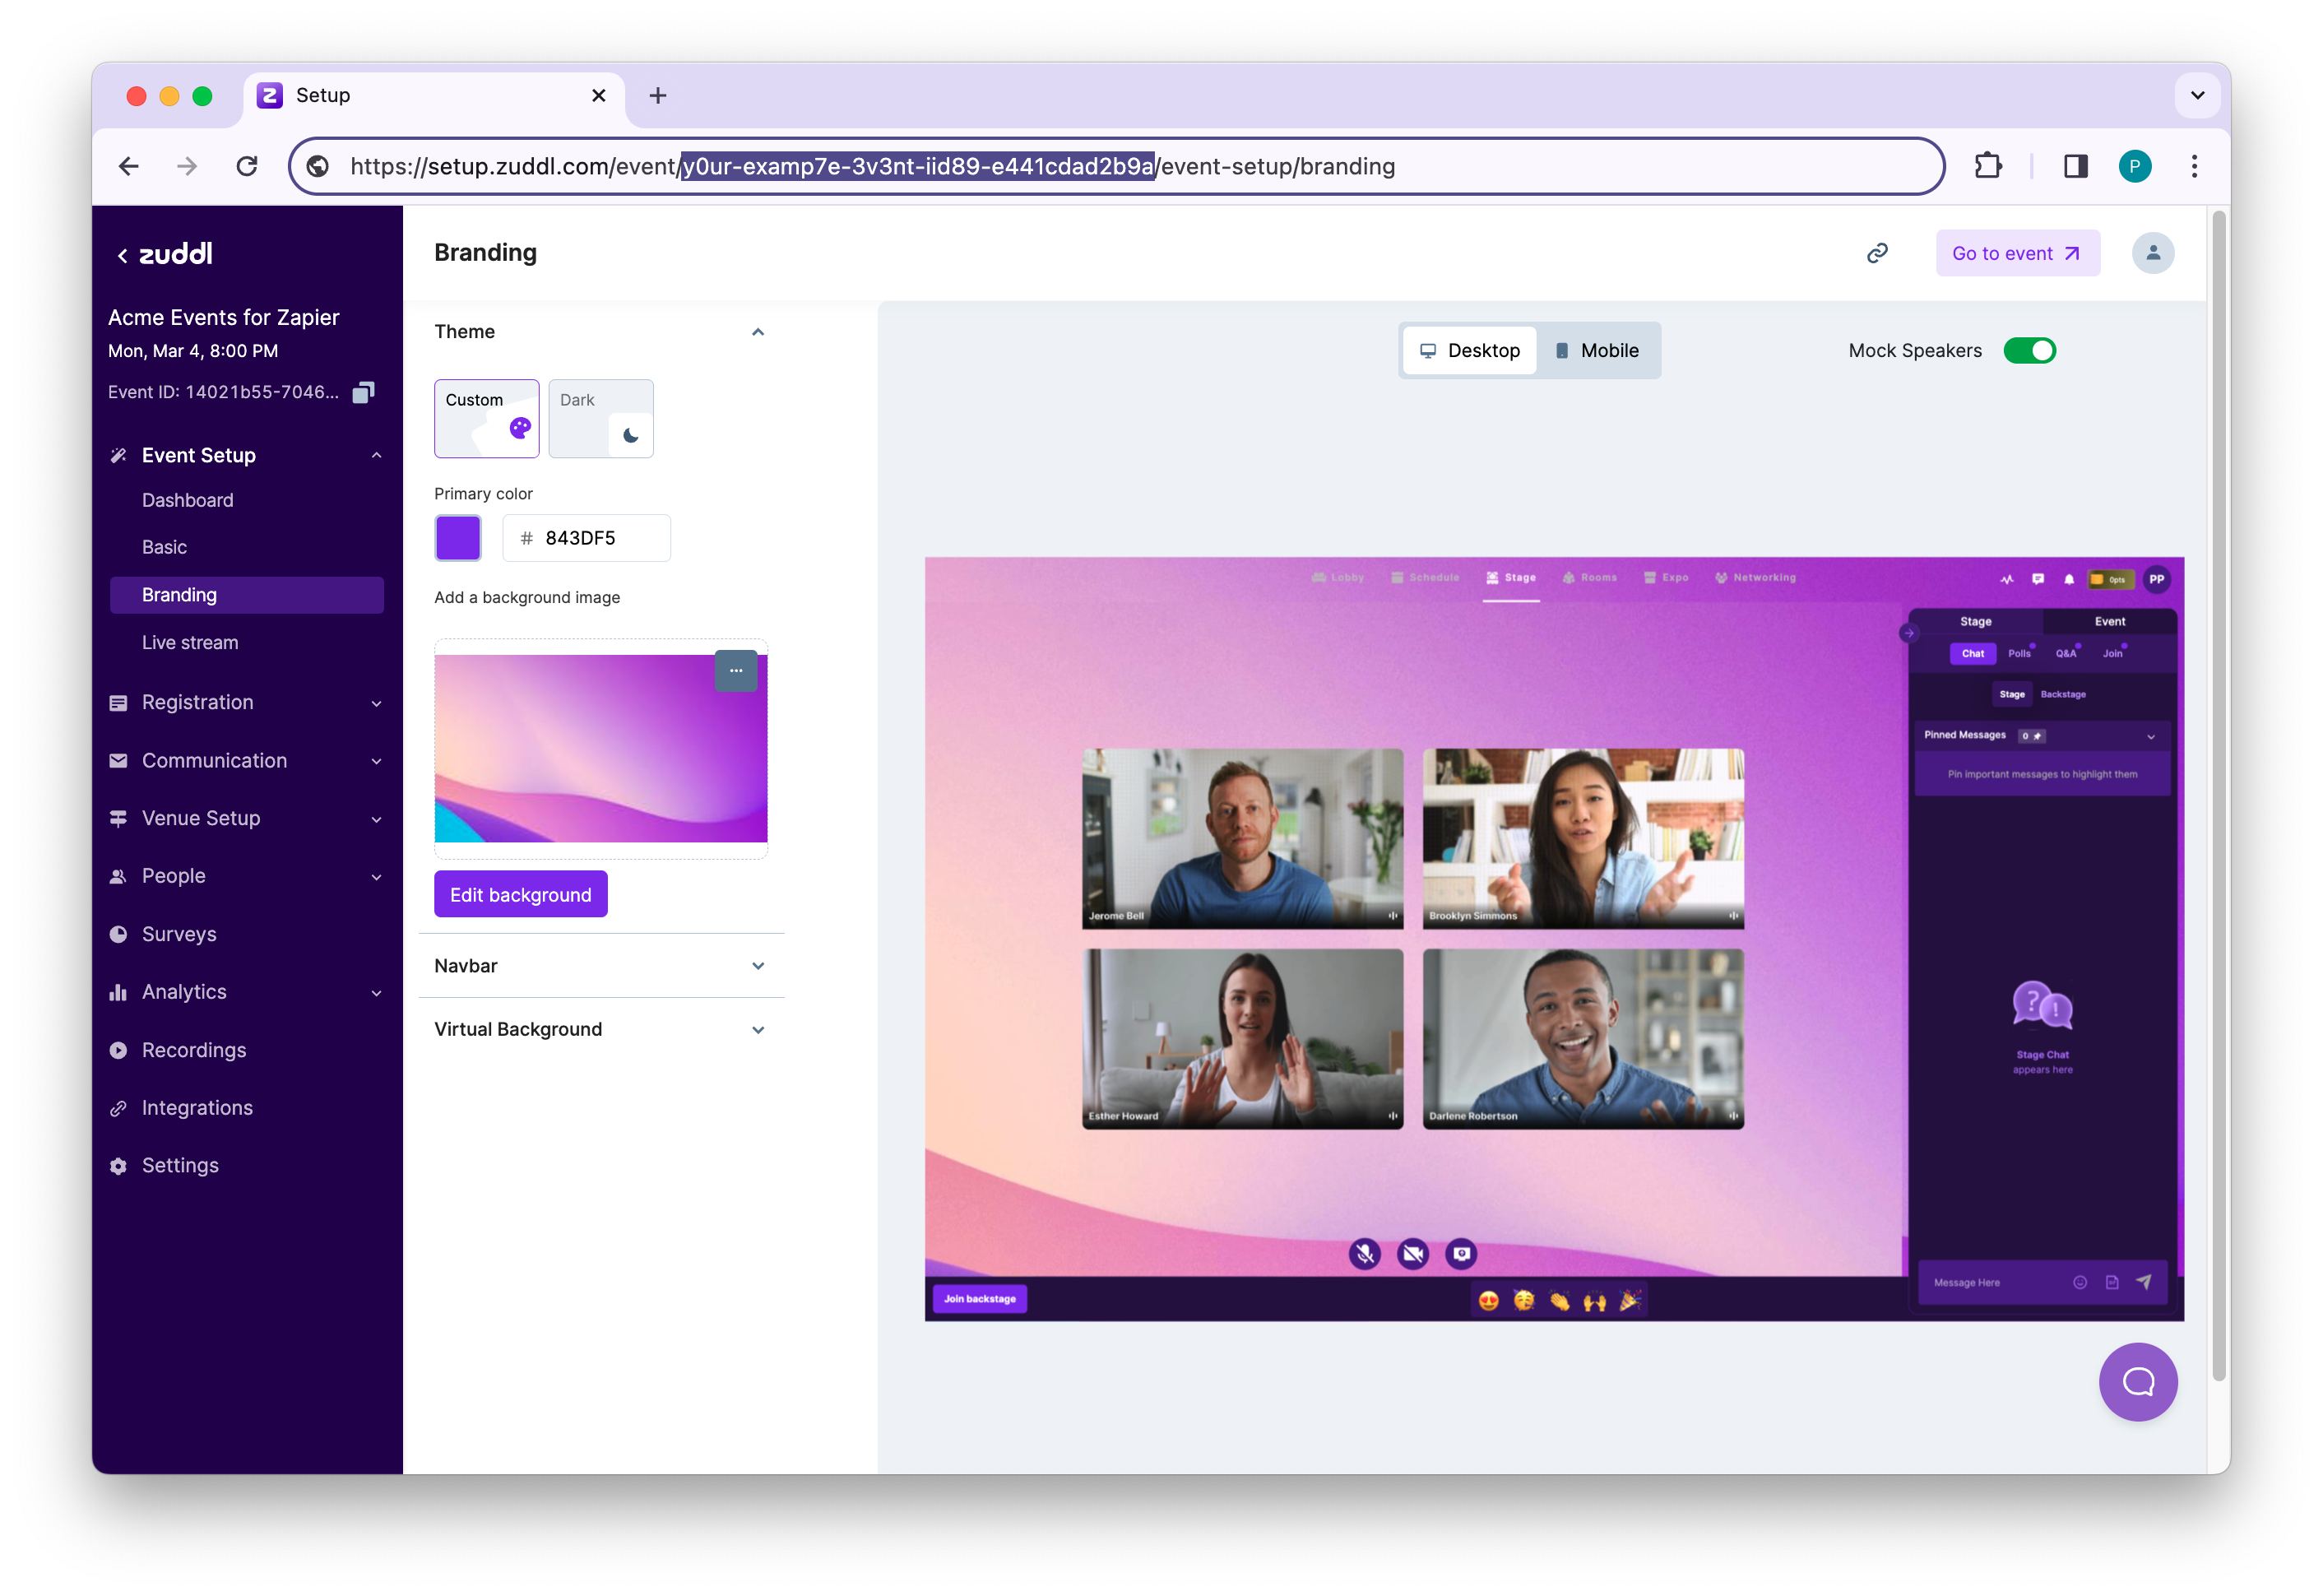
A sample eventId/webinar Id is highlighted in the following URL: https://setup.zuddl.io/event/**1q1q061q-qqq7-48qq-q223-738d7ee93qq0/**event-setup
Click Refresh fields and click Continue.
4. Testing the trigger
This is an optional step. In the Test trigger section, click the Test Trigger button. Zapier instantly connects and searches for recent registrations in Zuddl to confirm if the trigger is set up correctly. If there are no registrations for your event, it will ask you to create a new registration to test the trigger. Learn how to add attendees to your Zuddl event.
Once added, go back to Zapier and test the trigger again.
Don’t add organizers as attendees.
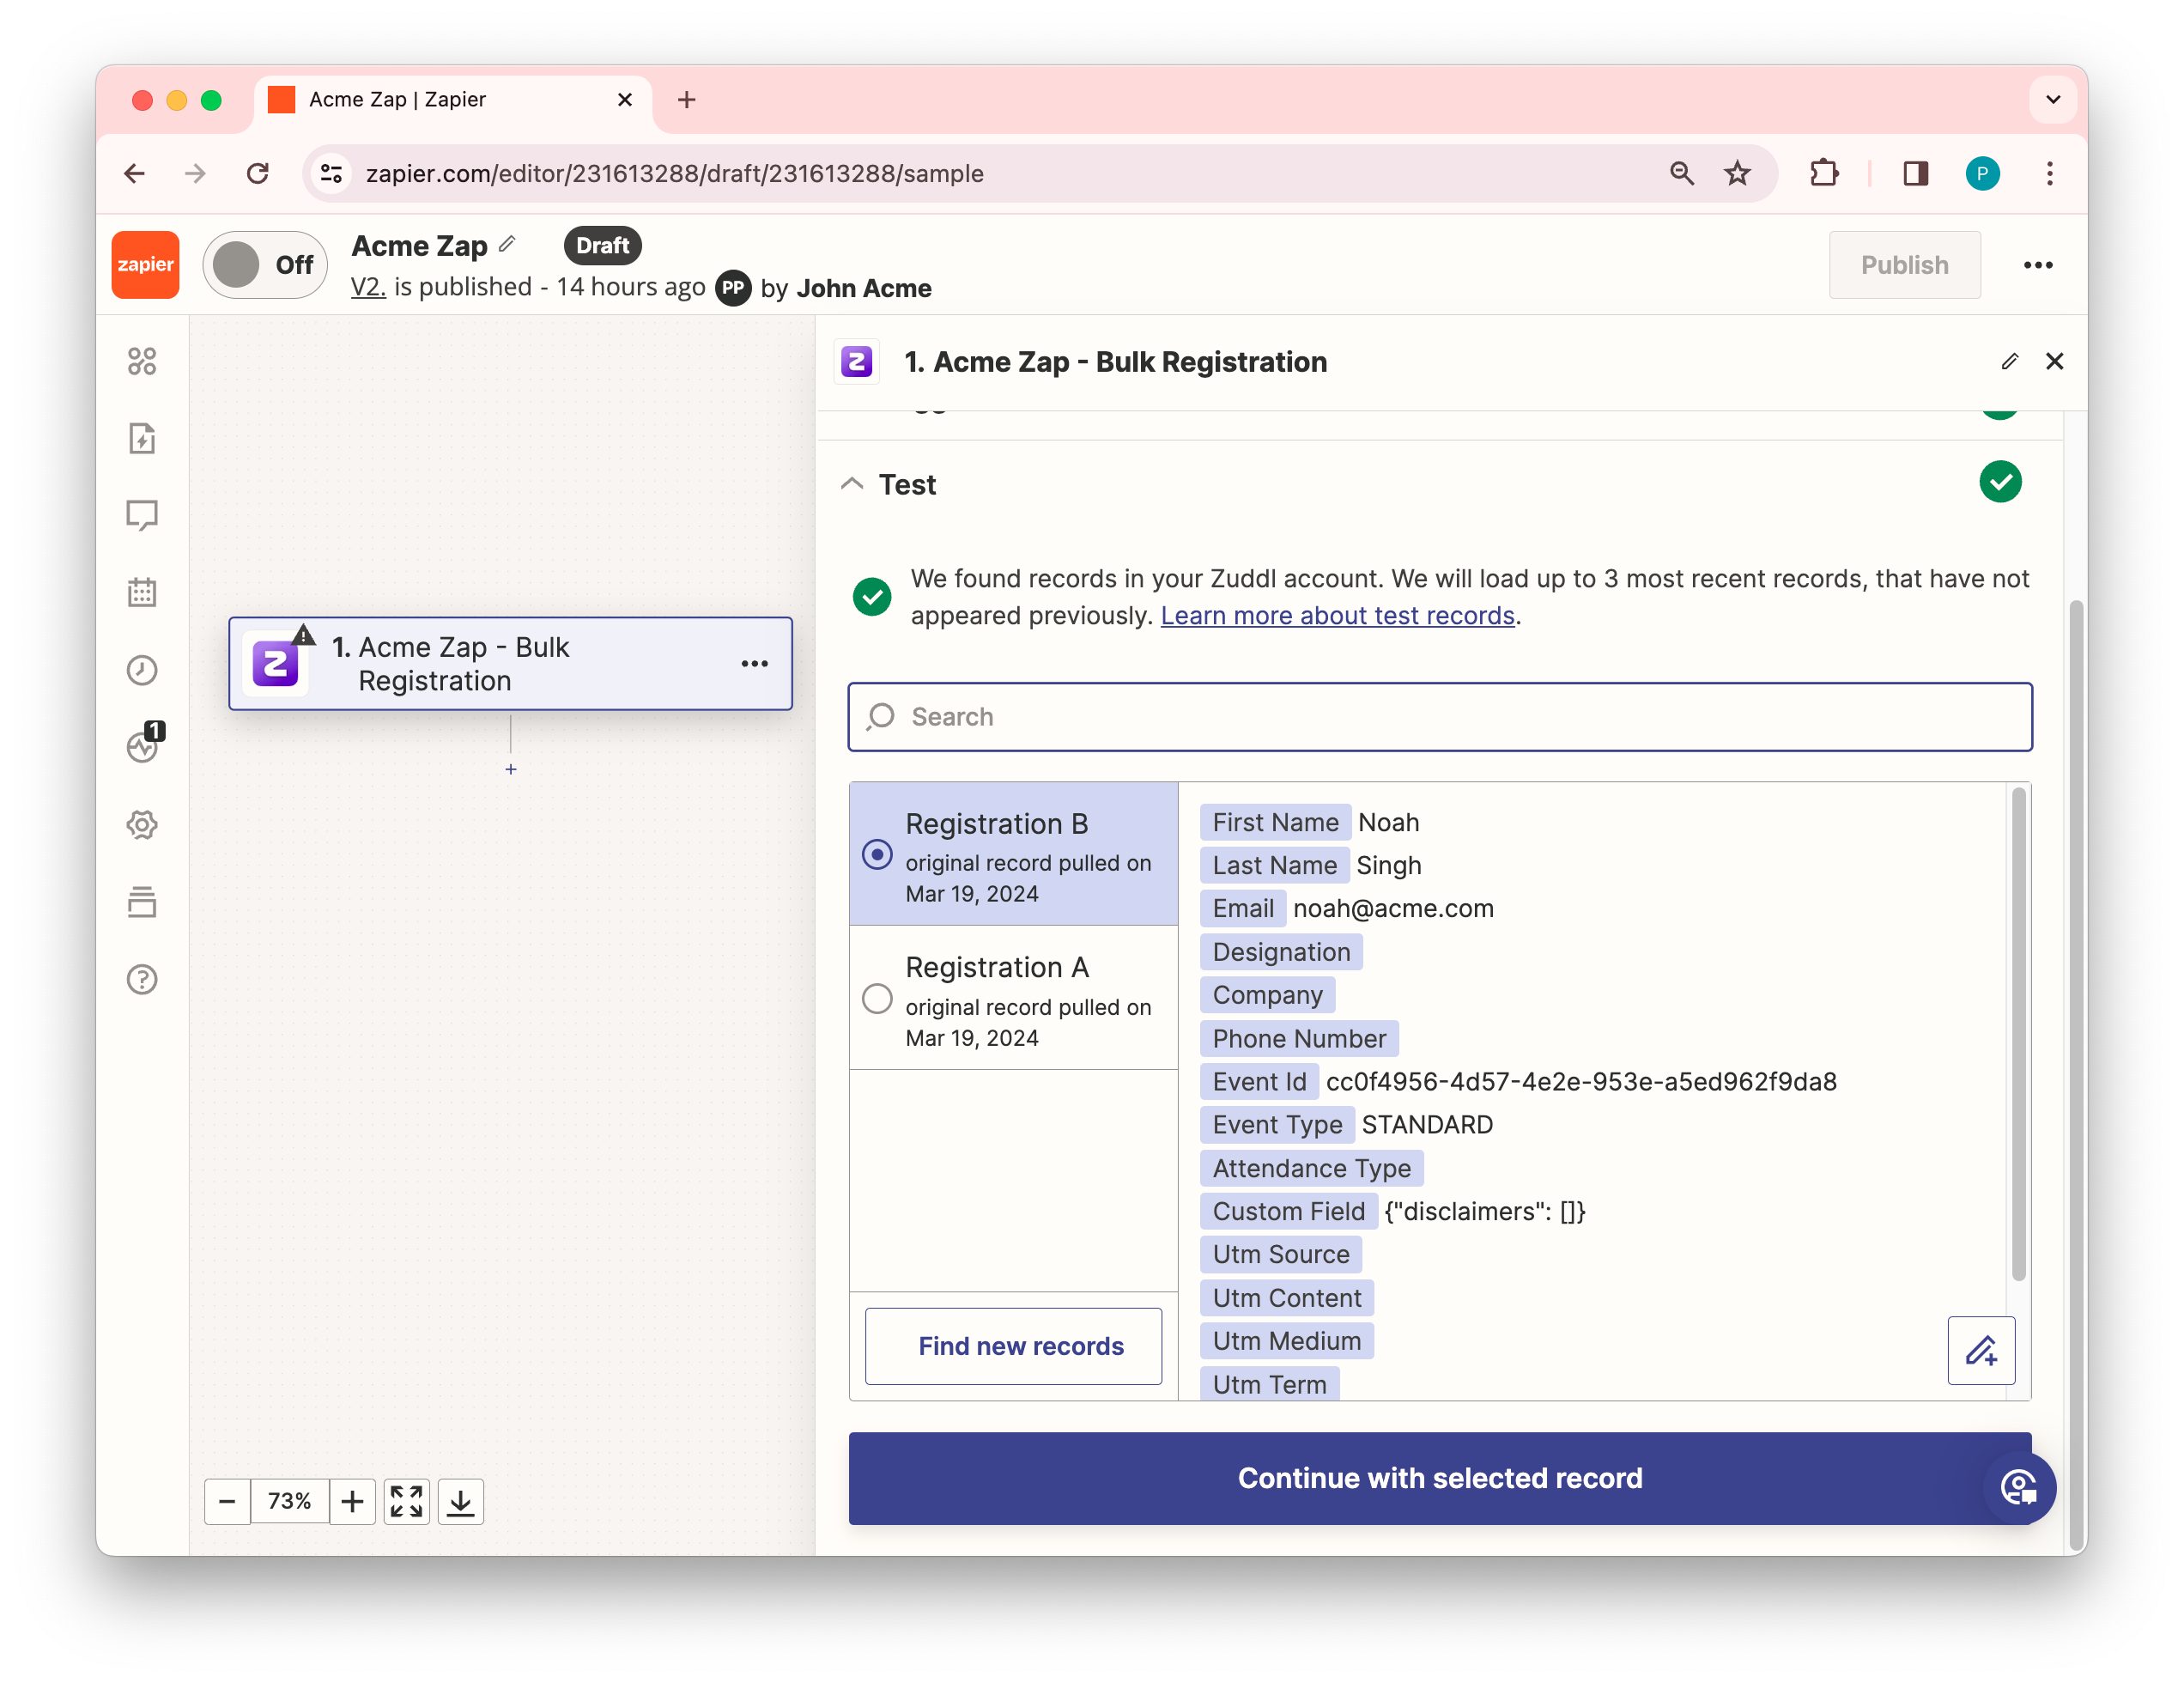
If a registration is found, it appears on the dropdown menu option with the registrant field details such as:
Field nameDescription | |
First Name | The registrant’s first name |
Last Name | The registrant’s last name |
The registrant’s email | |
Designation | The registrant’s official designation |
Company | The registrant’s company name |
Phone Number | The registrant’s phone number |
Event Id | The event Id of the event. |
Event Type | STANDARD |
Attendance Type | VIRTUAL or IN_PERSON |
magicLinkUrl | The direct link to join Zuddl event |
Custom Field | Custom fields in JSON. For example { “custom1”: “field1”, “custom2”: “field2”, “custom3”: “field3”[]} |
Utm Source | UTM source |
Utm Content | UTM content |
Utm Medium | UTM medium |
Utm Term | UTM term |
Utm Campaign | UTM campaign |
Utm Id | UTM Id |
Ip Country | Country of the registrant based on IP address |
Ip City | City of the registrant based on IP address |
Ticket Tag Type | Tag to identify the attendance type of the ticket |
Ticket Type | Name of the ticket |
Add On Details | Array list of add-ons |
Amount Paid | Total amount of the ticket (including add-ons) |
Coupons Applied | Coupon code string |
Click Continue with selected record. This sets up a trigger. You now need to set up an action to be performed by the workflow upon the trigger activation.
5. Add an Action
Code by Zapier
If you’ve added custom fields to your registration form, you can convert the custom fields into selectable data points on Zapier by using the’ Code by Zapier’ app.
You must specify a desired field key name, such as ‘custom field.’
Initially, the custom field appears in JSON format.
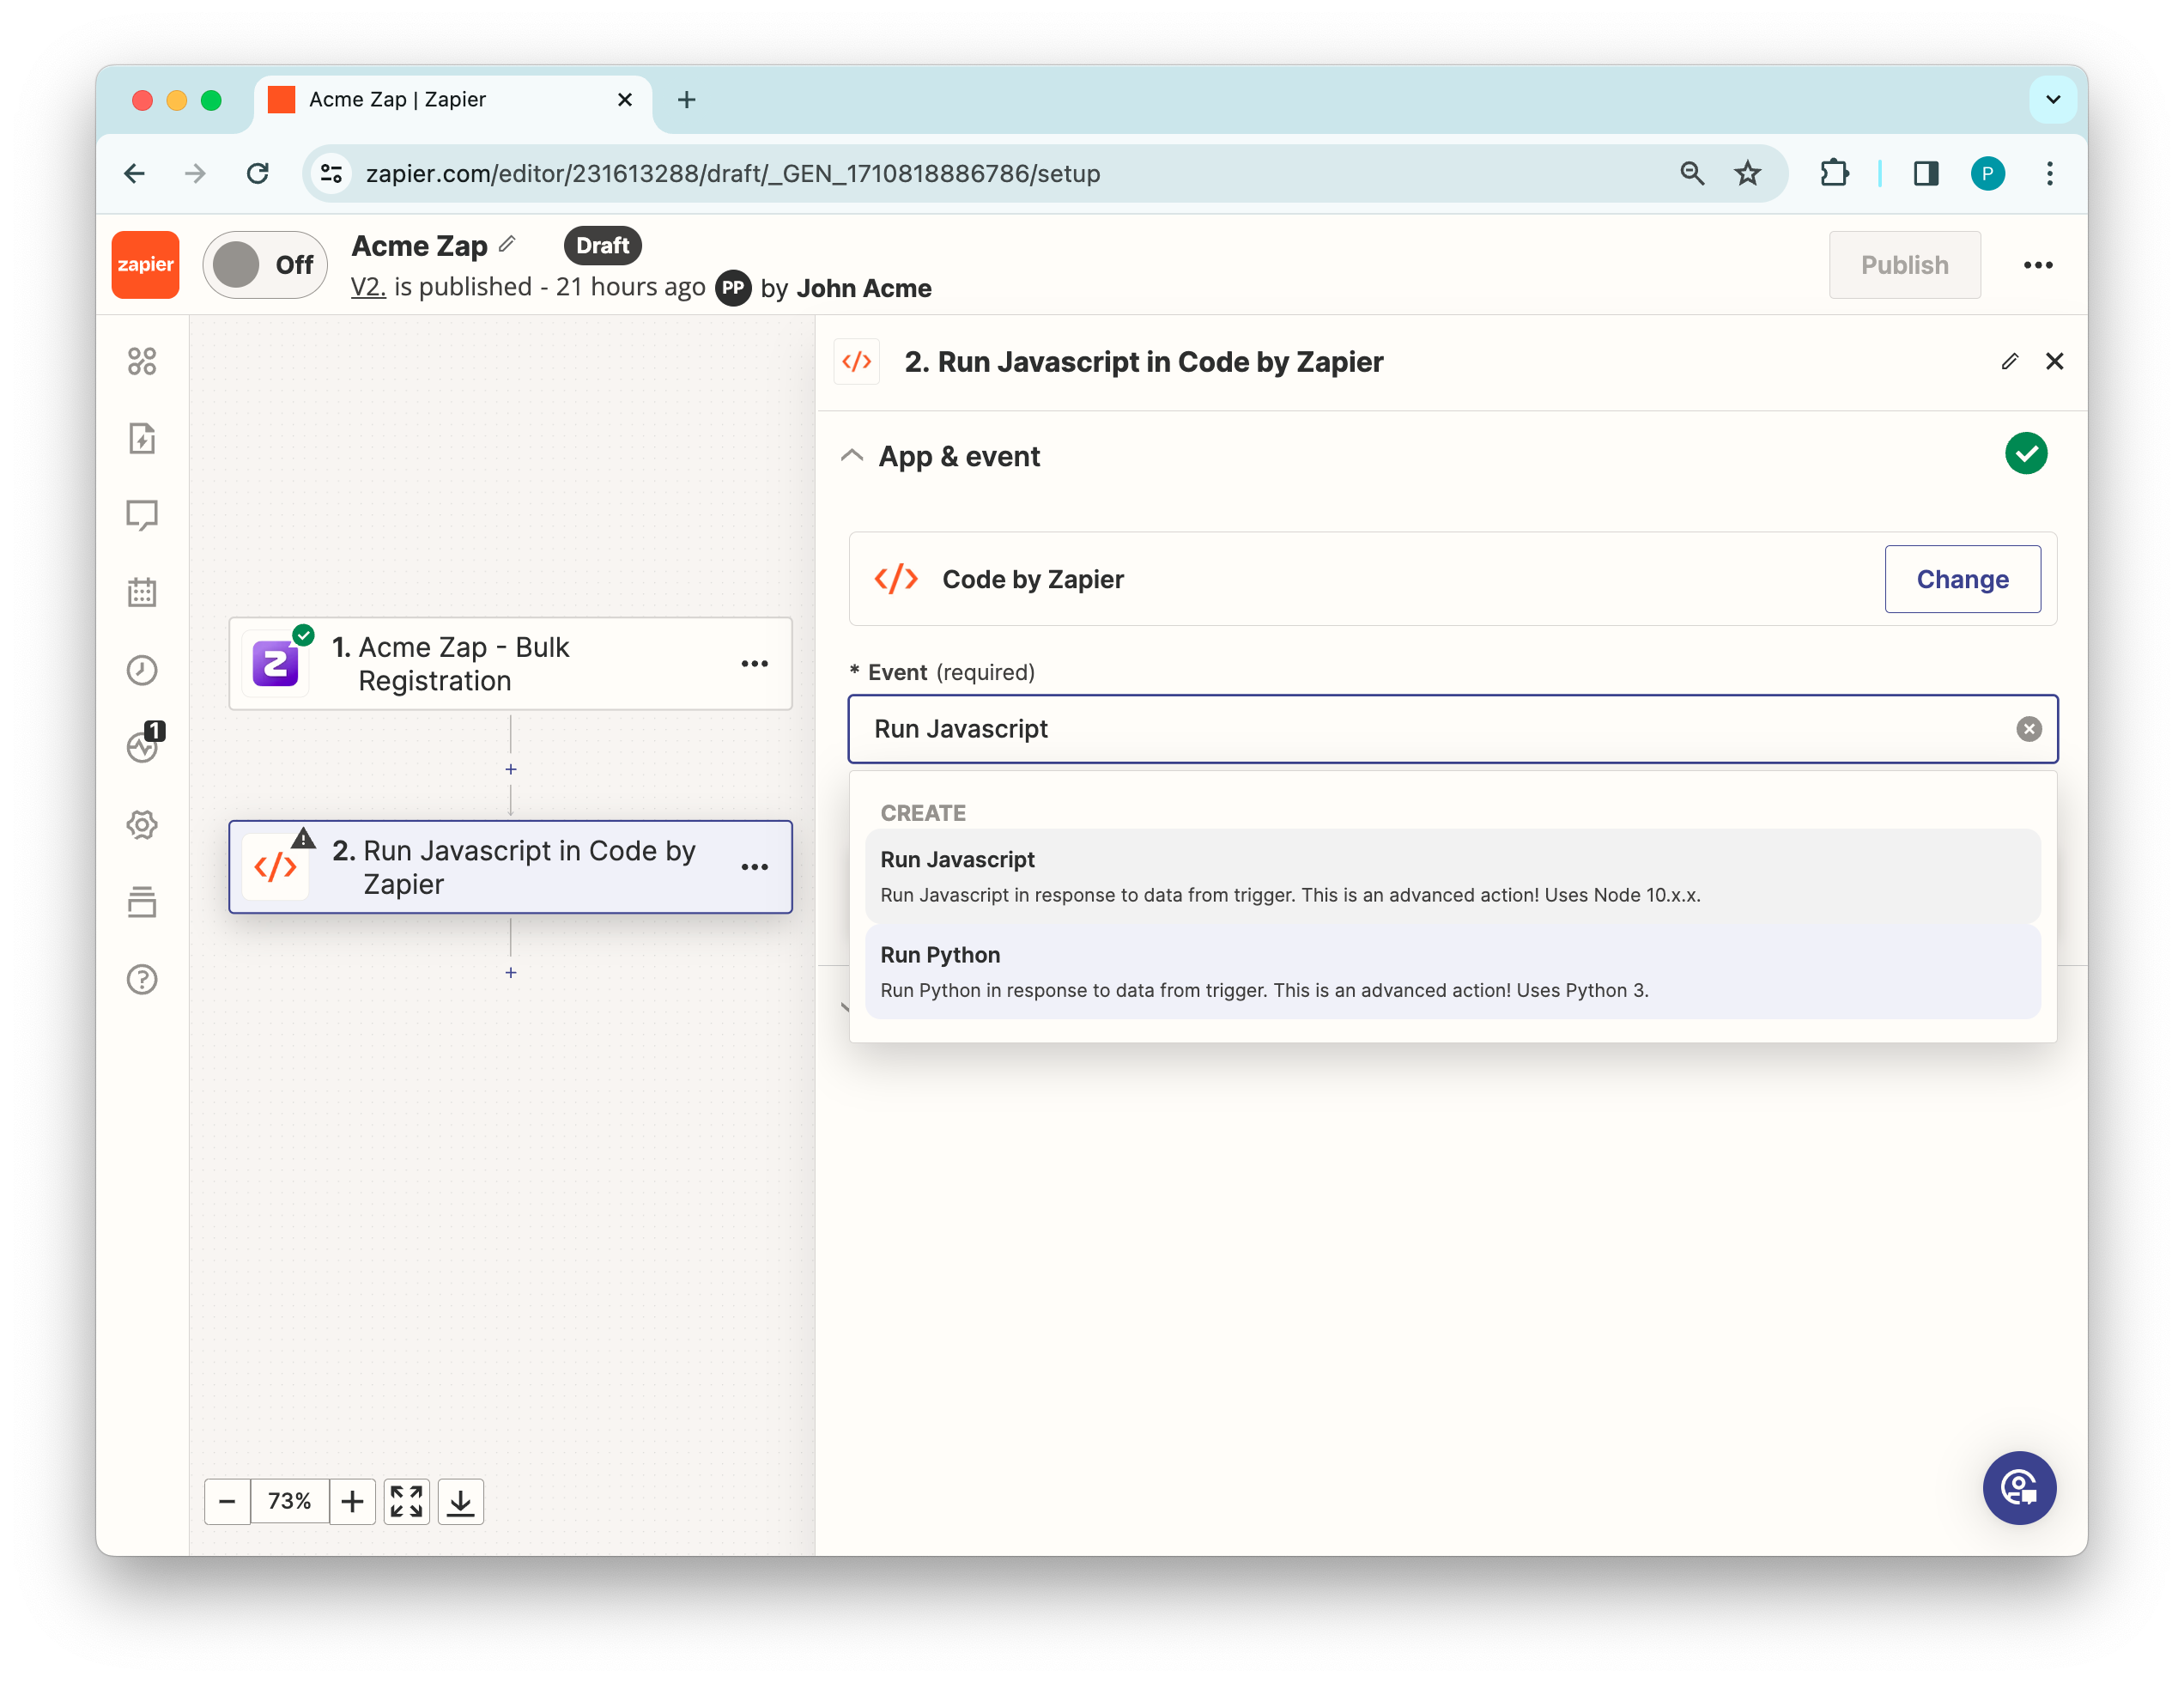
On the Change action page, search for “Code by Zapier” and select it.
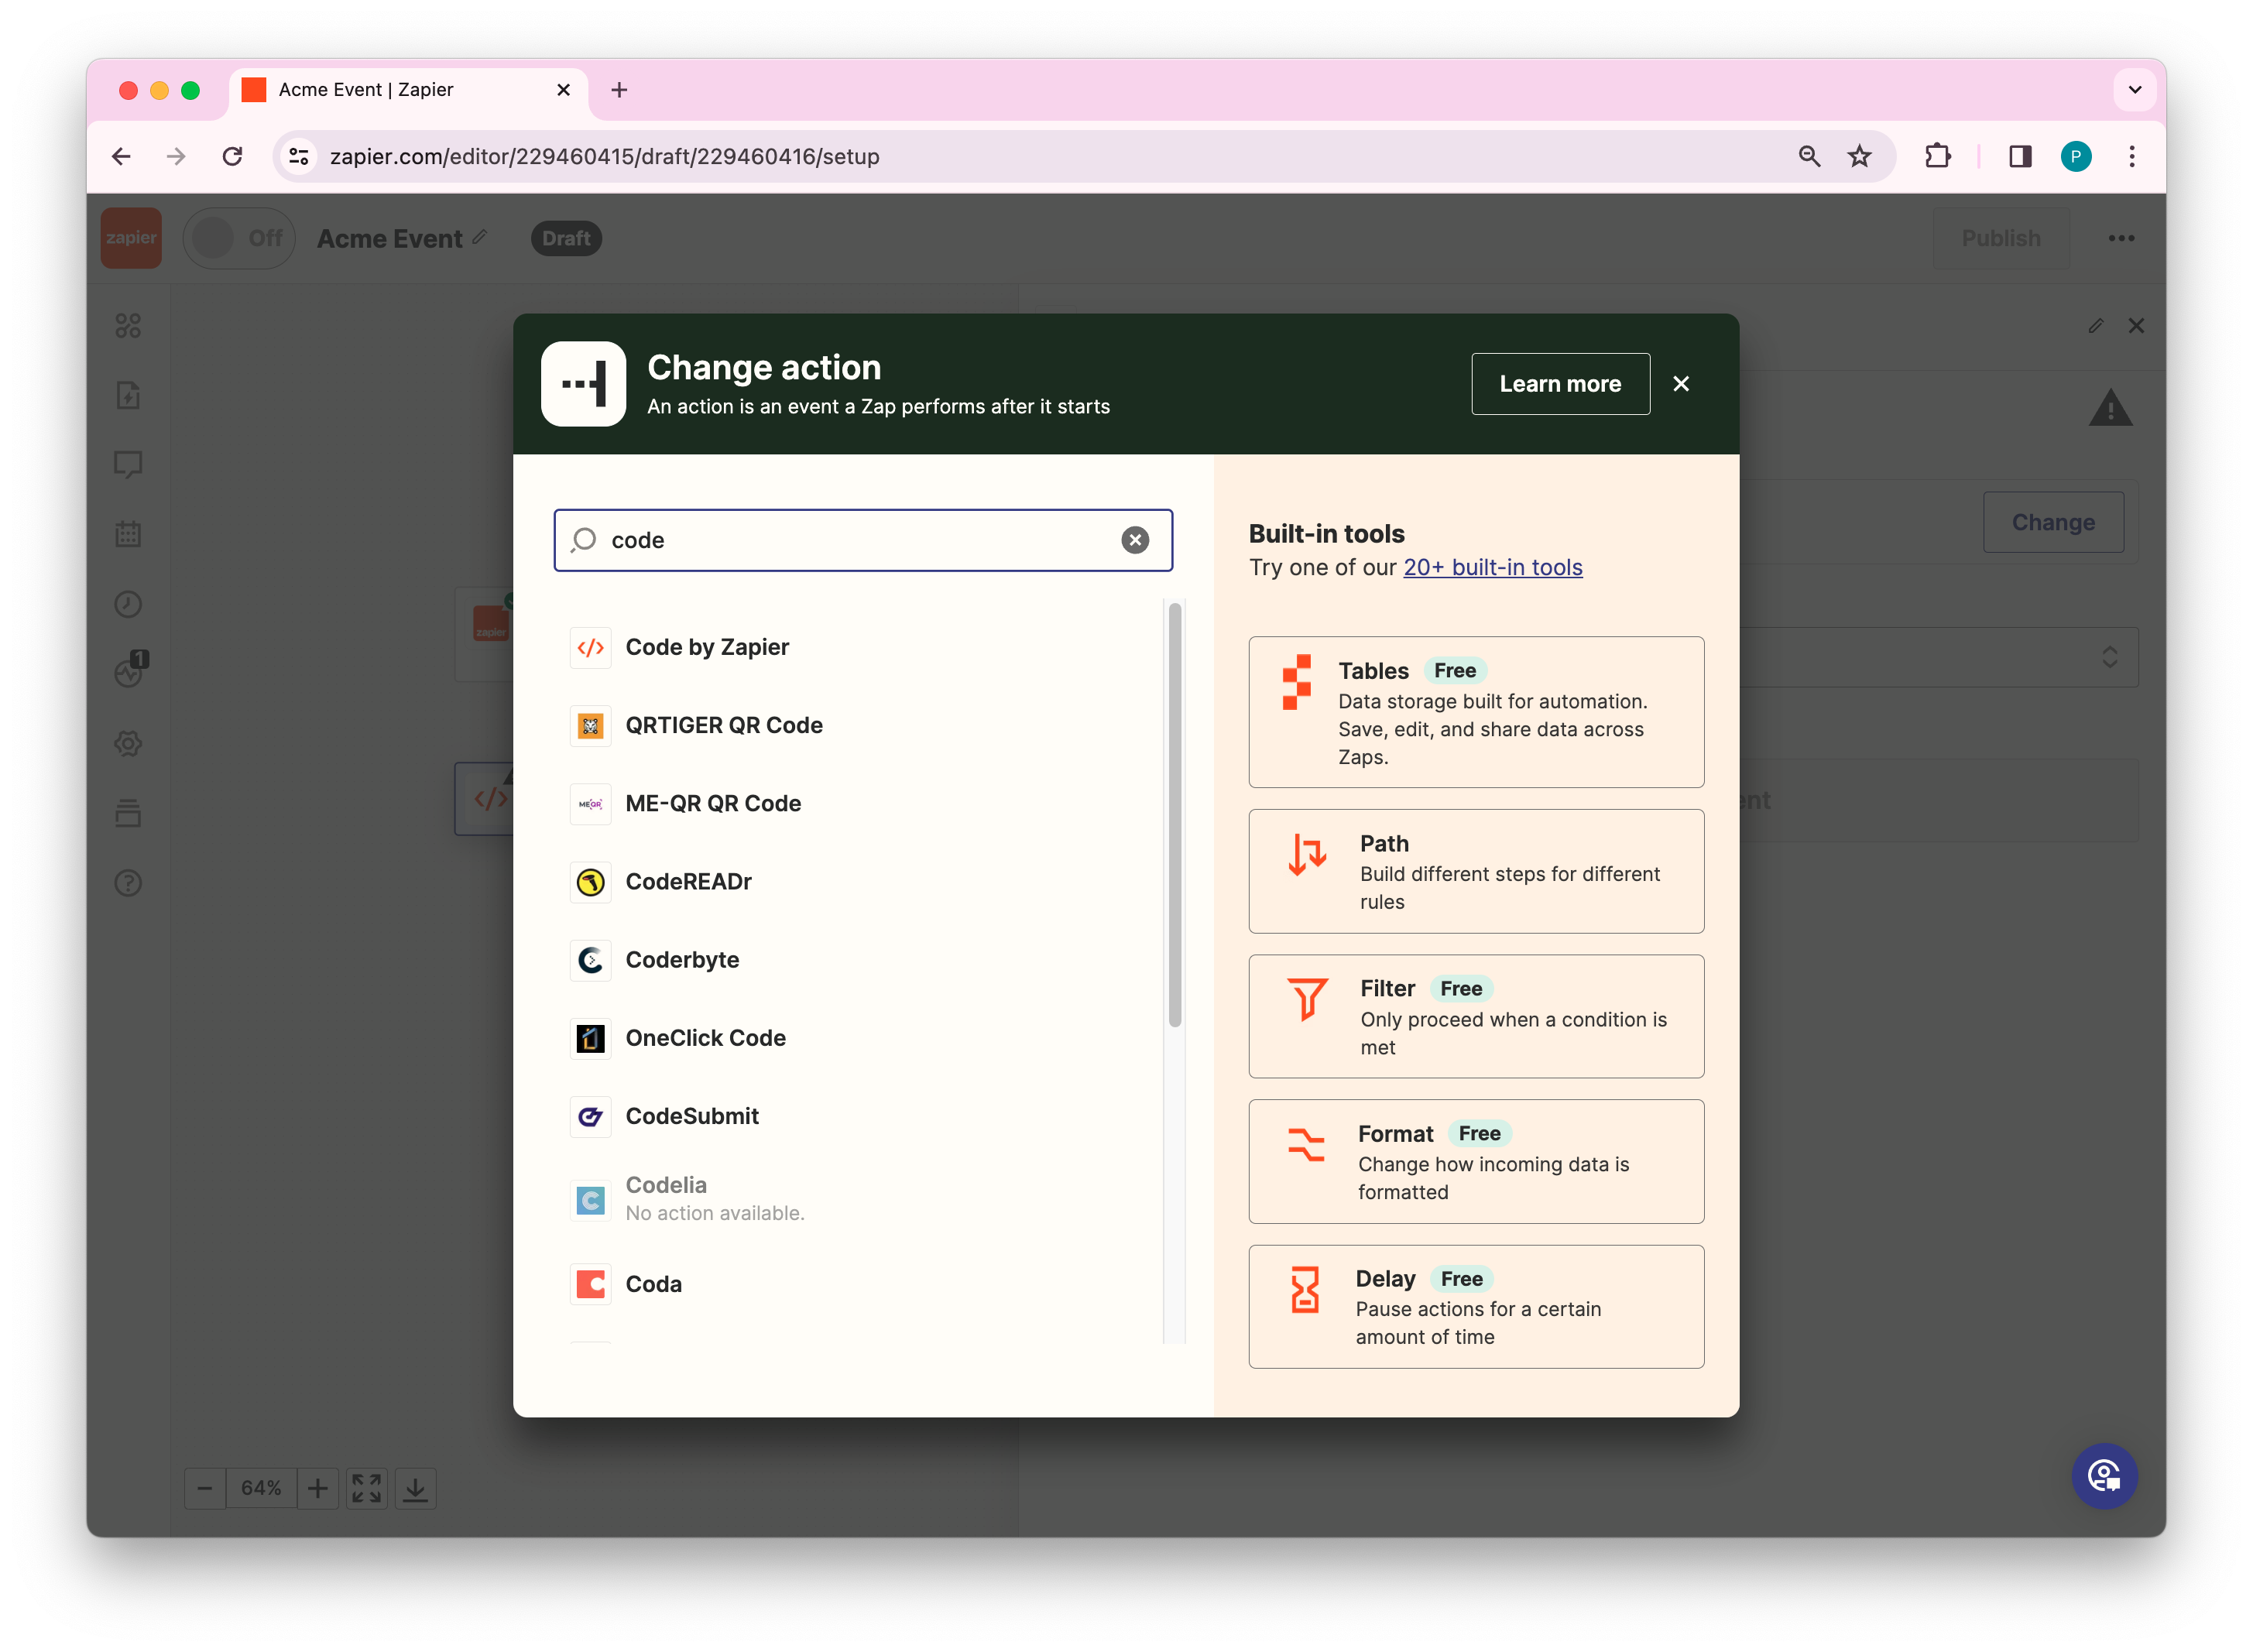
Under Event dropdown, select Run Javascript and click Continue.
Under Input Data, enter a key name for the custom field, say “custom ” and select the unformatted custom fields.
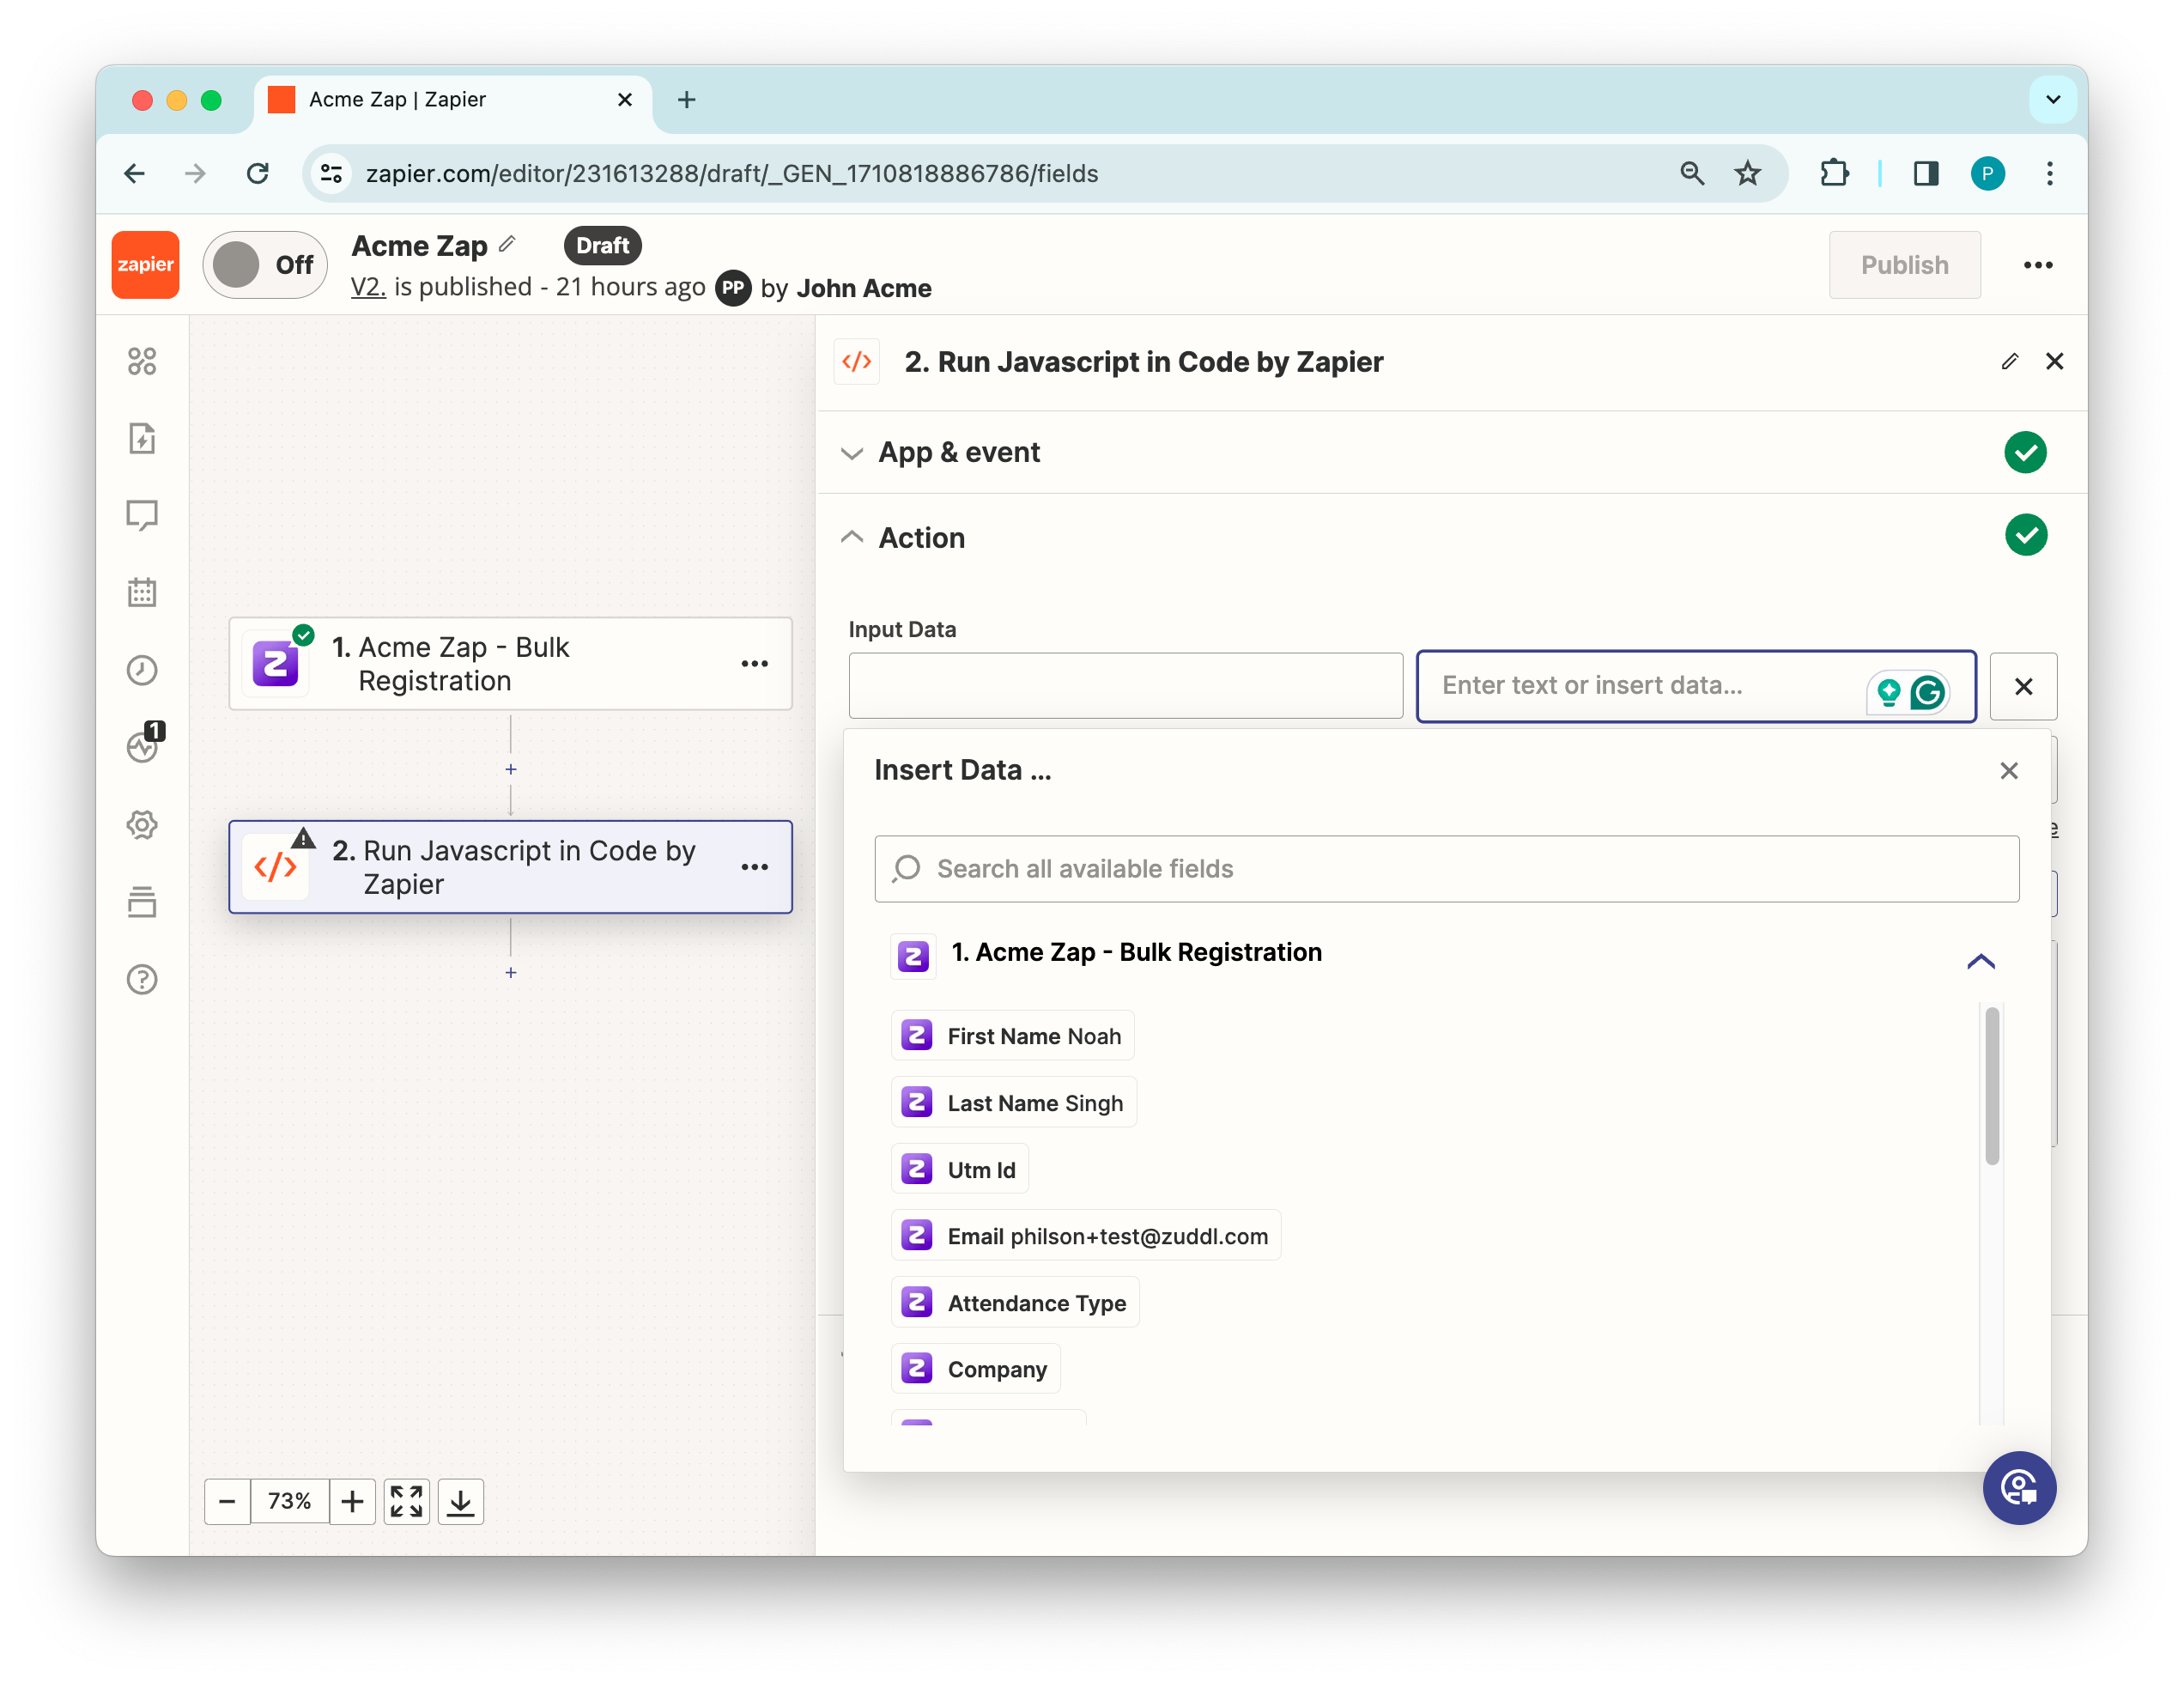
From the Insert Data dropdown, insert the custom fields JSON to the other field.
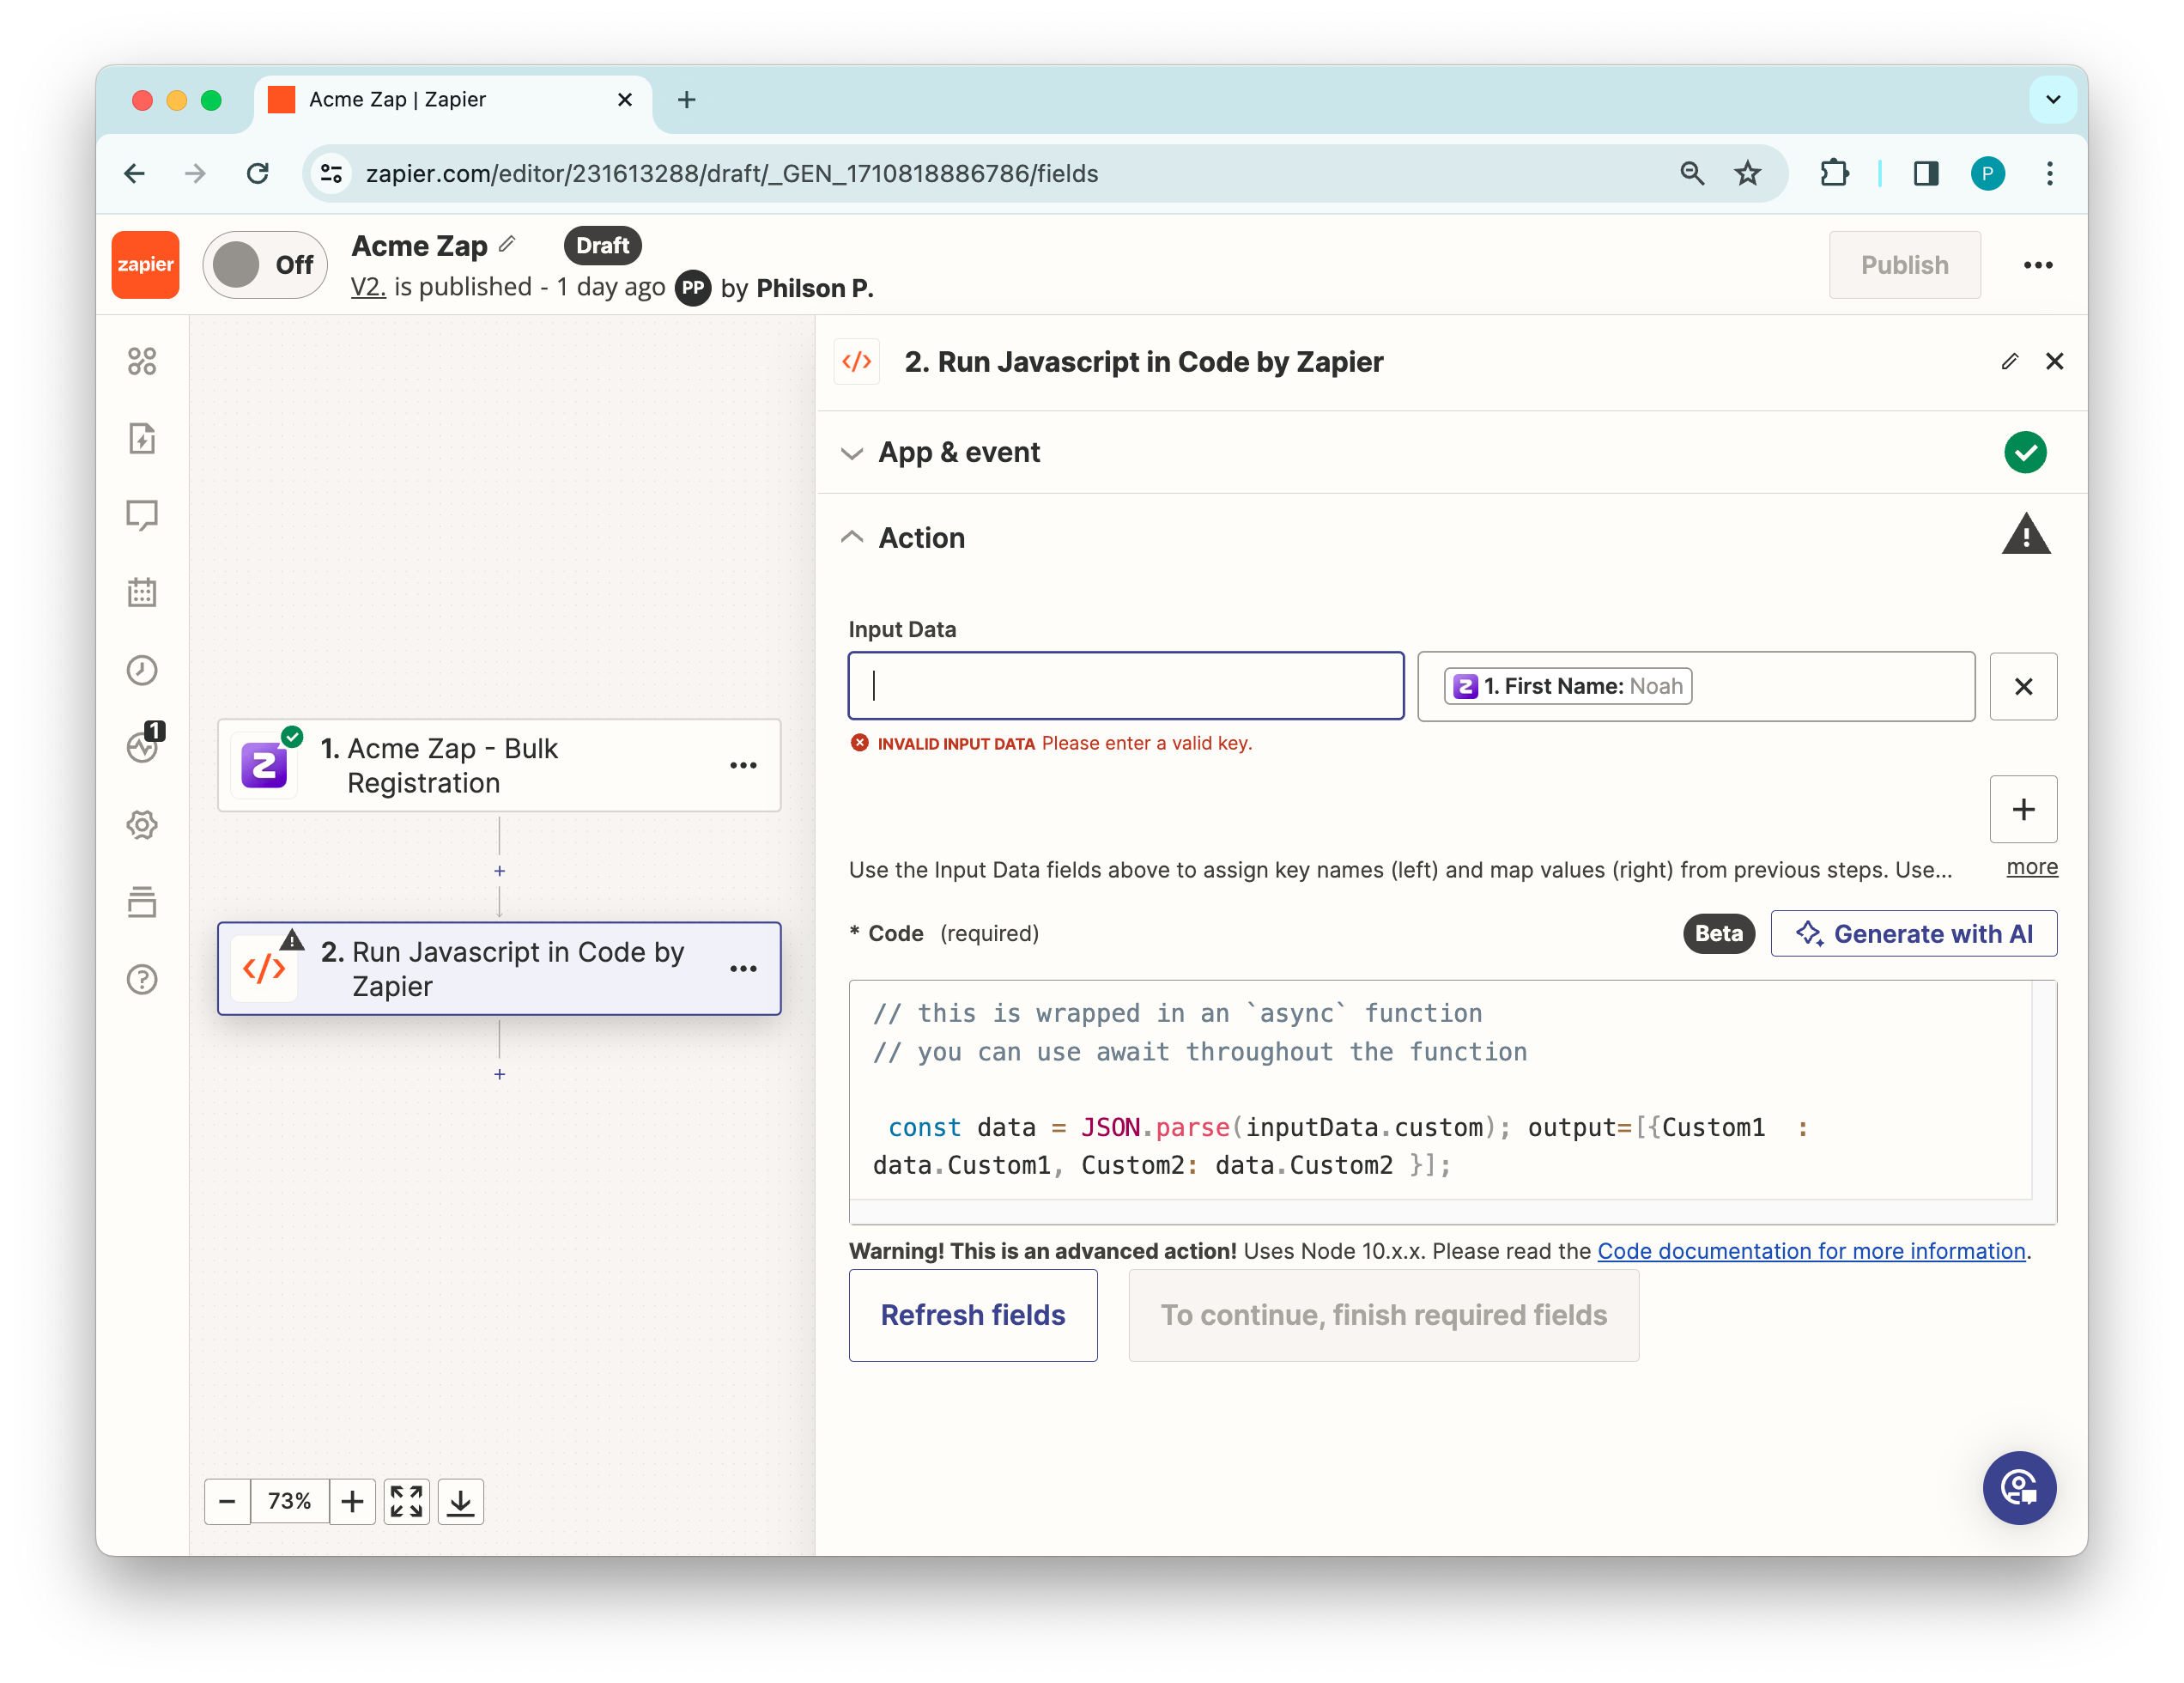
Inside the Code text area, add a custom logic for custom fields added in the Input Data field. For example for 2 custom fields, copy and paste the following code:
const data = JSON.parse(inputData.custom); output=[{Custom1 : data.Custom1, Custom2: data.Custom2 }];Remove the line, output = {{id: 123, hello: “world”}} to receive the correct output.
Click Continue and click Test step. The output of the JavaScript code is shown.
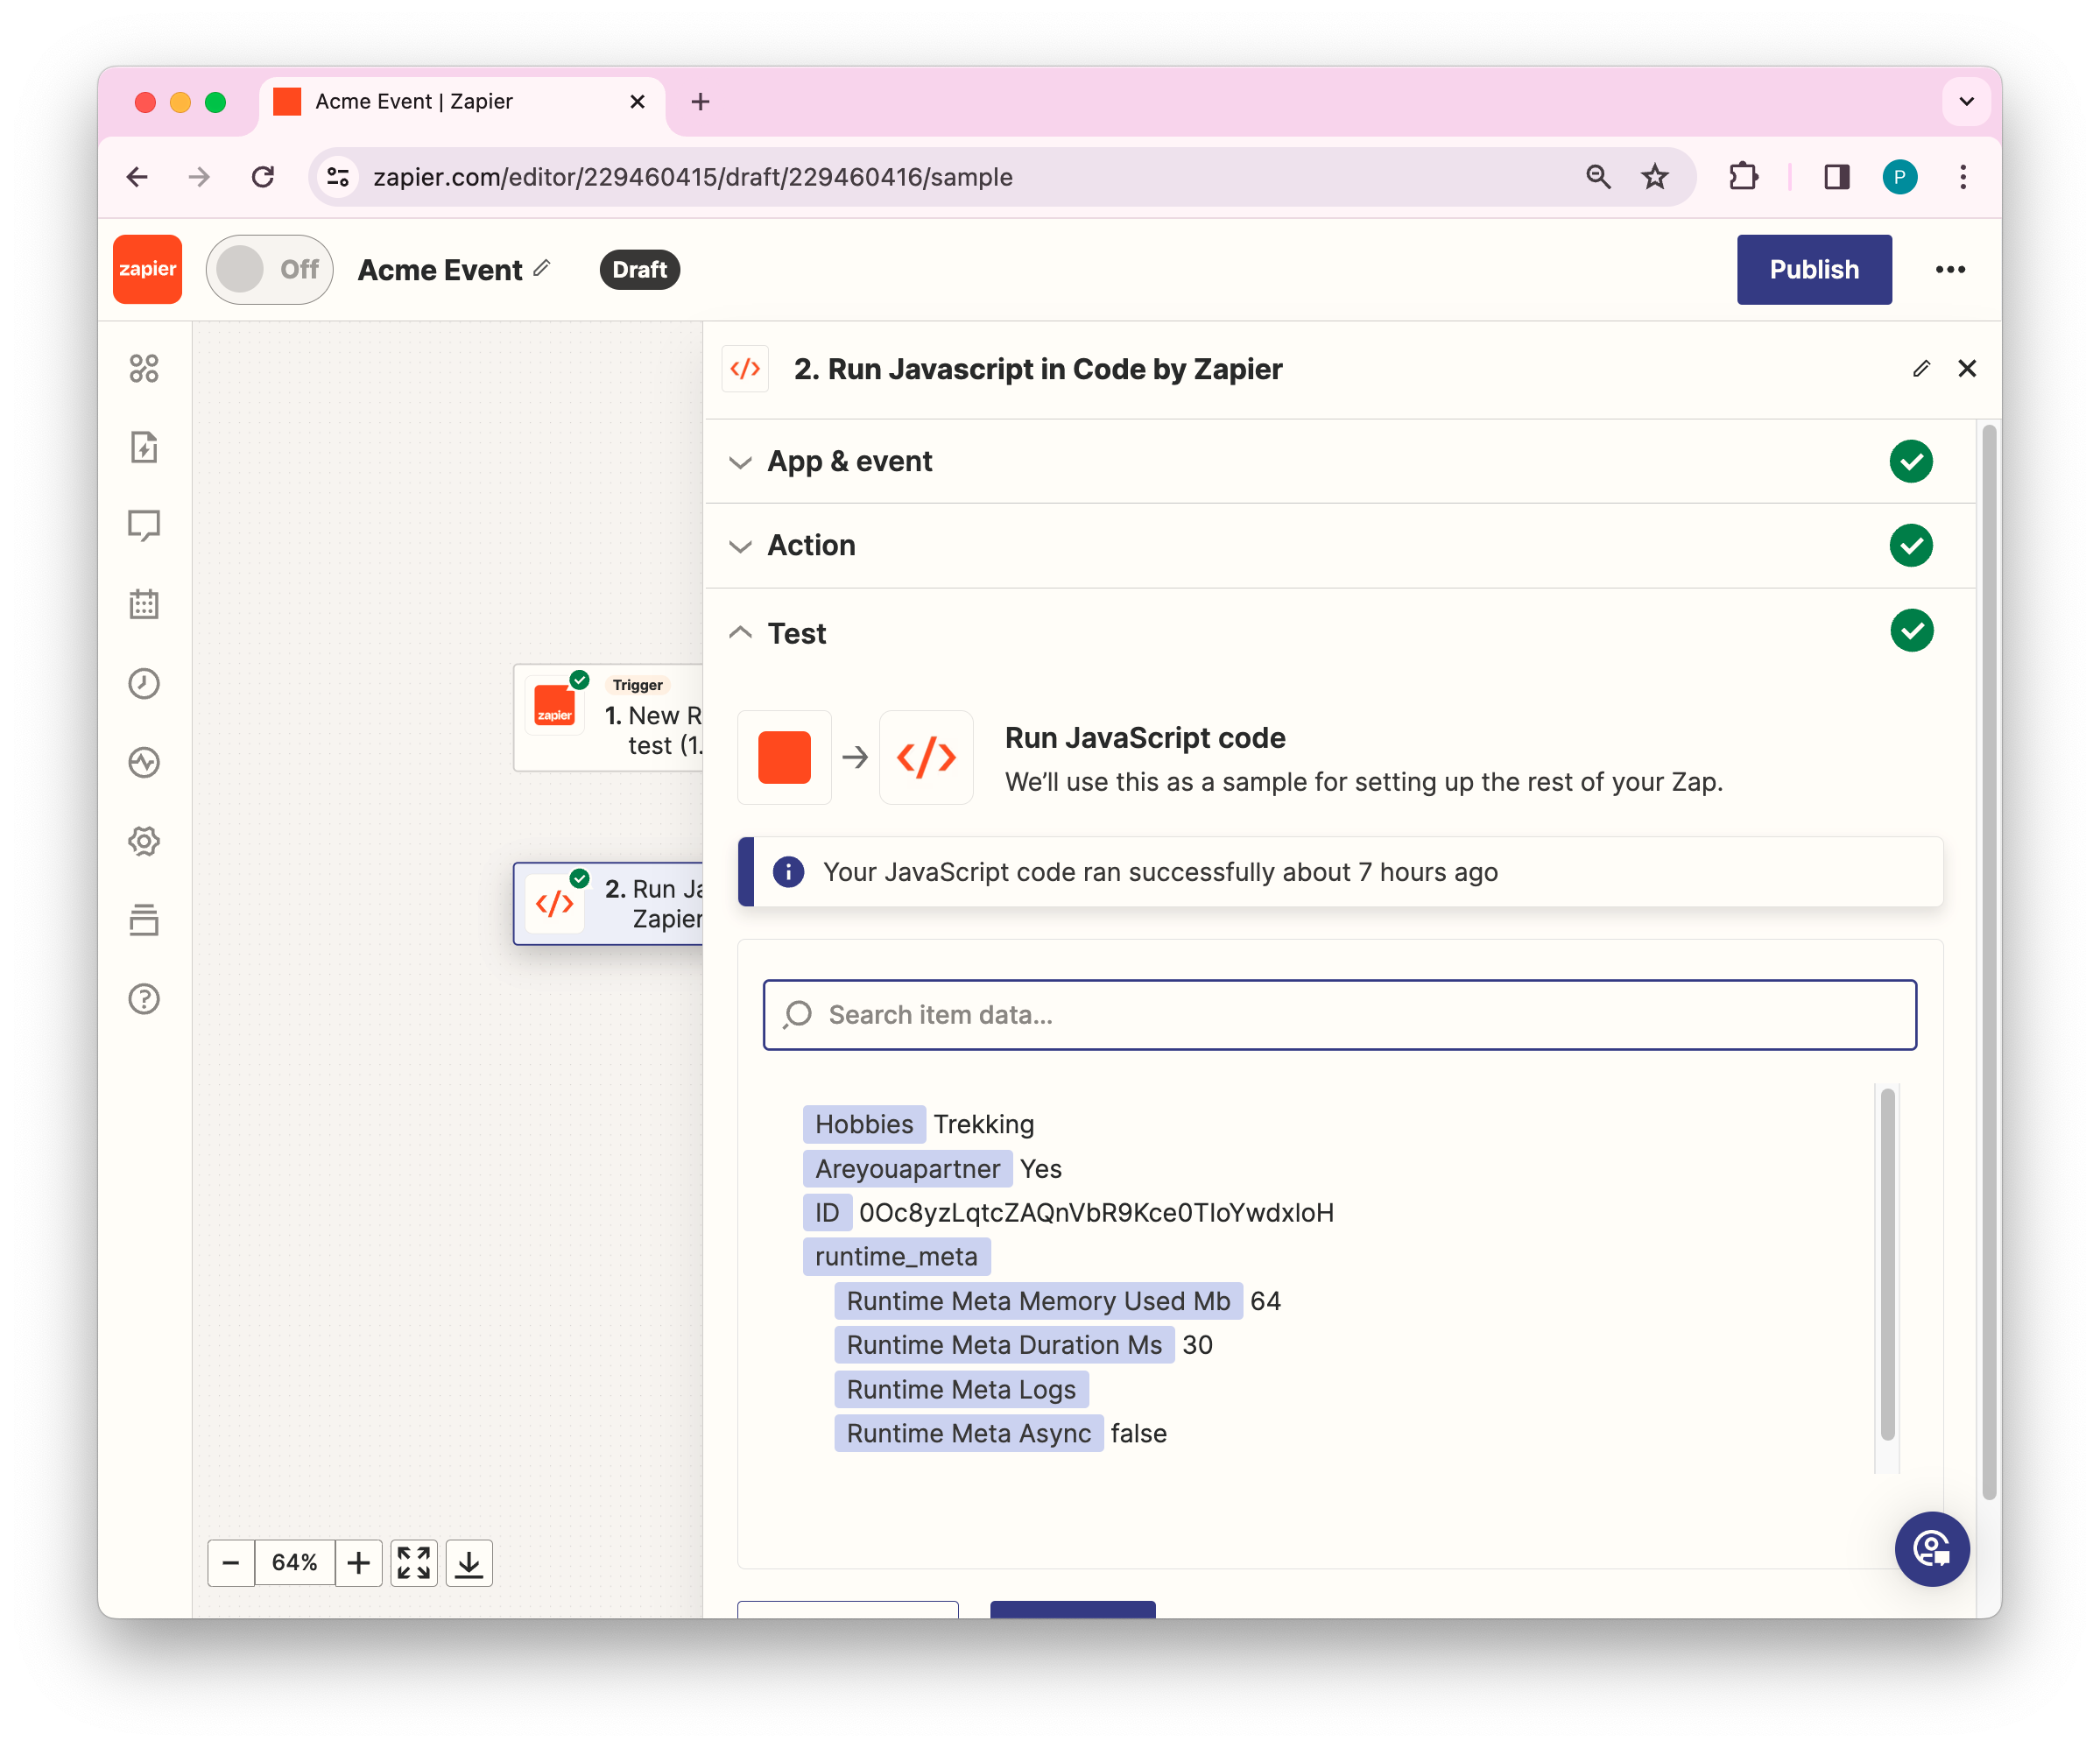
This converts the custom fields into usable fields that can be inserted when choosing another action.
You can also use any other coding tools to convert custom fields from JSON format to individual selectable fields.
Other actions
Now, that you data is prepared on Zapier, you can configure a suitable action.
On the Change action page, search for the required app for the action step. For testing purposes, let’s select “Email by Zapier”.

Inside the Action step, under Choose app & event search for the app where you want Zapier to pass on the data from Zuddl. For testing purposes, let’s select “Email by Zapier”.
In the Event section, select Send Outbound Email and click Continue. This action sends a custom outbound email to a recipient of your choice.
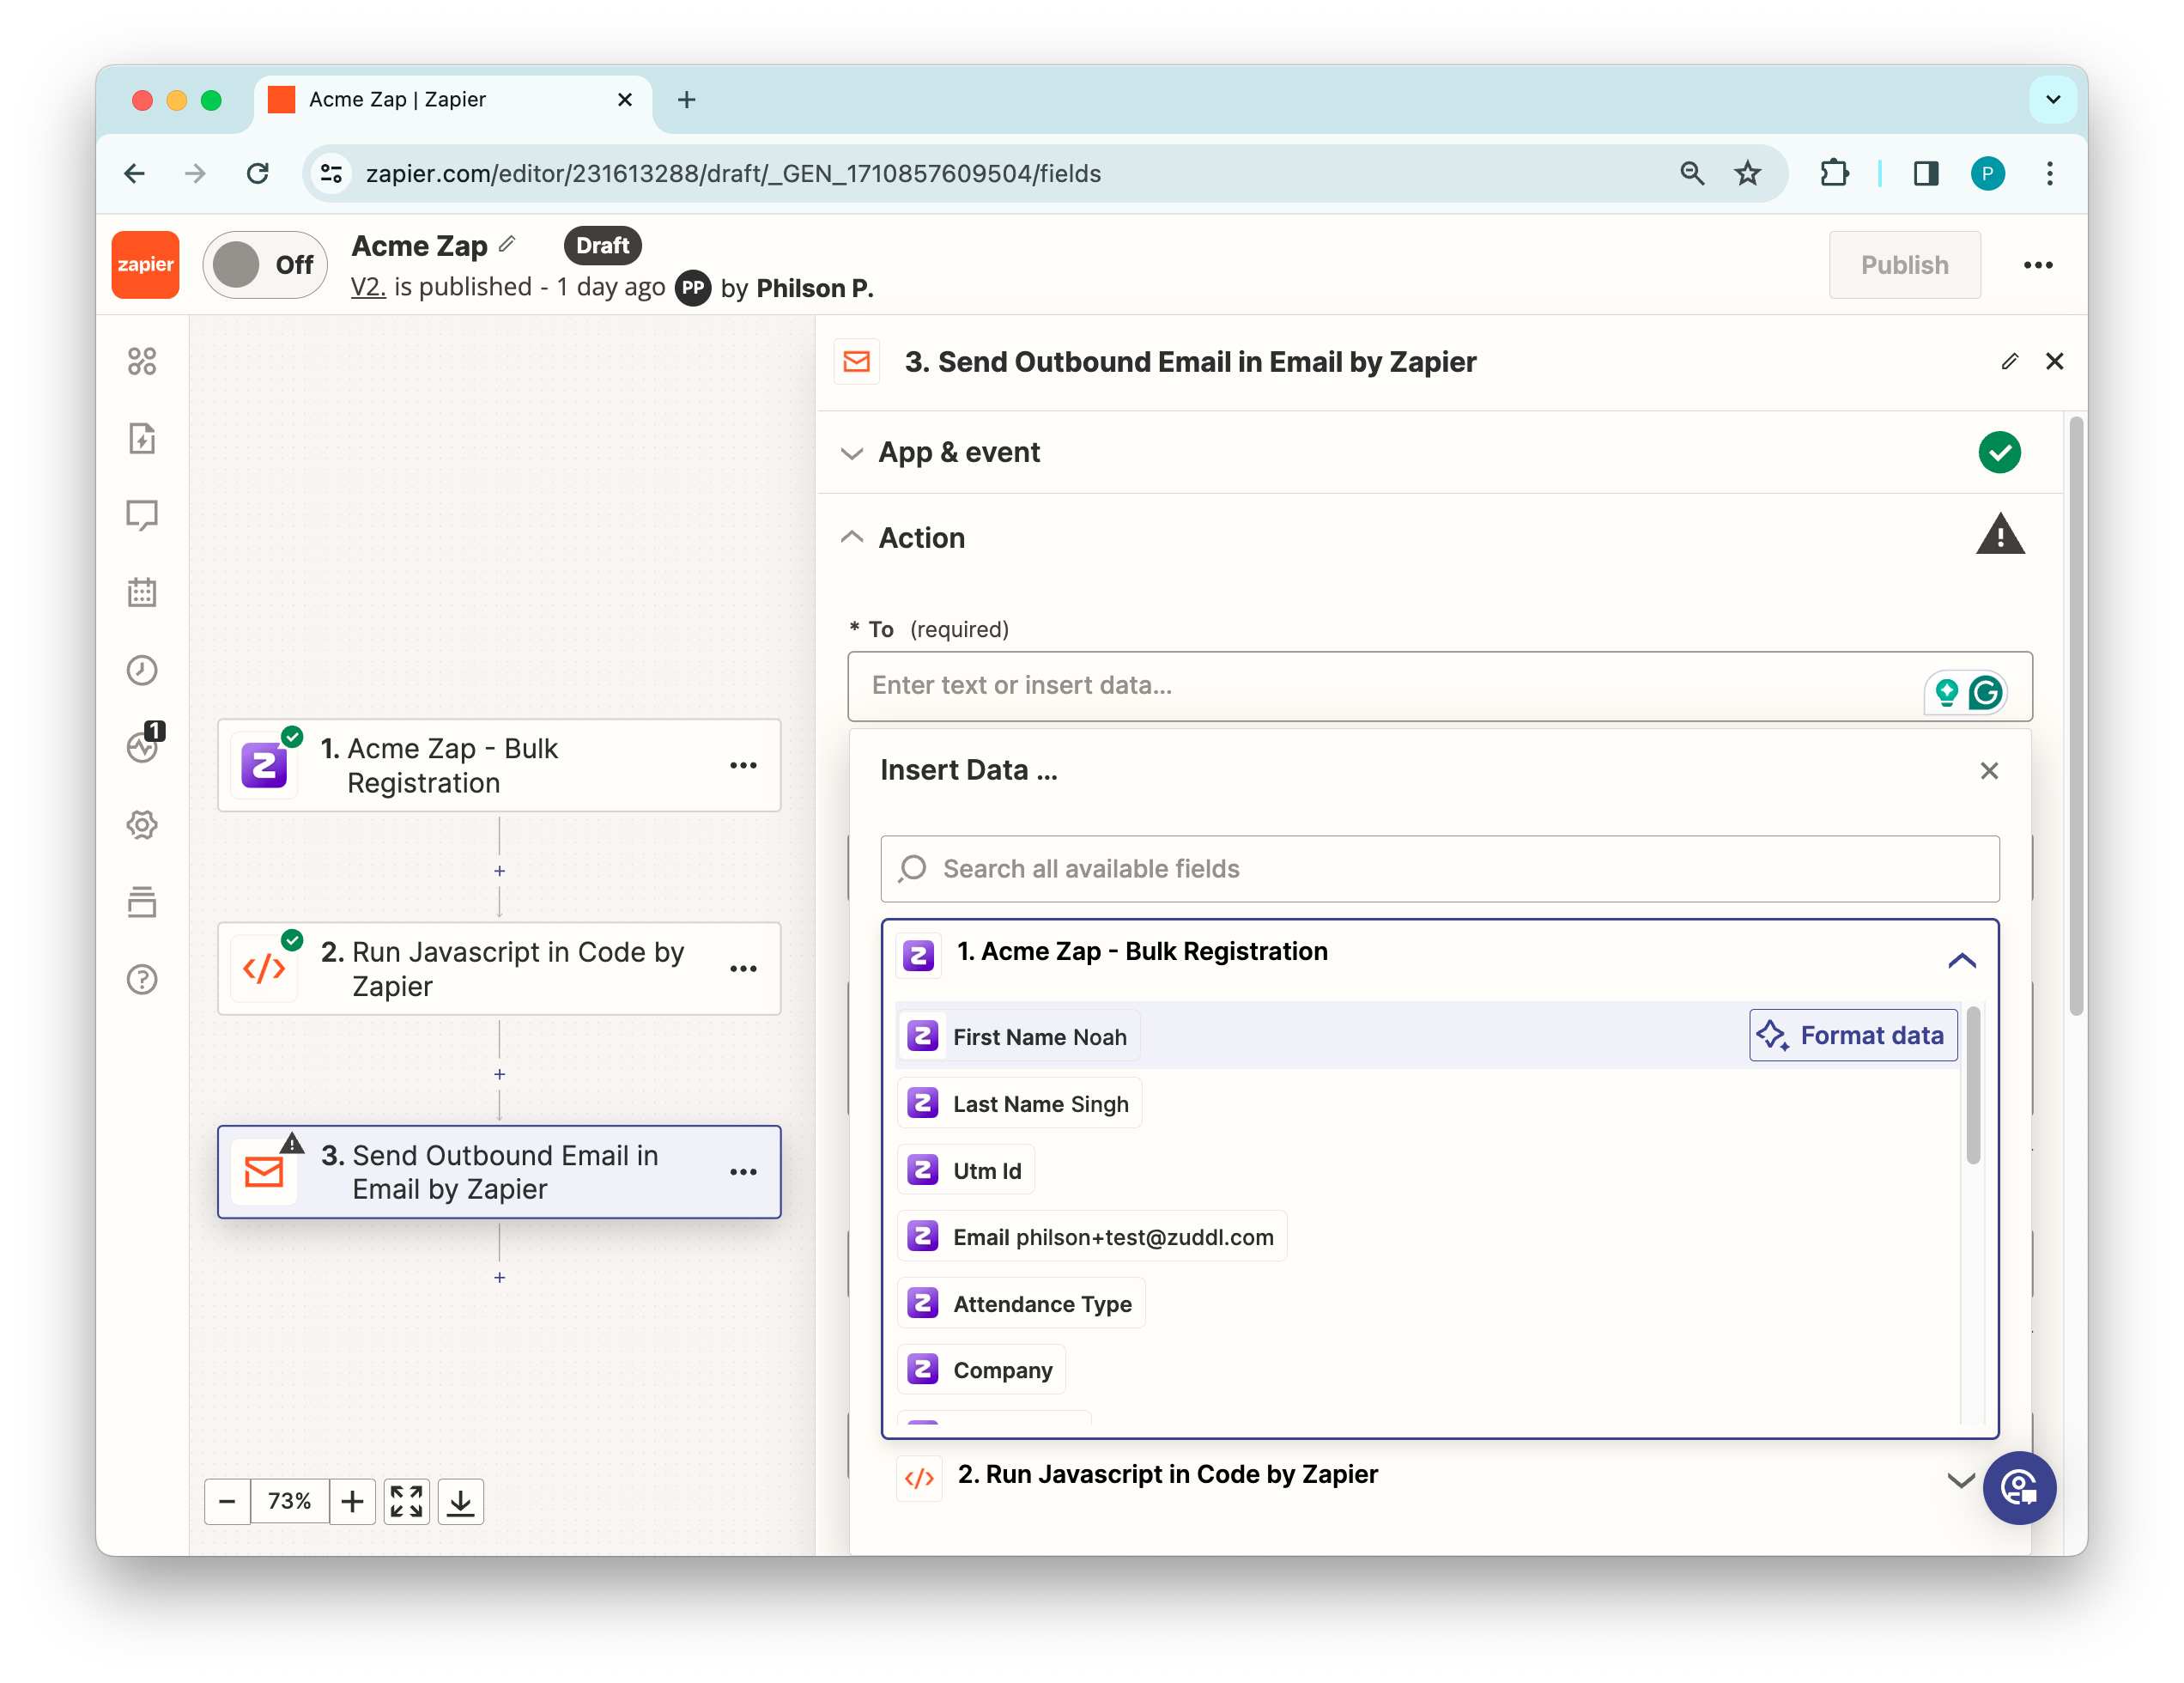
Inside the Action section, you can enter the recipient’s address (To email), Subject, Body, and other fields to set up an email.
Each field shows an Insert Data pop-up that shows all registration details that can be directly inserted.
Click Continue. This shows the filled-up email fields and the empty fields.
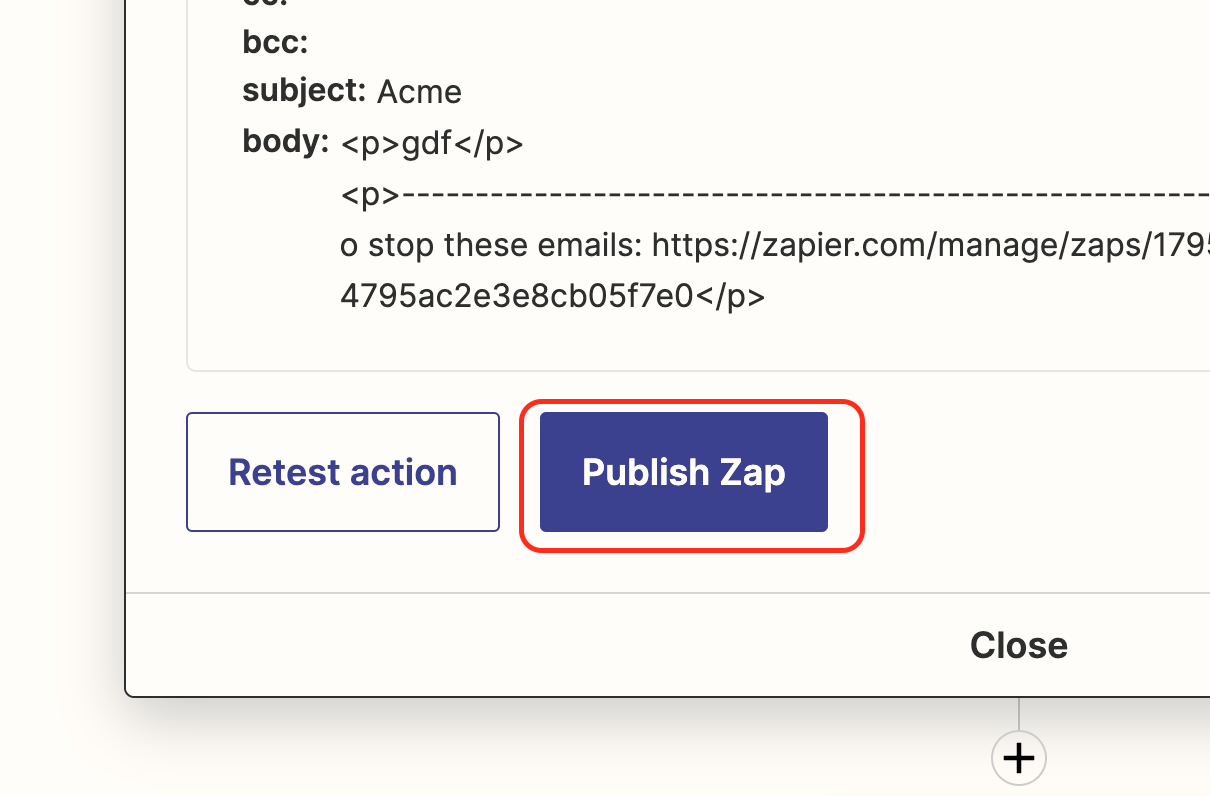
Click Test action. This initiates the action and sends the outbound email and shows the formatted email.
Now, go to your Mailbox and check for the email. If you have received the email, the trigger test is successful.
Come back to your Zapier instance and click Publish Zap.
This turns on the Zap and also the integration on Zuddl. Now, if any attendee is invited through Zuddl, within 1 minute, the data flows into Zapier via the trigger.
Viewing Zap history
You can also view the history of the Zap. All registration data that flows into Zapier can be easily seen in the Zap History tool. The latest registrations would take about 1 minute to arrive at Zapier.
Click History on the right-hand side of the Zap.
Under the Data In tab, you can view the registrant details such as: firstName, lastName, email, designation, company, phoneNumber, eventId, eventType.
You can also capture registrations in bulk using the Looping by Zapier app. Learn how to capture registrations in bulk using the looping function by Zapier.