How to Create a Zapier Workflow to Capture Attendee Activity
Last updated: August 1, 2025
The actions attendees take within an event give insights that deepen your understanding of your attendees and equip you to make meaningful conversations with them and eventually convert them into customers.
All the different activities that are captured in an event are described in the activity table. Interaction activities such as polls answered or questions upvoted to time spent activities such as total time spent in the event, time spent in a session, and so on. The trigger activates when a user activity is detected and is passed as the event happens. To capture user activity on Zapier, you need to do the following:
1. Choose app & event
-
On your Zuddl dashboard, create a new event.
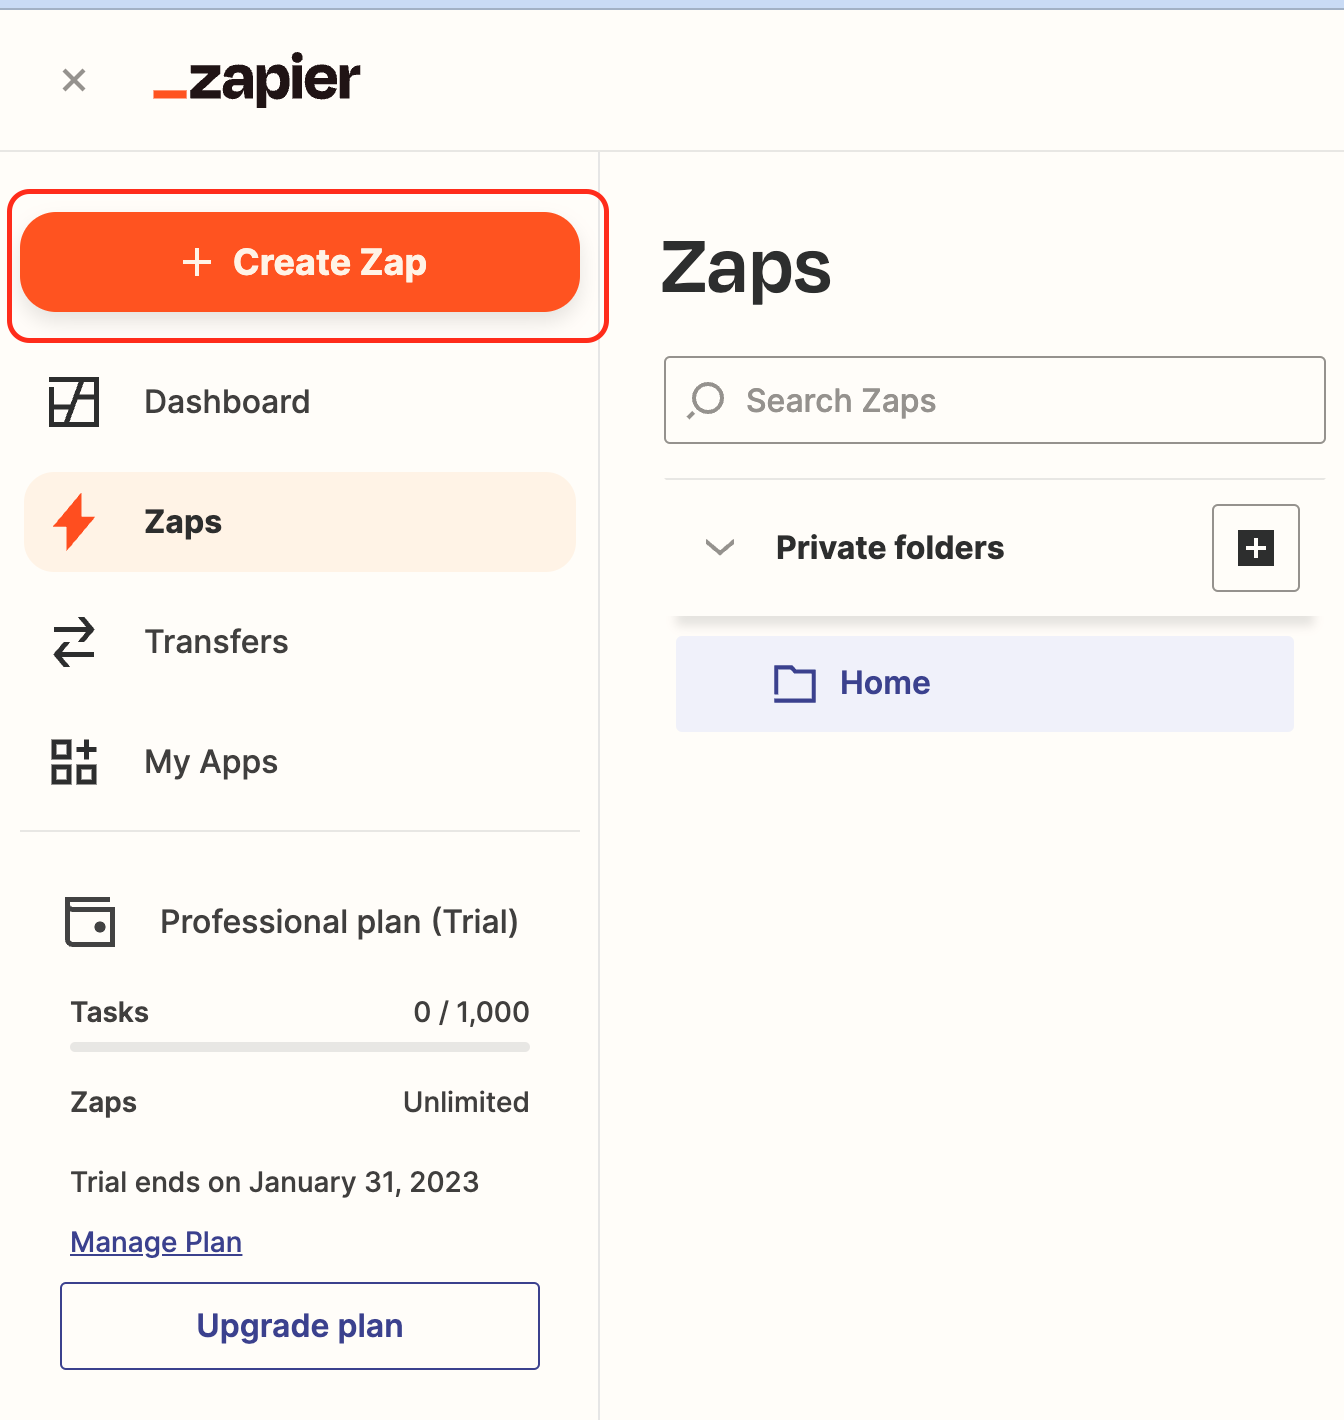
Now go to your Zapier dashboard, click + Create Zap , and select New Zap.
-
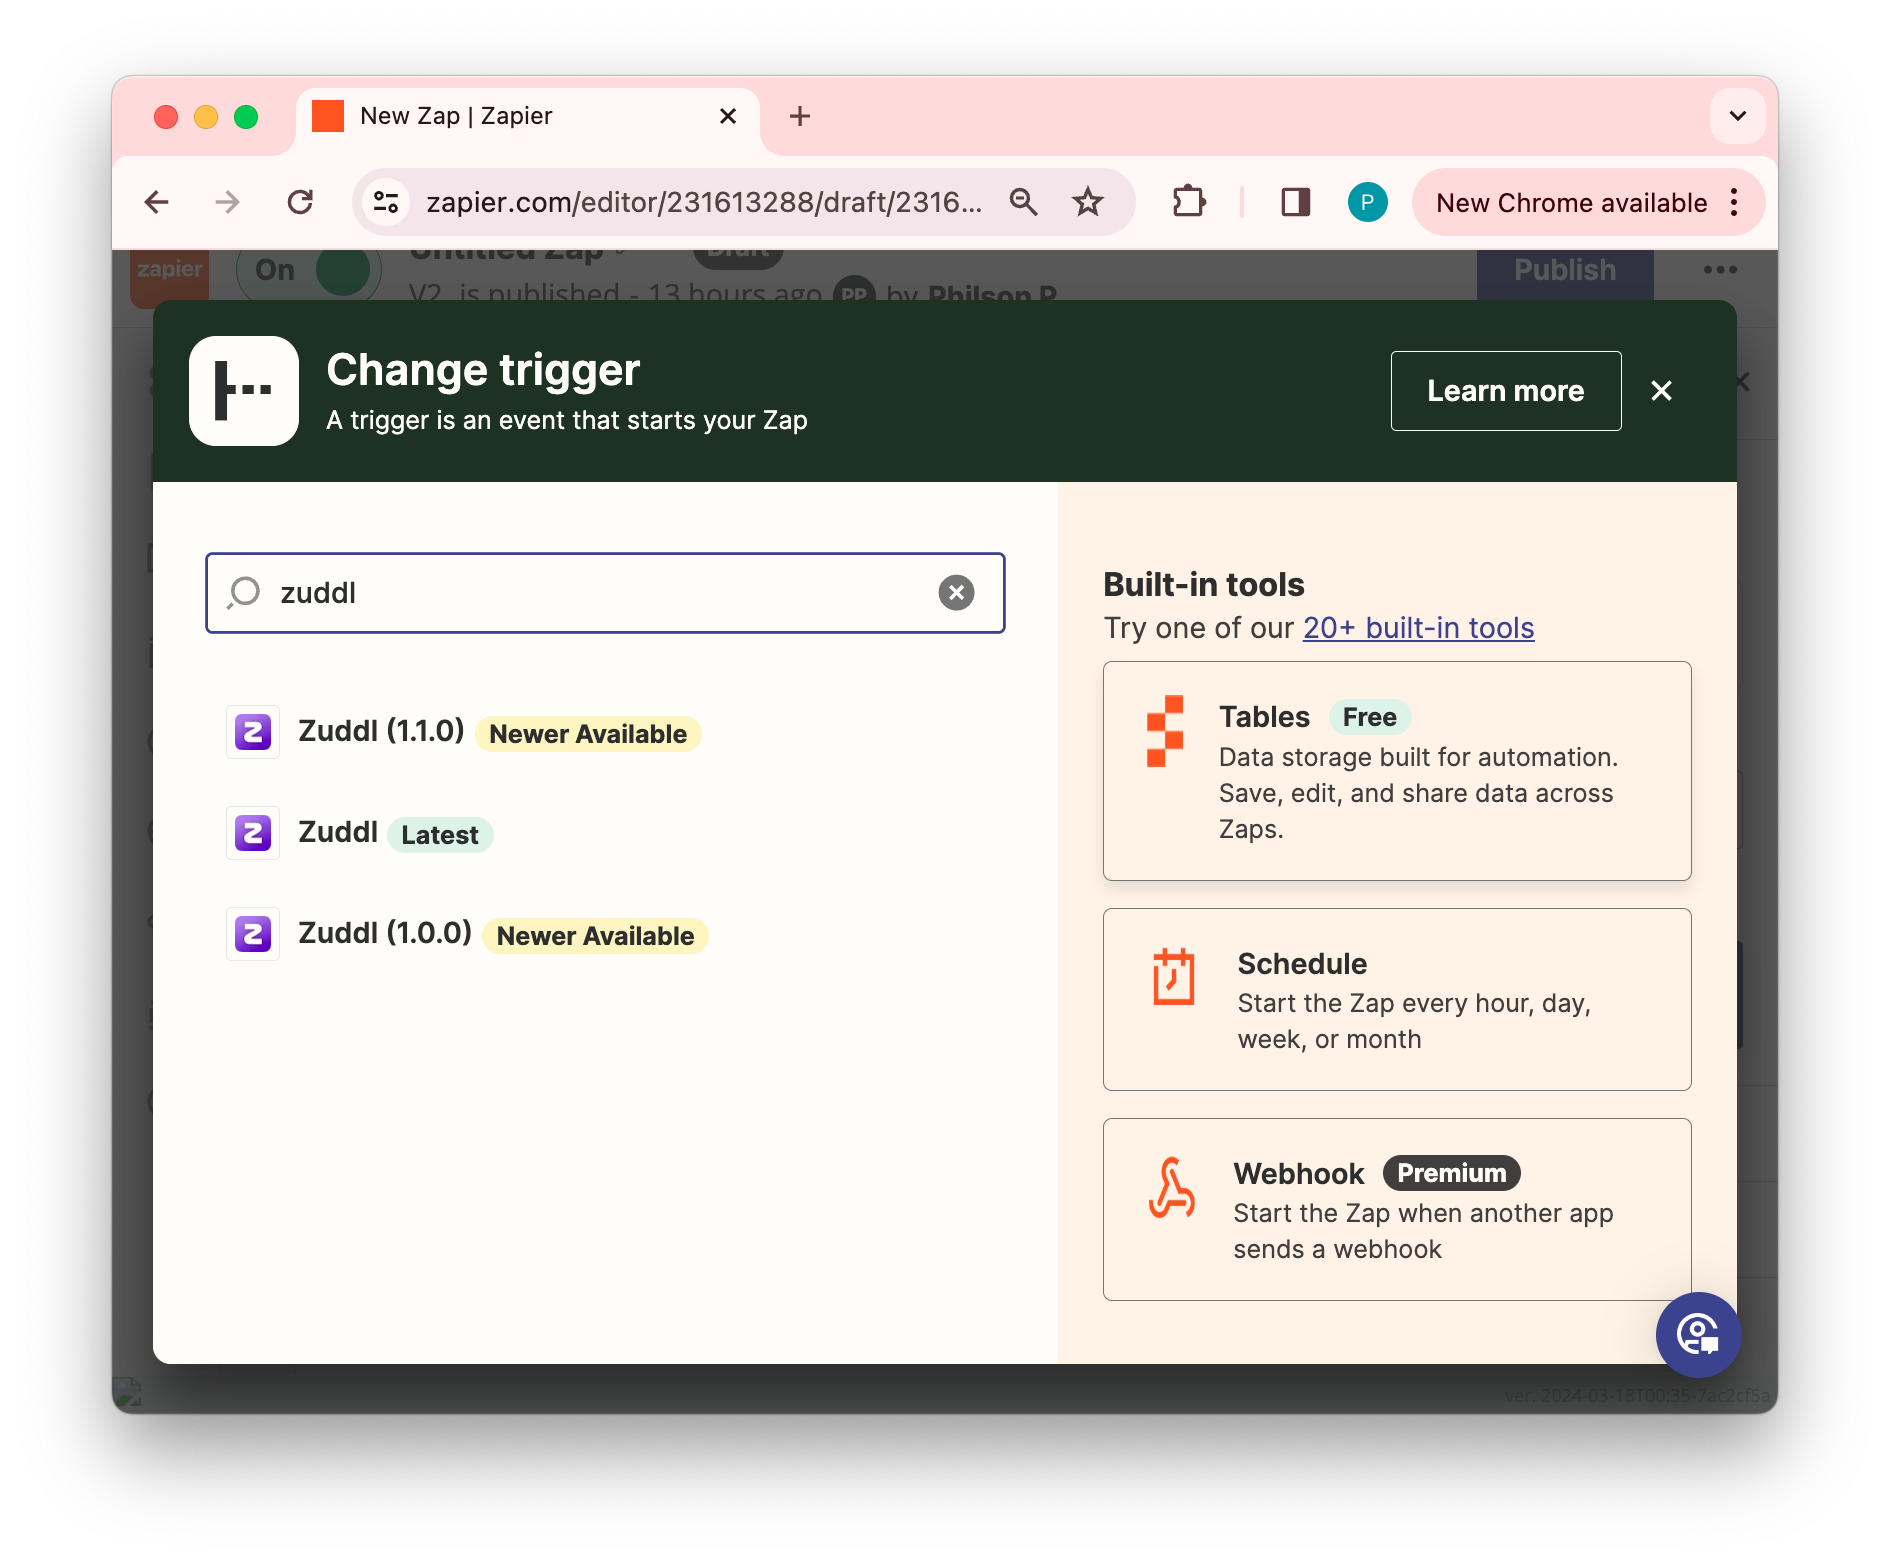
On the Change trigger screen, search for the Zuddl app, and click on the latest version of the Zuddl app.
-
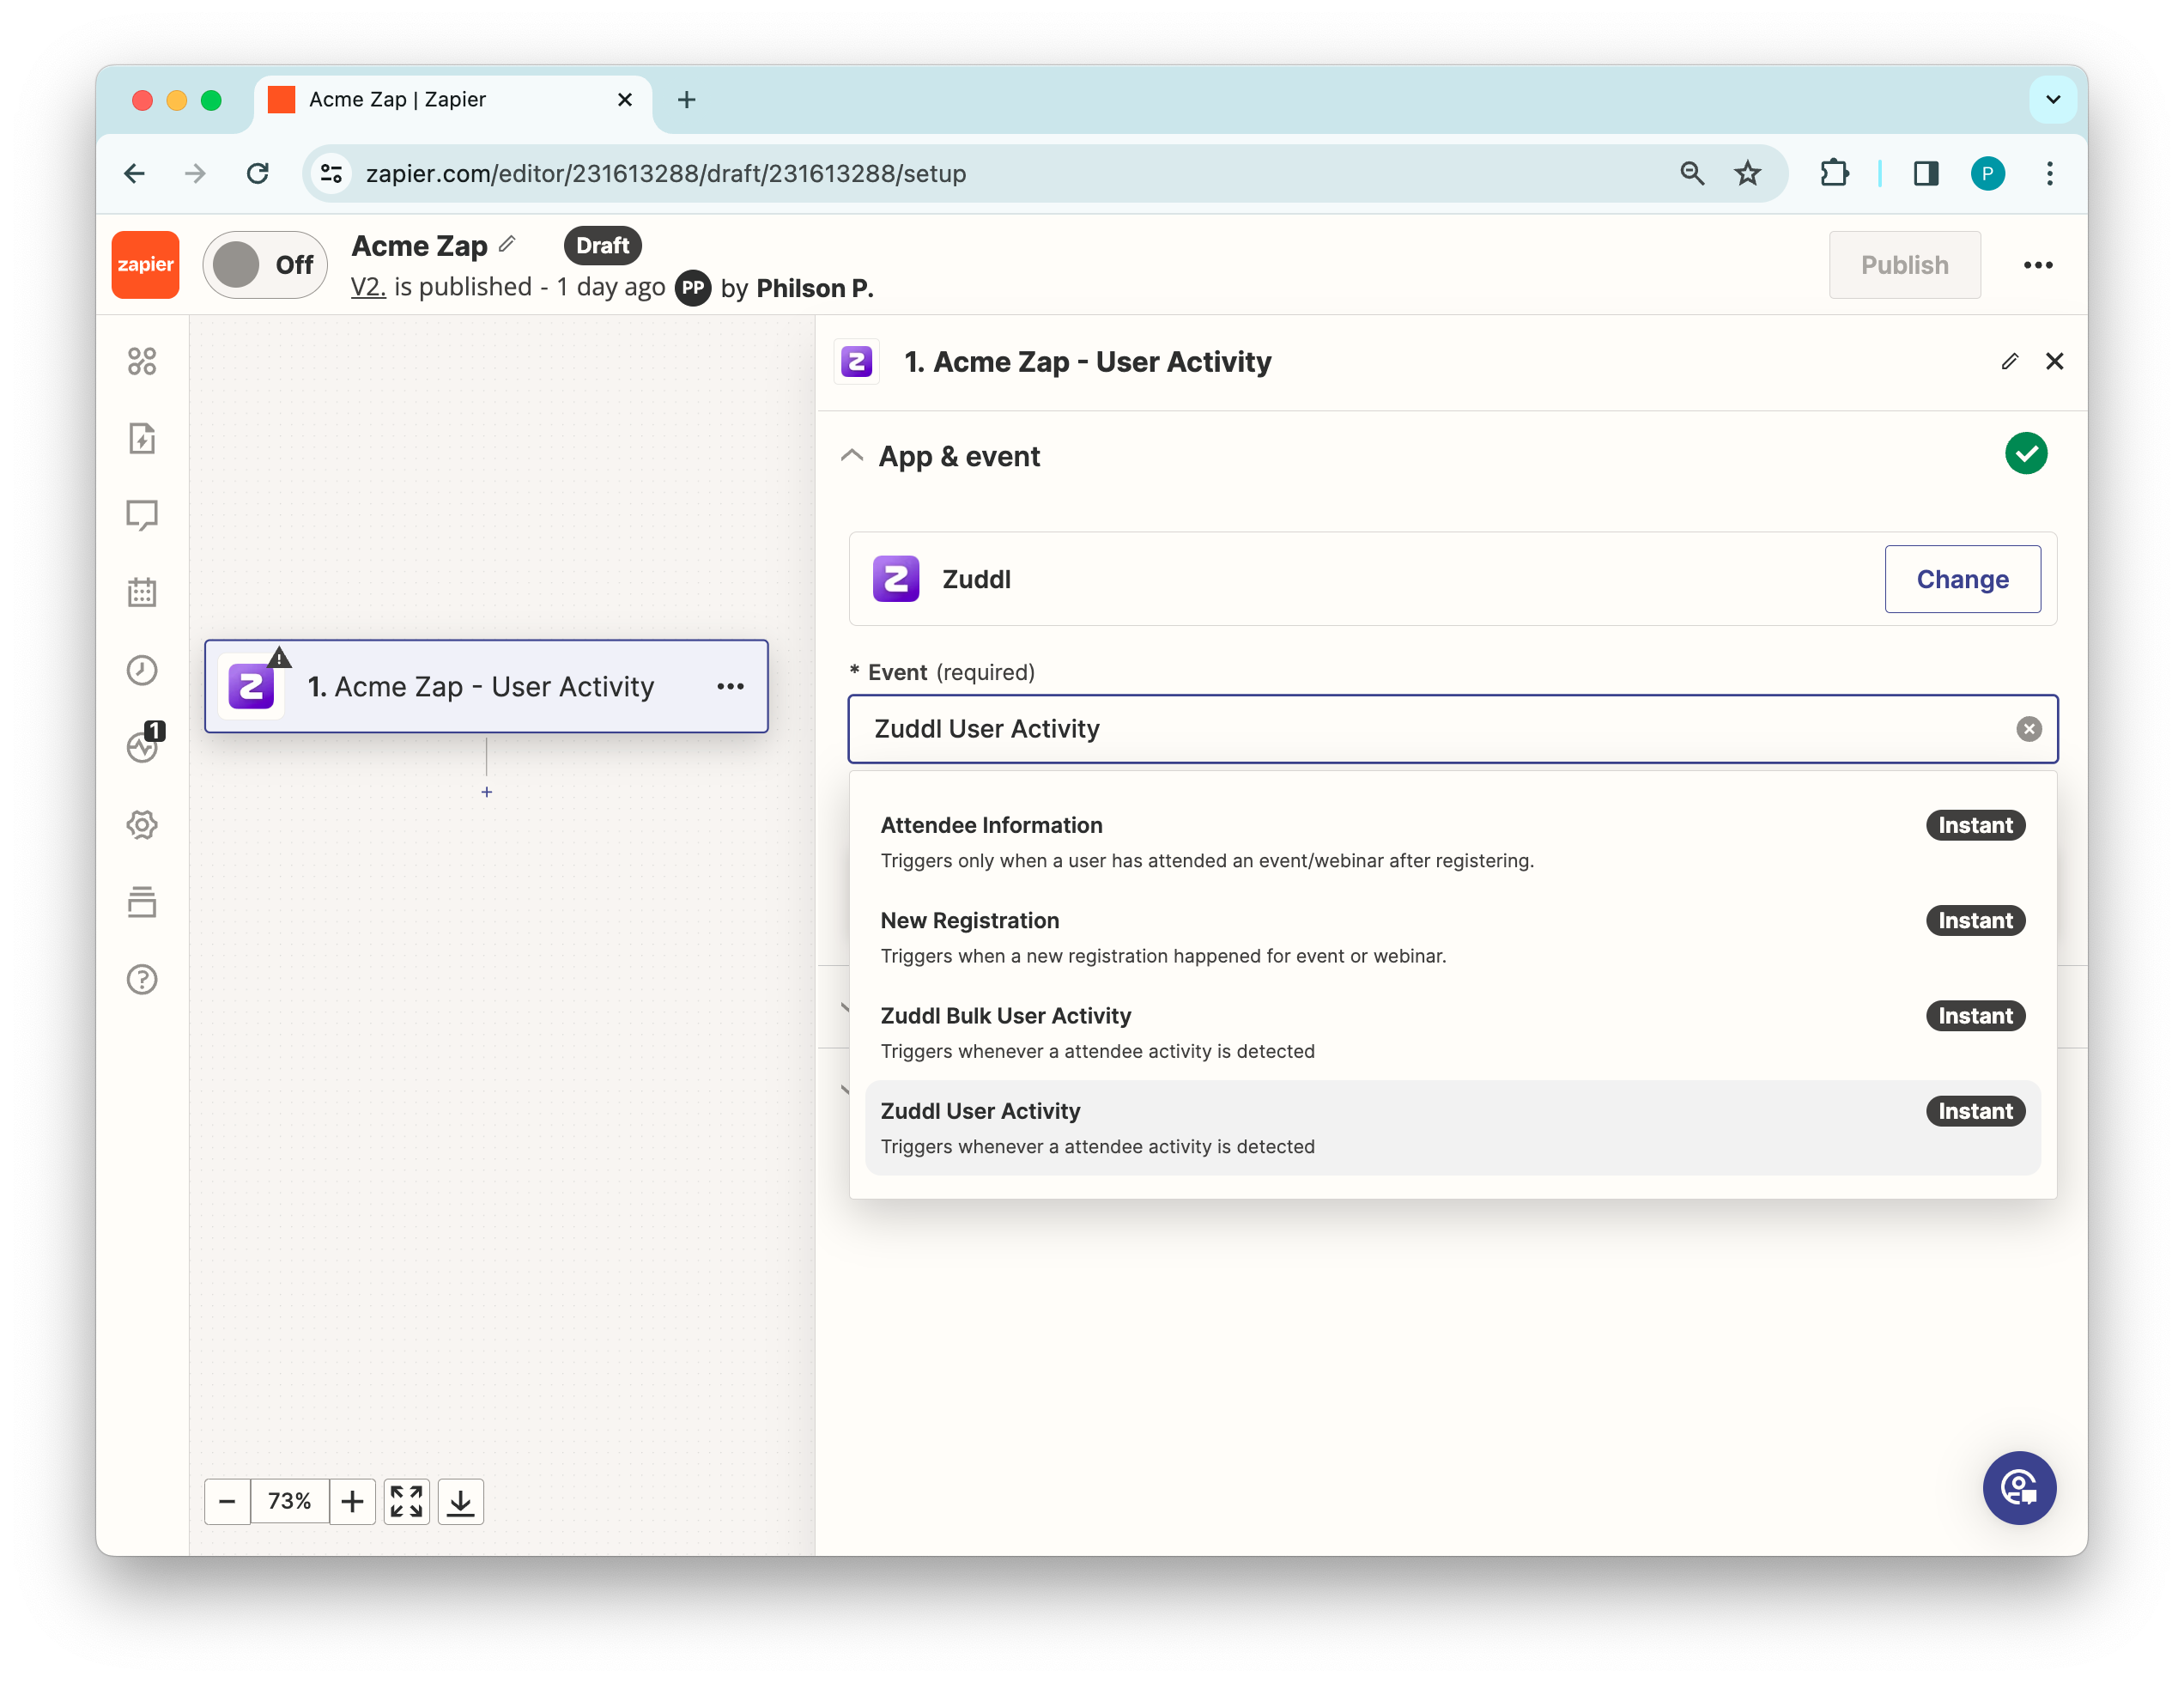
Under App & event in the Event dropdown, select User Activity and click Continue.
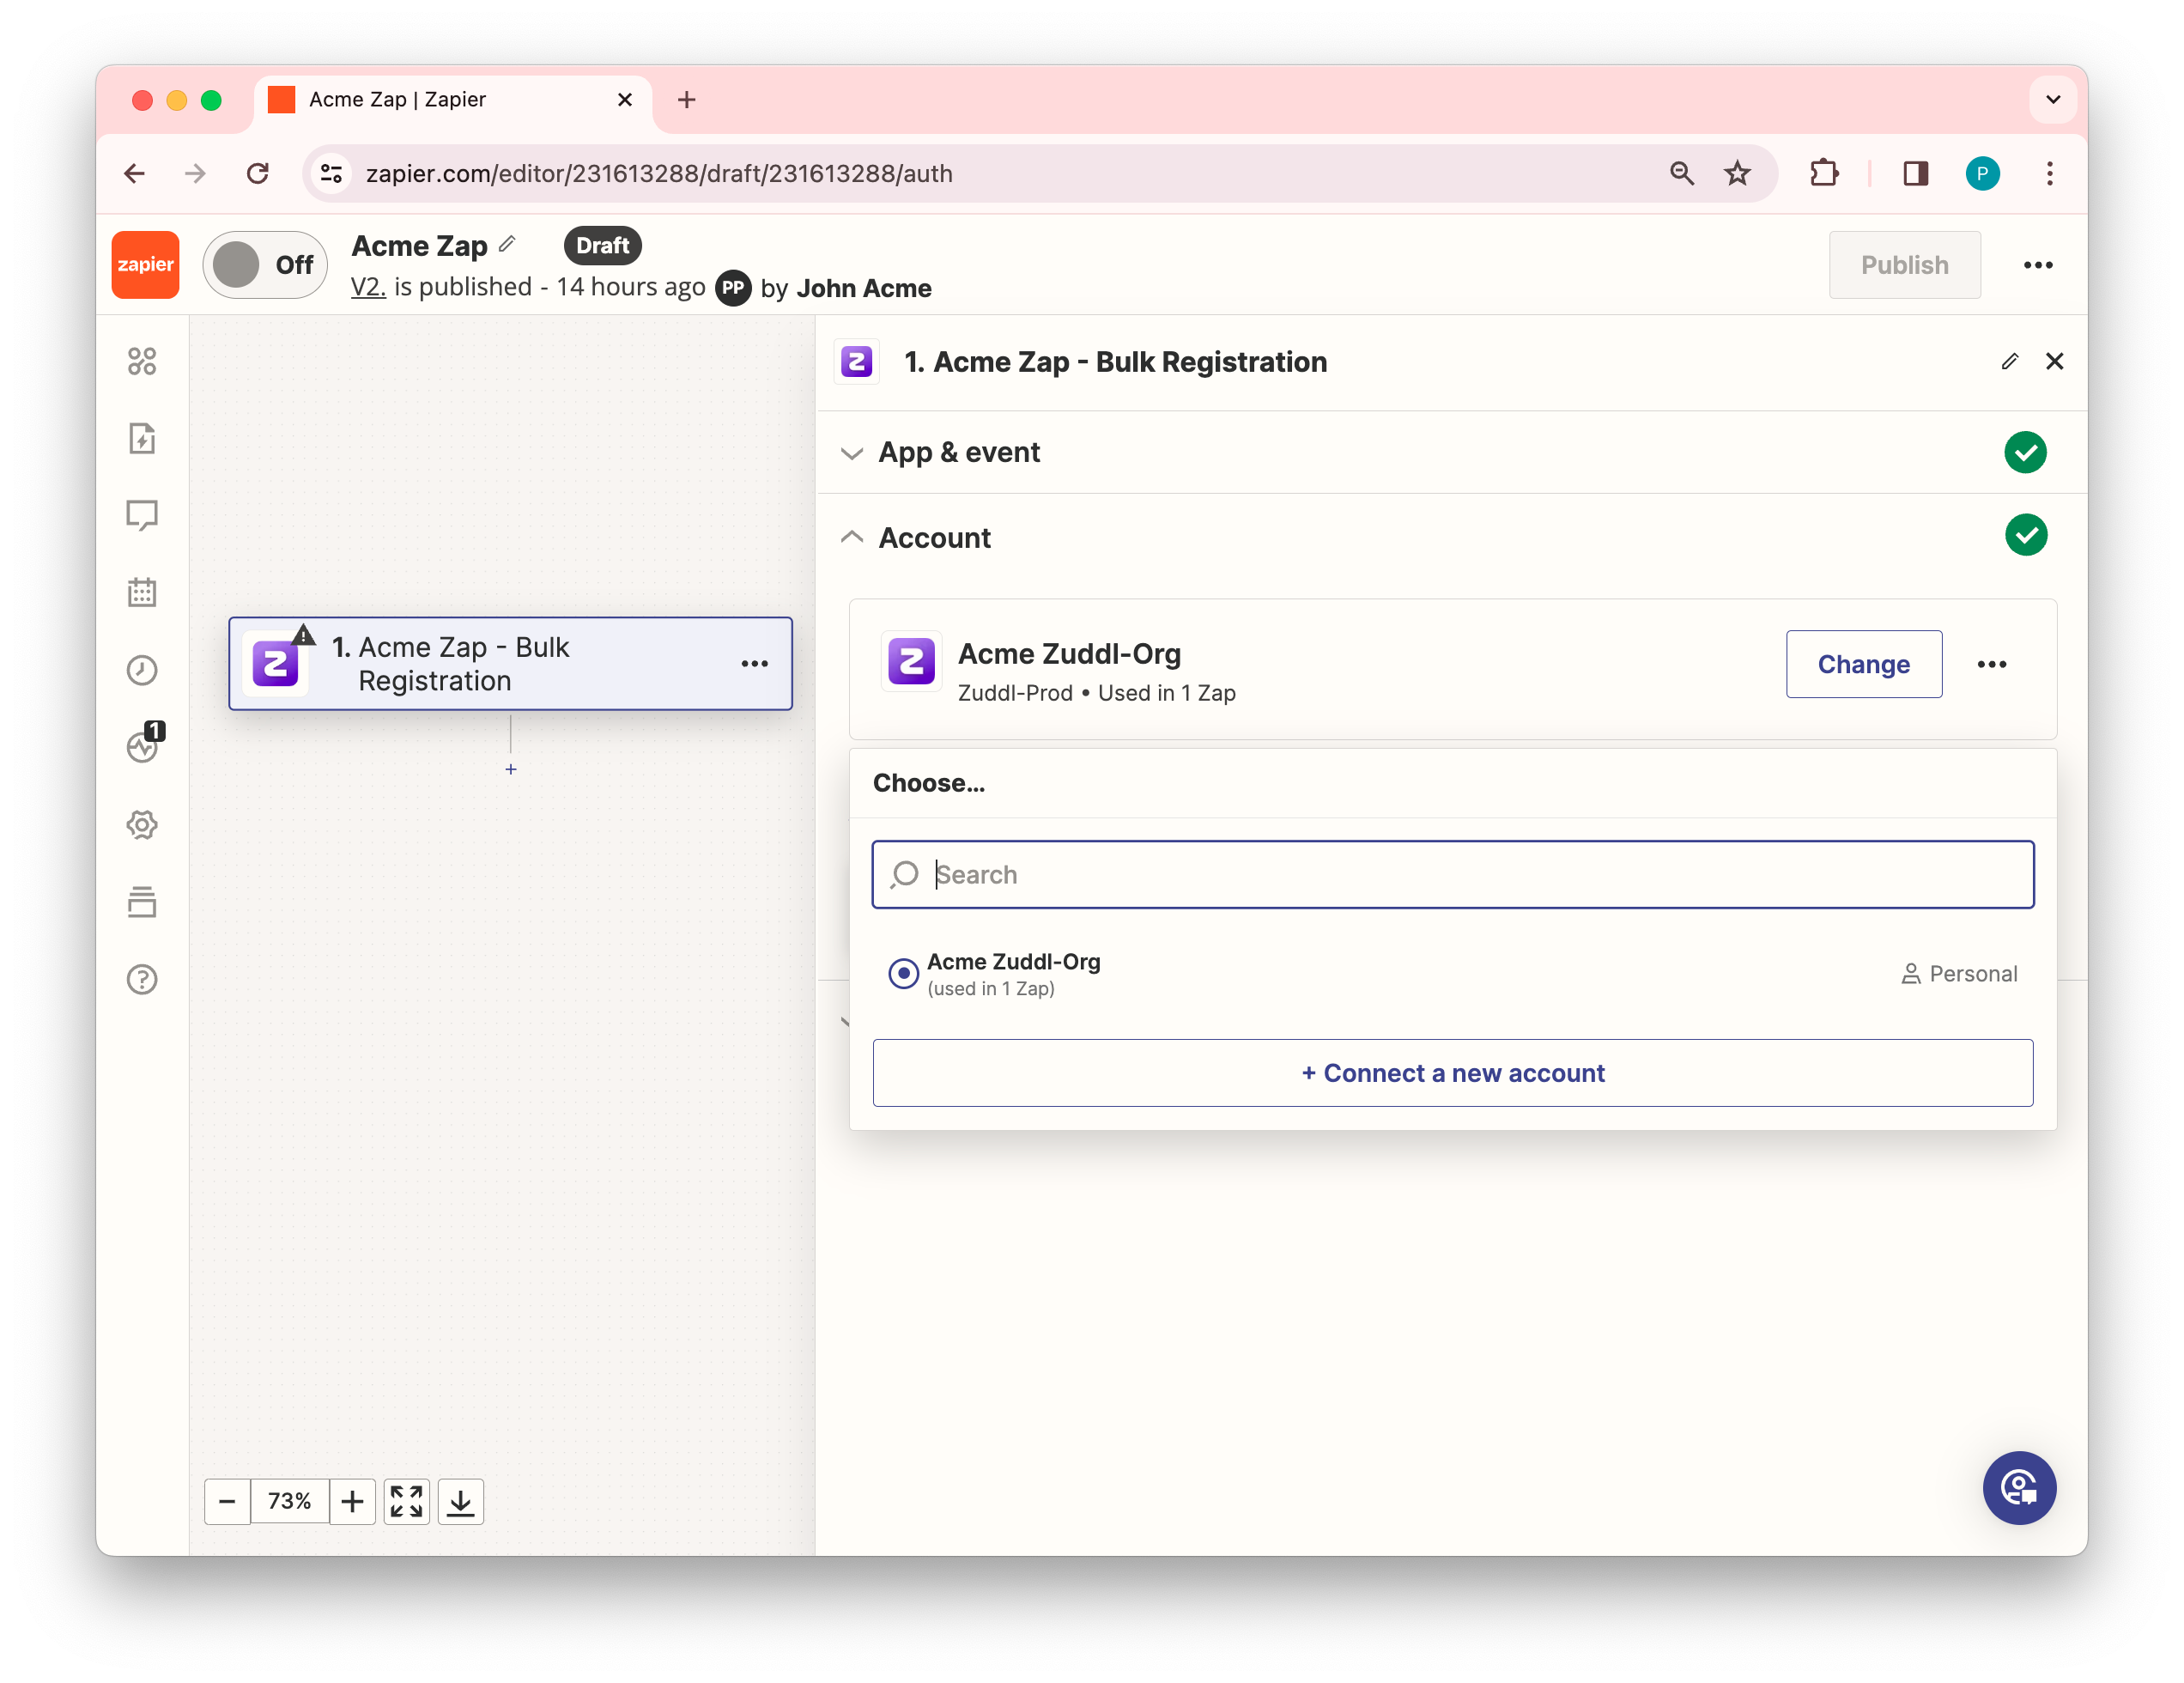
2. Choose an account
Under the Account section, you need to authenticate the organization. Steps 1 to 4 of the Choose an Account step are the same as for New Registration activity.
3. Add a Trigger
-
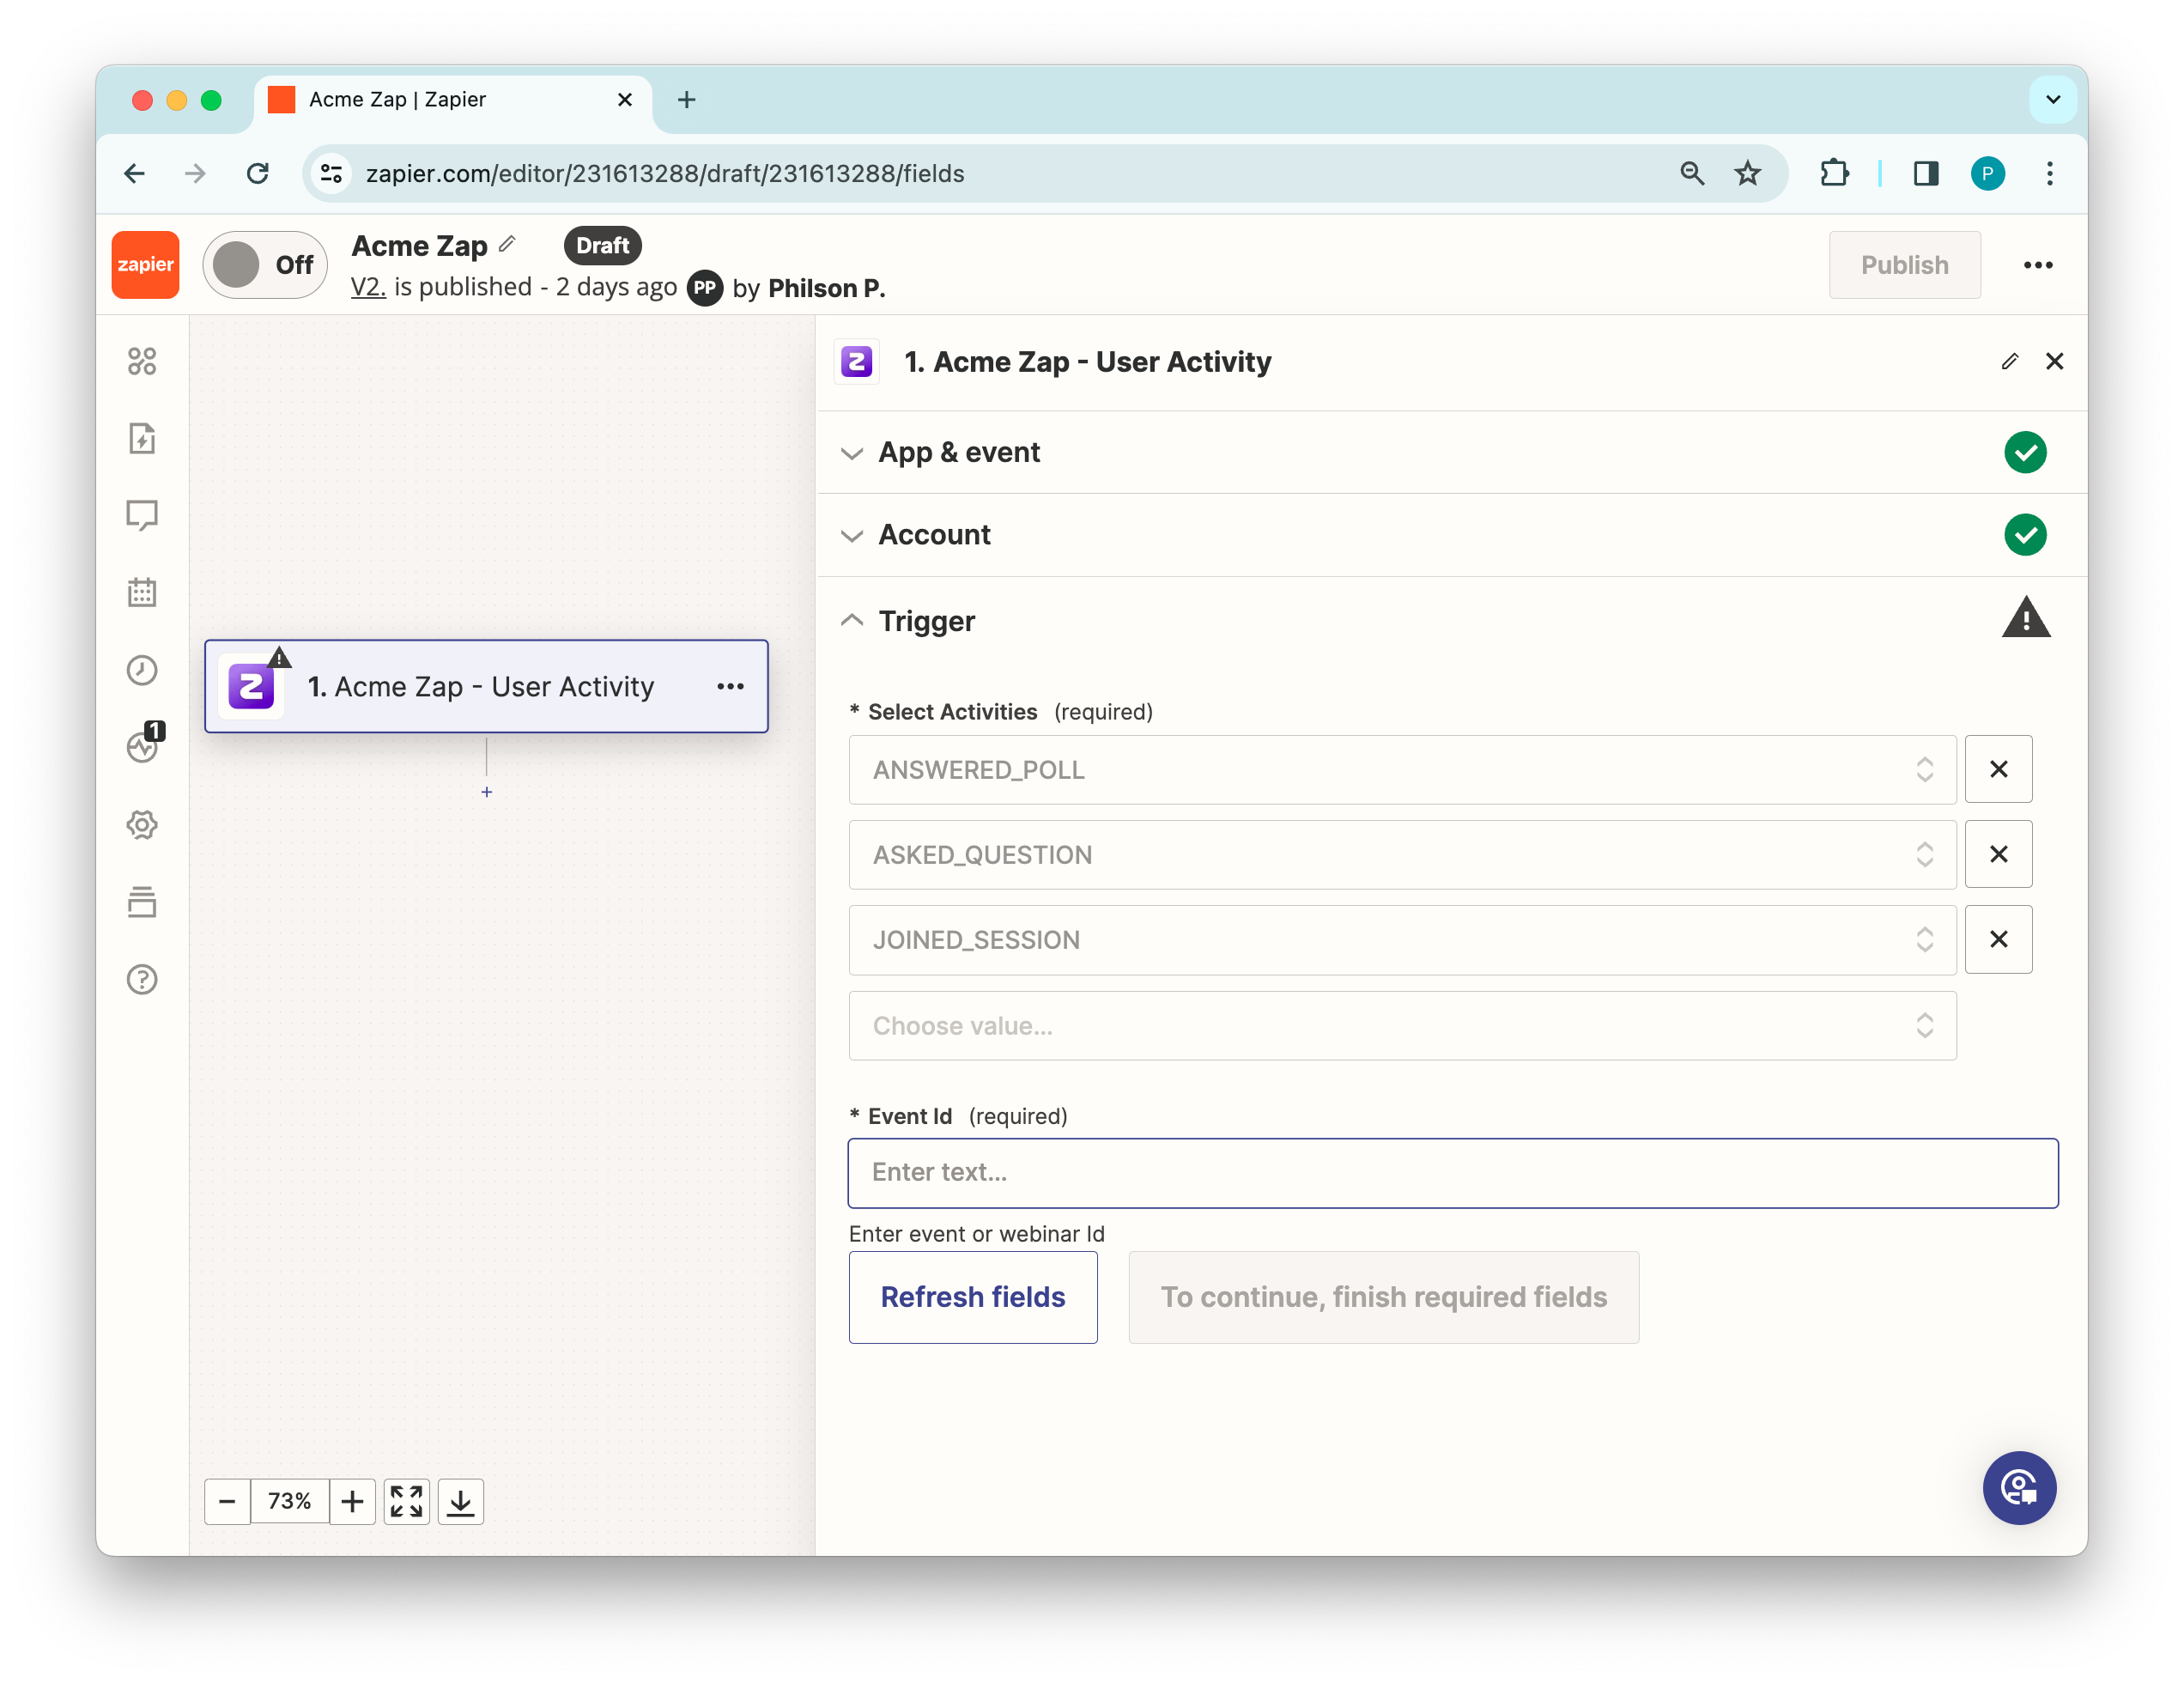
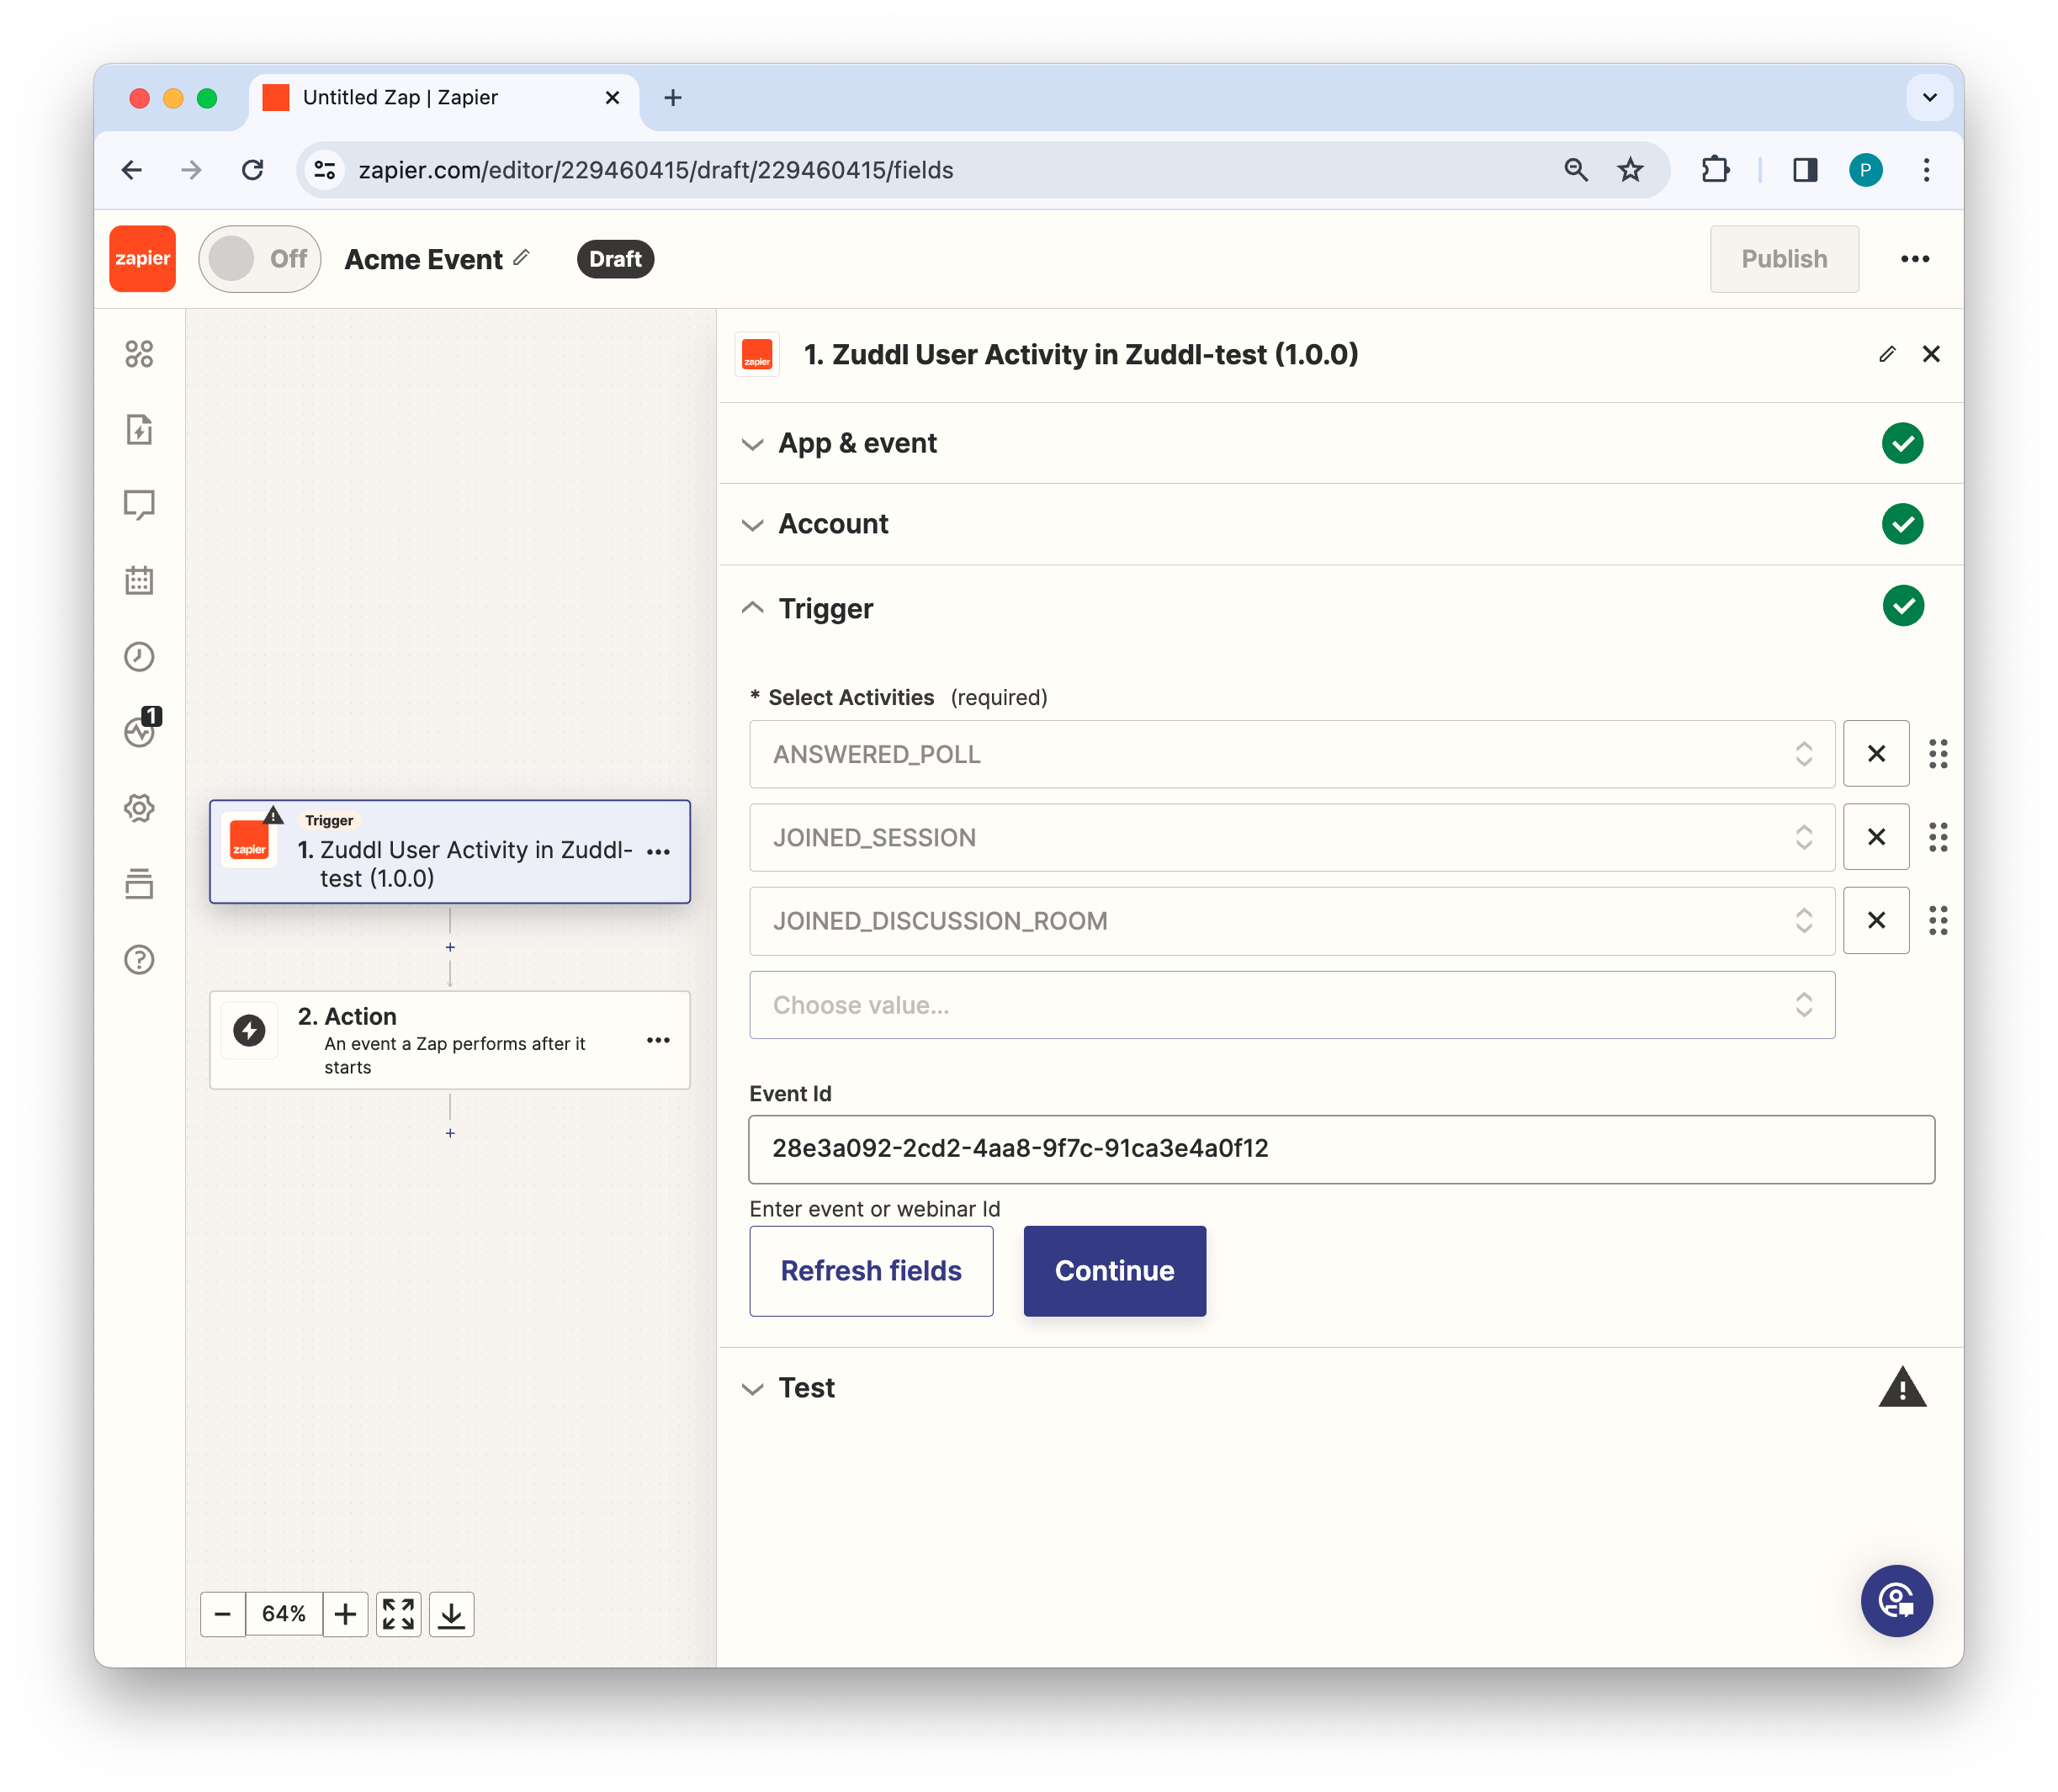
Under the Trigger > Select Activities dropdown field, choose the activities from the Select Activities tab. Refer to the activity table for the description.
You need to select each activity individually, one by one. Only the activities you select here will be sent in response. Your activity selection looks like this: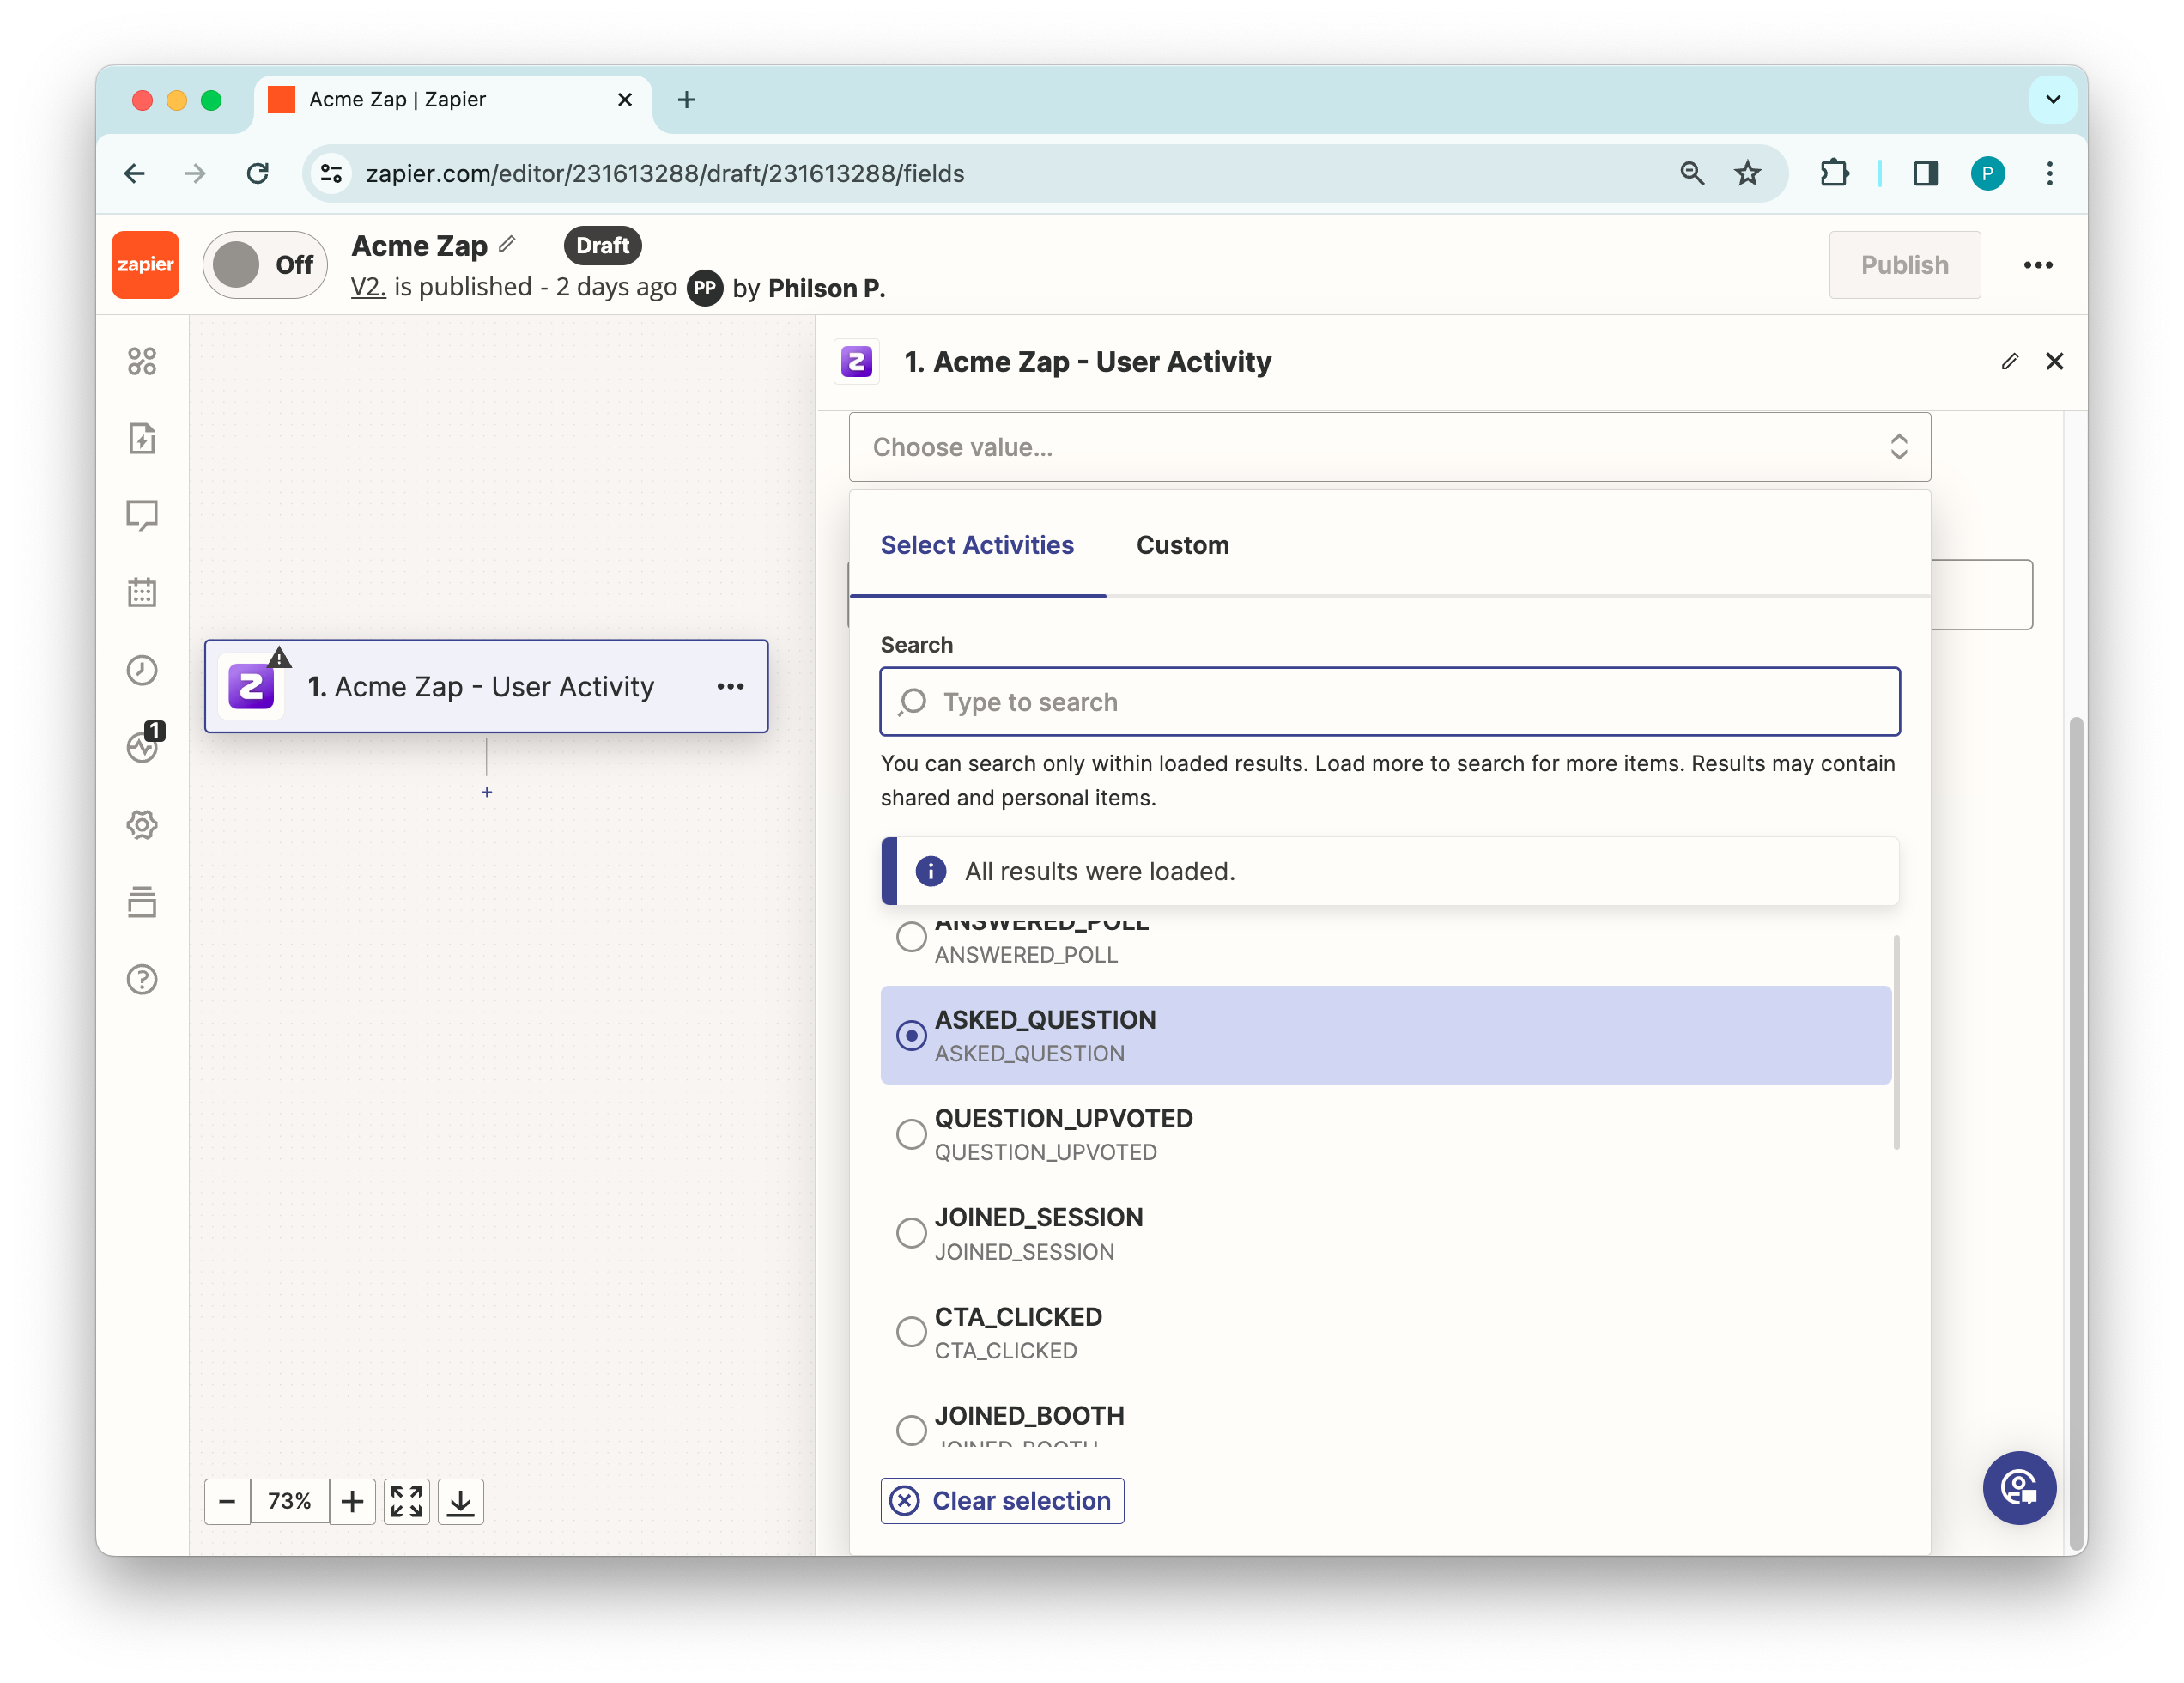
-
Next, enter your Event ID and click Continue.
Go back to the Zuddl dashboard and copy the event ID from the URL/address bar—for example, https://setup.zuddl.com/event/***y0uralphanum3ricc0d3***/event-setup.
4. Testing the trigger
This is an optional step. You can click on Test Trigger which will show a dummy response as shown below:
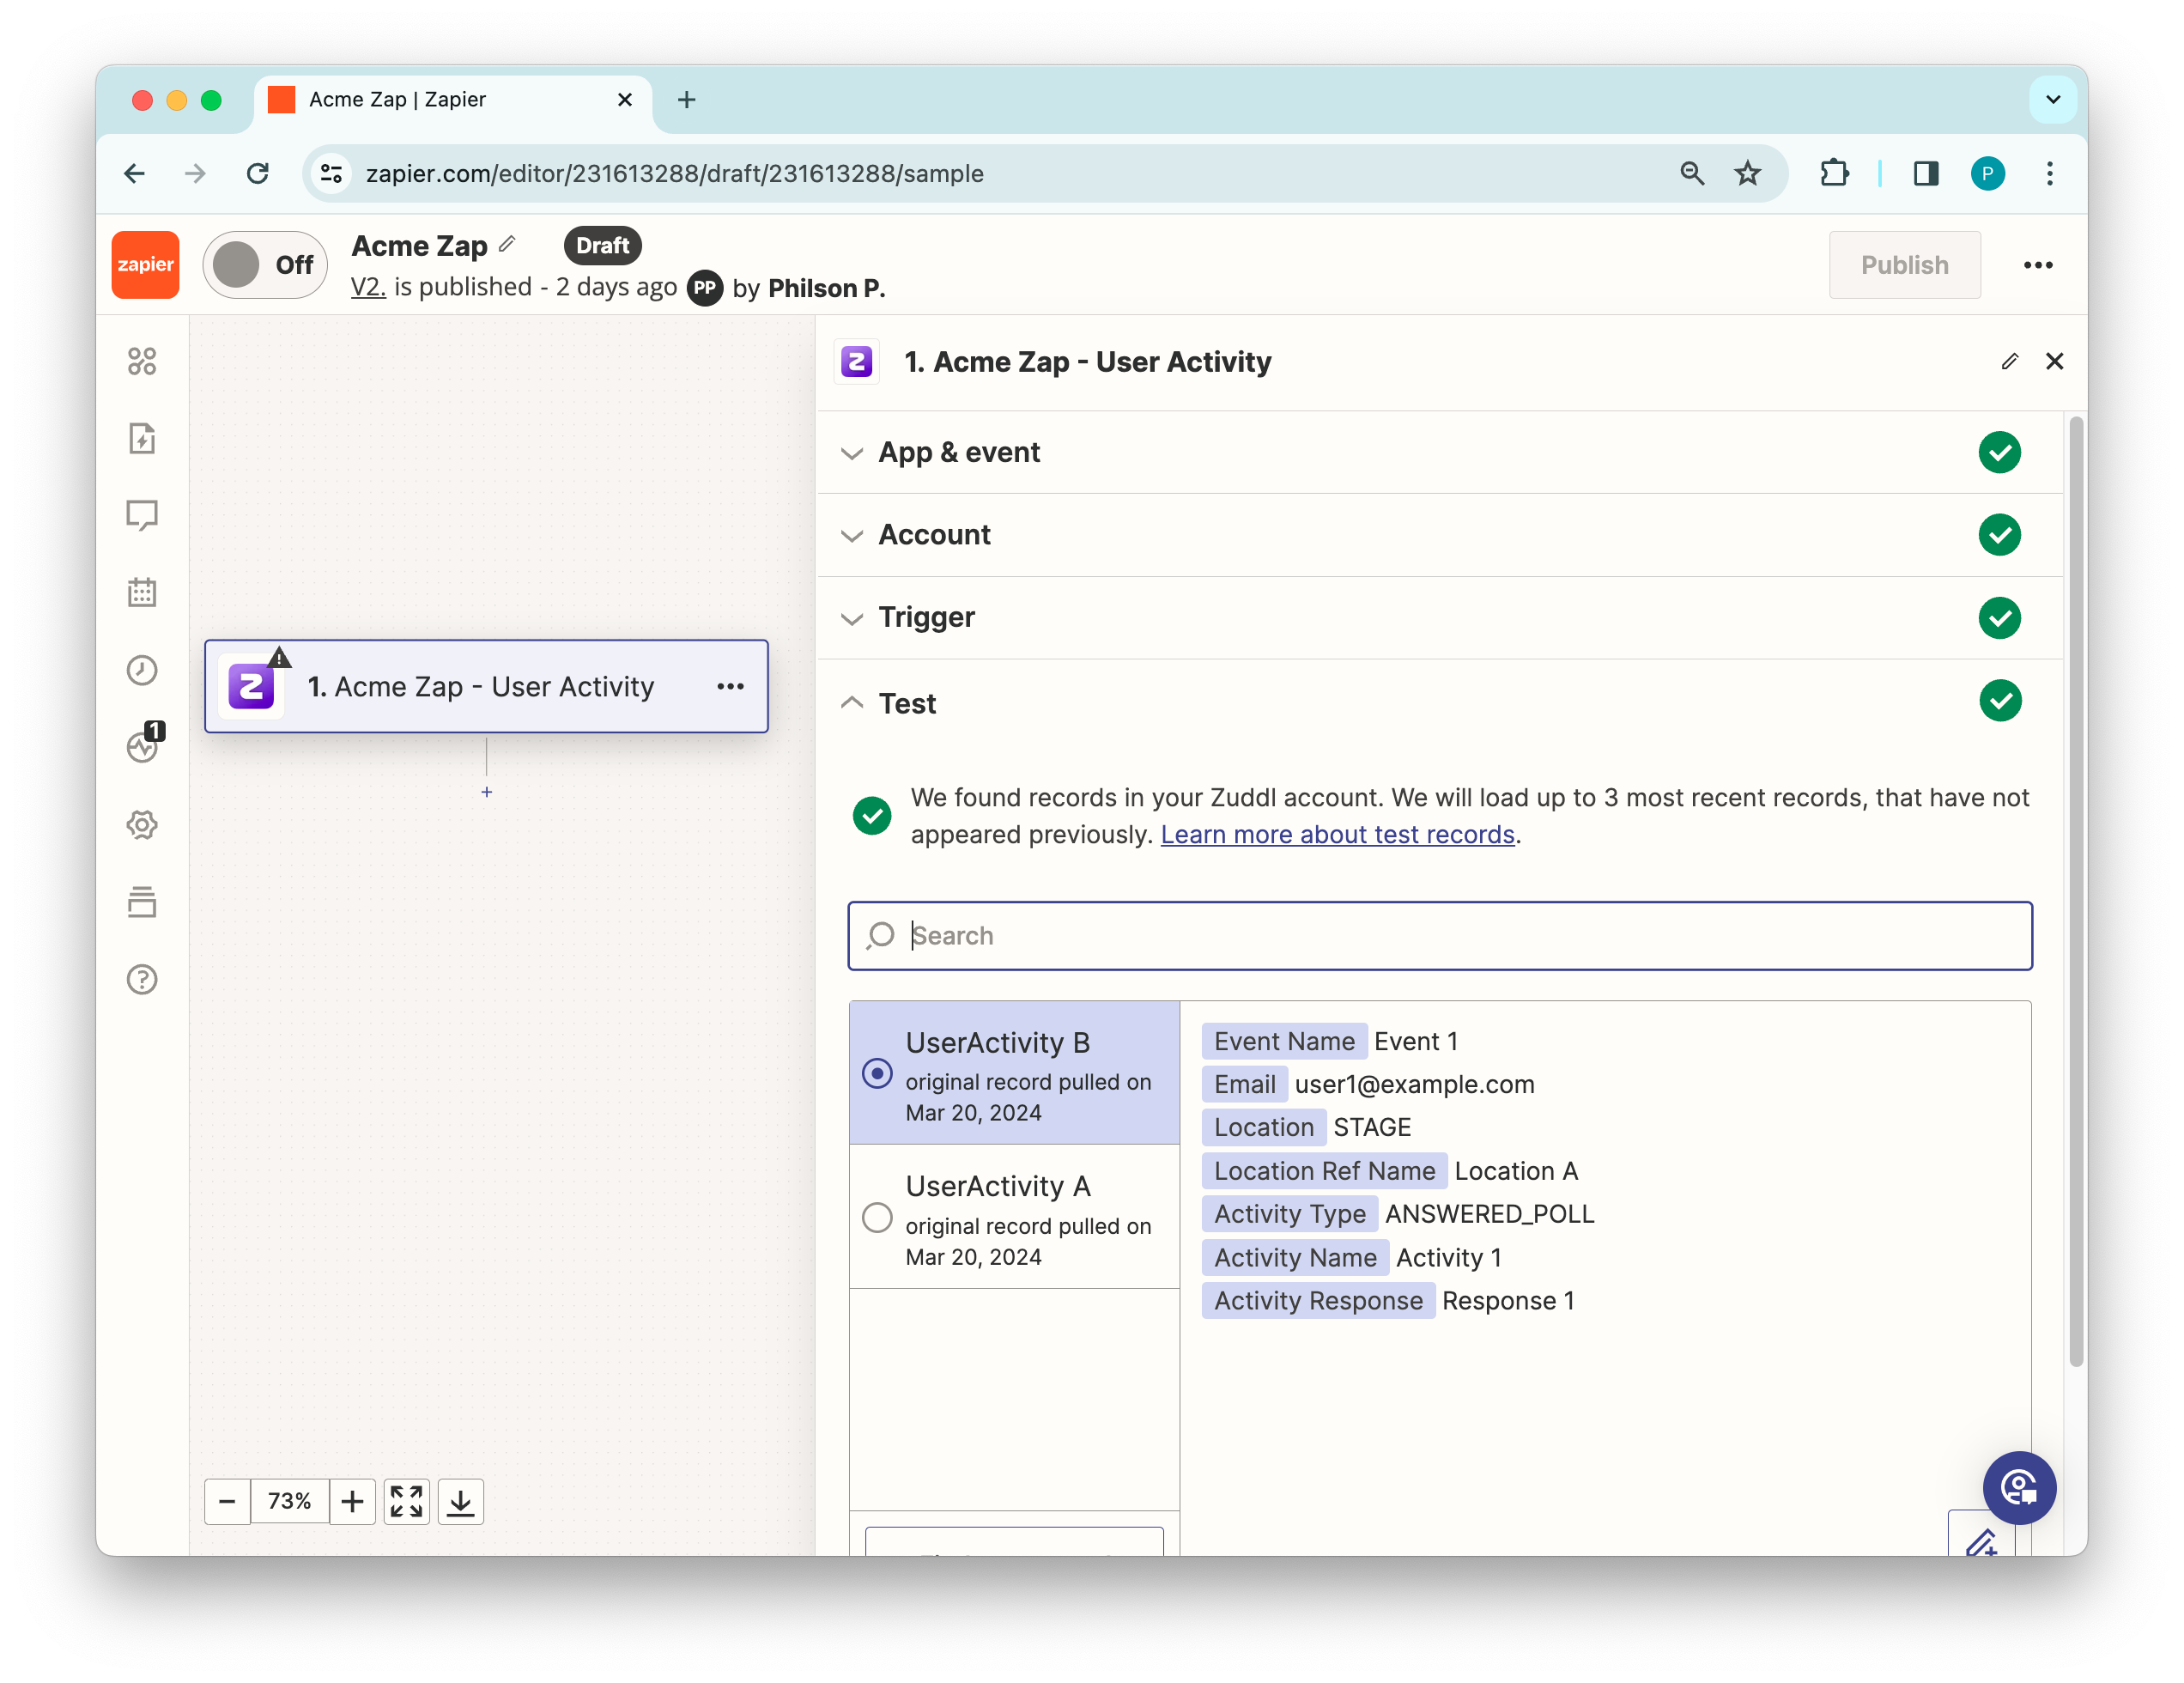
Response objects
| Field names | Description |
|---|---|
| Event Name | Name of the event |
| Attendee’s email address | |
| Venue | Venue type: “Stage,” “Room,” “Booth,” etc. |
| Location Ref Name | Name of the stage, room, or booth. |
| Activity Type | Refer activity table to view all the activity types. |
| Activity Name | Name of the activity, such as poll question, Q&A question, stage name, Room name, session name, etc. |
| Activity Response | Attendee’s input |
Then, click Continue with selected record button.
2. Add an action
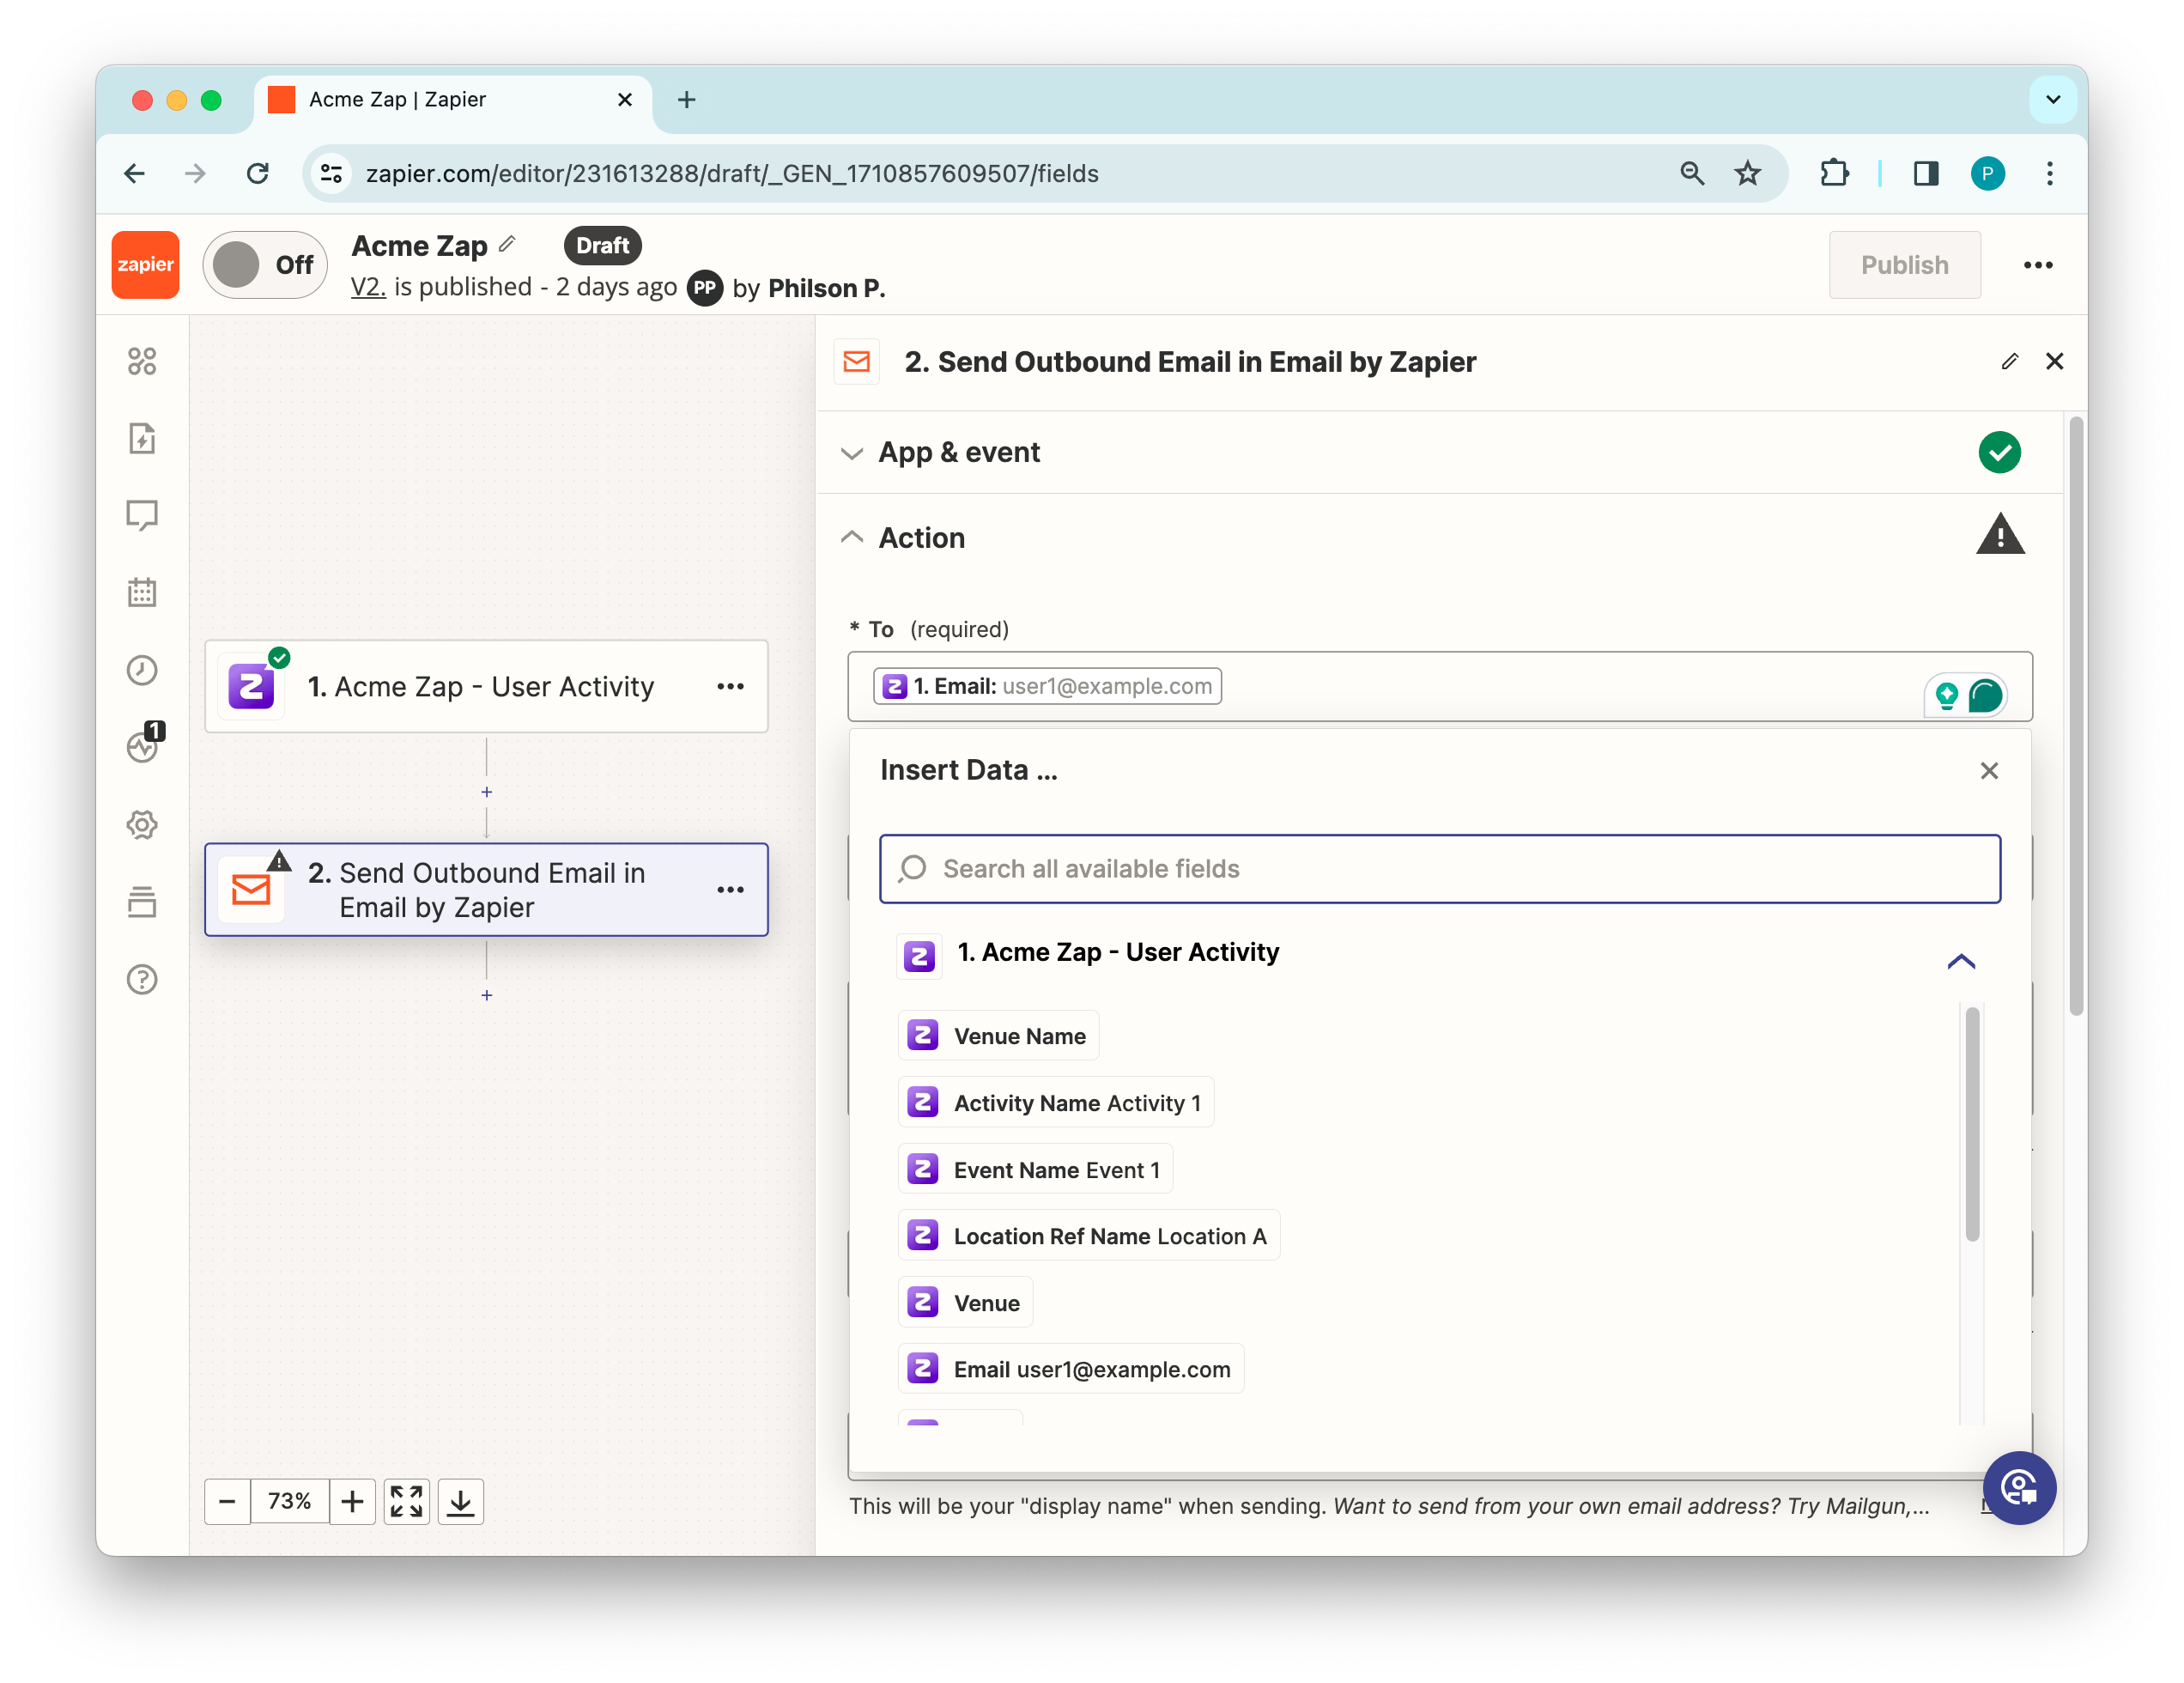
On the new Change action page, search for the required app for the action step. For testing purposes, let’s select “Email by Zapier”. You can insert data into each field, as shown below.
Once the action is set up, you can test the action and Publish the zap.
Viewing Zap runs
Click on the Zap runs icon on the side-navigation to view the data logs.
Activity Details
The supported activity type and their description is shown below:
| Activity Type | Description |
|---|---|
| CTA_CLICKED | The call-to-action button clicked by the attendee |
| ASKED_QUESTION | The questions asked by the attendee |
| ANSWERED_POLL | The poll answered by the attendee |
| QUESTION_UPVOTED | The questions upvoted by the attendee |
| JOINED_SESSION | The sessions joined by the attendee |
| JOINED_DISCUSSION_ROOM | The discussion rooms joined by the attendee |
| JOINED_BOOTH | The booths joined by the attendee |
| ANSWERED_SURVEY | The surveys answered by the attendee |
| WATCHED_VOD | The Video-on-Demand videos watched by the attendee |
| TIME_SPENT_IN_SESSION | The total time spent by the attendee in a session |
| TIME_SPENT_IN_DISCUSSION_ROOM | The total time spent by the attendee in a discussion room |
| TIME_SPENT_IN_BOOTHS | The total time spent by the attendee in a booths |
| TIME_SPENT_IN_EVENT | The total time spent by the attendee in an event |
| PROFILE_UPDATED | Profile updated by the attendee |
To pass this data to a specific app, use Activity Type as the field and Activity Details as value.