Category / Section
3. Zebra Printer Utility App - Setup Guide
Published:
7 mins read
Updated:
Previous step: 2. Set up your printer
Once your Zebra printer is set up and ready, you can begin installing the setup app. This article explains how to set up your Zebra setup app.
Here is the video guide for setting up the printer: Zebra ZD621 setup video.
Here is the video guide for setting up the printer: Zebra ZD621 setup video.
If your using printers from choose2rent, here is the guide to setting up the printer: Choose2rent printer setup guide.
1. Install the Zebra printer setup app
Refer the supported Zebra model and download and install the Zebra Printer Setup Utility from the provided links.
| OS | App | Link |
|---|---|---|
Android | Zebra Printer Setup Utility | Google PlayStore |
| iPad/iPhone | Zebra Printer Setup Utility | Apple AppStore |
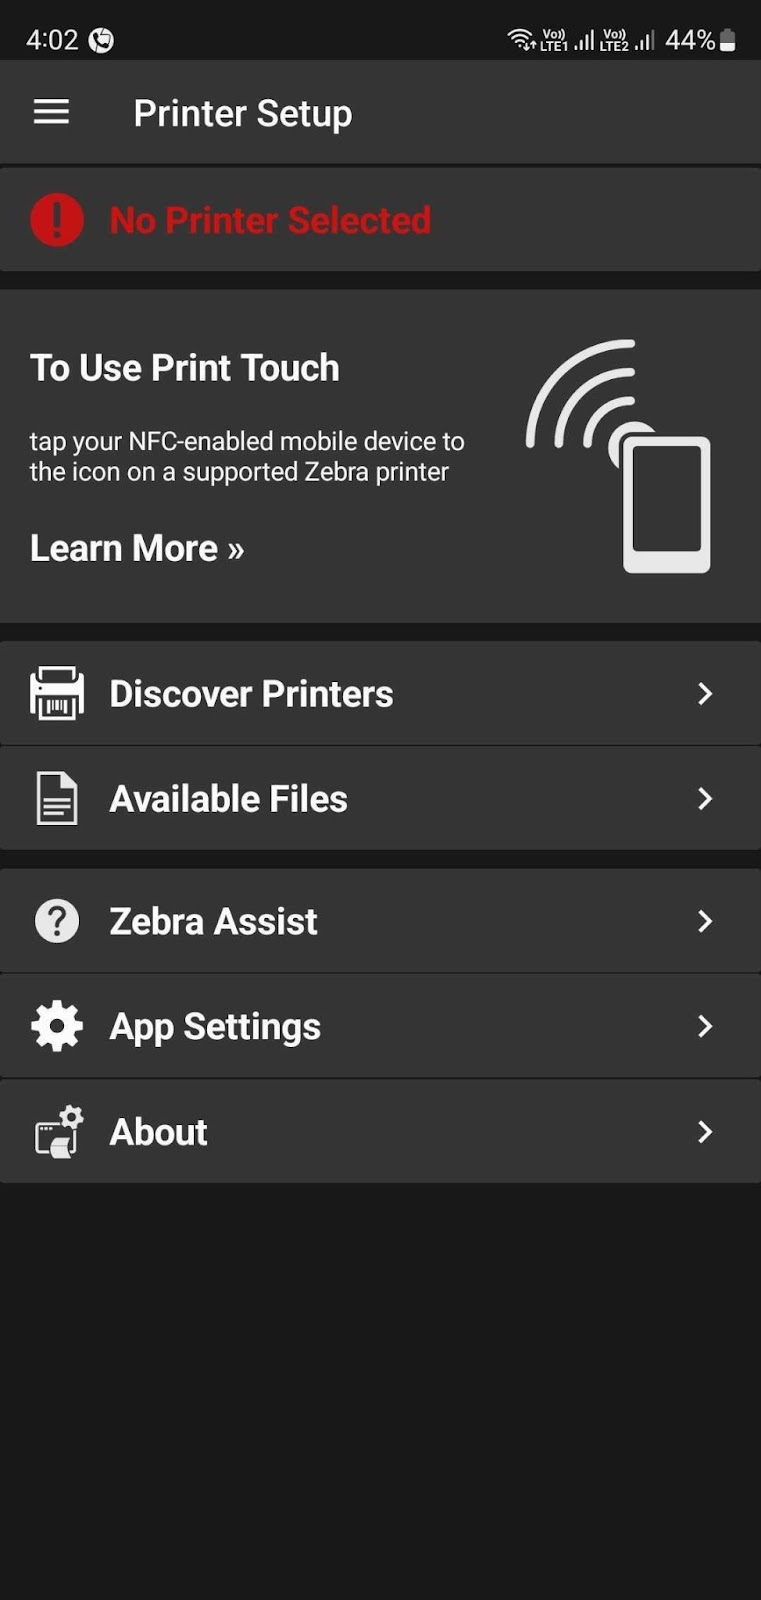
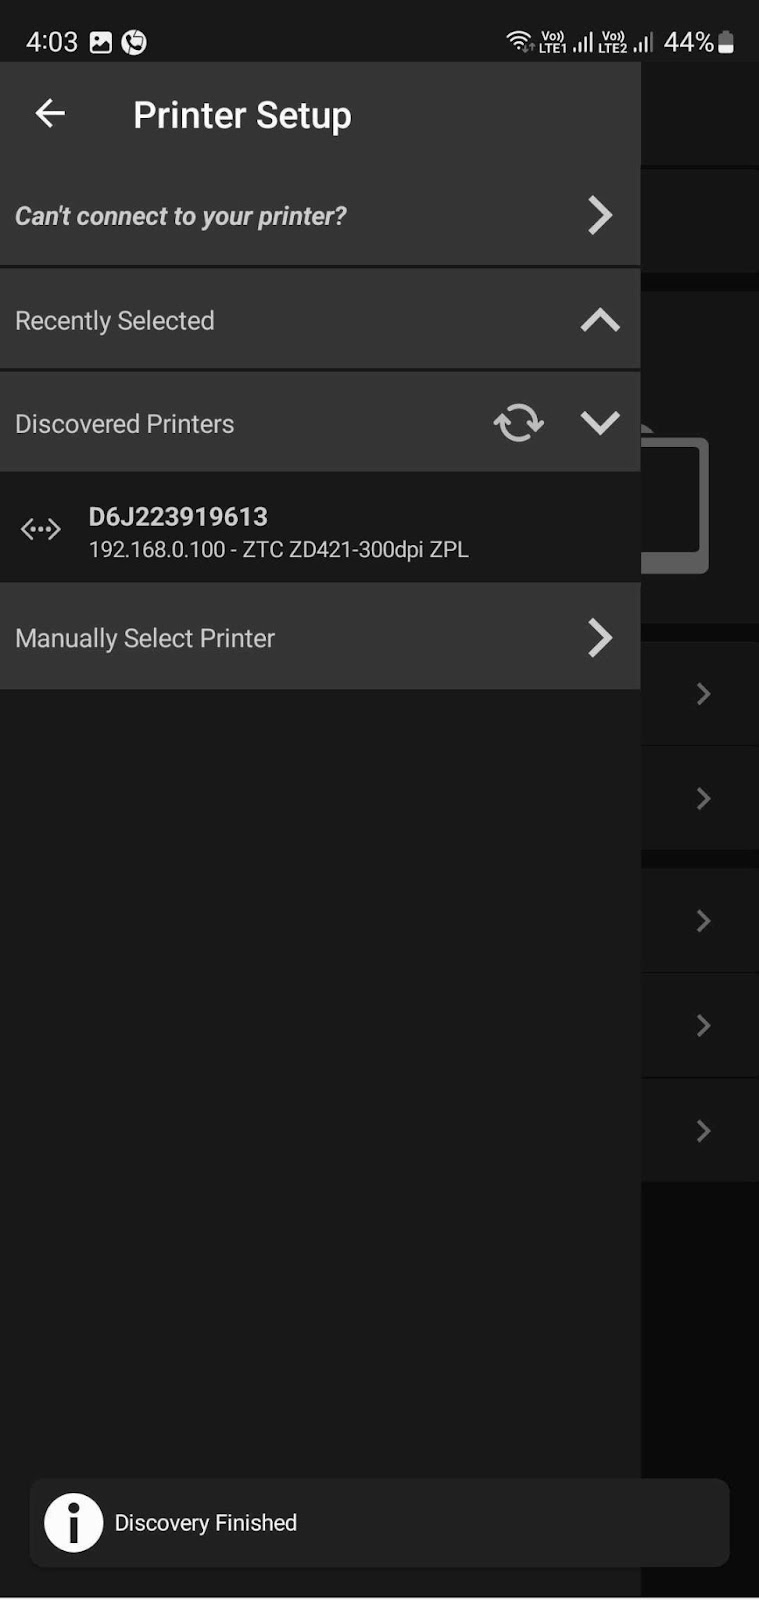
2. Find your printer
- Open the app and click on “Discover printers”.
- Ensure your printer is connected to the router and your mobile device/iPad is on the same network.
- Select the printer that appears in the list with its IP address.
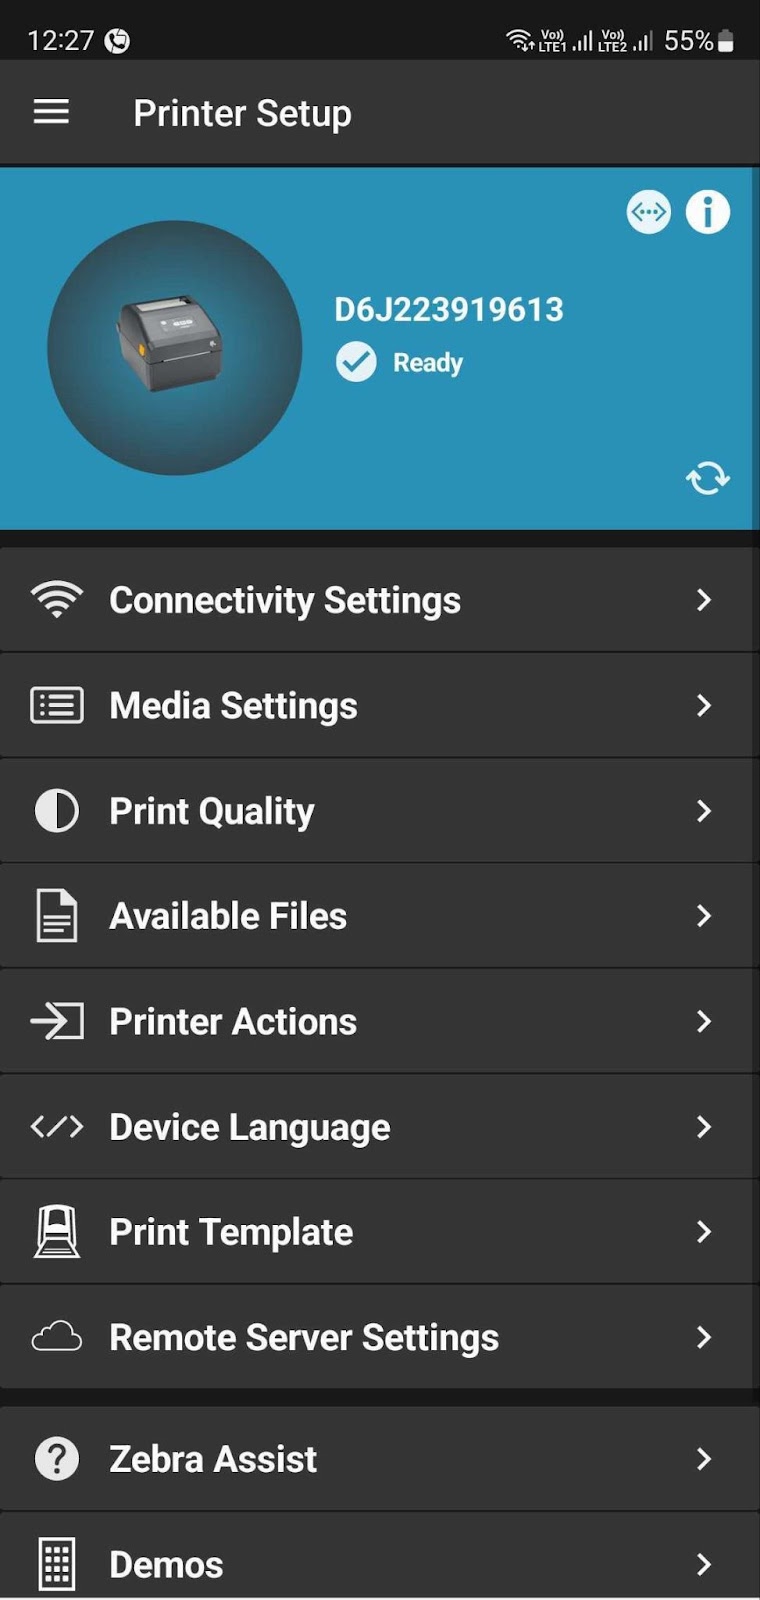
3. Printer configuration
Once selected, the Printer Configuration page will open.
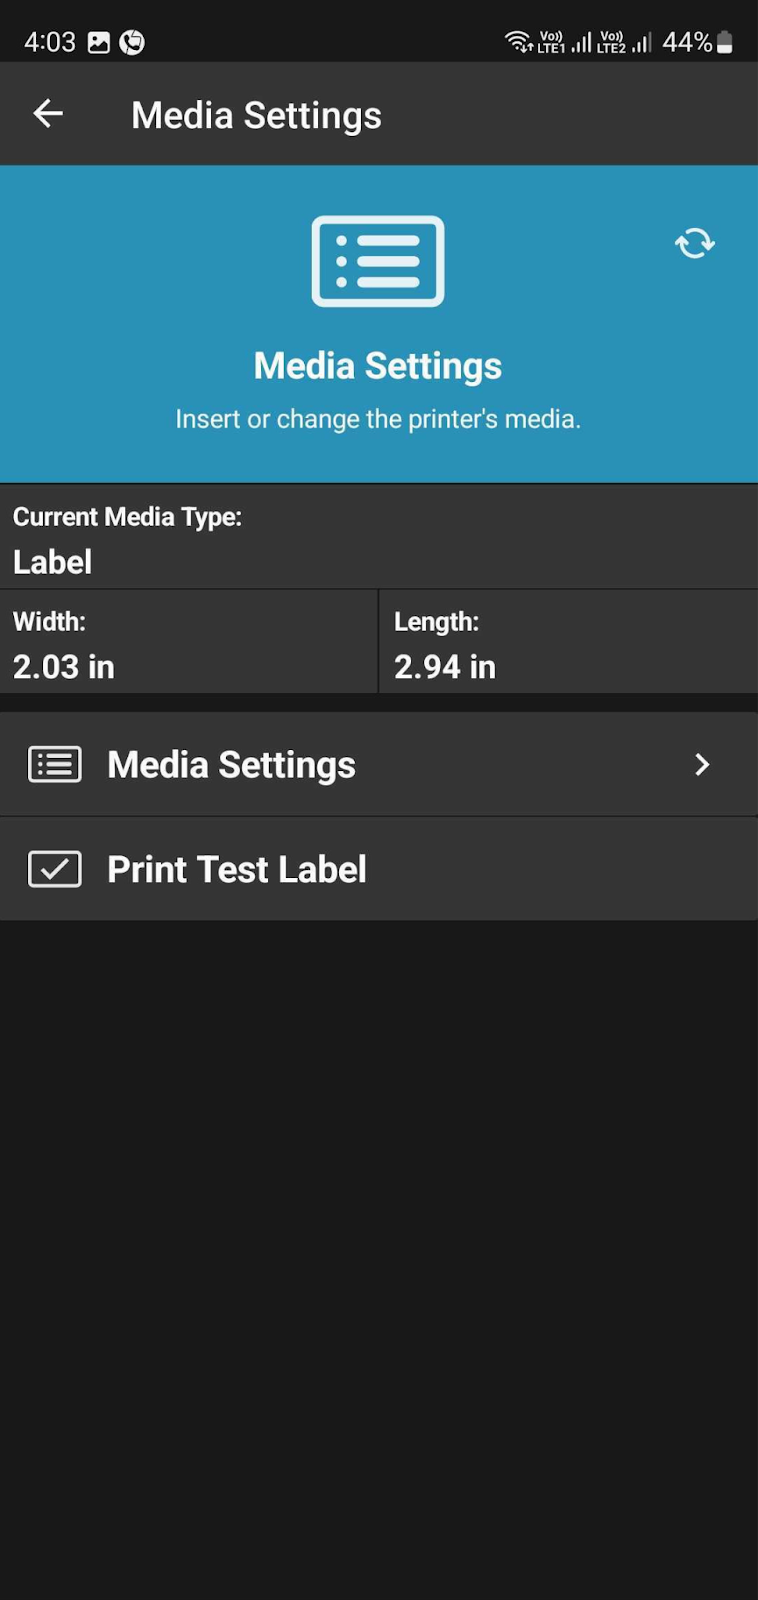
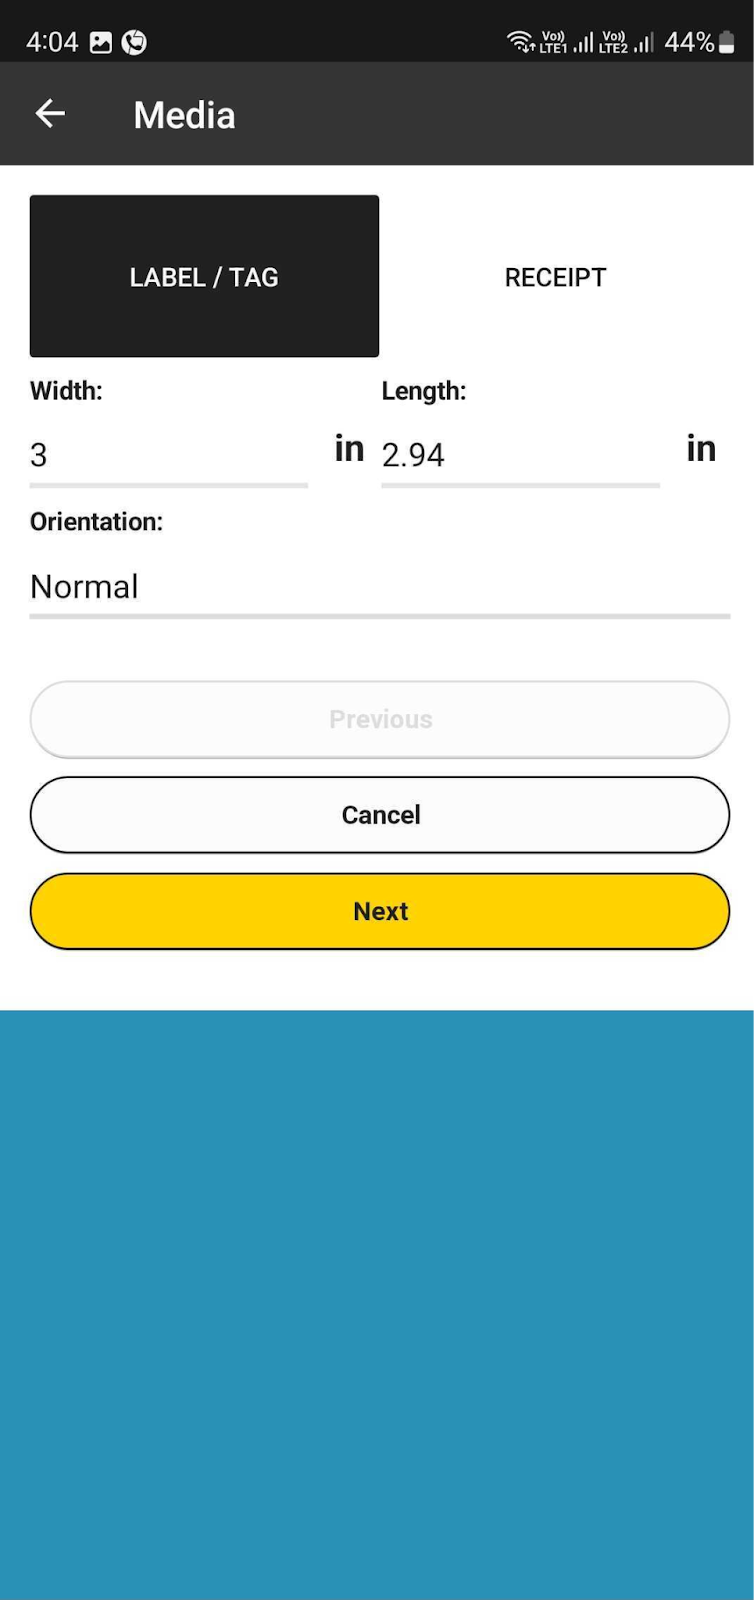
4. Media settings configuration
To configure media settings:
- Select “Media Settings”.
- If you have previously calibrated the printer using the calibration button, the media type, width, and length of the label should already be set.
- Review and adjust the Width and Length of the label if necessary.
- Set Orientation to “Normal”.
- Click “Next”.
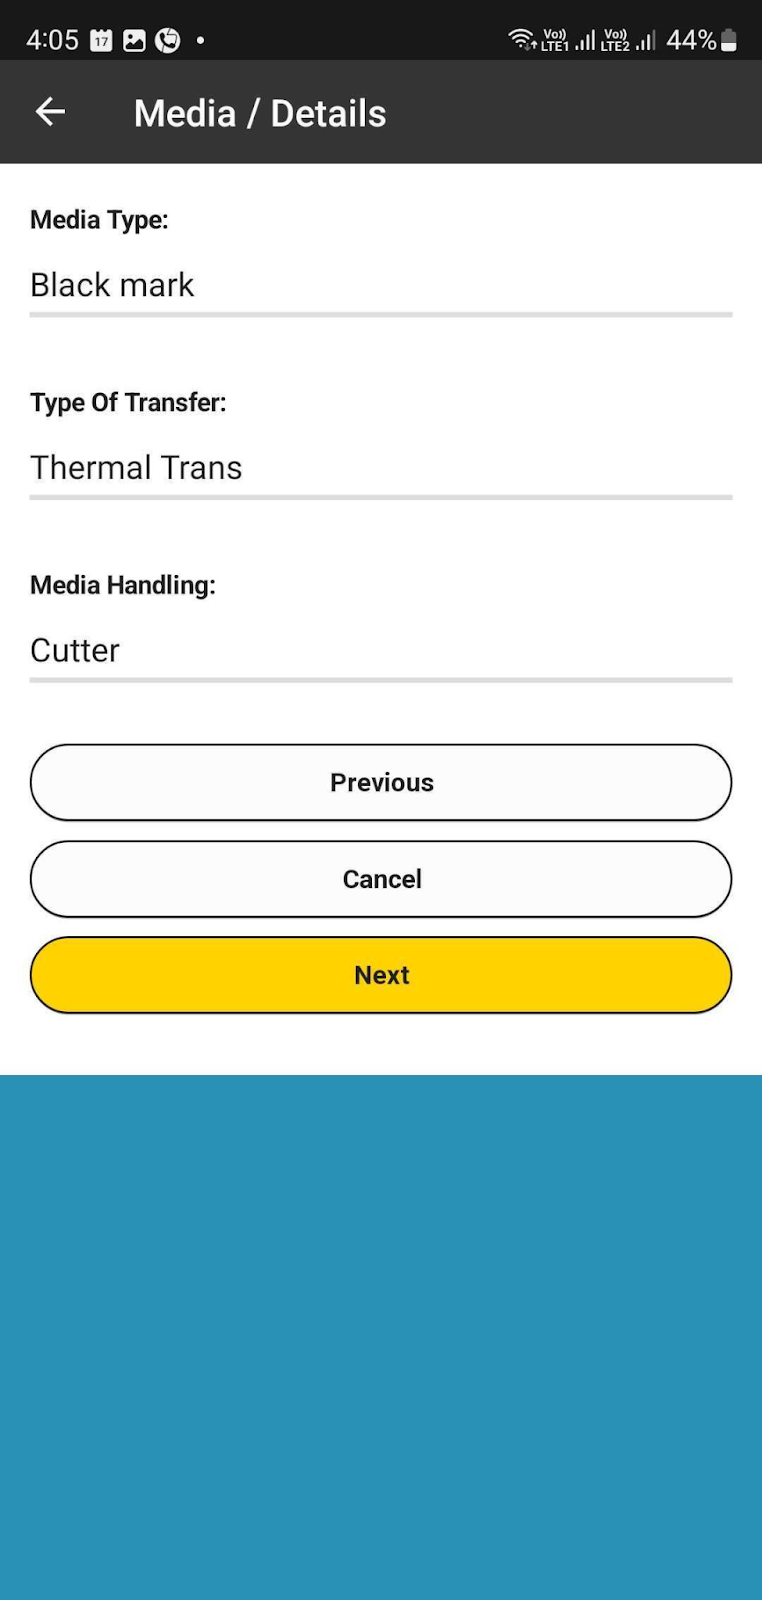
Media settings
This section gives an overview of the available media settings in the app.
- Media Type: Set automatically during calibration. Options include:
- Gap: For media with gaps or notches between labels
- Black Mark: For media with black marks on the back
- Continuous: For continuous roll media without gaps or marks
- Type of Transfer:
- Thermal Transfer: Uses a ribbon to transfer ink onto the label
- Direct Thermal: Uses heat-sensitive media, no ribbon required
- Media Handling: Most settings are set automatically during calibration. Options include:
- Cutter: Cuts each label after printing
- Tear Off: Feeds the printed label to the tear-off bar for manual removal
- Peel Off: Peels the label from its liner and presents it to the user while rewinding the liner inside the printer
- Rewind: Rewinds the printed labels (or the liner) onto a core inside the printer
- Delayed Cut: Cuts the label after a specified delay post-printing
- Stream: Continuous printing without cutting or tearing, often feeding directly to another process or device
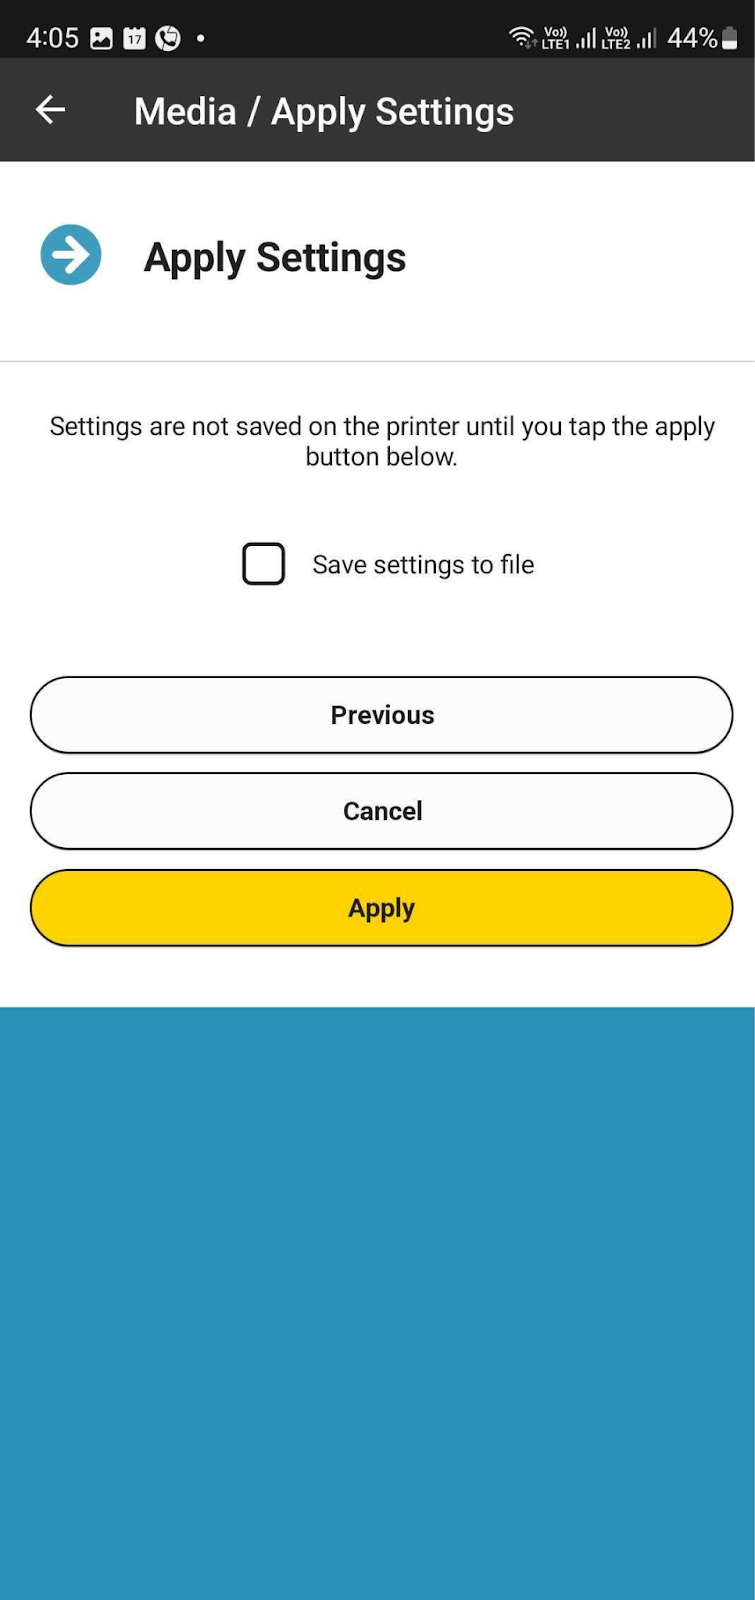
Click “Apply” to save the settings.
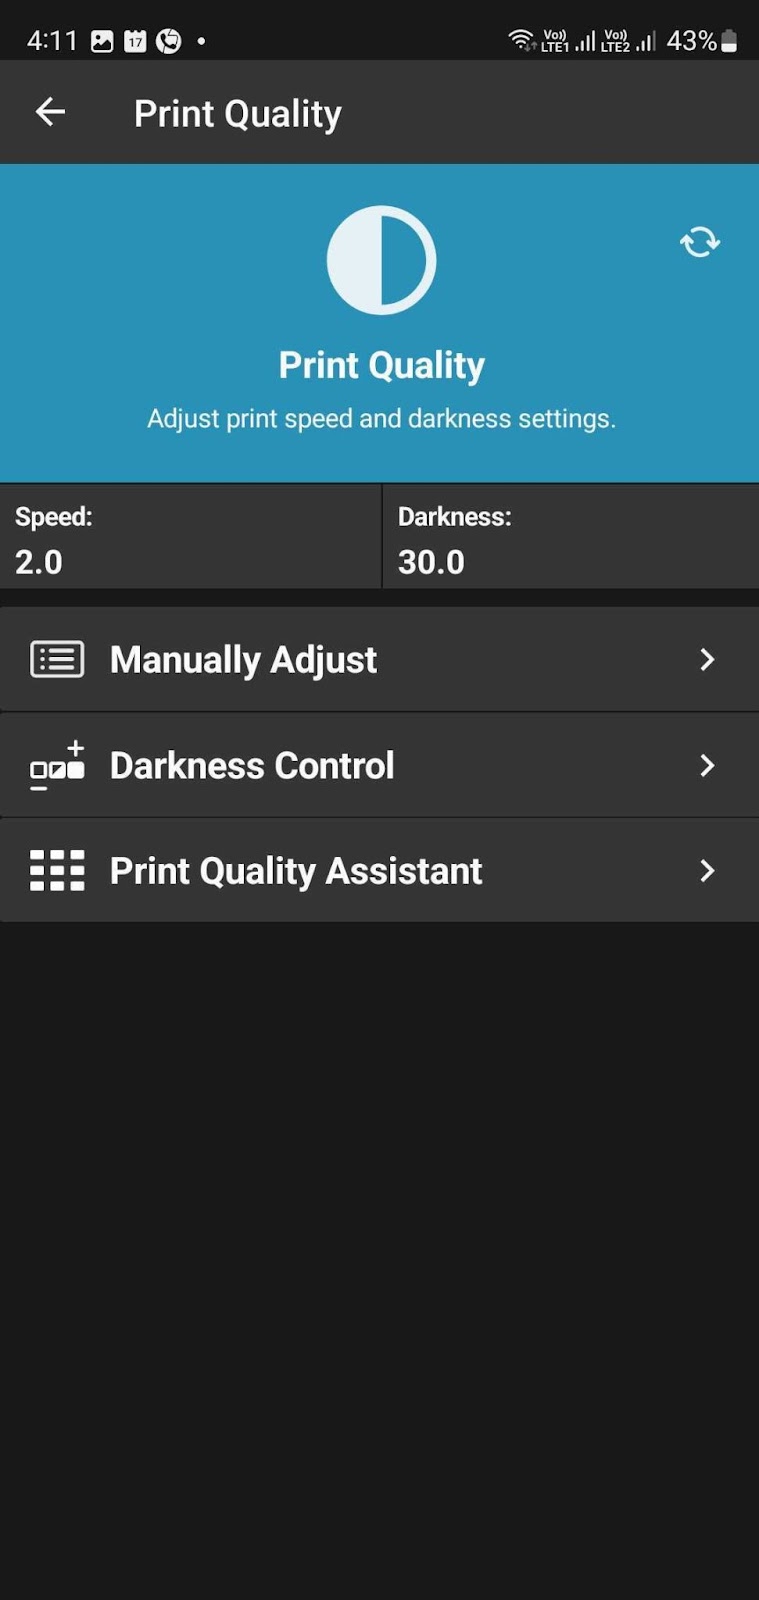
Adjust print quality
To adjust print quality:
- Select “Manually adjust” to configure Print Speed and Darkness.
- Print Speed: Adjusts the speed of printing. Ranges from 2 ips to 12 ips, depending on the printer model. Lower speeds improve quality for detailed graphics or small text.
- Print Darkness: Controls the print’s darkness by adjusting the heat from the printhead. Ranges from 0 to 30. Increase for darker, more defined prints; decrease if prints are too dark or bleeding.
- If the print is too light, you can increase the darkness level from the settings. The recommended setting is 10, and this should never be over 20.
- For printer ZD620:
- The first setting is DARKNESS. Press the up (▲) button to increase the darkness.
- Press HOME, then press the (✔) button to enter SETTINGS.
- For printer ZD621 with touchscreen:
- Tap Menu > Print (🖨️) > Print Quality > Darkness
- Use the plus and minus buttons to make adjustments.
Additional instructions
Turn off the Energy star setting to prevent the printer disconnecting from network.
Next step: 3. Connect printer to your onsite app