Receive Registrations from Marketo to Zuddl
Last updated: July 22, 2026
Previous: Install Marketo App on Zuddl
Overview
The Marketo-Zuddl integration lets you pass registrant details captured on Marketo to your Zuddl account. This is achieved by triggering a webhook using the Smart Campaign tool in Marketo.
Integration steps
Warning
Before you enable the event-level integration, ensure that the “Event invitation” email for attendees has been toggled on from the Communication menu. Without this enablement, registrants will not receive any event invitation.
Learn how to set up email communication for your event.
Learn how to set up email communication for your webinar
Bulk registration limit
The combined limit for bulk registrations (incl. registrations via CSV per event) is 15,000. If a bulk registration has more than 15,000 registrations, it will be rejected, and bulk import will be disabled. When the remaining limit is less than 3,000, a warning message appears on the attendee page.
Please reach out to our support team at help@zuddl.com to request an increase in your limit.
1. Pass Marketo forms fields to Zuddl
If you’ve added fields in your Marketo form in addition to the fields you had already mapped during installation, these must be mapped to the appropriate Zuddl fields.
Prerequisite
If suitable Zuddl fields do not exist for a particular Marketo form field, you must add new fields to your Zuddl registration form.
To map Marketo fields with Zuddl,
Inside the Zuddl dashboard, go to the connected event/webinar then inside event setup, go to Integrations.
On the Marketo card, click Customize on the Import section to configure the event-level settings. The Import section shows a Disabled status before turning on the integration.

Any new Lead in Marketo is synced as a new registrant for your Zuddl event/webinar. Under the Lead custom fields tab, map any custom Lead fields in your Marketo instance to suitable Zuddl registration fields in Zuddl.
Select a custom field in the Zuddl registration fields dropdown. Next, choose a suitable Marketo Lead field from the Lead fields dropdown that needs to be passed to Zuddl.
Prerequisite
A Zuddl registration form with all the required fields need to be created in order to map the fields.
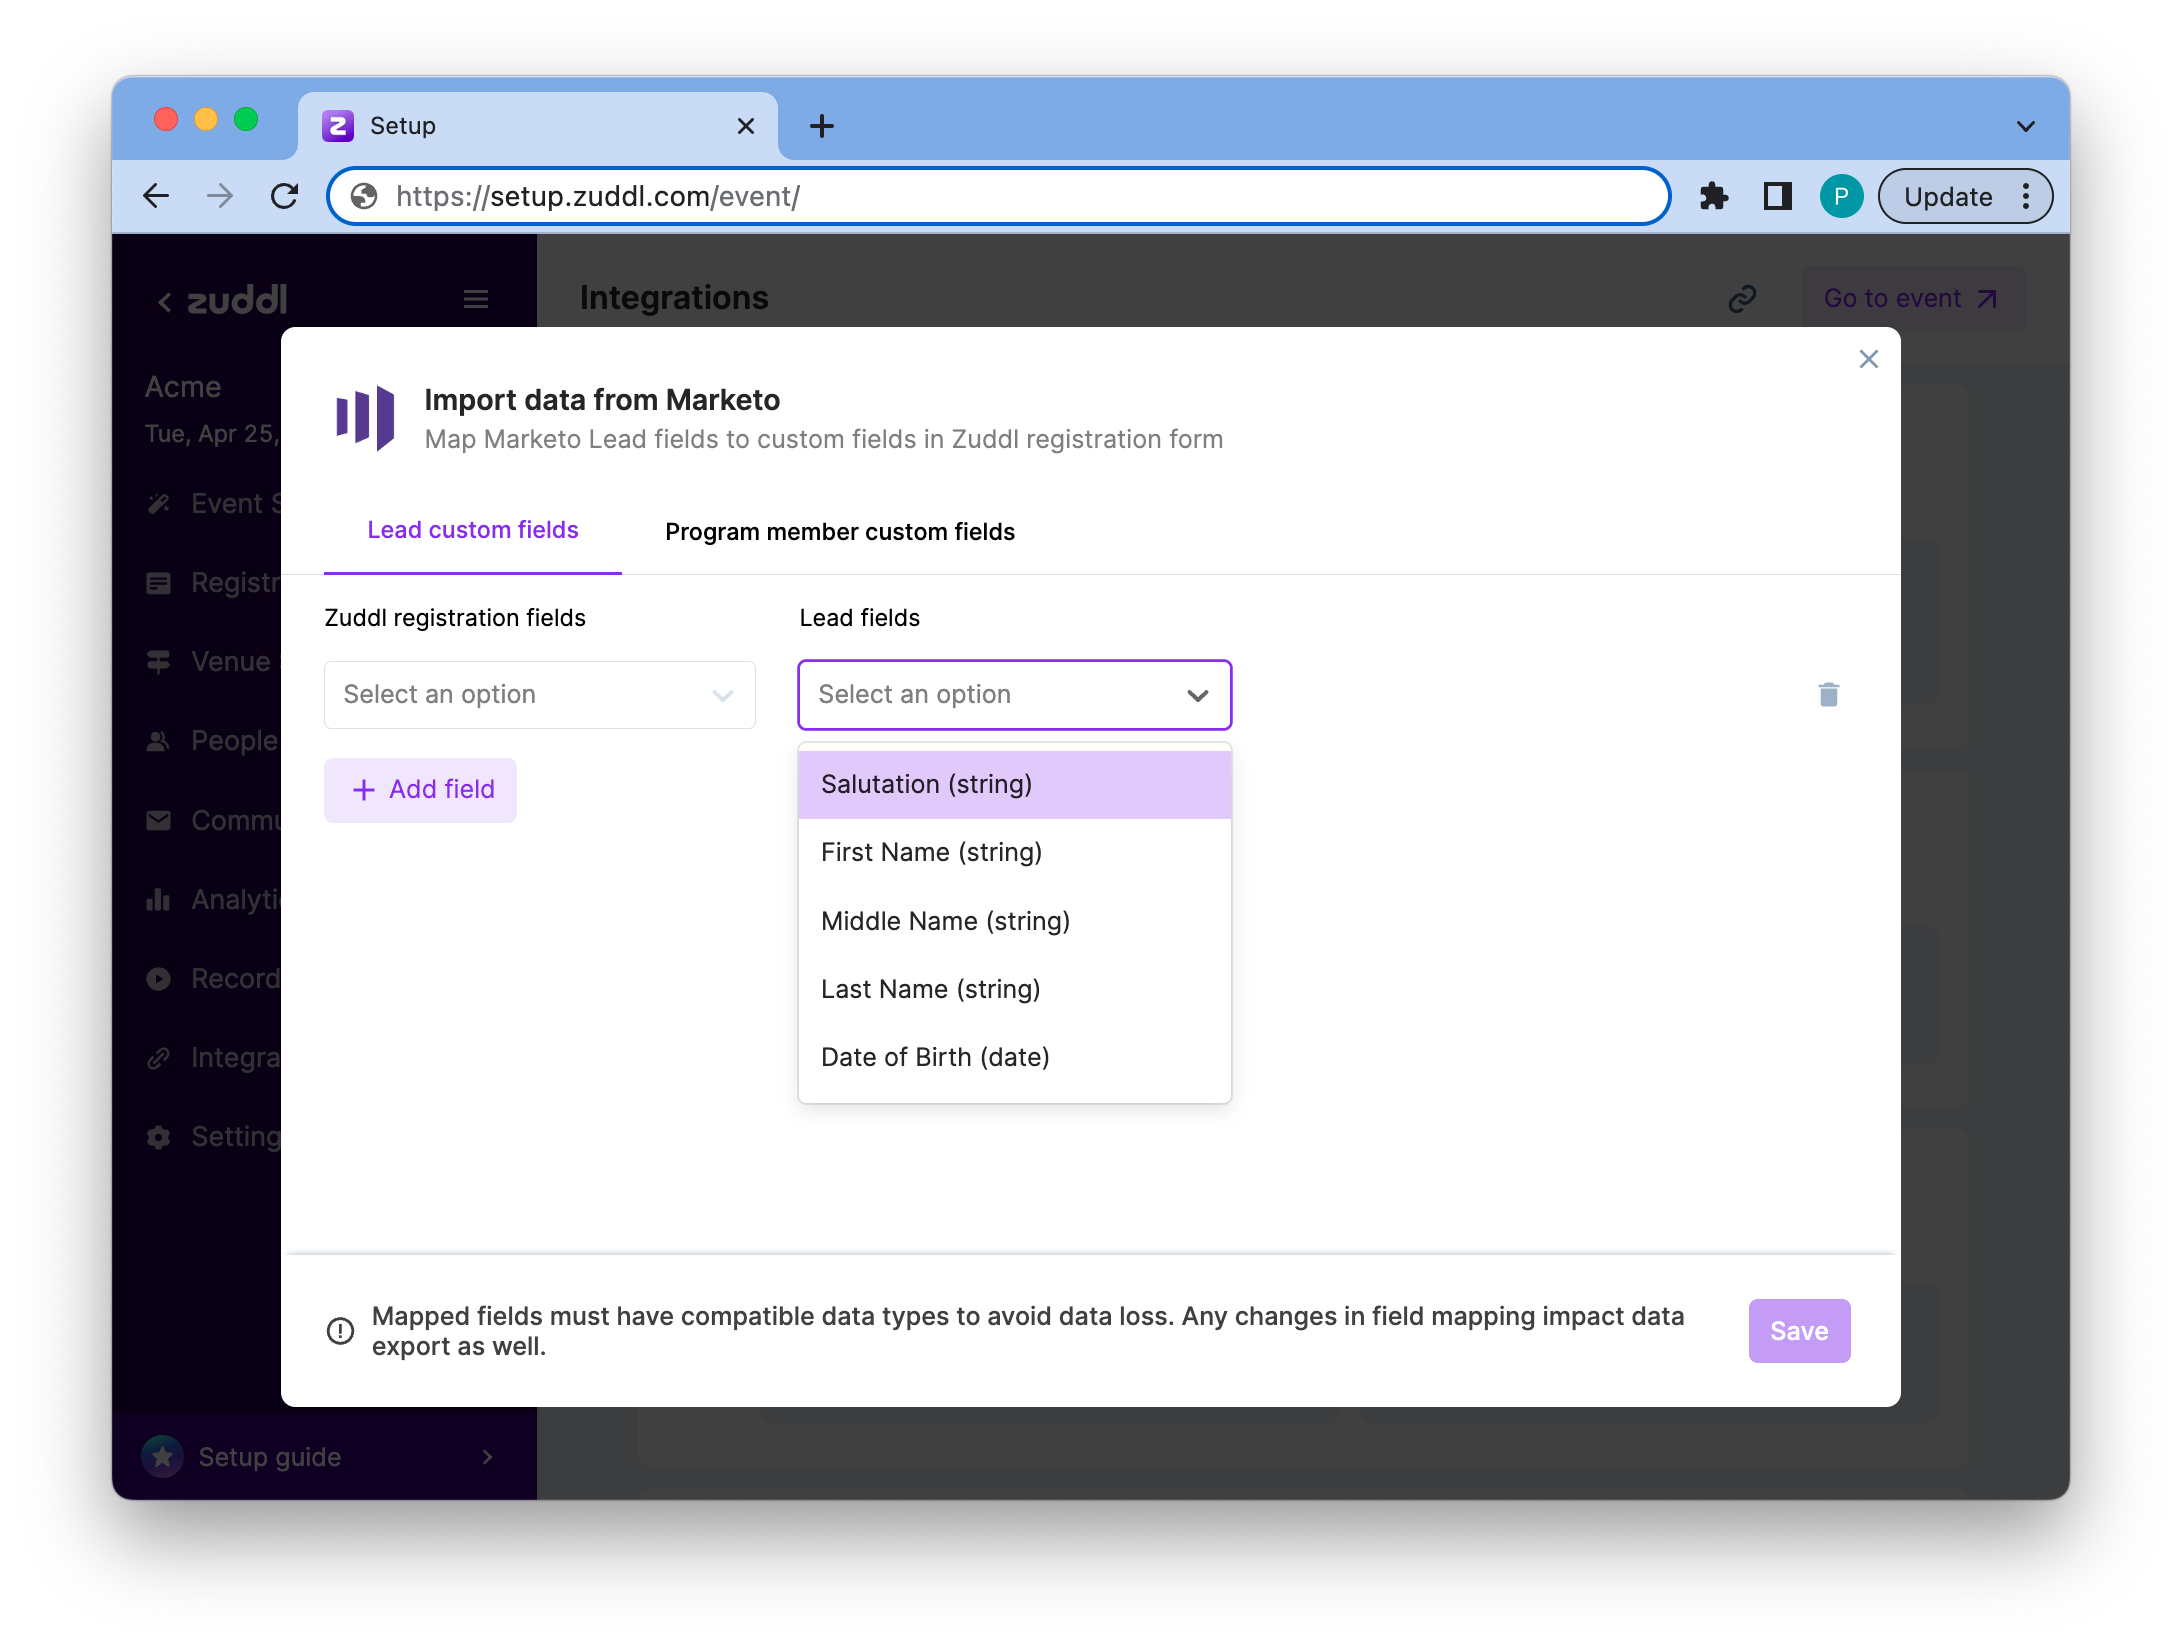
Click +Add field to add map more fields in the same way.
Click Save.
Program member level data can be passed to Zuddl. Map any custom program member fields to a suitable Zuddl registration field.
Prerequisite:
A Zuddl registration form with all the required fields need to be created in order to map the fields.
Click +Add field to add map more fields in the same way.
Click Save.
After mapping the fields, a webhook must be created in order for the integration to pass any field to Zuddl.
Webhooks must be used to pass any new field added in Marketo to Zuddl.
2. Create a Webhook
On your Zuddl organizer dashboard, create a new event/webinar and copy the eventId. It is the text string after “event/” or “webinar/” in the URL. Eg. https://app.zuddl.com/p/a/event/081ee1a9-5b78-4a95-9b5d-b8f0ac8ac3f. The highlighted part needs to be copied.
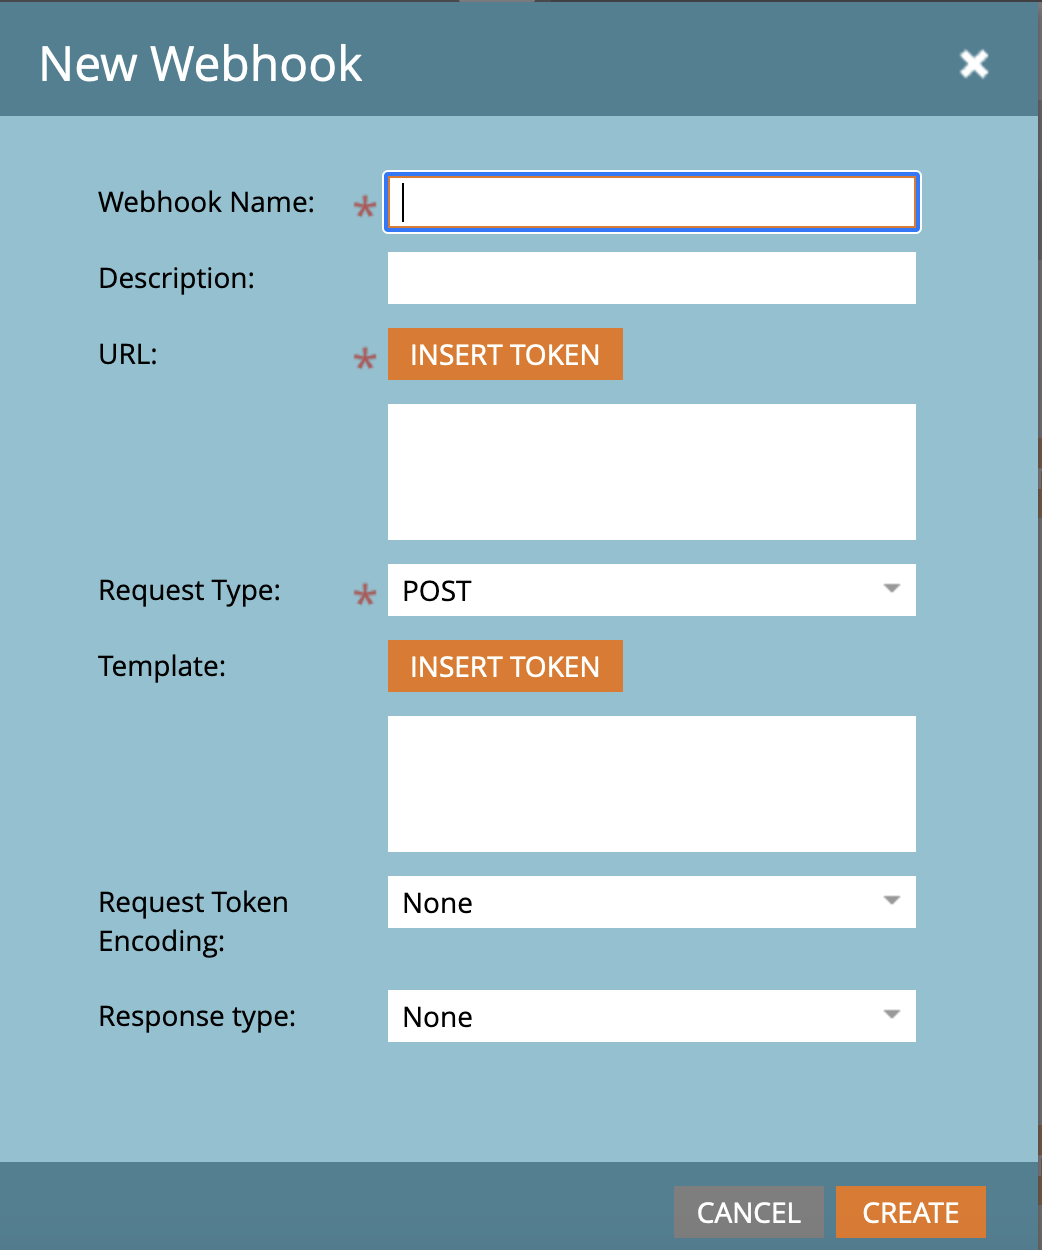
Create a webhook. To create a webhook: Sign in to Marketo → Go to Admin → Webhooks → New Webhook. On the New Webhook form, enter the following:
Webhook Name: Enter a unique webhook name.
URL: Here, paste the URL that you copied while installing the app.
If you missed copying the Webhook URL, you can fetch it by the integration detail page. Go to Zuddl → Integrations → Marketo.
On the Marketo details page, → click on Edit and you can copy it from there. To the webhook URL, append the eventId previously copied as shown below: https://2589c350-0213-457f-84cb-210ad09ea4b1.trayapp.io?eventId=081ee1a9-5b78-4a95-9b5d-b8f0ac8ac3f7
In the above sample URL
‘?’: Separator for appending parameters to the original webhook URL.
‘eventId’: is the key for adding the eventId value into the URL. This is for the event/webinar for which registrations taken in from the webhook are passed on to in Zuddl. The value or eventId is entered after the equals to symbol.
For Marketo base programs
If you are going to be creating new programs via base program, instead of manually adding event id for each new event in the webhook URL, edit the webhook URL for the base program by replacing eventId value with a token
'eventId={{my.zuddl_eventId:default=null}}'
So the complete URL will be:
https://2589c350-0213-457f-84cb-210ad09ea4b1.trayapp.io?eventId={{my.zuddl_eventId:default=null}}
This allows the same webhook (with no change in configuration) to pass registrations received by a cloned program to the correct event.
Select POST as the Request Type.
Under Template, create the below template for passing the mandatory Zuddl registration form fields (First Name, Last Name, and Email) through the webhook:
{"firstName": {{lead.First Name:default=edit me}}, "lastName": {{lead.Last Name:default=edit me}}, "email": {{lead.Email Address:default=edit me}}}Each field in the template has two parts — a key and a value:
The key (for example, firstName) is the API name of the Marketo field, not its display label. Use the exact Marketo API name for every field you pass. Marketo’s standard fields use the API names firstName, lastName, and email; a custom field uses whatever API name is defined for it in your Marketo instance (you can look these up under Admin > Field Management in Marketo).
The value (for example, {{lead.First Name:default=edit me}}) is a Marketo token that fills in the lead’s value for that field when the webhook runs. The :default=edit me part is the fallback text used if the lead has no value for that field.
Prerequisite
You must add all Marketo fields in the webhook body that you want to pass to Zuddl.
In the template, text strings such as {{lead.First Name:default=edit me}} is created using the Insert Token button next to Template, just search keywords such as “firstname” in the token and select the appropriate option.
Warning:
You cannot copy the above template from this document. You need to create it manually. However, you need to do this only for the first webhook, for the subsequent webhooks, you can copy paste directly from this webhook or clone to a new webhook.
Enter the Request Token Encoding as JSON.
Leave the Response Type as None.
Click Create. The created webhook details are displayed on the page as shown below.
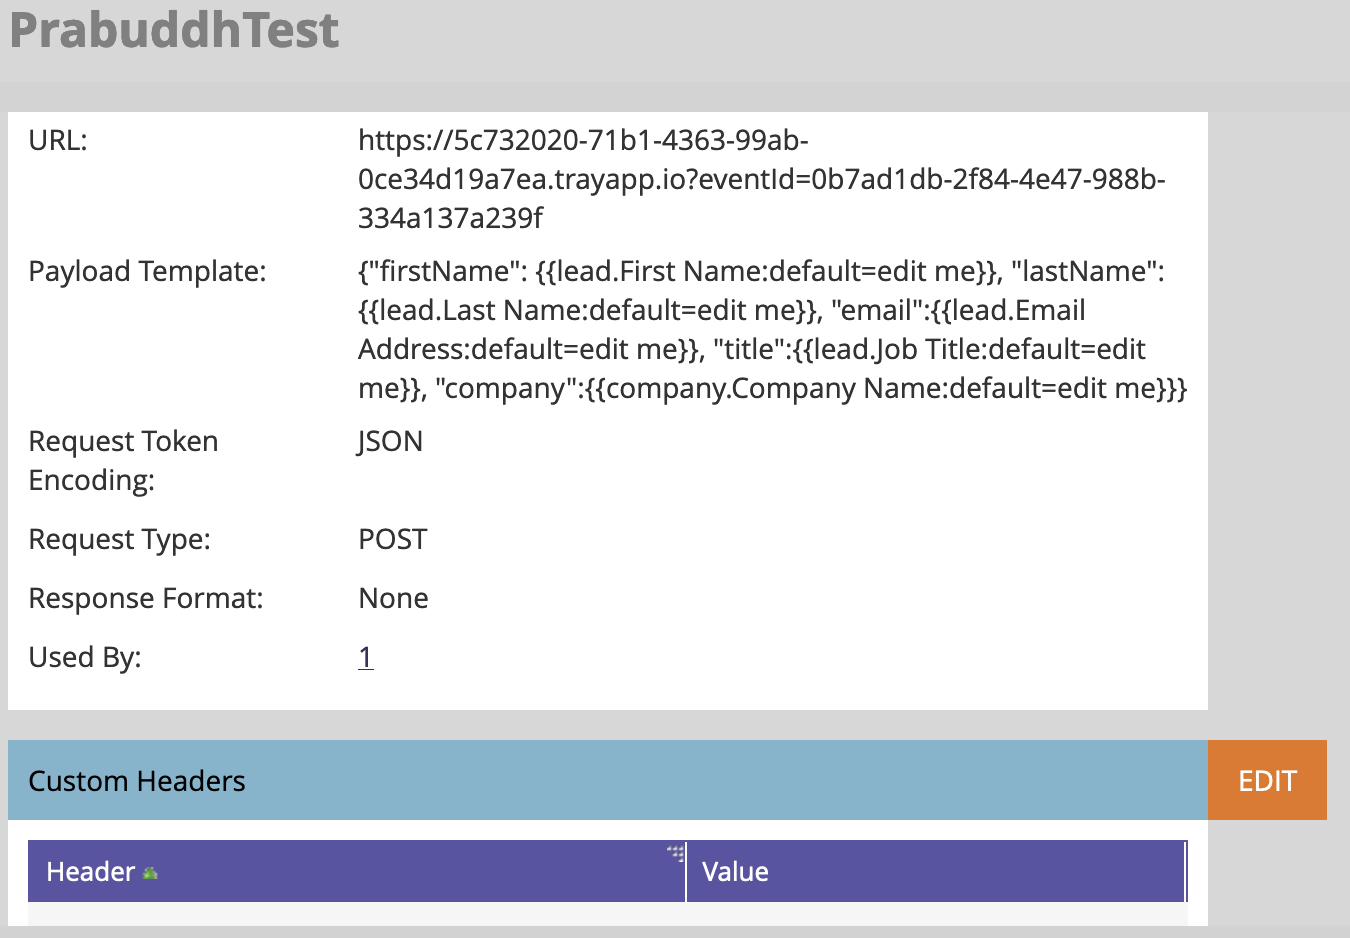
Now, go to Custom Headers, click on Edit and click Add and then add Content-type in Header and application/json in Value.

This sets up our webhook. You can either edit this webhook by just changing the eventid value for another event/webinar or clone it to have different webhooks for different events/webinar.
Testing the Flow
In order to capture the registrations and test the flow, you need to do the following:
Create a new test program or use an existing program.
Next, create a form for registrations.
Once the form is created, create a landing page and embed the form in it. An example of how a form looks after embedding on the landing page is shown below:

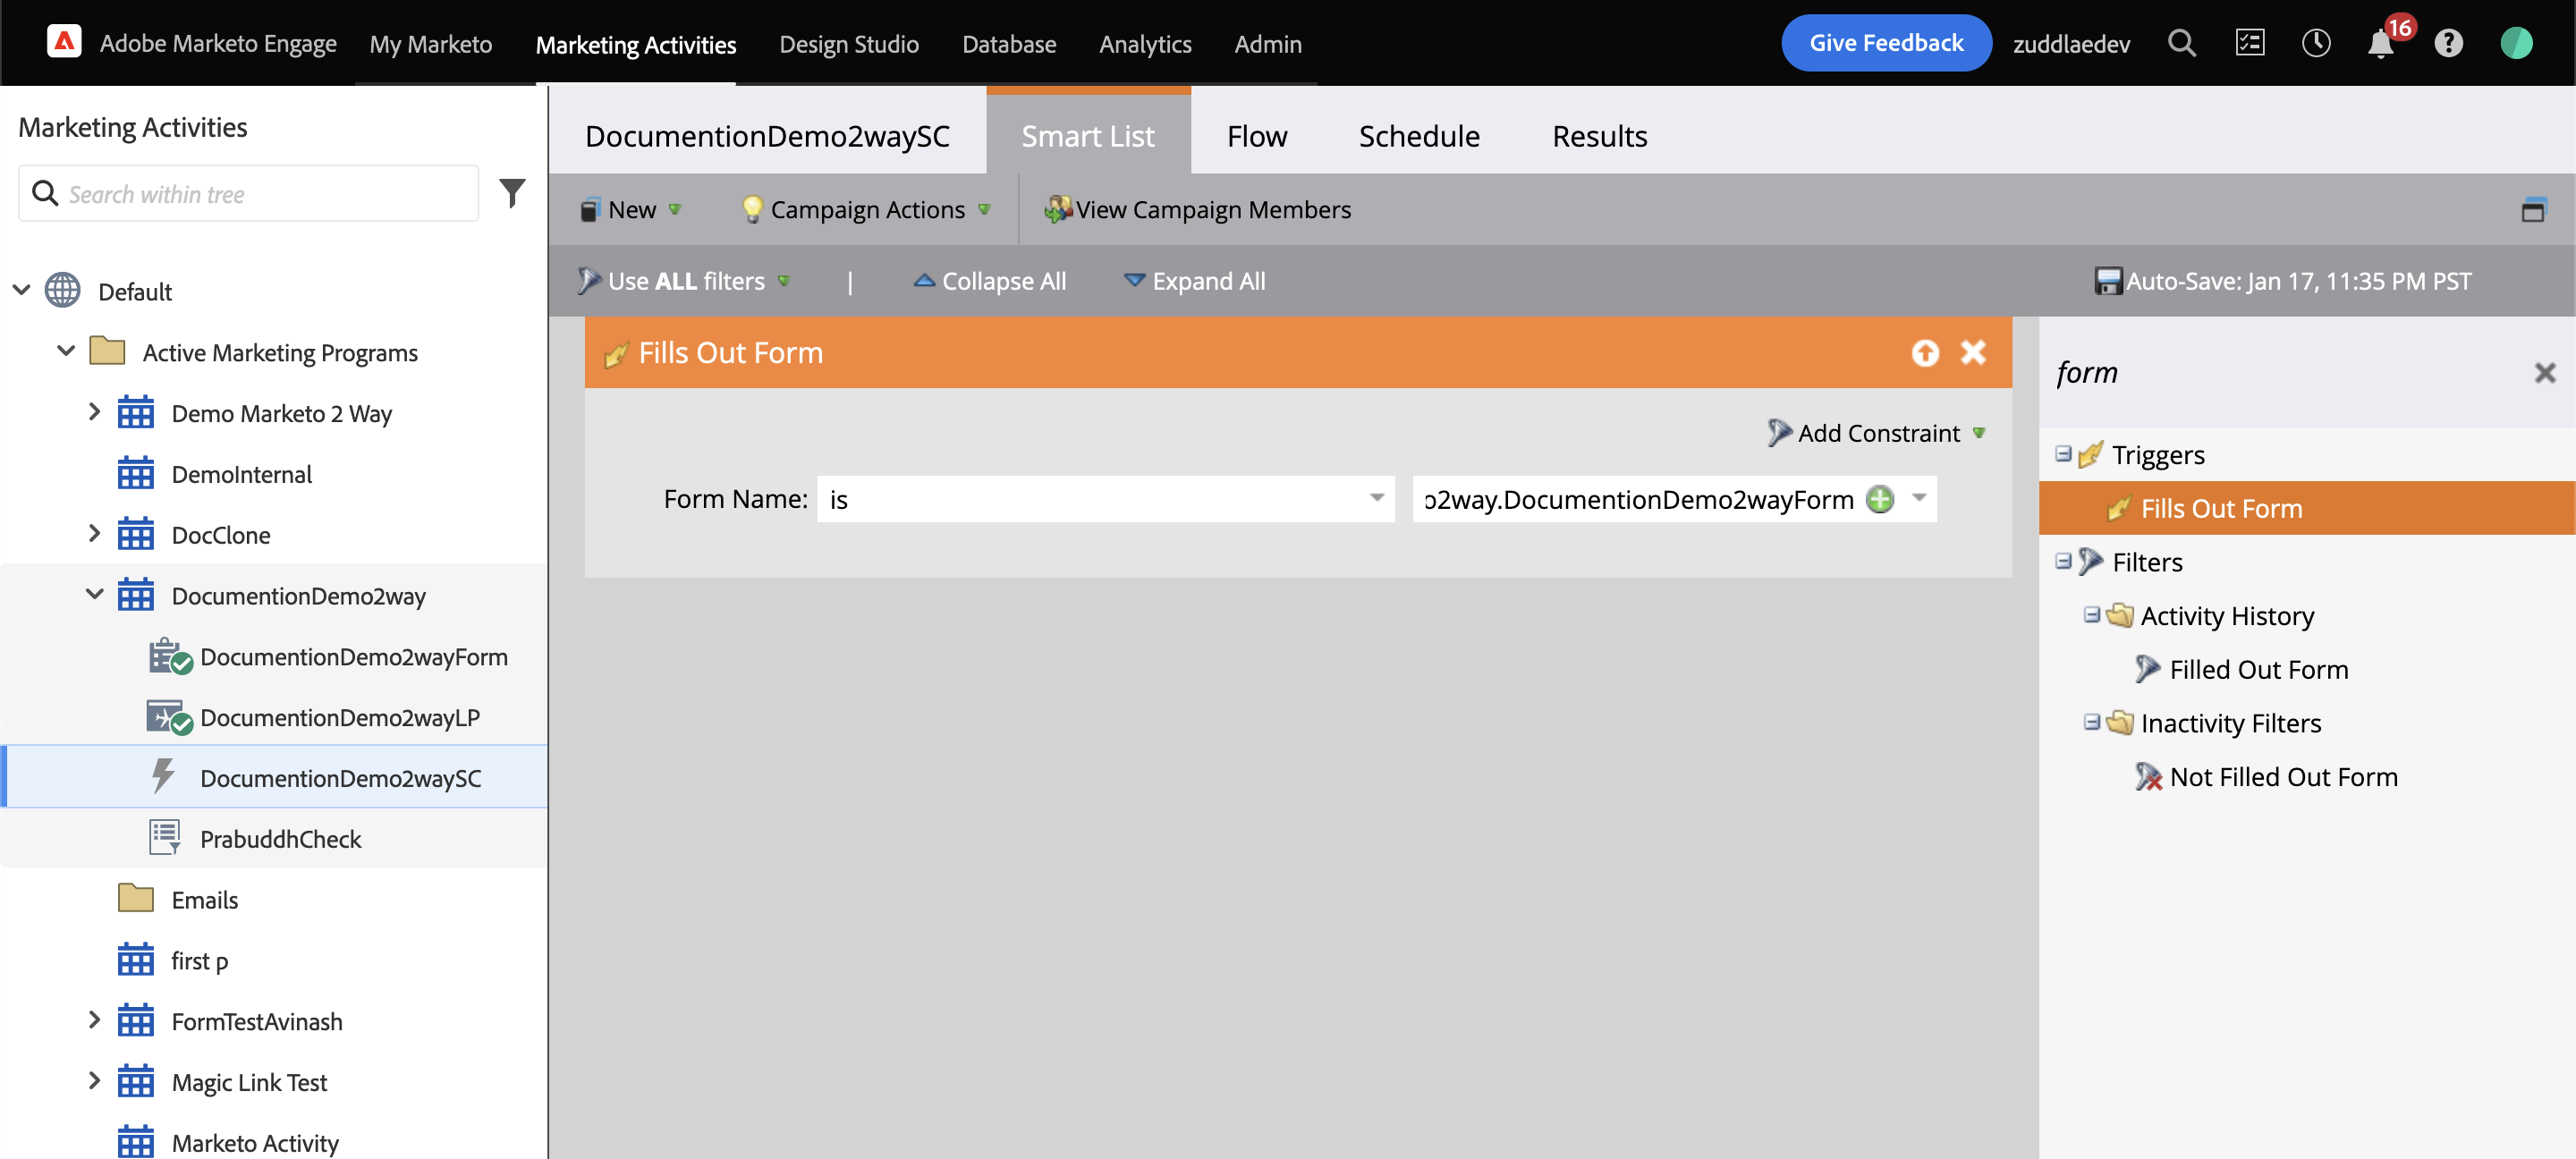
Now, create a smart campaign. Inside a smart campaign, go to Smart List and add the “Fills Out Form” trigger. This trigger is activated every time a new person fills out the form in which you collect the registrant details. In the Form Name dropdown, select “is” and on the next field, select the correct form name for the program.
Under the Flow tab, add Call Webhook function and add the created webhook in the previous steps.

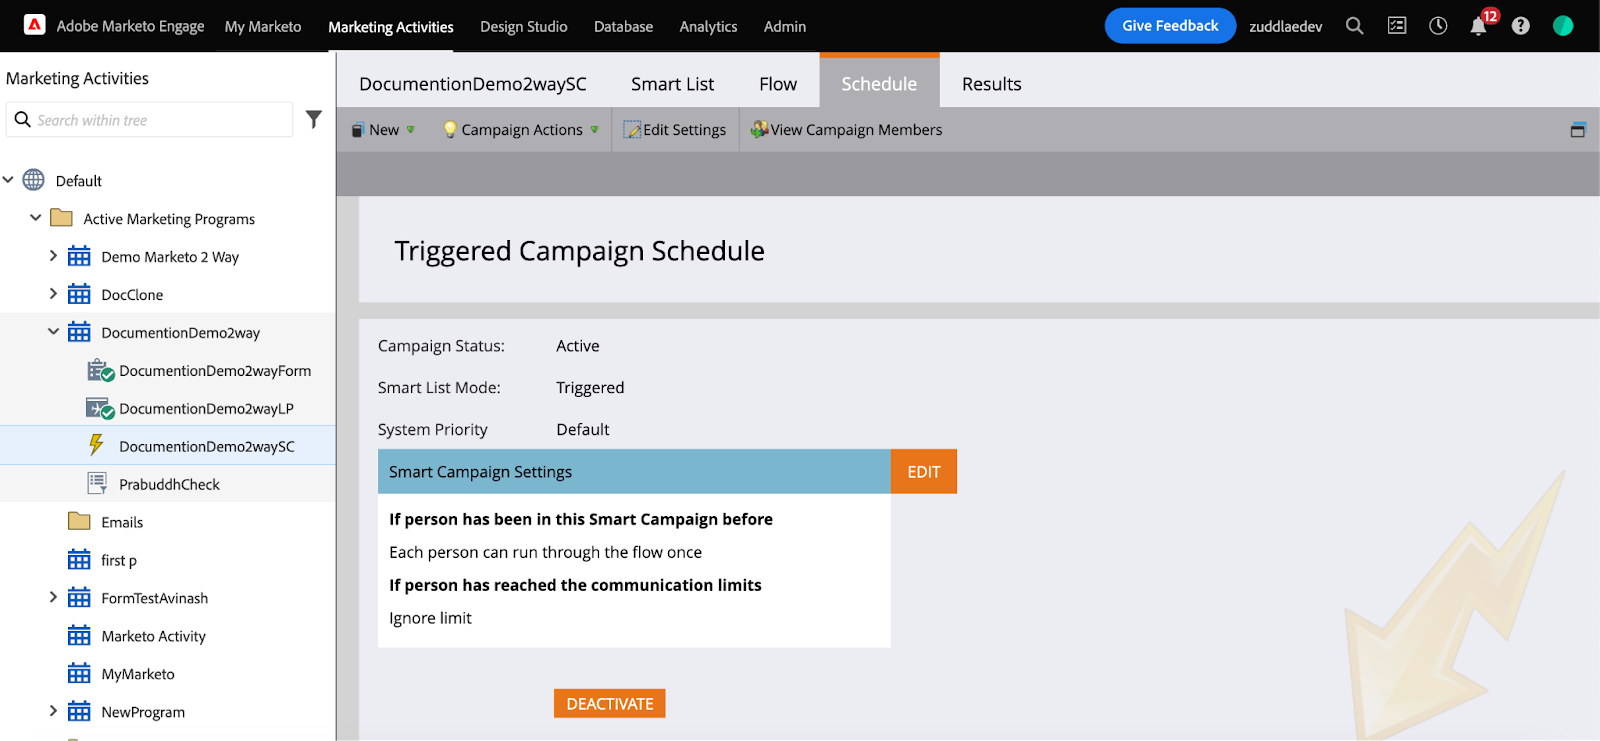
Now, go to Schedule and click on Activate to initiate the campaign.
This completes registration capture and trigger activation. Now, in order to test the flow, fill out the registration form on the created landing page. New registrations get synced to Zuddl and start appearing in Attendee with the correct status.
All the registrations from Marketo to Zuddl flow only after the integration is complete.
It is highly recommended to test out the flow a few times before using it for actual events/webinar. If registrations are not being sent to Zuddl, please reach out to us for a quick demo/ troubleshooting. Also, if you want to pass on the magic link from Zuddl to Marketo, for registrations created in Marketo and passed on to Zuddl, then also setup Zuddl to Marketo integration.