Custom Statuses
Last updated: July 1, 2026
What This Does
Custom statuses let you label where each contact sits in your workflow using names that match how your team actually works.
For nominations, that might mean adding statuses like Shortlisted, Manager review, or On hold so everyone working a Smart Table knows what still needs action.
You create these once at the organization level and then reuse them in relevant smart tables.
This article covers how to create and manage custom statuses and how they get applied to rows in a Smart Table.
Where custom statuses are supported
Custom statuses are not available everywhere yet. They currently work for:
Event types: events and field events. Other event types (such as webinars) are not supported at this time.
Smart Tables: the attendee-based tables — Nominations, Approvals, and Registrations. Wherever the Status column is shown on these tables, your custom statuses are available in the dropdown.
Before You Begin
You need to be an organizer in your Zuddl organization. External collaborators (Editors and Contributors) can apply existing statuses but cannot create or manage them.
Steps
You can manage custom statuses from two places:
Open Settings and select Statuses in the sidebar; or, while editing a status cell inside a Smart Table, select Add custom status in org library in the status dropdown to jump straight to the Statuses page.
On the Statuses page, statuses are grouped under their workflow stage — Pre-invite, Invitation, Approval & registration, and Post-registration. Find the system status your new status should sit under.
Select [+ Add custom status] under that system status, type a name, and save. Names can be up to 200 characters; keep them under 50 characters so they are not truncated in narrow columns.
Currently you can add custom statuses under Nominated and Pending Approval. More statuses to be supported soon.
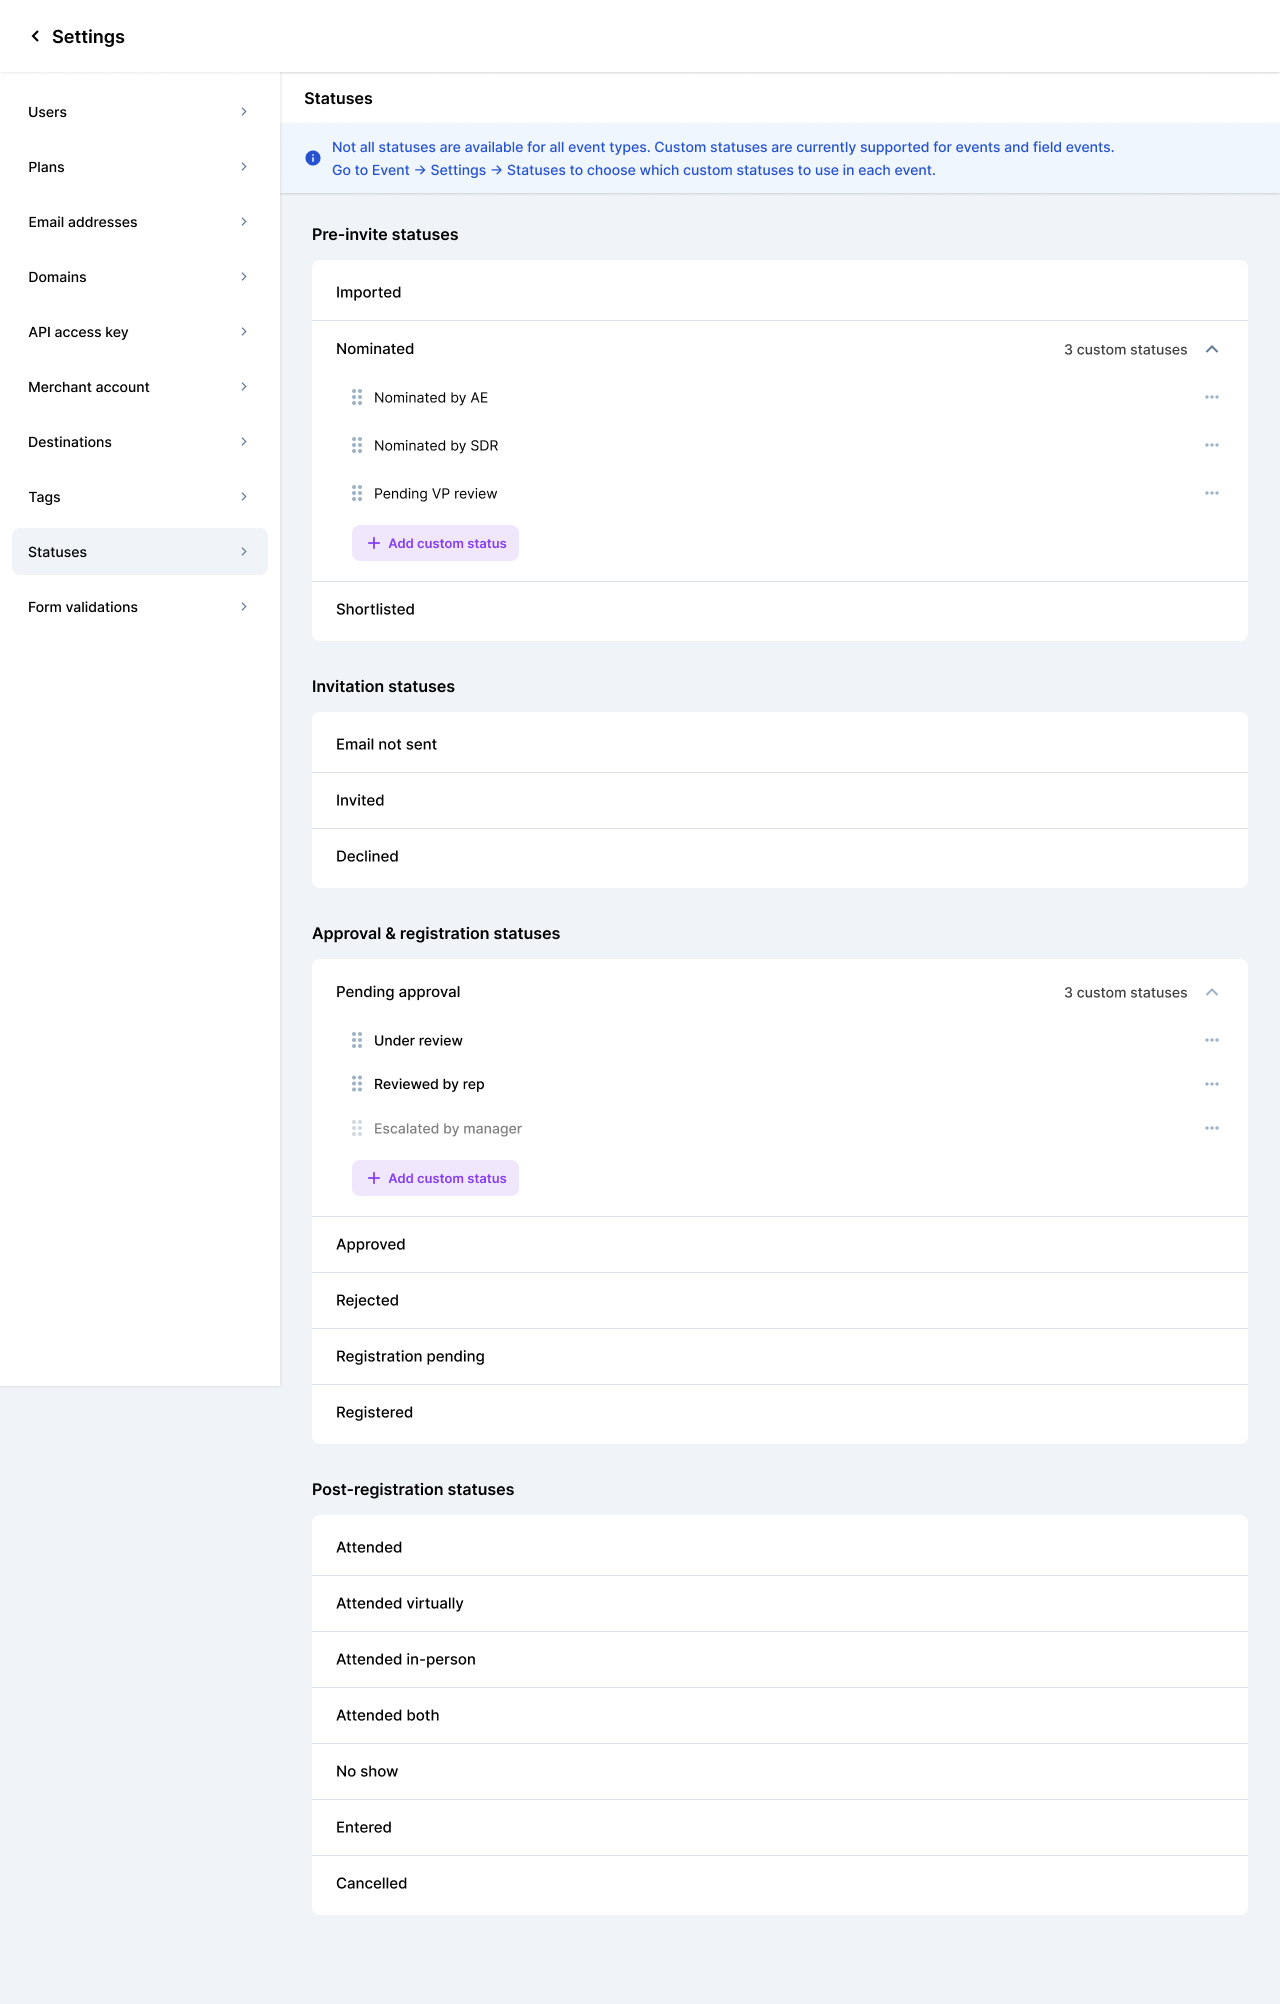
Reorder statuses within a system status by dragging them into the order you want. The order you set here is the order collaborators see in the status dropdown.
To change a status later, use the (⋮) menu next to it and choose Edit to rename, Disable to stop new assignments, or Enable to bring a disabled status back.
Note: Zuddl's built-in system statuses (such as Invited, Approved, and Registered) cannot be deleted or renamed. Custom statuses are the names you add underneath them.
What Happens Next
Once saved, a custom status becomes available wherever the Status column is shown across your Nominations, Approvals, and Registrations Smart Tables. To apply it:
In a Smart Table, make sure the Status column is visible (add it from Manage Columns if needed).
Select a row's status cell to open the Change status dropdown. Custom statuses appear nested under the system status they belong to.
Pick the status you want. The change is saved to the master list, so it flows back to every view that includes that row.
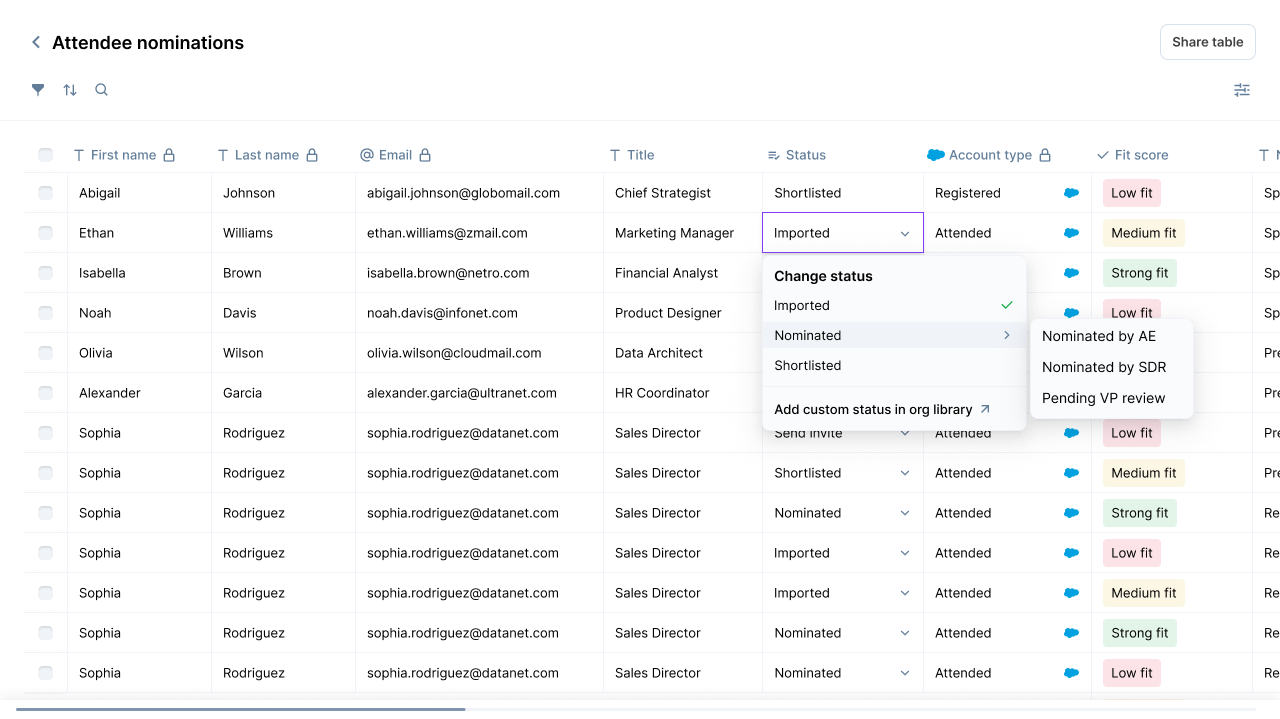
Both Editors and Contributors can change a row's status from the dropdown.
Editing and disabling statuses
Custom statuses are meant to be long-lived, so Zuddl protects the ones already in use:
Edit renames a status everywhere it appears — existing rows keep the status and simply show the new name.
Disable stops the status from being assigned to new rows while leaving existing rows untouched. Use this when a status is no longer relevant but you do not want to lose its history. A disabled status can be re-enabled at any time.
Notes
Custom statuses are shared across your organization — a status you create under a given system status is available in every Smart Table that supports it.
Status names must be unique within the same system status, and they cannot be empty. Names over 50 characters may be truncated in some views.
Related articles
Need help with custom statuses? Reach out to your Zuddl contact or our support team.